As music producers, learning how to make beats that sound professional and reflect your unique style is basically our whole gig.
You need to know how to create drum patterns that drive the track, design melodies and chord progressions that evoke emotion, and layer sounds with precision.
Plus, learn how to add ear candy and FX to keep your listeners hooked 一 ensuring your mix and master are always top-notch.
This way, your beats will stand out from the competition and your tracks will never feel flat, basic, or unpolished.
That’s why we’re breaking down absolutely everything you need to know about how to make beats, like:
- Setting up your DAW to produce beats ✓
- Laying down solid drum patterns/choosing drum sounds ✓
- Designing chord progressions and melodies ✓
- Building impactful basslines ✓
- Arranging your beat effectively ✓
- Adding ear candy and FX for flavor ✓
- How to create beats that don’t sound basic or boring ✓
- Mixing and balancing your own beats ✓
- Mastering for that final polish so your beat sound on point ✓
- Advanced tips for professional sound design ✓
- Key music production techniques for beat-making ✓
- All the tools/all the elements needed to make a beat ✓
- Much more about how to make beats like a boss ✓
After this article, you’ll know everything about how to make beats from start to finish, in detail, regardless of genre and style (although today’s article is catered to hip-hop).
Plus, we’ve thrown in some industry-hidden tips and tricks for our more advanced readers as well.
No matter what point of your music production journey you’re at right now, this can be your ultimate guide on making beats and enhancing your skills.
So, let’s dive in so you can learn how to make beats all day…
Table of Contents
- How to Make Beats: Step-by-Step
- Step 1: Setting Up Your DAW
- Step 2: Drum Patterns: Laying Down the Foundation
- Step 3: Chord Progressions & Melodies
- Step 4: Building Your Bass Line
- Step 5: Arranging Your Beat
- Step 6: Adding Ear Candy and FX
- Step 7: Mixing Your Beat
- Step 8: Finalizing the Beat (Mastering)
- Bonus: 5 Advanced Beat-Making Tips/Techniques
- How to Make Beats: Final Thoughts
How to Make Beats: Step-by-Step
Making beats can be a highly personal process, with every music producer developing their own unique workflow. While there’s no one-size-fits-all approach, this guide will break down a step-by-step method that covers everything from setting up your DAW to finalizing your beat. Remember, when you create beats, it might take you a few tracks to get the process down, and it can be in any order.
Step 1: Setting Up Your DAW
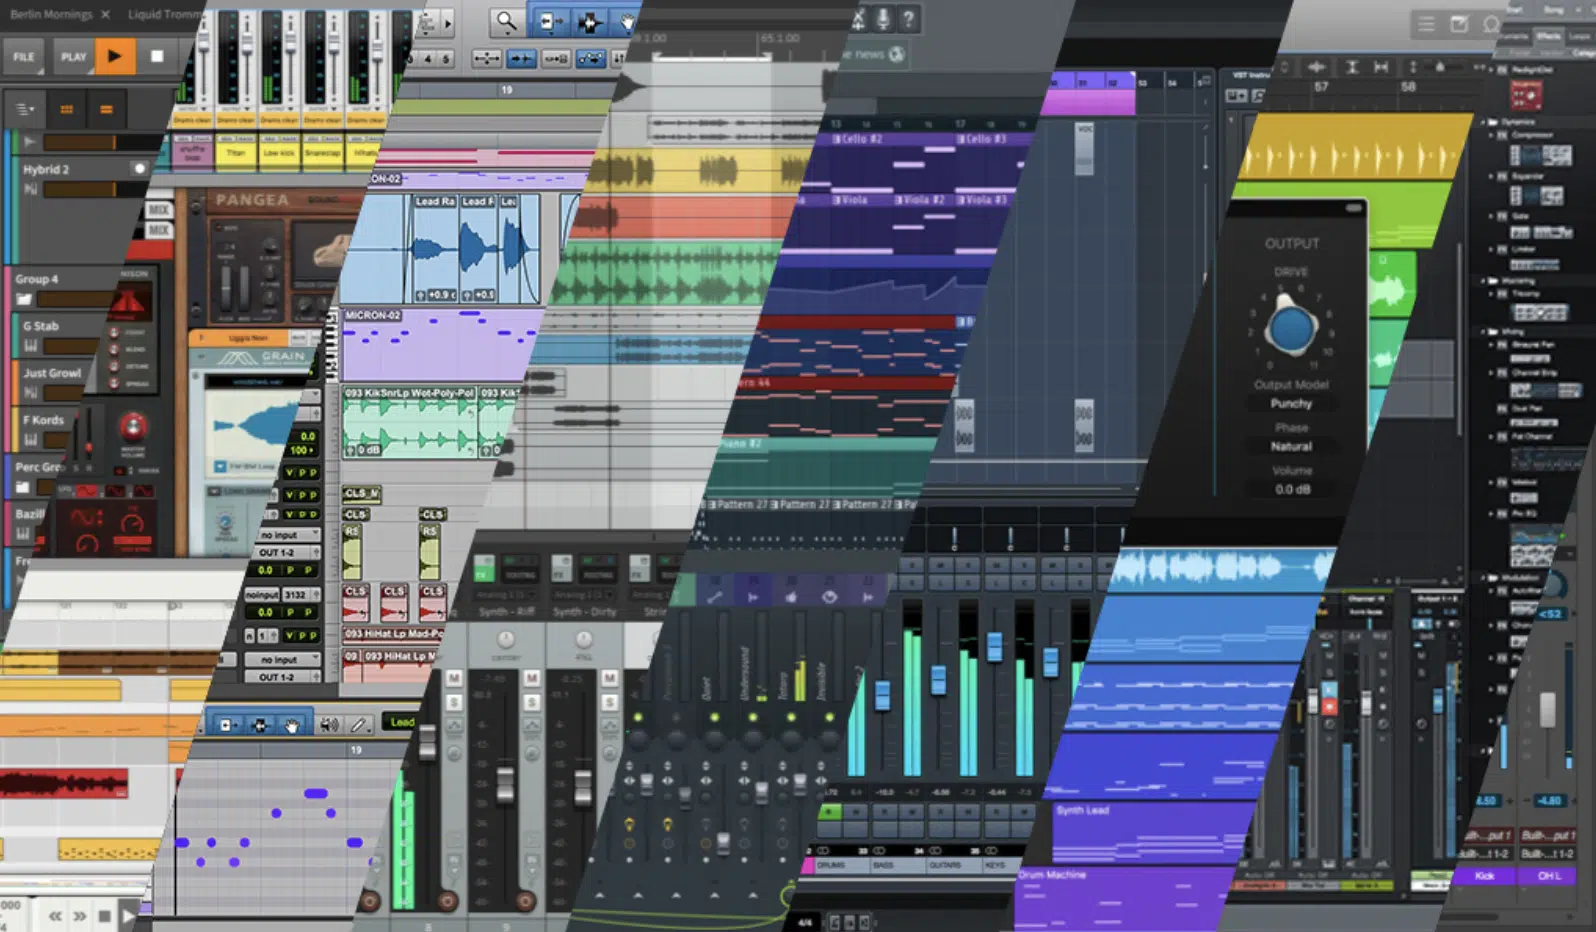
Before diving into the actual creative process of beat-making, setting up your DAW (Digital Audio Workstation) correctly is essential.
Your DAW is the central hub of your music production setup, where every idea comes to life, so make sure to choose one that vibes well with your unique production style.
Whether you prefer the intuitive layout of FL Studio, the live performance capabilities of Ableton Live, or the comprehensive features of Logic Pro X, the choice is up to you.
Once you’ve selected your DAW, you have to take the time to customize your music production workspace, which means:
- Organizing your sample libraries
- Setting up your go-to plugins
- Creating templates that match your usual workflow
- Etc.
For example, you might set up a default project template that includes your favorite drum kit, a few tracks for virtual instruments, and pre-loaded effects chains you love.
Also, adjust the audio settings to match your hardware because it’ll help make sure your sessions run smoothly 一 reducing latency and avoiding any pesky technical hiccups.
Configure your audio interface settings, selecting the right buffer size and sample rate, which can seriously impact performance.
A lower buffer size reduces latency, which is important when playing virtual instruments live, but it can also increase the CPU load, so finding the right balance is key.
If you’re using MIDI controllers or any other external gear, make sure they’re properly synced with your DAW to avoid any timing issues.
Basically, always fine-tune your DAW setup in your own style so you have a place where you can comfortably make a beat without any distractions or aggravation.
Step 2: Drum Patterns: Laying Down the Foundation
The drum pattern is the backbone of your beat, providing the groove and rhythm that drives the track. Getting your drums right is key, as they set the stage for everything else to fall into place, so let’s break it down.
-
Kick Drums: Creating a Solid Foundation
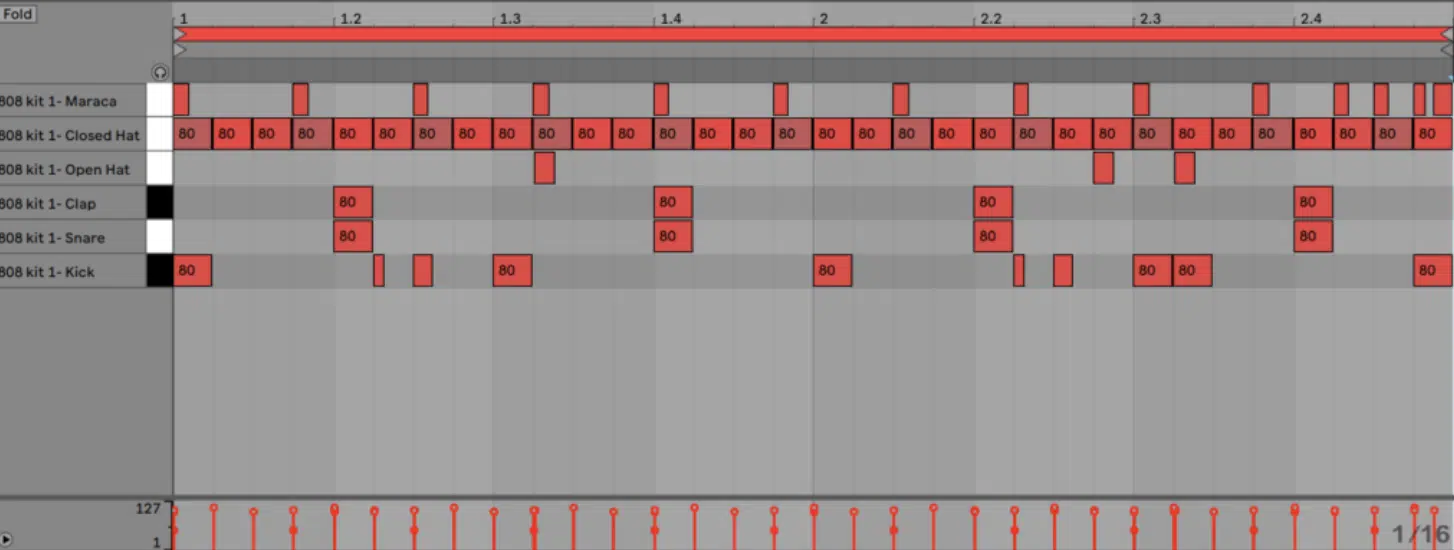
The kick drum is the heartbeat of your hip-hop track, and getting it right can make or break your beat, so pay attention closely.
Start by selecting a kick sample that matches the vibe you’re going for, whether it’s a hard-hitting 808 kick for a trap beat or a gritty, vinyl-sampled kick for a boom-bap track.
Once you’ve got your kick, focus on nailing the placement.
Typically, kicks hit on the downbeats, but in hip-hop and trap, you can add kicks on the off-beats or even double them up to create that signature bounce.
For example, placing a kick right before the snare on the “and” of the beat adds a syncopated groove that’s common in modern trap.
Layering your kicks can add even more depth and punch, so try combining a sub-heavy 808 with a punchy, mid-range kick to cover both the low and mid frequencies.
Use sidechain compression to duck the bass when the kick hits so your low end remains clean and powerful (like every good beat should).
Finally, tune your kick to the same key of your track to make it sit better in the mix, especially when working with 808s that carry strong melodic elements.
It will make the kick feel more cohesive within the mix 一 blending with your bassline perfectly and enhancing the overall musicality of your beat.
-
Snares and Claps: Creating Groove and Snap
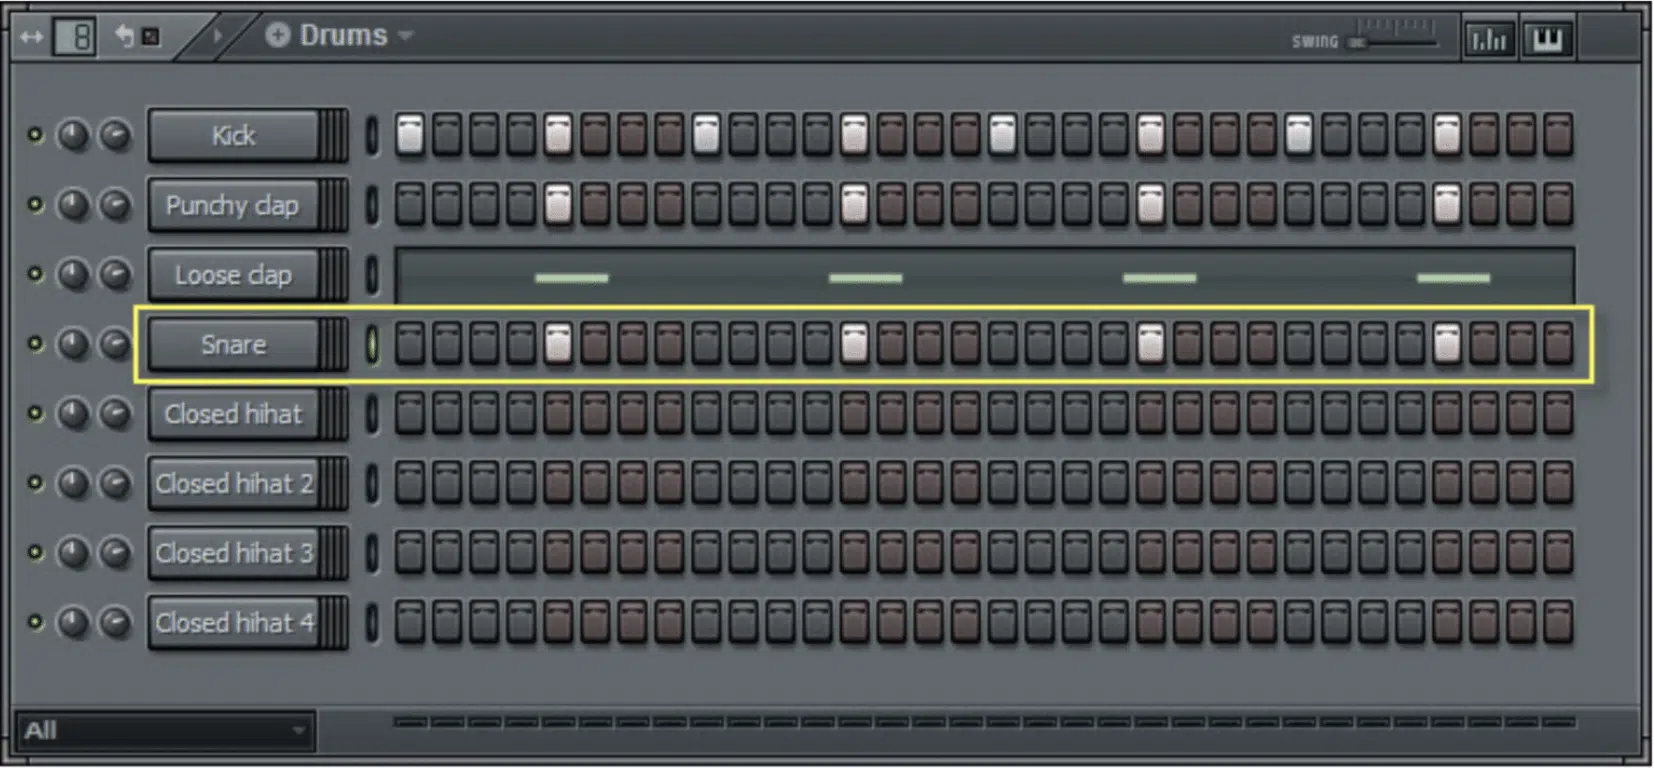
In hip-hop music production, snares and claps are all about creating the groove and adding that essential snap to your beat.
Start by selecting a snare or clap that cuts through the mix 一 a crisp, snappy snare for a trap beat or a thicker, more organic snare for a boom-bap vibe.
In hip-hop, the snare usually lands on the 2 and 4, but adding extra snares or claps on the off-beats can introduce that classic “trap bounce” to your own music.
For instance, you can layer a high-pitched snare on the 3 and “and” of a bar to add a rolling, rhythmic feel that’s really popular.
And again, don’t be afraid to experiment with layering…
Try adding a clap on top of your snare to thicken the sound or even layer multiple snares with different tonal qualities to create a more complex and textured sound.
This could be, for example, a punchy, mid-range snare combined with a darker, lower-pitched one
Also, adding reverb with a short decay can help your snare sit better in the mix without overwhelming it.
Also, consider using ghost notes (softer, quieter snare hits between the main hits) to create subtle rhythmic variations and keep the groove dynamic.
NOTE: Ghost notes are most effective when combined with varying velocities to give your beat a more human, less mechanical feel.
-
Layering Hi-Hats and Percussion for Movement
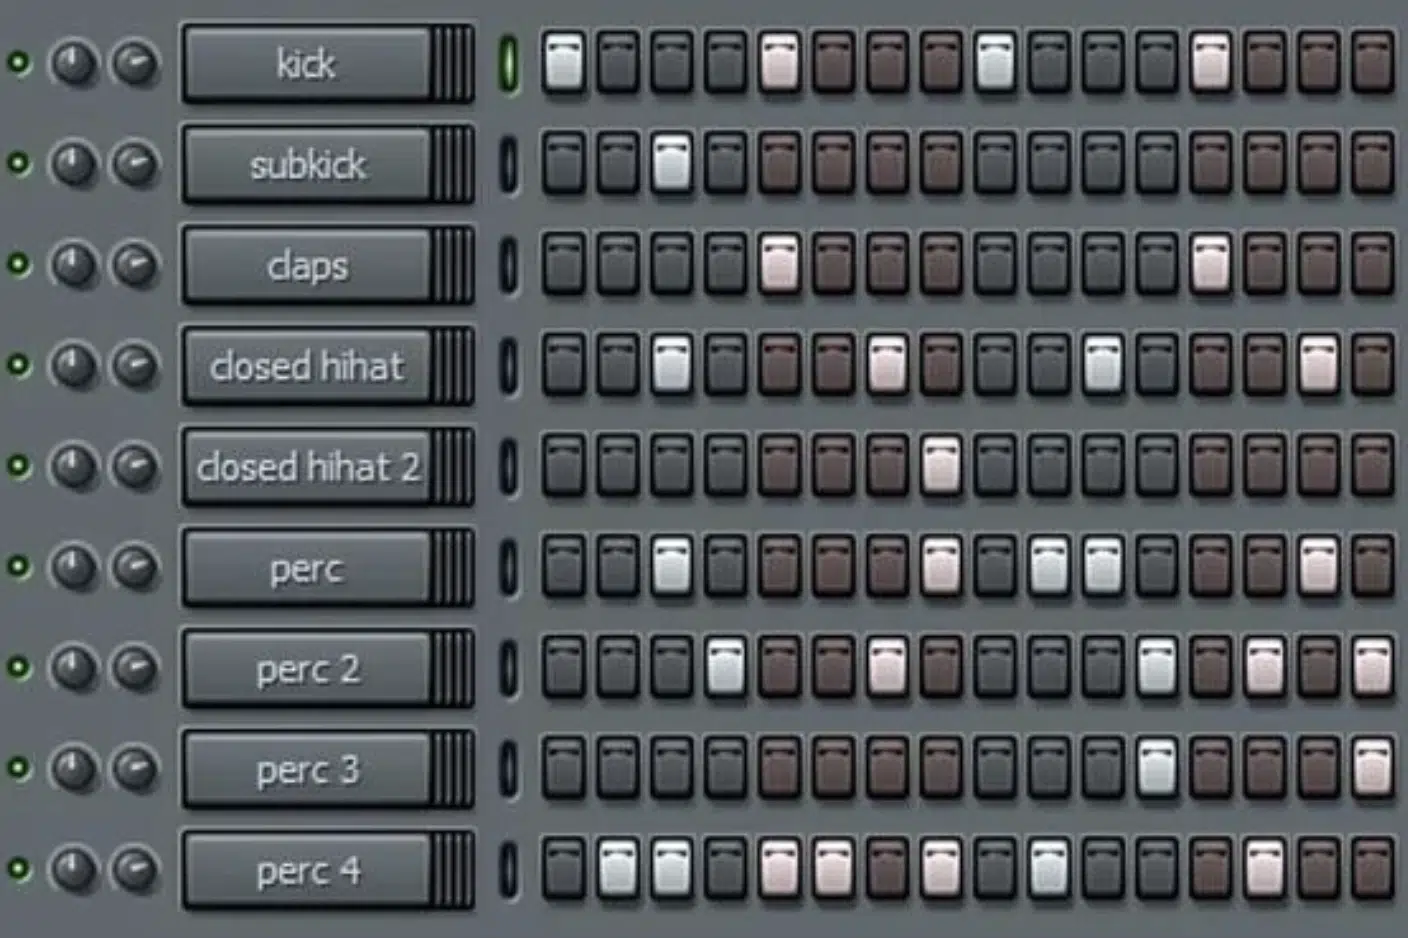
Hi-hats are those little addicting hits that provide the ultimate movement and energy that keeps people locked in.
For hip-hop beats, begin with a basic hi-hat pattern 一 16th notes are common in trap beats, giving a rapid-fire feel that really drives the track forward.
From there, throw in some rolls or stutters, for example, you can use triplet rolls (trips) at the end of a bar to create tension before the drop.
Layering your hi-hats with additional percussion, such as shakers or tambourines, can add more texture and rhythmic complexity.
Try panning these elements slightly left or right to create a wider, more immersive soundstage that people can get lost in.
Another technique when you’re learning how to make beats is to play with the velocity of each hi-hat hit, making some hits softer to add a more human, less robotic feel.
Like a live drummer would.
Finally, consider using a high-pass filter to remove unnecessary low frequencies from your hi-hats, ensuring they sit nicely in the mix without clashing with your kick or bass.
NOTE: A gentle high-pass filter starting around 200-300 Hz can clean up any muddiness, allowing your hi-hats to cut through the mix with clarity.
-
Pro Tip: Adding Swing/Groove
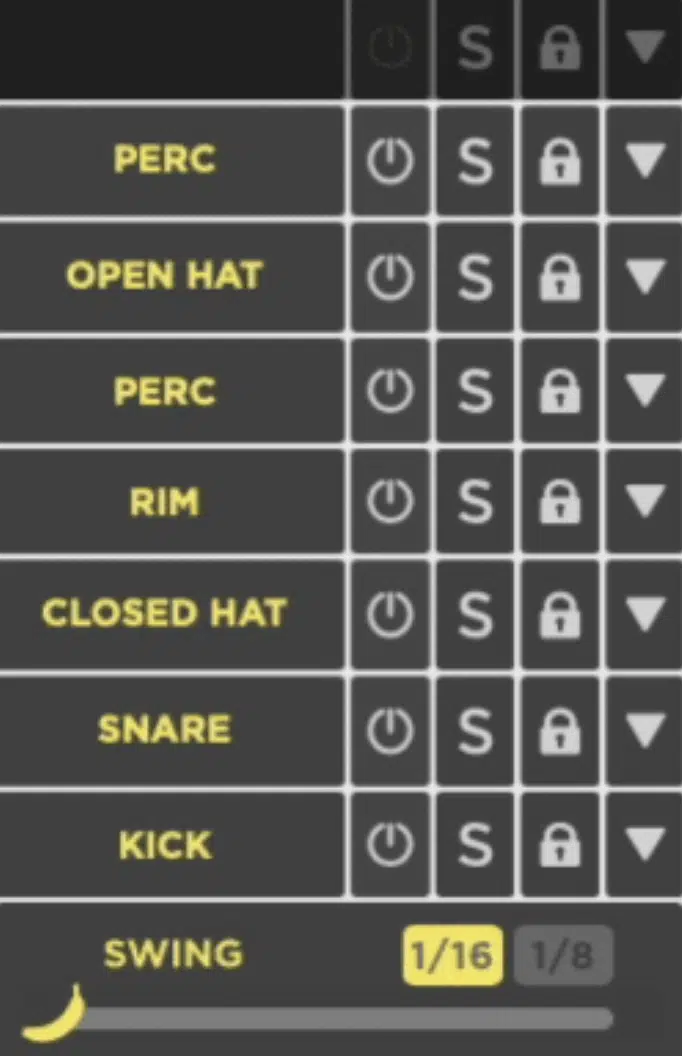
Check out Drum Monkey to Instantly Generate Drum Patterns in ALL Popular Genres
Learning how to make beats in the hip-hop genre, adding swing or groove to your beat is essential for creating that signature hip-hop bounce.
Swing refers to the slight delay of certain notes, usually the off-beats, which adds a laid-back, shuffled feel to the rhythm.
In your DAW, you can adjust the swing or quantization settings to introduce this effect 一 start with a subtle swing, around 15-25%, to give your beat that human touch.
For trap beats/hip-hop beats, applying swing to your hi-hats can soften the rigid 16th note patterns, which makes your rhythm fluid and on point.
Another technique is to manually nudge certain notes off the grid, especially kicks and snares, to create a more relaxed groove; think that classic head-nod vibe.
By mastering the art of swing when beat-making, you can give your own beats a groove that’s both infectious and uniquely your own (the perfect balance).
Step 3: Chord Progressions & Melodies
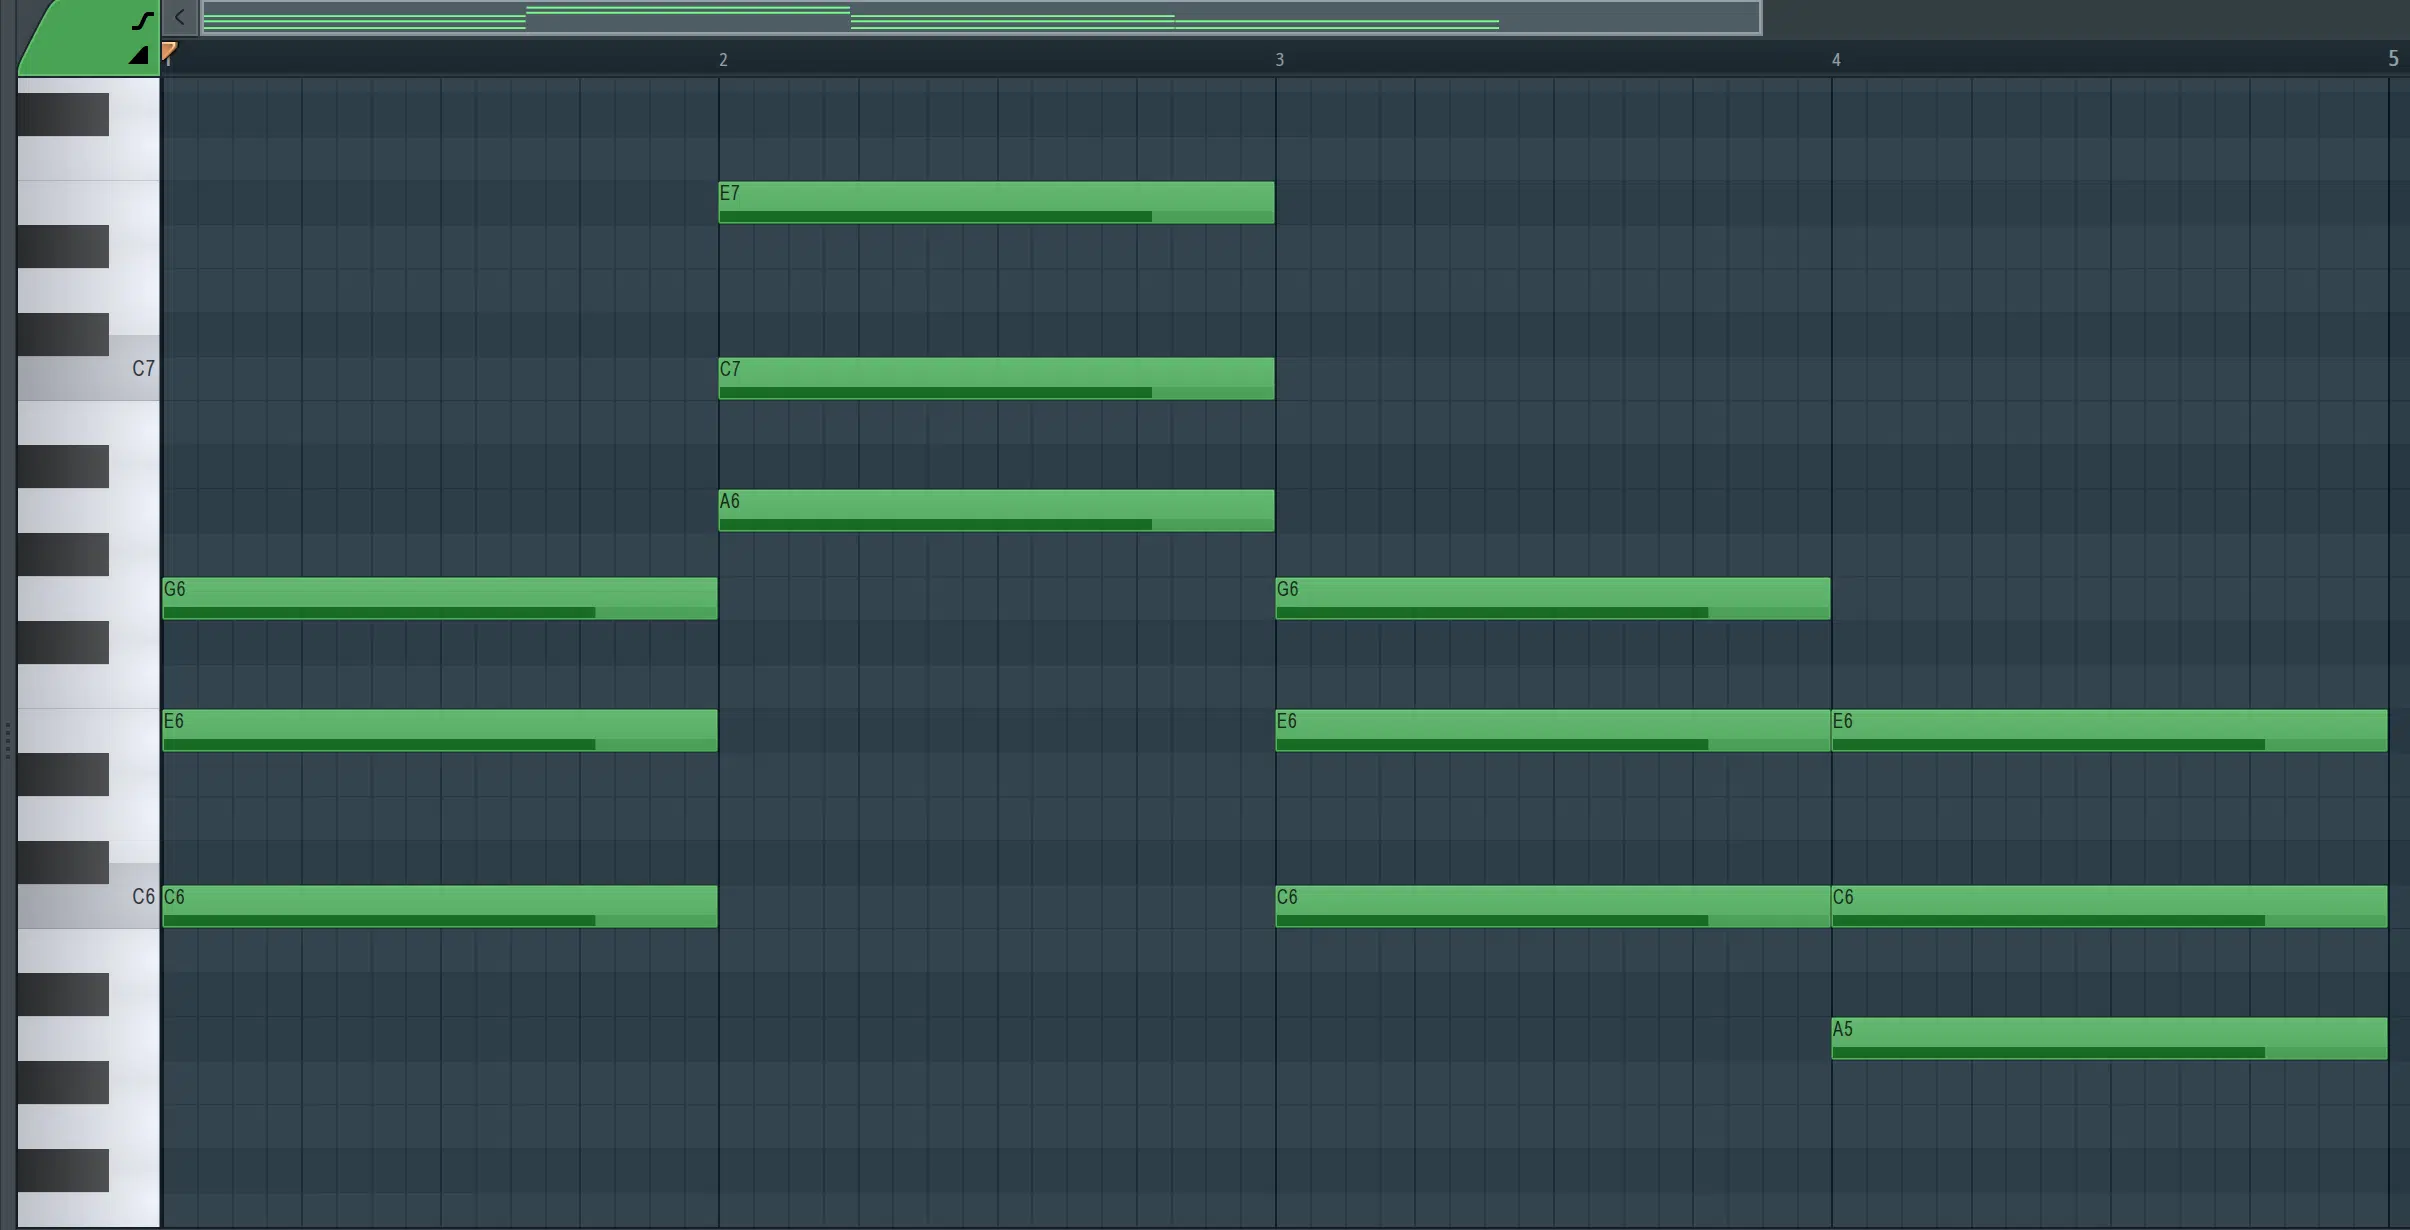
C major to A minor
Creating epic chord progressions and melodies is where you bring different emotions to the table so you can bring your hip-hop beat to life.
Start by choosing a key that sets the mood (minor keys like A minor or C minor are popular in hip-hop for their dark, moody tones).
A simple but effective technique is to use a four-bar chord progression, repeating it throughout the track while introducing subtle variations to keep it fresh.
For instance, a common progression might involve the I-IV-V chords, like in C minor: C minor, F minor, and G minor.
To add more flavor, try experimenting with seventh chords or suspended chords, which add tension and release in your progression.
For example, adding a G7 chord before returning to C minor can add a sense of anticipation and resolution that pulls the listener in even more.
Once you have your basic chords down, it’s time to build a melody that perfectly complements them.
In hip-hop music production, when you add melodic elements, you need to remember they’re often simple and repetitive.
To create your melody, you can use virtual instruments like:
- Pianos
- Synths
- Sampled strings
- Etc.
Also, layering your melody with a secondary instrument an octave higher or lower can add richness and depth.
You could, for example, layer a soft pad one octave lower beneath a brighter, more percussive synth melody to create a fuller sound.
Finally, don’t forget to leave space in your melody…
Sometimes, the pauses between notes can be as powerful as the notes themselves 一 creating a more impactful and memorable line.
You’ll learn this throughout your beat-making journey, but the earlier the better.
-
Pro Tip: Counter Melodies
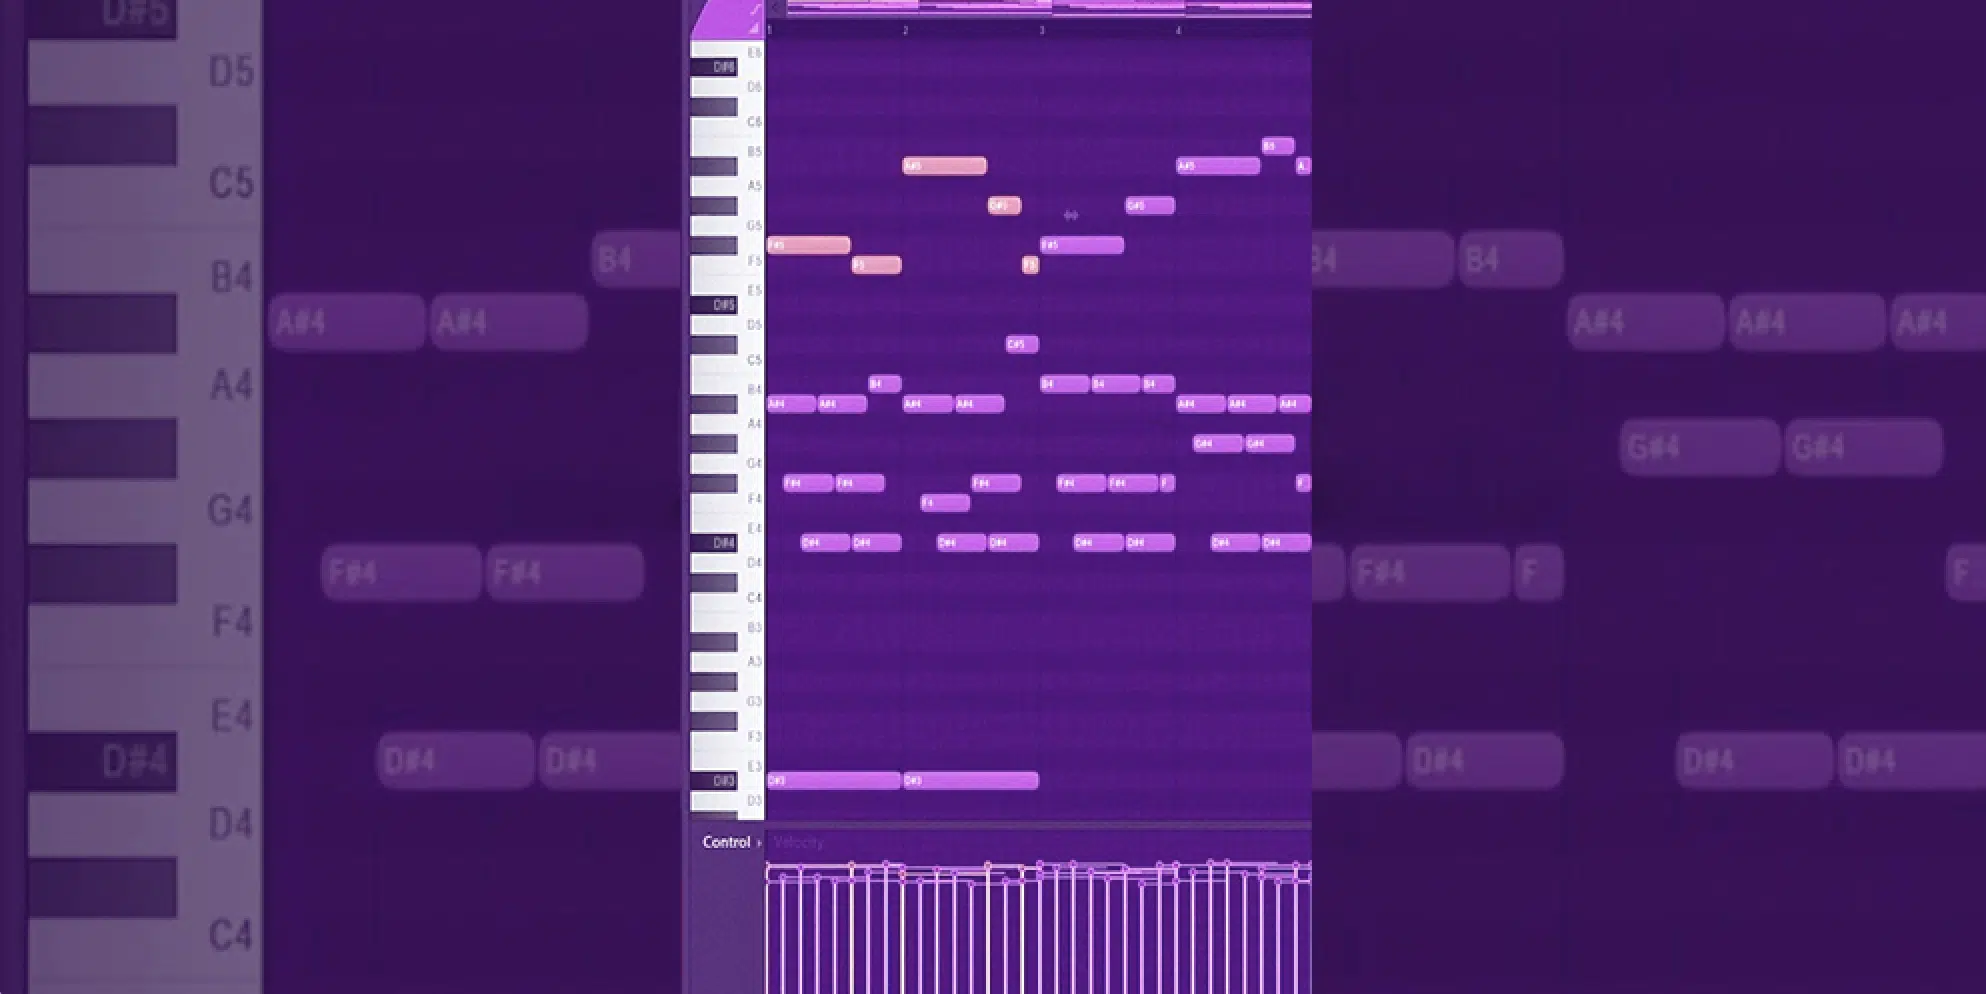
A counter melody is a secondary melody that plays alongside your main melody, adding even more complexity and depth to your track.
In hip-hop, counter melodies should be used sparingly to avoid cluttering the mix, but when done right, they can elevate a beat from good to great.
You’re going to first identify the gaps in your main melody where a counter melody could fit (usually in the spaces between notes or in a different octave).
For example, if your main melody is playing in a higher octave, try adding a counter melody an octave lower with a different instrument, like a soft synth or pad.
The counter melody should complement the main melody, either by harmonizing with it or providing a wicked rhythmic contrast.
By throwing in a counter melody, you add a new layer of interest to your beat which will keep the listener engaged with a unique sound (without overwhelming the mix).
NOTE: You could always use the counter melody to echo or respond to the main melody, creating a call-and-response effect that adds depth and interaction within the track.
Step 4: Building Your Bass Line

When you’re learning how to make beats, the bass line is everything 一 providing you with the low-end groove that drives the rhythm and holds down the melody.
Once you’ve chosen your sound completely, focus on creating a bassline that complements your chord progression.
A simple technique to use as beat-makers is to root your bassline on the same notes as the chords, but don’t be afraid to add passing notes or slides to create movement.
For instance, if your chord progression is C minor to F minor, your bassline might move from C to F, with a slide up to G in between to add a bit of edge.
You should also try to syncopate your bassline with your kick drum… Creating a tight, punchy rhythm that locks in with the drums.
If you’re working with an 808 bass, consider using glides between notes to create that signature trap sound, where the bass note slides smoothly from one pitch to another.
Finally, make sure your bassline leaves room for other elements.
Too much low-end can muddy up the mix, so you can use sidechain compression or EQ to carve out space for the kick drum as we touched upon.
Remember, you always want to make sure your beats sound great, not sloppy (like most beats).
-
Pro Tip: Adding Sub-Bass to Enhance Low-End Presence
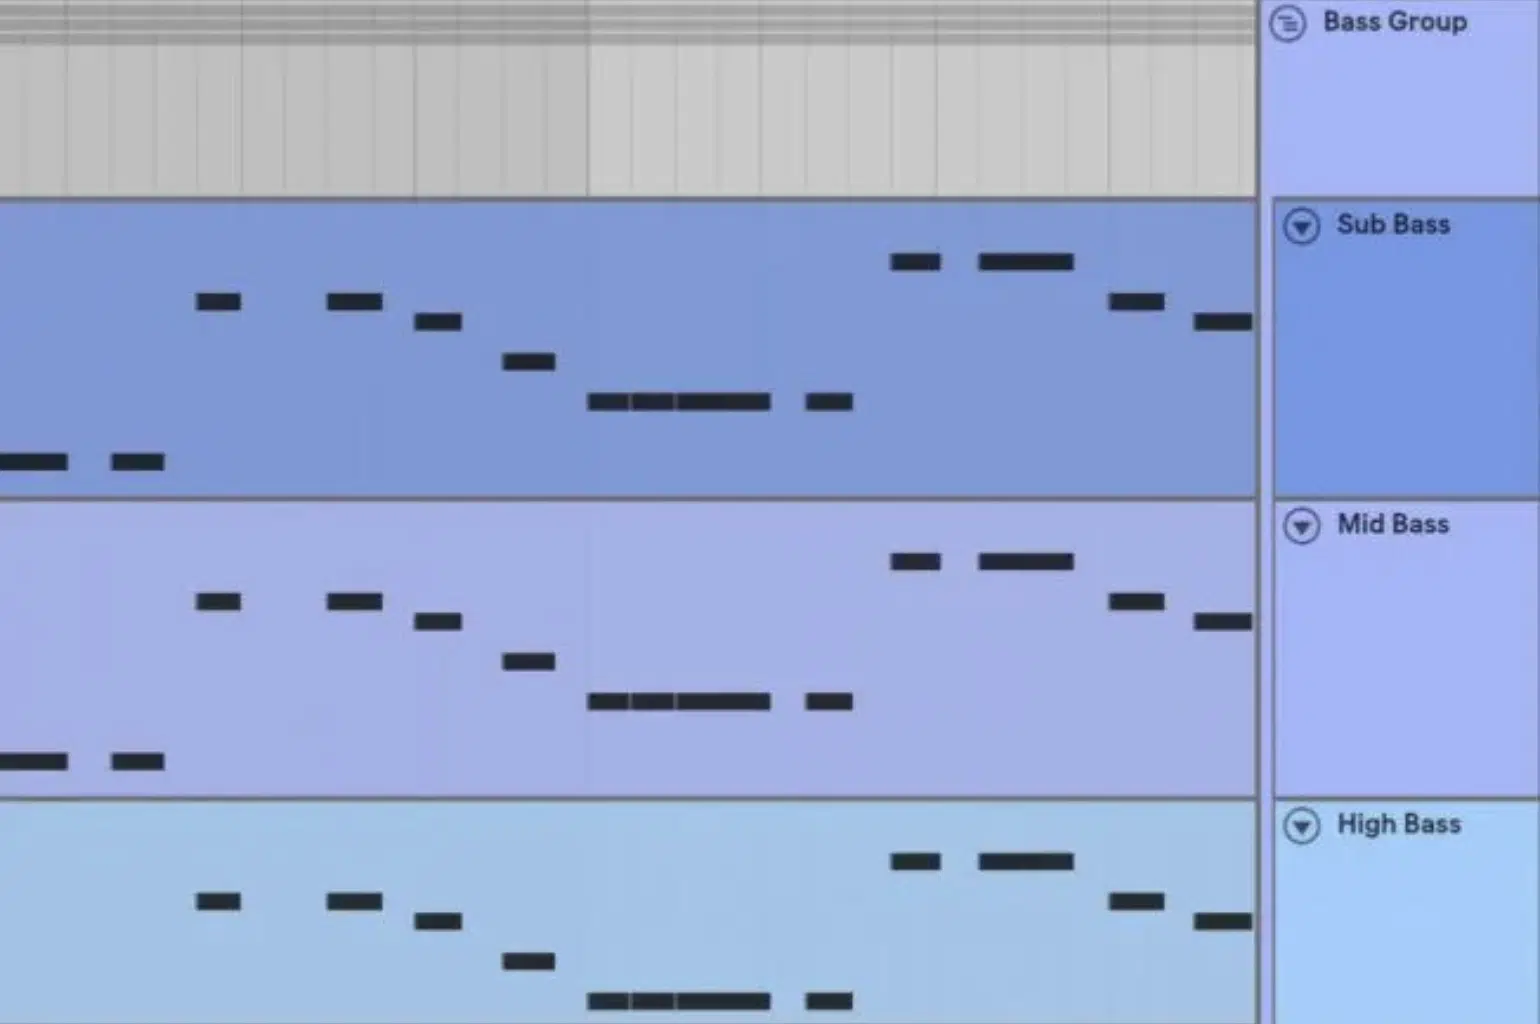
Adding sub-bass is another powerful way to enhance the low-end presence of your beat, especially in hip-hop, where the bass line needs to hit hard.
If you’re learning how to make beats like the pros, you’ll need to know all about it.
Sub-bass typically sits in the frequency range below 60Hz and is more felt than heard, giving your track that deep, rumbling energy that shakes the speakers.
To add sub-bass, start by layering a pure sine wave underneath your main bassline.
You can do this with a simple sine wave generator in your DAW or a dedicated sub-bass plugin, like R-Bass by Waves or SubLab by Future Audio Workshop.
Make sure the sub-bass follows the root notes of your bassline to maintain harmony, but keep it simple (less is more when it comes to sub-bass).
Use a low-pass filter to cut off any frequencies above 60-80Hz, ensuring that the sub-bass stays focused in the low-end and doesn’t interfere with any other elements.
By adding sub-bass, you give your beat that extra depth and power 一 making it hit harder on both big systems and headphones alike.
Step 5: Arranging Your Beat
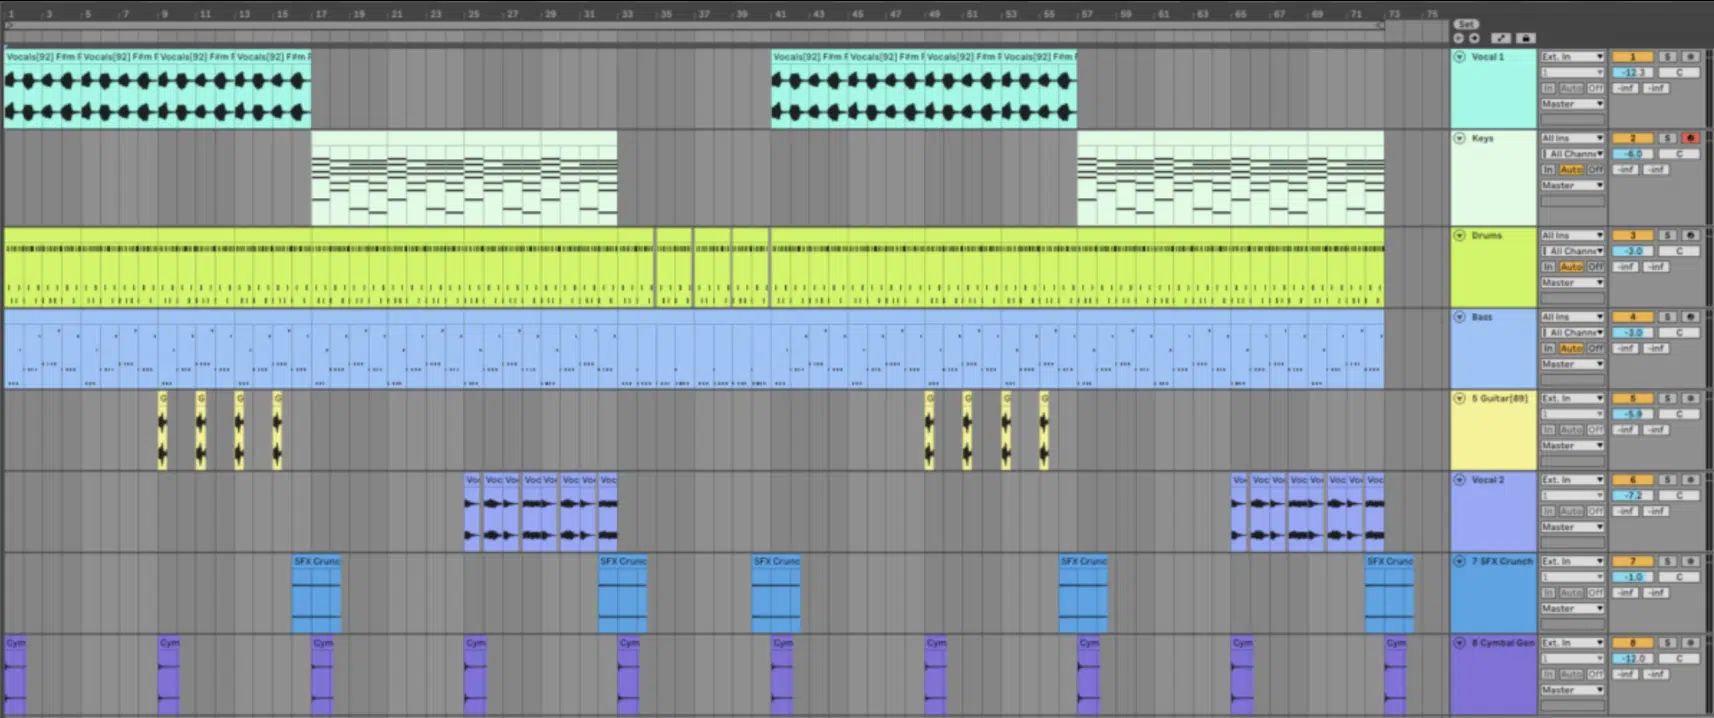
As beat producers, especially those first learning how to make beats, arranging your beat is extremely important.
It’s where you take the core elements you’ve created and shape them into a full track.
A typical hip-hop arrangement might start with an 8-bar intro, followed by a 16-bar verse, an 8-bar chorus, and then repeat.
To keep things interesting and help your beat sound unique, consider switching up the arrangement slightly in each section…
For example, you could strip back the drums in the first half of the verse, focusing on just the hi-hats and bassline.
Then, bring in the full drum pattern for the second half to build momentum
Remember, when it comes to how to create beats in any genre, it’s all about tension and release; momentum and anticipation.
In the chorus, you might layer additional melodies or add a vocal chop to make it stand out from the verse, whatever you think makes sense.
Another technique is to use breaks or drops 一 moments where the beat cuts out or simplifies right before the hook or drop, creating epic anticipation.
Cutting out the kick and bass for a bar before the chorus drops can make the drop hit even harder.
Finally, don’t forget about automation (one of my favorite topics).
Things like fading in and out elements, adjusting filter cutoff frequencies, or panning can add dynamic changes that keep the listener engaged throughout the track.
Step 6: Adding Ear Candy and FX
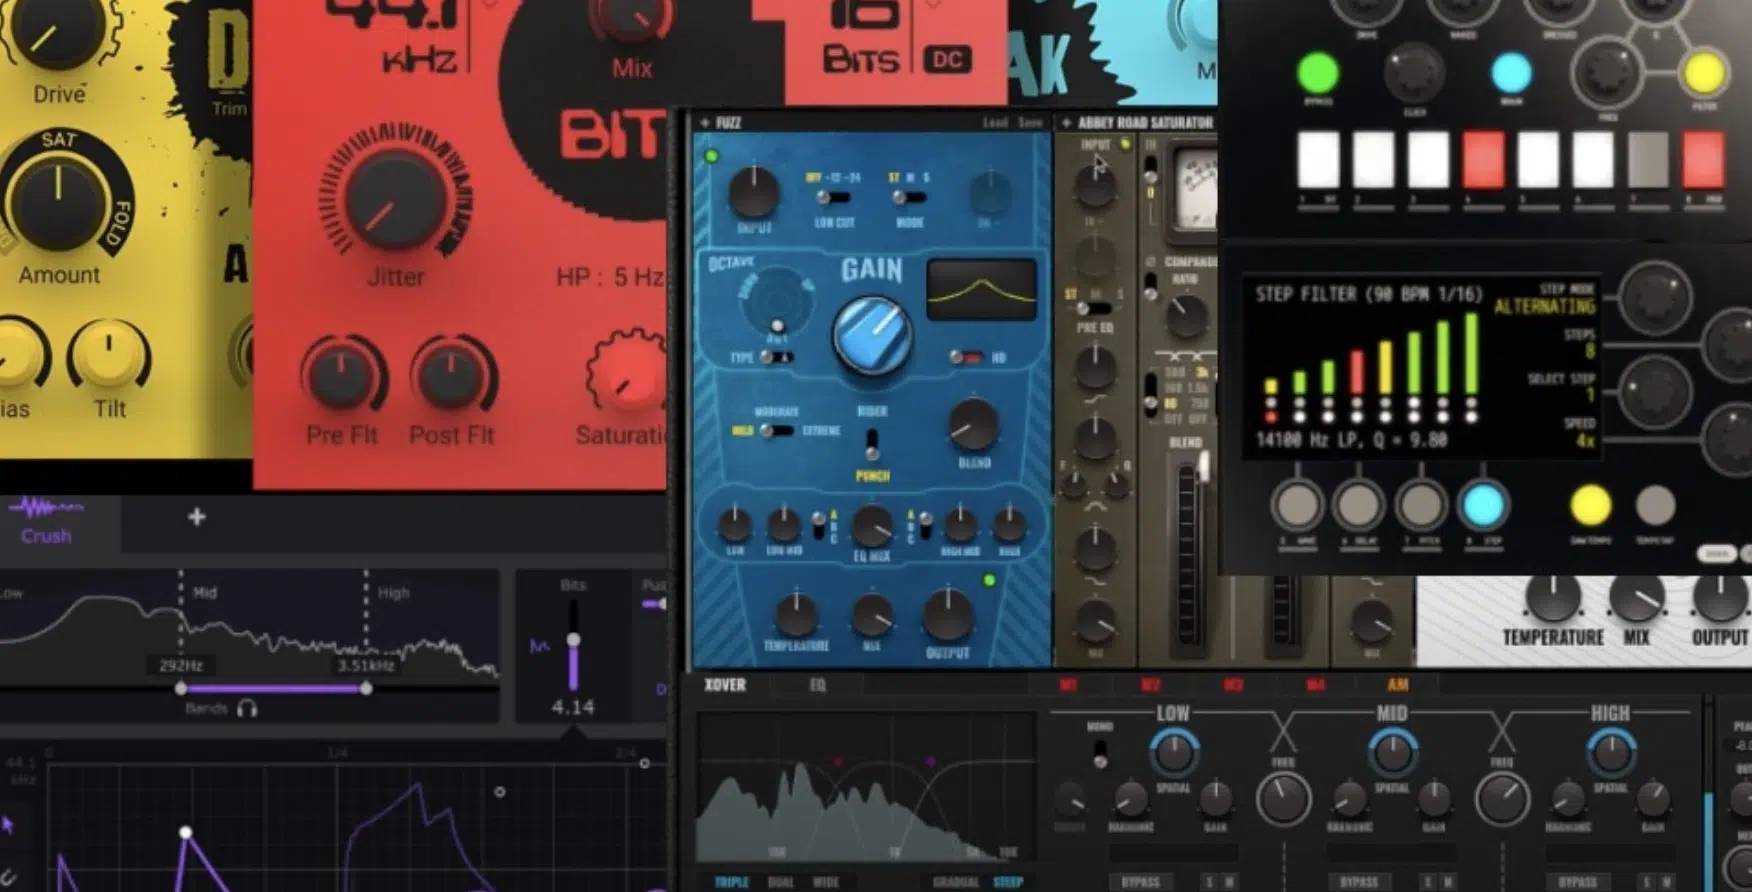
Ear candy and FX are the secret sauce when music-making that take your complete beat from good to great 一 adding unique touches that make your track memorable.
Start by scoping out moments in your arrangement where you can introduce subtle details, like a reverse crash right before the chorus hits.
Or, a vinyl crackle to give your beat a more lo-fi vibe that’s getting super popular.
For example, in a trap beat, you might add a rapid hi-hat roll with a rising pitch just before the drop to build tension and get people hyped up.
Layering ambient sounds, like city noises or crowd chatter, can add texture and depth to quieter sections, making them feel more immersive, which is also great.
Remember, sound selection when you’re learning how to make beats is key, so if you want to throw in some risers and impacts, they’re perfect for transitional sections.
NOTE: A classic riser might involve a pitch-shifted synth that gradually increases in volume and frequency, leading into the hook or chorus.
On the same note, adding reverb or delay tails to your snare hits in certain sections can create a sense of space, which makes the beat feel bigger.
Don’t be afraid to get extra creative with your effects.
You could try automating a phaser on a background pad or using a bitcrusher on a snare hit for a gritty, distorted effect that stands out.
By sprinkling ear candy and FX throughout your beat, you add layers of interest that keep listeners hooked from start to finish.
Personally, I advise saving them for key sections so people can really remember them (and they’ll be “TikTok worthy” if you will).
Step 7: Mixing Your Beat
Once your beat is arranged properly and all elements are in place, the next step is to mix everything together. Mixing ensures that each element of your beat is clear, balanced, and works harmoniously to create a polished final product. Whether you’re learning how to make beats or this is your 100th one, you have to be on point here.
-
Balancing Levels: Ensuring Every Element Stands Out

Balancing levels is the foundation of a good mix… I mean, without proper leveling, your beat can sound muddy or weak and you won’t be taken seriously as a beat-maker.
First, set your kick and snare levels first.
The kick should hit hard and punch through the mix without overpowering the other elements, so start with it around -6dB and adjust from there.
Next, bring in the bass, making sure it supports the kick without clashing (use sidechain compression if needed to duck the bass when the kick hits).
Aim for the bass to sit just beneath the kick in terms of volume.
From there, add in the hi-hats and percussion, making sure they sit comfortably above the drums but not too loud to dominate the mix.
Your melody and chord elements should come in and complement the drums and bass, filling in the midrange frequencies without overpowering them.
Vocals or lead instruments should be clearly audible and sit at the forefront of the mix.
NOTE: Occasionally listen to your mix at a low volume to help you identify if any elements are too loud or too quiet relative to the others.
This technique, known as the “quiet test,” is a great way to make sure your mix sounds good across different listening environments.
By carefully balancing each element, your beat will always be cohesive, and every part stands out as intended and shines through.
-
EQ & Compression Techniques
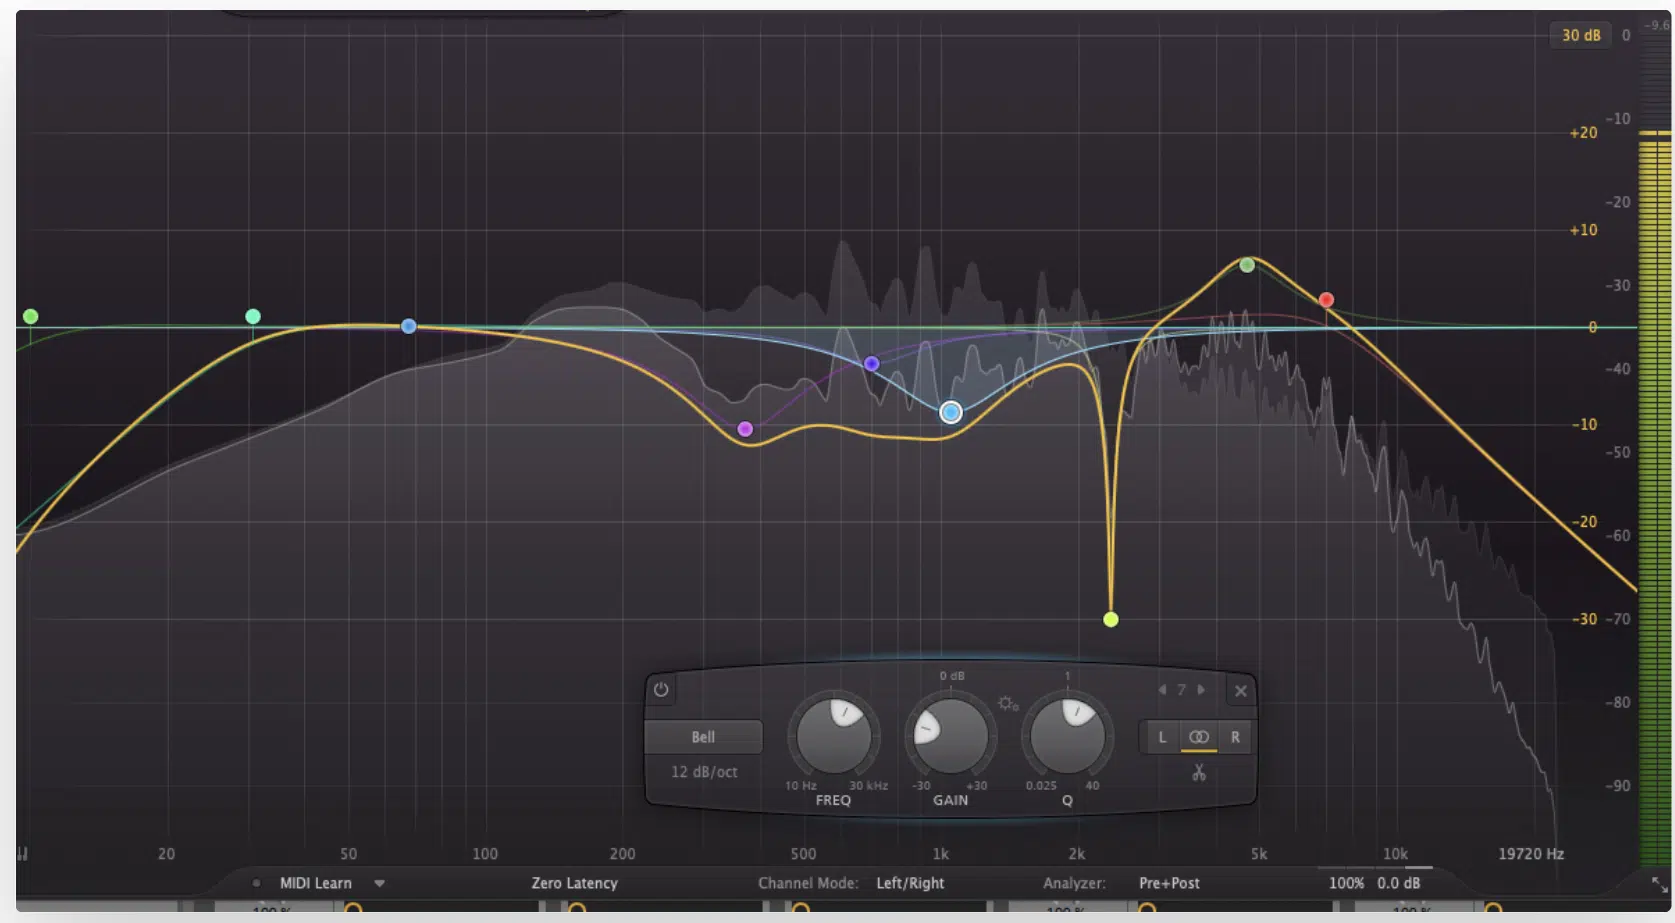
EQ and compression will help you shape the sound of your hip-hop beat so each individual element fits perfectly in the mix.
Start with EQ by carving out space for each instrument.
Use a low-cut filter on non-bass elements like hi-hats and melodies to remove unnecessary low frequencies that could muddy up the mix.
For example, cutting everything below 200Hz on your snare can help it pop without interfering with the bass, which is what you want.
When EQing your kick and bass, use subtractive EQ to remove frequencies that clash.
For example, if your kick has a strong presence around 60Hz, consider cutting that frequency slightly in the bass to avoid masking.
Compression, on the other hand, is about controlling the dynamics of your track.
Use a fast attack and release on your drums to keep them punchy and in control (this is especially important for kicks and snares in hip-hop).
NOTE: Setting the attack around 5-10ms and the release around 50-100ms can tighten up your snare.
On your bass, try using parallel compression, which is simply done by blending a heavily compressed version of your bass line with the original signal to add weight and sustain without losing the punch.
By mastering EQ and compression, you’ll achieve a clean, powerful mix where every element shines.
When you’re learning how to make beats, don’t underestimate their power.
-
Using Reverb and Delay for Depth and Space
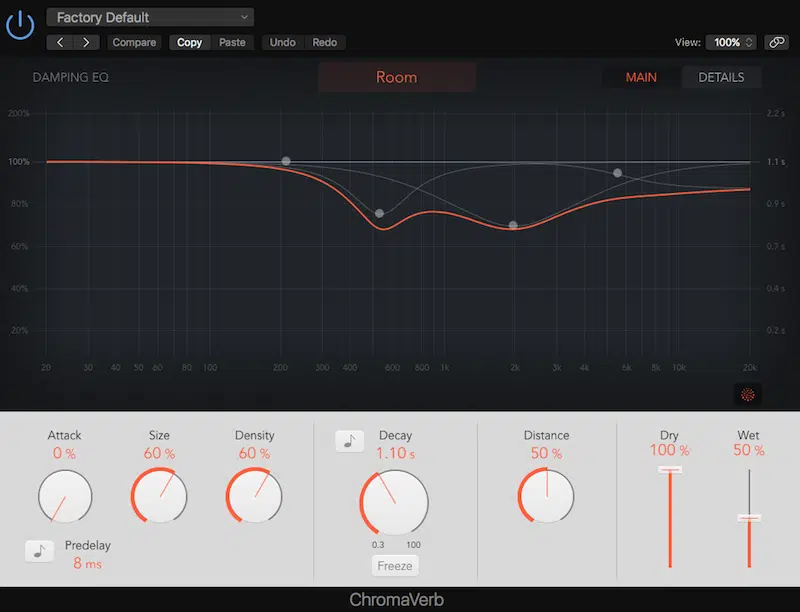
When it comes to adding depth and space to your hip-hop beat, reverb and delay are the key players.
Start by applying reverb to elements like snares, claps, or background melodies to place them in a virtual space.
For example:
- Using a short, room reverb on your snare can make it feel more present.
- Using a longer, hall reverb on a pad can push it to the back of the mix for depth.
When using reverb, less is often more, so make sure to dial back the wet signal to avoid washing out your track.
Delay, on the other hand, is perfect for creating rhythmic echoes and enhancing melodies, for instance adding a quarter-note delay on a vocal chop or lead synth.
This can add some extra complexity to your arrangement, which is always a plus.
You can also use delay subtly on hi-hats or percussion elements to create a sense of movement without cluttering the mix.
NOTE: Use EQ on the effects themselves. Cut the low frequencies on your reverb or delay return to keep them from interfering with your bass and kick.
-
Panning and Stereo Imaging for a Wider Mix
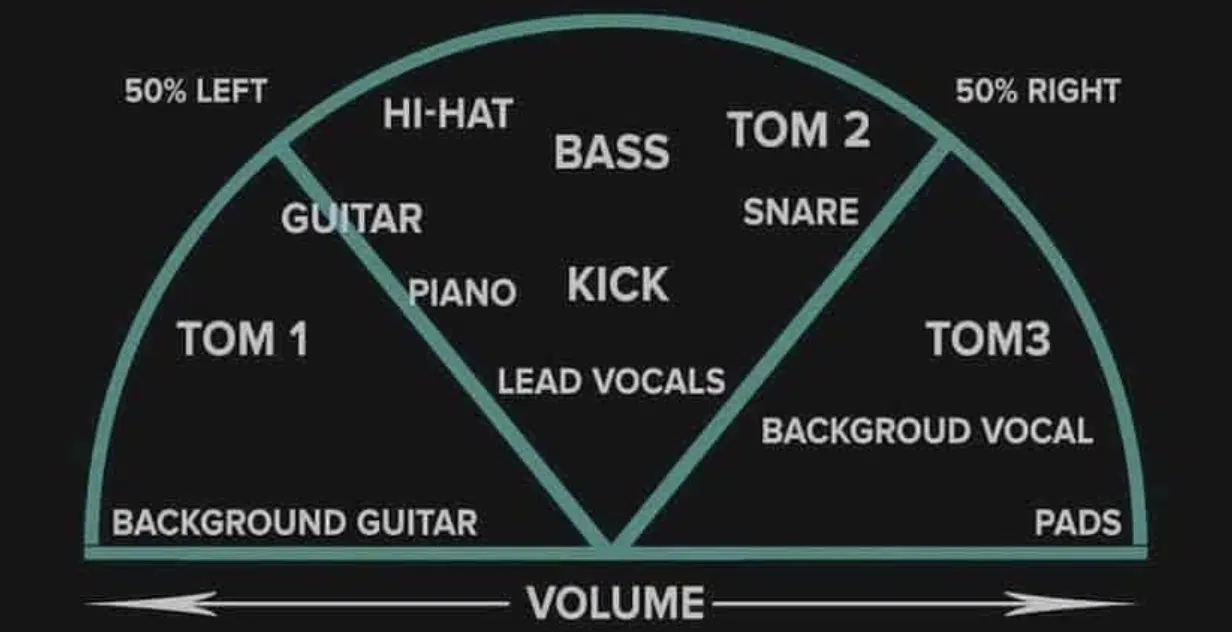
Panning and stereo imaging will help you create a wide, spacious mix that feels more full, dynamic, and engaging.
When you’re learning how to make beats, start by panning elements like hi-hats, percussion, and background vocals a little left or right.
This will create separation and avoid unwanted clutter in the center of the mix.
For example, pan your hi-hats 20-30% to the left and your percussion 20-30% to the right to create a balanced stereo field.
Stereo imaging plugins can be used to widen synths, pads, or background effects 一 pushing them out towards the edges of the stereo field and making your mix feel larger.
You’ll want to keep the kick, snare, and bass centered, while panning supporting elements to create a wide mix that still hits hard in the middle.
Another trick is to use subtle automation on panning, because slightly moving a sound from left to right over time can add a sense of motion and keep the mix engaging.
Finally, check your mix in mono to ensure that all elements are still audible and balanced, as overly wide mixes can sometimes lose impact when collapsed to mono.
-
Pro Tip: Using MIDI Controllers for Beat Production

When using MIDI controllers in your beat production process, don’t just stick to the basics; try thinking outside of the box (the possibilities are endless).
MIDI controllers can be powerful tools for exploring unexpected sounds and adding depth to your tracks.
Try mapping the knobs and pads on your MIDI controller to different parameters within your beat sequencer or a legendary drum machine, which allows you to:
- Tweak effects
- Automate filters
- Trigger samples in real-time as you make a beat
You can even use a MIDI controller to layer different sounds or trigger multiple samples at the same time, which can help you stumble upon unique combinations that contribute to a good beat.
To make the most of your MIDI controller, play around with assigning non-traditional sounds, like ambient textures or vocal chops, to your pads.
This will create unexpected sounds that can take your beat production to the next level.
It keeps the creative process fluid and can lead to a truly innovative, great beat that will sound good and completely original.
Plus, help you learn how to make beats in a way that makes total sense to you because, like I said, everybody has a different process.
Step 8: Finalizing the Beat (Mastering)
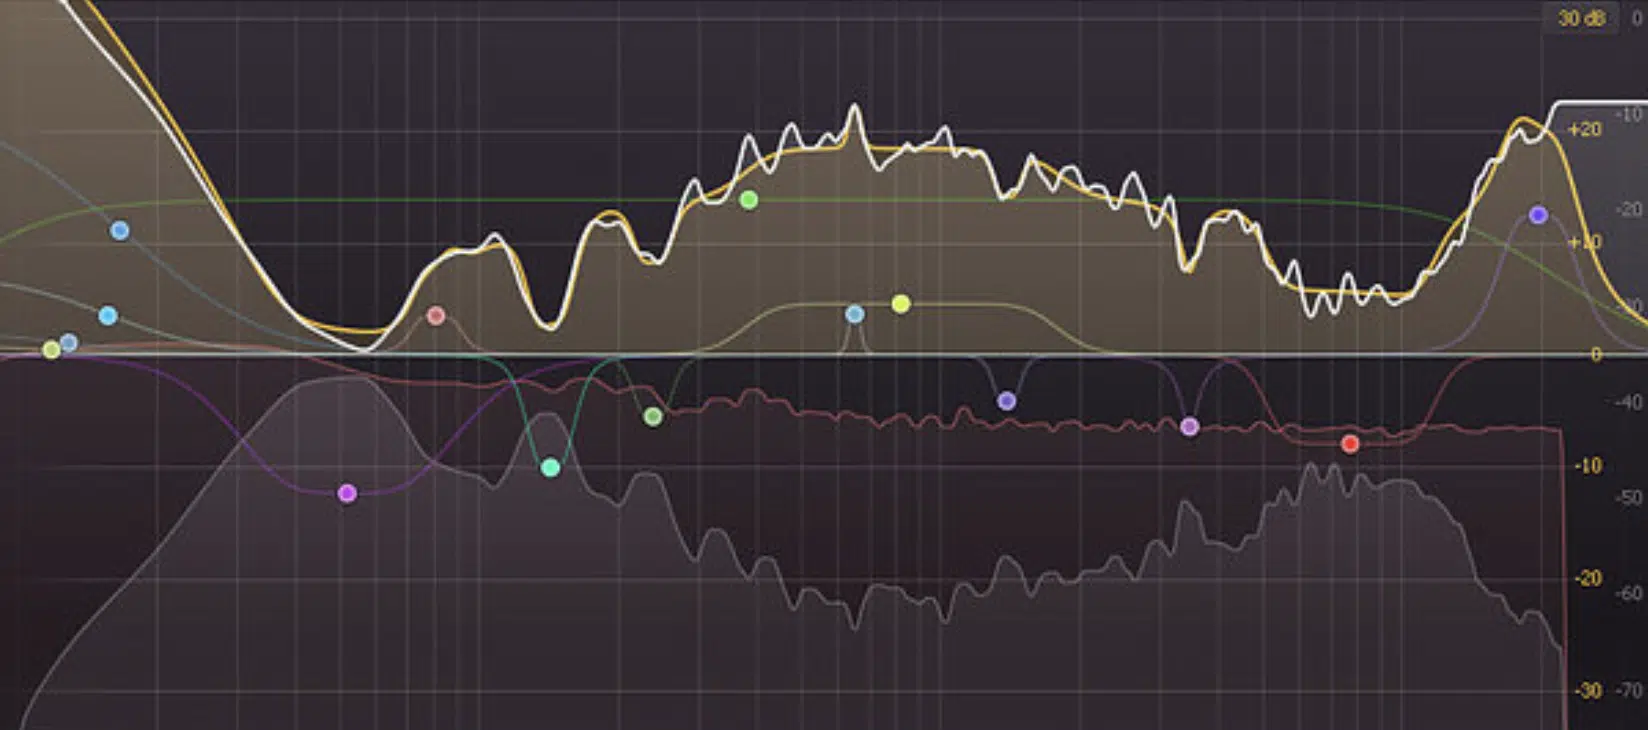
Mastering is the final step in the beat-making/music production process, where you polish your beat to ensure it sounds its best on all playback systems.
Remember, this is not where you fix the mix, but rather make the final tweaks (you can’t put makeup on a pig, or a similar analogy).
Start by applying a gentle EQ to balance the overall frequency spectrum.
If your mix is too bass-heavy, a slight reduction around 100Hz can help, while a small boost around 10kHz can add clarity and brightness.
Compression is also key in mastering, so use a multi-band compressor to control different frequency ranges separately.
This way the low end stays tight and you won’t squash the mids and highs.
For example, you might compress the low end more heavily to keep the bass line consistent while using lighter compression on the highs to preserve their sparkle.
Limiting is the final touch to your own beats, so apply a brickwall limiter to raise the overall loudness of your track without causing distortion.
Aim for a competitive loudness level, typically around -8 to -6 LUFS for hip-hop, but be careful not to overdo it, as excessive limiting can lead to a loss of dynamics.
Side note, if you want to know all about LUFS, RMS, and True Peak metering, we’ve got you covered.
To ensure your own beat translates well across all systems, listen on different playback devices, like studio monitors, headphones, and even phone speakers to see how your beat sounds.
If you need to, simply make adjustments.
By carefully mastering your beat, you ensure it’s ready for release, with a professional sound that stands out in any playlist, or simply hire a mastering engineer.
Bonus: 5 Advanced Beat-Making Tips/Techniques
Now that you know how to make beats like a pro, it’s time to dive into more advanced techniques so you can bring your beat-making skills to the next level. From sound design to innovative rhythm techniques, they’ll give your own beats a unique edge.
#1. Advanced Sound Design: Creating Unique Sounds from Scratch
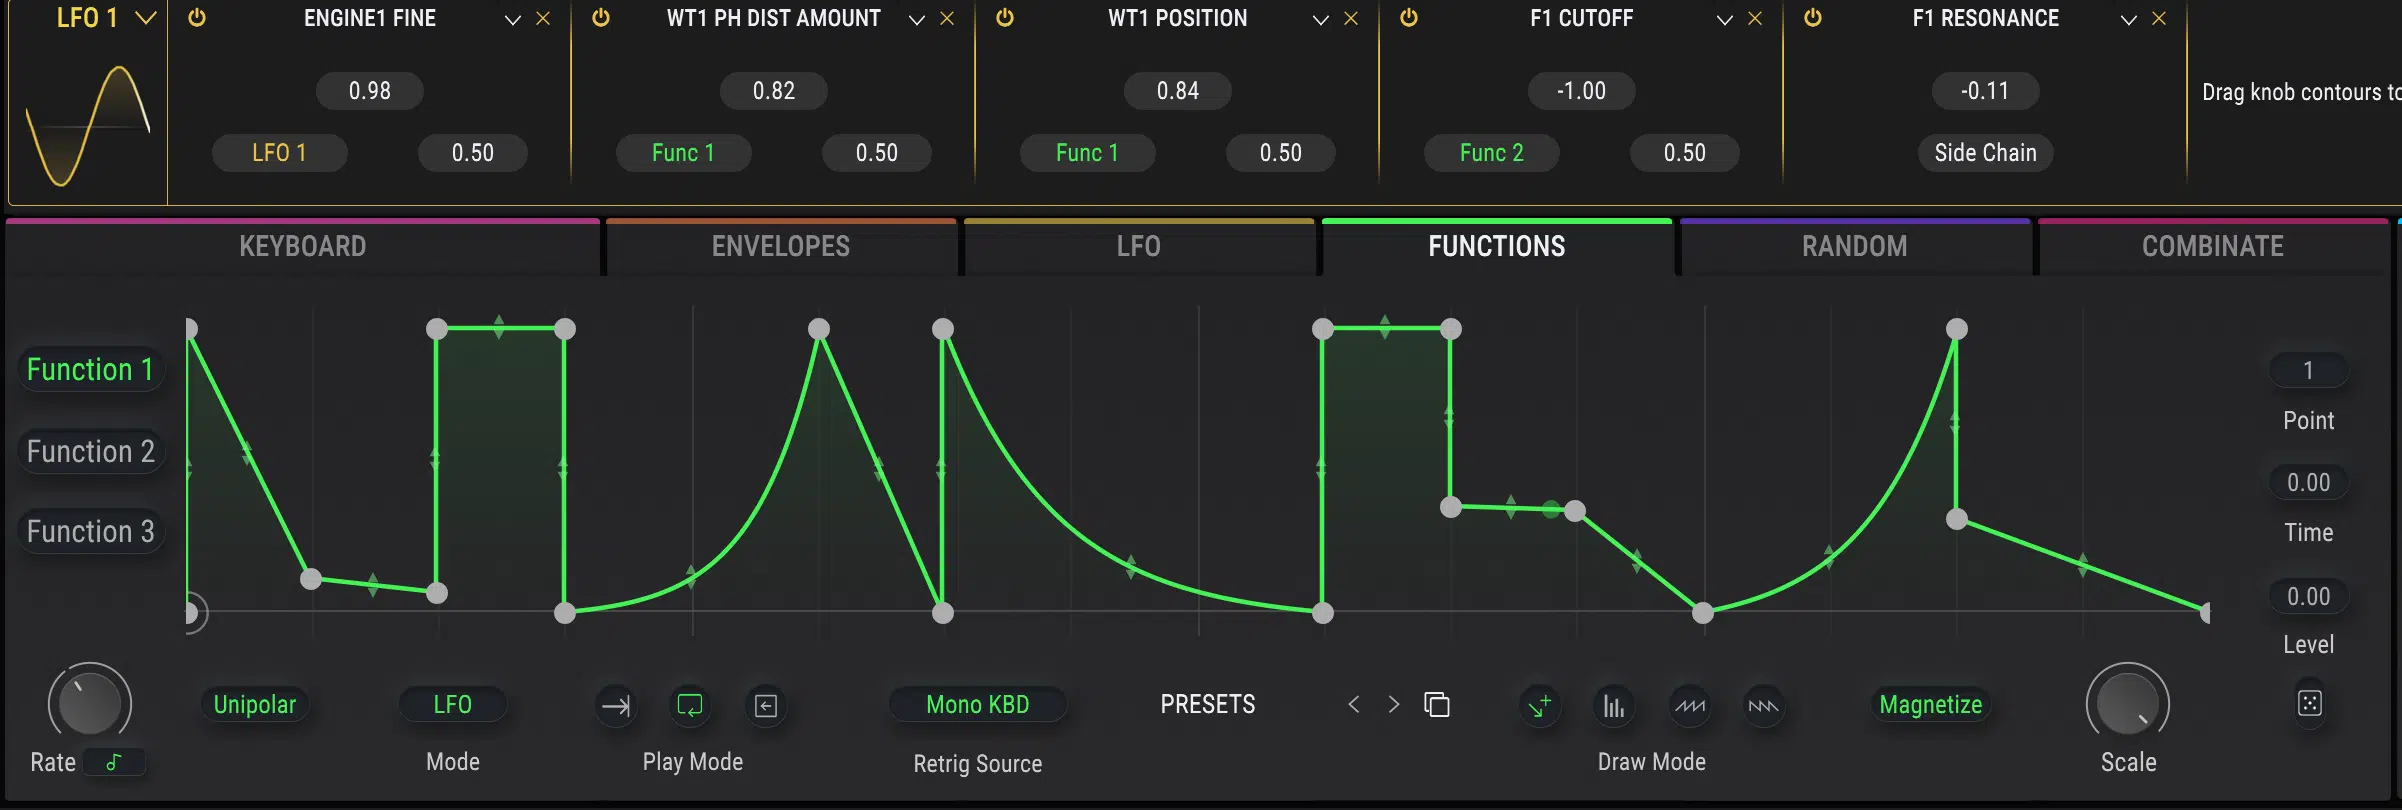
Creating unique sounds from scratch is a powerful way to give your own beats a distinct identity that stands out and learn how to make beats like a pro in the process.
Start by experimenting with synthesis, like:
Using plugins like Serum or Massive, you can design custom basses, leads, and pads that no one else has (there are literally endless possibilities).
For example, in Serum, try using a wavetable oscillator combined with an LFO modulating the filter cutoff to create a gritty, evolving bass line sound people love.
Layering different sound sources, like combining a synthesized lead with a sampled texture, can add complexity and depth to your sound.
You can also resample your sounds—bounce them to audio, chop them up, and reprocess them with effects like bitcrushers, phasers, and pitch shifters.
It will help you create something completely new and intriguing.
Another good beat-making practice is to use granular synthesis, where you can take a small snippet of audio and stretch or manipulate it to create ethereal pads or glitchy effects.
By diving into sound design, you can create a signature sound that’s entirely your own as a music maker 一 making your own beats instantly recognizable.
Remember, you always want to make sure your beat sounds different and intriguing from the rest of the music production world.
It’s going to take some time, but I promise you it’s worth the effort.
#2. Using Unconventional Time Signatures for a Unique Feel
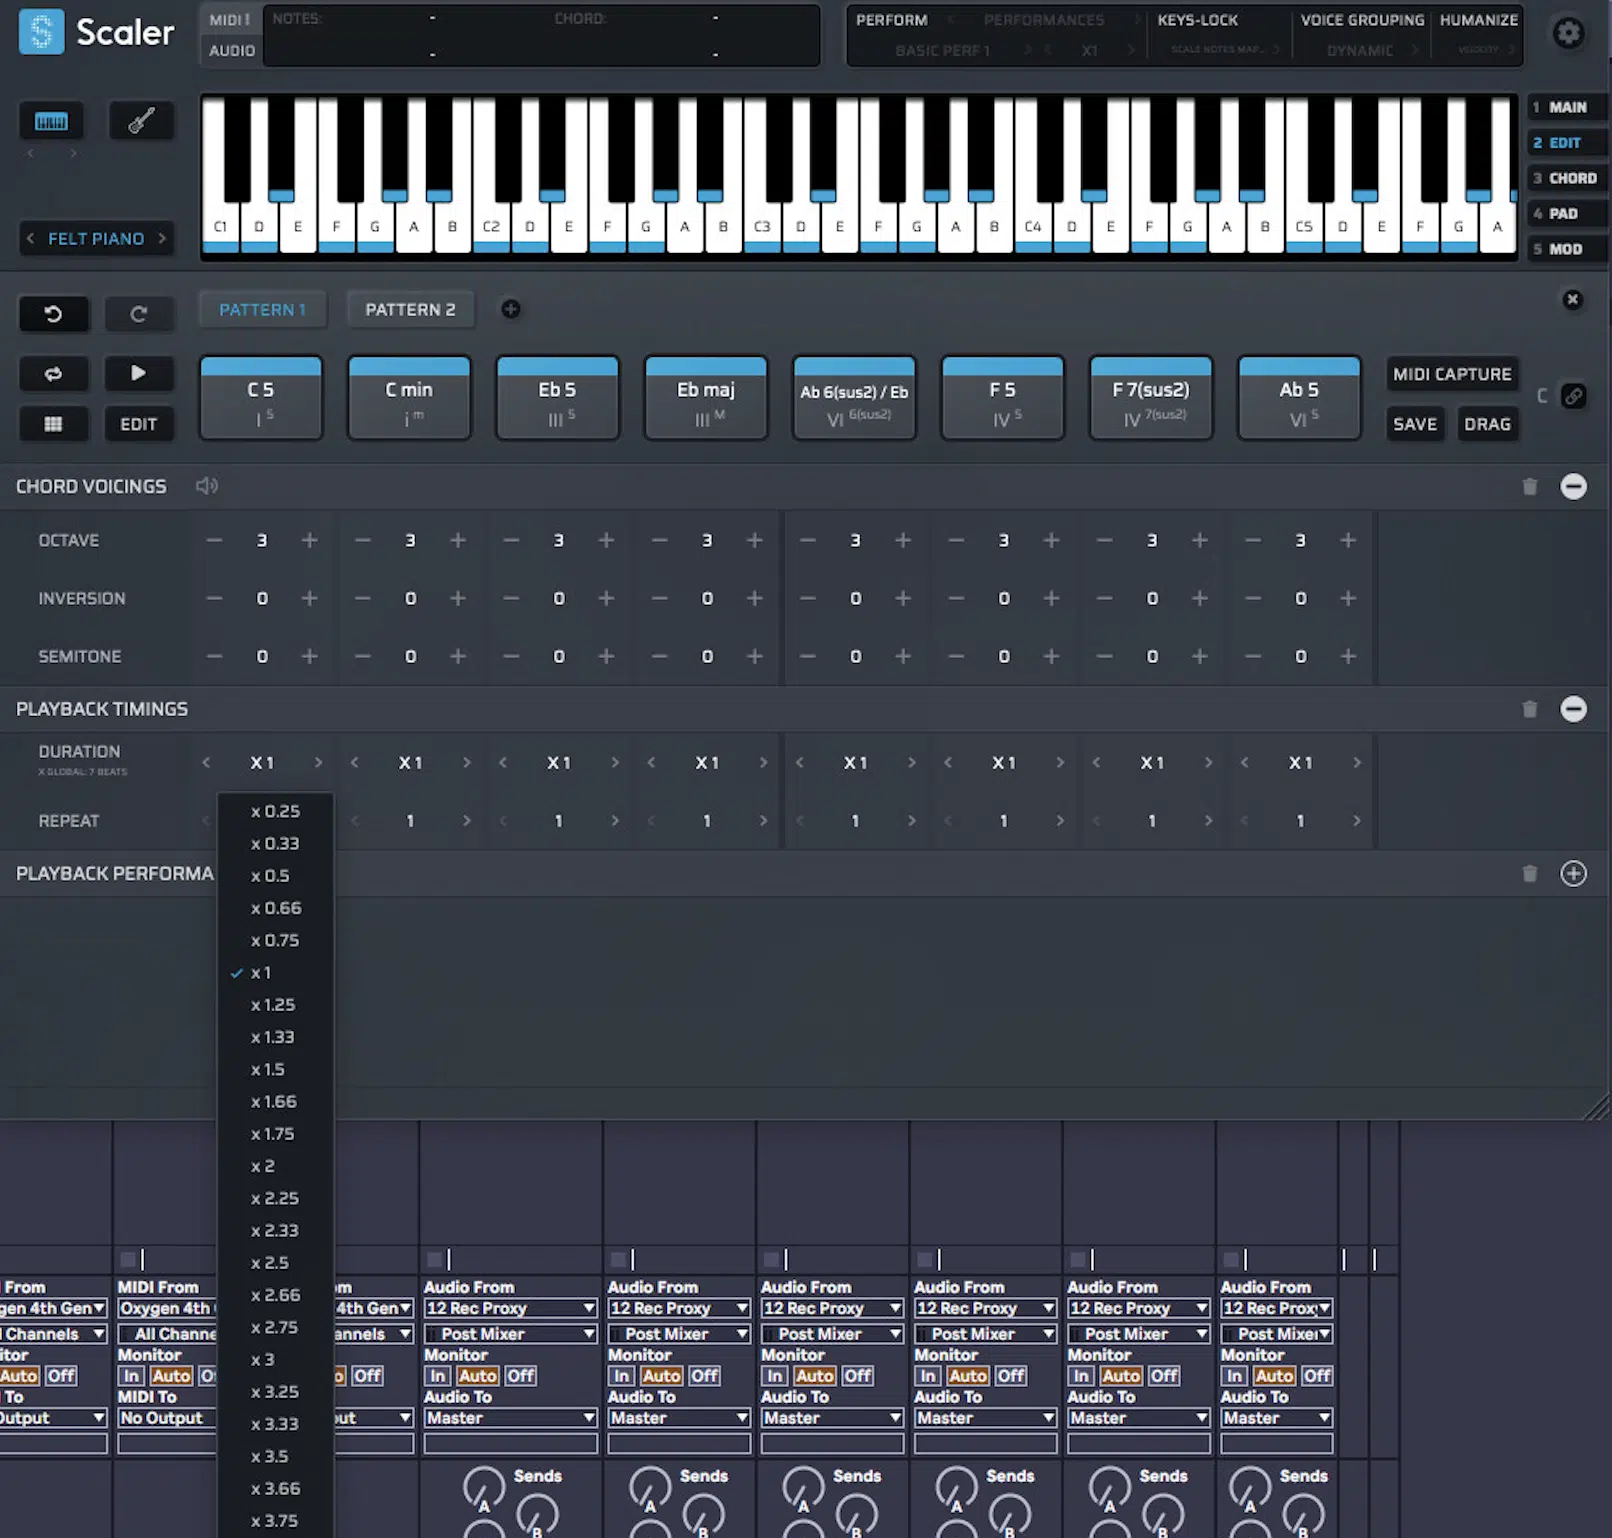
Playing around with unconventional time signatures is a great way to break out of the standard 4/4 mold and create beats with a unique rhythmic feel.
While 4/4 is the most common time signature in hip-hop, experimenting with 3/4, 5/4, or even 7/8 can introduce a fresh, unexpected groove to your tracks.
For example, in 3/4 time, you can create a funky rhythm with the kick landing on the first beat of each measure and the snare on the third, giving the beat a circular feel.
In 7/8, you might place your kick on beats 1, 3, and 5, with the snare on beat 7 一 creating a rhythm that feels off-kilter yet compelling.
You could try layering an element in 4/4 as well, like a repeating hi-hat pattern, over the unconventional time signature to give the listener a familiar anchor.
Also, you can switch between time signatures within a track…
Starting in 4/4 for the verse and switching to 5/4 for a bridge or breakdown to create contrast in your next song.
Making beats (music production in general, really) is all about not only learning the rules, but breaking them in super creative ways.
#3. Creative Sampling: Flipping Samples in Unexpected Ways
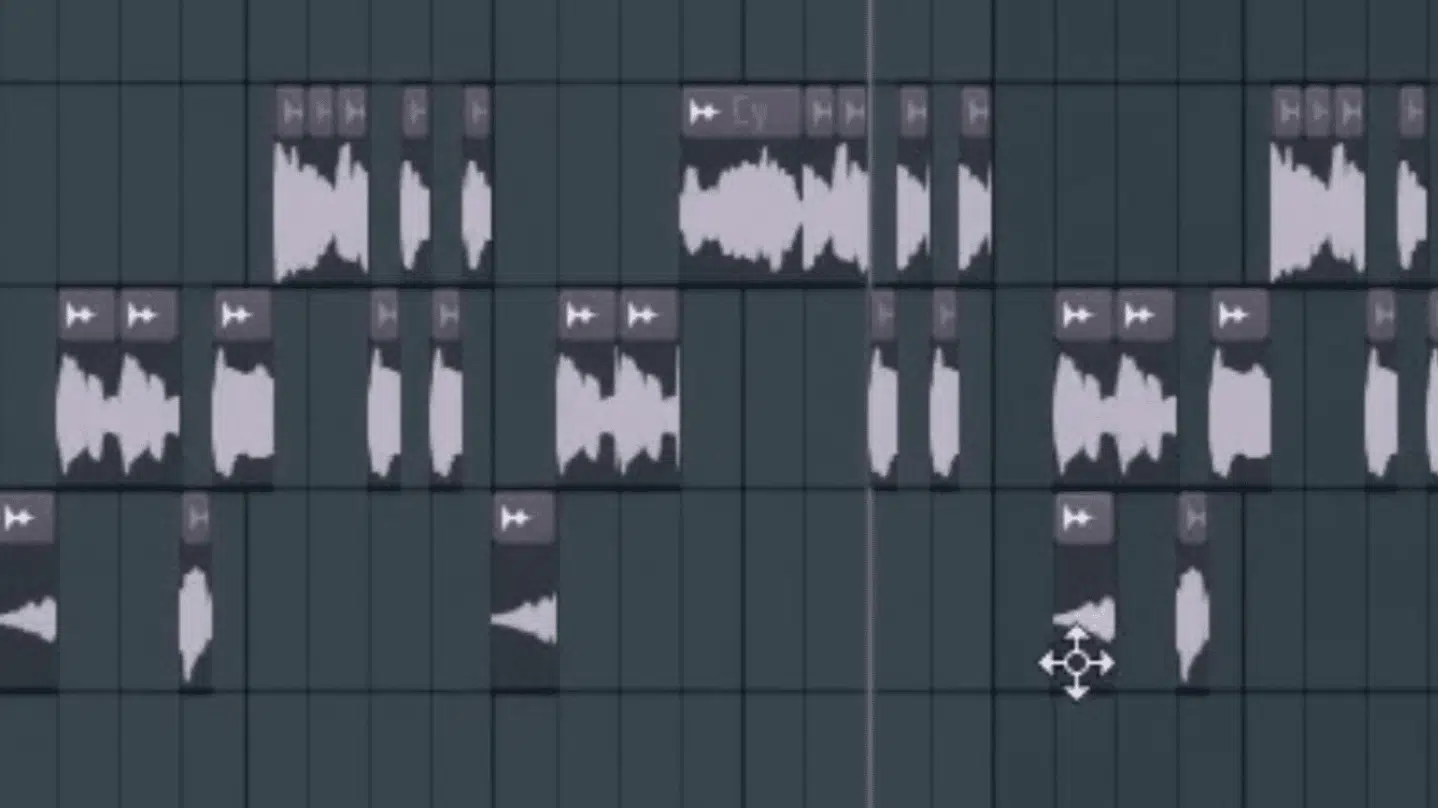
Creative sampling will certainly help you learn how to make beats that can dominate the competition.
Flipping samples in different ways will help your own beats sound radio-ready.
Start by selecting a sample that resonates with you 一 This could be anything from an old soul record to a random viral YouTube clip.
Once you’ve got your sample, consider chopping it up into smaller pieces, then rearranging these chops to create a new melody or rhythm.
For example, you could take a soulful vocal phrase, slice it into individual words or syllables, and then re-sequence them to lay down an entirely new hook or verse.
Also, try to pitch shift your sample:
- Down 一 To create a darker, moodier vibe.
- Up 一 For a more energetic, upbeat feel.
You can also experiment with reversing your sample, adding effects like reverb or delay, or using time-stretching to change the song’s tempo without affecting the pitch.
By flipping samples from your sample library in these creative ways, you transform familiar sounds into something fresh and original.
It’ll give your own beat a unique flavor that sets it apart from any other music maker out there.
#4. Experimenting with Hip-Hop Modulation for Movement
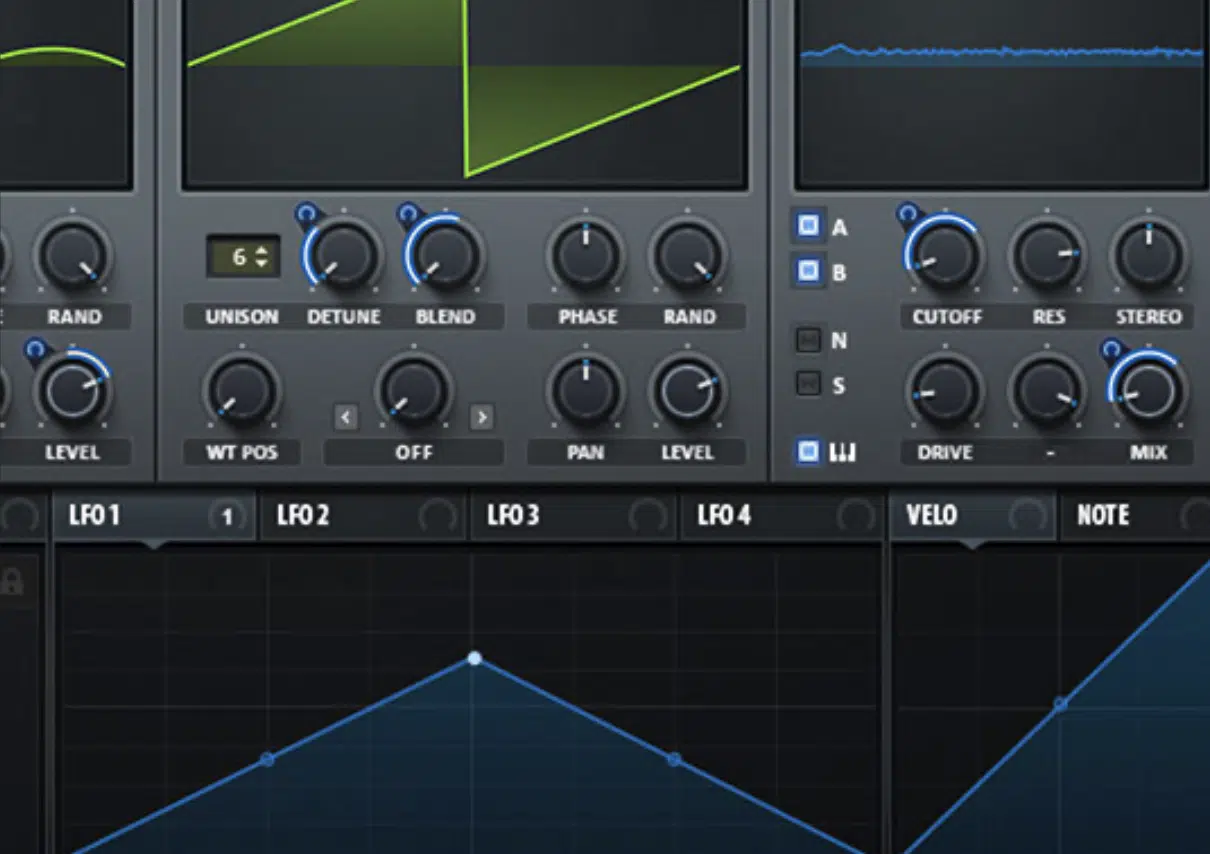
Modulation adds movement and variation to your sounds, making your great beats more dynamic and interesting to the listener.
One common technique is to use LFO (Low-Frequency Oscillator) modulation on a synth or bass line, modulating parameters like:
- Filter cutoff
- Pitch
- Amplitude
It will create rhythmic pulsations or evolving textures that your audience or collaborators are sure to respond well to (because who doesn’t like that sound?).
For example, you could apply an LFO to modulate the pitch of a pad to create a subtle vibrato effect that adds richness/depth to your background elements.
Try playing around with modulating effects like phasers or flangers on your hi-hats or percussion.
These effects sweep through the frequency spectrum, adding movement and color to otherwise static elements.
You can also experiment with modulating the reverb size or delay time when you make a beat, where the effect changes over time.
To add even more complexity, try using multiple LFOs with different rates to modulate several parameters at once, creating intricate sounds that keep your own beat fresh.
By experimenting with modulation in your music production process, you introduce subtle changes that breathe life into your beats.
It will make them feel more organic and less repetitive, which is what you should aim for.
#5. Adding Ghost Notes and Fills for a Professional Touch
Being an innovative music maker doesn’t just involve having a basic understanding of music theory, how to create a bass line, or picking the right drum loops, it’s about getting creative and breaking outside of the box (I cannot emphasize this enough).
Ghost notes and fills are a great way to practice that, especially if you want to add some complexity to your drum patterns.
Side note, if you want to learn all about hip-hop drum patterns, we got you.
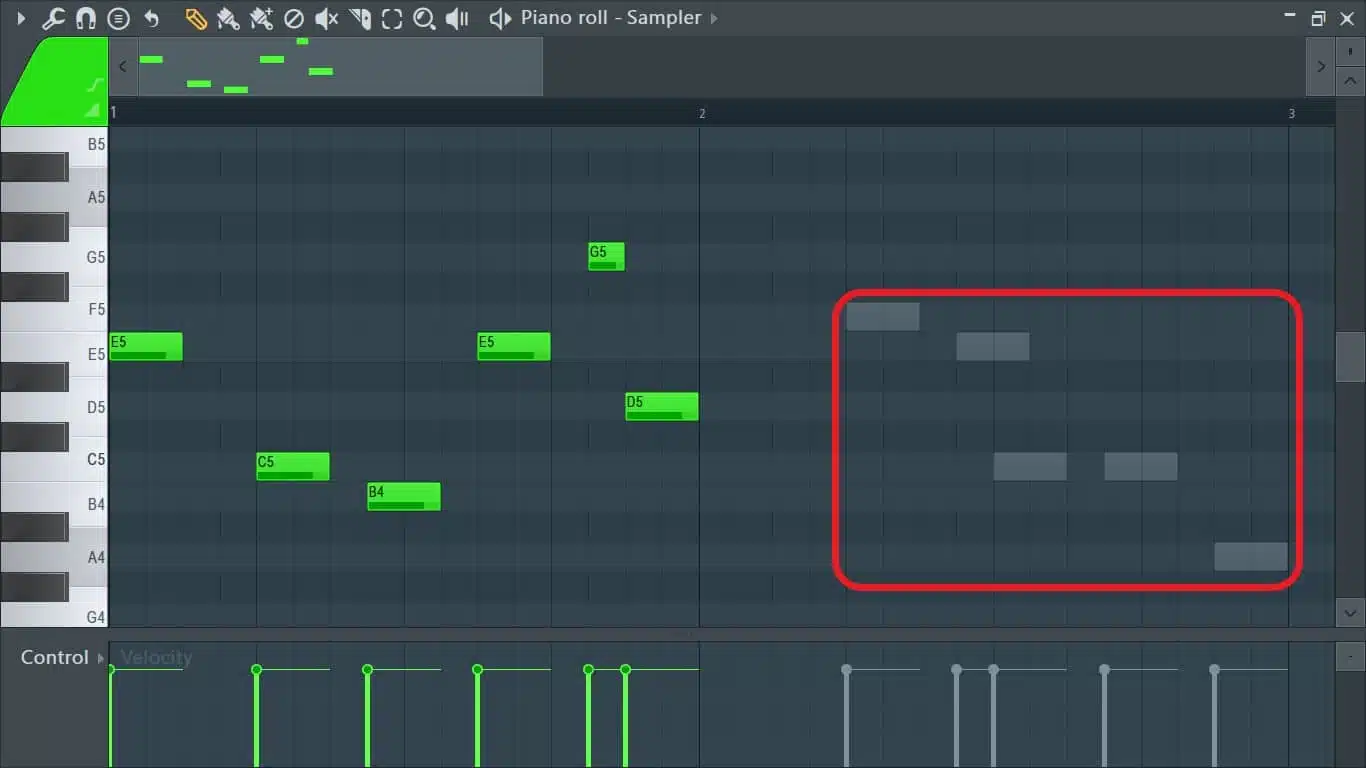
If you’re unsure, ghost notes are softer, almost imperceptible hits that occur between the main snare or clap hits.
For example, place a ghost snare just before the main snare hit to add a sense of anticipation and rhythm.
Fills, on the other hand, are short, often fast-paced drum sequences that break up the regular pattern and lead into new sections of your track.
These can be simple, like a rapid series of hi-hat rolls, or more complex, involving toms and snares 一 dealer’s choice.
When adding fills, make sure they complement the beat and don’t overpower the groove.
Vary the velocity of ghost notes and fills to maintain a natural, humanized feel 一 avoiding the mechanical precision that can make a beat feel stiff.
By incorporating ghost notes and fills, you elevate your beat from basic to professional, adding layers and layers of detail that keep the listener engaged.
How to Make Beats: Final Thoughts
Learning how to make beats is an ongoing journey that involves mastering various skills and consistent learning/growing.
From laying down solid drum patterns to designing captivating melodies and mixing your tracks for a polished finish, you need to really nail certain things down.
As you’ve seen, there’s a lot that goes into creating professional-quality beats, but with practice and attention to detail, you can take over the industry.
Whether you’re just starting out or you’ve been making beats for a while, everything we talked about today will help you refine your process and find your signature sound.
It’s all about getting creative, experimenting constantly, and staying motivated.
Remember, knowing how to make beats that stand out involves more than just following a formula, it’s about pushing boundaries.
Make sure to find a workflow that fits best with your unique workflow (you might want to do drums first, or maybe melodies; it’s all up to you).
To help you really see firsthand how to make beats like the professionals, you’ve got to check out this invaluable Free Project Files pack.
It includes 3 project files that demonstrate exactly how to make beats from start to finish, from the world’s top producers, engineers, and sound designers.
Breaking down the fundamental techniques, tips, and tricks, plus some more advanced processes, you’ll be able to learn from the best, and all for free!
Each project file is also fully customizable, so you can explore the intricacies of beat-making right within your DAW (FL Studio, Ableton Live, or Logic Pro X).
From drum programming and sound design to arrangement and mixing, these files cover every aspect of how to make beats.
You’ll get hands-on experience that can seriously speed up the time it’ll take you to learn how to make beats on a professional level.
So, as you continue on your journey to becoming a skilled beat-maker, remember that persistence and creativity are key.
Always keep experimenting, stay inspired, and push yourself to learn more, because even though it’s corny and grossly overused, it’s right: education is key.
Until next time…


Leave a Reply
You must belogged in to post a comment.