To get attention from the industry as a professional producer, your beats have to be on point, from start to finish, including mixing.
A proper mix can seriously take your music from sounding amateur to sounding like it belongs on a major playlist or radio station.
Plus, a great mix helps your tracks sit comfortably next to big industry hits, keeps your dynamic range intact, and pushes your music to its full potential.
And now, with Sound Doctor, if you’re trying to fix your mixes, it’s easier than ever.
Today, I’m breaking down everything you need to know about how to fix your mixes like a boss, including:
- Choosing the right style/formula for your mix ✓
- Customizing FX chains ✓
- Using parallel and serial processing the right way ✓
- Saving and recalling custom presets ✓
- Mastering the master control center to maintain full control ✓
- How to tackle any challenge and right any mixing wrong ✓
- Applying style-specific processing techniques ✓
- Pushing creative boundaries with Sound Doctor ✓
- Using proper gain staging to achieve a balanced track ✓
- Reference tracks to hear the truth about your mix ✓
- Bonus tips, knowledge, tools, and techniques for producing like a pro ✓
- Enhancing your music production process in general ✓
- Much more about how to fix your mixes ✓
With all these new tips, tricks, and techniques about how to fix your mixes, you’ll be able to dial in punchier drums, brighter vocals, and bigger synths.
Plus, successfully tighten up your dynamic range, add compression, and bring your songs to life.
This way, your mixing skills will seriously enhance and your mixes will always sound balanced, full, and professional every single time.
Table of Contents
What is Sound Doctor?

Sound Doctor is a next-level AI plugin from Unison Audio that was built specifically to help producers fix their mixes quickly and easily.
It’s loaded with 25 high-quality effects, including saturation, compression, EQ, distortion, stereo width, reverb, delay, flanger, chorus, phaser, and even more.
You can stack up to eight different effects inside a chain, tweak the parameters, flip between parallel and serial routing, and totally customize the vibe.
What really makes Sound Doctor special is how it hands you style-based formulas (like Clean, Warm, Dreamy, Aggressive, and Gritty).
They’re already dialed in to fix common mix problems right out the gate.
Whether your mix needs more space, more punch, or a more balanced feel, Sound Doctor makes it insanely easy to get there without needing to watch a million YouTube videos or anything.
It’s one of the best mixing tools for any production style (and nothing is limiting!).
How to Fix Your Mixes with Sound Doctor: Breaking it Down
Now that we know what Sound Doctor is packing under the hood, it’s time to dive into exactly how to use it to fix your mixes like a pro. Let’s break down the specific steps, tricks, and techniques that’ll help you clean up, tighten up, and bring your tracks to life.
-
Choose the Right Style and Formula for Your Track
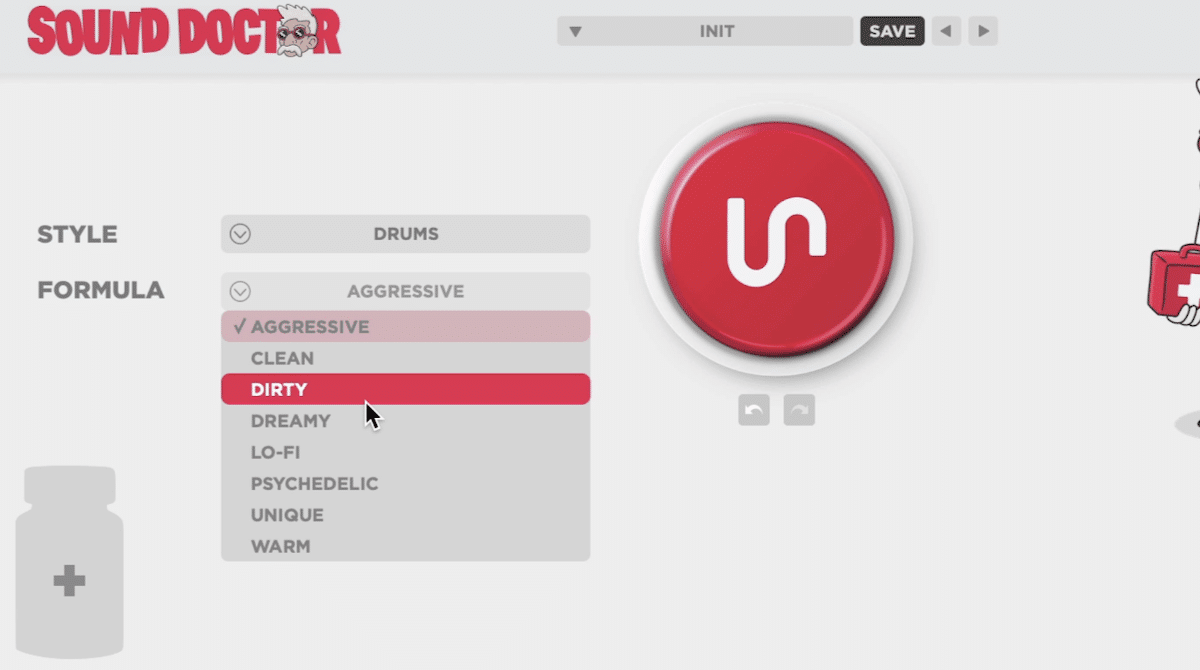
The first move when you’re trying to fix your mixes with Sound Doctor is to pick the right style and formula that fits your track’s energy and vibe.
In Sound Doctor, a “formula” is basically a pre-designed FX chain blueprint that stacks multiple effects together (like EQ, compression, reverb, saturation, stereo widening, etc.)
They’re all already dialed in for a specific type of sound and feeling, which is awesome.
Each style, like Dreamy or Aggressive, has eight different formulas inside it, all with slightly different chains and settings that are designed to match different goals.
For example, if you’re working on a chill melodic song with lots of synths and vocals, throwing on the Dreamy style and selecting the Ambient Glow formula is ideal.
It will create a lush, open space around your sounds…
It boosts your stereo width by around 20–25% instantly, while also smoothing out harsh midrange frequencies with a gentle parametric EQ cut at about 2.5kHz.
You can even play around with the reverb decay setting in that formula, which usually sits around 3.2 seconds by default.
This will either make the space feel bigger or tighter, depending on how you want your track to breathe of course.
On the other hand, if you’re dealing with drums that need more punch and loudness, switching to the Aggressive style with the Punchy Impact formula will give you a solid transient boost.
This is typically done by increasing attack shaping by about +4 dB while tightening your dynamic range, plus adding light saturation at around 10% drive.
This keeps the drums feeling full without losing their snap.
The key is to always match the style and formula to the idea behind your track because every mix needs a different sense of balance, loudness, and energy.
When you’re stuck in the production process, choosing the wrong formula can actually cause your mix to feel way off 一 making your vocals get buried or your drums lose punch without you even realizing it.
And, that’s definitely not how you want to fix your mixes, am I right?
-
Customize FX Chains to Fit Your Mix

Once you’ve got a style dialed in, it’s time to play around with the FX chains to truly fix your mixes and get everything sitting the right way.
Each FX chain lets you load up to eight different effects, and you can easily swap out modules…
This could be like replacing a stock compressor with a more aggressive one that hits a 6:1 ratio and a fast 10ms attack for better control over your drums’ dynamic range.
For vocals, I usually like pushing the EQ around 3kHz by about +2dB using the built-in parametric EQ, then hitting it with a subtle compression setting (around -20 dB threshold with a 2:1 ratio).
This helps maintain clarity without flattening the life out of the performance.
You’re free to reorder effects too, like dragging a reverb before your limiter to smooth out peaks without destroying the natural energy.
This can seriously affect the way your track feels and help your song sit comfortably in the mix (and that’s really the key when mixing a track).
Plus, one killer trick is adding slight saturation after compression with a drive setting around 8–10% just to bring out the harmonics and make the midrange pop.
That little move can push your whole production to the next level.
The truth is, when you play around with FX chains inside Sound Doctor, you open up so much creative freedom that it becomes one of the fastest ways to fix your mixes.
All without falling into bad habits or endlessly watching videos, mind you.
Side note, if you want to learn everything you need to know about creating custom FX chains with Sound Doctor, I got you.
Download The #1 Mixing Plugin Now
-
Utilize Parallel and Serial Processing Modes

Another thing that makes Sound Doctor insanely powerful when you’re trying to fix your mixes is the ability to flip between parallel and serial processing modes.
In parallel mode, you can blend dry and wet signals perfectly.
For example, setting a 50/50 balance when you’re stacking a gritty distortion with clean vocals to keep the original sound intact but still add life and loudness.
Serial mode, though, is epic when you want every effect to affect the next, like compressing a snare at 4:1 before hitting it with stereo widening at 30%.
This will help you get that big, in-your-face drums vibe that still stays tight inside the dynamic range as it should.
The key is knowing when to push for serial to create aggressive chains, and when to pull back with parallel to maintain more of the natural feel.
Once you master this with Sound Doctor, it makes a massive difference in how you fix your mixes and create pro-level balance in your songs.
-
Save and Recall Custom Presets
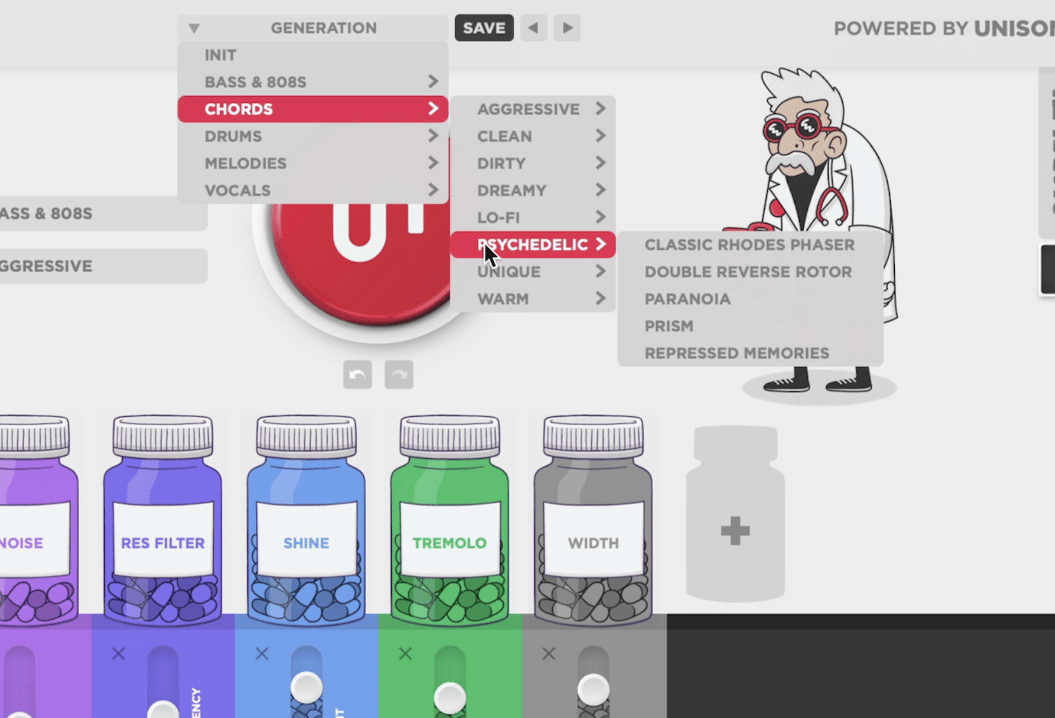
One of the easiest ways to save time while you fix your mixes with Sound Doctor is to take full advantage of the ability to save and recall custom presets.
Basically, whenever you dial in an FX chain, you can save that exact combo as a custom preset and instantly pull it up later in any project…
Let’s say you set your compression to a 3:1 ratio with a -18dB threshold, layer in a stereo widener at around 22%, and EQ your vocals with a slight +2dB boost at 5kHz.
You’re free to bounce between different projects without losing your favorite settings, and have it saved for later.
It makes a huge difference when you’re under deadline pressure or when you’re stuck trying to recreate the same punchy drum mix or bright vocal tone.
PRO TIP: Always name your presets with specific markers like “Trap Vocals — Bright + Compressed” so when you’re deep in the production process, you don’t have to guess which preset to grab.
You can simply load it and fix your mixes fast without overthinking or slowing your workflow (which, as you know, is super important because every second counts).
-
Take Advantage of the Master Control Center
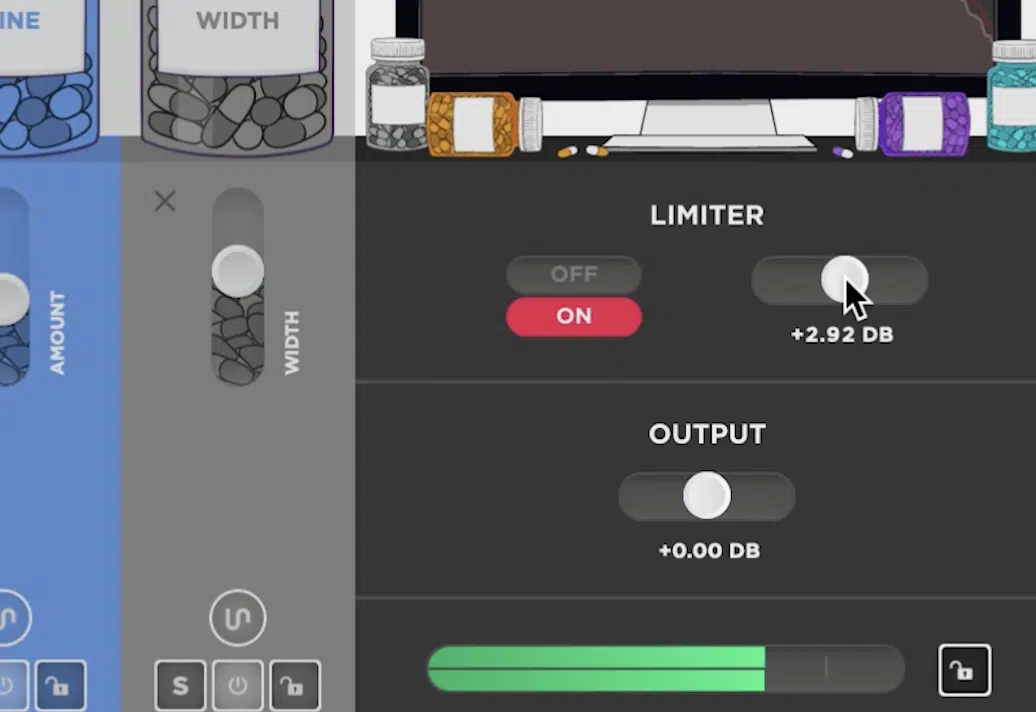
The Master Control Center in Sound Doctor is where you fine-tune the overall impact of everything you’re stacking up.
It’s one of the most underrated places to fix your mixes without overcooking them.
You’ll find key controls like the global Dry/Wet mix knob (which I usually set around 70% wet when I want the processing to stay punchy but not too heavy).
As well as an overall Output Gain (which I recommend keeping between -2dB and 0dB for a safe headroom buffer), and an instant Bypass toggle to A/B your choices.
The truth is, just tweaking your Dry/Wet blend alone can bring a track back to life.
This is especially true if you accidentally pushed too much compression or added distortion that flattened your drums or vocals too much during the rest of the chain.
By keeping an eye on the Master Control Center and not being afraid to pull things back, you’ll maintain better dynamic range and create cleaner energy across your mix.
Plus, be able to push your track closer to that high-quality, radio-ready sound we all want to hear and that the industry will be thoroughly impressed with.
-
Apply Style-Specific Processing Techniques
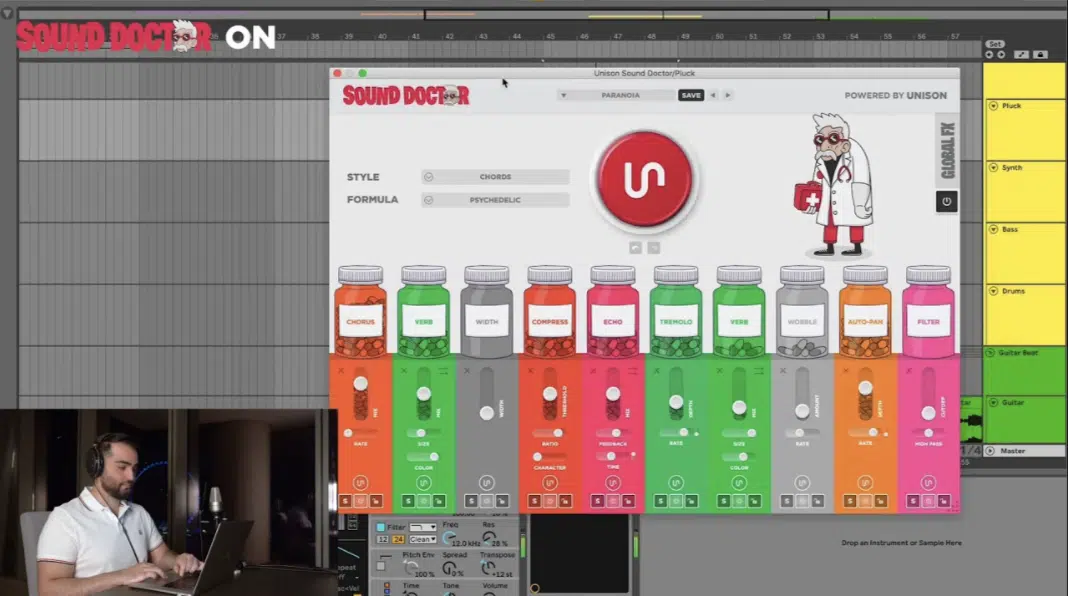
Each style inside Sound Doctor is basically a full FX framework designed to help you fix your mixes based on the exact vibe you’re aiming for:
Clean is all about keeping your mix crisp, open, and polished.
Tight EQ cuts, transparent compression, and a light stereo enhancer that makes your vocals and instruments breathe naturally in the mix.
Warm is focused on adding rich low-mids, soft saturation, and gentle harmonic excitement.
It’s perfect for creating that vintage, analog-style vibe that makes your song feel full without sounding muddy.
Dreamy is built to create wide, immersive space with lush reverbs, long delays, and subtle chorusing.
It can help give your synths, pads, and even vocals that floating, ethereal quality.
Aggressive is about enhancing punch, transient attack, and upfront presence.
It uses fast compressors, saturation, and transient shapers to make drums, bass, and leads punch straight through a dense mix.
Gritty is my favorite, made for raw energy, distortion, and attitude.
It’s all about stacking overdrives, saturation, and midrange boosting EQs to create edgy, textured tracks that still maintain a sense of control and dynamic range.
For example, the Clean style is awesome when you want clear, polished vocals…
I like stacking a subtle compression setting at 2:1 with a fast 15ms attack, plus rolling off a little low-end with a high-pass filter around 80 Hz.
This keeps the mix balanced and breathing perfectly.
On the flip side, if you’re working with dirty synths or distorted basslines and want to add life without overcrowding your track, flipping to Gritty style with a distortion module set around 12% drive and a stereo widener at 18% is perfect.
It can add exactly the right energy without wrecking your dynamic range.
The key is to always think about what sense of energy and space you’re trying to create in your song, and then use the right style and its built-in techniques.
Not just fix your mixes, but push them into their full potential like a freakin’ boss.
Bonus Tips on How to Fix Your Mixes
Even after locking in the main parts of your project, it’s the extra little things that really make or break how you fix your mixes. So let’s jump into a few more advanced techniques that’ll help you create better balance, maintain proper dynamic range, and bring your tracks to life every single time.
Proper Gain Staging
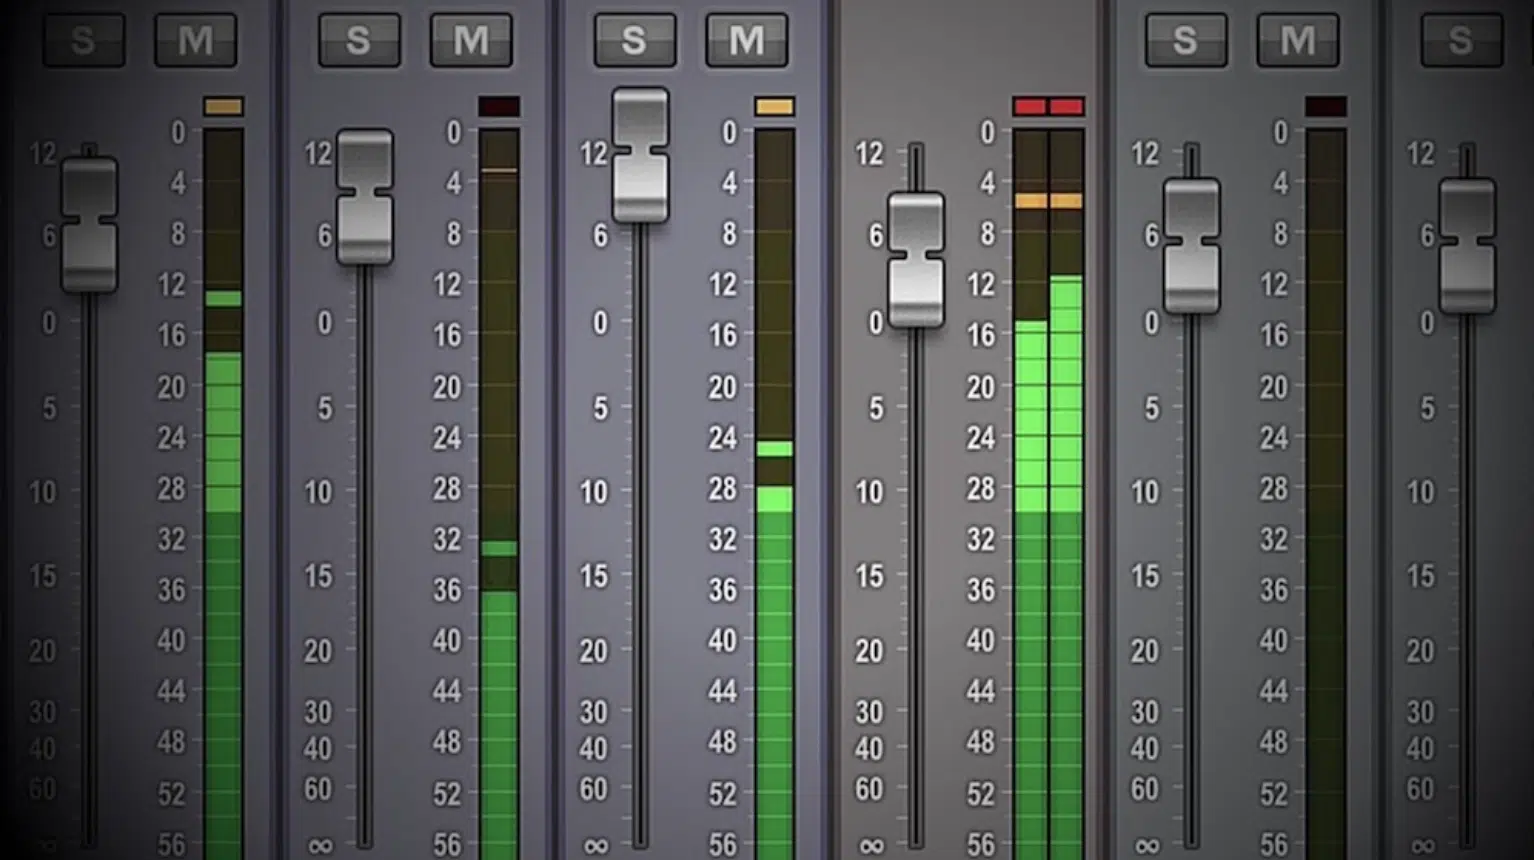
When it comes to trying to fix your mixes, proper gain staging should always be one of your first checkpoints, period.
You can think of gain staging as setting the right volume levels before any major compression, EQ, or mastering steps.
This way, every track flows through the chain cleanly without blowing out your headroom or creating unwanted distortion.
A solid idea is to aim for all your individual sounds (vocals, drums, synths, bass) to peak between -6dB and -3dB before hitting any bus processing.
It keeps the overall master channel hovering around -10dB to -8dB pre-mastering.
This way, you successfully:
- Maintain a healthy dynamic range
- Push just the right amount of energy into your compressors
- Allow your mix to sit comfortably with enough space left for subtle compression moves later during mastering
Proper gain staging also helps you hear the real balance between elements without being tricked by clipping, hidden distortion, or extra loud stuff.
This can mess up your entire project without you even realizing it.
For example, if your synth bus is coming in at -2dB but your drums are only peaking at -8dB, you’ll naturally feel like your drums are weak, even though it’s just bad gain staging, not an actual mix problem.
One smart move is to group tracks early 一 like putting all your drums under a Drum Bus and keeping the Drum Bus peak around -6dB.
This way, you always have clean headroom feeding into your master channel and mastering compression later on.
Plus, when you keep your tracks staged properly, your limiters and final mastering chain can breathe, work more musically, and let the final track hit harder without slamming into distortion or collapsing your stereo width.
Use Reference Tracks
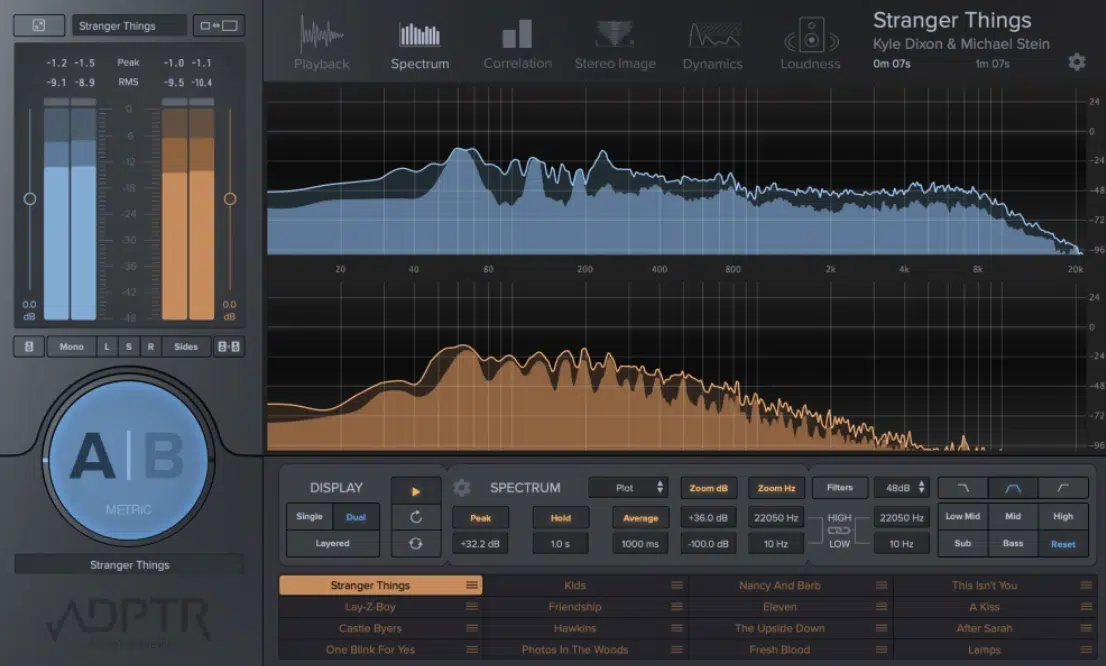
Another invaluable technique that can instantly help fix your mixes is using high-quality reference tracks throughout the entire music production process.
Grabbing a finished, professional song in the same genre and level-matching it to your project (using about -14LUFS as a rough starting point) helps you measure and tweak:
- Loudness
- Clarity
- Stereo width
- Overall balance
It’s smart to load your reference track into your session on a muted track at first.
Then, use a basic level meter or a LUFS meter (like Youlean Loudness Meter or iZotope Insight 2) to make sure both your project and the reference are hitting right.
For example, if your drums aren’t hitting hard enough compared to a reference, you can push your kick by +2dB and add a little mastering compression around 2:1 just to tighten things up without losing life or dynamics.
You can also compare your stereo width by soloing the sides on a mid/side EQ plugin and checking if your synths, pads, or vocals have enough spread.
All without crowding the center image, of course.
And luckily, you’re free to flip back and forth between your project and the reference whenever you need…
Some pros even solo out the reference mid-song just to reset their ears during long mixing sessions.
This way, you can hear the truth about any low-end buildup, muddy vocals, or mix energy differences that could affect how your song stands out in the music industry.
Take Regular Breaks & Listen with Fresh Ears

When you’re locked into a project and trying hard to fix your mixes, it’s way too easy for your ears to start playing tricks on you.
After about 90 minutes of straight mixing, your ears naturally start losing sensitivity to small changes in loudness, dynamic range, and stereo width.
This is why it’s smart to schedule breaks every 45 to 60 minutes to reset your perception because ear fatigue is real.
A great idea is to step away from your room completely, maybe even listen to something outside your main genre at a lower volume, just to refresh your sense of:
- Energy
- Balance
- Subtle compression
- Etc.
When you come back, you’ll hear the truth about your mix with fresh ears, and you’ll instantly catch problems like vocals sitting too low.
And drums not pushing enough, or too much distortion clouding the sound, etc.
This way, you can fix your mixes more confidently, maintain the full dynamic range, and make professional-level decisions that actually push your music to its full potential without second-guessing or overcompensating during the music production process.
Music Production Bonus (Last Minute Things to Remember)
When you’re chasing greatness and trying to fix your mixes like a pro, there are a few last-minute techniques and truths that’ll always push you further.
First, always remember that subtle compression is your best friend when it comes to maintaining a healthy dynamic range without killing the life of your track.
Even mastering engineers swear by this because it affects the overall energy more than you might realize.
Second, no more YouTube videos or anything for every tiny question you have.
The best way to really improve is to practice, join communities, create new projects, push your limits, and listen critically to both your track and professional references.
And finally, never forget that the real challenge in the music industry isn’t just creating high-quality sound…
It’s learning how to maintain balance, hear the difference in stereo width, work your master channel carefully, and push your music production process to achieve mixes that sit comfortably in any room.
And, hit with the right sense of space and life, and pass through every feedback session without falling apart under mastering compression or limiting pressure.
Remember, audio producing and mixing is a challenge, but instead of backing down, push it to the limits.
Eventually, all of the little tweaks will become second nature, and with Sound Doctor in your arsenal, you can never go wrong.
Until next time…


Leave a Reply
You must belogged in to post a comment.