Table of Contents
BEFORE GETTING STARTED
In order to understand how to manipulate chord progressions, you must first understand how to construct them properly.
I will be including a crash course on the fundamentals, but If you aren’t familiar with basic chord structure, or want to brush up on your Music Theory 一 click here for everything you’ll need to know (in-depth).
CHORDS
A chord is defined as any harmonic set of pitches that consist of two or more (usually three or more) notes that are played at the same time.
3-note chords are referred to as Triads. From those triads, many extended chords can be manufactured.
Extended Chords are chords that contain between 4-7 notes.
INTERVALS
An interval – the difference in pitch between two tones (notes). They are determined by how far (in distance) each note is from one another.
These intervals can be categorized as either:
- Melodic 一 when they appear as a sequence of consecutive notes (when two notes are played one after the other).
- Harmonic 一 when two related notes are played at the exact same time (as they are sequenced within a chord).
NOTE: These intervals are not assigned by their relation to the scale. They are determined on a ‘note to note’ basis.
» An interval of just 1 semitone is known as a Minor Second.
» An interval of 7 semitones is known as a Perfect Fifth.

- Minor Second 一 1 semitone (B to C)
- Major Second 一 2 semitones (C to D)
- Minor Third 一 3 semitones (A to C)
- Major Third 一 4 semitones (C to E)
- Perfect Fourth 一 5 semitones (C to F)
- Augmented Fourth 一 6 semitones (C to F♯)
- Perfect Fifth 一 7 semitones (C to G)
- Minor Sixth 一 8 semitones (A to F)
- Major Sixth 一 9 semitones (C to A)
- Minor Seventh 一 10 semitones (A to G)
- Major Seventh 一 11 semitones (C to B)
- Octave (Unison) 一 12 half steps (C♯ to C♯)
Taking these intervals and strategically stacking them on top of one another (and/or playing them in sequence) is the foundation of every musical creation ever produced.
By knowing, referencing, and administering these intervals, you’ll be able to successfully create chords and melodies that directly follow the rules of Theory (while producing a pleasing and much-desired sound).
CHORD PROGRESSIONS
A chord progression is the order chords are played one after another (in succession). The chords you use and the order in which you play them make up the harmony and tonal center of a song.
You will commonly hear variations of the same chord progressions used over and over in popular music.
This is because there’s only a total of 24 basic chord triads, and certain chords tend to work very well together to create specific moods and invoke specific emotions.
They make up the entire major/minor system we know and use.
CHORD CODES: MAJOR & MINOR CHORD TYPES
0 will ALWAYS be your starting point (the first note in the chord) and is referred to as the root note. From that point forward, you will count upwards – including both the white and black keys.
» The Major chords: 0-4-7
» The Major 7th chord’s code: 0-4-7-11
If you start C… the next note in the chord will be E, then G, and lastly B.
» The Minor chords: 0-3-7
» The Minor 7th chord’s code is: 0-3-7-10
If we start at C… the next note in the chord will be D♯ (sharp), then G, and lastly A♯.
» The same exact sequence should always be applied, regardless of which note you start on.
You could expand either the minor or major chords to the 9th and 11th – but we’re focusing on just the fundamentals.
BREAKING IT DOWN
» The first note (the tonic) in the chord is always ‘1st’
» The second note in the chord is considered the ‘3rd’
» The third note in the chord is considered the ‘5th’
This is different than chord codes and is referred to as Scale Degrees. The main reason most people get confused is that they don’t differentiate the two 一 once you do, it becomes super simple.
When building chord progression, these chords typically sound better when they contain a healthy balance of both major and minor chords.
In certain circumstances going against the rules can result in unique and alluring sounds, and serves as a technique in itself.
Having said that… people naturally enjoy and are drawn to sounds they identify as ‘familiar,’ so don’t stray too far off the beaten path.
There are hundreds of techniques (possibly more) that you could implement to expand and style your chord progressions, and today we’re breaking down a few industry favorites.
NOTE: There is no specific order in which to apply these techniques. Combining them is encouraged. They are easy enough to memorize and master within hours!
VELOCITY AND QUANTIZATION
When programming MIDI of any kind, it’s important to know the roles of Velocity and Quantization.
» If you’re plugging in the notes by hand odds are the notes won’t only snap-to-grid, but all velocity will also remain stagnant as well.
This is because the DAW’S default velocity or the most recent value input will get automatically applied to each note.
The only way to ensure ‘perfection’ in that case, is either:
(A) Include the imperfections that MIDI imparts when played by hand.
(B) Simply program it that way, by humanizing your MIDI manually.
» If you’re playing the notes directly into the piano roll 一 the results are more natural, but they too can be ‘faked.’
If so, just keep in mind that you’ll have to zoom in by a good amount to be able to accurately nudge/change values (incrementally).
Below is an example of a humanized chord after using the mouse to input the notes with Quantization enabled. Then, they were reprogrammed with quantization disabled and tweaking the clip’s velocity and the Note Timing ever so slightly.
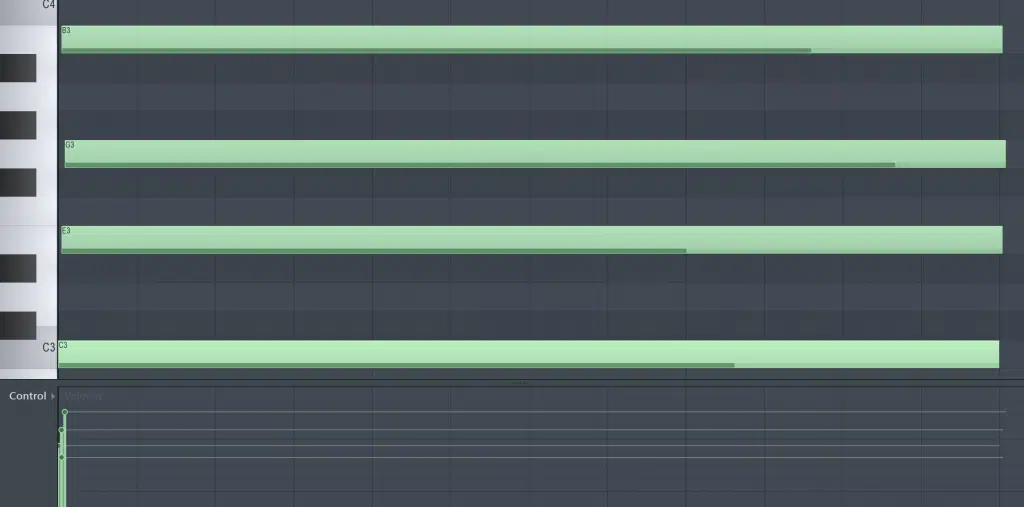
By zooming in drastically, you’re able to see the minute time differences. They’re too small for the human ear to even register as separate notes.
» When it comes to playing by hand 一 play as well as possible until you’re satisfied, even if it doesn’t look/sound ideal on the piano roll itself.
Just don’t Quantize the notes, as the whole goal is for them to be slightly off-grid.
It may seem as if each note is being triggered simultaneously, but in reality, the triggering of each note is staggered by a handful of milliseconds.
This may not seem like anything at all, but it makes a huge difference.
If any notes are off the grid by way too much, I still recommend you don’t quantize, just keep the Snap to Grid function off, and slide the note to be more in line with the grid and more cohesive (in time) with the rest of the part.
If played correctly, you shouldn’t even need to adjust the velocity at all unless something is significantly too high/low. But, similar to Timing, each note should retain a different velocity value.
ONCE YOUR PART IS PROGRAMMED:
- Disable Snap to Grid
- Zoom in
- Slide the notes off-grid slightly
» If you have not yet input the notes 一 do so while keeping Snap to Grid off and filling in each note as close to the most accurate timing as possible throughout.
EXTENDING CHORDS
While this may be the simplest, most common chord manipulation technique, it’s worth mentioning, as it can help you conquer beat block.
This is accomplished by taking a standard chord triad and adding a note (or set of notes), to turn it into a 7th, 9th, 11th, or 13th chord.
To help you further visualize this, simply take a look at the interval chart above and memorize the ‘harmonic intervals’ between notes.
It can always be calculated by counting semitones in between the root note and your final destination 一 the formulas never change.
For example, a minor 7th is always 10 semitones away from the root note, and a major 7th is always 11 semitones away from the root note.
Or, you can keep the triad as is, and take the notes of the extended chord and use them as the melody (or melodic phrasing) surrounding the given chord and progression.
Below is a C Major triad, using the notes of a C major 11th chord over the course of the 2 bars, comprised of the notes A-D-F as well as G (a note we took from the C Major triad), played in the octave above it.
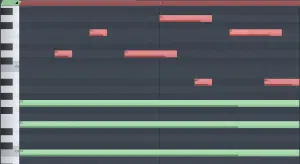
It’s essentially like a puzzle, with no true final picture… it can transform into anything you want.
With this knowledge, you can modify any existing chord progression and turn it into something completely new (especially if you utilize the following techniques).
SPLITTING CHORDS
Splitting chords is taking a basic progression, adding 2 extra octaves of the bass note, and then playing the ‘top’ and ‘bottom’ of the chords separately (known as the Triad and the bass notes).
This method is used throughout numerous genres and does an amazing job at taking a boring, standard, or basic progression and transforming it into a full-length song that is epic enough to be featured on the big screen.
If you’re a fan of Dr. Dre (or the west coast in general) you have unquestionably heard many songs that take advantage of this trick.
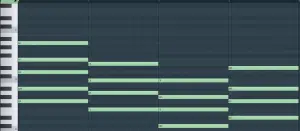
ORIGINAL CHORDS
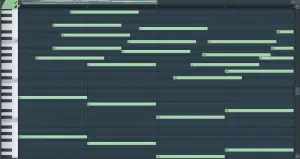
AFTER SPLITTING THE CHORDS
» You can add, or strum tone colors which successfully play with the Triad or bass notes. They consistently switch off for every single stab.
Tone Colors are notes that are not in our scale but, at times, add the ideal amount of tension and (slight) dissonance that we need to excite the ear and complement the given piece.
You can also use this technique in a different, darker, more ‘classic’ Hip-Hop style which utilizes the ‘sustain’ effect (making the keys longer) and involves playing the bass notes at different times.
TO DO THIS:
Every time you play the bass notes:
- Play the Triad in its original pitch
- Then one octave higher
- Then back down to the original pitch again
- Finally back to the bass notes.
FLATTENING THE 7TH
Major and Minor 7th 9th & 11th chords are customarily used in this specific technique
‘Flattening’ simply means you bring a chosen note down a semitone to create a dissonant vibe. This is called adding tension.
For example, the black key below B is B Flat, when going downwards. Yet, when you start from that same B and go upwards, the black key above it is considered a C Sharp.
This is heard mostly in the ‘electronic’ genres, but it can essentially be introduced anywhere (in any genre) to create an interesting/unique feel.
TO FLATTEN THE 7TH:
- Take the 7th note in your chord progression.
- Move it down a semitone.
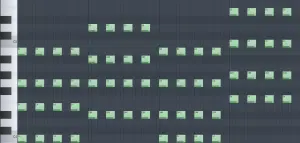
ORIGINAL CHORDS
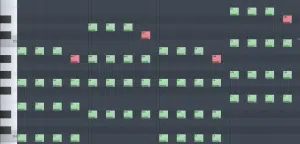
AFTER THE 7TH IS FLATTENED
THE 7TH NOTE IS:
» The top note on a Major or Minor 7th chord
» The second note (from the top) in a 9th chord
» The third note (from the top) in a Major or Minor 11th chord.
This process can be implemented at the stab that’s located right before the chord change, as a transition, seen above (second picture).
Neo-Soul & Progressive House chords are normally not held down (sustained) but instead are stabbed rhythmically, and eventually change.
NOTE: It’s always a smart idea to add contrast (if possible) by including some variation, like long or short chords.
It may not sound phenomenal right off the bat, so I sincerely urge you to play around with your sounds and reserve this method solely for the chord(s) you think it sounds best applied to.
Not every stab should be flattened, as it won’t produce the best results. I prefer to flatten the last stab before switching to another chord, just to add some extra flavor and tension.
Sometimes flattening the first stab can also sound great, but it truly depends on the progression itself; always remember to trust your ear.
Also, try your absolute hardest not to overdo it! Most of the time flattening one or 2 notes every few bars is enough. Like everything else in music… subtlety is key!
On occasion, it actually turns out to be the middle note in the progression that needs flattening; this is frequently overlooked, use it to your advantage!
» These chords are super intriguing to the subconscious mind.
They convey a sense of familiarity, yet they’re not too familiar because they’re not heard as often as other (more basic) chords; which will seriously pique the interest of your listeners.
NOTE: This technique can go in the opposite direction as well, by bringing a note up (making it a sharp) instead of down, although it oftentimes doesn’t sound supreme in comparison.
However, if the flattening technique doesn’t strike you as impressive or what you were going for, try it this way instead. You never know.
STRUMMING
Major 7th and Minor 7th chords are customarily used in this specific genre
This is a very popular method, especially in the R&B genre. What you do is ‘strum’ the notes (think guitar) instead of simply playing all the notes of the chord at the same time.
They are to be played in a series, based on a predetermined time (which you set) that fits the song, tempo, and vibe you’re attempting to convey.
STEP 1 一 Begin strumming from either top to bottom or bottom to top. I recommend alternating throughout the song, it’s a great way to add variation.
Try to incorporate guitars and electric pianos as they usually end up sounding spectacular (a Rhodes typically sounds the best).
Randomly having the note’s timing ‘offset’ is excellent for natural chords, but for this particular technique a linear approach is ideal (again, in order from top to bottom or vice versa).
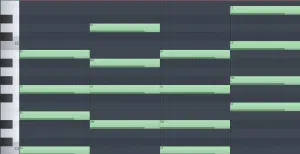
ORIGINAL CHORDS
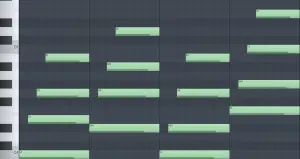
AFTER THE CHORDS ARE STRUMMED
STEP 2 一 Make sure to apply the appropriate alterations to the velocity of your notes so a ‘realistic’ sound is generated. Or, make certain notes softer so every element cohesively matches the mood of your track.
If you’re using FL Studio, they make it super easy to accomplish this, because they include a ‘Strum’ feature that achieves the same goal/sound (as do many other DAWs).
However, I personally prefer to do it manually because that way I have the ability to get very intimate with the notes and their separation; which can spark and inspire new ideas.
STEP 3 一 Add a base note (or two) by transposing it (or them) down by one octave so you have more notes to work with. Just make sure its velocity is lower than all the other notes.
Play around with this, as every progression is different and you’ll want to accentuate certain notes depending on the feel of that specific song.
You can choose whether or not to draw this effect out – it’s all about personal preference and what will match the overall feel you’re going for.
When short on ideas you’ll find plenty of chart-topping hits that utilize this method, as both the chord progression and melody. It works particularly well when subbing your current instrument; driving the progression to an acoustic guitar.
DELAYED NOTES
For this technique, you’re going to play the chords as you normally would, except this time you’re going to intentionally delay playing a note (or two) by a few seconds.
The amount of time you wait depends on the current tempo of your track. Your musical instincts should kick in and help guide you through this process.
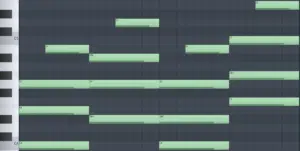
» A Minor 7th is a good chord to utilize this delay.
» The 5th or 3rd are good notes to delay.
In the case of using a 3-note chord (triad) – the 3rd note (the chord’s top note) usually sounds best when delayed.
NOTE: Try combining this technique with strumming for some insane results!
VOICE LEADING
The term “Voice Leading” refers to the way in which individual voices move from chord to chord. The best voice leading occurs when all individual voices move smoothly.
You can achieve this by moving between chords using the same note or moving up or down by a step in the inner voices of the chord, whenever possible.
» This should be your go-to when in the midst of beat block. You can spawn an entire progression or song by choosing just 1 chord and building the next 1 based on it. Continue that method for the length of the progression.
TO DO THIS:
STEP 1 一 Take a chord (for this example C Major).
STEP 2 一 Follow that up with a chord that contains a note (preferably as its root note) from C Major. It could be either a major or minor chord, as long as it works in your progression.
STEP 3 一 Continue the process until it’s time to repeat the cycle (generally when you reach the final chord in a progression) by wrapping around. In this case, C was used as the root for both the first and last (4th) chords. The first chord is C Major 7, with the Minor being C Minor 7.
Whereas this may look the same, it is comprised of many sonic and strategic benefits; for both you (as the creator) and your listeners.
This method will take some practice, but remember, it’s more about solving the puzzle than perfecting the technique.
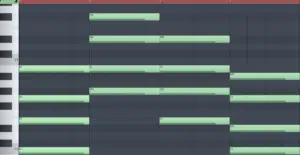
Above, is a 4-chord progression, built using just the C Major chord. It adds another level of cohesion, as the note B3 is played in all the chords within the progression.
The Unison Essential Famous MIDI Chord Progressions Pack is ideal for this type of ‘chord puzzle building’ as you have access to any variation of the chord and type you could ever dream of.
It provides you with chord variations you would have never even considered or didn’t even know existed. When you exit the realm of simple major/minor triads, the possibilities are endless.
COLLAPSING CHORDS
This is another brilliant technique that will add an intriguing and, at times, mysterious layer to your progression. The overall effect can be subtle, but (just like flattening the 7th) tends to exude a dissonant vibe.
» Collapsing chords is simply changing the voicing, not the chord type itself.
In regards to keeping/retaining the Voicing in a particular chord, progression, or scale intact, it simply refers to keeping the same/original notes. It has absolutely nothing to do with their order, octave, root note, or the like.
Going back to your Theory roots, you can compare it to how the A Minor and C Major scales are the same when it comes to Voicing aspects 一 as they both contain the same notes 一 they just ascend from and start on a different Tonic note.
When using this technique in its simplest form, it’s just a transposition of a note (or notes) within a chord.
ACCOMPLISHED BY:
- Moving a note that resides in a different octave (closer to the rest of the notes)
- Moving a note to a more distant octave (further away)
» This technique works best with big chords, like a Minor 9th or Minor 11th. This is because these extended chords span over the course of more than 1 octave.
FOR EXAMPLE:
When dealing with a 9th chord, the top note is in a different octave than all the other notes. What you’re going to do is simply take the top note and invert it down an octave so all the notes are now in the same octave range.
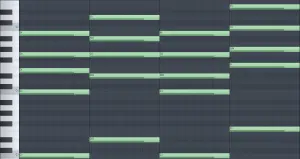
BEFORE
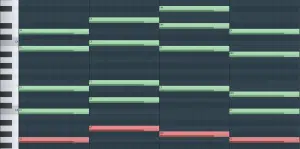
AFTER THE TOP NOTE IS COLLAPSED
You can continue collapsing all the upper notes if using 9th and 11th chords.
NOTE: There is, unfortunately, a limit to how far you can take this, so try to find a good balance and don’t go overboard. As always, subtly is key.
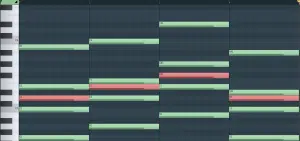
2 NOTES COLLAPSED
» The bigger the chord, the more options you have in regards to what specific note to pull down. Experiment with them individually to see what sounds the most desirable.
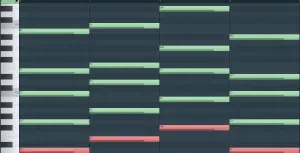
3 NOTES COLLAPSED
» When collapsing chords, the notes can sometimes get jumbled. It may sound good, but oftentimes you’ll have to bring the collapsed note up/down a semitone (if it works within the scale you’re currently using).
If not, bring it up/down another octave.
Velocity will play a big role in being able to pull this off. The collapsed notes may not sound good unless they are played at a lower level than the rest of the notes.
NOTE: Collapsing chords may not sound ideal in every circumstance but, when it does, it seriously stands out and makes a huge difference; even if it’s on a subliminal level and you don’t consciously notice.
BONUS
Copywriting can be tricky these days and is the main reason all of your samples must come from reputable sources (like us here at Unison).
However, there is one part of your song that can NEVER be violated or (for better or worse) protected under Copywrite Law: Chord Progressions!
This is why so many famous chord progressions are just extensions, alternations, or straight-up copies of famous songs.
So, next time you’re truly stuck on a chord progression, remind yourself that you’re legally allowed to ‘steal’ it without having to worry about the consequences.
FINAL THOUGHTS
Chord Progressions are a vital part of the structure of your song and are essentially one-half of the overall melodic foundation.
The other half is melodies of course, which I recommend you focus on after you’ve already created your progression. We will explain why in an upcoming Melody article.
To hear examples of both traditional chord progressions and uniquely manipulated ones, check out the Unison Essential Famous MIDI Chord Progressions and the Unison Essential Advanced MIDI Chord Progressions.
You won’t find other packs available anywhere with the intention of providing you with progressions that are explicitly created to manipulate or use within your own projects as is – so take advantage of it!
They are a great source of inspiration, or you can even plug & play them into your very own music for some professional chords guaranteed to make your music stand out… and the best part is: they’re 100% free!
Until next time…


