- Compressors are a form of dynamic processors that control the overall volume of a sound.
- Compression reduces the overall dynamic range, by detecting when it exceeds a specified level, and then attenuating it by a specified amount.
Simply put: it lowers the loudness of peaks & increases the quieter parts of a signal, so its levels are more consistent.
Table of Contents
MIXING AND MASTERING: THE VITAL DIFFERENCES
Before getting started, you must first understand the distinction between Mixing and Mastering.
They are two completely separate processes. Both of which deserve the proper care and attention. Their roles, duties, and implementation are quite different.
While both are a form of post-processing and of equal importance, the key to remember is this:
You can’t have a perfectly professional ‘mix and master’ without first having a professional mix, to then master perfectly.
Most engineers specialize in either mixing or mastering for a reason. They require very different techniques and applications.
But don’t worry, you won’t only be getting a complete crash course on how to apply compression during the Mastering stage, but the vital distinctions between mixing and mastering as well.
With this knowledge, your tracks will absolutely shine, and you will no longer have to question or worry about the differences between the two, as you will know them like the back of your hand.
MIXING
The step before mastering that involves adjusting, combining, and optimizing individual tracks into a stereo or multichannel format (aka ‘the mix’). It marks the start of post-production.
The purpose of mixing 一 to bring out the very best in your session by manipulating levels, panning, and time-based audio effects (chorus, reverb, delay, etc.).
MASTERING
The final step in the production process. It involves processing your mix into its final form so it’s ready for distribution. This process may include transitioning/sequencing songs and could range from a single to an entire album.
The purpose of mastering 一 to make your music sound balanced, cohesive, uniform, professional, and ready for commercial (or personal) release.
It also ensures playback optimization across various speaker systems, media formats, streaming, and digital distribution platforms.
THE DIFFERENCES
All too often producers attempt to complete the mix and master in 1 session, as a sort of ‘finale’ in preparation for release.
This is mainly due to the common misconception that mastering your track means applying processing to your master track/bus within your mix session. Not to mention unawareness, speed, laziness, cost proficiency, and things of that nature.
This completely defeats the purpose of each process. The results are unprofessional and, to trained ears, very amateur.
So, if you’re planning on mastering your mix properly, you must ensure your mix session includes no processors placed on the master track.
- THE MIX handles all the heavy-lifting in preparation for the mastering stage.
Each move is extremely methodical, even on a micro-level. Every element (instrument, track, vocal, sample) is not only mixed independently to perfection but as a whole as well.
- THE MASTER is manipulated on a more macro level.
Meaning, very subtle tweaks that could ultimately make or break your overall product.
The goal when mastering is not to make your song sound good, because that’s what the mix is for, but rather to prepare and optimize it to match the professional standards of a certain platform (or its overall final destination).
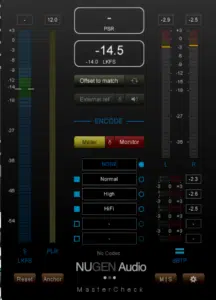
NOTE: There are a variety of utility mastering plugins that can be used to preview and convert your current master into whatever compatible form is standard for the platform at hand.
My go-to is MasterCheck by NUGEN Audio.
STANDARD COMPRESSION: MIXING VS MASTERING SETTINGS

If anyone were to claim they have a foolproof “one size fits all” method to Mixing, including parameters and settings, it would be far from foolproof, to say the least.
However, when it comes to mastering settings, and the processors needed to achieve a professional master (including compression), the one size fits all approach would be more accurate, although far from perfect.
This is for one reason, and one reason alone:
- When mixing 一 there’s no telling what needs to be done, how many processors to use, which settings to apply, what maneuvers you should make, etc.
- When mastering 一 this process is slightly easier because the mixing is already complete, and you’ll reach a ‘standardized’ point. Meaning, it’s only a matter of zeroing in and making some umbrella changes.
If you already completed your mix properly, this shouldn’t be a difficult or daunting task.
It should only entail a handful of processors and a few macro adjustments, done on a broad scale. You will be totally within the margin of error and still have a decent-sounding final product.
DO NOT expect to fix any mixing issues during the mastering stage!
I cannot emphasize this enough. If the mix is not right going in, the master won’t help to remedy any problems or shortcomings, period. Even the most experienced mastering engineer on the planet will tell you the same.
BUS COMPRESSION/GLUE
BUS COMPRESSION: the act of using a compressor on the master output to create a uniform sound for the entirety of a mix or master.
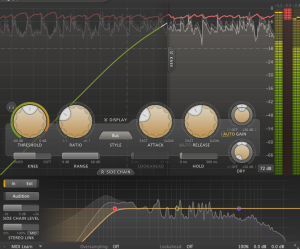
- When Mixing 一 all of the main settings found on a Compressor are of equal importance. They all feed off one another
- When Mastering 一 the Ratio is the most critical and distinguishing factor, that you will typically apply with the same range of values, relatively. The goal isn’t necessarily to compress the signal, but rather add what’s referred to as ‘Glue.’
GLUE: essentially adds control and depth, in extremely subtle amounts. It makes the different sets of instruments more cohesive amongst the other groups, which is how I prefer to utilize and take advantage of glue.
It can additionally be viewed as an extra measure of control, to retain consistency rather than enhancing; getting more out of a given signal.
The range and amount of processors used in the mastering phase are limited.
They are usually comprised of EQs, compressors & limiters, and some form of saturation/distortion/harmonic processing. And on occasion, specialized mastering utilities (like a Stereo Imager or a Mid/Side Processor).
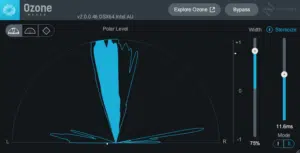
These are used to manipulate both the stereo and mono signals to ensure good translation over a speaker, headset, system, or setting of any kind.
Every now and then you may spot a few more specialized processors, but these are the essentials and are all you really need to complete the post-production process… granted you nailed the mix, of course.
- Mixing a track may be completed in under 2 hours, others may take upwards of days, and that’s perfectly fine.
- Mastering should take no longer than 30 minutes. Otherwise, you’re doing it wrong.
This is because mixes are unpredictable and require a lot of thorough testing and manipulation 一 masters on the other hand should only serve as the icing on the cake to an already incredible mixed cake.
You aren’t compressing the signal in the same fashion you normally would, which can indeed be confusing at first. The key here is to recognize compressions’ overall purpose during the mastering stage.
It will allow you to produce a polished master without completely destroying your mix in the process. To hear examples of perfectly mixed and mastered samples, click here.
When it comes to mastering, the difference between too much and too little compression is virtually undetectable. It’s not until you play it back across various platforms that you will notice it.
So it’s more about intuition, experience, and estimating what your shortcomings might be when it comes to certain playback systems.
For example: knowing in the car that the kick won’t hit hard enough, or you won’t be able to hear the gritty 808 on earbuds without adding an extra layer of processing, etc.
Eventually, you’ll be able to detect compatibility issues may be, or exactly how it will sound on a certain platform without even having to physically listen on that system at all.
Once intuition merges with knowledge, you will officially be a mastering master; no pun intended.
THE RATIO
RATIO:
A value, traditionally written as a fraction in ‘ratio’ form (for example 4:1). It represents the amount of gain reduction that will occur for each decibel (dB) the signal has passed the threshold.
When you compress using a 4:1 (sometimes displayed as just a Value of 4), this simply means for every one dB the signal goes over the set threshold, four dB of gain reduction will take place.

You will then compensate for this gain reduction by adding it back, using your compressor’s Makeup Gain parameter.
- Under normal circumstances 一 you would use a Ratio of at least 2 and set the Threshold to a value that will purposefully induce some form of gain reduction (for the sake of compression).
This is done with the intention of making things more even and consistent, while simultaneously making things bigger, thicker, and louder… once you adjust the makeup gain, naturally.
- When mastering 一 that whole thought process should be thrown out the window. Instead of using the compressor for enhancement purposes or to ‘fatten,’ you’re merely using the compressor as a backup measure for control.
The goal is extremely little gain reduction. It’s more about what you don’t hear than what it adds.
Needless to say, everything that you want to use compression for within your mix, should be handled during the mixing stage.
NOTE: Even when mixing you won’t always use a compressor to fundamentally change the RMS impact, but rather to impart what’s known as ‘color.’ Other times it’s the only reason you use a given plugin in the first place.
Through a mix of undetectable harmonic linearities and all the physical mechanisms that encompass hardware compressors. These emulations provide you with something that pure digital compressors (not modeled off of hardware) don’t have.
Next time you see more than 1 hardware compressor on a master, odds are, it’s not for the actual compression, but rather subtle warmth and enhancement (equivalent to a filter on Instagram, for example).
PUSH IT TO THE LIMIT
This process will always be the last and final processor on your Master chain. No processing should be applied after the master-limiter.
It’s a common misconception that compression and limiting are 2 completely separate forms of dynamic processing. They are actually one and the same. A limiter is technically a compressor with just one fundamental difference: the ratio.
- Limiting has a ratio of 10:1 or higher (it can go to ∞).
There are many compressors and limiters designated as their own plugins/units. However, if you know what you’re doing and the processor at hand offers a wide range of available ratio settings, any limiter can be used as a compressor and vice versa.
Even an expander is simply a compressor with a ratio lower than 1:1; which I will break down in an upcoming article. The real difference is not the processor itself, but the purpose it will ultimately serve.
Some say it’s the icing on the cake, but it’s more like the protective box we put it in to make sure it looks good for the reveal.
NOTE: Consider limiting and maximizing one and the same. In reality, a Maximizer is a tool, which is oftentimes just a fancy limiter, specifically developed to enhance the loudness while mastering.
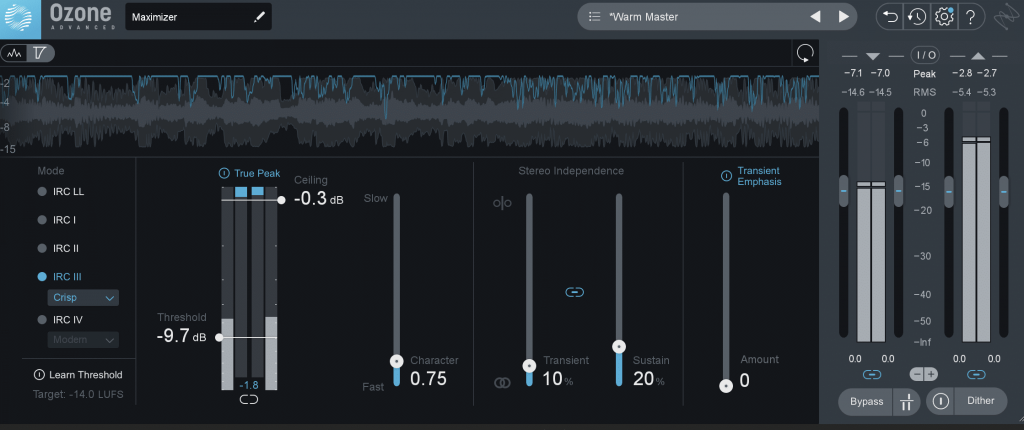
They are very similar in essence, so for the sake of ease, consider maximization as just another synonymous term that certain developers use to separate their product from all the other dynamic processors on the market.
LIMITER SETTINGS
The ideal limiter settings are not as highly dependent on the source material, like the bus or master compression.
Instead of using it to shape and tame your master, it’s used to finish, finalize, beef up, enhance and bring the level up.
All the additional headroom you left within your session will disappear 一 bringing it up to commercial standards.
FOR EXAMPLE:
If 12dB of gain was added to account for the 15dB of headroom, your output is therefore 3dB. You’ve technically brought up the level of the signal through the use of the Limiter at this point, making its peak level -3dB.
No gain reduction took place, hence no limiting… which means it’s time to push it harder!
Set the ceiling in order to push the signal without exceeding the set level (resulting in gain reduction). Otherwise, you’re not limiting the signal at all.
In Pro-L 2’s case, all you have to do is move the gain slider up, and you’re good to go. Just make sure to keep an eye on the gain reduction meter to know exactly how much is occurring.
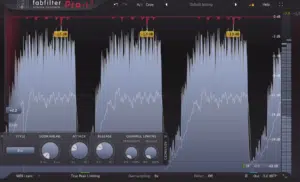
Some say the rule of thumb is around 2-4dB.
However, when competing in the loudness wars (as you’re now officially a soldier in if you’re reading this article), the goal is to push it harder without any negative consequences.
- I advise the target to be anywhere between 4-6dB when first trying this. As long as it sounds good without any pumping involved (aka sudden unwanted level-inconsistencies) throughout any point within your track, that is.
While it’s true you should never ‘set and forget’ the limiter’s settings if you were to push the limits, this processor is capable of handling that job and some. You can attribute the first grenade thrown in the aforementioned loudness war to the limiter.
- Your output level is going to vary depending on your target platform. For instance, Spotify has certain standards you’re required to meet otherwise they will algorithmically tweak it for you, which can end up destroying it completely.
NOTE: Most streaming platforms measure levels in terms of LUFS. To find out everything you need to know about LUFS and preparing your tracks for distribution (especially Spotify) 一 Click here.
It’s a crucial step in the preparation process that you absolutely cannot afford to get wrong or not be aware of completely.
THE RATIO:
Depending on your specific limiter, this may automatically be set based on the Input. However, that doesn’t offer you the flexibility needed to finalize a modern-day master.
- Anything from 10:1 to ∞:1 (infinity) will suffice.
Increasing the ratio simultaneously lowers the output level (considerably) as well, so don’t be concerned when this happens. Simply compensate with Makeup Gain. Just like you would with any other compressor.
The higher the ratio, the harder the signal will end up getting slammed once it crosses the threshold.
- The goal of the limiter is to ultimately reduce these dips and peaks by a somewhat extreme amount. Don’t be scared to push it hard and squeeze as much dynamic range out as possible without sounding too crazy or overdone.
THE THRESHOLD:
Determines how hard you ‘slam’ the master and is sometimes used in conjunction with the input gain; often displayed as 1 parameter.
It essentially relays to the limiter when exactly to kick in, just like a compressor.
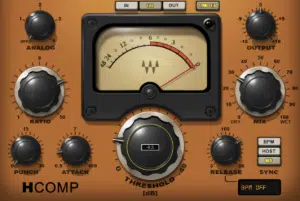
You can either:
(A) Bring the threshold down
(B) If no apparent threshold is provided, increase the Input level.
Either way, it accomplishes the same task.
PRO TIP 一 When first attempting this process (the first 25 sessions, give or take) try using a Limiter with a good ‘Auto Makeup Gain’ setting, like FabFilter Pro-L 2.
It not only eliminates the makeup gain guesswork but ensures the output level is relatively consistent as well and no automation is needed.
It’s like the limiter is continuously writing and rewriting the output gain automation, to avoid peaks/dips you did not intend on having.
Just be sure to use a good quality plugin with sufficient makeup gain. Otherwise, it’s known to do the complete opposite (ironically) and is not something you want happening at any point of the post-production process.
- If Auto Gain is enabled 一 the output level will automatically be matched.
- If Auto Gain is disabled (or no option is given) 一 take a look at the Gain Reduction Meter and take the average value, and add that back to the Output or Makeup Gain.
You’ll instantly hear the magic of limiting and you’ll know you’re just a few moves away from your final master!
NOTE: To truly set an accurate threshold, sometimes the trick is to normalize the given track in order to have a set MAX level. Then, you’ll be able to set the threshold accordingly.
ATTACK AND RELEASE
- ATTACK 一 the time it takes for the compressor to attenuate the audio once the signal has breached the threshold.
- RELEASE 一 the time which determines how long the attenuation will continue, or the time it takes for the compressor to ‘release’ once the threshold is no longer crossed.
The attack and release times will traditionally have the biggest impact in terms of achieving your desired effect, regardless of whether you’re using compression or limiting.

- ATTACK TIME 一 You want your attack to be set to a medium (ish) time so it doesn’t clamp down too quickly. This is pretty universal.
- RELEASE TIME 一 The release time in regards to the Master Limiter is usually fairly quick, but it truly depends on what you’re going for and the genre in which you’re mastering.
If you want the track to be smoothly limited 一 without it bouncing back quickly and with the intention of control as opposed to a driving force, a medium attack should do.
If you’re dealing with modern electronic music of any kind 一 you’ll want the track to intentionally swell and jump back to bassline fairly quickly when hit with too much attenuation, a fast release time is needed. This will make the track ultimately hit harder, not softer.
PRO TIP: The easiest, most effective way to fine-tune these settings in order to reach your intended effect is to leave both values at a relatively ‘medium’ level while you adjust the other parameters first (threshold, ratio, makeup gain, output level).
Only once you’re satisfied with the settings of your other parameters, do you then start adjusting the attack and release times as you please.
Just remember to be careful, you don’t want to end up spending hours squeezing to just end up changing the entire essence of your track in the process.
THE GOLDEN RATIO
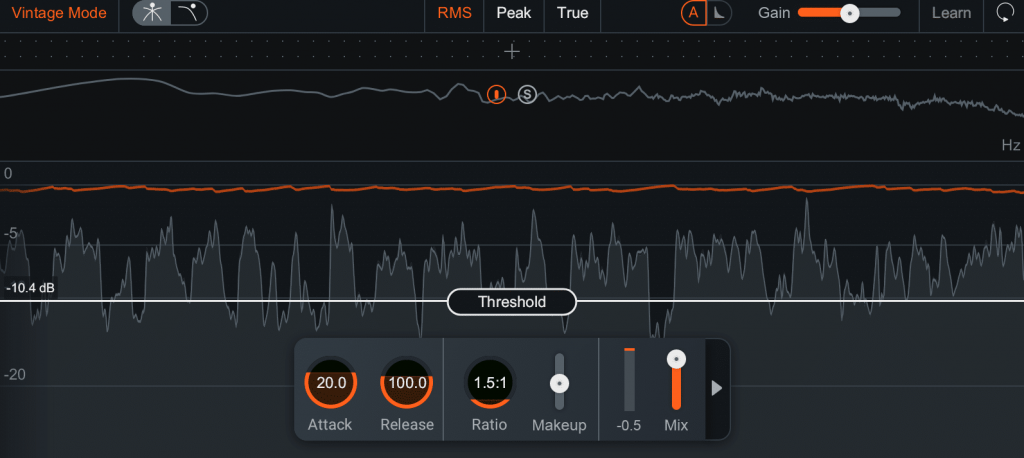
BUS/MASTER:
- AVERAGE 一 1.5:1
- RANGE 一 from 1.1:1 – 2.5:1
LIMITER:
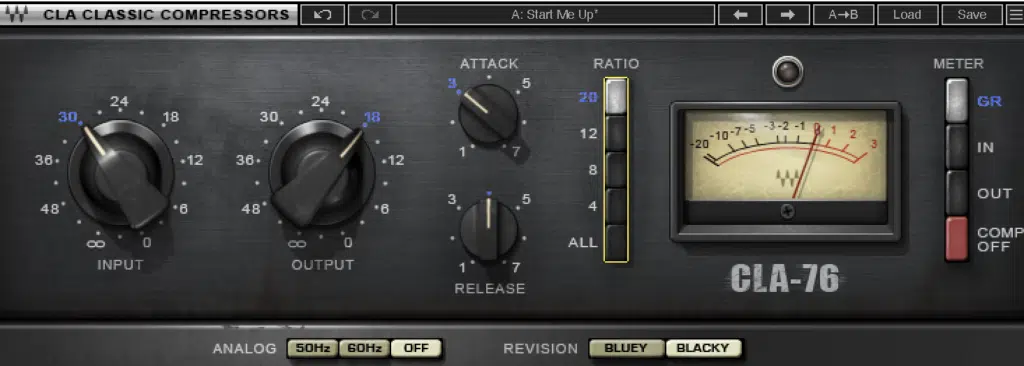
- AVERAGE 一 20:1
- RANGE 一 from 10:1 to ∞(infinity):1
ZEROING IN ON THE COMPRESSOR
In order to ‘zero in’ on the ideal ratio when mastering or applying bus compression, you must use a compressor with very fine, intricate control over the ratio itself.
The majority of compressors offer predetermined ratio values, sometimes jumping in increments of 2 or more, while others are fully dependent on the program itself.
Meaning, it does its own internal calculations on the backend, based on the input signal and how you drive it 一 this won’t cut it for the job at hand!
You should preferably use one that allows you to input values that are a fraction of a decimal, but any compressor that lets you set the ratio in intervals of 0.5 will due.
Or, simply use one designed specifically as a Mastering Compressor.
- When using Mastering Compression, the ‘Golden Ratio’ will always be around 1.5, with a .5 margin of error.
This makes it so, for every 1 dB that the threshold is breached, you’ll receive around half of a decibel (dB) of gain reduction; a value virtually undetectable by an untrained ear.
- You also want the Threshold to be set extremely high, around the level of the loudest peaks.
This will result in an extremely low amount of gain reduction, as the goal is not to reduce the track’s dynamic range, but rather tame it and make things a little tighter.
The threshold should be set at a value so high in fact, that the gain reduction is far from constant. You simply want only the very highest peaks to get hit with the compressor.
As producers, we’re used to applying compression and instantly reaping the benefits, but the goal here is the complete opposite; you shouldn’t hear it or even know it’s there.
So little in fact, that if you have the correct settings applied, the compressor’s Action shouldn’t even register on your Compressors’ Gain Reduction Meters (which is kind of the whole point).
FOR EXAMPLE:
If your mix peaks at -12 and is, on average, hangs around at around -16: you don’t want the threshold any lower than -14.
If you have to add back more than (around) .5 of makeup gain, you’re doing it completely wrong. Readjust your threshold/input level entirely, along with your ratio, and possibly even your attack and release times.
Attack and release settings should both be at a moderate level (at least to begin with), so it doesn’t kick in super quick and won’t have a fast release time. Otherwise, it would be completely counterproductive for this particular task.
- THRESHOLD 一 just a few dB’s lower than the average of the loudest peak.
- RATIO 一 1.5
- ATTACK & RELEASE 一 generally start in the range of 500 ms. From there, you can really go anywhere with it.
the Input Gain and Threshold go hand-in-hand. You will always be adjusting both to achieve the desired effects; not sticking to the default input gain settings.
Most of the time, the attack and release settings will need to be manipulated based on the material being processed; so you will have to listen and adjust accordingly.
15 COMPRESSION MYTHS
- Mastering is done on the master bus (mix/master in 1 session) and implemented simultaneously. It is not one and the same, and should never be approached as such.
- You can fix the mix within the master and vice versa. It’s impossible to do since even starting the master requires a completed mix.
- Mastering is for loudness.
- You cannot clip in a modern DAW due to its high internal sample rate.
- Compression can treat frequency-related issues.
- Compressors only have the ability to be utilized for one specific thing.
- Dynamic range is bad and it must be minimized at all costs.
- Digital Compressors add color or character
- Analog Compressors are precise and predictable.
- Side-chain pumping can only be achieved using a compressor with side-chain functionality.
- You can only use 1 compressor on your master track.
- Compression should be applied first or last in the master chain.
- The master session handles the brunt of the compression.
- If something is wrong, compression can magically fix it.
- If you ever hear yourself saying “It may not sound good going into the master, but with the right compressor (or right settings) it will end up sounding perfect.” No!
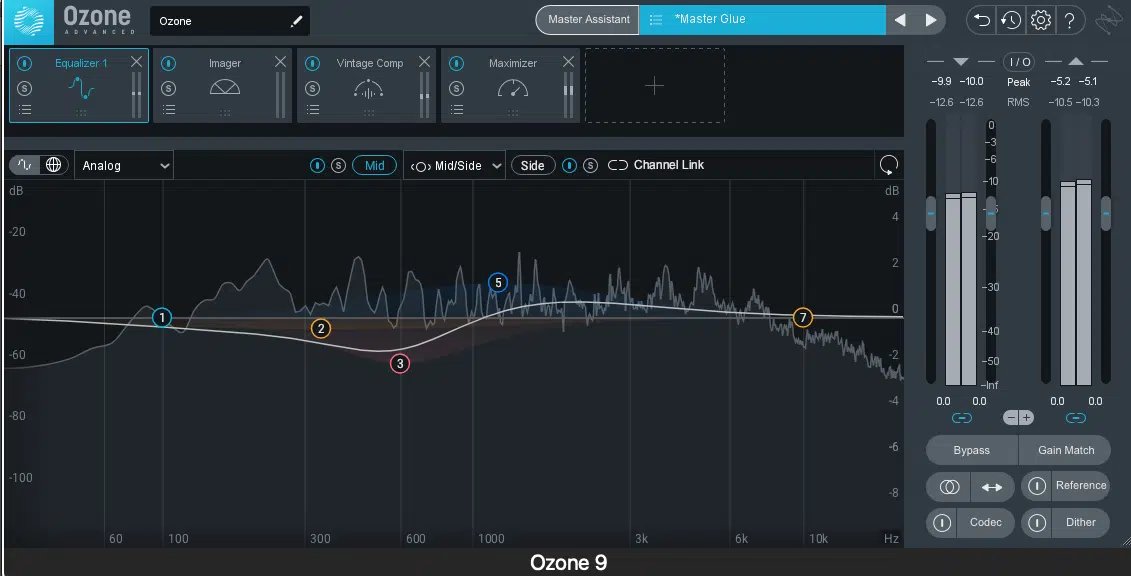
ADVANCED TIP
Compressors are NOT the only form or technique in which to apply compression.
While we will be diving deeper into this when our more advanced article drops, I feel the need to mention that Analog-modeled Tape Saturation applies its very own form of compression.
It imparts extremely desirable sound/color that you couldn’t otherwise achieve through other methods, let alone a compressor itself.
When you’re unsure if you applied sufficient compression to your master, or if the compression you did apply tends to ruin your master, simply throw on a good quality Tape Machine.
This is usually applied second to last in the chain, before the limiter. Its effects vary based on where it is placed, so keep that in mind and experiment.
- The harder you drive the input, the more compression it applies.
If you feel that it’s beneficial to use it in place of a compressor, be sure to use a tape machine that gives you full control over every aspect of its sound/mechanisms (such as Wave’s Kramer Master Tape or the J37).
You’ll be able to disable things like drift, wobble, noise, along with any settings that make classic tape machines classic; turning into a full-blown compressor.
Make sure it has the ability to swap the tape type and size/speed you will use 一 giving you access to multiple (authentic) analog tape compressors that you didn’t even know were there! Try it out and see for yourself.
FINAL THOUGHTS
While mastering is undoubtedly an essential step in the post-production process, it should ultimately serve as the icing on an already perfectly mixed cake 一 Remember, mixing is 95% of the battle.
Next time you’re not entirely sure whether or not your mix is even ready to be mastered, compare it to (or simply use) these samples from the FREE Unison Essential Bass Loops and FREE Unison Essential Melody Loops.
Not only are they mixed to perfection, but they are also of the utmost quality.
Until next time…


