Table of Contents
- MANAGING YOUR SAMPLE LIBRARY
- #1 – FIND A GOOD SAMPLE MANAGER
- TOP 10 SAMPLE MANAGERS TO CHECK OUT:
- 2. CREATE AN ORGANIZATION METHOD/FILE SYSTEM & STICK WITH IT
- 3. GROUP BY TYPE & INTENDED USE
- 4. REDEFINING CATEGORIZATION (GENRE/STYLE)
- 5. YOUR SAMPLE LIBRARY’S METADATA
- 6. LICENSE INFO & PROOF OF PURCHASE
- 7. KEEP TRACK OF SAMPLES YOU’VE USED
- FINAL THOUGHTS
MANAGING YOUR SAMPLE LIBRARY
Organizing and managing your sample library is one of the most important, if not the most important, and beneficial things you can do as a producer.
It can also be the most time-consuming and boring, which is why a lot of producers don’t hold it in high regard… this can be a devastating oversight.
You will end up wasting hours searching for things, losing inspiration, or even having your hard work ripped away from you because of a technical (or legal) error.
When creating a track, you might end using hundreds of samples…
Even when you have a general idea of what you’re looking for, the nightmare associated with searching for, locating, and incorporating them if you don’t set things up properly is just not worth it.
Especially when you could have prevented it from happening in the first place.
This is why taking the time to organize and manage things properly, even if it requires days to perfect, is a step you should never skip.
It not only saves you endless time and frustration (not to mention, possible heartbreak) but will make your workflow more concise and efficient.
It will even make you a better overall producer, as it allows you to:
- Take advantage of inspiration when it strikes
- Locate things when needed so you don’t lose momentum
- Ultimately help you create quicker and more efficiently.
Today, we’re breaking down 7 of the top ways to guarantee your sample library is organized and optimized especially for you 一 including how to maintain it after it’s set up 一 so you can spend more time doing what you love: making music!
#1 – FIND A GOOD SAMPLE MANAGER
A Sample Manager is an indispensable tool that saves time by making your pallet of sounds more immediately accessible and navigable.
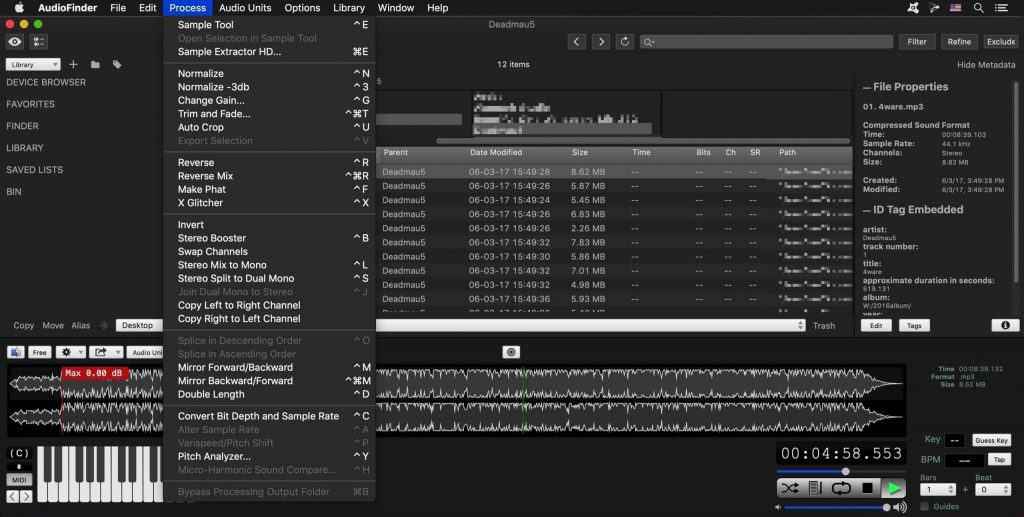
Whereas it’s not necessary to use a sample manager, it is very beneficial (I would say critical) when organizing your sample library for a number of reasons.
Sure, you can find other ways to organize, manage, and fill out or include all fields needed for categorization, possibly with the help of multiple apps/programs.
However, using your computer’s built-in Explorer and its associated structure may hinder you greatly.
This is because your computer’s file explorer (finder) is meant for just that, exploring and finding, not organizing a massive sample library. It’s not even designed or optimized in any way for audio.
With that said, something like Windows Media Player or Itunes (and the like) is better than nothing, but far from ideal, which you will understand fully by the end of this article.
Luckily, over the last few years, some incredible free sample managers and free versions of paid products have become available 一 there’s no excuse for using such outdated programs, and no need for retrofitting one to perform functions it wasn’t made to accomplish.
Good programs usually incorporate some sort of (built-in) basic editing functionality, others take it further by operating in the same fashion as a Sampler, and some even stand on the border of an Audio Editor.
For example, they can:
- Apply plugin processing
- Import sampled instruments from unprotected Ableton, Machine, and Kontakt libraries
- Import & split-up multi-sampled instruments, that you wouldn’t normally even have access to in the click of a button 一 such as Logic’s ESX sample-format
That is why, as a producer or musician, using a specialized Audio Sample Manager is key. Below is a list of different options, all great in their own respect, for all price ranges.
No need to spend your money on the most expensive options, unless you have a specific reason, of course.
Otherwise, any of the following will suffice; including all the fields required to stay organized, achieve musical tasks, and even exceed your expectations. It will just come down to a matter of preference.
Some include very advanced features that even make it super simple to catalog sample packs and instruments that come with your DAW or Sampler, like Kontakt.
» Explore all your options, and choose one that best matches your individual needs.
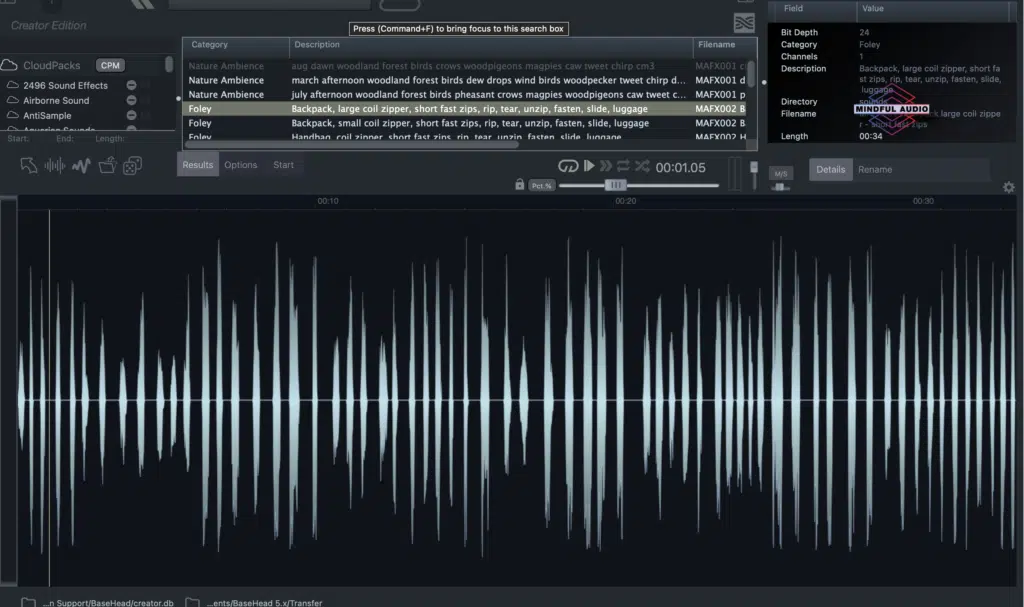
TOP 10 SAMPLE MANAGERS TO CHECK OUT:
- BaseHead (BaseHead Creator Edition is the free version)
- Soundminer 一 the most expensive. Uniquely geared towards audio professionals working in movies, TV, and video games
- Soundly (free, with available subscription)
- AudioFinder
- Samplism
- ADSR Sample Manager (free)
- Sononym
- XO – XLN Audio
- Atlas 2
- AudioShare (iOS)
NOTE: Most DAWs have some sort of Sample Manager/File Explorer built-in, but it has minimal functionality. However, when it comes to that category, Reaper’s (ReaSamplomatic5000) is the best, by far.
2. CREATE AN ORGANIZATION METHOD/FILE SYSTEM & STICK WITH IT
Creating a sample library organization file system 一 and sticking to it 一 sets the foundation for absolutely everything.
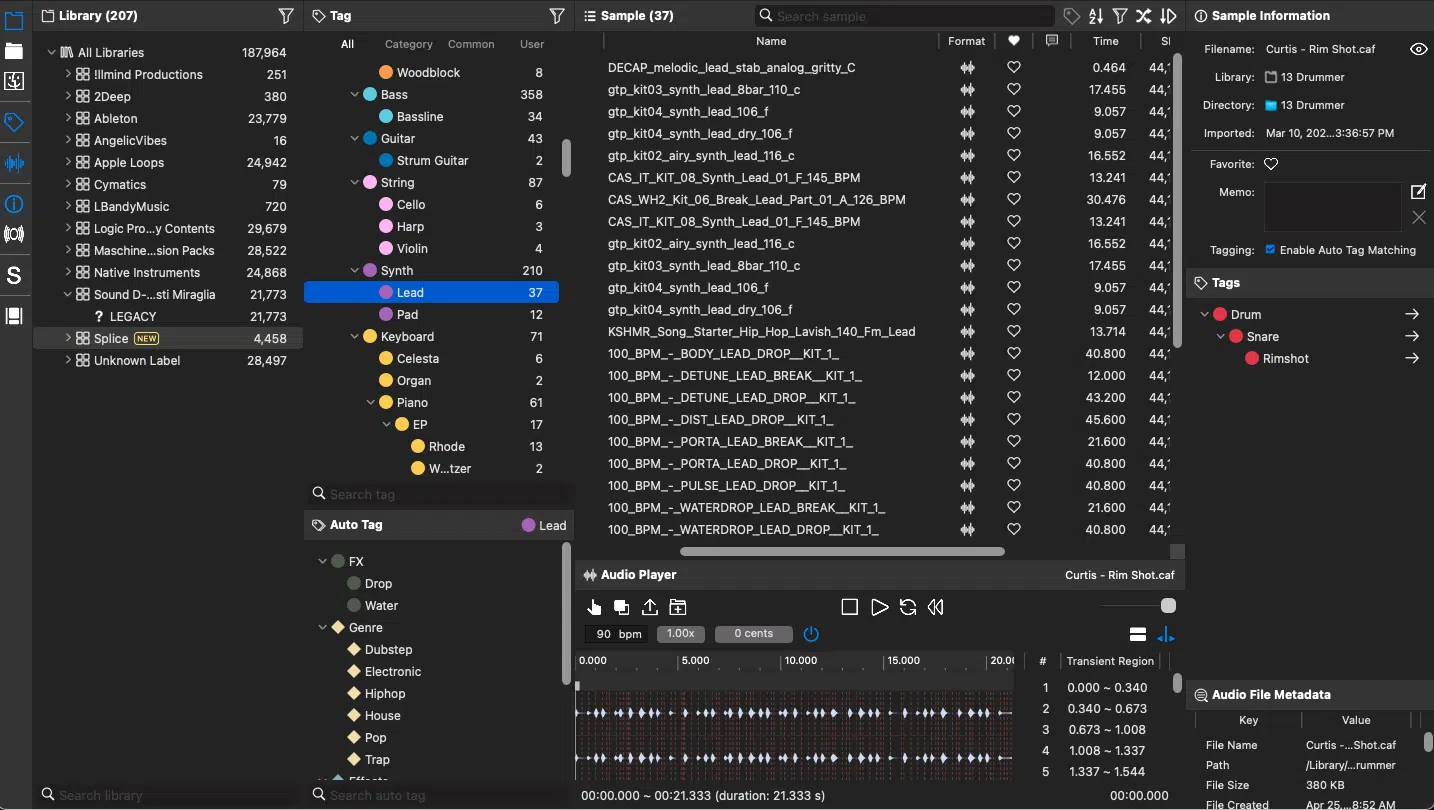
The following guidelines should be followed in order for the organization to be successful, but the specific structure can be altered to match your individual needs and process.
It will take some initial thought and planning, plus a few runarounds to build properly, but within a few months you can polish it to perfection, and your chosen method will be solidified for optimum organization and thoroughness.
Regardless of how long it takes to perfect, it is more than worth it, and if it doesn’t feel right to you 一 either when organizing or in the future at any point when dealing with your library 一 don’t hesitate to assess and tweak it.
You undoubtedly spend endless hours selecting samples you love and, if organized, when it comes to using them within your music, it won’t take more than a few seconds (or minutes, at the very most).
If you know the type of sample you need, you’ll be able to search, locate, and then narrow down by way of listening to a few samples that match your criteria. It’s that simple. Your sample library is key.
» Below, is a common hierarchy most professionals consider a great starting point.
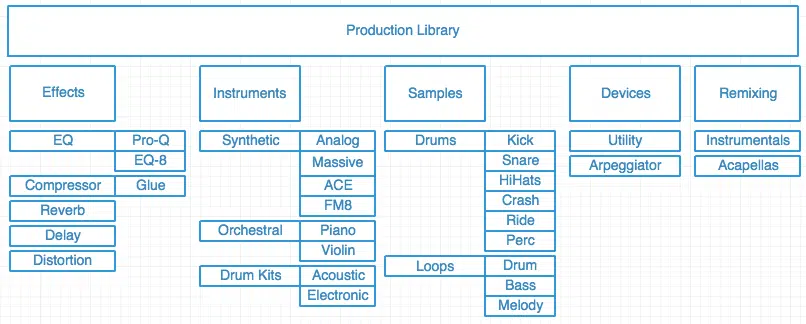
But remember, this is a highly-individualized process and the only way to ‘mess up’ is if, when applying it, it doesn’t reduce the time it takes you to search and select samples.
As long as you’re able to find what you’re looking for with relative ease, you’re on the track you need to be (yes, pun intended).
3. GROUP BY TYPE & INTENDED USE
Grouping by type and intended use is the most crucial step, and will sometimes be included in the pack’s title (like a drum pack).
If you’re lucky, the developer will even include good metadata with the applicable fields filled out.
» Even if they do, you still need to take it one step further…
Instead of just grouping by more broad categories, the inclusion of subcategories is even more helpful and beneficial.
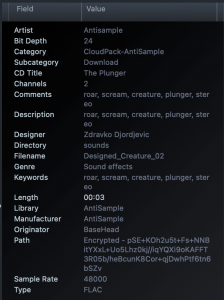
Breaking up the order and grouping of the pack itself 一 not sorting based on the pack/bundle it belongs to 一 is the best way to go.
Otherwise, it just limits your creativity and will end up keeping you in a box; one that may be super hard to break out of.
Plus, the music you create will always fit within the realm of the pack you’re using, and that’s never a good thing.
Don’t throw all your similar hip-hop drum samples (for instance) into 1 category within your sample library, or group them based on the developer or pack it came from.
Instead, you should be way more detailed, like grouping based on a specific drum type. Then, add even more sub-categories based on the qualities of that sub-type.
FOR EXAMPLE:
Instead of just having all your hip-hop kicks in one place, it’s best to refine it and further break things down by sub-type, like:
- Hard hip-hop kicks
- Soft hip-hop kicks
- Deep/low-end kicks
- Kicks with top-end
It’s also ideal to get a manager that doesn’t just deal with (virtually) every audio file type but rather, if possible, one that specializes in MIDI, because:
- Your samples can (and should) be applied to MIDI files
- You can create your own MIDI library
- You can create other proprietary file formats 一 like the ESX Sampler instruments, unprotected Kontakt libraries, Ableton drumkits, and more
- You can work on autopilot when experiencing Beat Block
For these perks, I suggest either AudioFinder or Samplism (above).
I was an avid AudioFinder user but I’ve found that, over the years, the developers of Samplism slowly & strategically built a feature-set that both matches the format of AudioFinder.
It also includes unique features as well, is a fraction of the price, and includes better (visual) subcategorization options (described below).
4. REDEFINING CATEGORIZATION (GENRE/STYLE)
This may be as easy as taking the genre of the pack at hand and inputting it into the Genre/Style field of your sample library or, even simpler, some will even have it included. However, that’s only half of it…
Aside from the obvious, I have two words: color-coding (shown below).
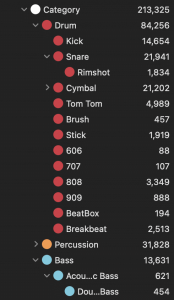
Also, try inputting and grouping these samples not just by the genre they universally fall under, but the genre/style you will most likely use them for (or consider them to be) as well.
Aside from the structure, this is where things will vary based on individual preferences the most, such as your personal workflow habits, the style of music you make, etc.
If you have something especially unique on your hands and don’t know exactly where it should fall under, or how you may incorporate it 一 create a section explicitly for that purpose.
» This will be your Inspiration section.
Title it something that represents as much, such as ‘Unique’ or ‘Odd ball’ or ‘Uncommon,’ so when you’re looking for something new or rare, you won’t have to waste time searching through everything to find it.
» Also, create another section full of quality samples you may consider ‘Generic’ as you’ll need those too of course and will be able to locate them with ease.
Also, don’t leave out a folder for those samples you know you can simply drag & drop from your sample library into your DAW to create a song within minutes.
Catalogs speak volumes, and in the production game, quantity is just as important as quality. So, even those ‘quality’ samples you feel are too easy, common, or generic to use deserve their rightful place and will help to enhance your workflow.
For the ultimate building blocks to start your masterpiece off right, download the FREE Unison Essential Famous MIDI Chord Progressions pack.
They include progressions that you never have to worry about being up-to-par, and never disappoint (in quality or quantity, for that matter).
5. YOUR SAMPLE LIBRARY’S METADATA
Metadata is used to name, describe, catalog, and indicate ownership or copyright for a digital audio file.

When you’re searching for specific samples in your sample library, the terms’ creators include may vary from your own opinions. In fact, it’s more than likely that they will.
After all, what are the chances your definition of ‘creepy’ or ‘fruity’ match theirs? Not very…
Audio is one of the only fields where defining characteristics (consistently) differ from person to person. There are no ‘true’ definitions.
It could be a drawback, but instead, think of it as an opportunity to label things and utilize them how you want, with total creative freedom.
It will, however, take the most time compared to any other step, because you’ll first need to assess and determine your thoughts on a certain samples’ description.
This will require you to (tediously) listen to each one very carefully.
» First, you must create a glossary and define all your terms. This will, no doubt, take some extensive time to accomplish, and it will constantly be updated, but it’s more than worth it.
More often than not, this will be the only means of successfully locating a sample within your sample library when you only have a one-word description (or idea) in mind. Having everything defined, listed, and sorted is absolutely essential.
» The more descriptive terms you can include, the better.
Since there is an abundance of names/terms you can choose from, things may get tricky or overwhelming… so, keeping a running log, to serve as your legend or dictionary, is key.
» Constantly add and refine (or redefine) terms as you see fit.
The good thing is, memorization is much easier when you clearly define the term and its associated (common) descriptions. Trust me, if this is the step you spend the most time on, it’s well worth the effort.
The time you spend idly searching for certain samples (and the frustration that comes with it) will be drastically reduced, and your output/productivity will increase exponentially.
6. LICENSE INFO & PROOF OF PURCHASE
So many developers will say a sample is royalty-free until they see you actually make a profit, then they may switch up and say it never really was, or decide to change the terms on the fly.
Or, even worse, claim they never even received your purchase in the first place and that your license must have been stolen or is not valid.
That’s why it is super important to make a habit of:
- Logging and attaching the included license information into the field of every pack or group of samples you use 一 usually found as a text (or PDF) file within the pack
- Always keep and attach your proof of purchase 一 both within your sample manager and in an outside source like a Receipt app, but nothing is better than a hardcopy.
For example, one of my students had a developer claim they wrongfully used a snare and crash that he designed himself, from the ground up.
If not for me prepping him for this (outrageous) event, whatever he made on the tracks, along with its streams, and even its very existence on any platform, big or small, would have been revoked/removed overnight.
Saying it’s better to be safe than sorry is a HUGE understatement.
Aside from having the highest quality, dopest, most professional samples in the game, you can rest assured that here at Unison, we never ever make any false claims.
Go ahead and make millions off of any of our free sample packs 一 found here 一 we encourage it!
7. KEEP TRACK OF SAMPLES YOU’VE USED
This step speaks for itself and is an extension of the previous step.
Since, as producers, we make so many songs (some never even see the light of day), it’s vital to keep a running log and make sure, within your sample library, to distinctly separate:
- Samples you have used 一 along with the info of the track(s) they were used in
- Samples you haven’t used 一 or don’t intend on using anytime soon
Even more so if your particular sample manager doesn’t have a long field of notes to include this info on.
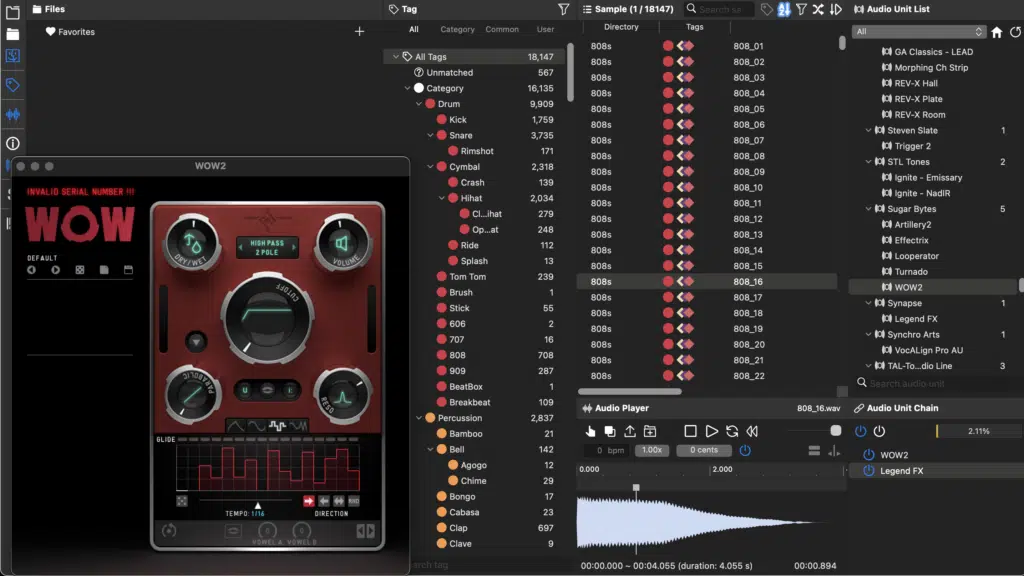
Always have it somewhere safe, easily accessible, and backed up.
» This step should always be done before you bounce, finish, upload, or sell a project. If you wait until after it will be too late, and the odds of recovering the source of each sample at that point (with any accuracy) is very slim.
Listing this info right when you include it into a session 一 way before it’s completed 一 is the only way to keep track of this.
» Always keep a version of your original session before it was bounced. This is another key factor for ultimate organization, efficiency, and legal protection.
Sometimes a not-so-successful developer may hear a sample similar to theirs and will try to claim it, either unbeknownst to them, or intentionally trying to make a quick buck.
Or, even worse, you use a purchased sample that the developer stole and did not have the right to grant a license to in the first place.
» Having proof and documentation on the actual sample they claim to be theirs (and its origin) is the only real way around any discrepancies.
Even if you haven’t made a dime, is it really worth having a developer (or producer) be able to take it down from a streaming platform like Spotify just because you weren’t organized with your sample use? I think not.
Please don’t make the mistake of thinking this can’t happen to you, because it’s as common as balloons at a birthday party.
» Never forget to keep an extensive, always updated log of every single sample you use within any session, just to be safe.
Otherwise, a dispute over a kick could send your highest ranking (streamed) track into oblivion, and possibly the entire project it’s included on.
FINAL THOUGHTS
When inspiration strikes, you only have a short window to execute your musical thoughts. You cannot afford to waste precious time searching through an unorganized sample library to find what you need.
Having all your samples organized, easily accessible, and categorized appropriately, guarantees you won’t lose hold of a vibe you may never feel again.
It is the backbone of your entire production process, whether you realize it now or not.
Skipping these vital steps can be detrimental to your entire workflow and can end up causing endless problems in the long run.
» Always take the time to organize first, and save yourself heartache later.
One thing you never have to worry about, however, is finding the samples and MIDI files you’re going to organize & manage because any of our FREE Unison Essential Sample & MIDI Packs got you covered.
When you need inspiration or want to up your game with professional sounds, there’s no better variety to choose from.
Until next time…


