It’s the effect that follows you everywhere… you know, the one that makes everyone a professional singer in the shower. To the outside world, it seems so simple, but in the production world, it’s a little more complicated.
Reverb is what makes your mixes shine, even when you don’t even know it’s there…
Table of Contents
- WHAT IS REVERB?
- DELAYS VS ECHOS
- TRICK #1: SIMULATING REVERB WITH A DELAY
- KNOW YOUR REVERBS
- TRICK #2: USING A CONVOLUTION REVERB AS A RESONATOR
- REVERB TYPES
- TRICK #3: GATED REVERB SNARE TRICK
- TRICK #4: EQ-ING YOUR REVERBS
- PARAMETERS
- TRICK #5: AUTOMATION NATION
- TRICK #6: REVERB SENDS/RETURNS
- TRICK #7: FREEZE AND COMPARE
- TRICK #8. PITCH-SHIFTING REVERBS
- 3 THINGS TO REMEMBER
- FINAL THOUGHTS
WHAT IS REVERB?
Reverb by definition is when a sound or signal hits any reflective surface and bounces back at varying times, phases, and amplitudes until its decay. This is due to the sound being absorbed by the surrounding objects and surface.
It creates a unique echo that contains sonic information about that specific space.
The majority of digital reverb used today is a form of Physical Modeling. Through math, it can mimic any desired space and reverb ‘type’ imaginable; giving you endless possibilities.
Open up your favorite Reverb Plugin, with adjustable early and late parameters, and grab a dope sample. Compare and contrast the difference between the two reflection types.
NOTE: When analyzing this, stick to one specific sample so you can gauge the differences and similarities accurately. Any of our professional-quality samples will work perfectly for this.
DELAYS VS ECHOS
- DELAYS 一 Take the signal you feed it, copy and ‘delay’ it by a certain amount of time, repeat that delay (through a feedback parameter), and gradually fade, or continue to play out.
Most of the time, other than when you’re dealing with delay, the ‘repeats’ are just that: literal repetitions. They do not change over time and are not echos, just recreations of them.
- ECHOS 一 The result of any given sound bouncing off of one, or several walls for the very first time — known as Early Reflections. Once those early reflections bounce to the next surface, they quickly multiply. This changes the interactions between them over time, commonly referred to as ‘Crosstalk,’ which then turns into reverb.
All reflections (echos) following that first bounce are called Late Reflections, which constantly change and rapidly evolve over the course of their duration.
As the sound continues to bounce off of each wall, surface, or object, it begins to pile up until the sound pressure dissipates; no longer having the energy to reach the next surface.
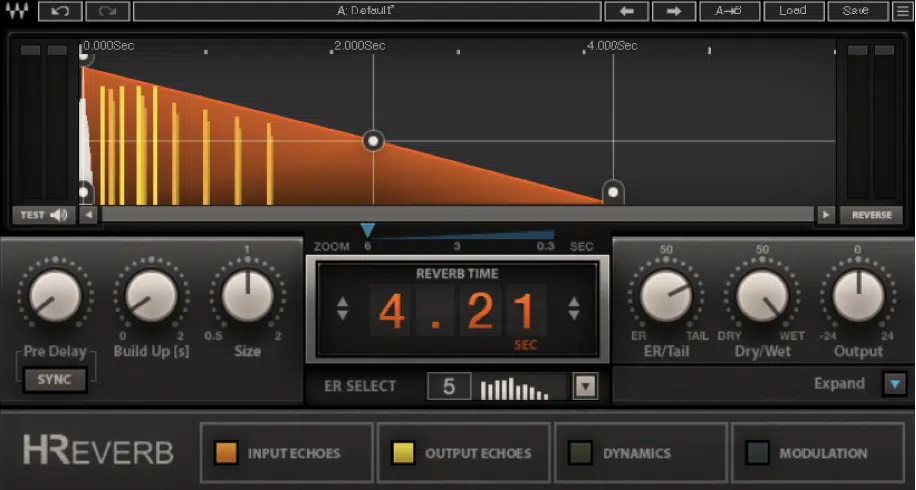
You can see the early reflections in yellow (output) & the late reflections in orange (input).
TRICK #1: SIMULATING REVERB WITH A DELAY
To visualize what late reflections sound like, to use a delay as a reverb, or simply produce a wicked effect:
STEP 1 一 Take a short signal and set the delay time to a standard speed, with medium feedback. Then, route it through a Send.
STEP 2 一 As time progresses, make the delay-time shorter.
STEP 3 一 Bring the feedback up with the delay time, and a few seconds later bring it back down, until you hear nothing left at all. This is essentially what happens when a set of early reflections spawn late ones.
STEP 4 一 Automate the level depending on how you’d like it to fade out.
PRO TIP: By using a Tape Delay and automating the delay time ever so slightly, every so often you can achieve some trippy DJ-like start/stop FX.
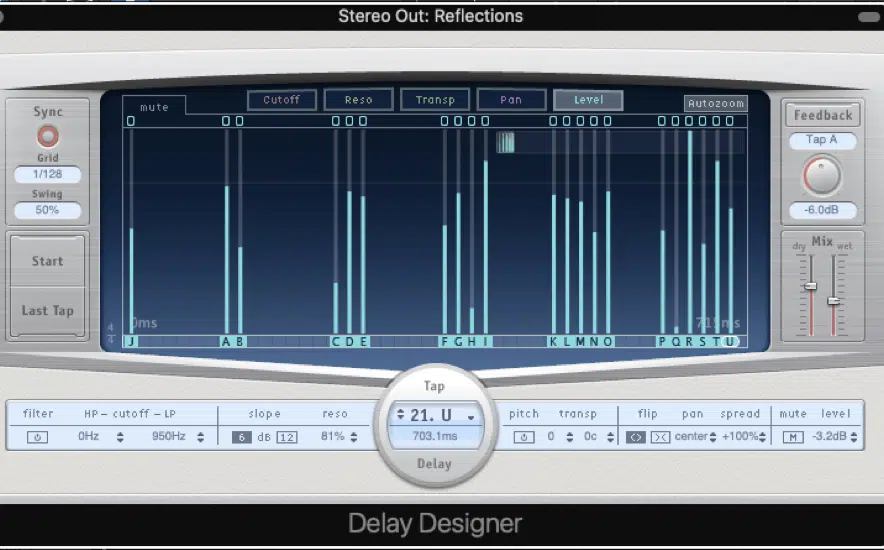
The denser a reflection is, the closer you get to achieving a sound that reflects true reverb.
KNOW YOUR REVERBS
Each (common) reverb type is categorized by the space in which it simulates, or the methods used to achieve it. Every reverb you use is either: Algorithmic- or Convolution-based.
- ALGORITHMIC REVERB 一 A class of reverb that relies on algorithms, modeled after real-world environments and processes. If you use reverb plugins, the majority of them fall into this category.
- CONVOLUTION REVERB 一 This is considered the crown jewel in the digital world, as it’s not only capable of generating the most realistic reverb, but allows you to capture the essence of any room, or environment through sampling.
When you create the ‘impulse response’ (IR) you’re using a control sound — like a short burst of white noise, or a sine wave sweeping across the human range of hearing, or sample — in order to gauge the reverberant qualities of that room.
By doing this, the convolution reverb is able to replicate it with the highest degree of accuracy possible.
TRICK #2: USING A CONVOLUTION REVERB AS A RESONATOR
By loading samples other than the traditional impulse responses, you can create your very own Physical Modeling processor.
Load up something like a violin, and play a raw square, saw, triangle, or sine wave through your convolution reverb. This makes it possible for you to create, and tweak (realistic) string-like instruments.
- Play around with the DRY/WET, starting with higher values at first.
If you throw a plucked-guitar sample into the reverb or send your favorite plucked synth through it, you’ll get a brand new instrument and form of synthesis every time.
Get creative with this technique: it can be applied to any sample to model any instrument.
REVERB TYPES
- ROOM 一 As the name suggests, it mimics a traditional room, that is rather small. Remember, you’re thinking about the space within the room. These units are designed so you’re able to modify the settings and simulate all different types of room sizes, shapes, and dimensions.
MOST BENEFICIAL WHEN: dealing with drums, or when adding very subtle (short) hints of reverb. Subtlety is key.
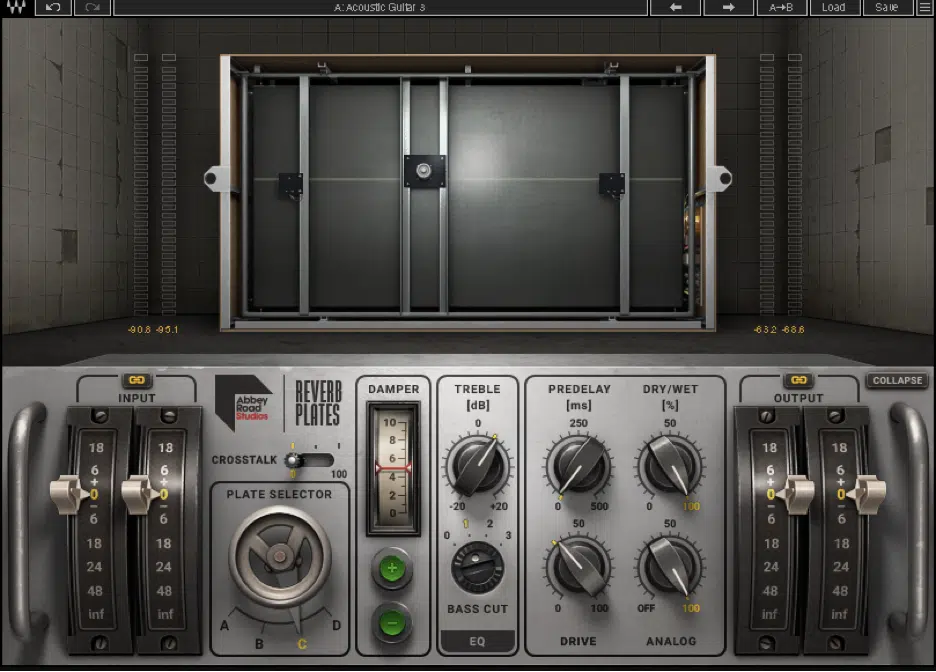
- PLATE 一 This was one of the very first successful forms of artificial reverbs used in recording. They suspended a flat metal sheet under tension, supported by springs at each corner.
The idea was to activate vibrations with a signal from a transducer, which was then captured on the plate; with the use of a contact mic. If you can imagine the effects created when placing your ear near any large metal apparatus and tapping, you can easily picture how this technique was manifested.
MOST BENEFICIAL WHEN: dealing with drums and vocals, as its effects are dense, yet bright.
TRICK #3: GATED REVERB SNARE TRICK
This is an effect that causes the reverb to end suddenly once it dips below the threshold, with the use of a Gate.
The trickiest part about this method is timing. Make sure to set the Threshold and Attack/Release so the gate closes with precision.
You can implement this throughout your entire mix as a blanket processor (on a snare or vocal), or selectively. From there it’s simply determining how loud, and present you’d want this effect to be.
- SPRING 一 Spring reverb has the same concept as Plate reverb, just through the use of different materials. Instead of a flat sheet of metal, it uses a coiled-up one (spring). An audio signal is sent to one end of the spring through the use of a transducer, creating waves that travel through the spring for the purpose of exciting it.
When a wave arrives at the end of the spring, another transducer then converts the spring’s motion into an electrical signal.
Some of its energy is reflected, some remains within the spring, causing the spring to continuously vibrate until it dissipates. Think of those door stoppers we all played with as kids. These vibrations are responsible for their unique, metallic characteristics.
MOST BENEFICIAL WHEN: dealing with guitars (especially electric), snare drums, abrasive mixes, and edgier vocals. They are also great for adding some grit to more polished synths.
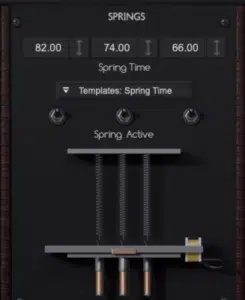
The exact effect is based upon the size of the spring itself and the amount of tension applied.
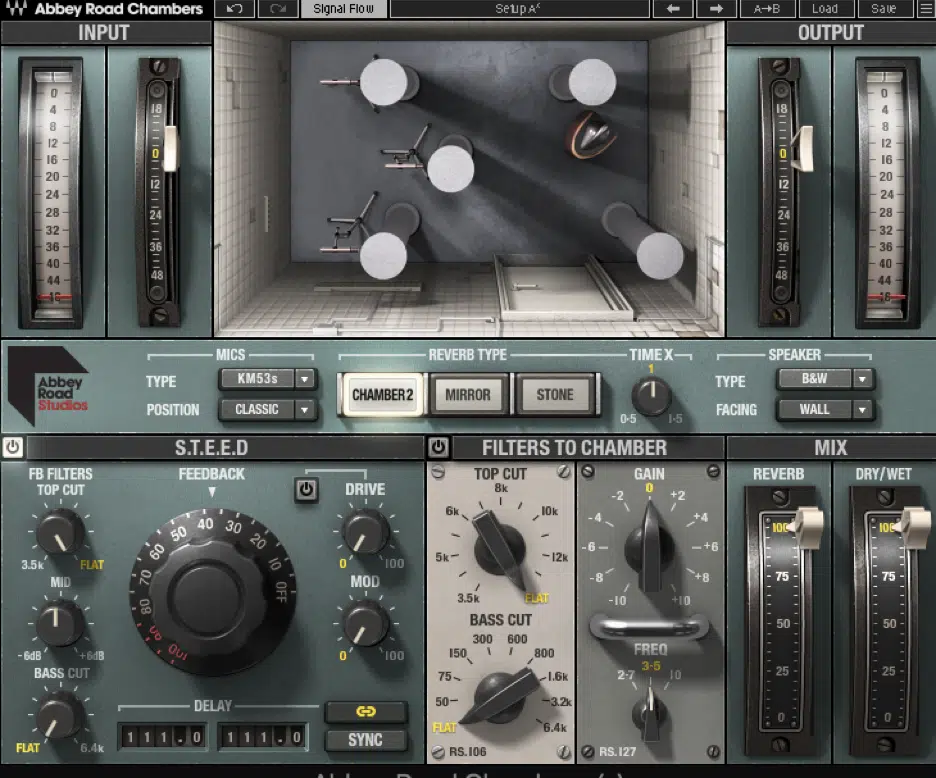
- CHAMBER 一 When you think chamber reverb, you think of the ‘chambers’ below Abbey Road and Capitol Studios.
The idea was: designate a reflective room (such as a tiled bathroom), and place a series of speakers and microphones within it.
Audio would then be amplified through a speaker, picked up by the mics (placement is key), and routed back. Then, it could be mixed with the original signal/audio to achieve the desired effect.
However, instead of sounding like a traditional bathroom, what came about was a much darker, grittier reverb that couldn’t be replicated by traditional real-world means.
Chamber reverb sounds amazing on all types of instruments including strings, vocals, acoustic guitars, etc.
- HALL 一 Hall reverb is, for the most part, self-explanatory as it simulates the sound of a concert hall, church, and the like. The decay is usually super long, smooth, and wide due to its gigantic size.
MOST BENEFICIAL WHEN: working with strings, pads, and orchestras. Remember to be extremely careful when applying it, as it tends to muddy up a mix due to its thicker, more layered sound.
- HYBRID 一 Hybrid reverb can either combine both convolution and algorithmic reverbs, or multiple types of just algorithmic reverbs.
There are an abundance of all-in-one (or, multi-type) plugins that allow you to switch between different algorithms, room types, and spatial options. One of my favorite hybrid-plugin recommendations is Waves H-Reverb. The stock reverb located within your DAW can most likely be placed into this category.
MOST BENEFICIAL WHEN: you’re not 100% certain of which reverb to apply.
PRO TIP: You can use a basic (stock) digital reverb with options that offer multiple spatial types and keep interchanging them until you hear something you like.
Not until it’s perfect, just until you nail down the desired feel. Once you do, you can then open up a more ‘customizable’ reverb based on your personal preferences.
It’s also easier to compare and contrast different reverb types when applying them to the same element.
Grab the FREE Unison Artist Series Essentials and start applying these reverbs to these professionally mixed samples right away. Keep in mind there’s nothing wrong with reverbs on top of reverbs.
TRICK #4: EQ-ING YOUR REVERBS
When dealing with reverb, there’s bound to be some clashing issues, hence why most reverbs offer some type of HP/LP filtering. However, they are not frequency-specific enough, and don’t address the (dreaded) mid-range…
- That’s where EQ comes in.
EQ doesn’t serve as just a correction tool. It can also enhance designated areas (most commonly the top-end), and make your reverb truly shine without increasing its overall level as well.
Pre-processing with an EQ on the Reverb Send first can be applied. This will affect the incoming signal before it hits the reverb itself, to either isolate a specific range or accentuate/attenuate certain frequencies.
PRO TIP: Try placing a compressor before, or after the reverb in the chain to even out your signal. Be careful though, it can ruin your reverb’s entire effect if done improperly.
PARAMETERS
Now let’s cover the general outlines of the most common parameters found on all reverb plugins, respectively:
- SIZE/PRE-DELAY 一 The size/pre-delay time determines how long it takes for the signal to reach its first reflective surface (early reflections). The longer it takes, the larger the room or space it’s simulating. Think of this as the determining factor when introducing that very first echo.
- DECAY TIME 一 Decay time, sometimes referred to as the ’tail’ parameter, dictates how long it takes for the late reflections to fade out.
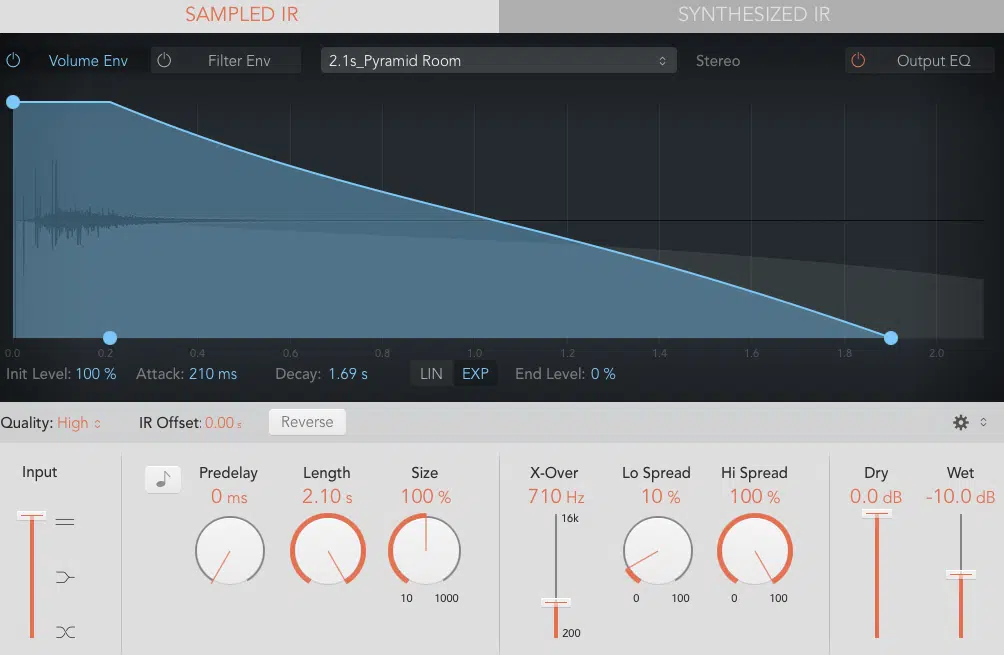
The decay time may be represented visually, in the form of an envelope; used to customize the shape of the ‘output’ reverb signal.
- DIFFUSION 一 Determines the dispersion and density of the reflections over time.
≫ Lower values result in clearer, more sparse reverb, and put less emphasis on the late reflections.
≫ Higher values create extremely dense reverb and put more emphasis on the late reflections.
- DAMPING 一 Absorbs the high frequency within the reverb, typically over time. Think of this as a dynamic low-pass filter. It’s also common for a Reverb to omit this option altogether, and include a set of LP/HP filters instead.
≫ Lower values allow for the high frequencies to remain active longer, and die out with the reflections. This produces a brighter, lighter sound; reminiscent of a more spatial atmosphere, such as an amphitheater.
≫ Higher values ’choke’ the higher frequencies’ Rate-Of-Decay. This produces a darker, more concise sound.
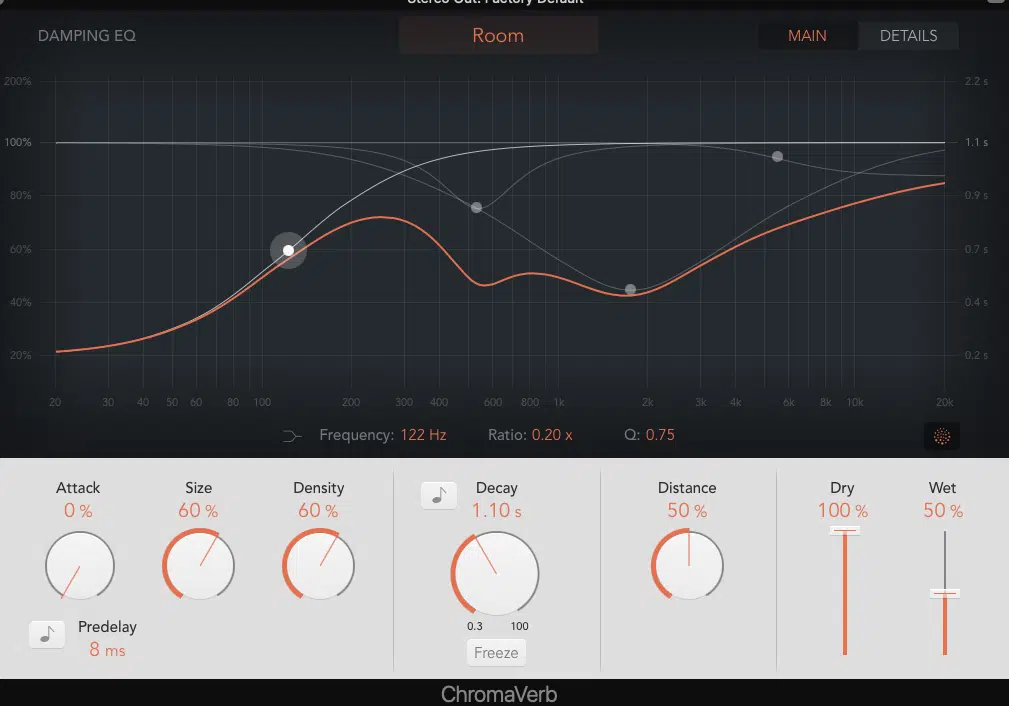
Sometimes you will find the ‘damping’ control expressed in the form of an EQ.
TRICK #5: AUTOMATION NATION
Reverb’s intention is to simulate ‘real world’ spaces. However, you can incorporate a modern-day feel, and even exceed your plugin’s abilities by selectively automating its parameters.
- Try automating the decay time, send level, input level, or the WET/DRY mix (if applied directly onto the track) over the course of its duration.
This adds a sense of depth and makes the listeners hyper-aware of your reverb’s subtleties for ‘key’ moments, notes, and/or phrases.
- Use this method for the last note (or word) of an element/vocal right before a transition, and listen to the instant magic. How noticeable the effect, depends on how much Automation you implement.
Now you can possess varying levels of reverb throughout your mix… something which is heard in 99% of all professional mixes today.
TRICK #6: REVERB SENDS/RETURNS
Reverb-processing with sends/returns is applicable when: you’re using one processor for multiple signals.
Or, when you seek complete control over the sound (as well as its effect) and wish for it to be separate from the original sound… which is almost always the case.
NUMBER 1 一 Create a Send/Bus and place the desired reverb on it.
NUMBER 2 一 Set the DRY/WET (sometimes labeled ‘MIX’) to 100% so that none of the dry signals seeps through (only the wet). Then, set up its parameters.
NUMBER 3 一 Send the desired signal(s) to the send.
- Now each track can individually be set to different ‘amounts’ and you’ll be able to blend in that Send signal, to introduce reverb and manipulate it however you’d like.
By doing this, you have eliminated virtually all risk of it having a negative impact on the original sound.
TRICK #7: FREEZE AND COMPARE
When working with reverb, if you choose to move on for the moment, always remember to freeze that track/effect in place.
Having a bunch of reverbs on each track (or multiple sends) will devour the CPU, even more so than the synth or instrument you’re producing with itself. This can be applied for not just individual processors, but entire chains as well.
You’ll be capable of using as many plugins as you’d like, at any time you’d like without your computer crashing!
- You could also choose to take it one step further by creating entire alternative frozen processing chains.
By doing this, you’ll be able to compare and contrast your favorite plugins and their parameters, as well as determine which reverbs (and settings) are most/least desirable for your track.
- Be sure to duplicate the original track first, so you can easily ‘comp’ the different variations. You may even decide to use a combination of both chains. Or, even enter pro-status by blending the signals of your alternative chains in parallel with the original signal.
TRICK #8. PITCH-SHIFTING REVERBS
You can either pitch-shift a copy of the reverb itself or the incoming signal. This will produce a super trippy, atmospheric effect.
My preferred method is placing a pitch shifter on the reverb send (right before the reverb) and shifting the incoming signal’s pitch. This is an awesome trick that will leave your listeners in awe.
3 THINGS TO REMEMBER
STEP 1 一 It’s not about the reverb unit itself, but rather how you use it.
When choosing a reverb type, envision which emotions you’d like to evoke from your listeners. Reverb is the most psychological mixing-processor we have access to… take advantage!
STEP 2 一 Know your processors and remember: simplicity is key.
Producers tend to just pile them on because they may sound good in isolation, or because they think they’re supposed to… don’t make that mistake! One stray processor can ruin a mix entirely.
Also, remember that all these creative/additive effect-processors will almost always require their own set of processing as well.
STEP 3 一 Always playback in MONO.
The reason reverb is so difficult to nail within a mix is largely due to its lack of mono compatibility, as well as phase issues. It tends to ‘smear’ the frequency-content of signals, which causes varying degrees of phase cancellation.
This can end up wreaking havoc within your mix if not taken into consideration, even if it goes undetected at first.
- Phase is highly elusive because it’s more about what you can’t hear.
It’s also why using common mixing tools, such as EQ and compression is super important when using processors like reverb.
Stereo signals can cancel one another out, causing elements to disappear, or take on a new form when played back in mono, and usually not for the better…
- Always playback in mono throughout the entire course of your mix!
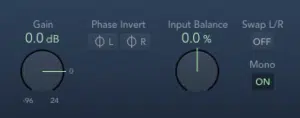
Virtually all DAWs nowadays come equipped with an option to monitor or switch Channel Mode to mono directly on the master track.
FINAL THOUGHTS
Rome wasn’t built in a day, and reverb can’t be learned in a day, so don’t get discouraged if you’re first starting out. It’s a process… no pun intended.
If you want some professional-quality samples with reverb already applied perfectly out the box, check out the FREE Unison Artist Series Essentials.
These samples are unique, exclusive, and proven to work, so download them now to get ahead of the curve today!
You’ll eventually learn that, when it comes to reverb, the only rule is: never rule anything out.
Until next time…


