Gain staging is the first thing you should do when starting a mix every single time. It’s a quick, simple process but determines the professionalism of your mix.
Would a scuba diver go in the ocean without gear and think he can breathe underwater? I think not. So, always ‘gain’ up before diving in, or you’re bound to drown.
Let’s talk about what Gain Staging is, why it’s so important, and, most importantly, how you can use it to enhance your mix.
Table of Contents
THE HISTORY OF GAIN STAGING
Gain Staging was brought about to counteract analog’s shortcomings. When recording in analog, each signal gets processed through multiple physical hardware processors.
From the Input to the Hardware EQ and Compressor, to the Console Desk where it was run through even more processors. Then, finally printed to tape, where the cycle continued.
Similar to all devices carrying an audio signal, if the input level was too high (0dB and above, known as ‘hot’ signals) it ended up ‘clipping’ and causing that horrible sound, which needed to be stopped.
This is where the signal-to-noise ratio came into play.
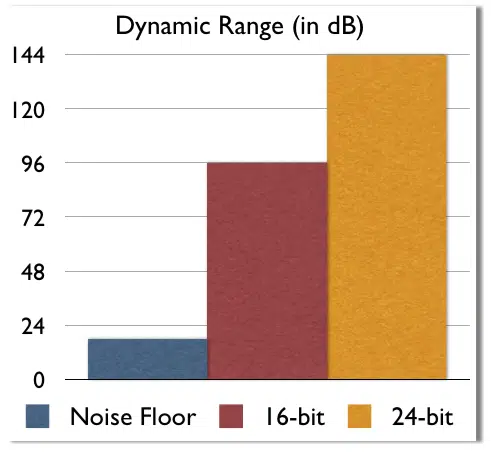
If you send a signal through a processor at a level too low to be picked up without further increasing the gain, you end up with an audible ‘hiss.’ This is known as the Noise Floor.
On the flip side, if you send it through to ‘hot’ signals, audible distortion can occur, regardless of clipping. Each processor is unique in the way it can be ‘driven,’ and some will clip long before 0dB as well.
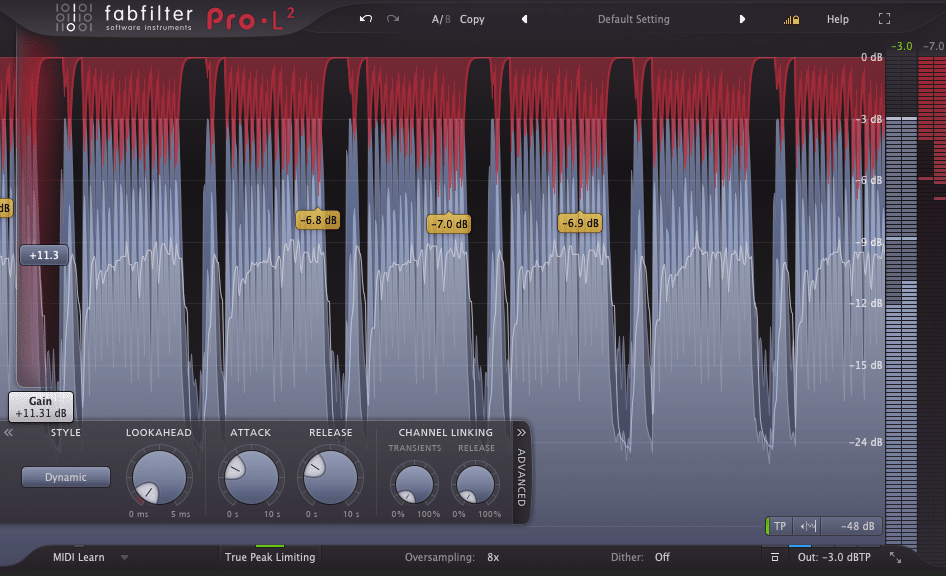
For example, if you turn up a signal (considerably) after running it through an already overdriven distortion patch, it’s going to sound horrible.
Next time that happens, simply increase the gain through the output instead of making the input level louder. It will sound much cleaner, as almost all distortion occurs based on the input level it’s being driven through.
You might just discover that your processors have a wide variety of different ‘flavors’ depending on how you drive the signal.
The magic of gain-staging in action is truly a sight to see… or, should I say, hear.
WHAT EXACTLY IS GAIN STAGING?
Gain staging is the adjustment of ‘gain’ for each Amplification stage. It ensures an optimal signal-to-noise ratio, with minimal noise or distortion.
In the digital world, you simply take each signal and make sure the audio/instrument’s gain is at (approx.) the same designated level.
This way, you’re able to have all the tracks in your mixer set to 0dB (unity gain), and the contrast of volume between each element will be reflected back accurately.
You’ll also be able to tell which processor is changing the signal’s volume, and by how much (roughly) as all your tracks will start off the same.
Gain staging is also key when recording live music, or directly into your interface.
Clipping is a huge issue in the analog world. It’s important that the signal is low at first to eliminate the risk of clipping, but not too low to the point where the ‘noise floor’ reveals itself.
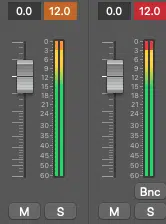
Clipping causes unwanted artifacts and distortion that is super unpleasant.
When it comes to hardware processors such as Compressors, and Limiters, you need to know the gain of the input.
Otherwise, you can’t set the parameters appropriately. You also won’t be able to compensate for any gain-alterations the processor may have made.
When gain staging, the ‘Mixer Track’ fader should always remain at its default position (0).
So, when talking about affecting the signal’s volume, it’s referring to the file/plugin/instrument’s Input Gain.
IS IT REALLY THAT IMPORTANT?
In a word: absolutely!
Gain staging is one of the most fundamentally important elements in creating professional mixes. Without it, comes distortion and excessive noise.
Even as a modern producer with digital instruments, you need to concern yourself with the possibilities of clipping. This is especially true when using processors, as those most certainly can (and probably will) clip.
On top of that, whether you know it or not, you’re using some form of analog-modeled processor in your chain, if not entirely throughout.
These units mimic the clipping characteristics of the original unit to a tee, for better or worse. And, if you’re not gain staging, it’s definitely for the worse.
Some plugins and most major platforms and streaming services (such as YouTube and Spotify) operate in Fixed-Point, not Floating-Point, so clipping can occur in real-time. Yes, even if there’s no clipping within your DAW.
In other words, never skip this step! You’re releasing your music into the real world, not your controlled studio environment, so you need to give it the proper attention it deserves.
For samples that have already been mixed to perfection, download the FREE Unison Essential Bass Loops. You can simply throw them into your track and move on to the next step, super easy.
SESSION ORGANIZATION
I cannot emphasize the importance of session organization enough. It may seem like a waste of time to organize each and every session before you even start gain staging, but I guarantee you it’s not.
It’s the one non-audio processing method that has the biggest impact on your overall mix. Never underestimate its importance, and skip that whole part where you learn the hard way.
Eventually, you will have your own methods of setting up your session (color-coding, grouping, sorting) but here’s a general rundown:
STEP 1 一 Import, or drag-and-drop all of the tracks/stems you plan on using into your session.
STEP 2 一 Organize each track by sorting them based on types and roles.
For example, all the stems containing drums should be grouped together. Kick and snare first, followed by bass, percussion, and melodics (or however you see fit). As long as they are all sorted and categorized, it’s fine.
REMEMBER TO: Take advantage of subcategories, for instance, sort the melodic elements by type: chord-tracks together, melody-tracks together, fills together, effects together, etc.
STEP 3 一 Label each track accordingly.
Include details for each track so you don’t get tripped up. You do not want to confuse kick-samples or make silly errors when mixing, especially when it could’ve been easily avoided.
STEP 4 一 Take these tracks and create categorized Busses and Sub-Busses
NOTE: Some DAWs have different labels for this function, such as Stack and Groups, so make sure to always refer to your manual. This is done so you can, for example, have control of all the drum elements (as a whole) within your bus.
You can mute ‘solo’ or even automate the gain and other mixer controls, like Panning and Stereo Width without having to go through each individual drum element.
Don’t forget about the ‘glue’ that’s added when processing groups in the same category, using the Group Bus.
Glue (or, ‘Bus Processing’) makes each track in a group cohesive. It gives the illusion they were all recorded in the same room, at the same time. It is one of the keys to producing a professional mix and keeping your elements under control.
STEP 5 一 Create a ‘color code’ and stick to it (including all future sessions).

All of my busses are purple, so I can easily identify them when taking a quick glance at my mixer.
All of my drum elements are assigned to their own special shade of red. The kick is the darkest (almost burgundy), and it gets progressively lighter in color as the elements continue (snare, hats, cymbals).
By the time we reach the bass elements and the more ‘official’ percussive instruments, you can see they are ascending across the shades; from orange to yellow.
Close enough to the color red that I know it will play a similar ‘role,’ but different enough where I know the sound will be vastly different.
Once you’ve finished with all that, it’s gain staging time!
HOW EXACTLY DO I GAIN STAGE?
There are really only 3 tools you will need to gain stage. Those are:
- Normalization (optional)
- Clip-Gain
- VU Meter
Knowing that, you can now gain stage properly.
STEP 1 一 Take each track, and individually ‘normalize’ them to anything lower than 0dB (I usually shoot for -3dB). This brings up the track as a whole, and its highest peak is now the value you set.
Also, it will ensure that there is no clipping from the start; even from a small, momentary spike in volume.
STEP 2 一 Open up your VU Meter on the Master track.
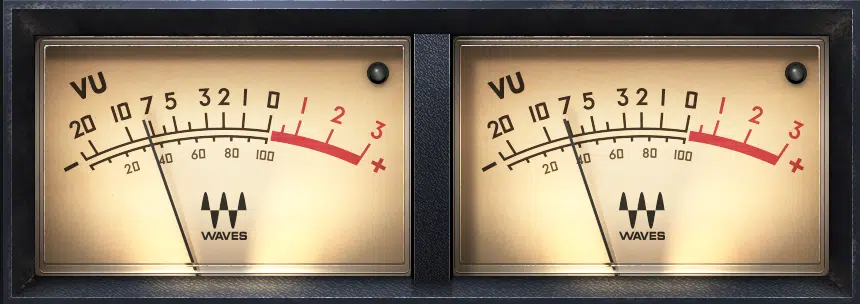
‘VU’ stands for Voltage Units, and what it does is give you an average level of the signal it’s fed. It’s basically an RMS Meter that uses a different equation.
Since it’s an average, you will never be 100% with the level, but that’s okay for now. You’re shooting for all the signals to be relatively the same, not spot on.
STEP 3 一 Play each track in SOLO and adjust the Clip Gain until it’s hanging around your target volume.
For the sake of headroom, I suggest the level you shoot for is anywhere from -12dB to -18dB. But, if you insist on more loudness, don’t exceed -8dB.
Wait… ‘I thought louder was better?’ Oh, the contrary.
Of course, you want the end result to be loud but, when it comes to the mixing process, the key is to keep the levels very low.
This way, you’ll have ample headroom to process things without any unwanted artifacts or distortion, and can successfully steer clear of clipping.
NOTE: Keeping the level on your interface fairly high in order to mix at an appropriate level is perfectly fine. Just be sure to bring the level down as you raise the level up on the Master Limiter, but that’s a topic for another article.
Easier than you thought, right?
ALMOST FINISHED
You’re not ready to hit the ground running quite yet, as there’s a special process we professionals use before we introduce any plugins into the mix: Static Mixing.
Gain staging applies to much more than just your mix and its preparation. It’s something you need to apply to EVERY signal you work with.
This is something seldom spoken about, yet the only reason most of our processors even have Input/Output levels in the first place is to gain stage.
I’m sure you’ve seen a ‘Make-Up Gain’ parameter on one of your compressors. Or maybe you’ve heard of ‘Gain Compensation.’ Well, they are one and the same.
Make sure, when sending a signal through any processor, its OUTPUT is level-matched and relatively the same volume with and without the new processor enabled.
Gain-compensation should be done on every single track, going through every single processor to ensure the levels stay consistent and the values you gain-staged (at the start of the mix) are cohesive.
STATIC MIXING
The term Static Mix refers to a mix that’s created using only the Faders and the Pan-Pots within your DAW’s mixer.
Instead of considering this the first official step of your mixing, consider it to be the last step in the gain-stage process. I say this because there’s really no mixing involved at all.
No processors or plugin utilities of any kind: just your eyes, ears, and mixer levels, of course.
The ‘clip’ gain of each signal was adjusted to the target level (I suggest -12) to ensure no clipping, as there should be ample headroom before the audio is fed through the mixer.
So now, when you look at your Mixer tracks, the fader’s levels are not random.
If the kick is louder than the snare, you’ll know it’s actually louder, not just lower on the mixer-fader (to compensate for inconsistent levels).

The tracks are all ‘zeroed out’ (at unity-gain). Each track peaks at target-level (19dB-12dB) after the Gain stage, but before the Static Mix.
This is key when looking at the general overview of your Mixer, to know where and how each element is in relation to one another.
STEPS: STATIC MIXING
STEP 1 一 After organizing your session, you need to determine if your track should be Mono or Stereo. This may seem like a no-brainer… Stereo, of course, right?
Not exactly.
- You don’t need to use stereo signals to mix or generate a stereo track. You can technically use all mono-signals and, through panning, output a fully Stereo Master.
Perhaps even with better stereo compatibility, as your music is most likely being played back in mono anyway.
- If you have no true reason to use a stereo track, it’s oftentimes better to work with mono tracks. You can simply place them within the stereo-field with strategic Panning. Just because a signal is a stereo, it doesn’t mean the right and left channels aren’t identical.
Even if they are, all you really have is a Mono signal, which makes things much easier anyway. Simply decrease the width of the stereo signal with the use of a Stereo Imager.
- Low-end frequencies should always remain in Mono. If you have, let’s say, a stereo drum loop and can’t separate the low-end elements… simply use a Multiband Stereo Imager. Make anything below 300Hz Mono (give or take).
STEP 2 一 Take each track’s corresponding mixer-fader and bring it all the way down so everything is completely silent.
STEP 3 一 Starting with the drums, slowly bring the first element up to a level you’re comfortable mixing in (usually the default 0dB position), followed by the next element, and the next.
STEP 4 一 Slowly raise it until you feel it’s proportional to the other tracks. Do this for every Fader on your track, while making minor adjustments along the way as you introduce the other signals; finding the perfect balance.
This way, you can match levels properly, as opposed to fixing them with any plugin processing.
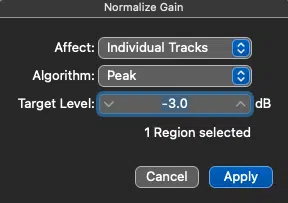
- The key is mixing at low levels, so try not to make the tracks too loud. Normalization will always bring them back up to the industry standard for streaming and the like.
Volume-related adjustments should be made through a balance of the clip-gain and the mix-faders, not only the Mixer.
STEP 5 一 The last step of this stage is Panning.
PANNING: Determines where the signal will be positioned within the Stereo Field and/or the distribution of the signal between the right and left channels.
Panning can additionally be used to prevent crowding and frequency-overlapping, clashing, and masking. It can also help you avoid stereo-related phase issues.
The Static Mix and Gain Staging, when applied, will always make your mixes better.
You are already ⅓ of the way done with your mix at this point! Significant headway was made, and you eliminated most of the mixing issues you’re faced with (pre-processing).
Just remember, it’s the last 10% of your mix that’s the most crucial (and difficult), so don’t get ahead of yourself, make sure to be thorough.
FINAL THOUGHTS
Gain staging is an essential part of mixing, there’s no ifs, ands, or buts about it. When you skip this process is like building a house without laying down a solid foundation first, it’s destined to fail.
Once it becomes a regular part of your mixing routine, you won’t even think twice about it… but I bet your listeners sure will.
Even with all the mixing knowledge in the world, there’s no reason to use unmixed samples, as it could disastrous to the mixing process itself.
Luckily, all of our samples are (professionally) mixed to perfection. You won’t have to worry about a thing, you can focus on mixing, not fixing.
Don’t believe me? Check them out for yourself… Grab any of our FREE Unison Essentials packs, here.
Until next time…


