As music producers, one of the most important steps when you’re laying down beats is the mixing stage.
Of course, you could hire a mixing engineer and have them do everything for you, but that costs money — and who knows how reliable they’ll be with timing and efficiency.
That’s why I’m breaking down the absolute best mixing hacks in the game, including things like:
- Building pro-level FX chains ✓
- Crafting multi-layered sound profiles ✓
- Enhancing stereo image so your beat sounds great ✓
- Cleaning up muddy kick drums ✓
- Perfecting vocal sound and presence ✓
- Using reference tracks so your beat sounds great ✓
- Balancing overall volume across instruments ✓
- Working with frequency balance like a pro ✓
- Optimizing your mix’s low end (super fun) ✓
- Ensuring your tracks sound on point every time ✓
- Many more mixing hacks/mixing techniques ✓
With these legendary mixing hacks and industry secrets that cover everything, your mixes will be on point and professional every single time.
This way, you’ll never have to worry about your tracks sounding unnatural or muddy ever again and all of your mixing techniques will be super solid.
Plus, your own music will always sound better, your main track will cut through the mix, and you’ll be able to produce beats like an absolute boss.
Table of Contents
- The Best Mixing Hacks/Mixing Tips in the Game
- 1. Using Unison Sound Doctor for Pro-Level FX Chains
- 2. Create Multi-Layered Sound Profiles with Sound Doctor’s ‘Formulas’
- 3. Use Sound Doctor for Subtractive Processing to Avoid Overprocessing
- 4. Tame Harsh Frequencies With Dynamic EQ Rather Than Static Notching
- 5. Use Stereo Image Offsets for Subtle Width Without Phase Issues
- 6. Reference Tracks in the Same Genre (Match Perceived Loudness)
- 7. Parallel Process Your Kick Drum for Punch and Body
- 8. Use Multiband Distortion to Add Energy Without Adding Volume
- 9. Use Mid/Side EQ to Clean Low-End Mud From the Side Channels
- 10. Boost Vocal Presence Using Subtle Saturation Before Compression
- 11. Use Tonal Balance Tools to Visually Target Frequency Consistency
- 12. Low-Pass Filter Reverb Sends to Avoid Clashing with Lead Vocals
- 13. Group Drum Kit Elements & Bus Compress With a 4:1 Ratio (Slow Release)
- 14. Add Movement to Pads or Vocals With Pitch Modulation
- 15. Use Volume Automation Instead of Compression for Dynamic Control
- 16. Re-amp Virtual Instruments to Add More Room Tone & Analog Texture
- 17. Frequency Slotting (Mixing Techniques)
- 18. Use High-Pass Filters on Non-Bass Elements
- 19. Reference Your Mix on Small Speakers to Catch Masking Issues
- 20. Bounce a ‘Full Mix’ and Then Listen With Fresh Ears Next Day
- 21. Layer Percussion Using Transient Shaping Instead of EQ
- 22. Mix at Low Volumes
- Final Thoughts
The Best Mixing Hacks/Mixing Tips in the Game
When it comes to creating better mixes, it’s not just about turning knobs and guessing what sounds good — it’s about understanding what each move is actually doing to your sound. The following mixing hacks/mixing techniques will help you master your mix like a true professional. This way, your workflow will be improved, your skills will skyrocket, and your mixes will also be clean as hell.
1. Using Unison Sound Doctor for Pro-Level FX Chains

Getting a polished mix used to mean stacking individual plugins and tweaking each one from scratch…
But Sound Doctor completely flips that process on its head with AI-powered, genre-specific FX chains.
For example, loading in a lead vocal will automatically build a chain like this:
- An EQ that high-passes at 120Hz and scoops 350Hz by -2.5dB (Q: 1.8)
- Followed by a de-esser targeting 6.3kHz with a -12dB threshold
- Then a compressor set to 3.5:1 ratio with 8ms attack and 45ms release
- Finally, a stereo widener boosting side gain +2dB above 4.5kHz
What makes this one of the most powerful mixing hacks is that everything is fully editable, which is absolutely epic.
You can bypass modules, rearrange them, or dial in mix amounts per effect.
This means you’re not locked into presets but still get an advanced starting point that’s sonically on point every single time.
From a workflow perspective, this cuts your setup time in half and gives you consistent, pro-level chains that you can customize per vocal track, drum kit, or your whole mix.
This makes it one of the most invaluable mixing tools in modern music production.
2. Create Multi-Layered Sound Profiles with Sound Doctor’s ‘Formulas’

Inside of Sound Doctor (which we just talked about) you’ll also find the renowned “Formulas” system.
This gives you curated FX chains based on specific mix goals like “Clean & Wide,” “Punchy & Tight,” or “Gritty & Saturated.”
Each one creates a multi-layered sound profile.
For example, choosing “Clean & Wide” on a vocal sound might load a soft-knee compressor (3:1 ratio, 40ms release), a surgical EQ cutting 300Hz with a Q of 2.0, and a stereo widener with side gain boosted by +2.5dB above 4kHz.
And because each formula is fine-tuned for a different tone and texture, it lets you shape contrast between your own music elements.
All without manually stacking plugins or overprocessing.
As far as time-saving mixing hacks go, this one gives you detailed tonal control while keeping your workflow fast and focused.
3. Use Sound Doctor for Subtractive Processing to Avoid Overprocessing

In mixing, subtractive processing means removing or dialing back effects to improve clarity (instead of constantly stacking more plugins).
With Sound Doctor, you can also solo individual modules in any chain, deactivate ones that feel unnecessary, or delete them entirely.
This is a huge advantage when your mix starts sounding too processed or unnatural.
For example, if your lead vocal feels smeared in the highs, solo the exciter module and drop the high boost to +1.2dB or bypass it altogether.
This will instantly make your vocals more balanced and precise.
This is one of the smartest mixing hacks to clean up your FX chains and create more space in the mix without sacrificing impact.
This is especially true when working with complex chains or multiple sound sources.
4. Tame Harsh Frequencies With Dynamic EQ Rather Than Static Notching
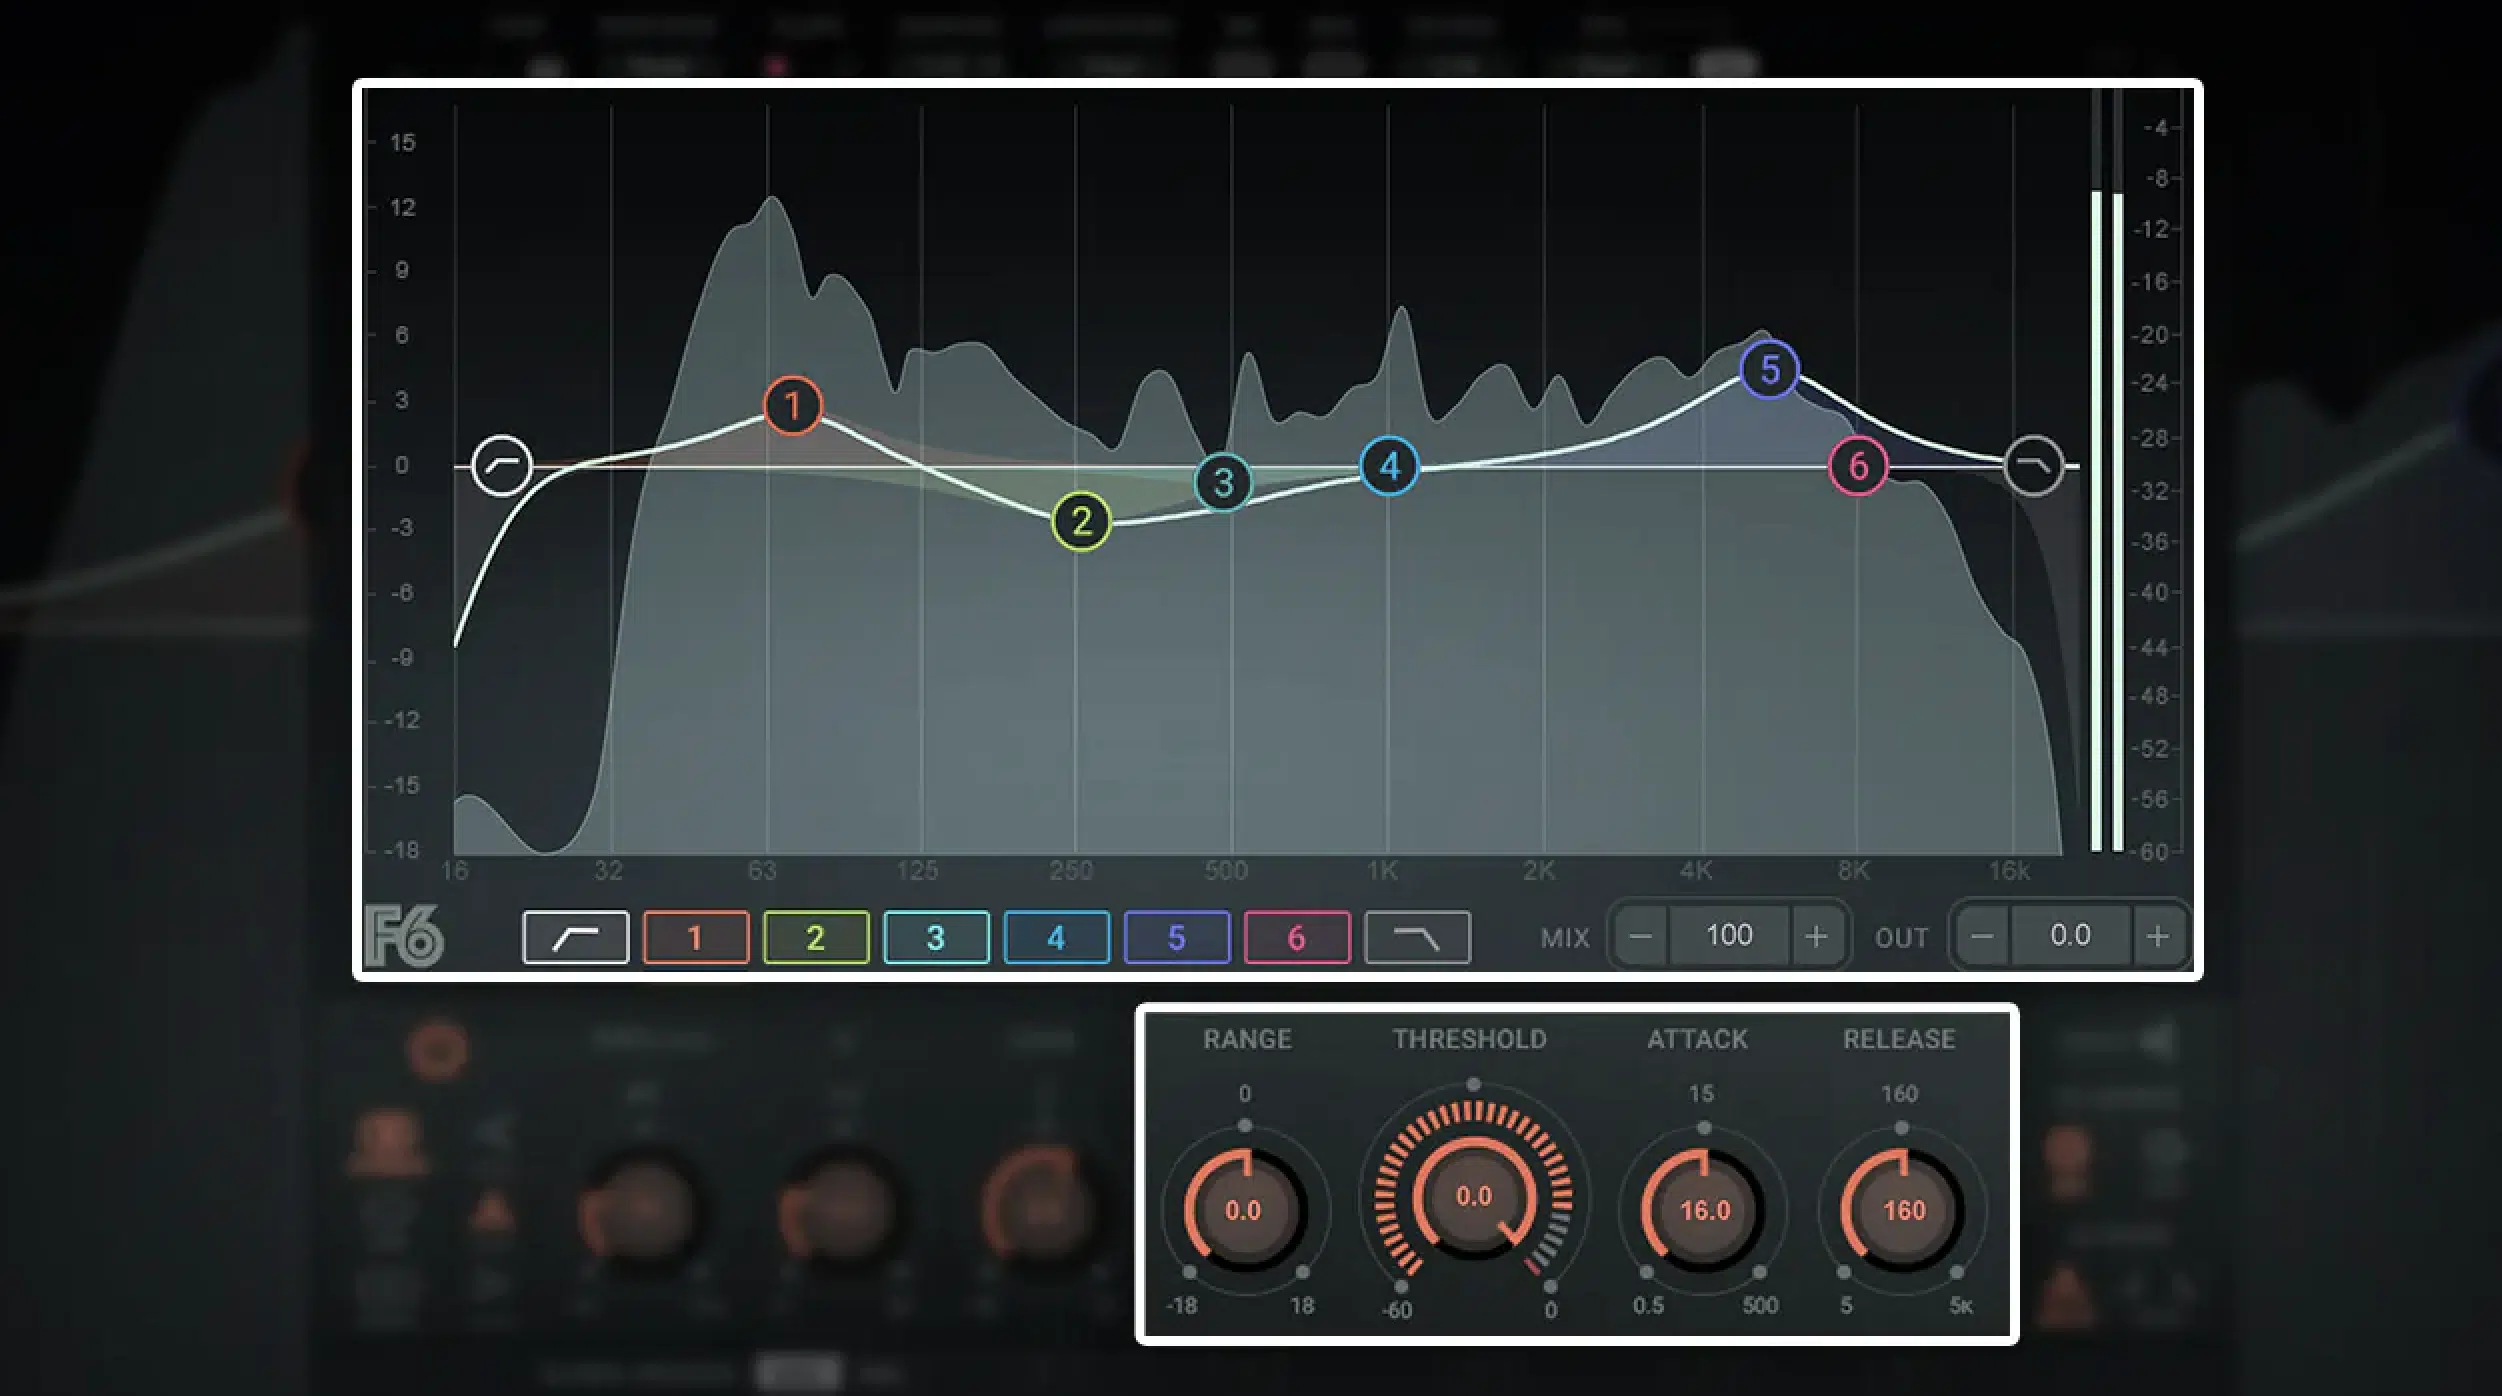
Harsh frequencies usually show up in the 2.5kHz–5kHz range, especially on vocals, snares, cymbals, and synth leads.
Cutting them statically can easily kill the character of the sound.
Instead, dynamic EQ-ing allows you to target those frequencies only when they spike, which keeps the tone intact but smooths out any piercing moments that would distract the listener.
So, you can try loading a dynamic EQ with a narrow Q of 4.0 at 3.6kHz and set the threshold to activate only above -20dB with a gain reduction of -3dB.
This way, the reduction only happens when needed.
Using this type of responsive control is one of the more advanced mixing hacks that gives your tracks a more polished, controlled sound without losing energy or presence.
5. Use Stereo Image Offsets for Subtle Width Without Phase Issues

Creating width in your mix is important, but overdoing it can easily cause phase problems (especially if you’re relying on reverb or hard-panned doubles).
A cleaner technique is to apply subtle stereo image offsets, where the left and right channels are treated slightly differently.
This can give a sense of space without affecting mono compatibility.
One approach is to detune the left channel of a synth or pad by -7 cents and the right by +7 cents, or use a dual LFO pitch modulation with a 180° phase shift and a depth of 0.1% per side.
It’ll create some natural movement and perceived width.
Used correctly, this is one of the best mixing hacks for getting your sound to feel immersive and wide without cluttering the main track or sacrificing punch in the center.
6. Reference Tracks in the Same Genre (Match Perceived Loudness)
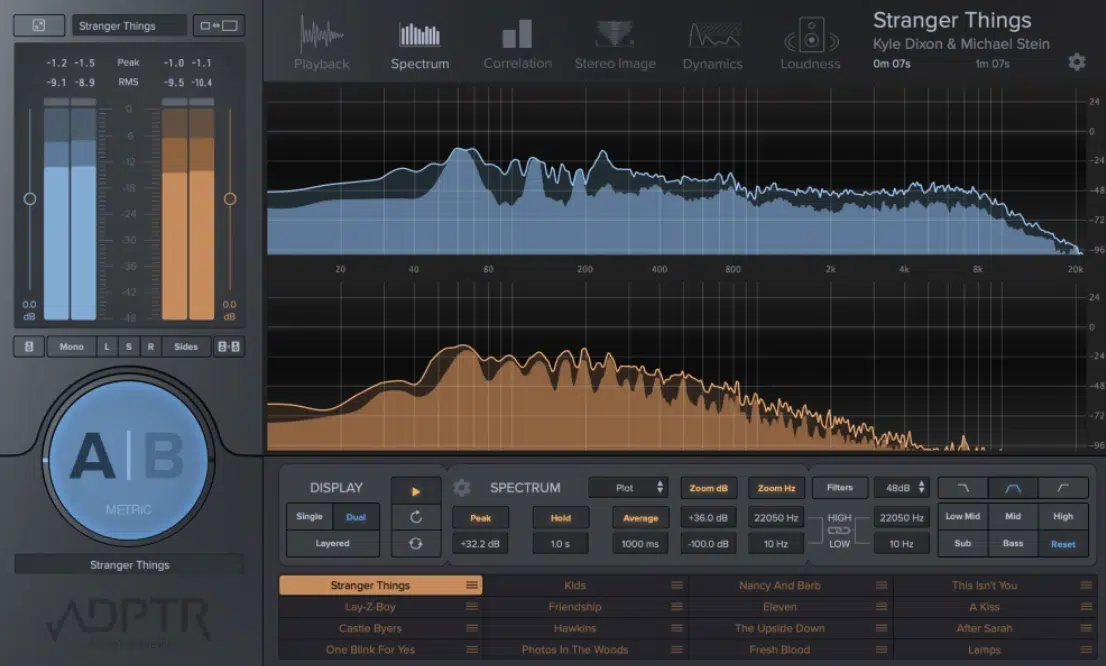
Using reference tracks can expose everything from tonal imbalance to low-end confusion 一but only if you’re matching perceived loudness the right way.
Pull in a professionally mixed track from the same genre and drop a loudness meter like iZotope Insight 2 or Youlean Loudness Meter on your mix bus.
If the reference is sitting at -10.5 LUFS integrated, adjust your mix’s output gain so it’s within ±0.5dB of that.
Otherwise, your ears will favor the louder track and distort your judgment.
Once they’re level-matched, A/B just the hook sections and listen specifically for how the lead vocal, kick drum, and stereo image are presented…
Not just the overall vibe, but the way those elements are spaced and balanced.
This is one of those mixing hacks that sounds obvious on paper but takes discipline to do right, and when done consistently, it sharpens your ability to make professional mixing decisions that hold up across every playback system.
If you’re aiming for better mixes that translate to real-world sound systems, this is the way to go, most definitely.
7. Parallel Process Your Kick Drum for Punch and Body
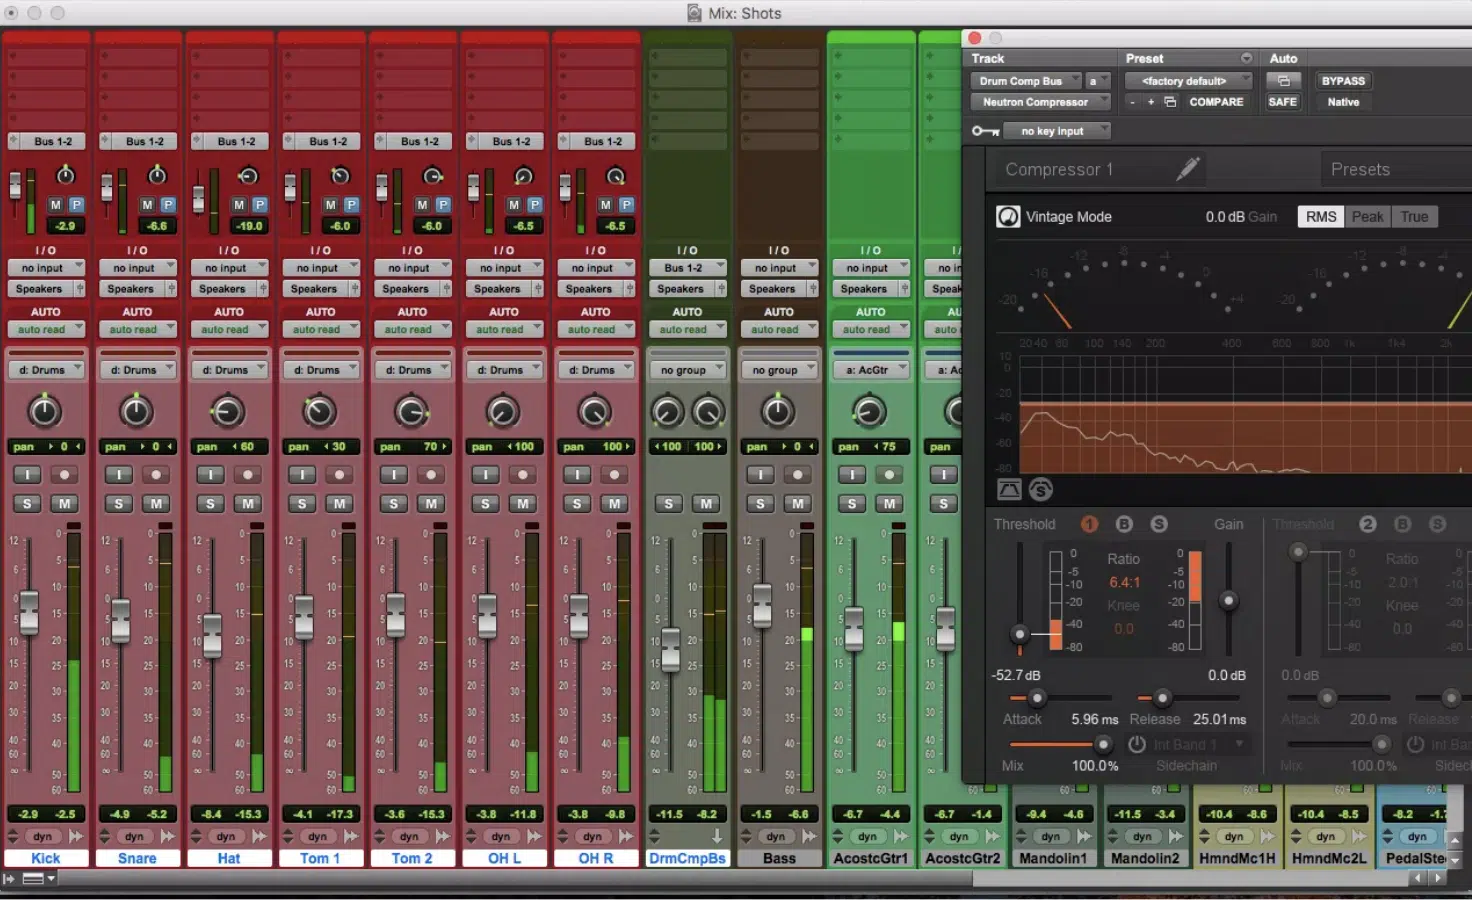
Parallel processing is one of my favorite mixing tips around, so definitely don’t overlook this one.
Parallel processing means duplicating a signal and applying heavy processing to the duplicate while blending it back in under the original.
This is one of the most effective mixing hacks to make your kick drum hit hard without overpowering the mix.
You’ll want to start by duplicating your kick to a parallel channel and insert a compressor set to 10:1 ratio, 2ms attack, and 150ms release.
Make sure to drive it hard until you’re getting around -8dB of gain reduction.
Then, blend the parallel channel back in at -12dB below the main kick until it adds thickness in the 80–100Hz range and snap in the 3–5kHz range without getting boomy.
PRO TIP: Add a saturator like FabFilter Saturn 2 or Soundtoys Decapitator on the parallel channel before compression, pushing the drive to 4–5dB to give your kick extra harmonic richness without touching the original punch.
8. Use Multiband Distortion to Add Energy Without Adding Volume
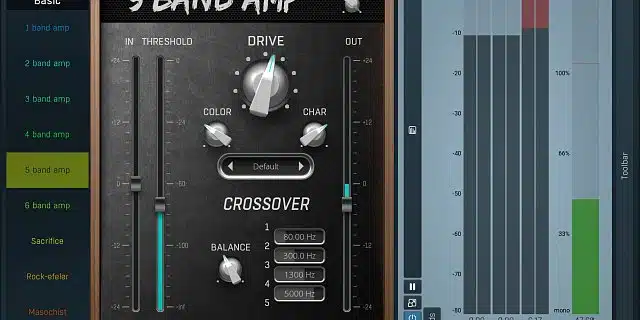
Instead of trying to widen your bass guitar, one of the more proper mixing tips is to enhance its perceived loudness and tonal energy using multiband distortion.
This is especially true in the upper mids where the human ear is most sensitive.
Start by duplicating your bass signal and inserting a multiband processor like Trash 2, Saturn 2, or Sound Doctor (if using a harmonic saturation formula) and isolate the top band from 1.5kHz–5kHz.
Then, apply mild tape saturation with +3dB of drive and a soft knee, and blend it back under the dry bass at -10dB.
This will give your bass texture and presence that cuts through the mixes sound without raising the fader.
It’s one of those next-level mixing hacks that lets your low-end sit tight while still feeling alive, and it works just as well on 808s, layered subs, or virtual instruments that lack analog bite.
9. Use Mid/Side EQ to Clean Low-End Mud From the Side Channels
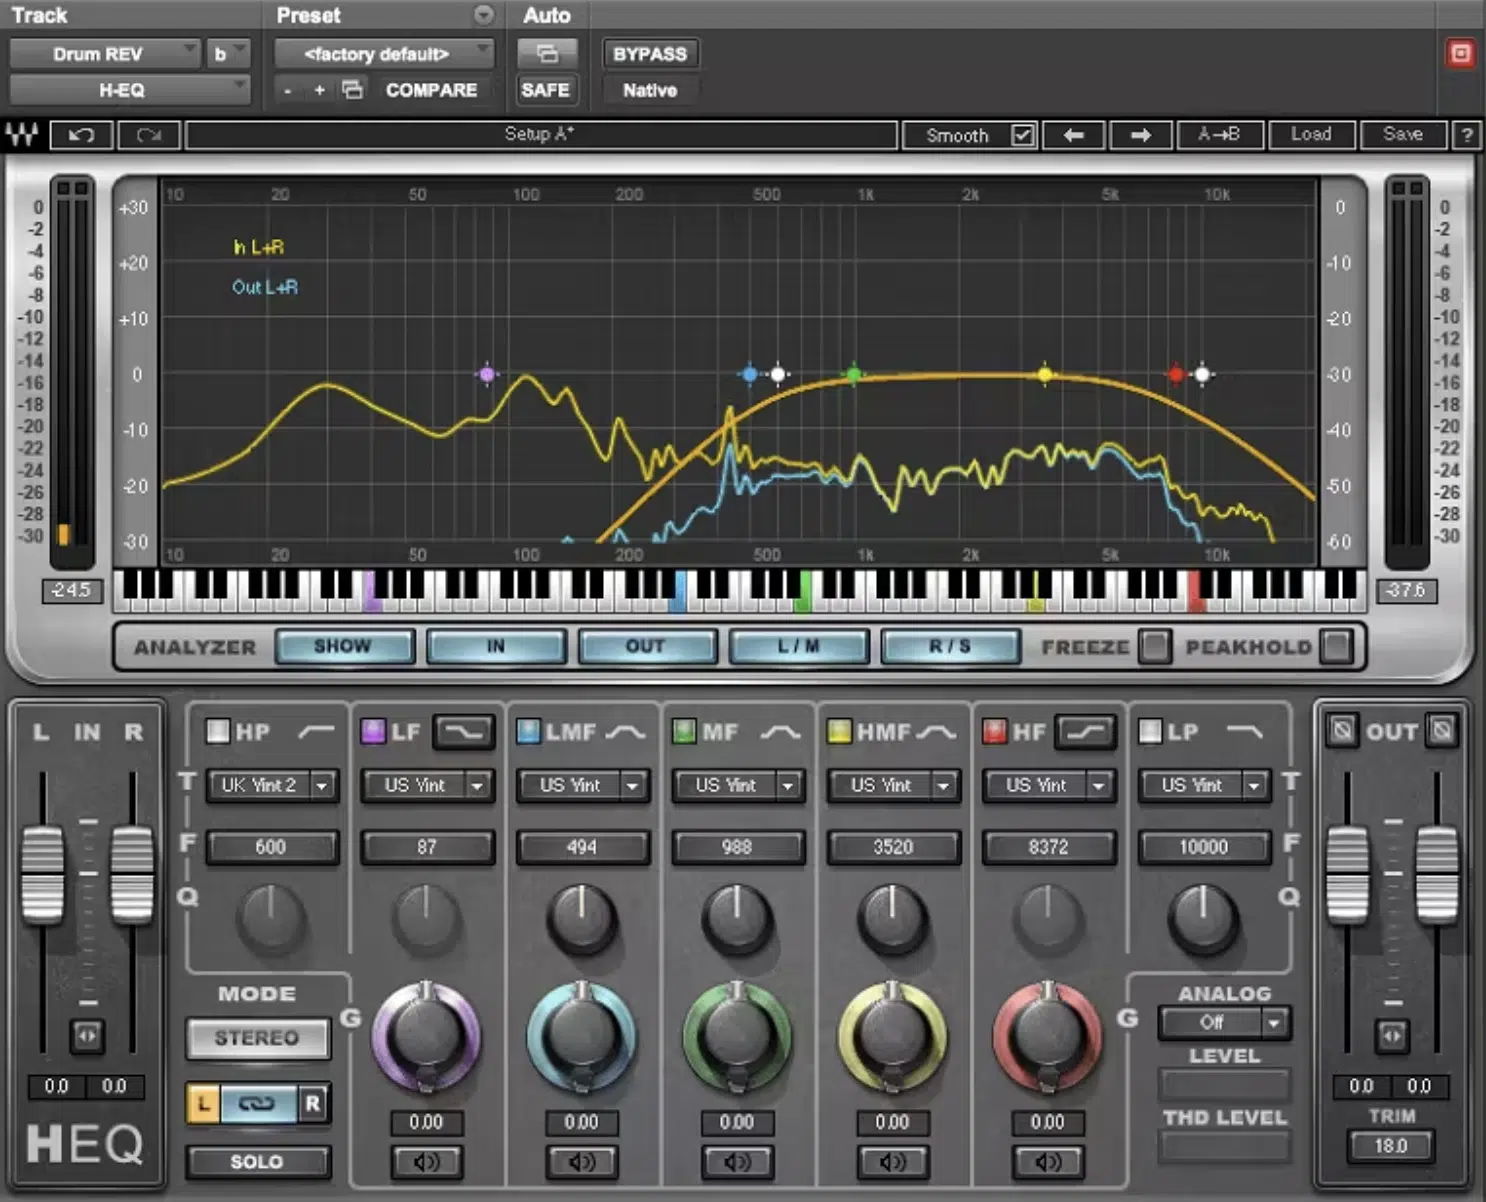
Mid/Side EQ lets you separately EQ the center (mid) and edges (sides) of your stereo field, using it to clean up the low end in the side channels is key.
It’s one of the most important mixing hacks for getting a tighter, more focused bottom end (which you should always be going for).
The low end, especially below 150Hz, should mostly live in the center of your mix…
So, make sure to apply a high-pass filter to the side signal only 一 cutting everything below 120Hz with a steep 24dB/oct slope.
For example, use FabFilter Pro-Q 4 in M/S mode: set a high-pass filter on the side band at 120Hz, and leave the mid band untouched.
This will instantly clear up stereo mud caused by wide synths, overheads, or reverb returns.
PRO TIP: Check your mix in mono after this step to make sure the low end still feels solid and centralized to prevent phase smear on club systems or smaller playback setups.
10. Boost Vocal Presence Using Subtle Saturation Before Compression
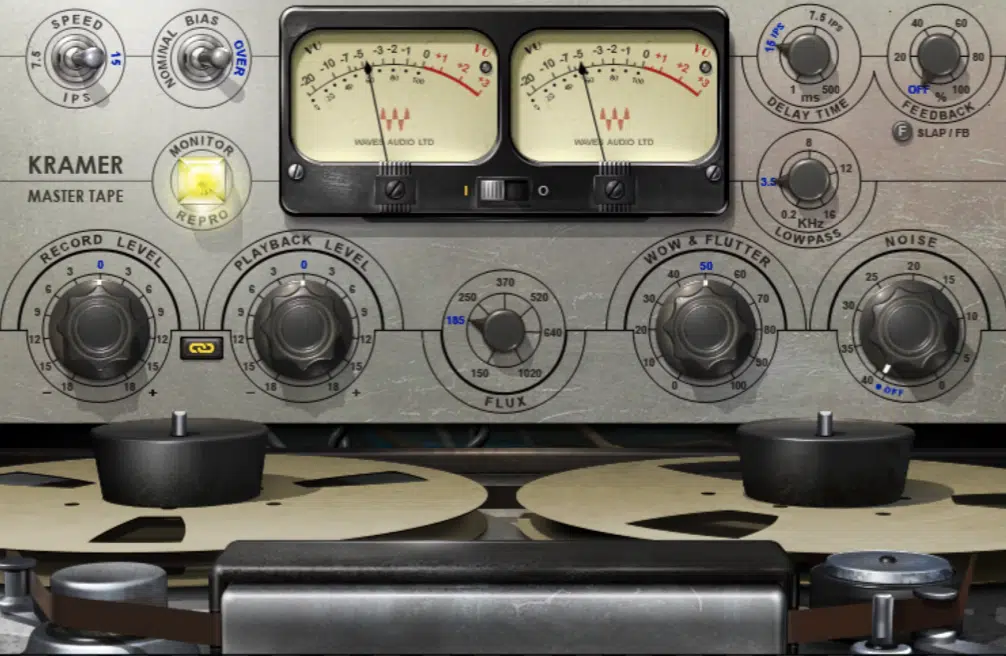
Saturation adds harmonic content that enhances clarity, warmth, and character.
And, when placed before compression in your vocal chain, it helps retain that presence even as the signal gets leveled out.
Start with a tape-style saturator like Kramer Tape or Softube Tape, applying +2–3dB of drive and focusing the saturation on the upper mids around 2kHz–5kHz.
Then follow with a vocal compressor (e.g., LA-2A emulation or an opto-style unit) set to a 3:1 ratio, fast attack (1ms), and medium release (40–60ms) to gently shape dynamics without dulling the added brightness.
It’s one of those underused mixing hacks that makes vocals feel polished and vibrant 一 especially when working with softer vocalists or recordings lacking natural grit.
11. Use Tonal Balance Tools to Visually Target Frequency Consistency

Instead of using pink noise to balance frequency ranges, one of the more advanced and accurate mixing tips is to rely on tonal balance tools.
Especially when mixing music in untreated rooms or on budget monitors.
Plugins like iZotope Tonal Balance Control, ADPTR Metric AB, or Youlean Loudness Meter 2 let you visually compare your own music to genre-specific EQ curves.
And, spot imbalances in real time, of course.
For example, if your mix is heavy in the low-mids (150Hz–300Hz), Tonal Balance Control will show your energy overshooting the genre target range.
This helps you decide whether to EQ your vocal track, kick drum, or electric guitars, and is one of the smartest visual mixing hacks for music producers/musicians working in less-than-perfect environments.
And, when paired with your ears, it’ll help you create better mixes that translate across every studio, headphone, and sound system without guesswork.
12. Low-Pass Filter Reverb Sends to Avoid Clashing with Lead Vocals

When adding reverb to vocals, the high end can easily clash with the lead vocal’s intelligibility, that’s a fact.
So, one of the smartest mixing hacks/mixing tips is to filter the reverb’s return signal with a low-pass EQ.
What you’ll want to do is load your reverb on an aux/send channel, and after the reverb plugin, insert an EQ that rolls off everything above 6.5kHz using a 12dB/oct low-pass filter to remove excess sizzle and breath noise from the tail.
This will keep the vocal reverb lush and supportive without masking consonants or creating a harsh wash in the upper frequencies.
Also, make sure to cut a small notch around 2.5kHz–3kHz in the reverb return to carve space for the lead vocal’s presence peak.
This subtle move makes your vocal sit upfront while still sounding wide and atmospheric.
13. Group Drum Kit Elements & Bus Compress With a 4:1 Ratio (Slow Release)

When your drum kit sounds disjointed or lacks cohesion, grouping everything into a dedicated drum bus and applying compression is one of the best mixing hacks.
This technique involves routing your kick, snare, hi-hats, toms, and percussion to a stereo aux track and compressing them as a single unit…
It’s not to flatten dynamics, but to “glue” the elements with shared energy.
Set your compressor to a 4:1 ratio, 30ms attack, and a slow 200ms release, then aim for just 2–3dB of gain reduction on the loudest hits.
This gives your drums more punch while still allowing transients to cut through.
And for extra control, try filtering out anything below 50Hz in the sidechain input to prevent the kick from triggering unnecessary compression.
It’s a pro-level adjustment that keeps the groove tight and musical.
14. Add Movement to Pads or Vocals With Pitch Modulation
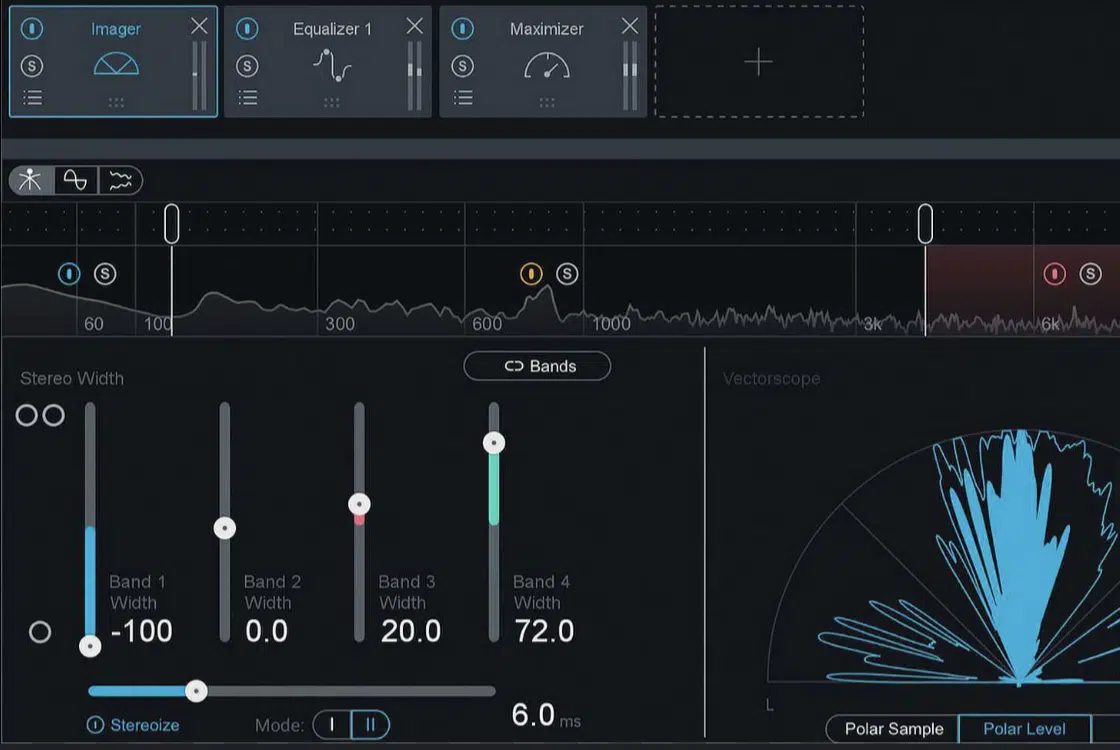
When your pads or background vocals feel static and lifeless, introducing subtle pitch modulation can instantly create a sense of width, depth, and motion.
And the best part is you don’t have to rely on reverb or delay.
Pitch modulation works by gently shifting the tuning of a sound up and down using an LFO, and when applied asymmetrically across the stereo field, it makes the signal feel like it’s “breathing” across the speakers.
Try modulating the left channel by +6 cents and the right by -6 cents using a dual pitch LFO at a rate of 0.1–0.2Hz with a sine wave shape.
Plugins like Soundtoys Crystallizer or Melda MFreqShifter are ideal for this kind of movement.
As far as spatial mixing hacks go, this one adds a hypnotic, analog-style character to flat digital instruments.
It’s perfect for ambient layers, vocal beds, or lo-fi synth stacks (or other instruments) that need more vibe.
15. Use Volume Automation Instead of Compression for Dynamic Control
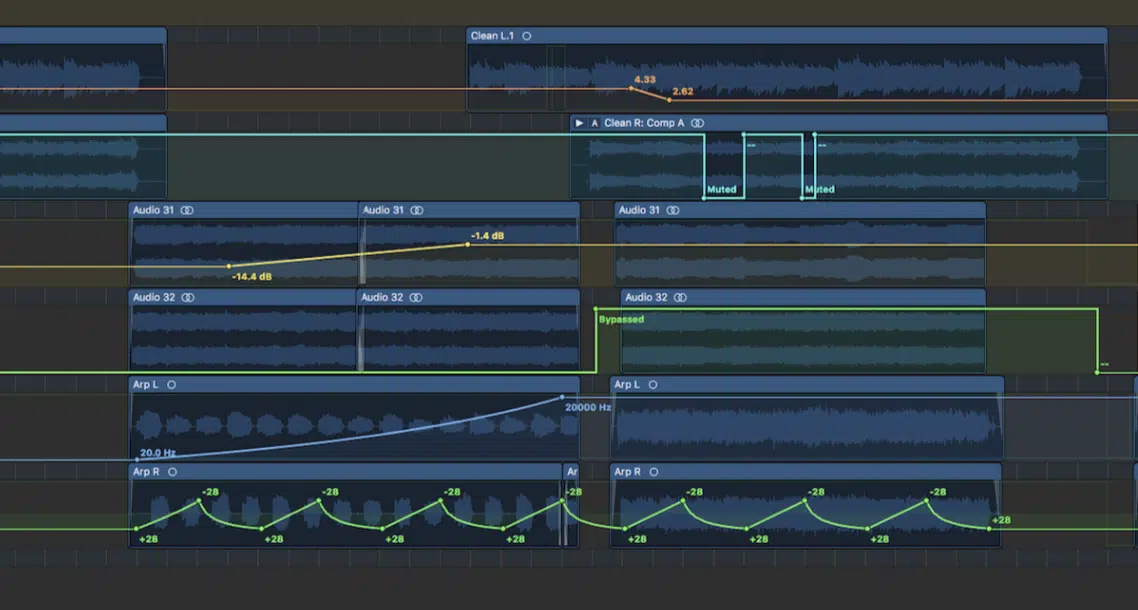
Compression isn’t always one of the best mixing tips for controlling volume, especially when you want to preserve tone and avoid squashing transient detail.
That’s where volume automation comes in 一 instead of applying a global dynamic effect, you manually adjust levels over time to retain natural phrasing and impact.
For vocals, automate each phrase to ride 1–2dB louder during emotional peaks and pull back by 1dB in more relaxed sections.
And for 808s or electric guitars, lift the tail of notes by 0.5dB to even out sustain without killing the attack.
It’s one of the most hands-on mixing hacks, but it gives you surgical control over your track’s energy…
And when done right, it sounds more transparent and musical than any plugin could replicate, so definitely practice until you get it on lock.
16. Re-amp Virtual Instruments to Add More Room Tone & Analog Texture

Virtual instruments often sound too clean and sterile, even when well-designed.
This is why re-amping has become one of the most underrated mixing hacks for bringing some extra dimension and realism to the table.
Re-amping involves sending a digital signal through a real-world amp, speaker, or even a guitar pedal, then capturing the result with a microphone or back into your interface.
For example, running a Rhodes VST through a small tube amp at low volume and miking it with an SM57 six inches off-axis.
Then, blending that back in at -10dB below the dry signal can instantly add harmonic depth and more room tone.
NOTE: If you’re working completely in-the-box, you can simulate the same effect using plugins like AudioThing Speakers, IK’s AmpliTube, or Soundtoys Devil-Loc chained with a convolution reverb to emulate a live mic’d space.
It’ll give your instruments the same grit and color as real-world recordings.
17. Frequency Slotting (Mixing Techniques)

When multiple sounds occupy the same frequency range (like a vocal and a synth pad both sitting around 500Hz) your mix starts to feel crowded and indistinct.
That’s where frequency slotting comes in…
It’s a technique that involves strategically boosting and cutting specific ranges in different elements so each one has space to shine.
For example, if your lead vocal sounds boxy around 320 Hz, cut that area by -3dB with a Q of 1.6, and simultaneously boost that same range slightly (+2dB) in the piano to preserve warmth.
This lets both to coexist without masking each other.
It’s one of those precision-based mixing tips that forces you to think in terms of frequency real estate, if that makes sense.
And when you dial it in right, the whole track opens up and feels professionally carved.
18. Use High-Pass Filters on Non-Bass Elements
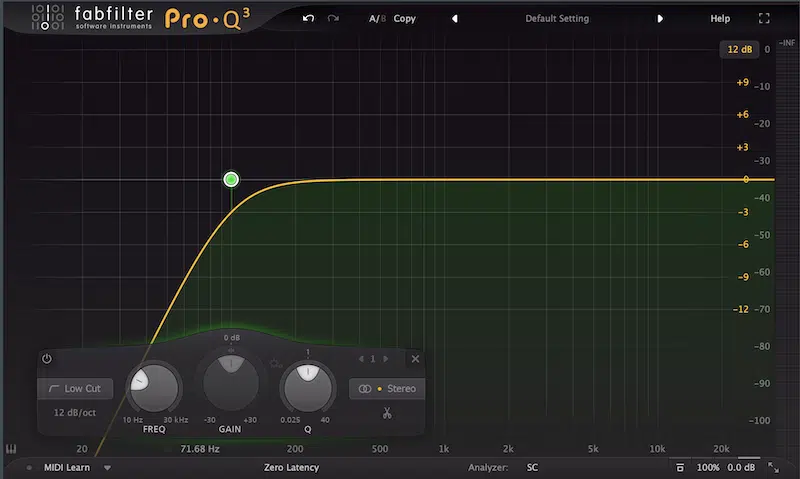
Low-end buildup is one of the biggest causes of muddy, unfocused mixes, and it usually comes from unexpected places like:
- Vocals
- Synths
- Even reverb returns
By applying high-pass filters on non-bass elements, you can clean out unnecessary sub energy and give your actual bass and kick the space they need to breathe.
As a general rule, make sure to roll off anything below 80Hz on vocals, pads, guitars, and FX 一 using a 12dB/oct slope to keep the transition natural.
For synths, you can go even higher, up to 120Hz if the patch doesn’t need low-end at all.
This is one of the most essential mixing hacks for building a clear, controlled foundation.
And, it works a whole lot better when combined with visual tools like SPAN or FabFilter Pro-Q 4 to spot low-end overlap at a glance.
19. Reference Your Mix on Small Speakers to Catch Masking Issues

If your mix sounds amazing on studio monitors but falls apart on a phone or laptop, it’s likely because masking is hiding important details in the midrange.
Masking happens when two or more elements compete in the same frequency area, especially between 200Hz and 4kHz.
So, by referencing on small speakers, it exposes those conflicts instantly.
One of the simplest mixing hacks/tricks here is to route your output through a mono speaker simulator (like Avantone MixCube or Slate VSX) and listen at low volume…
You’ll quickly hear if your lead vocal gets buried behind a synth or if the snare disappears under a guitar loop.
PRO TIP: Bounce a quick 30-second loop and play it back on your actual phone with no EQ enhancements; if the key parts still cut through, your mix is probably balanced.
20. Bounce a ‘Full Mix’ and Then Listen With Fresh Ears Next Day

No matter how well you know your gear, room, or plugins, your ears will lie to you after long sessions, because ear fatigue is a real thing, period.
This is why one of the most underrated mixing techniques/mixing tips is to simply step away and revisit the song later.
I know it sounds like a little thing, but honestly, it makes all the difference.
After finishing your session, bounce a rough mix at 24-bit with a -3dB true peak ceiling (leave headroom), and listen the next day through a different playback system, like:
- Headphones
- Car speakers
- Your laptop’s built-in audio
- Etc.
Within seconds, you’ll notice things you completely missed 一 maybe the hi-hats are too bright, or the vocal is 1.5dB too low in the first hook.
Taking this reset not only sharpens your perspective, but it also mimics how other people will experience your song (with fresh ears and zero context).
This makes it one of the most honest and revealing mixing hacks you can apply.
21. Layer Percussion Using Transient Shaping Instead of EQ
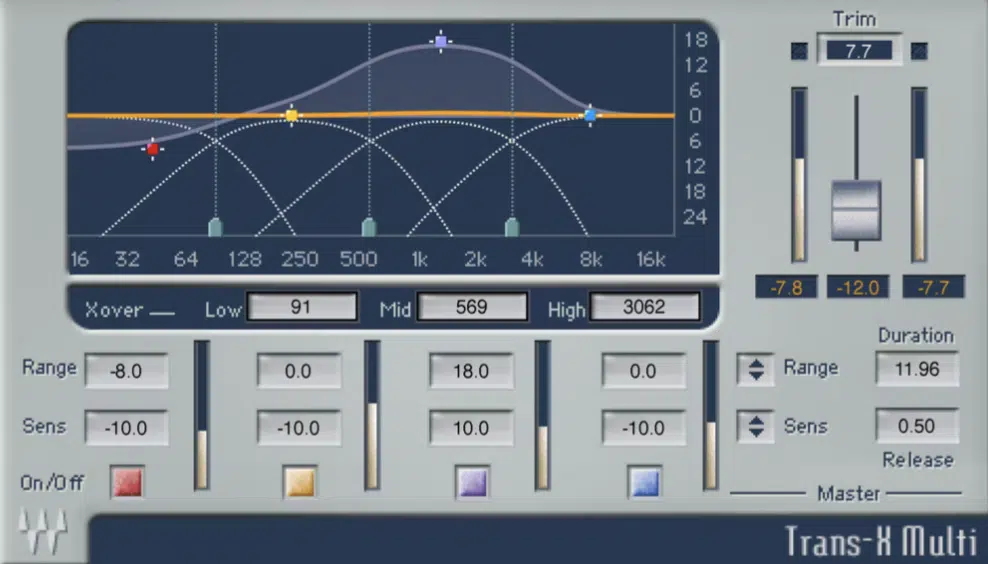
When your percussion feels weak or undefined, it’s tempting to reach for EQ, but really, transient shaping is usually going to be your best bet.
Transient shapers let you directly control the attack and sustain of a sound…
This makes your percussion pop without cluttering the frequency balance or masking your vocal track.
So, you’ll want to begin by layering a crisp clap sample with a soft snare, then use a plugin like SPL Transient Designer or iZotope Neutron 5 to boost the attack by +3dB and pull the sustain down -2dB.
This keeps the transients tight and lets the layer sit forward in the whole mix.
It’s one of those mixing hacks that adds definition while keeping your drum kit elements from getting buried across different sound systems.
This is especially true when working with dense productions or darker genres like lo-fi and underground trap.
22. Mix at Low Volumes

And last but not least, one of the most reliable mixing techniques for achieving better mixes is mixing music at low volumes, usually around 65–75dB SPL.
This way, you can clearly hear:
- Overall volume balance
- Tonal issues
- Tracks that might be poking out or getting lost
When you monitor loud, your ears adapt and trick you into thinking your mixes sound better than they really do.
This can completely throw off your EQing, reverb levels, or dynamics decisions.
Instead, drop the volume so that you can comfortably hold a conversation over the mix.
From there, check if your lead vocal still holds focus, your kick drum still hits, and your bass guitar isn’t overwhelming the main track.
Before wrapping up the session, always do a final low-volume pass and check your aux sends, virtual instruments, and stereo width.
If it still sounds tight and balanced at low volume, it’ll translate across studio monitors, headphones, and even laptop speakers without a problem.
Final Thoughts
And there you go: the absolute best mixing hacks, techniques, and secrets that will completely change the game for you.
With these tricks up your sleeve, you’ll be able to seriously tighten up your low end, shape cleaner transients, and get that wide, polished sound you’re looking for.
Plus, your vocal track will sit perfectly, your overall volume will stay balanced, and your mixes will translate across every sound system like an absolute boss.
Just remember to always trust your ears, double-check your references, and work smart.
Otherwise, you’ll be stuck wondering why things don’t hit the same way others do, and let’s be honest, nobody has time for that.
As long as you stay dedicated and focused, and practice all day long using these mixing hacks, your mixes will be on point every single time, hands down.
So, go pull up that session, load up your chain, and start applying these mixing hacks like a real pro 一 this is how you make beats that truly stand out.
Until next time…
Download The #1 Mixing Plugin Now


Leave a Reply
You must belogged in to post a comment.