Reverb automation is one of the most powerful techniques in the music production world, no doubt about it, and it’s actually slept on a lot for some reason.
It can help you shape a transition, add tension, give your chorus extra edge, and give your vocal track an entirely different vibe (with just a few tweaks).
Plus, it’s super important when it comes to creating dynamic mixes, controlling space, and dialing in contrast between different parts of your song.
As producers, knowing all about reverb automation can seriously level up your mix automation game and give your sound an insane level of depth.
That’s exactly why I’m breaking down everything you need to know about reverb automation, like:
- The point of reverb automation ✓
- Dry/wet mix automation ✓
- Decay time adjustments ✓
- Pre-delay timing tricks ✓
- Using automation lanes properly ✓
- The best reverb send strategies ✓
- Automating vocals and transitions ✓
- How to add drama and excitement ✓
- Which parameters to tweak (and why) ✓
- More reverb vs less reverb ✓
- Common mistakes and how to avoid them ✓
- Advanced tricks, tips, and techniques ✓
- Much more about reverb automation ✓
By mastering reverb automation and truly understanding everything it’s capable of, you’ll seriously enhance your production skills, which is invaluable.
You’ll be able to automate reverb like a boss and apply the same techniques as the experts do, which will help you dominate the competition.
Believe me, by mastering it, your tracks will feel alive and you won’t have to worry about super boring, flat, amateurish mixes again.
Table of Contents
What Exactly Is Reverb Automation?
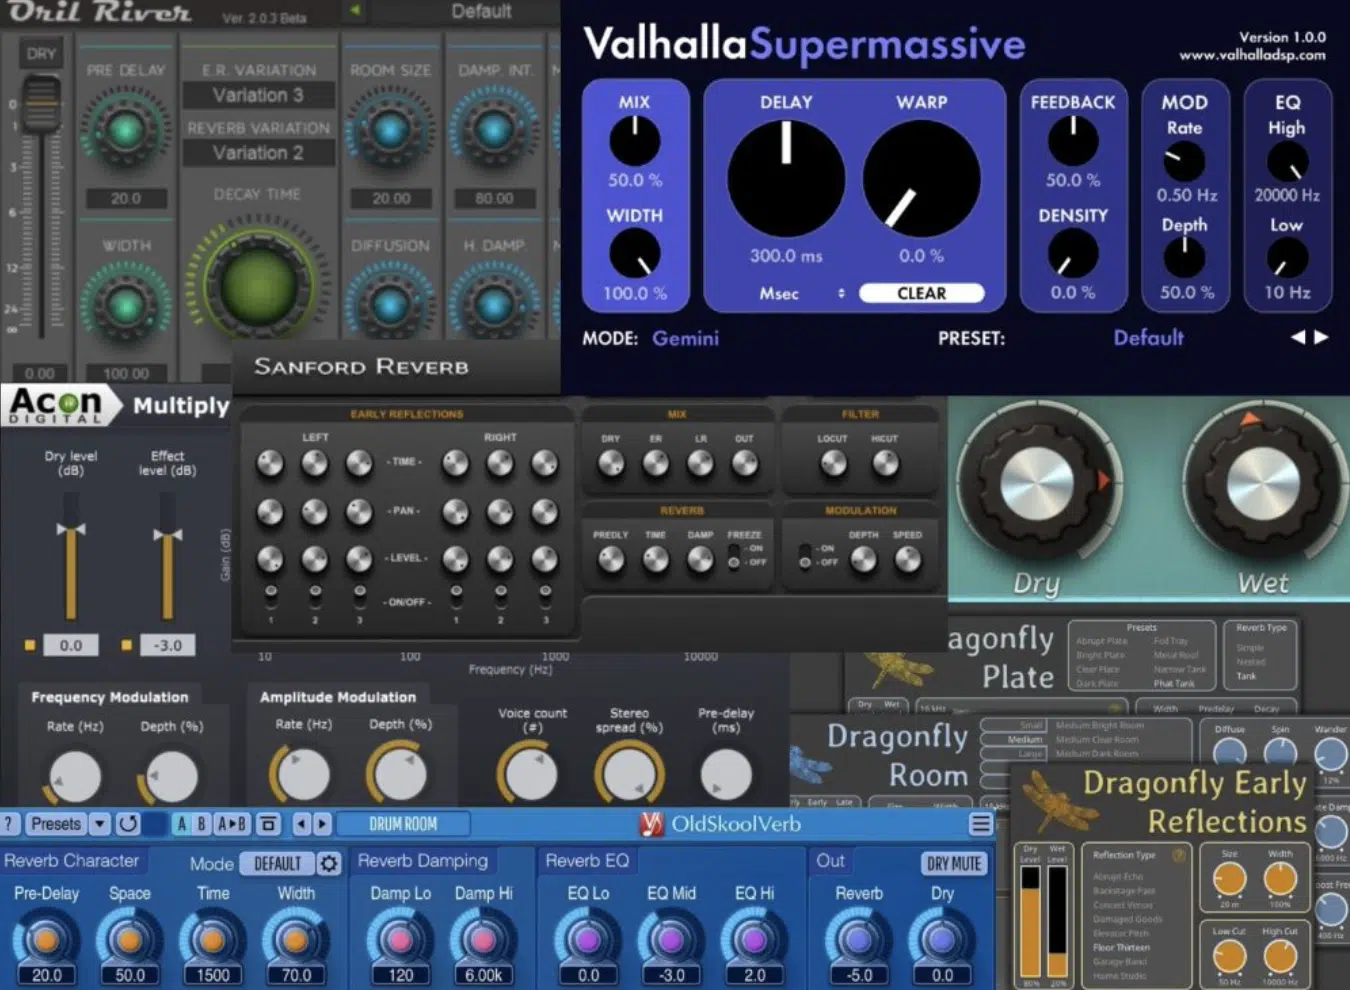
Reverb automation is when you program changes to your reverb settings over time 一 shaping how it moves, breathes, and evolves across your entire track.
Unlike volume automation, which only controls how loud a sound is, or mix automation, which adjusts the blend of multiple tracks or effects, reverb automation is different.
It lets you tweak parameters like decay time, dry/wet mix, pre-delay, and more to control how space and ambiance shift throughout a song.
For example, you might automate the dry/wet mix of a lead vocal to sit at 20% during the verse, then rise to 45% in the chorus for added space and emotion.
Or you could automate a reverb send so the final syllable of a phrase swells into a 3.2-second tail before pulling back instantly for the next line.
This will help give your vocal a sense of motion and breath without cluttering the mix.
You can also use reverb automation to enhance transitions, like building tension in a drop by slowly increasing the decay time from 1.2s to 4s over 8 bars.
Then, cutting it completely to make the next section hit even harder, which is sick.
And whether you’re automating the volume of a reverb return, the parameters inside the plugin, or the send level itself, each technique gives you different levels of precision for creating space and excitement.
PRO TIP: The key is knowing when to use each type… Volume automation gives you broad dynamic control, mix automation helps you balance multiple sources, and reverb automation lets you directly sculpt the feel of your spatial effects.
And side note, don’t worry if it sounds a little confusing or overwhelming right now because I’ll be breaking everything down in detail throughout the article.
This way, you’ll truly understand everything reverb automation is capable of and use it so your tracks are much more intriguing.
Reverb Parameters You Can Automate
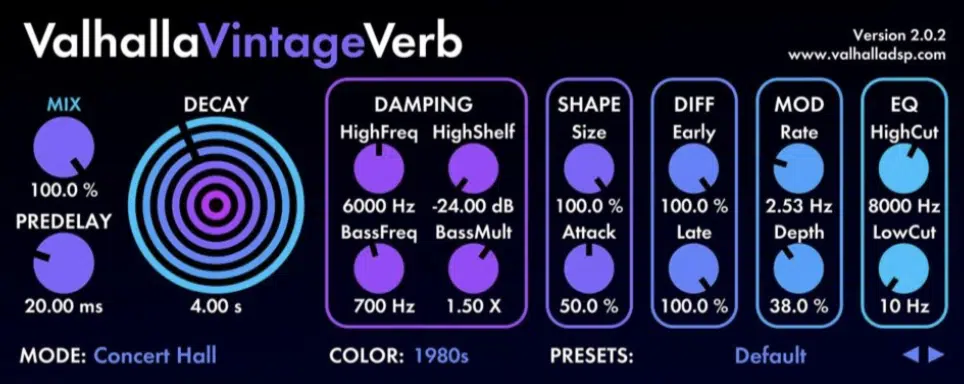
Now that you’ve seen how flexible reverb automation can be, let’s break down the most important parameters you’ll be working with. Each one acts differently when automated. And, when used strategically, they can completely change how a sound moves through your mix. Trust me, when you hear the difference, you’ll see why it’s so important.
Dry/Wet (Mix) Control to Automate Reverb
The dry/wet control tells your reverb how much of the original signal should be blended with the processed one.
This setting is usually labeled as “Mix” in most plugins like Valhalla VintageVerb, FabFilter Pro-R, or stock DAW reverbs, and it’s expressed as a percentage from 0% (completely dry) to 100% (completely wet).
It gives you direct control over how deep or present a sound feels.
A low mix setting (around 10–20%) gives you subtle depth without muddying the track, while anything above 50% usually puts the sound into the background or “behind” the other elements in the mix.
For example, on a lead vocal, you could start with a 20% wet setting during the first verse, then automate it up to 40% by the end of the chorus to create excitement and space.
This creates contrast between song sections and helps the vocal sit in a more intimate pocket early on, then bloom open once the chorus hits.
Especially when paired with a longer decay time (like jumping from 1.5s to 3.2s over the transition), I might add.
You can also add drama by automating a short boost (e.g., 45% wet) just on the final word of a vocal line, then fading it down instantly with a 2-bar fade for a ghostly throw.
If you’re using a reverb send, you can automate the send level instead (like pushing it from -12dB up to -6dB for a wider stereo feel during the post-chorus).
This type of mix automation lets you open or close the sonic environment in real-time, without having to switch reverb plugins mid-track.
You could even assign a macro knob to control multiple mix settings at once, which lets you tweak dry/wet, filter cutoff, and decay together for fluid, scene-like transitions.
It’s super useful when layering vocals or processing instruments like guitar solos or pads, where you want dynamic control over the reverb without masking key frequencies.
Keeping one layer at 15% wet and another at 35% wet with a low-pass at 9kHz to separate them spatially while still blending smoothly.
It brings some width without blurring their presence in the mix.
Dry/wet reverb automation is also a great way to keep your low-end clean, since you can back it off completely during kick or bass hits and fade it back in gradually.
NOTE: My last tip here would be automating the mix down to 5% right before an 808 drops, then ramping it back to 25% after the hit to let the sound breathe again without masking your low-end punch.
Decay Time & Size (Room, Hall, Plate)
Decay time is the amount of time it takes for your reverb to fade out, and it plays a huge role in how long a sound lingers in your mix.
If you’re using plugins like FabFilter Pro-R, Valhalla Room, or Logic’s ChromaVerb, decay time is usually adjustable from under 1 second up to 15+ seconds depending on the algorithm you’re using.
And it’s arguably the most emotionally impactful parameter you can automate, honestly.
You might automate a plate reverb’s decay from 1.2 seconds to 3.6 seconds across an 8-bar build-up, which can create drama before the final drop.
That subtle stretch builds tension and makes the track feel like it’s expanding in real time, especially if you combine it with a:
- Rising delay level
- Subtle volume lift
- Even a high-shelf filter sweeping upward
Changing the size parameter (from a small room to a wide hall) also changes the perceived space, which is great when automating reverb on guitar solos or backing vocals.
You could start with a 15% room size to give a vocal stack a bit of early reflection, then automate it up to 55% during the chorus to push it deeper into the background while your lead vocal takes center stage.
For example, a room size of 20% on a plate during the verse can keep things tight and up-close.
Pair that with a short decay time of 1.0s, and you’ve got the perfect intimate setting for clean vocals and minimal instruments.
And the best part is there will be no unnecessary mud bleeding into the low-end.
Expanding it to 60% during the chorus, on the other hand, makes the sound pop without needing extra layers all over the place.
You could also combine both decay and size automation to make transitional moments feel super immersive…
This could be like taking the decay from 2.0s to 4.2s and size from 30% to 75% over a riser, then snapping both back in a single beat to shift from an expansive build into a dry, punchy drop (the contrast makes that moment hit way harder).
Basically, when it comes to space, decay time and size are two of the most expressive reverb automation tools you have, period.
They control not just how long the reverb lasts, but how big the listener feels the room is 一 which is a game-changer for movement, emotion, and depth in your mix.
Pre‑delay & Early Reflections
Pre-delay controls how long the reverb waits before kicking in, and automating this parameter can help you control separation between the dry and wet signals.
In most plugins, pre-delay is measured in milliseconds, and values between 20ms and 80ms are common for vocals.
It gives you space without muddying the transients or early phrases.
For example, you could set the pre-delay to 60ms on a vocal track during the verse so it stays clear and upfront.
Then, automate it down to 20ms during the chorus to let it blend into the reverb tail.
That subtle shift makes the vocal feel more connected to the space, adding emotional weight and letting it float inside the mix rather than sitting on top of it.
And if you’re also bumping the wet mix or adjusting delay levels for added texture, it’s absolutely perfect.
Early reflections determine the first set of bounce-back sounds and are key when it comes to defining the perceived room shape and depth.
They give you the sense of physical space…
For example, in Logic’s Space Designer or Pro-R, you can change the room type and immediately hear how those early reflections change the:
- Tone
- Thickness
- Stereo width of the reverb
And automating early reflections can help you move between tight and wide spaces.
This could be like setting them at -18dB in the intro, then boosting them to -10dB during the hook for added width and presence.
That slight boost fills in the stereo field just enough to create excitement without sounding unnatural, which is great for doubled vocals, wide synths, or layered instruments where you want depth without masking.
When automating both parameters together, you’re able to shape the movement of the reverb itself (pulling it forward or pushing it back based on the vibe you want to create).
For instance, increasing pre-delay to 70ms while dropping early reflections to -20dB gives you a super dry, in-your-face vocal sound.
Flipping those values for the chorus, on the other hand, pulls the vocal into the background and widens the feel in a major way.
Pre-delay and early reflection reverb automation is great for balancing space around vocals, pads, or plucks without sacrificing clarity or introducing mud into your mix.
Just a few milliseconds or a few dB can completely change how your listener perceives the size and placement of your track’s most important elements.
EQ on the Reverb Return: HPF & LPF for Clarity
One of the best ways to keep your reverb clean is to EQ the reverb return using a high-pass filter (HPF) and low-pass filter (LPF).
You can start by setting a HPF at around 150 Hz to 200Hz to remove rumble or mud that competes with your kick or bassline in the low-end.
If you’re working with low-shelf-heavy instruments like pads or piano, push that HPF even higher (up to 250Hz) and A/B it with and without the reverb automation to hear how much tighter your mix feels instantly.
Then roll off the highs using a LPF between 7kHz and 10kHz to tame any harshness that might clash with your lead vocal or hi-hats.
I recommend that if your vocals already have a bright top end and automate the LPF to open up just for transitional moments so you maintain sparkle without letting the reverb get sizzly.
This could be like letting it reach 12kHz only during the last chorus.
I also suggest that you automate the filter cutoff during a build-up like gradually opening the LPF from 7kHz to 12kHz over 8 bars to create excitement and extra energy leading into the drop (which is key).
This kind of movement can sound amazing when layered with automation on the decay time or dry/wet mix.
The whole space will feel like it’s opening up around your track 一 adding tension and anticipation that people react well to.
It’ll help your mix stay focused while still letting you dial in lush, evolving spaces.
Even just automating a 2dB gain on the EQ post-reverb return can help push things forward subtly so your sound is more alive.
All without adding anything new to the arrangement, I might add.
Just keep in mind that when you’re automating reverb EQ like this, you’re not just balancing the sound, you’re shaping its motion and placement across the entire track.
It’s one of those mix decisions that separates an okay beat from a super polished one, as great space isn’t just heard, it’s felt.
Creative Applications of Reverb Automation (Most Effective Ones)
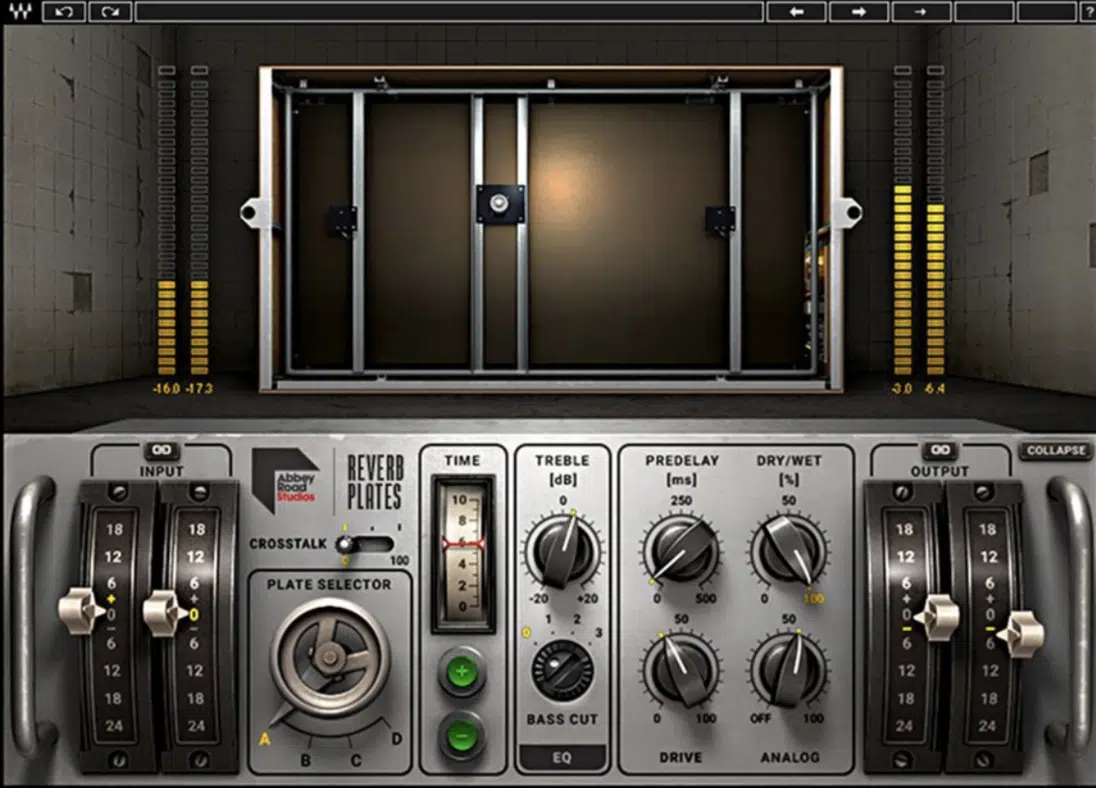
The creative applications of reverb automation is where things start to get super fun, because now you’re not just managing space, you’re designing unforgettable moments.
One of the best tricks is using a reverb throw…
This is when you automate the reverb send to crank up the wet signal for the last word in a vocal phrase, then fade it out gradually over 2 bars.
For this you’re going to use a 3-second decay time to create a ghostly trail.
Another cool move is building tension by automating both decay and dry/wet mix.
This could be like increasing decay from 1.5s to 4s and mix from 15% to 40% over a build-up 一 then cutting it off completely right before the drop for MAX impact.
You can also use this same technique as the pros do on verse-to-chorus transitions.
To do this, keep the reverb nearly dry in the verse (e.g., -10dB send level), then automate the return volume and size during the chorus to let the space explode.
On drums, try automating a splashy plate reverb only on the final snare of a fill, using a 50% wet setting with a 2.8s decay just for that one hit to make it feel massive.
With moves like these, you’re not just adding reverb, you’re using automation to create drama, shape movement, and add signature sauce to your song.
Techniques & Workflow Must-Knows: Breaking it Down
Before diving into the hands-on automation process, there are a few key concepts and techniques that’ll make your reverb automation workflow way smoother. So, for the next few sections let’s break down different automation strategies and I’ll show you exactly how to tweak these parameters like a pro inside your DAW.
-
Send vs. Insert Reverb Strategies
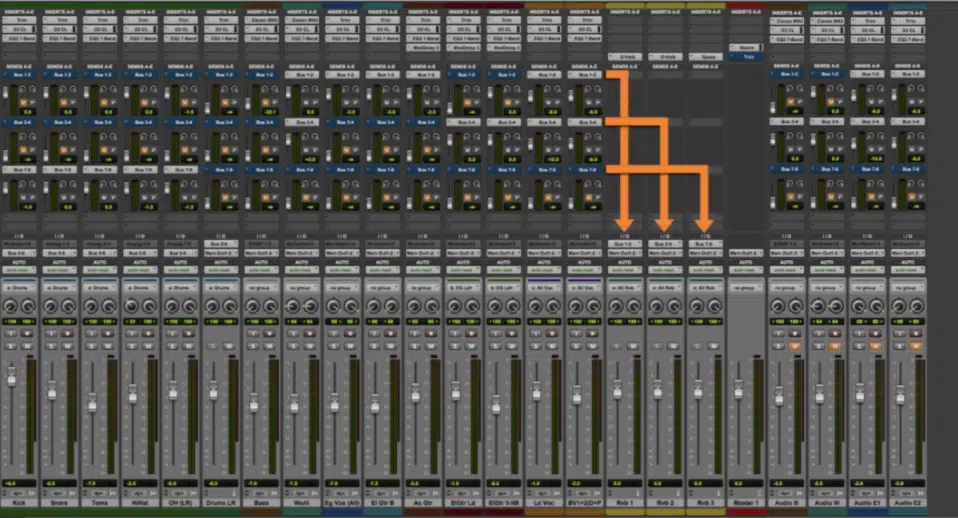
Using a reverb send lets you apply the same reverb across multiple sounds by routing them to a dedicated aux track.
This gives you consistent space and makes it easier to control everything from one fader.
For example, if you’re working on a lead vocal, backing vocal stack, and a couple of ambient pads, you could send them all to Bus 1 with a plate reverb plugin at 100% wet.
Then, automate the send levels individually based on where they sit in the mix.
This is great when you’re trying to automate reverb only during certain phrases, like pushing a vocal track’s reverb send up from -18dB to -9dB just for the final word of a line to get a throw effect.
Insert reverbs, on the other hand, work better when you need custom reverb automation per element.
This could be like when you’re giving a snare a special gated reverb that’s totally separate from the rest of the track.
PRO TIP: If you’re automating insert reverb, make sure the decay time and dry/wet mix are adjusted carefully to avoid phase issues.
Try starting at 30% wet with a 1.5s decay and tweak it up or down depending on how crowded the low-end is.
Remember, for most situations, a reverb send is the more flexible and CPU-friendly option, but both approaches have their place depending on your mix automation goals.
-
Drawing vs. Recording Automation
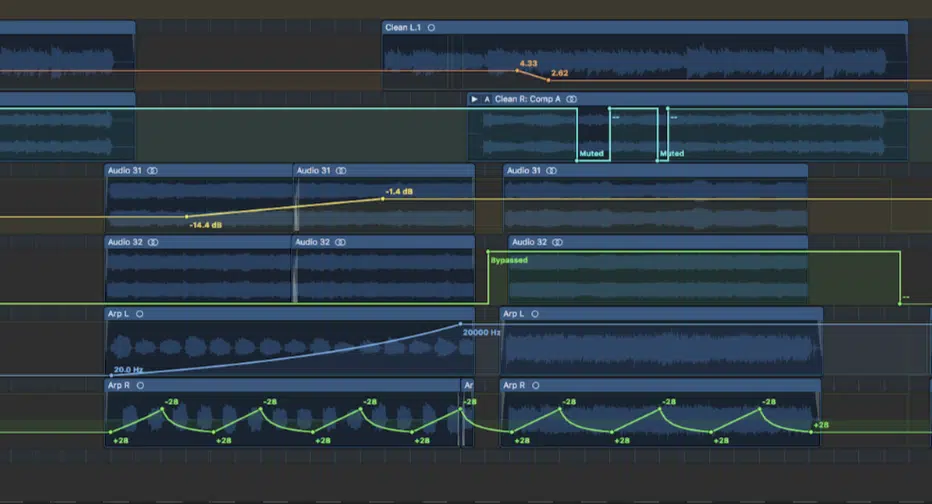
When it comes to automating reverb, you’ve got two main options:
- Drawing it in with your mouse.
- Recording the moves in real-time using a MIDI controller or your mouse in latch/touch mode.
Drawing automation gives you precision, like setting the reverb send to jump from -12dB to -6dB over 2 bars before a drop.
Or, automating a fade on the wet mix from 40% down to 10% for the final phrase of a chorus.
Recording automation, on the other hand, gives you that natural, organic feel.
This is especially true when you’re moving parameters like decay time or volume with your hand while listening in real time.
A lot of producers prefer to record the initial pass, then go into the automation lanes and fine-tune the curves or breakpoints afterward for more control.
For example, you could record a live automation sweep of the LPF cutoff on a reverb return going from 7kHz to 11kHz during a sick build-up.
Then, later edit the slope to match the energy curve of your riser.
But, whether you’re drawing or recording, the key is to make every move purposeful because random automation adds noise, but intentional reverb automation adds movement and emotion to your song like you’d want.
Quick Tip: DAW Automation Modes (Read, Write, Touch, Latch)
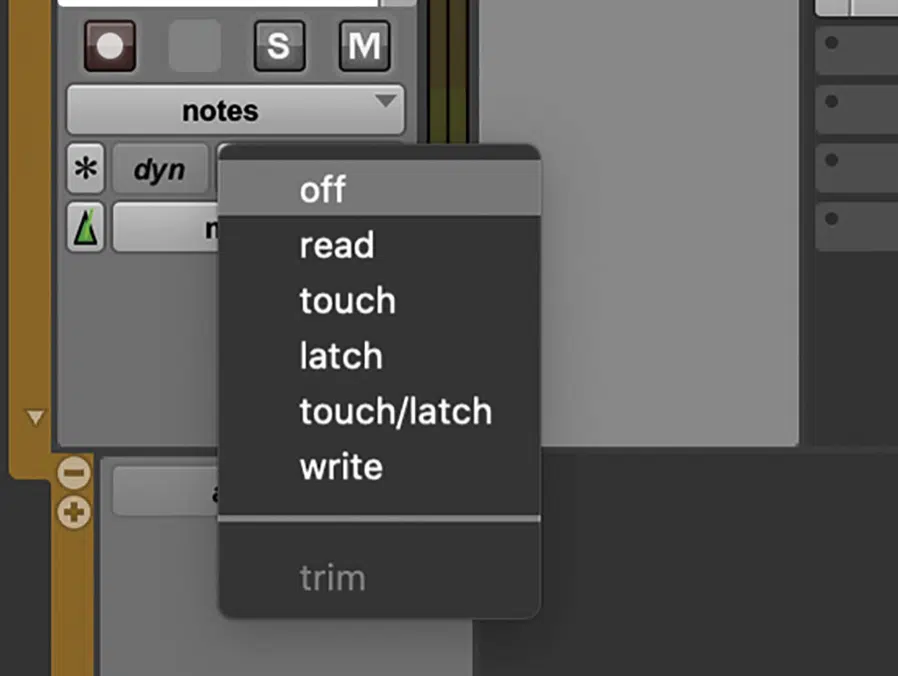
Your DAW’s automation modes change how it captures and plays back changes to reverb parameters.
Understanding them gives you way more control over your workflow.
In Write mode, every parameter you touch gets recorded in real-time, which can be risky.
For example, if you move the dry/wet control from 25% to 70% accidentally, it’ll lock that into your automation lanes the second you hit play.
Touch mode is much safer for reverb automation because it only writes data while you’re actively moving a knob or fader.
Then, returns to its previous state once you let go (perfect for quick volume or mix tweaks).
Latch works similarly but holds the value after you let go, which can be useful when automating long filter sweeps or delay levels across an entire section.
For playback, Read mode simply follows whatever you’ve drawn or recorded, so it’s the one you’ll use when polishing your final reverb automation edits across the track.
Advanced Mixing Techniques
And now, I thought I’d leave you with some of my favorite, advanced techniques that can help you take things to the next level.
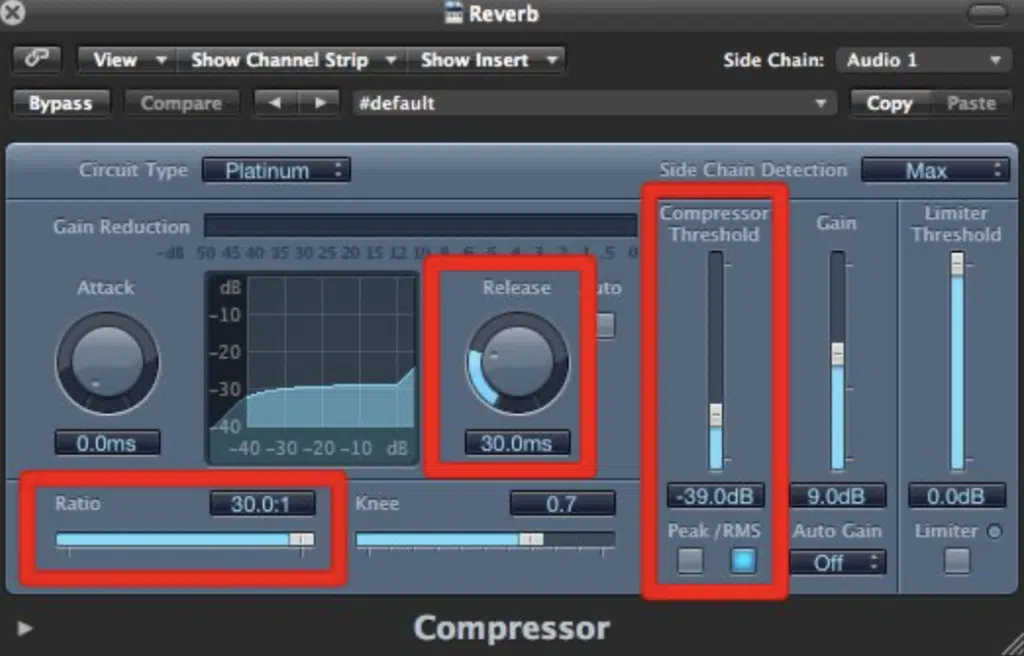
One underrated technique is ducking reverb using sidechain compression, where you trigger a compressor on the reverb return using the dry signal.
This is especially helpful when working with dense vocal arrangements or busy drum sections where space is tight 一 ducking the reverb gives you all the ambiance without smearing the transients or lead articulation.
So, when the lead vocal or snare hits, the reverb ducks out of the way and then swells back in between phrases, which keeps your mix clean and exciting.
It creates this rhythmic breathing effect that not only adds movement, but also helps the dynamics of your track feel more alive.
All without relying on volume automation or EQ dips alone.
Try setting a compressor on your reverb send bus with a 3:1 ratio, a fast attack (~10ms), and a medium release (~200ms), keyed to the dry vocal track.
You can use a plugin like FabFilter Pro-C 2, Ableton’s Glue Compressor, or even Logic’s stock compressor, dealer’s choice.
Just make sure you set the sidechain input to the dry channel, and not the same reverb signal, otherwise it won’t duck at all, and nobody has time for that.
This keeps the tail present without stepping on the clarity of the original line.
And if you want even more control, you can automate the compressor’s threshold throughout the song, tightening the ducking during the verse, then loosening it slightly in the chorus to create contrast.
Another smart move is layering multiple reverb returns with different decay times and EQ curves, for example:
- One short room at 0.9s with an HPF at 200Hz
- Another long hall at 3.5s with an LPF at 9kHz
By keeping one reverb snappy and dry while the other is lush and long, you can blend them in and out using fade automation to hype up different parts of your arrangement.
Just make sure you’re lending them using volume automation and fade curves for total control, because that’s your best bet for sure.
PRO TIP: Automate a slow 4-bar fade-in of the long hall reverb during the pre-chorus while simultaneously lowering the short room’s level.
This naturally shifts the perceived space as the energy builds.
You can also automate the bus fader volume on your reverb channel to create dynamic space (like having a master wet/dry control for the entire mix).
If you’re using sends and want to edit reverb presence on a section-by-section basis without touching your plugin parameters directly, it’s absolutely perfect.
My advice is that you try pulling it down -6dB during verses and fading it back in across 4 bars to build into a hook.
For instruments, especially pads or keys, another trick is automating delay levels and routing those into a second reverb.
For example, send your ping-pong delay to its own bus, then insert a shimmer-style reverb like Valhalla Supermassive.
Then, automate that delay send level from -18dB to -6dB during a build-up to wash your sound in tail-on-tail motion.
It’ll add a tail-on-tail ambiance that moves independently from the main source.
Another advanced idea is using a pitch-shifter after the reverb, then automating the blend…

Try using Soundtoys MicroShift to detune by -5 semitones and use mix automation to blend it in slowly behind a vocal phrase or melodic hit.
For instance, detuning the reverb return down 5 semitones during a drop can create eerie, wide textures that sit behind the main sound.
Pair that with a rising LPF sweep and a subtle stereo widening plugin like Ozone Imager for a truly spaced-out, cinematic feel that evolves while staying in key all day.
All of these techniques let you push reverb automation far beyond the basics to give your audio track that polished, pro-engineered feel that makes a huge difference.
Once you’re comfortable with these reverb automation moves, you’ll find yourself automating space just as much as levels or EQ, and that’s where real professional depth comes from.
Bonus: Common Pitfalls of Reverb Automation & How to Avoid Them

And last but not least, I’ll give you some extra tips about the most common pitfalls I’ve seen producers struggle with and how to successfully avoid them.
One of the biggest mistakes with reverb automation is doing too much.
Automating every parameter on every audio track might seem creative, but it often leads to a chaotic, disjointed mix that lacks cohesion.
Another major issue is low-pass filtering too late…
If you don’t cut out the low-end with a high-pass filter early in the signal chain (e.g., around 180Hz), your reverb can quickly muddy up your drums, bass, and overall sound quality.
Overlapping long decay times across different parts of the song is another big problem that I’ve seen a lot.
So just remember if your verse, chorus, and bridge all have 4-second reverb tails, there’s no contrast, and the song loses its sense of movement.
You also want to avoid automating multiple plugins at once on the same channel unless you’re confident in your routing.
Otherwise, you’ll introduce phase issues and make it harder to edit or tweak later.
To stay in control, my greatest advice would be to always use dedicated automation lanes, label them clearly, and remember that reverb automation should enhance the dynamics of the music 一 not fight against it.
Final Thoughts
And there you have it: absolutely everything you need to know about reverb automation to keep your tracks feeling alive, clean, and on point (regardless of genre/style).
By knowing all the best tips, tricks, and techniques I’ve laid out for you today, you’re honestly in a position to do some serious damage.
Plus your music production skills will level up fast, which is always a plus.
And once you start putting this stuff into action, it’ll completely change how you approach space, movement, and emotion in your mixes.
And as a bonus, if you want to actually see how this kind of reverb automation works in real-time, you’ve got to check out the legendary Free Project Files pack.
It’s like the cheat codes, because it’ll show you exactly how professionals deal with automation lanes for reverb sends, filters, faders, delay throws.
So if you’re trying to learn how reverb blends into vocals, opens up in a chorus, or fades out on a riser, it’s all right there in the session.
All ready for you to break down, tweak, and steal ideas from.
Bottom line, when it comes to reverb automation, just remember that it’s all about contrast and control 一 those are the keys.
So always look for ways to open up space, tighten things down, and give every section its own vibe and proper attention.
Also, don’t forget to automate not just for movement, but to shape energy across your whole track.
This way, your mixes will hit harder, feel more professional, and actually breathe (just like the records that inspired you to start producing in the first place).
Until next time…


Leave a Reply
You must belogged in to post a comment.