Advanced delay modulation is all about creating movement, texture, and space using delay that doesn’t just repeat 一 it evolves.
It can twist your track into new dimensions, build depth that doesn’t feel static, and give your sounds a super professional polish that most producers slack on.
Plus, when you get it locked down, you’ll be able to shape your FX so they dance, pulse, and shift like an absolute professional.
As producers, knowing all about advanced delay modulation can seriously change the game for you, which is why I’m breaking it all down, like:
- Key parameters/features ✓
- LFOs, delay time, depth & shape ✓
- How to modulate feedback & filters ✓
- Left and right channels (must-knows) ✓
- Epic stereo field movement ✓
- How to achieve legendary results ✓
- Sculpting space with feedback chains ✓
- Tap tempo with rhythmic textures ✓
- Delay modulation vs pitch effects ✓
- Subtle automation for crazy evolving textures ✓
- Different effects that you can come up with ✓
- Real-time tricks using MIDI controllers ✓
- Much more about advanced delay modulation ✓
By knowing all about advanced delay modulation, you’ll seriously take your sound design to new levels and unlock some epic delay effects.
Plus, your tracks will always sound wide, dynamic, and alive, and you’ll never have to worry about stale repeats or boring FX tails ever again.
Table of Contents
- What Is Advanced Delay Modulation?
- Key Parameters That Actually Matter
- Creating Motion with LFO-Based Delay Modulation
- Delay Time Modulation vs Feedback Modulation
- Avoiding Artifacts, Smear & Phase Problems
- Parallel & Serial Modulation Chains
- Stereo Width & Movement with Ping-Pong & Offset Modulation
- Adding Texture with Filter Modulation in Delays
- Rhythmic FX with Synced Multi-Tap Modulated Delays
- Delay Modulation for Epic Sound Design
- Sculpting Space with Feedback Path FX Chains
- Advanced Automation Techniques with Delay Mod
- Delay Modulation for Vocals, Drums & Synths
- Real-Time Performance Tricks with Delay Mod
- Bonus: When NOT to Use Delay Modulation
- Final Thoughts
What Is Advanced Delay Modulation?
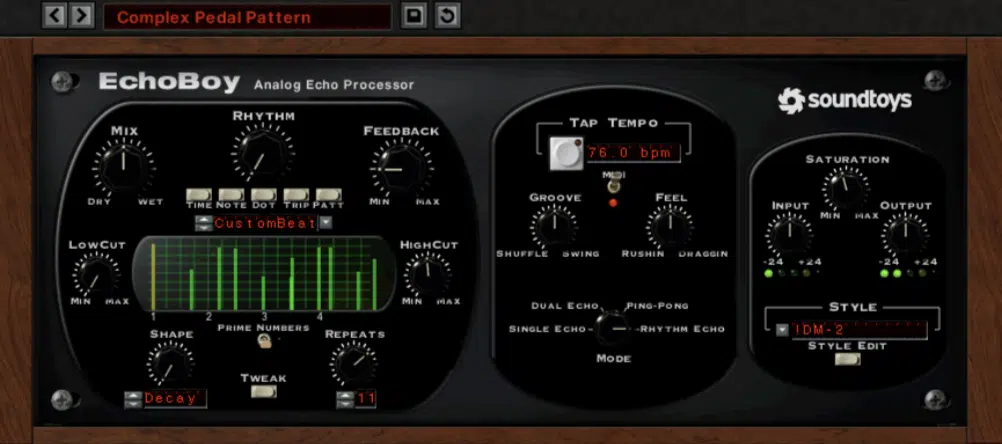
Advanced delay modulation is when you take a standard delay and apply motion to one or more of its core parameters to make it move, shift, or evolve in real time.
Usually using an LFO, automation, or another mod source.
That could mean modulating:
- Delay time
- Feedback
- Filter cutoff
- Even output tone
This way, your delay changes dynamically rather than repeating identically every time.
So instead of one boring delayed signal copy-pasting over and over, you get pitch movement, tonal shifts, stereo animation, and evolving character built straight into the repeats.
When done right, advanced delay modulation gives your FX real movement and depth 一 adding emotional energy to your track without overprocessing it to death.
Don’t worry if it sounds a little complicated right now, I’ll be breaking it all down (in detail) so you get a super solid understanding by the end.
Key Parameters That Actually Matter
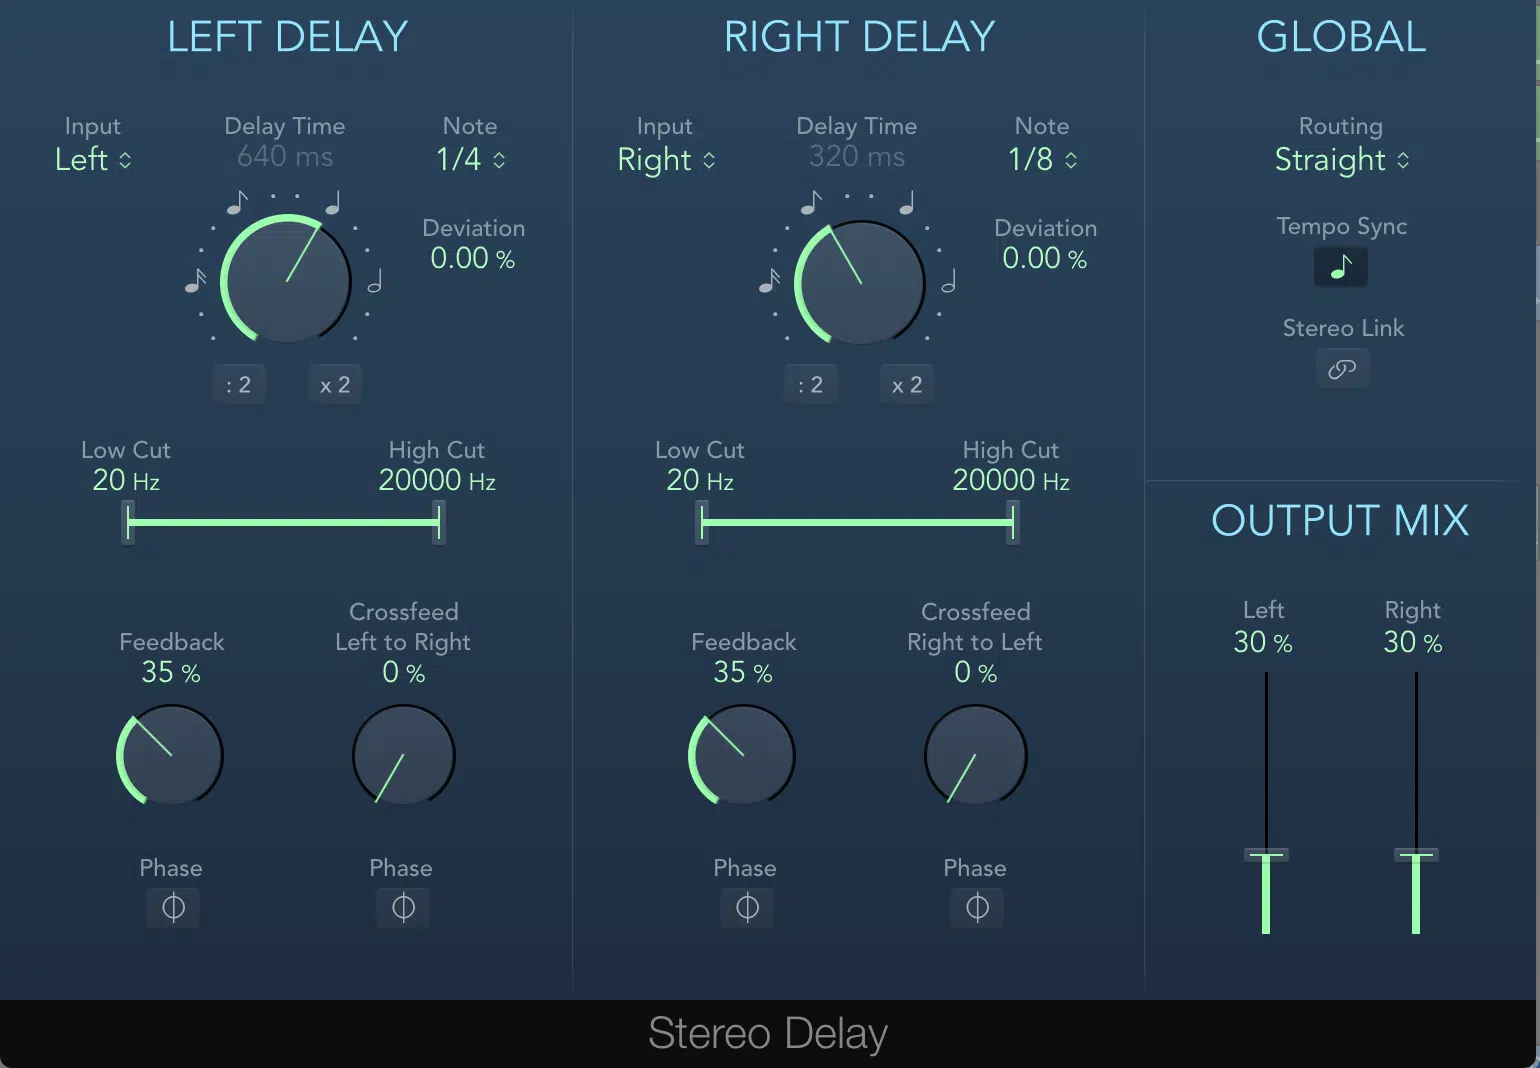
When you’re dialing in advanced delay modulation, the modulation rate is where it all starts, so you’ll definitely need to be familiar with what happens.
- Lower rates like 0.1 to 0.4Hz are great for ambient swelling movement
- Faster (audio) rates like 1.5 to 5Hz start entering chorus or flanger territory
The depth of that modulation is equally important (with parameters such as delay time) to keep it tight (5–10ms) for subtle thickening.
Or, push it to 20 ms+ for more dramatic warble or pitch-shifting effects.
Delay time itself determines the base spacing of your repeats.
Short times under 50ms create comb-filtering FX, 80–150 ms is classic slapback territory, and longer times (400–800ms) are for dreamy echoes or spacey sound design.
You’ll also want to think about whether you’re using sync mode (locked to BPM divisions like 1/4 or dotted 1/8) or free mode (like 425ms, completely unlinked from the grid) 一 depending on how tight you want your FX to feel.
Next up you got feedback, which controls how many times your signal repeats.
I suggest you start with 25–35% for short delays, or push it to 60–75% for big, evolving builds, just don’t let it hit 90%+ unless you’re going for full-on self-oscillation.
Finally, your LFO shape totally changes the flavor of the motion.
Sine waves are smooth and flowing, triangle waves give you a steady back-and-forth, and square waves hit with aggressive jumps that go from 0 to 100 super suddenly that sound great for rhythmic modulation or glitch FX in your modulated delay chain.
Creating Motion with LFO-Based Delay Modulation
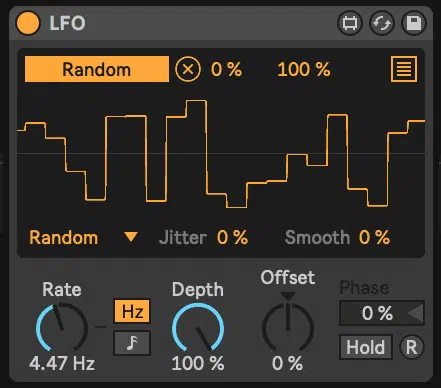
Once you understand the basics, advanced delay modulation really comes alive when you start modulating delay time with an LFO. This is where movement starts to feel organic, stereo widening becomes more dynamic, and your delays stop sounding like static repeats and start breathing with your track (super important). So, let’s dive in.
Applying Slow vs Fast LFOs to Delay Time
Modulating delay time with a slow LFO (around 0.1–0.3 Hz) gives you those long, pitch-bending shifts that feel like tape warble.
It’s perfect for pads, ambient leads, or vintage guitar FX.
So what you’ll want to do is set your delay to 550 milliseconds with a sine wave LFO modulating ±12ms and you’ll get a woozy, stretched-out vibe that gently bends each repeat without overpowering the mix.
Faster LFOs (1.5–4Hz) tighten things up, and are great for synths or vocal FX when you want movement that sits in rhythm.
Try setting your modulated delay to 300ms with a triangle LFO at 2Hz and a 5ms depth to add flutter and energy while still staying crazy clean.
PRO TIP: Layer a fast LFO on the delay time with a slow LFO on the feedback for two different motion layers, which is a super professional trick.
It’ll add subtle complexity that helps your signal feel alive in the stereo field.
Using Shape Types (Triangle, Sine, Square) for Different Movement
The LFO shape plays a huge role in how your modulation feels, and this is actually where a lot of producers miss the mark with advanced delay modulation.
And luckily for you guys, you won’t be one of them.
For something smooth and evolving, go with a sine wave 一 like an LFO modulating a delay time of 300ms with a depth of 10ms and a sine shape at 0.25Hz.
This will help you create subtle pitch bending that can make your modulated signal feel like it’s literally floating in freakin’ space.
A triangle shape gives you a slightly more classic back-and-forth movement, which works great on midrange synths or tap tempo-synced delays.
Wherever timing needs to feel consistent, this is the move.
But if you want something jarring and rhythmic, go for a square wave all day, modulating two delays (each at 200ms and 400ms) with square LFOs and offset left and right channels.
This will give you that jerky, stepped feel that punches through a dense stereo mix.
Automating LFO Parameters for Evolving Effects
If you want your advanced delay modulation to evolve throughout your track, try automating the LFO rate, depth, or even the wave shape in real time.
For example, start your modulated delay with a sine wave LFO at 0.2Hz and automate it to gradually rise to 0.7Hz by the chorus.
That sick ramp-up creates a build in motion that mirrors the musical energy.
Or automate the depth from 5ms to 18ms across 8 bars.
The modulation gets wider and more noticeable, which adds a sense of lift without needing any new instruments or layers.
You can also automate a swap in LFO shape, going from sine to triangle to square to create subtle shifts in movement.
It works great across different sections of your mix.
PRO TIP: If you’re using something like Ableton’s Auto Filter or Delay, map those mod targets to macros so you can draw in one shape and hit multiple parameters at once.
More motion with less automation lanes.
That type of control turns advanced delay modulation into an actual instrument you can play through arrangement and automation, and even control in real-time if mapped to a MIDI controller.
Delay Time Modulation vs Feedback Modulation
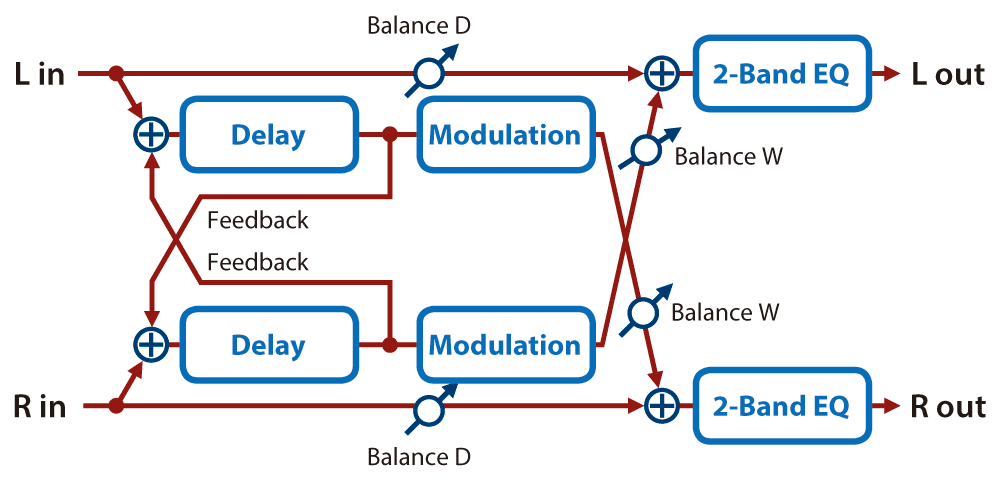
Here’s where advanced delay modulation really starts to branch off…
Modulating delay time gives you pitch-based movement, while modulating feedback adds intensity and unpredictability to the repeats.
If you’re using something like Soundtoys EchoBoy, modulating the delay time with a 0.3Hz sine LFO (±8ms depth) creates that signature warble you hear in dreamy leads or retro pads.
But if you automate the feedback instead (like sweeping it from 30% to 75% during the last bar of a buildup) you’ll hear the delayed signal start to stack and swell in a much more dramatic way.
It works insanely well for risers or pre-drop tension builders, especially when you throw a low-pass filter into the feedback loop.
Keep in mind, though, that modulating feedback comes with a risk and if it gets too high (85%+), it’ll start to self-oscillate.
That can sound cool in small doses but can quickly overcrowd your track if you don’t have control over it, and nobody has time for that, am I right?
Bottom line, you’re going to use delay time modulation when you want pitchy, warbly, vibey textures, and modulate feedback when you’re trying to build energy, saturation, or space.
Both are core tools in the advanced delay modulation arsenal, don’t get me wrong, but the vibe they give you is totally different, so always keep that in mind.
Avoiding Artifacts, Smear & Phase Problems
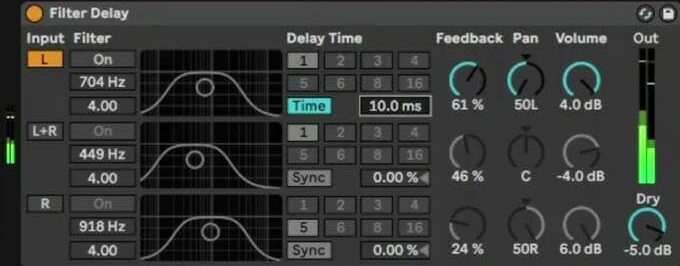
When you push advanced delay modulation too far (especially on stereo material) it’s easy to run into weird phase issues or tonal smearing.
For example, modulating delay time separately on the left and right channels (with unlinked LFOs or two delays) might widen the stereo field…
Bif you go past a 20ms swing, it’ll start phasing out your mids and making your mix feel hollow and super unprofessional.
To keep things tight and right, try keeping one modulated delay fixed at 7ms and the other swinging between 5–9ms with a triangle wave.
That’s usually subtle enough to keep the tone clean while still creating movement/width.
Also, make sure to use a high-pass or low-pass filter in the feedback path, or even an EQ if needed to carve out excess mud or top-end fizz.
This keeps the signal focused without compromising that modulated texture.
And always A/B your wet vs dry signal to make sure you’re not washing out important frequencies just for the sake of FX.
Parallel & Serial Modulation Chains
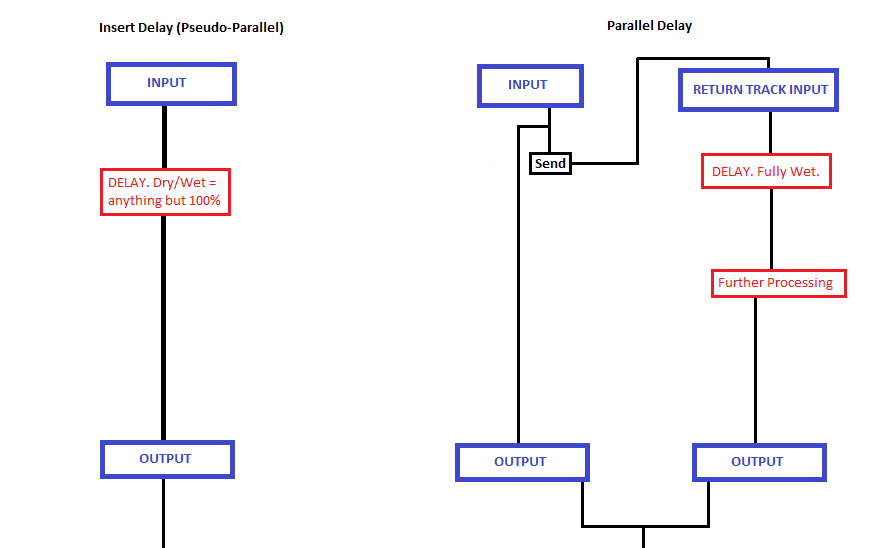
When you’re getting into advanced delay modulation, one of the best tricks I can help you iron out is deciding whether to split your delays into parallel chains or run them in series for maximum impact.
If you’re after clarity, running two modulated delays in parallel is the way to go.
For example, one delay set to 220ms with a 0.4Hz sine LFO on the delay time, and the other at 500ms with triangle-shaped feedback modulation.
Just make sure to keep the first delay in the left channel and the second in the right channel for extra stereo spread without muddying the dry signal.
On the flip side, stacking your modulation chains in series gives you wild, evolving results…
You can push the feedback on the first unit to around 60% and run it into a second delay with a low-pass filter and synced LFO for sweeping modulation effects that spiral into ambient territory.
This is a killer setup for long pad transitions, risers, or anything where you need complex evolving textures to be at the forefront.
PRO TIP: Always set different LFO shapes and rates across your chain (like pairing a 0.25Hz triangle with a 1Hz square) to keep the movement unpredictable but musical.
That’s how you get true depth in your advanced delay modulation setup.
Stereo Width & Movement with Ping-Pong & Offset Modulation
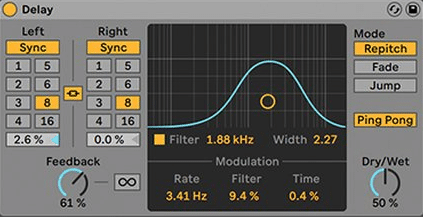
One of the easiest ways to add stereo width and space to your mix is by using advanced delay modulation with ping-pong delays or offset LFOs.
Take a ping-pong delay and modulate the delay time separately on the left and right channels:
- Set one LFO to a sine wave at 0.3Hz with 12ms depth
- Set the other to a triangle wave at 0.4Hz with 8ms depth
That offset creates constant stereo motion that sounds great on vocals, synths, or even hats (remember, production/sound design is all about playing around, so get crazy).
If your delay plugin lets you unlink the stereo modulation, like FabFilter Timeless 3 or Valhalla Delay, you can modulate feedback on one side and filter cutoff on the other.
This asymmetry widens the stereo field even more and keeps your modulated signal from feeling static.
PRO TIP: When mixing this in, start with 100% wet and blend it back to around 25–35% to maintain punch while still getting that motion you’re going for.
I mean, with advanced delay modulation, it’s all about balance between movement and control, so keep that in the bank.
Adding Texture with Filter Modulation in Delays
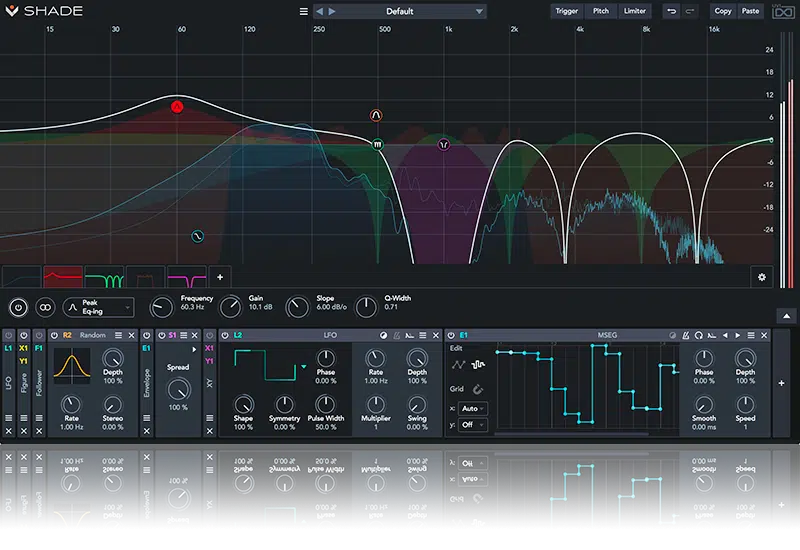
If your delays are sounding too clean or flat, this is where advanced delay modulation gets really useful, especially when you bring filtering into the mix, of course.
Start with a low-pass filter in the delay feedback path and automate its cutoff between 3.5kHz and 9kHz using a 0.2Hz LFO.
This smooths out the top-end and gives your repeats a warm, vintage tone.
Then, add a touch of distortion after the filter and you’ve instantly got a dirty, analog-sounding delay that sounds great on gritty synths or guitar leads.
Some plugins like EchoBoy and Arturia Delay ETERNITY even let you modulate both filter cutoff and resonance with independent LFOs or envelopes.
And what you’re going to do is use this to add tone-shifting movement to each repeat, which is perfect for ambient or lo-fi production.
You can also throw in a high-pass filter around 200Hz if your delayed signal is adding too much low-end rumble.
The goal with advanced delay modulation here isn’t just to clean up the sound 一 it’s to shape the actual tone of your delays in motion, so they don’t just repeat but evolve.
Rhythmic FX with Synced Multi-Tap Modulated Delays
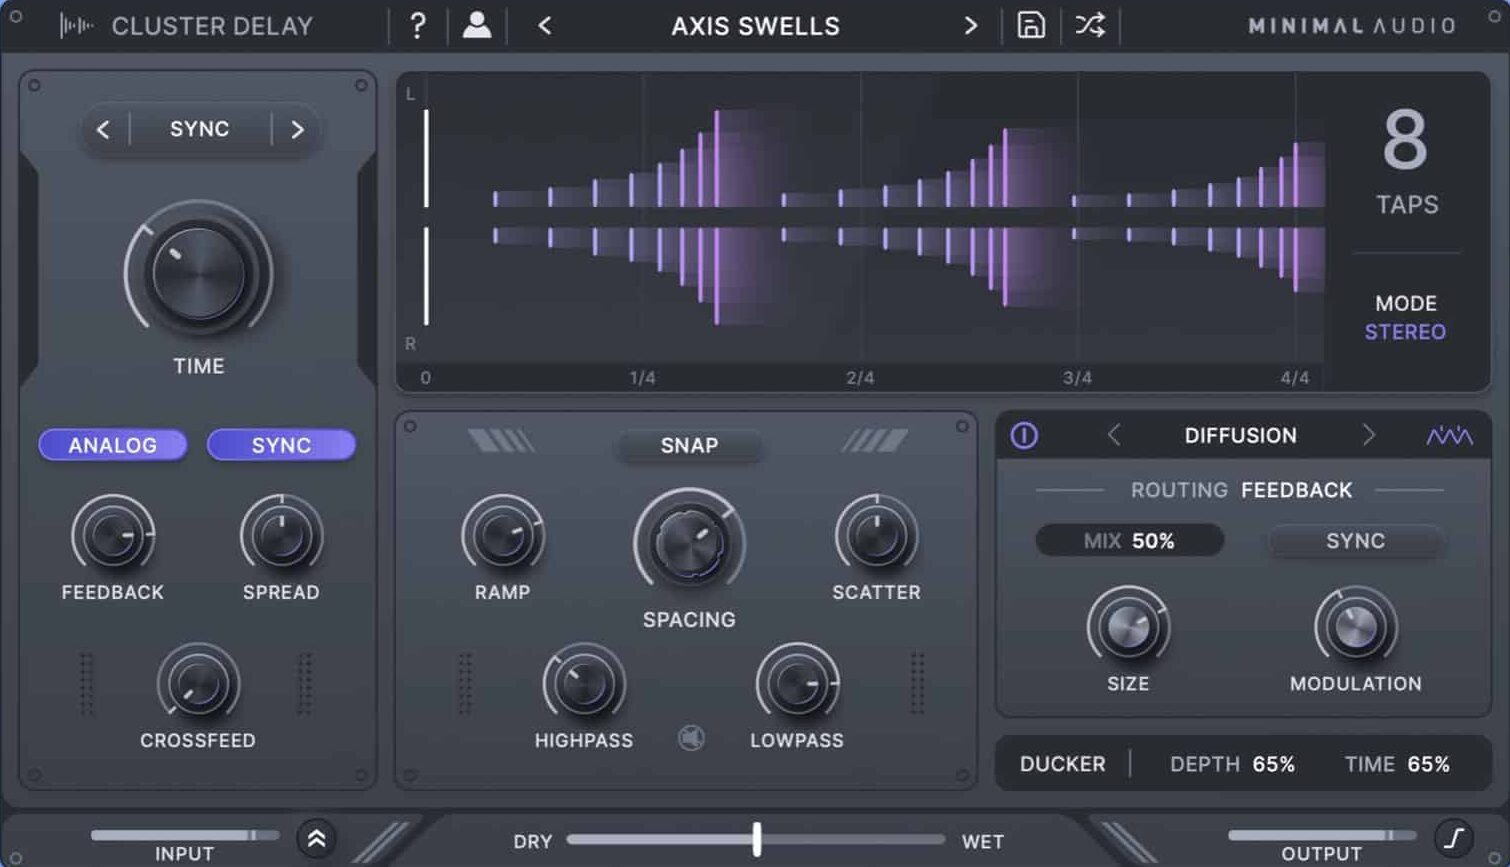
Now that you’ve locked down texture and stereo movement, it’s time to see how advanced delay modulation plays into rhythmic design. So, for these next set of techniques, I’ll show you how multi-tap delays and tempo-syncing can give your delays structure, bounce, and groove without losing that evolving character.
Layering Tap Points to Build Syncopated Patterns
When you’re building out syncopated rhythms with advanced delay modulation, using a multi-tap delay is where things get fun fast (in my opinion).
Try setting three taps at 1/4, 3/8, and 5/16 with a bit of feedback (around 35%) and then modulate just the middle tap’s delay time using a 0.5Hz sine wave for swing.
This creates a natural groove that moves without sounding robotic, especially when the taps are panned slightly apart…
Something like -20%, 0%, and +20% on the stereo field gives a clean bounce across the left and right channels works great.
PRO TIP: With Soundtoys PrimalTap or Waves SuperTap, you can automate individual tap levels for even more dynamic control 一 and layering just one or two modulated signals can completely transform a stale loop.
Modulating Tap Timing for Groove
To inject more bounce into your drums or instruments, modulating tap timing is a killer trick with advanced delay modulation.
Let’s say you’ve got a tap set at 1/8 note…
Try modulating it ±20ms using a triangle-shaped LFO at 0.75Hz for that push-pull swing that adds human groove.
This works especially well on claps, snares, or vocal chops where you want the delayed signal to almost “ghost” behind the dry signal without smearing the transient.
Keep feedback low (10–15%) so the groove stays tight, and if your delay plugin allows, modulate the depth over time for evolving intensity.
Use this technique sparingly to let the movement breathe — when done right, it becomes one of the most subtle but powerful parts of your advanced delay modulation toolbox.
Locking Delay Rhythm to Your Track’s Tempo Grid
Sometimes you want your advanced delay modulation to feel locked in and deliberate, and that’s where syncing to the tempo grid becomes key.
Set your modulated delay to a dotted 1/8 or triplet 1/16, and use a synced LFO (0.25Hz or 1/2-note sync) to move the delay time or filter cutoff without losing rhythmic alignment.
For extra tightness, use a plugin like FabFilter Timeless 3 and lock the modulation to the beat division 一 then push the modulation depth just enough to hear subtle movement.
But, not enough to shift the groove, which is perfect.
Pair this with a tap tempo button if you’re working outside a strict grid because it keeps things human but locked, especially during live resampling or performance.
This level of timing control is what makes advanced delay modulation so powerful across different FX styles.
Delay Modulation for Epic Sound Design
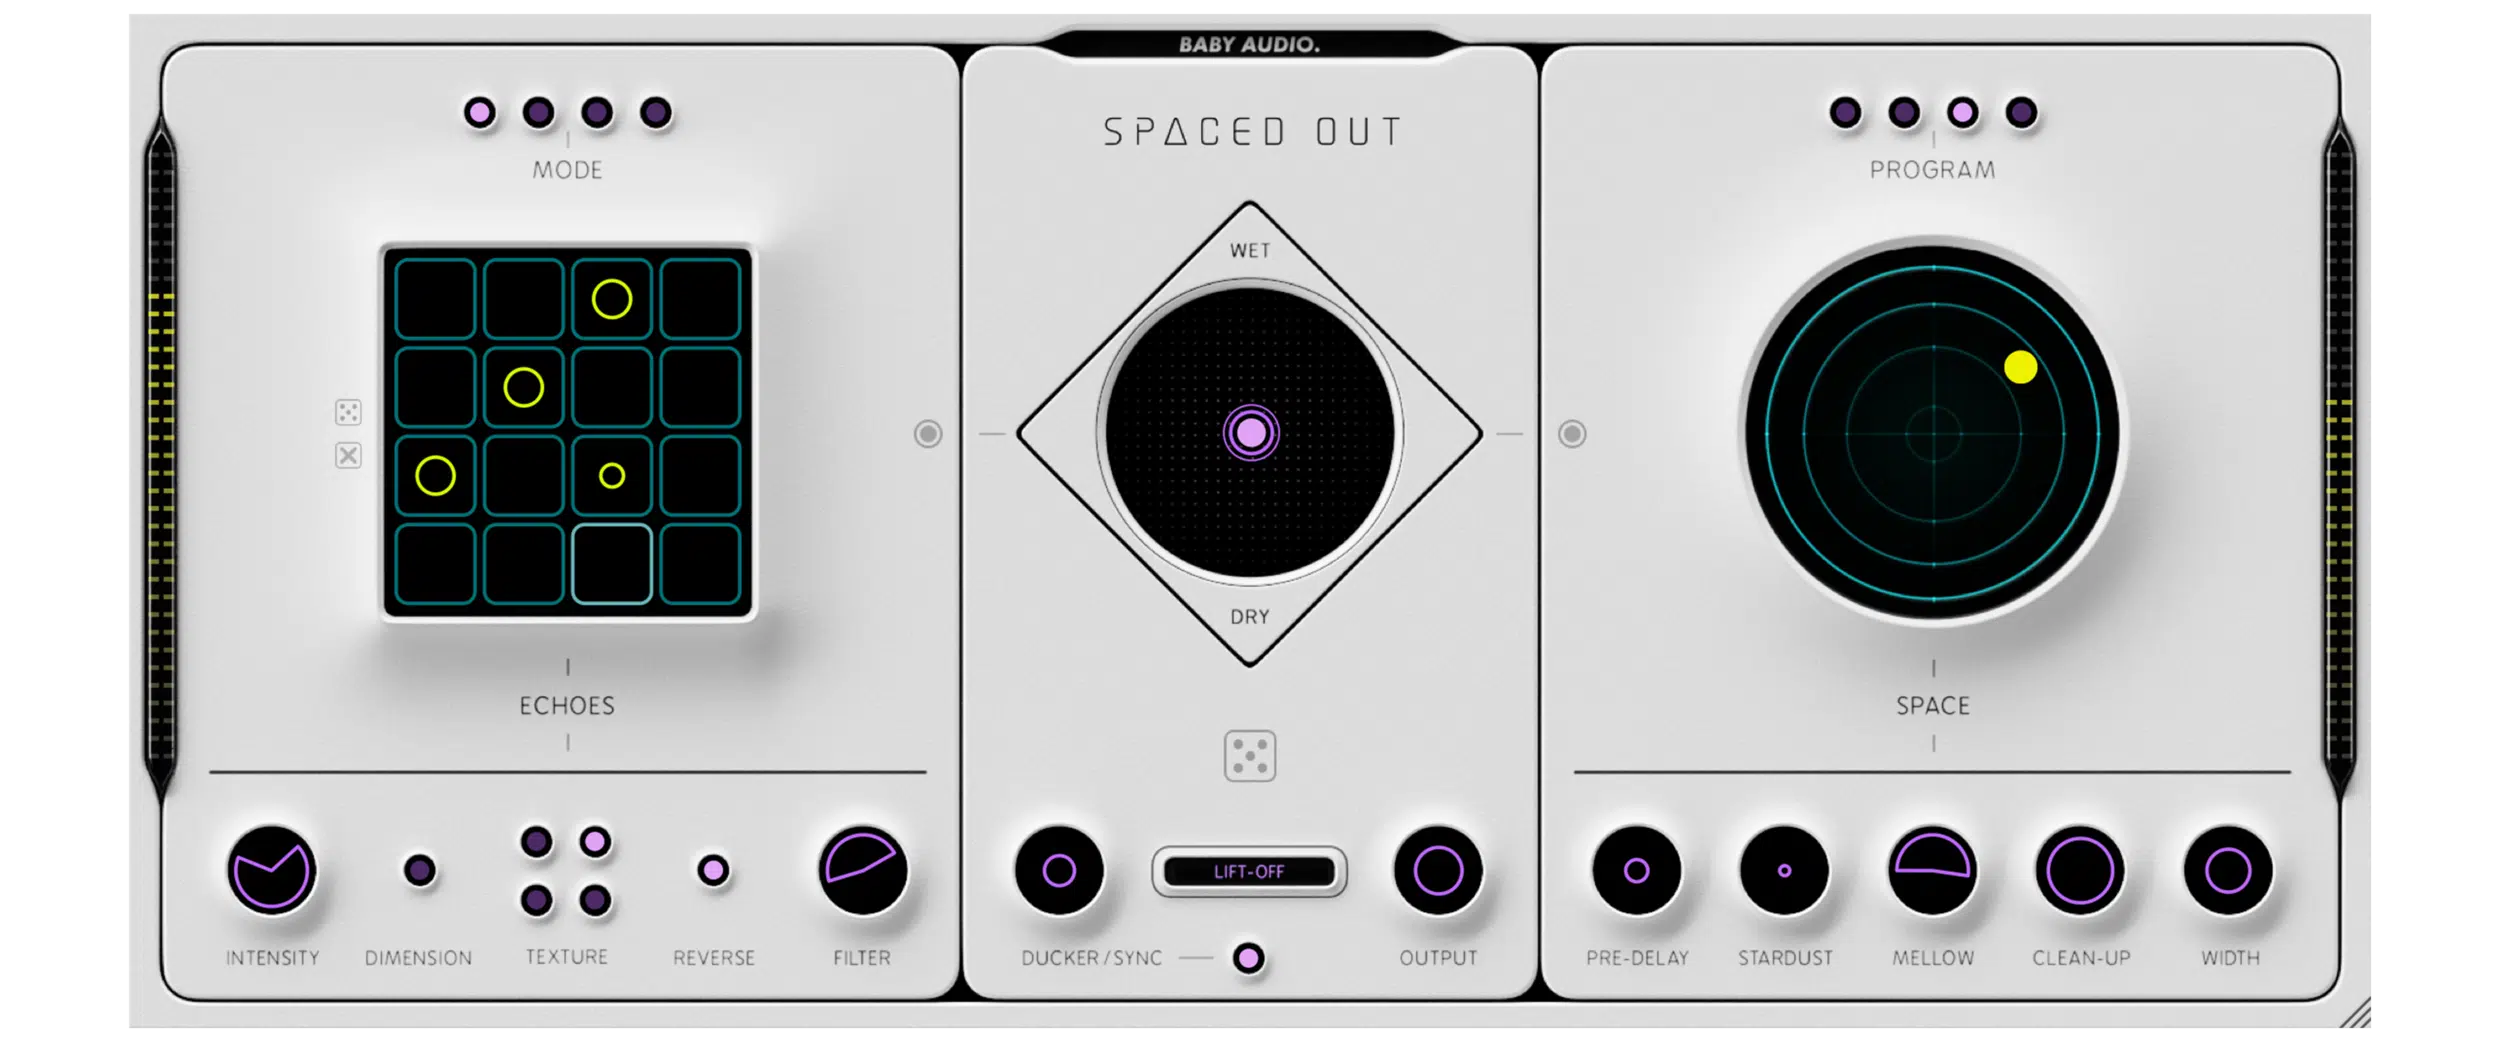
When it comes to sound design, advanced delay modulation is one of those secret weapons that gives static sounds motion, vibe, and serious emotion, of course.
So, take a static pad with a long reverb tail…
Now, add a delay set at 600ms with 45% feedback, a sine LFO at 0.2Hz modulating the delay time, and suddenly you’ve got a wash of evolving warmth that keeps moving.
Even with synth leads or bass tails, modulating a low-pass filter in the feedback loop with a 0.1Hz LFO can smooth the top-end while making each repeat feel different, like it’s breathing.
This kind of modulation delay creates subtle movement that pulls the listener in without needing to automate dozens of parameters by hand.
And if you’re like me and want to get weirder with the features, you can:
- Stack two delays in series
- Set the first to 400ms
- Set the second to 220ms
Then, modulate both with slightly offset triangle LFOs (like 0.4Hz and 0.55Hz) and you’ll get bizarre phase-smeared echoes that are perfect for transitions or FX risers.
This is where advanced delay modulation stops being strictly a mixing tool and becomes a pure sound design engine, which is my area of expertise.
Sculpting Space with Feedback Path FX Chains
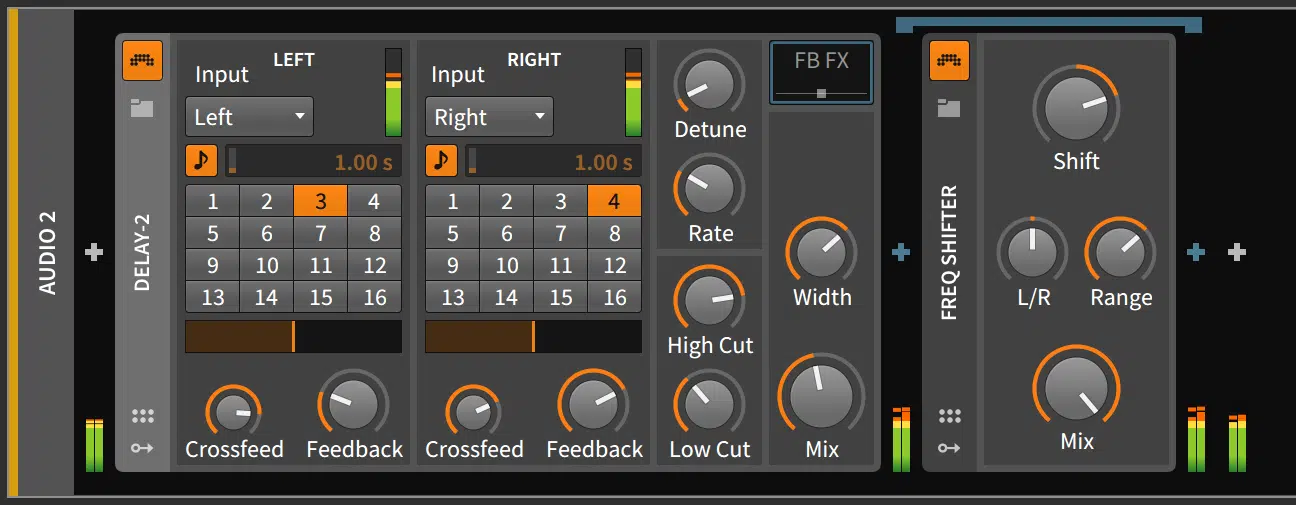
If you’re looking to get truly creative with advanced delay modulation, one of the most underrated tricks is processing the feedback path with extra FX.
For example, take a modulated delay at 450ms, push the feedback to around 60%, and drop a low-pass filter and a mild distortion unit directly inside the feedback loop.
The resulting tone shifts and saturates more with each repeat.
If you want to go even deeper, simply insert a reverb unit after the delay but before the feedback path reenters (something like Valhalla VintageVerb with a short 0.7s decay and pre-delay set to 20ms works great in my experience).
Every delayed echo picks up more ambience with each pass 一 creating super lush, evolving textures perfect for ambient pads or melodic fills.
You can even modulate the filter’s cutoff and reverb mix with two LFOs running at different speeds, one at 0.2Hz and one at 0.5Hz, to push the tone in unexpected directions while keeping it on point.
This is one of those advanced delay modulation moves that not only gives you movement, but also lets you completely transform the space around your signal.
PRO TIP: For full control of your feedback chain, check out Bitwig’s effects.
It lets you insert as many possible effects as you’d like directly between the delay and feedback path (I recommend it big time).
Advanced Automation Techniques with Delay Mod
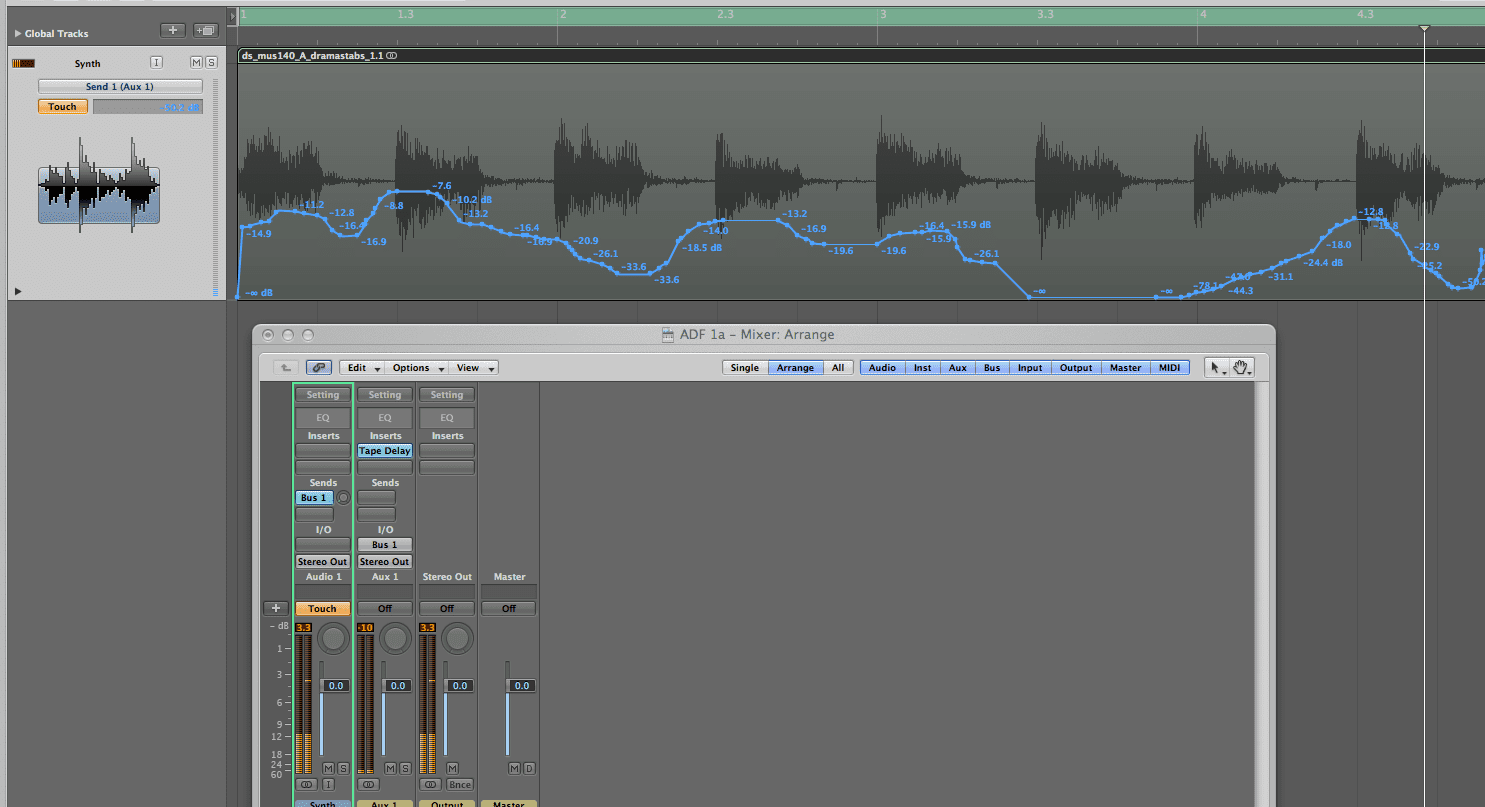
Sometimes LFOs alone unfortunately aren’t enough…
That’s where automating modulation settings manually inside your DAW brings a whole new level of advanced delay modulation control.
For example, if you’ve got a delay time modulated at 8ms depth with a 0.3Hz triangle wave, try automating the modulation depth itself to:
- Increase during your verse
- Peak in the chorus
- Fade out after the drop
This gives your delayed signal a sense of evolution and contrast between sections.
It’s super effective when you’re working with vocals or synth leads that need to feel dynamic without overprocessing.
You can also automate the LFO rate itself, like ramping from 0.25Hz to 1Hz over 8 bars to build some extra intensity and intrigue.
A go-to move I use all the time is pairing automation of both delay time and filter cutoff for each and every section.
If you’re going to do this, just make sure to keep the filtering tighter in verses (maybe 3.5kHz with low resonance) and more open in the hook (around 8kHz).
This way, you’ll feel the space and energy shift in a way more controlled way.
PRO TIP: Use visual envelopes inside automation lanes instead of linear ramps 一 curve them for more natural feel and movement.
When you start mixing automated modulation with LFO-based mod, that’s when advanced delay modulation stops being an effect and becomes a compositional tool.
Delay Modulation for Vocals, Drums & Synths
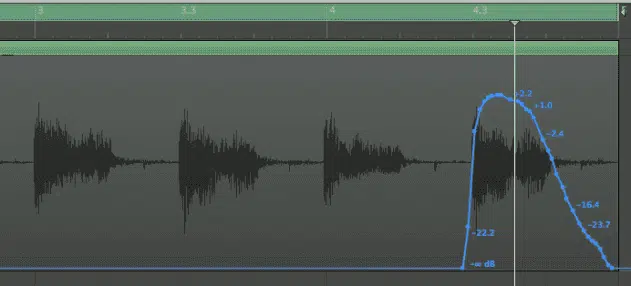
Now let’s look at how advanced delay modulation hits different depending on the instrument. Whether you’re working with vocals, drums, or synths, the way you dial in your modulation makes all the difference in the final feel and impact.
Adding Stereo Slapback to Vocals with Subtle Modulation
If you want to add some stereo slapback to vocals with subtle modulation, you’re going to start with a simple delay around 90ms, just enough to give you that slapback feel, and modulate it with a 0.3Hz sine LFO at around 5ms depth.
That gives the vocal a slight wobble that you can really feel in the stereo field, especially when you pan your left and right channels slightly off-center (like -15% and +15%).
Drop the feedback to 10% or lower and keep the wet/dry around 20–25% 一 that way it blends in without stepping over the dry signal.
And if your plugin supports it, throw a gentle low-pass filter at 7kHz into the modulated delay to keep sibilance from building up and creating harshness.
This is the kind of advanced delay modulation trick that sounds very natural, but adds width and character in a way that static slapbacks just can’t match.
Modulating Delay on Snare/Clap for MAX Groove & Bounce
If your snares or claps are feeling too rigid, advanced delay modulation can loosen things up while still keeping the rhythm tight.
Start by setting a delay to around 95–110ms (anything beyond 120 starts feeling late), and then apply a square-shaped LFO at 1Hz to modulate the delay time ±10ms.
Drop the feedback to 0% so you’re only getting one bounce, then layer that delayed signal behind the transient to create a ghost-like push without muddying the input.
This works beautifully with rimshots or layered snares, especially if you dial in a subtle distortion right after the modulated delay to enhance tone and control sharp transients.
Creating Dreamy Leads with Modulated Delay Tails
For dreamy synths or vocal leads that need to trail off in a smooth, spacey way, this is where advanced delay modulation really shines.
Try a delay set at 600ms, 50% feedback, and modulate a low-pass filter in the feedback path using a 0.2Hz sine LFO 一 cutoff starting at 8kHz, sweeping down to 4kHz.
Add a second delay line in series at 320 ms with subtle pitch modulation (±5 cents) and automate the depth to increase slightly during long notes to keep things feeling alive.
Throw in a bit of tape saturation on the output of both chains, and you’ll get warm, swirling echoes that add tons of space and emotion.
This combo works incredibly well when sound designing lead tones for ambient, R&B, or melodic trap, and trust me it makes a huge difference in the final track.
Real-Time Performance Tricks with Delay Mod
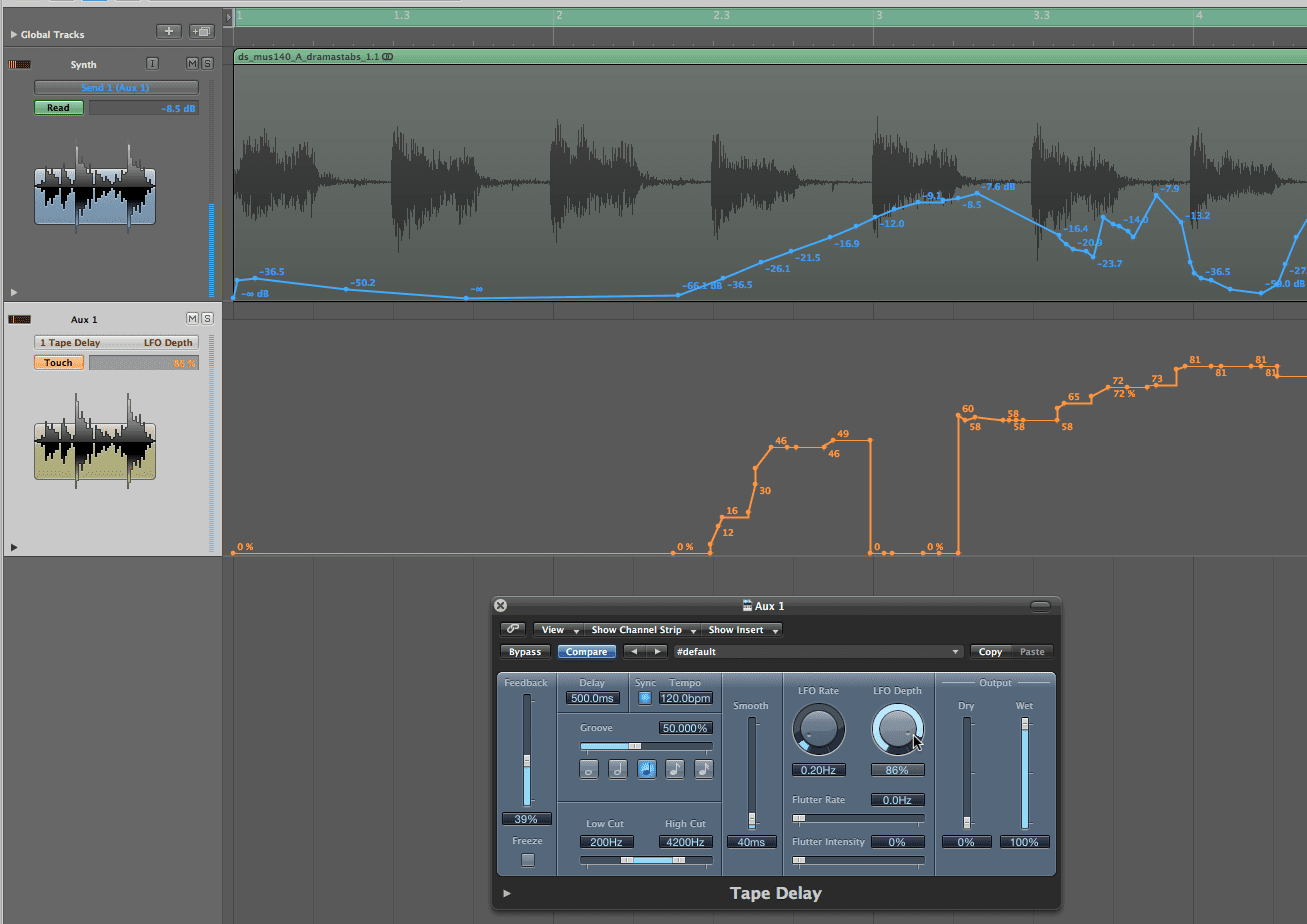
If you’re performing live or just like to play with FX in the moment, building real-time advanced delay modulation control into your setup can skyrocket your workflow.
Assign your modulation rate, feedback, or filter cutoff to a macro knob in your DAW, or map it to a MIDI controller like the Akai MIDIMIX or Novation Launch Control XL 3.
For example, one killer combo is mapping two LFOs, one to delay time (±15ms swing) and another to the low-pass filter, and controlling their depths separately via knobs or faders.
You could even set one fader to blend between two delays with different character…
This could be like one at 300ms with light tape distortion, and another at 600ms with modulated feedback and a wider stereo spread.
Having another knob dedicated to sync on/off lets you match the modulated delay to tempo in the verse 一 then flip into free-run mode during a breakdown for more hybrid movement.
You can also assign a toggle for synced vs free mode, which lets you switch between grid-locked grooves and more experimental, floating movements mid-performance.
Try building a rack where one macro controls LFO rate, feedback, and filtering at once.
Then, sweep it during a vocal throw or sound effect riser to completely transform the energy (which is super intriguing, so definitely give it a go).
This kind of hands-on setup is great for push-and-pull moments during breakdowns or transitions, especially when using FX throws or manipulating audio units in real time.
Another trick: assign velocity or aftertouch from your MIDI controller to modulation depth. So, the harder you play or press, the more intense the delay movement becomes.
It’s also a great way to test new presets by adjusting parameters live and instantly hearing how the modulated signal responds.
All-in-all, if you’re producing and performing, this is one of the most creative uses of advanced delay modulation that blurs the line between FX and instrument, period.
Pro Tip: Modulation Order Matters for All Time-Based Effects
The order in which you process modulation in your delay chain has a huge impact on how your sound develops.
So getting it right is a big part of mastering advanced delay modulation, of course.
Keep in mind that if you apply modulation before the delay, you’re shaping the source…
For example, using a chorus effect (set to 8ms ± modulation, triangle wave) that adds width before it even hits the delay unit.
On the other hand, modulating inside the feedback loop lets you build tone-shifting movement with every repeat.
It’s absolutely perfect for FX chains with reverb or filtering that evolve over time.
If you’re running modulation after the delay, it mostly affects the output tone, like running a phaser or reverse effect post-delay to shape each echo.
Each line in your FX chain changes the feel, so like I said before, you need to always A/B different configurations when stacking others effects with delay.
Bonus: When NOT to Use Delay Modulation
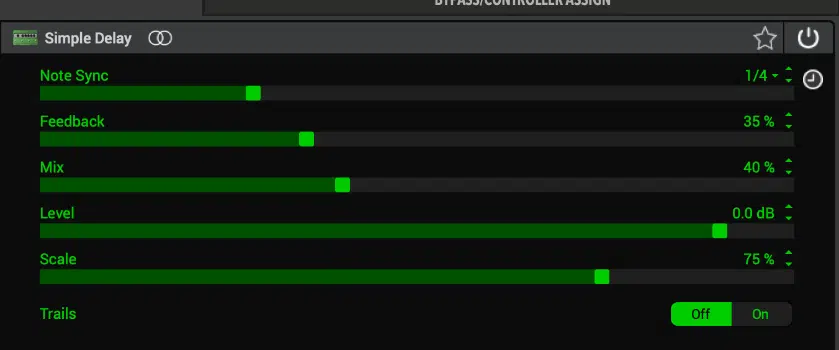
While advanced delay modulation can do amazing things, there are definitely times when it’s better to leave it out.
If you’re working with tight vocal stacks, aggressive 808s, or elements that need laser-sharp transients, delay modulation might push things out of time.
This will cause you to blur the punch, and you certainly don’t want that.
Also, when layering sounds in mono or collapsing a mix, too much stereo modulation (especially unlinked left and right channels) can introduce phasing or even cancel out parts of your signal.
If your mix is already packed with time-based effects, it might be smarter to use a clean simple delay or dial back the modulation depth altogether.
At the end of the day, just ask: “Is this modulation effect serving the track, or just adding noise?” If it’s the latter, pull it out 一 plain and simple.
Final Thoughts
And there you have it: everything you need to know about advanced delay modulation and everything you can achieve with it.
With all of this new information, you’ll be able to bang out more movement, space, and emotion in your delays like an absolute boss.
Plus, it’ll help you seriously elevate your mixes, bring new life into your sound design, and unlock textures that most producers never ever tap into.
Just remember that it’s really all about subtlety and control as opposed to cranking everything for the sake of it (because that’s whack).
You’ll just end up with a messy, phasey wash of sound, and you definitely don’t want that.
And, as a special bonus, if you want to see these legendary techniques in real life, you’ve got to check out these Free Project Files.
These 3 professional project files break down exactly how to carry these out like a boss; it’s like the secret cheat codes, honestly.
They were all created by the best producers and sound designers in the industry, so you’re getting the most invaluable insights ever.
This way, you can see exactly what you need to know 一 mapped out, routed, and modulated right in front of you as it should be.
Bottom line, when it comes to advanced delay modulation, you always have to stay intentional and trust your ears.
And just remember to never overuse the effect for the sake of “sounding cool,” use it to support the emotion of the track.
So go ahead and experiment, automate, modulate, and always think outside the box because that’s where the magic lies.
Until next time…


Leave a Reply
You must belogged in to post a comment.