Amplitude modulation is one of the most underrated yet powerful sound design weapons in the game.
It’s all about shaping the volume of a sound over time by using another signal (which might sound simple, but the results can get wild fast, trust me).
Plus, amplitude modulation unlocks all kinds of tonal changes, rhythmic movement, weird artifacts, and show-stopping textures.
And a lot of creative sound design that most producers sleep on too.
Whether we’re talking vintage radio vibes or cutting-edge modular setups, amplitude modulation is everywhere.
As modern-day producers and sound designers, knowing all about amplitude modulation can completely change the way we make music, build synth patches, and layer FX.
It’ll open the door to massive creativity, sharper transitions, and MAX movement, which is why I’m breaking down everything you need to know, like:
- Creating a pulsing amplitude modulated wave ✓
- Layering with a second carrier wave to add grit ✓
- Modulating your synth’s carrier signal with a chopped drum ✓
- Tweaking the modulation index for wild textures ✓
- Different types of amplitude modulation in the frequency domain ✓
- Using an input signal from another track to sync movement ✓
- Designing with modulated signals in modular rigs ✓
- Making your pads shimmer with sideband power ✓
- Boosting sound quality without EQ ✓
- Automating carrier frequency for advanced transition ✓
- Much more about amplitude modulation ✓
By the end, you’ll know exactly how to use amplitude modulation to shape your sound. And your tracks will have movement, texture, and expression that stands out.
Plus, your knowledge of amplitude modulation will help you seriously upgrade your sound design workflow.
This way, your tracks can have that pro-level motion and impact that people go crazy for.
Table of Contents
What Is Amplitude Modulation?
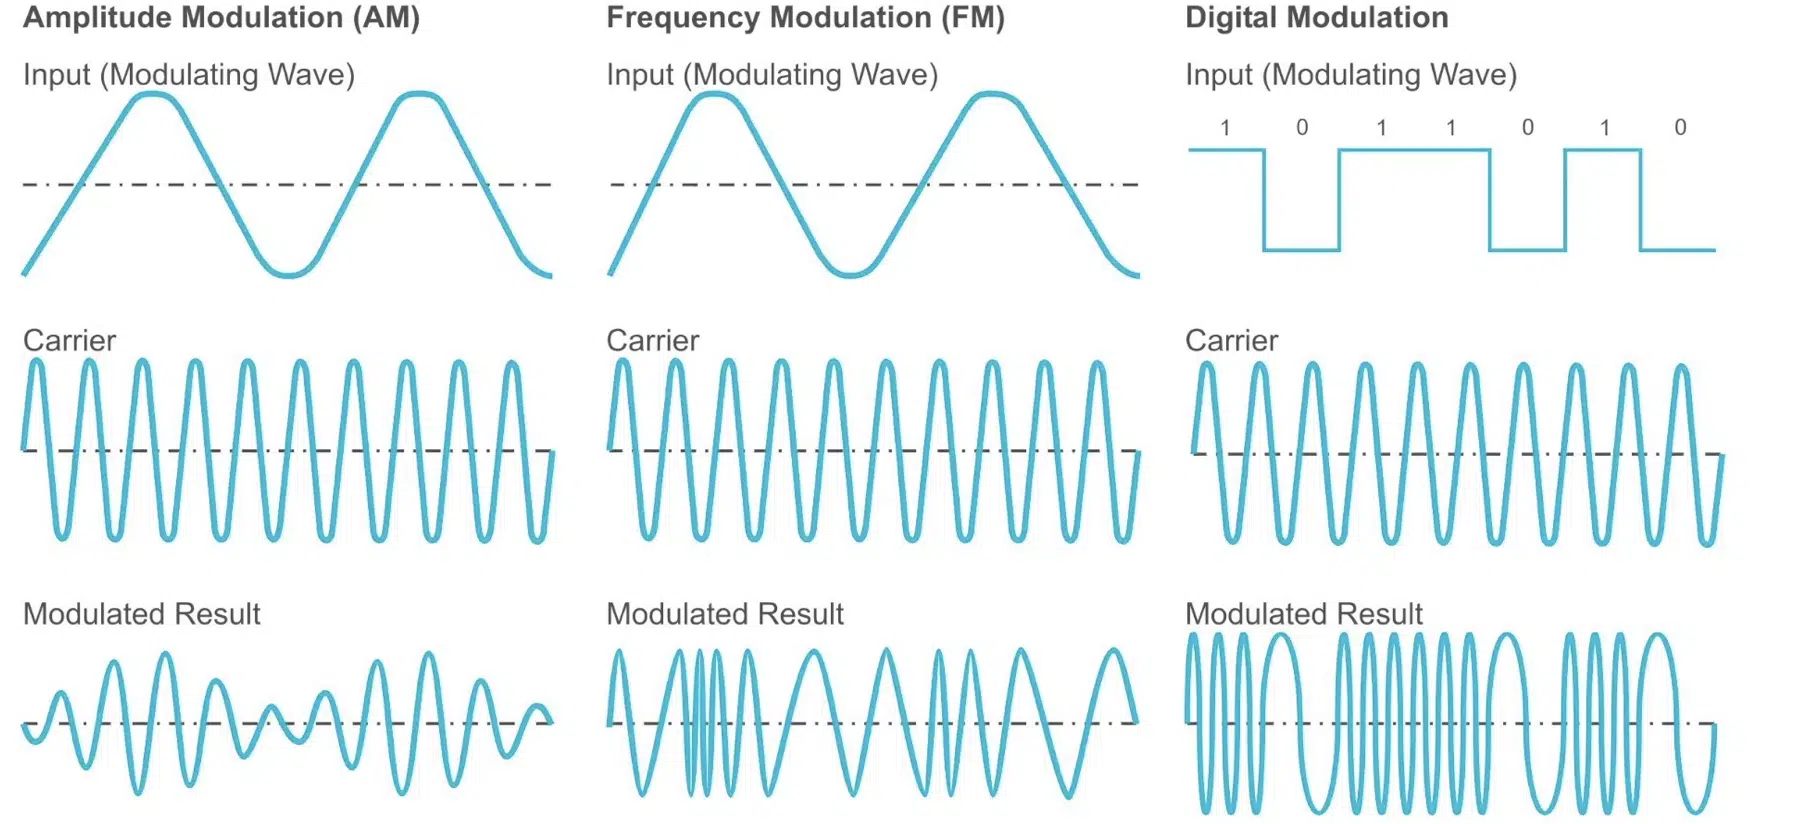
Amplitude modulation occurs when one signal controls the volume of another over time (in a nutshell).
You’ve got a steady signal called the carrier wave, usually something like a sine, saw, or square, and then you’ve got a second signal called the modulator, or message signal.
This signal changes how loud the carrier gets at every point.
What that gives you is a new sound, called a modulated signal, that follows the shape and movement of the modulator, which can be:
- An LFO
- An audio signal
- Even something random like a field recording
So instead of your sound staying static, amplitude modulation lets it pulse, groove, or even glitch out.
It really all depends on how you shape the modulated waveform, how deep you modulate it, and how fast that modulation is moving.
This technique is used everywhere 一 synth patches, tremolo plugins, rhythmic panning, even full-on sound design.
It’s because amplitude modulation is all about movement, texture, and energy without changing the pitch.
Once you get the hang of it, you’ll start hearing amplitude modulation everywhere and you’ll be able to use it for more motion, detail, and character.
Don’t worry if it sounds a little complicated right now, because I’ll be breaking down everything in detail so you get a super solid understanding.
Quick History About Amplitude Modulation
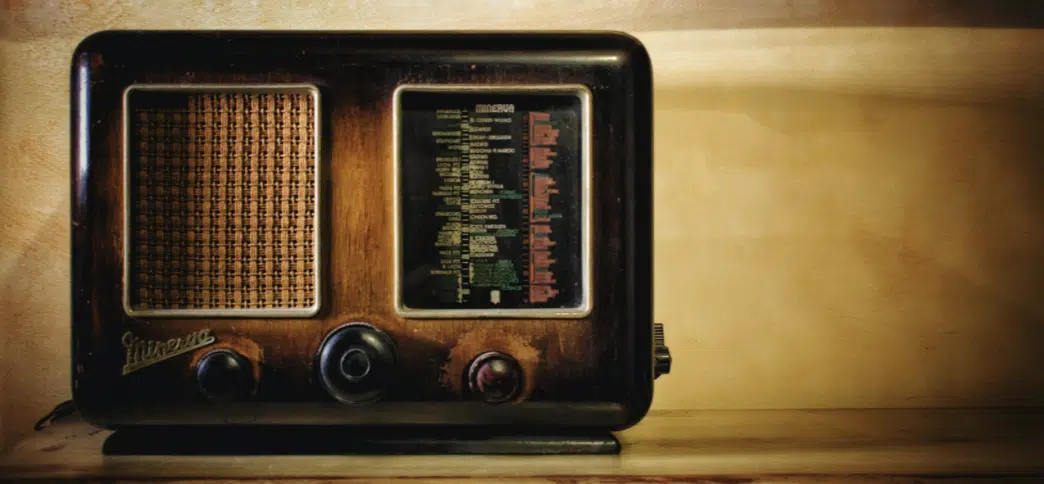
Let’s rewind for a sec before we get into the good stuff because, before amplitude modulation ever hit our DAWs, it had roots in radio communication.
Back in the early 1900s, amplitude modulation systems were developed to send electronic signals wirelessly over long distances.
In fact, amplitude modulation was the earliest modulation method used in electronic communication (think double sideband suppressed carrier).
It let people transmit audio signals like voice and music using a radio carrier wave, which is basically a sinusoidal carrier wave riding at a high frequency.
Here’s the breakdown: a baseband signal like a person speaking gets used as the message signal to control the amplitude of the carrier.
That creates a modulated signal which can then be transmitted.
At the receiver, like a radio transmission, an envelope detector extracts the original audio waveform from the modulated carrier (bringing voice or music back to life).
This method powered radio broadcasting for decades.
We also got into variations like double sideband, single sideband, and vestigial sideband modulation, each designed to tweak efficiency and sound quality in different ways.
In all these systems, the carrier wave remains constant while the modulated spectrum changes based on the message signal.
The frequency domain is filled with upper and lower sidebands, split across frequency components that extend from the carrier frequency out to the maximum frequency of the original baseband signal/high-frequency signal.
Eventually, quadrature amplitude modulation emerged as a combo of:
- Amplitude modulation
- Phase modulation
It boosted transmitted signal capacity in tighter bandwidths with the same frequency.
Today, we might not be thinking about RF signals, transmitted power, or carrier power when we’re building beats…
But the tech behind conventional amplitude modulation still drives how we process signals with an output voltage and a lower sideband frequency wave.
From modern synth engines to plug-ins, the science behind this is baked into everything, and once you start using amplitude modulation techniques creatively, the new world of sound you’ll discover will genuinely blow your mind.
-
The Role of Carriers & Modulators
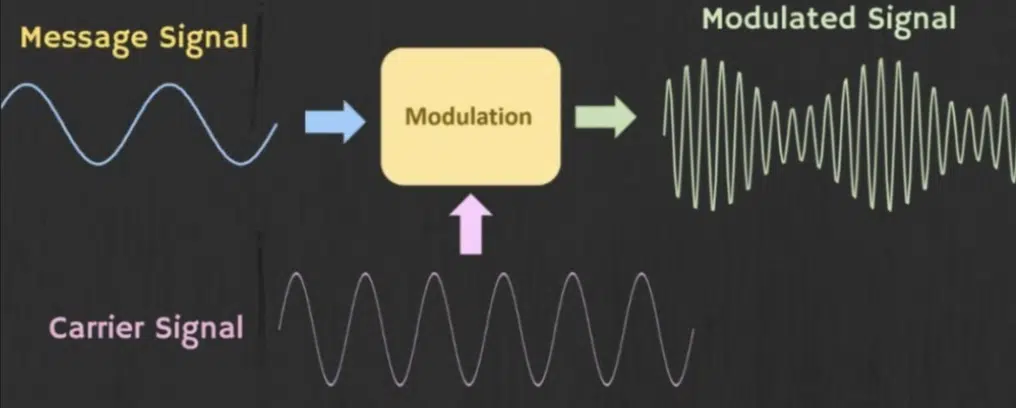
In amplitude modulation, the carrier wave is your main signal (usually a steady sine wave, square, or saw above equation) and it’s the one getting controlled.
The message signal (aka modulator) is what controls the amplitude of the carrier, and this can be anything from an LFO at 0.5 Hz to an audio signal like a hi-hat loop.
When you pair a carrier signal with an LFO set to 5 Hz and set your modulation depth to around 70%, you’ll hear a smooth tremolo effect.
This is a classic low-rate amplitude modulation sound.
If you flip the modulator to a sharp 808 snare and route that into your carrier’s amp input with an envelope follower 一 you’re now talking rhythmic gating that feels glued to your drums.
A good tip of mine is you can try to use a clean sine wave as the carrier if you want to hear exactly how the modulated signal is reacting.
Anything more complex might mask what’s really happening.
Also, when using synths like Serum 2 or Massive X, try routing a macro to control both the modulation index and carrier amplitude at once.
It’ll give you tighter expressive control when building movement.
-
Sidebands & Harmonic Creation
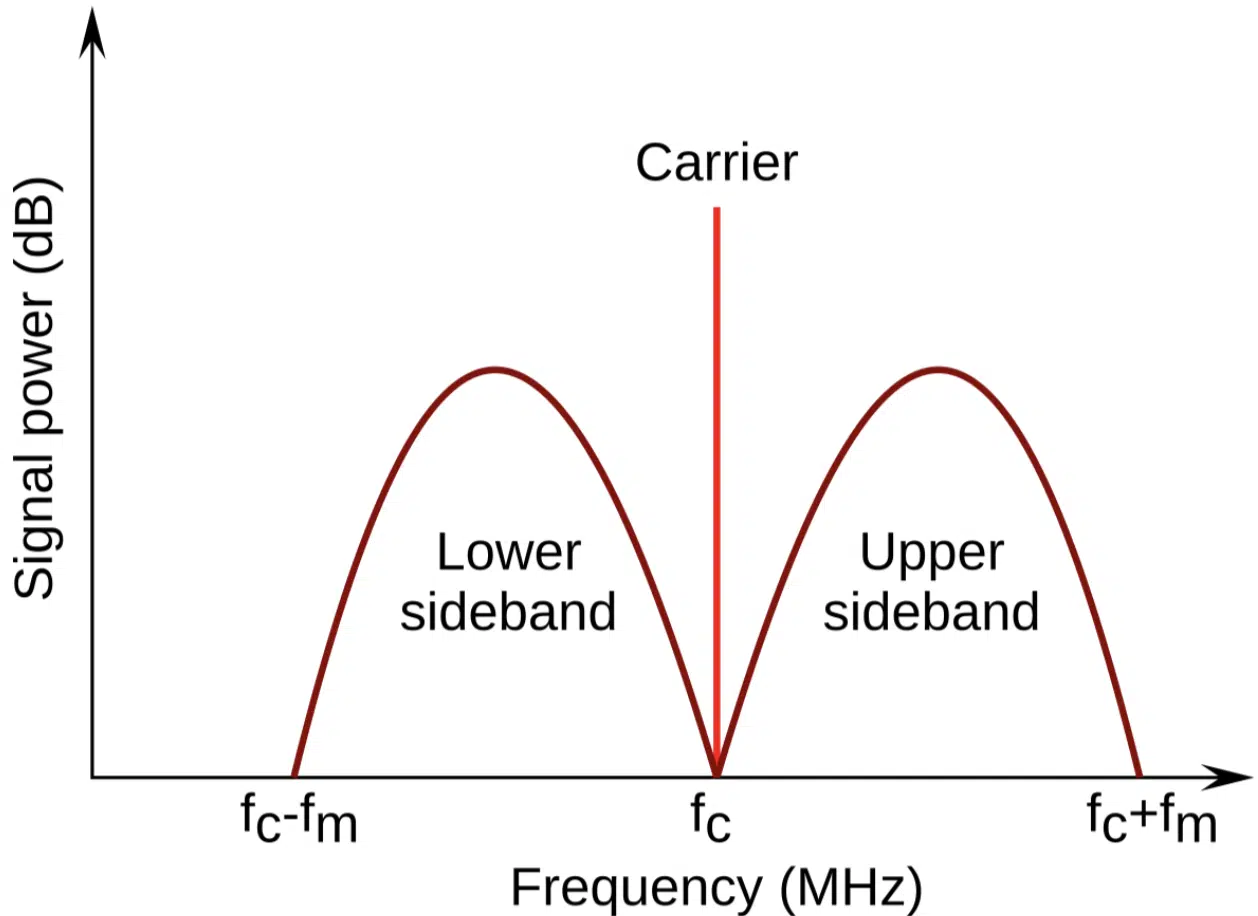
Whenever you use amplitude modulation, you’re not just changing volume; you’re actually creating new frequency components called sidebands.
When a carrier frequency of 440 Hz is modulated by a low-frequency signal at 50 Hz, the result is a modulated waveform containing both the:
- Lower sideband at 390 Hz
- Upper sideband at 490 Hz
If you increase the modulation index (try a value of 1.0 or higher), those sidebands grow stronger and generate even more harmonic content, especially with complex modulating shapes like saw waves or vocal samples.
This means amplitude modulation produces a tone-rich modulated signal even when you start with a pure carrier wave like a sine.
It’s crazy useful when building evolving pads or metallic leads.
For example, modulating a 1 kHz carrier with a 200 Hz message signal gives you sidebands at 800 Hz and 1,200 Hz…
And, depending on the modulation depth, you can shape them to be soft and subtle or razor-sharp.
In synths like Arturia Pigments, you can even map a random LFO to modulate the depth of sideband power in real-time.
That’s how you get that shimmering, unstable feel that reacts to movement in your track.
And if you want a darker tone, simply try cutting off the upper sideband with a steep low-pass filter at 1.5 kHz to emphasize the lower sideband.
If you’re going for cinematic or lo-fi vibes, definitely try that one out.
PRO TIP: A personal trick I use is modulating at twice the frequency of the target carrier signal, which often opens up brighter overtones and a more aggressive tone (works killer on distorted leads).
Key Parameters That Control AM
Once you’ve got your carrier and modulator signals locked in, there are a few key parameters that make or break the sound. Let’s break down the most important ones that directly shape how your modulated signal behaves.
-
Depth: How Intense Is the Modulation?
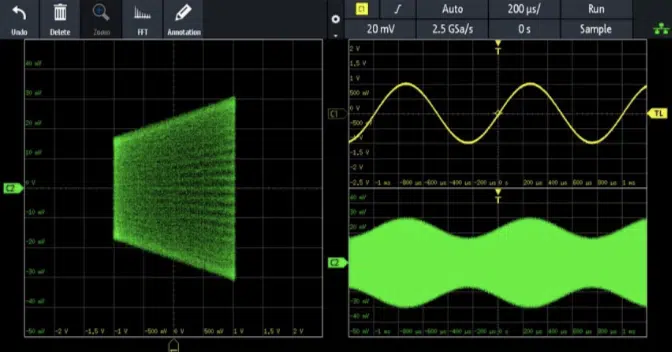
Modulation depth controls how much the amplitude of the carrier changes based on the input signal, which directly affects how dramatic the effect sounds.
For example, if you set your modulation depth to around 25%, you’ll get a subtle tremolo — just enough to make pads breathe without pulling focus.
But, if you were to push it to 80% or more, it’ll start slicing through your mix like rhythmic volume chops.
In something like Ableton’s Auto Pan, dial the amount to 0.75 (75%) and flip it to “invert” to get a full-on amplitude modulated wave that can turn even a static loop into something that dances hard.
NOTE: for tighter control, always map modulation depth to a macro or automation lane, which gives you the ability to evolve the movement over time instead of it feeling static.
And remember, too much depth without balance can create unwanted pumping or aliasing, especially if your carrier wave is already peaking in the maximum amplitude range.
So, just make sure to always keep an eye on your levels.
-
Rate: Speed vs. Rhythm vs. Audio-Rate
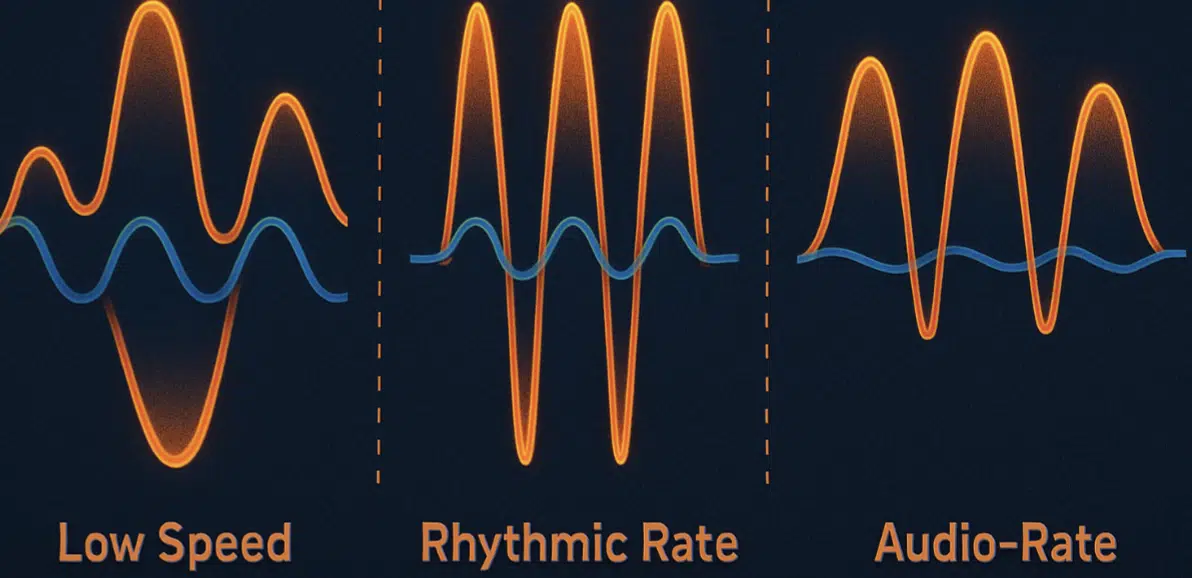
The rate of amplitude modulation isn’t just about speed… It changes the entire vibe of how your sound moves and breathes.
When you’re running a slow LFO at around 0.3 to 0.5 Hz, it’s like a slow inhale and exhale.
This is perfect for evolving pads or ambient textures that need a little bit of emotional depth without sounding repetitive.
Now, if you bump that rate up to something like 4 Hz and sync it to 1/16 notes in a 120 BPM track, your modulation locks in with the rhythm and gives loops or sustained sounds a pulsing groove (kind of like fake sidechaining without the kick).
But once you hit audio-rate modulation, like modulating a 600 Hz carrier wave with a 300 Hz message signal, the vibe changes completely.
You’re no longer shaping volume, you’re reshaping the tone itself.
That’s where the magic happens: audio-rate amplitude modulation lets you build new harmonics and energy without touching filters or distortion.
This is fire for leads that need to cut, or basses that need to bite extra hard.
-
Pro Tip: Synthesizers That Use AM (Hardware & Software)
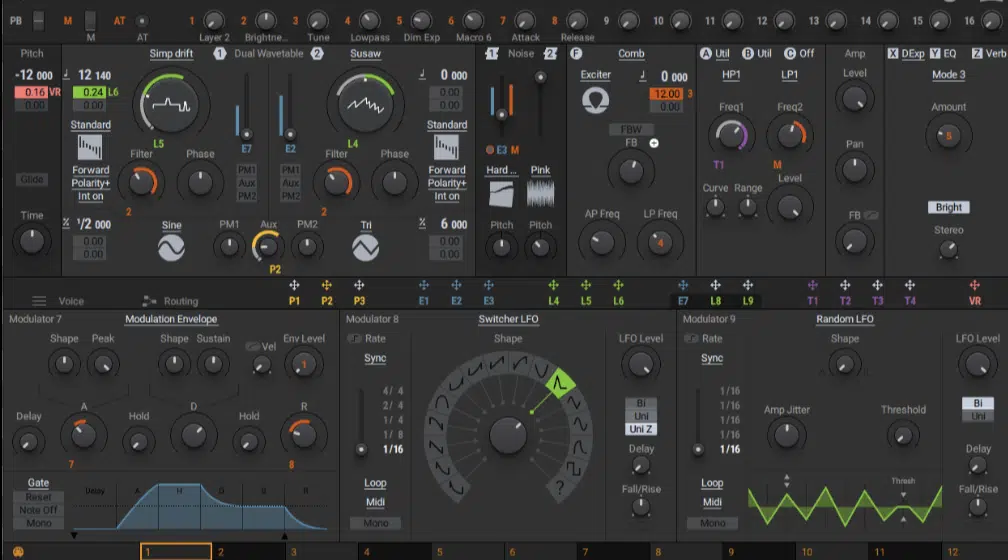
Some synths make amplitude modulation dead easy, and once you know where to look, you’ll start spotting it everywhere in your workflow.
In Serum 2, you can load a clean sine into OSC A, turn on OSC B as your modulator, and use the “AM from B” warp mode.
Then, drop OSC B’s pitch to around -36 semitones and automate its level for movement that feels raw and alive.
Massive X takes it even deeper because it lets you assign an audio-rate oscillator to directly modulate carrier amplitude.
Or, even blend it with frequency modulation for gritty, hybrid tones that evolve in real time, which I really love personally.
And, if you’re into hardware, the Korg MS-20 has a dedicated mod input that can run low-frequency signals straight into the amp stage…
Try modulating a 500 Hz carrier with an LFO at 8 Hz for that old-school radio warble.
NOTE: If you’ve got a modular setup, patching a square LFO into the VCA of a sine wave carrier at 440 Hz is a quick way to create modulated signals that feel both punchy and mechanical 一 just watch the levels if your modulation index gets too high.
Effects That Are AM-Based (Tremolo, Auto-pan, etc.)
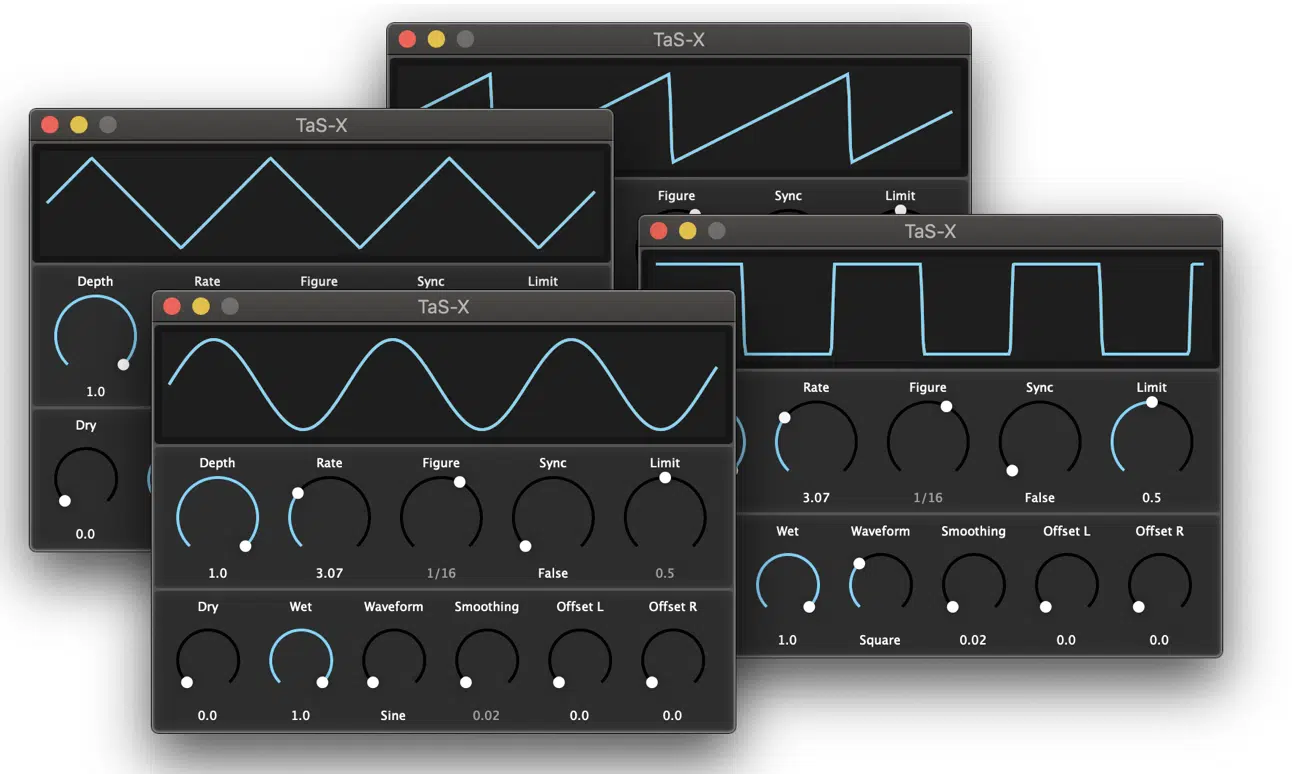
You might not even realize how many of your favorite effects are built on amplitude modulation, but once you start listening for it, it’s everywhere.
This is especially true when it comes to mixing and FX chains.
Tremolo is the textbook example: it’s just amplitude modulation with a fixed modulation depth and rate.
I suggest you try running Ableton’s Tremolo at 5.5 Hz with 80% depth and “Triangle” shape to get that classic wobble, great on keys and pads.
Auto-pan is basically tremolo with movement between speakers…
When you flip it to “Phase 180°” in Logic or Live, you’re sending the modulated waveform left and right in sync, which adds stereo motion without reverb or delay.
Even plugins like PanMan from SoundToys use amplitude modulation techniques under the hood, giving you advanced controls to spice up static instruments, like:
- Swing
- Randomness
- Rhythmic sync
A personal favorite of mine is to use volume-shaper-style plugins like ShaperBox 3 or LFO Tool to draw your own modulated signal curves.
This lets you fake amplitude modulation effects with full visual control and sync everything to your DAW’s grid.
And if you really want to push things further, combine tremolo and stereo auto-pan with different rates (say 3.5 Hz and 6 Hz) on separate return tracks.
This creates a layered modulated signal that’s always in motion but never gets chaotic.
And here’s a sleeper tip: try modulating a vocal reverb send with tremolo at 0.7 Hz to soften the tail dynamically and create more room for the dry vocal to breathe, using nothing but subtle amplitude modulation.
Creative Uses of AM in Sound Design
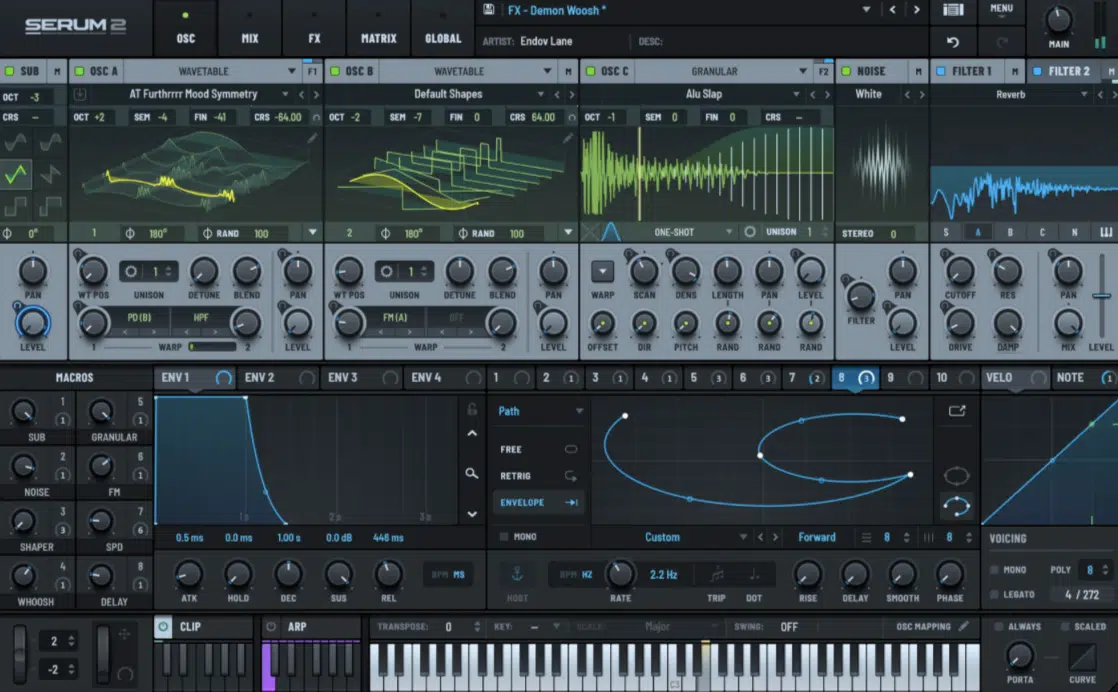
Now that you’ve seen how AM works, let’s talk about how to actually use it to build fire sounds from scratch. Whether you’re making ambient layers, textured drums, or synthetic risers, amplitude modulation gives you a whole new lane for shaping tones in ways EQ, compression, or even filters just can’t match. Let’s break it down.
Creating Pulsing Pads Without LFOs
You don’t need an LFO to make pads feel like they’re breathing because a slow amplitude modulation setup can get you there with way more control.
Try loading a clean saw pad in Serum, then modulate the amplitude of the carrier using another oscillator set to a sine wave running at 0.25 Hz.
That’s one full cycle every 4 seconds, which gives it a slow, emotional pulse.
Then, set the modulation depth to around 40% to start and gradually automate it up to 70% over 16 bars to evolve the sound in your breakdown or intro.
What makes this better than a basic LFO is that you’re actually creating a reactive modulated waveform…
This means you can layer this with other movement (like filter sweeps or stereo spread) without them stepping on each other.
PRO TIP: If your pad starts to feel too static, shift your carrier frequency slightly over time using fine pitch automation; a 2–5 cent drift adds even more organic feel without muddying your mix.
Adding Rhythmic Energy to Static Loops
Sometimes loops feel dead not because of their sound, but because they’re missing movement, and this is where amplitude modulation can bring life back instantly.
Take a static guitar or vocal loop and route it through a volume shaper using a synced triangle pattern at 1/8 note intervals.
Set your depth to about 65% and watch the loop lock into your track’s groove.
Now if you really want it to bounce, modulate that depth with an envelope follower triggered by your snare.
That way, the modulated signal reacts dynamically to the rhythm and adds push-pull energy (and remember, it’s all about that tension and release).
This isn’t just about volume because you’re shaping the carrier amplitude in time with your beat, you’re literally rebuilding the loop’s motion from the ground up using pure AM techniques.
My advice 一 Bounce the result to audio and layer it under the original loop at -6 dB for some subtle groove without making the timing feel robotic or overly quantized.
Making Harsh, Metallic FX from Basic Waveforms
If you’re looking to design industrial or aggressive sounds, amplitude modulation is one of the cleanest ways to get gritty without needing distortion.
Start with a basic sine wave carrier at 500 Hz and modulate it with a 1.2 kHz input signal at 100% depth.
The resulting modulated waveform will generate inharmonic overtones that scream metallic, so if you’re looking for that, definitely try this out.
To control the harshness, tweak the modulation index between 1.0 and 2.5:
- Lower values keep it crunchy but controlled.
- Higher values make the tone wild and unstable in a good way.
Try this in a modular synth like VCV Rack by routing an audio-rate oscillator into the amplitude input of another, then filtering out everything above 8 kHz to avoid ear fatigue and preserve that sharp, punchy attack.
If you want to go even further, automate your carrier frequency to sweep from 400 Hz to 800 Hz while keeping the message signal locked at 1 kHz.
This creates a tonal screech effect perfect for risers, transitions, or sound design stabs.
Advanced Amplitude Modulation Techniques
Now that you’ve got a grip on the basics and some basic ways to use them, it’s time to dig deeper into what amplitude modulation can really do (my fav). These next-level amplitude modulation techniques let you play around with new textures, design more expressive sounds, and push your modulation skills way past simple wobbles/pulses.
-
Using Audio-Rate Signals for Complex Timbres
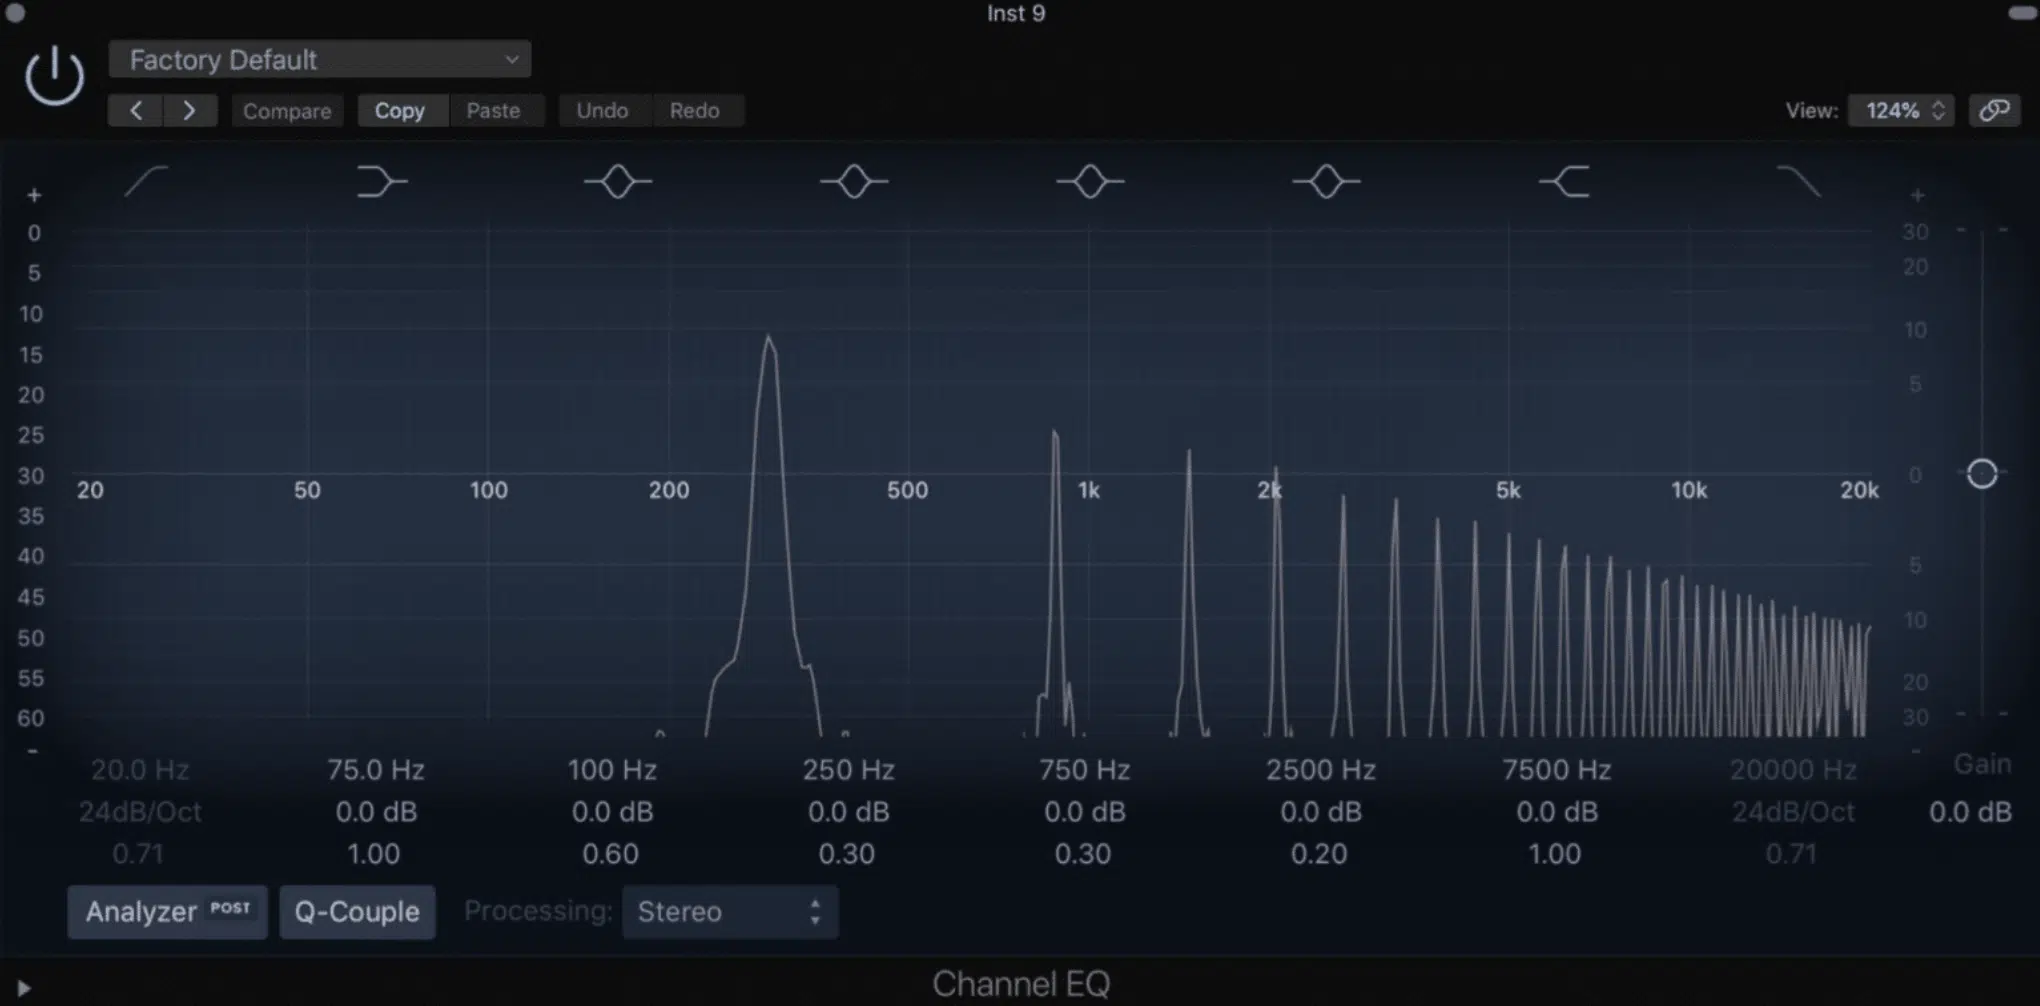
When you start modulating at audio rates (anything above 20 Hz), amplitude modulation stops sounding like movement and starts reshaping your actual tone.
For example, take a carrier wave at 400 Hz and modulate it with a 300 Hz message signal at 100% depth.
The resulting modulated waveform produces upper and lower sidebands at 700 Hz and 100 Hz, which completely transforms your timbre.
If you go even higher, say modulating a 1 kHz carrier with a 1.2 kHz input signal, you’ll get dissonant textures and non-harmonic overtones that are perfect for:
- Glitch
- Metallic hits
- Cinematic tension
The key is to dial in your modulation index carefully 一 start at 0.8 for subtle detail and push to 2.0+ for harsh, complex overtones.
Just make sure to monitor your carrier amplitude so it doesn’t clip.
One personal trick: use a sampler’s pitch envelope as the modulator and crank the time down to 5–10 ms — it creates punchy, percussive AM bursts that can turn a soft pluck into a metallic transient.
-
Hybrid Modulation Chains (AM + Filters + Waveshaping)
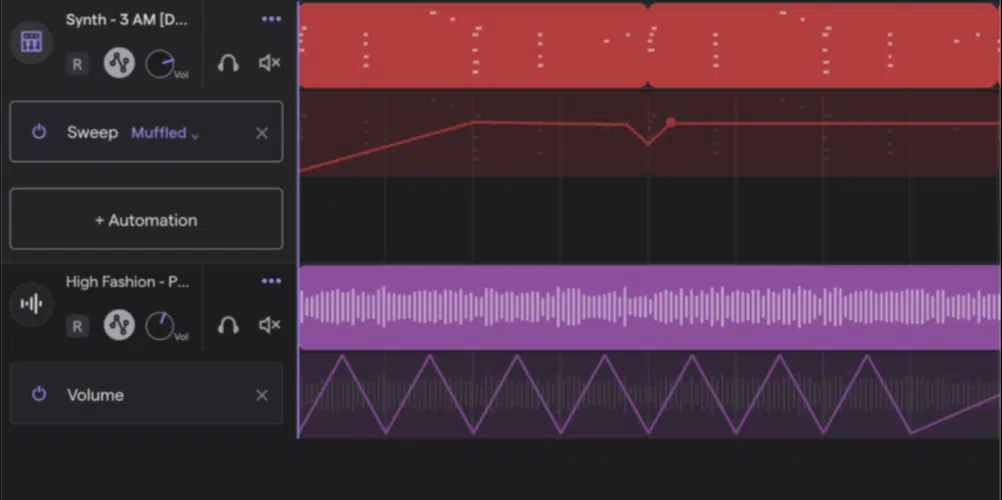
Mixing amplitude modulation with filters and waveshaping opens up a whole new world of sound design that feels reactive, aggressive, and tailored to perfection.
Try modulating a saw wave carrier at 700 Hz using an audio-rate square wave around 350 Hz, then run the modulated signal through a band-pass filter at 1.1 kHz with a high resonance (Q around 8–10) to emphasize the upper sideband.
Next, slap on a wavefolder like the one in Reaktor 6 or Fold in Ableton, and you’ll hear the modulated waveform come alive.
Each harmonic ripple will get accentuated and folded back in, which adds some serious movement and grit (big time).
Just be aware that stacking this kind of processing can crank up your sideband power, so it helps to limit the final signal at -1 dB and low-cut at 40 Hz.
This will help you clear out any unwanted rumble.
If you want even more control, automate your filter’s cutoff with a synced LFO at 0.25 Hz and map your modulation depth to a macro 一 this lets you morph the tone gradually over time, which is great for builds and breakdowns.
-
Inverting the Modulator: Reverse Phase & Destructive AM
Flipping the modulator’s phase by 180° can totally change how your amplitude modulation hits.
It can turn clean modulation into something way more unstable/unpredictable.
In synths like Massive X or modular setups like VCV Rack 2, you can invert the polarity of a triangle or square wave message signal before it hits the VCA.
This way, you’ll hear the modulated carrier start to phase-cancel in weird ways that add raw character.
When you modulate a carrier wave at 440 Hz with a 220 Hz inverted sine wave and push the modulation index past 1.5, the modulated signal starts folding in on itself.
It breaks the symmetry and introduces slight artifacts that feel almost like broken AM (a solid trick for gritty FX and transitions).
Especially when you automate the modulator’s phase mid-buildup using a bipolar LFO at 0.1 Hz for those slow, drawn-out pitch-bend style phase shifts.
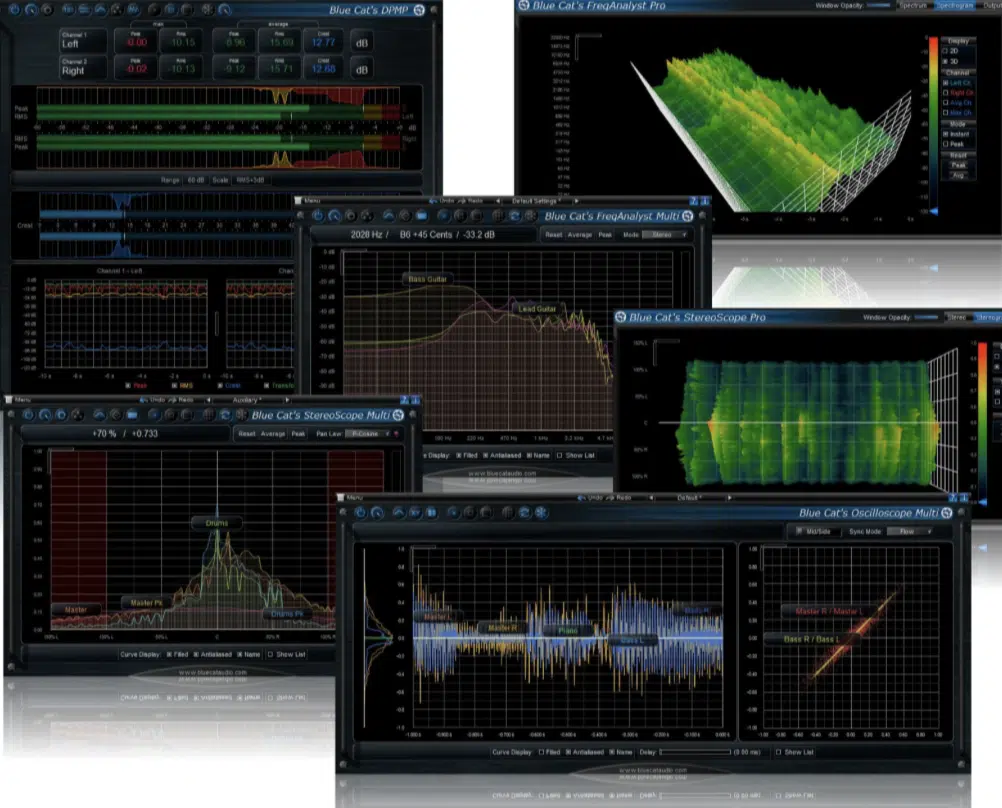
Just make sure to always monitor your output spectrum with a spectrum analyzer because destructive AM can easily add junk you don’t hear right away but might crowd your mix later.
-
Mapping AM Depth/Rate to Macros or MIDI Controllers
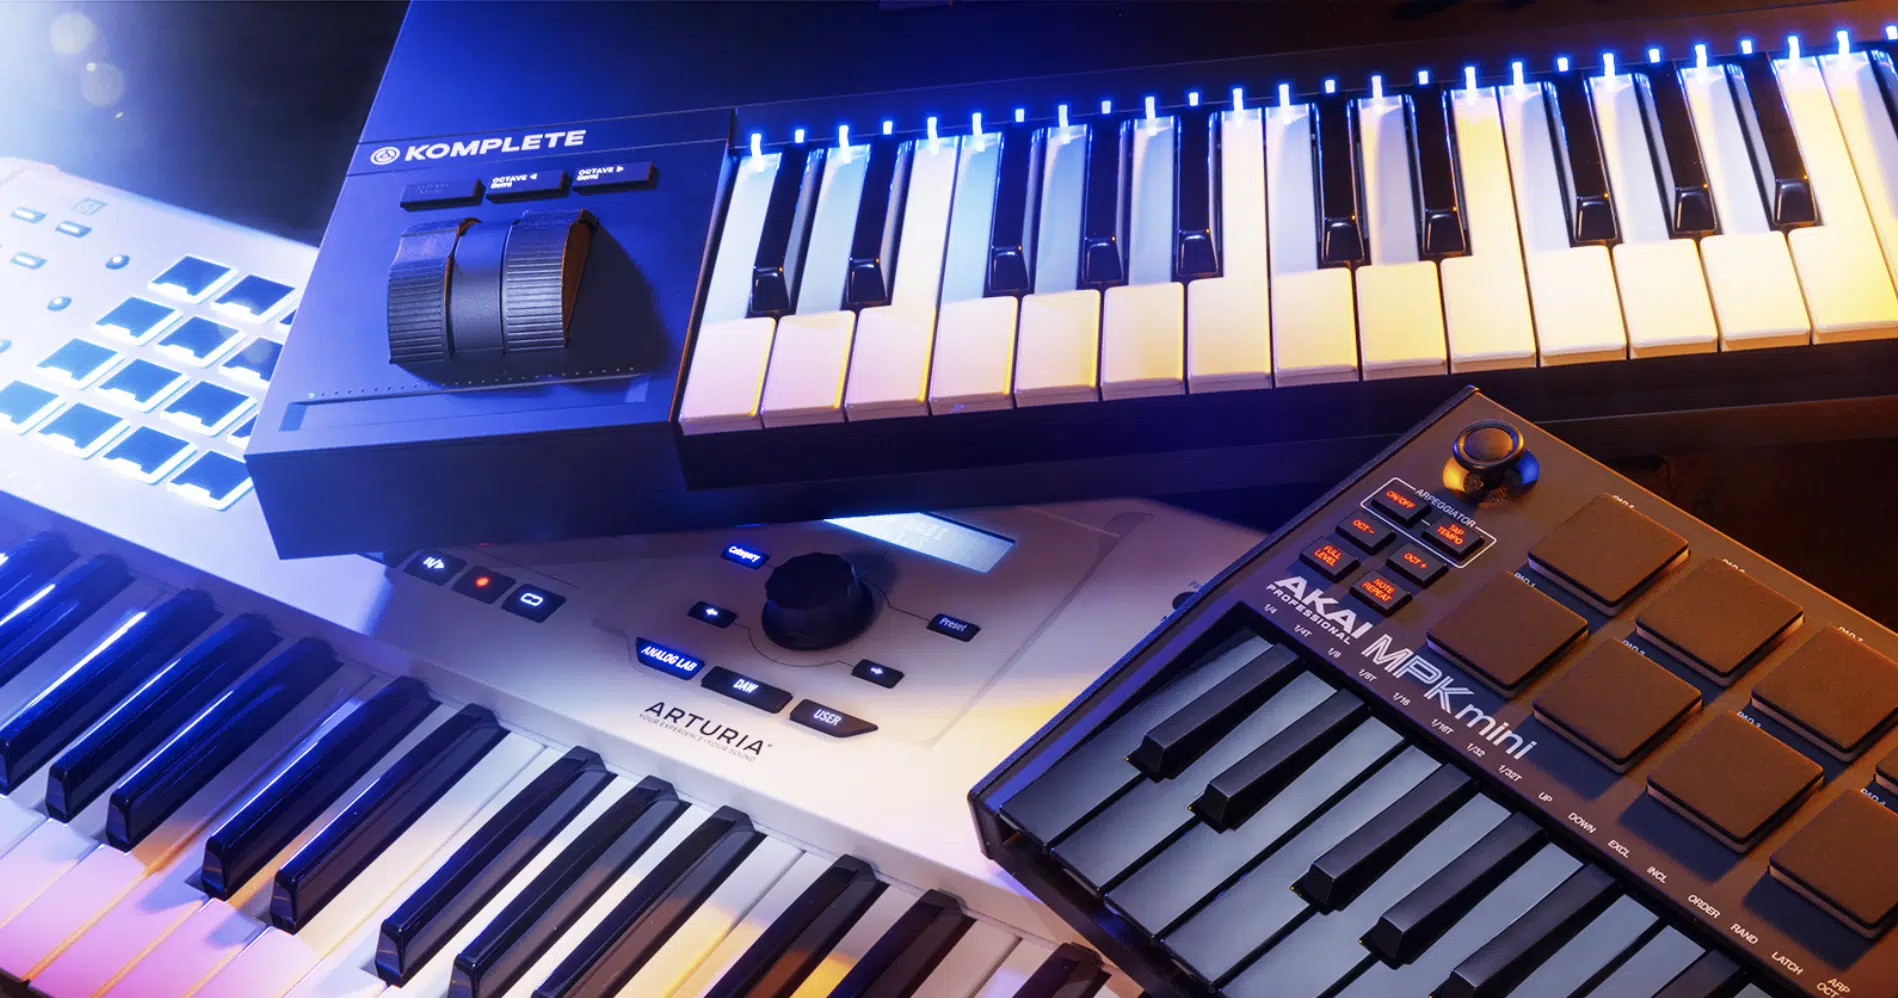
If you want to make your amplitude modulation even more expressive and performance-ready, you can map the modulation depth or rate to a macro or MIDI controller.
Let’s say you’re working in Serum 2 …
Assign a macro to the “AM from B” amount with your carrier on OSC A and the modulator on OSC B.
Then, automate it from 0% to 70% across a 16-bar riser to create a growing intensity.
In Ableton, use a rack with a Utility gain control modulated by an LFO Tool, then map the LFO’s rate and depth to separate macros.
This way you can evolve your modulated signal live without ever touching the plugin.
For MIDI setups, twist a knob on your controller to sweep an LFO’s rate from 2 Hz to 12 Hz while keeping depth locked at 60%.
This will give you a live tremolo effect that’s punchy, fast, and super tactile.
PRO TIP: If you want tighter response, use a mapped macro to limit depth to a max of 85% so you don’t accidentally clip your carrier amplitude in a live set or during quick automation curves.
-
Automating AM Curves for Transitions & Drops
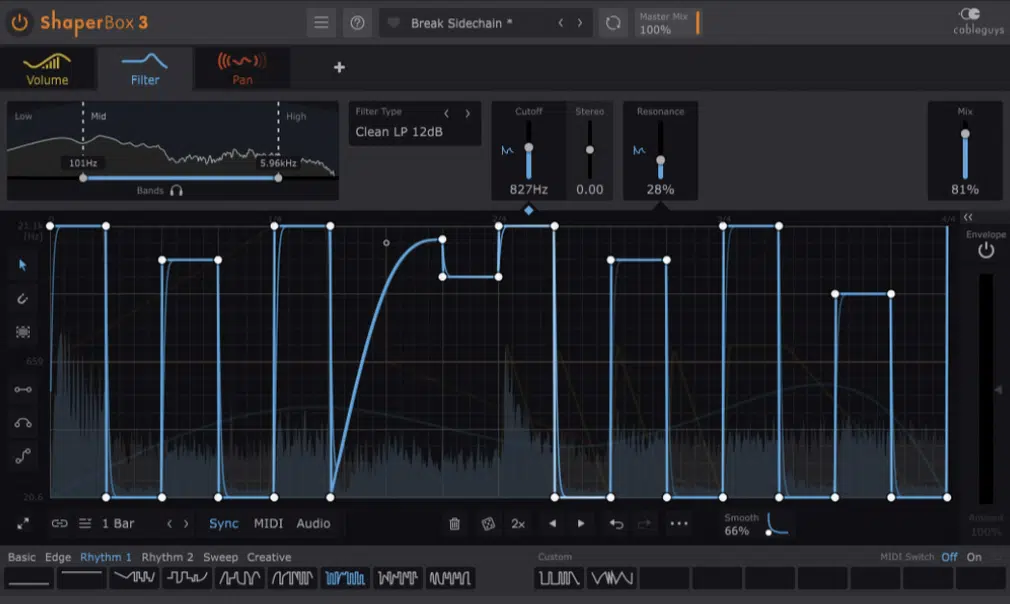
Amplitude modulation shines when you automate it over time, especially for breakdowns, risers, or tension-building transitions.
Start by modulating a carrier wave with an LFO at 0.25 Hz and automate the modulation index to ramp from 0.5 to 1.5 over 8 bars.
That’s how you turn a static chord into a moving, swelling riser without filters.
In ShaperBox, you can draw in a custom curve that increases modulation depth in the last two bars before a drop.
For example, start at 30% and ramp to 90%, synced to 1/16 notes, and blend that with some stereo auto-pan at 180° phase.
This works even better when layered: have a second modulated waveform under the main one, pitched up an octave and modulated faster (around 7 Hz), so the higher harmonics start bouncing while the low mids swell.
My final tip would be to always smooth your automation using curved breakpoints instead of linear ramps.
That slight curve upward makes the movement feel more natural and less robotic as the amplitude of the carrier starts peaking into the drop.
Bonus: Tools That Make Amplitude Modulation Easy
Now that we’ve covered all the hands-on techniques, let’s talk about some of the best tools that make dialing in amplitude modulation feel fast, flexible, and even fun. Whether you’re patching in modular environments or dragging in plug-ins on a timeline, they let you build complex modulated signals with just a few clicks/connections.
-
VCV Rack, Bitwig Grid, Reaktor: Modular AM Playgrounds
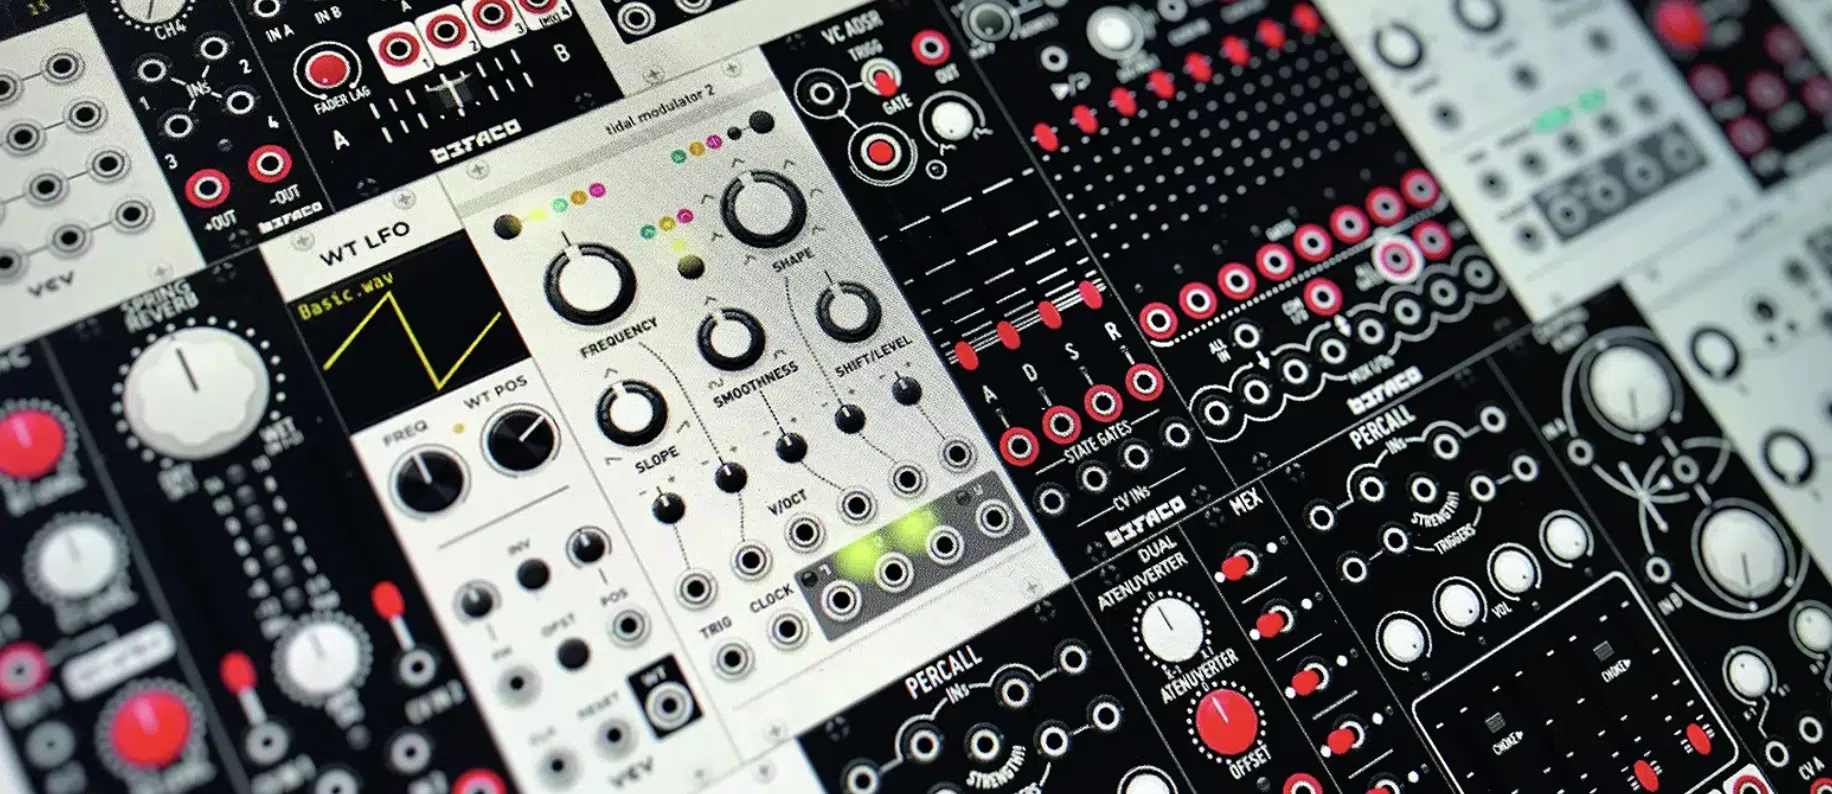
If you want full control over your amplitude modulation, modular environments like VCV Rack 2, Bitwig’s Grid, and Reaktor 2 are where things get next level.
In VCV Rack, start with a sine wave oscillator set as your carrier wave at 440 Hz, then patch an LFO or audio-rate oscillator into a VCA’s CV input.
That’s your message signal, and you can set the modulation index by controlling the modulation input level.
Then you have Reaktor’s Blocks, which lets you build amplitude modulated signal chains with visual routing.
You can patch a sinusoidal carrier wave into an amplitude mod block, then use a baseband signal or noise generator to create wide, gritty modulated spectrum textures.
In Bitwig Grid, drop in a double sideband modulator setup by using a Multiply module connected to both input signal and modulator paths.
Then, automate the modulation depth for evolving soundscapes that mimic radio communication interference.
These platforms are great for building wideband signals, stacking multiple carrier frequencies, and measuring output spectrum with built-in scopes.
-
Envelope Followers & CV Sources
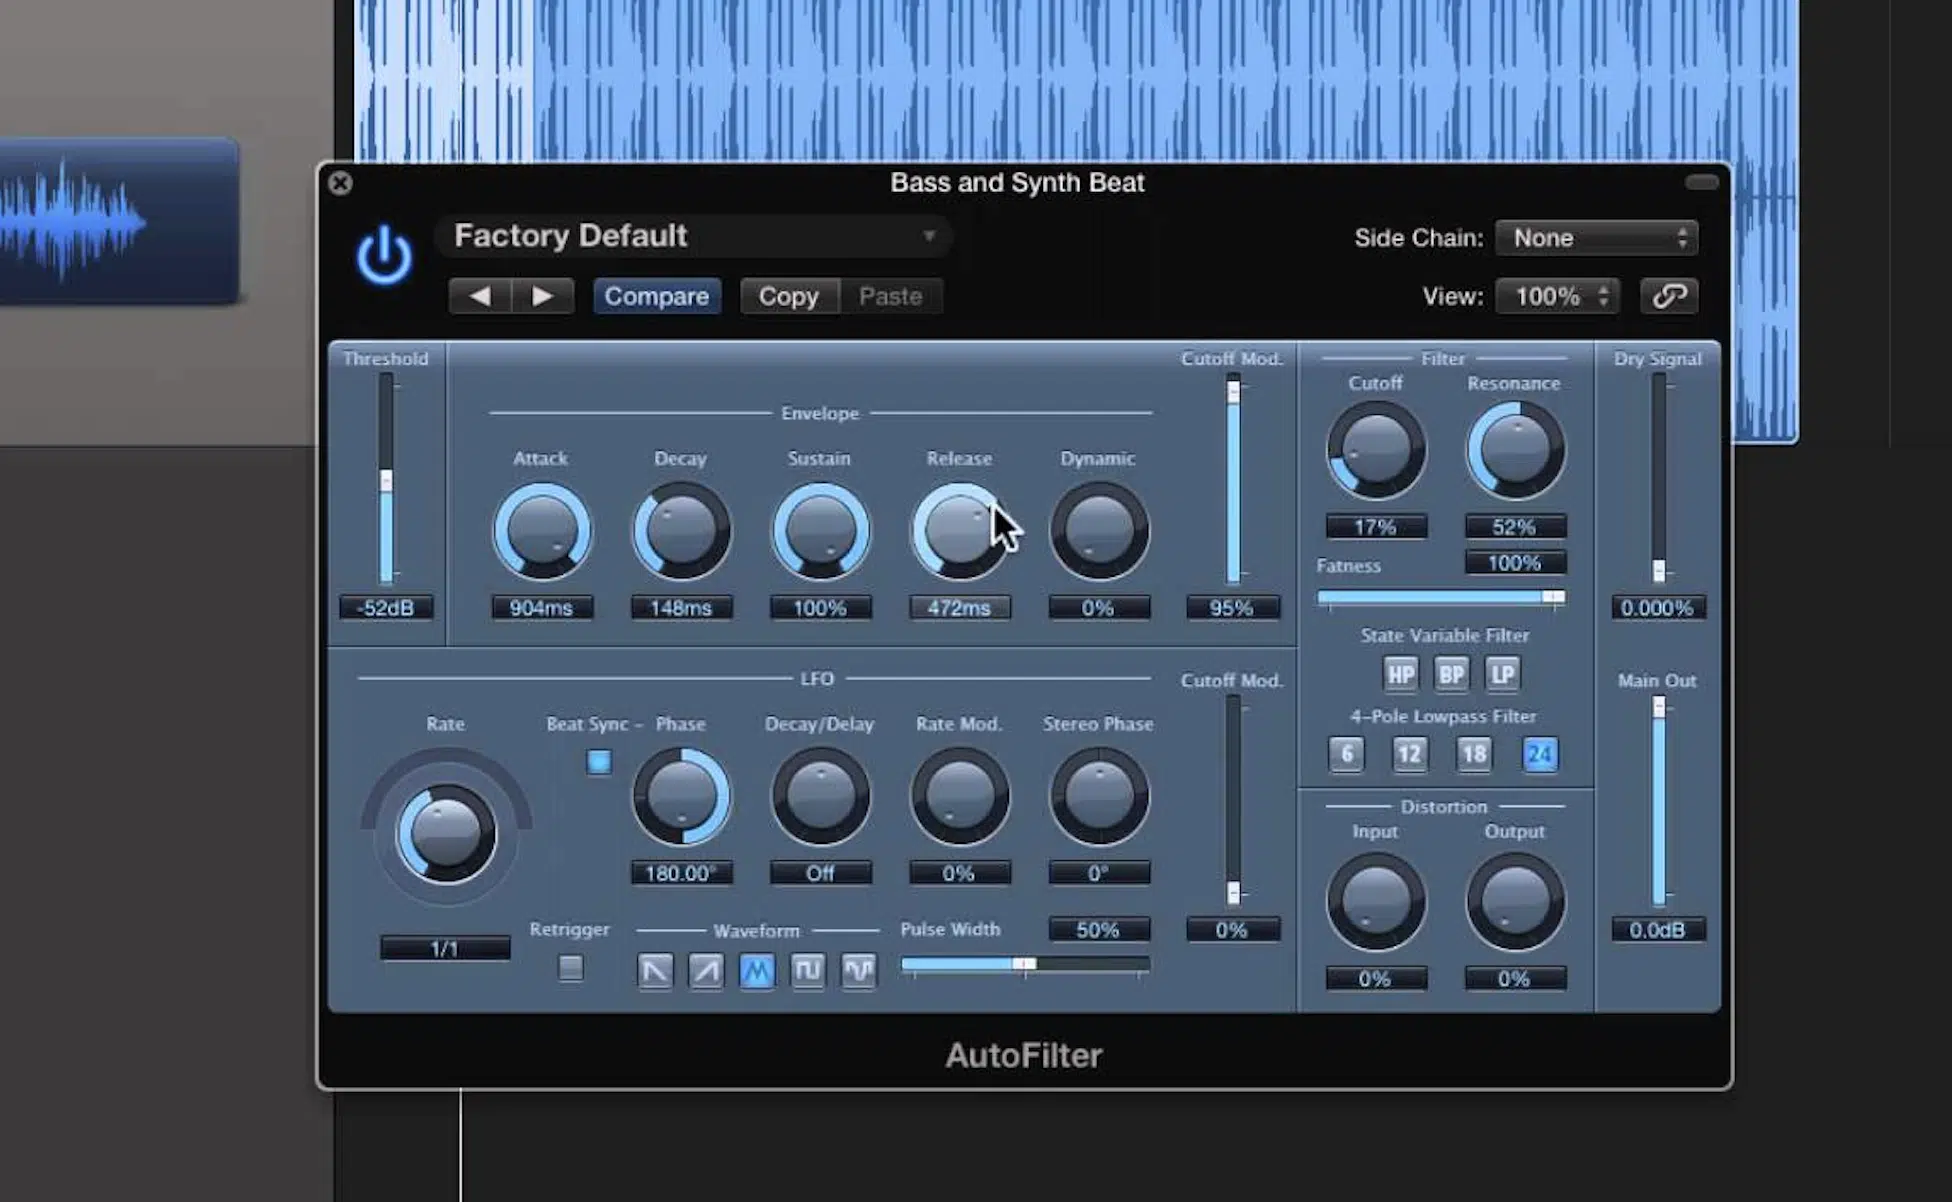
Envelope followers are a lowkey weapon when it comes to amplitude modulation, especially if you want movement that responds to dynamics instead of a fixed-rate LFO.
Drop an envelope follower on a kick or snare track, then route its CV output to modulate the amplitude of the carrier on a synth bass.
This creates a live modulated waveform that breathes with your groove and can replace traditional sidechain compression.
NOTE: If you’re using something like Ableton’s CV Tools or Moog’s CP-251 hardware, set your follower’s release to around 120 ms and send that to modulate a 600 Hz carrier wave for smooth but responsive pulse-like motion on leads.
You can also feed in electronic signals from drum mics, foley hits, or even a chopped audio waveform and map them to carrier amplitude.
This will create modulated signals that react in real-time to real-world energy.
This kind of setup is killer for radio broadcasting textures, especially when you stack it with single sideband filtering and layer a detuned version of your original modulated carrier 一 it creates a lo-fi, unstable wobble that’s totally musical.
Final Thoughts
And there you go: everything you need to know about amplitude modulation.
Now you’ll be able to add movement to your pads, bring life to static loops, and design wild textures that cut through any mix.
Plus, you’ve got the tools to shape basslines, leads, and percussion using amplitude modulation like an absolute pro.
Just don’t forget that it’s more about subtlety than brute force and always make sure to dial in your modulation depth carefully and keep an eye on your output levels.
This way, your amplitude modulation effects will enhance your tracks without overwhelming them or making things sound too cluttered.
And as a special bonus, you’ve got to check out these legendary Free Project Files.
This invaluable pack includes three professional-quality project files, available for Ableton, FL Studio, and Logic Pro.
They’ll show you how to create a beat from start to finish, including all the different amplitude modulation types.
From rhythmic tremolo effects to complex modulated textures, it’s all there.
You’ll be able to see exactly how amplitude modulation is used in professional tracks and apply those techniques to your own beats all day.
It’s like getting the cheat codes so you’re able to see firsthand what amplitude modulation is all about and how it can elevate your sound design skills.
Bottom line, when it comes to amplitude modulation, just make sure to experiment with different modulator waveforms and rates, and always listen critically to how the modulation affects your sound.
And never forget to always consider the unique musical context and the emotional impact you want to achieve.
This way, your use of amplitude modulation will not only up your tracks but also connect with your listeners on a deeper level.
Until next time…


Leave a Reply
You must belogged in to post a comment.