Band pass filters are essential tools in the world of digital music production.
They allow you to surgically remove or emphasize specific frequency ranges and shape the sound of individual tracks or even an entire mix.
However, you’ll never unlock their full potential if you don’t know how to use them properly and creatively.
Luckily, we’re breaking it all down for you today.
In today’s article, we’ll be covering:
- What Band Pass Filters Are ✓
- Basic Science Behind Them ✓
- Types of Band Pass Filters ✓
- Importance of Frequency ✓
- Relation to Other Filters ✓
- Understanding Cutoff Frequencies ✓
- Inputs and Outputs ✓
- Fine-Tuning Techniques ✓
- Creatively Utilizing Band Pass Filters ✓
By the end of this article, you’ll know everything there is to know about band pass filters.
You’ll be equipped to use them like an expert 一 enhancing your music production skills and elevating your tracks to new heights.
So, let’s dive in…
Table of Contents
- What Are Band Pass Filters?
- How Band Pass Filters Work
- Types of Band Pass Filters
- Importance of Frequency in Band Pass Filters
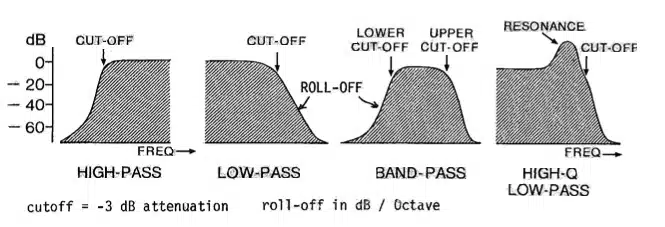
- Low Pass Filters & High Pass Filters: A Comparison
- Understanding Cutoff Frequencies
- Fine-Tuning Your Band Pass Filters
- Tips for Using Band Pass Filters in Music Production
- Band Pass Filters: Final Thoughts
What Are Band Pass Filters?
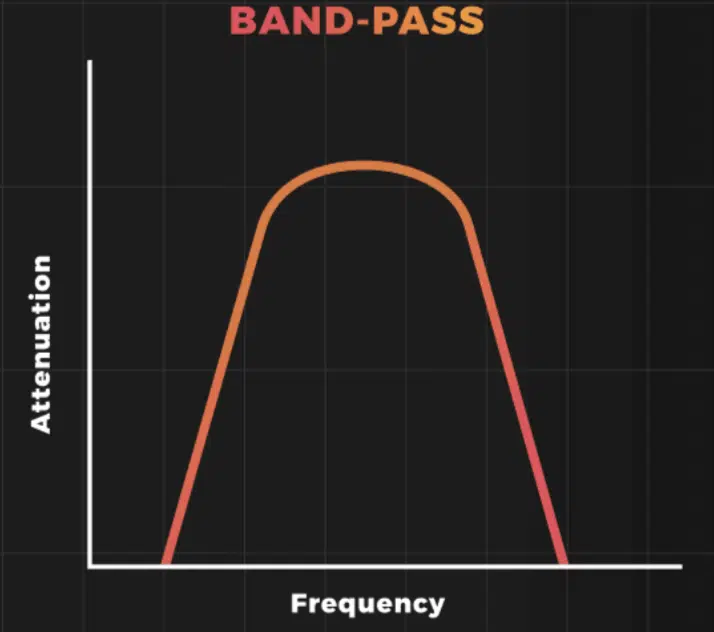
In digital music production, controlling your sound is everything, and one essential tool for achieving this is the band pass filter.
Defined as a filter that allows a specific range of frequencies to pass through while attenuating the rest, a band pass filter indispensable for sound design and shaping.
A band pass filter is essentially a combination of two basic filters:
- A high-pass filter 一 Eliminates low frequencies below a set cutoff point.
- A low-pass filter 一 Removes high frequencies above another cutoff point.
You’re left with a “band” of frequencies that remain in the signal (which is where band pass filters’ name comes from).
The utility of band pass filters becomes apparent when you have to manage a busy mix.
Clashing frequencies become inevitable as you layer more elements in your DAW (Digital Audio Workstation).
Applying a band pass filter on a specific track can isolate an instrument’s ‘sweet spot,’ as it reduces masking and makes room for other instruments to shine.
A bandpass filter is not just a subtractive tool; it can also be used creatively to add additional emphasis.
For instance, you can use a bandpass filter to make a snare drum ‘snap’ more by focusing on the 1-2 kHz range.
Or, to give synth leads a more ‘nasal’ character by emphasizing frequencies around 800 Hz to 1 kHz.
In software, band pass filters often come with additional parameters like ‘Q Factor’ or ‘Resonance’ that control the filtering’s sharpness or ‘peak.’
Don’t worry, we’ll discuss all that shortly.
Adjusting these parameters lets you fine-tune how tight or broad the band of passed frequencies will be.
NOTE: Bandpass filters are not to be confused with band-stop filters/notch filters.
How Band Pass Filters Work
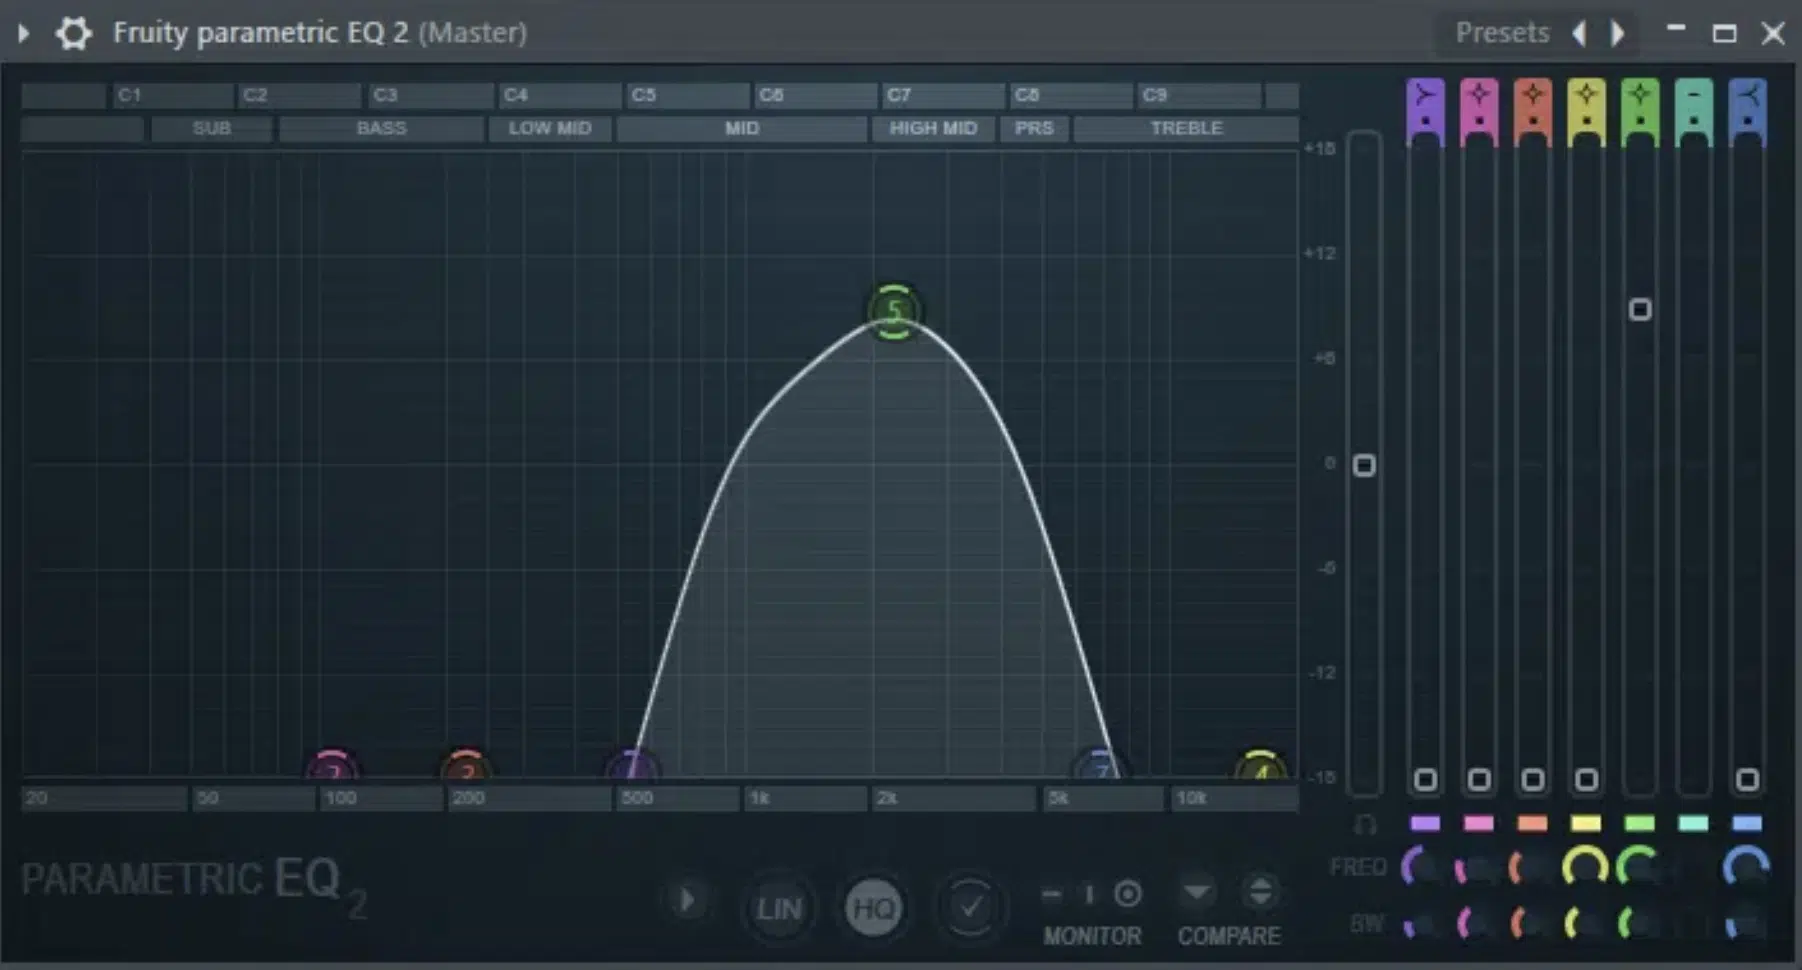
So, let’s get into the details of how band pass filters operate.
In the digital domain, a band pass filter is usually implemented through algorithms designed to mimic the behavior of its analog counterparts.
The algorithm processes each digital audio sample by applying a mathematical formula that represents the filter’s transfer function.
For those unfamiliar, the ‘transfer function’ is a mathematical representation detailing how the band pass filter affects different frequencies.
It essentially shows how much each frequency component of the input signal is either attenuated or boosted as it passes through the filter.
The digital implementation offers precision and repeatability.
In software like Ableton Live or FL Studio, you often have graphical interfaces with draggable nodes or dials that make setting your high and low cutoff frequencies intuitive.
In some DAWs, you may find band pass filters described as:
- IIR (Infinite Impulse Response) 一 More computationally efficient, but may cause phase issues.
- FIR (Finite Impulse Response) 一 Offer more precise frequency response at the expense of CPU.
In some software, the ‘Linear Phase’ setting can correct phase distortion caused by IIR filters.
However, it will increase latency, so use it wisely, especially in live settings.
NOTE: We’re not talking about hardware here.
Therefore, we won’t be discussing what a band pass filter circuit is or talking about filter circuits in general; that’s for another day.
Types of Band Pass Filters
Now that we’ve got the basic science down, let’s delve into the various band pass filters you’ll encounter in digital music production.
-
Narrow Band Pass Filter
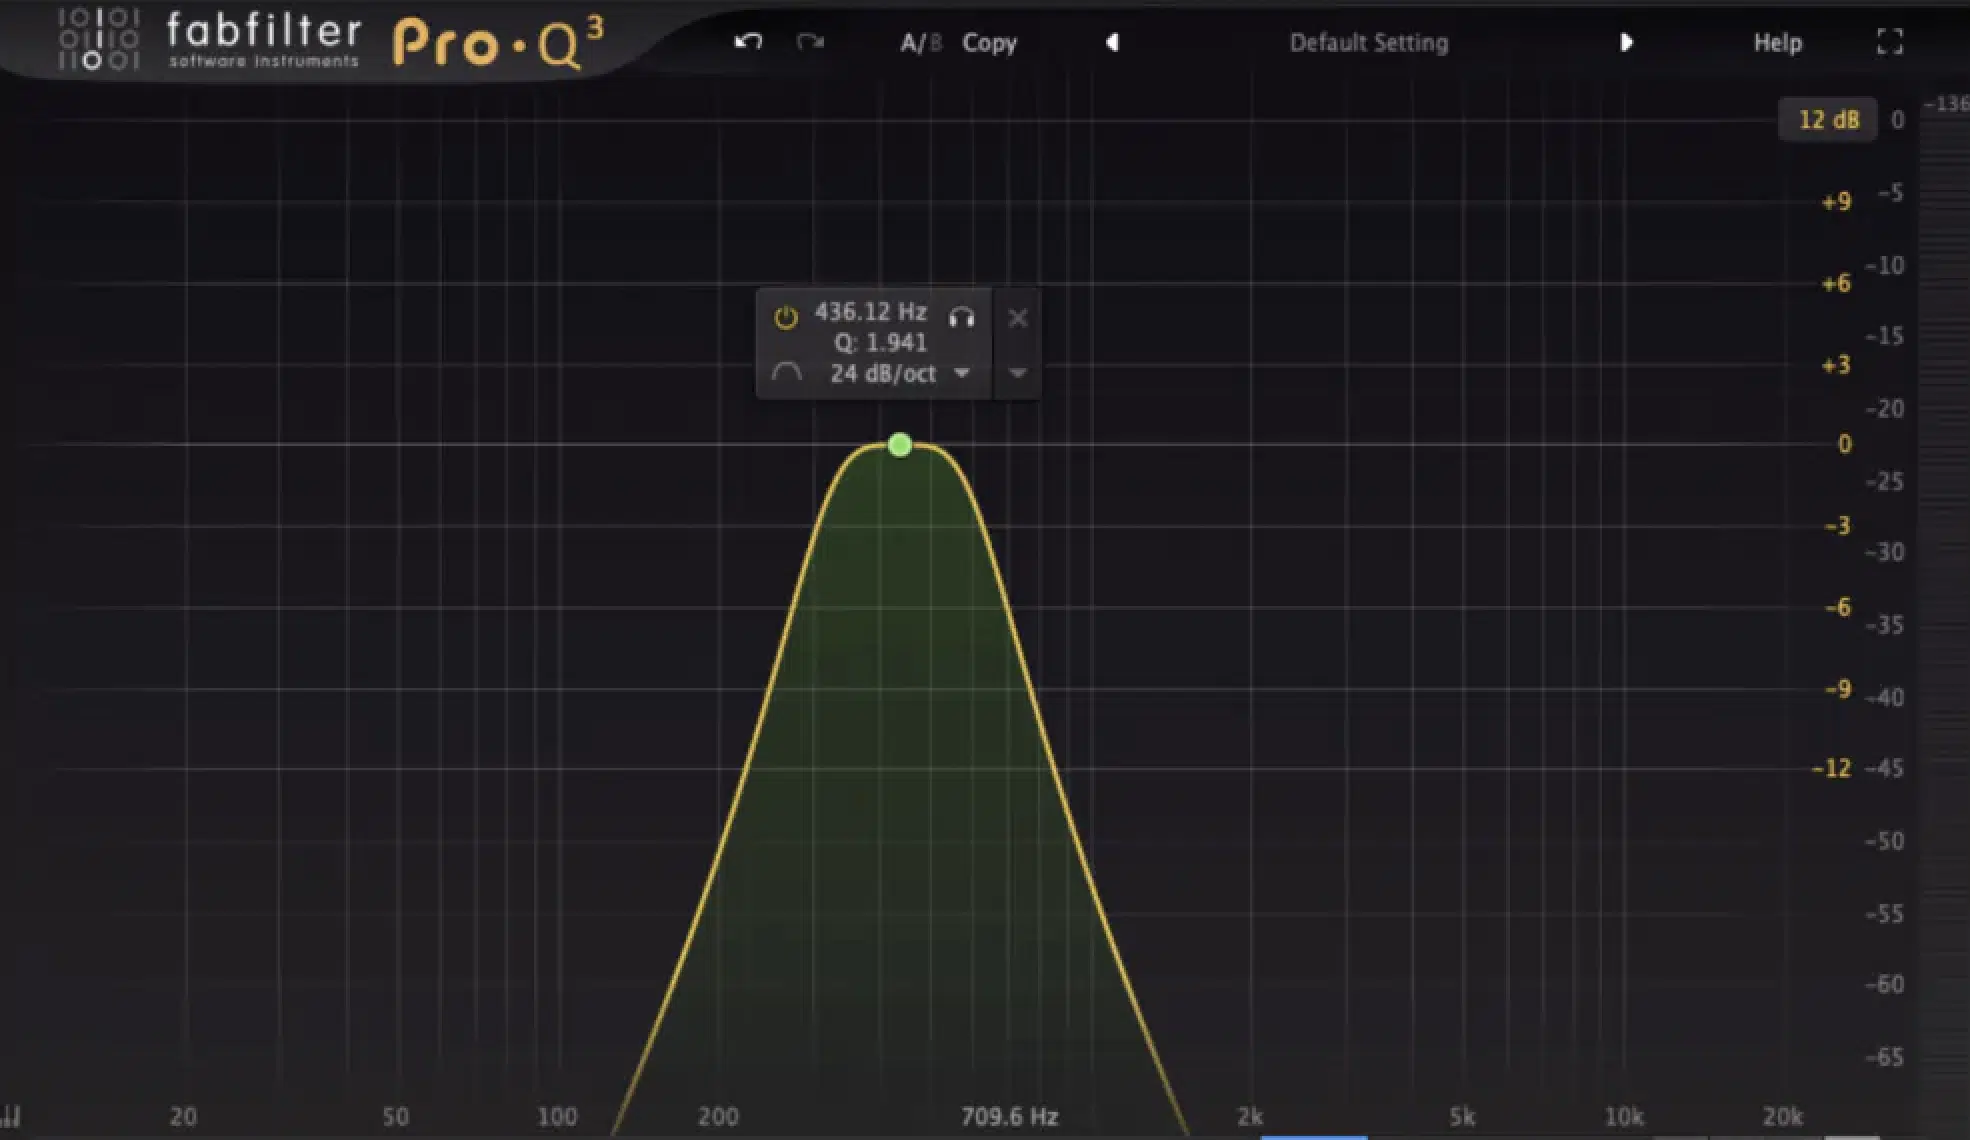
First up is the narrow band pass filter.
The word “narrow” refers to the bandwidth or the certain range of frequencies the filter allows to pass.
This type of filter is incredibly specific, targets a very narrow frequency range, and its application is quite nuanced.
Let’s say you have a snare drum with an annoying rattle at around 900 Hz…
A narrow band pass filter can isolate that specific frequency range (selected range) for modification without affecting the rest of the sound.
Regarding frequency response, narrow band pass filters produce a very sharp curve.
The ‘Q factor,’ which controls how sharp or broad the bandpass filter is, will typically be set high for such a filter.
For example, if you’re using a digital EQ, you can create a narrow band pass filter by selecting a band and tightening its bandwidth to a very small range.
Increase the Q factor to make it sharper.
The narrow band pass filter is an excellent tool for sound design.
Imagine using a narrow band pass filter to focus on specific harmonics of a synthesizer to create unique textures.
But be cautious 一 it can easily make your sound unnaturally thin if overused.
-
Wide Band Pass Filter
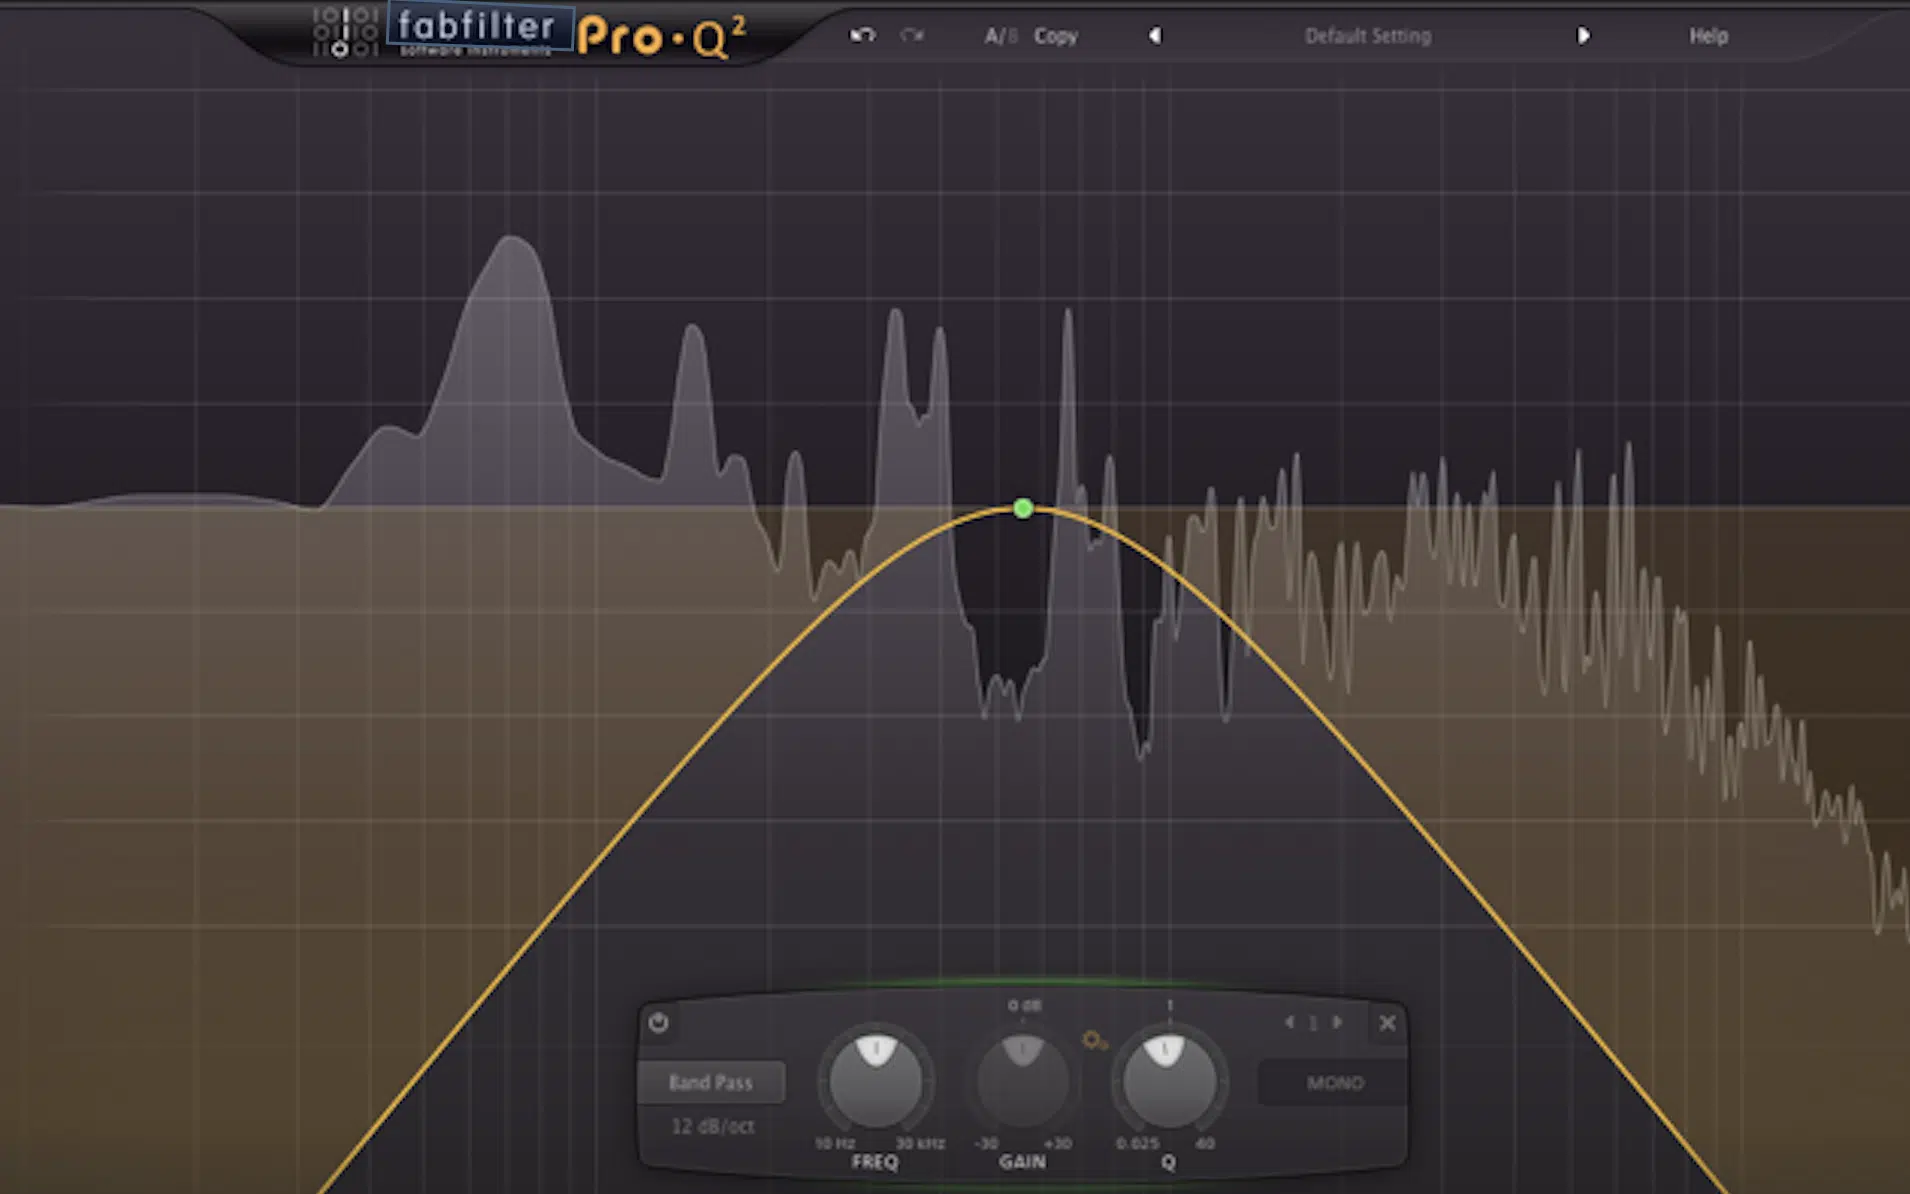
Contrary to its narrow counterpart, a wide band pass filter allows a broader range of frequencies to pass through.
This is particularly useful for isolating a more extensive section of an instrument’s tonal characteristics.
For instance, you might use a wide band pass filter to focus on the mid-range of a guitar track without entirely removing the sparkling highs and full-bodied lows.
The frequency response curve for a wide band pass filter is much flatter and broader.
A lower ‘Q factor’ is generally used for this type of filter.
Let’s say, for example, you wanted to create a ‘telephone voice’ effect…
A wide band pass filter can help you remove enough low-end and high-end to make the voice sound ‘vintage’ (without making it unintelligible).
A wide band pass filter can work wonders on keyboards and synthesizers if you want a vintage vibe.
It emphasizes the frequencies that give the instrument its characteristic warmth.
-
Passive Band Pass Filter
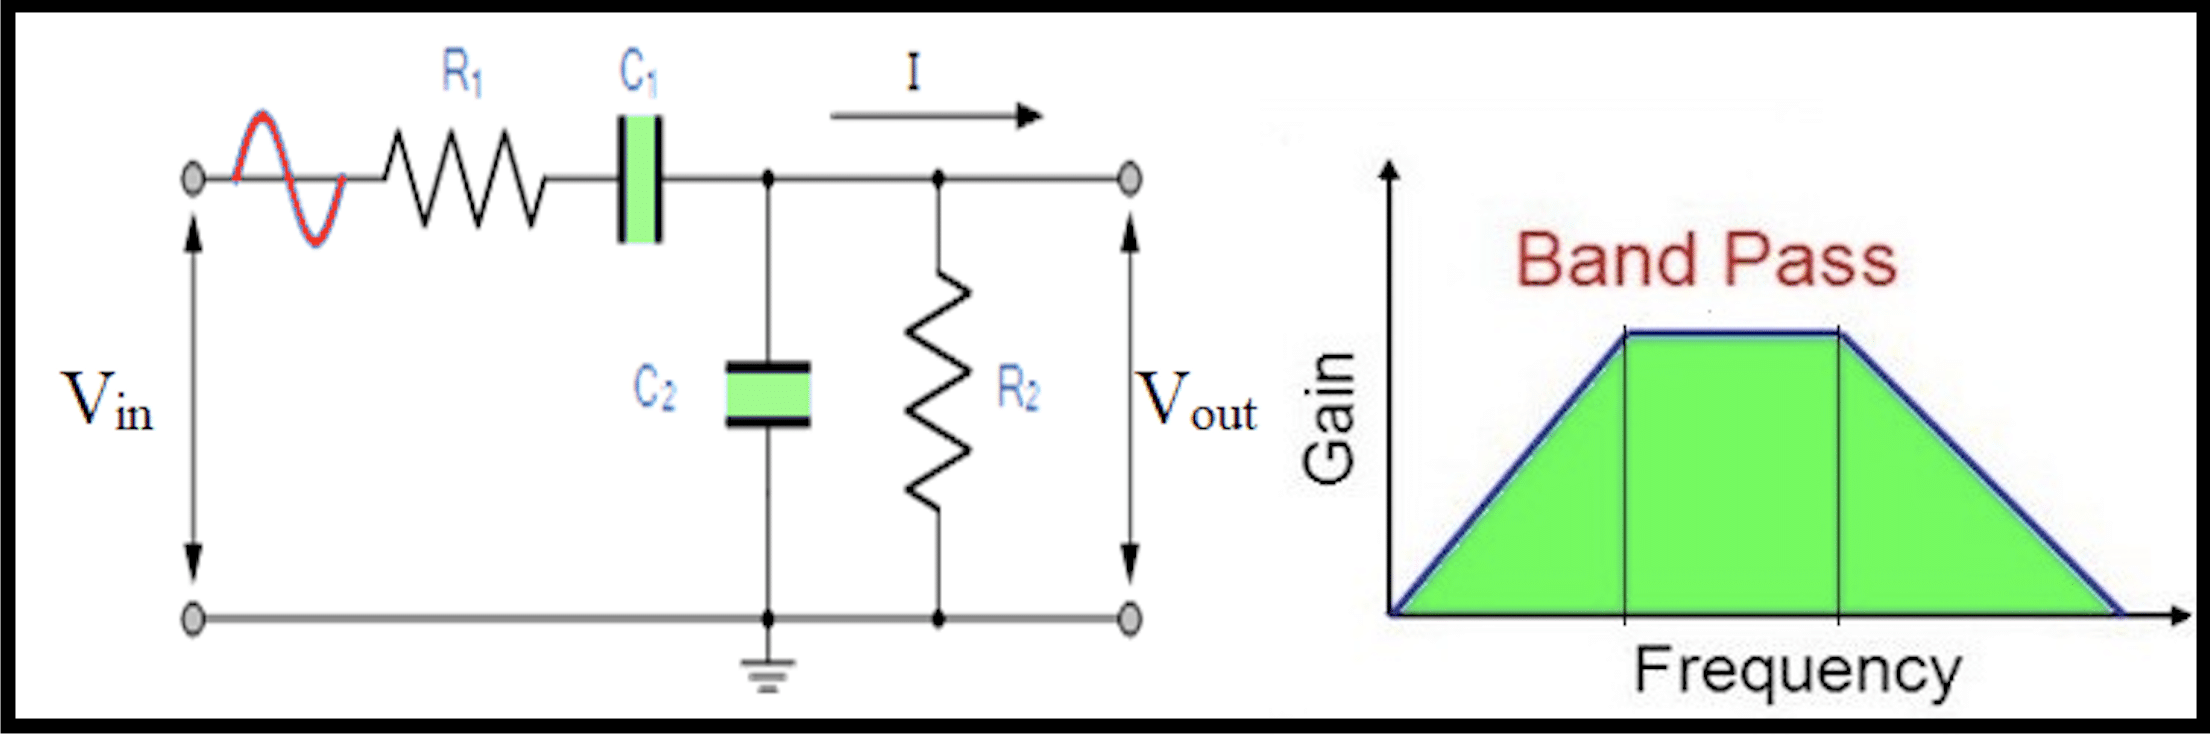
Now, onto the passive band pass filter.
NOTE: Passive band filters are less common in digital music production, but understanding them can broaden your technical knowledge.
A passive band pass filter is built using only passive components like:
- Resistors
- Capacitors
- Inductors
It does not require an external power source 一 unlike its active counterpart, which amplifies op-amps.
Due to their simplicity, passive band pass filters are not as flexible as their active counterparts, and usually have a fixed frequency response & Q factor.
You may come across some vintage emulating plugins that mimic the behavior of these passive filters, though.
Importance of Frequency in Band Pass Filters
So we’ve tackled the types of band pass filters you can use. But to utilize this tool effectively, you must understand the role ‘frequency’ plays.
So, let’s break it down.
-
Frequency Range
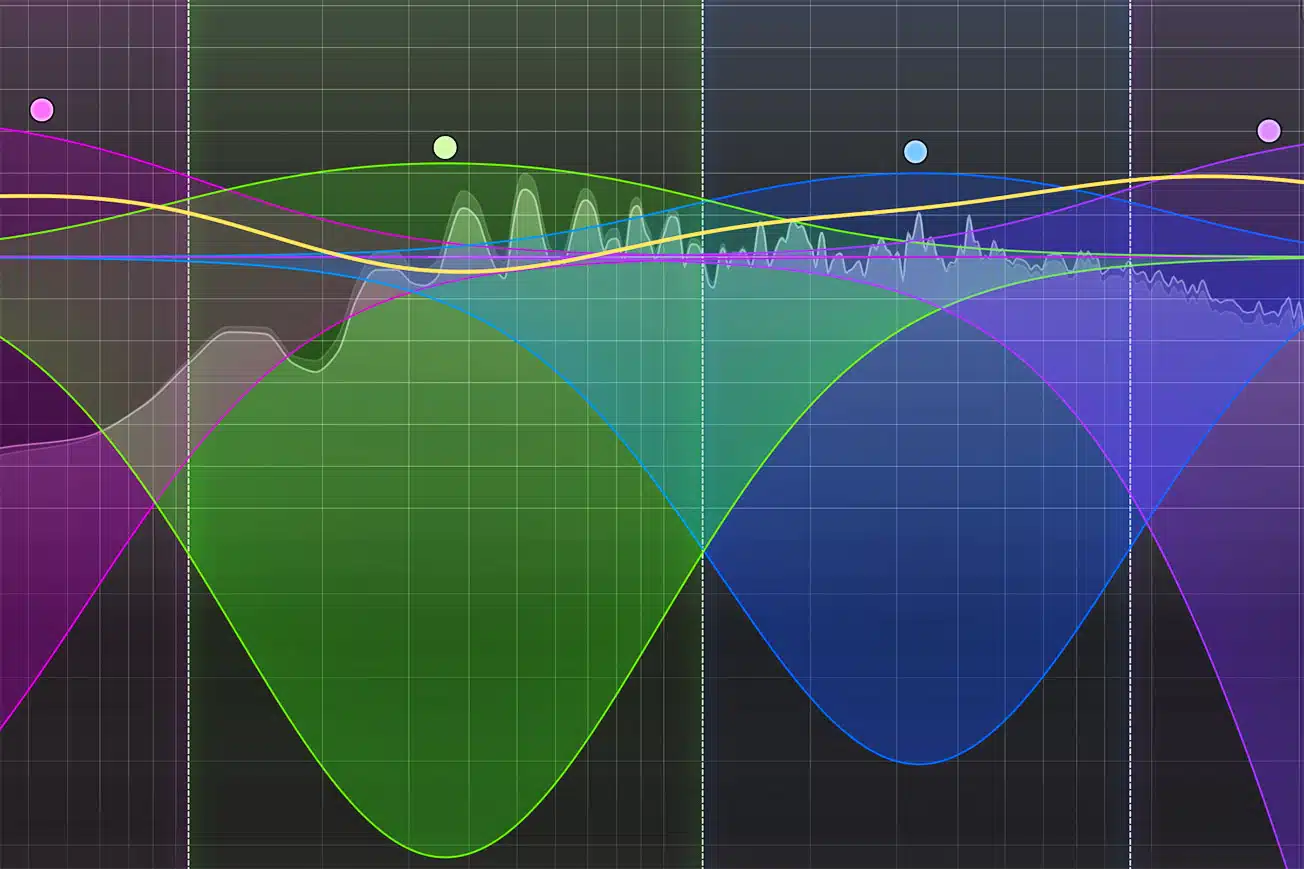
The frequency range is the span of frequencies that a filter allows to pass through.
This frequency range is the playground where your band pass filter operates.
In digital music production, it’s crucial to identify which desired frequency range of an instrument or sound source you want to highlight or suppress.
Software like Ableton Live or FL Studio usually have built-in visual aids to help you identify these ranges.
But it’s not just about the instruments 一 think about the overall mix.
If you have a lot of elements competing in the same frequency range, it can lead to a muddy mix.
A band pass filter can help you carve out space for each element.
For example, if you’ve got a muddy mix, try using a band pass filter on the bass track to leave room for the kick drum to punch through.
PRO TIP: When layering synths, use bandpass filters to ensure each layer occupies a unique frequency range.
This way, they complement rather than compete with each other.
-
Frequency Response
Frequency response refers to how a band pass filter reacts across the frequency spectrum.
It’s the visual curve you often see in your DAW’s EQ section.
- A steep curve 一 Means the filter is more aggressive in its attenuation of frequencies outside the pass band filter.
- A gentler curve 一 Ellicits a softer touch.
In digital music production, a steep frequency response can sometimes cause phase issues.
So unless you’re going for a specific audio effect, you might want to stick with moderate settings.
For instance, a steep frequency response could make the vocals sound unnatural if you’re working on a vocal track.
A more moderate curve will preserve the vocal’s natural tonality while eliminating unwanted frequencies.
Most EQs let you adjust the steepness of the frequency response curve, so play around with this setting to see how it affects your sound.
-
Narrow Frequency Range
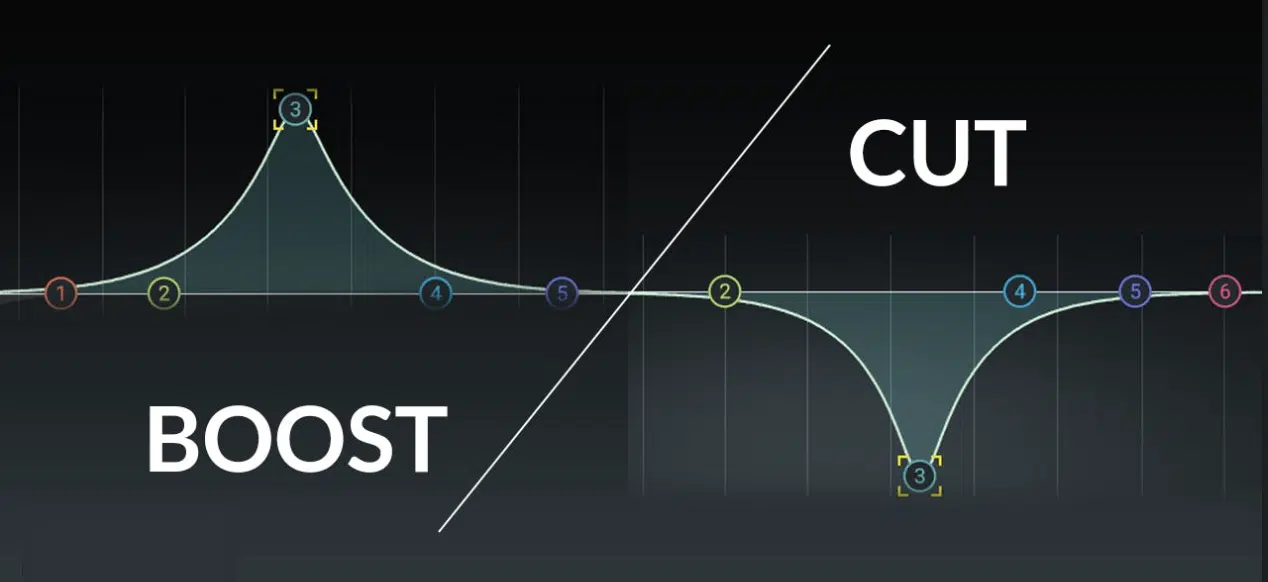
Narrow frequency ranges are often targeted when you want to remove or enhance very specific sound elements.
For example, the ‘sizzle’ of a hi-hat or the ‘thump’ of a kick drum usually lies in a narrow frequency range.
In the world of digital music production, this kind of precision can be your best friend or your worst enemy.
It’s easy to go overboard and end up with a mix that sounds hollow or lifeless.
Removing the narrow frequency range of 2.5kHz to 4kHz can often reduce harshness in vocal recordings.
But do it too much, and your vocal may lose its presence.
When working with narrow frequency ranges, start with subtle adjustments, as the ear is incredibly sensitive to changes in these ranges, so a little goes a long way.
Low Pass Filters & High Pass Filters: A Comparison
You can’t fully grasp the utility of a band pass filter without understanding its siblings in the filter family.
So let’s take a quick detour and discuss how low pass filters and high pass filters relate to our main topic.
-
Low Pass Filters
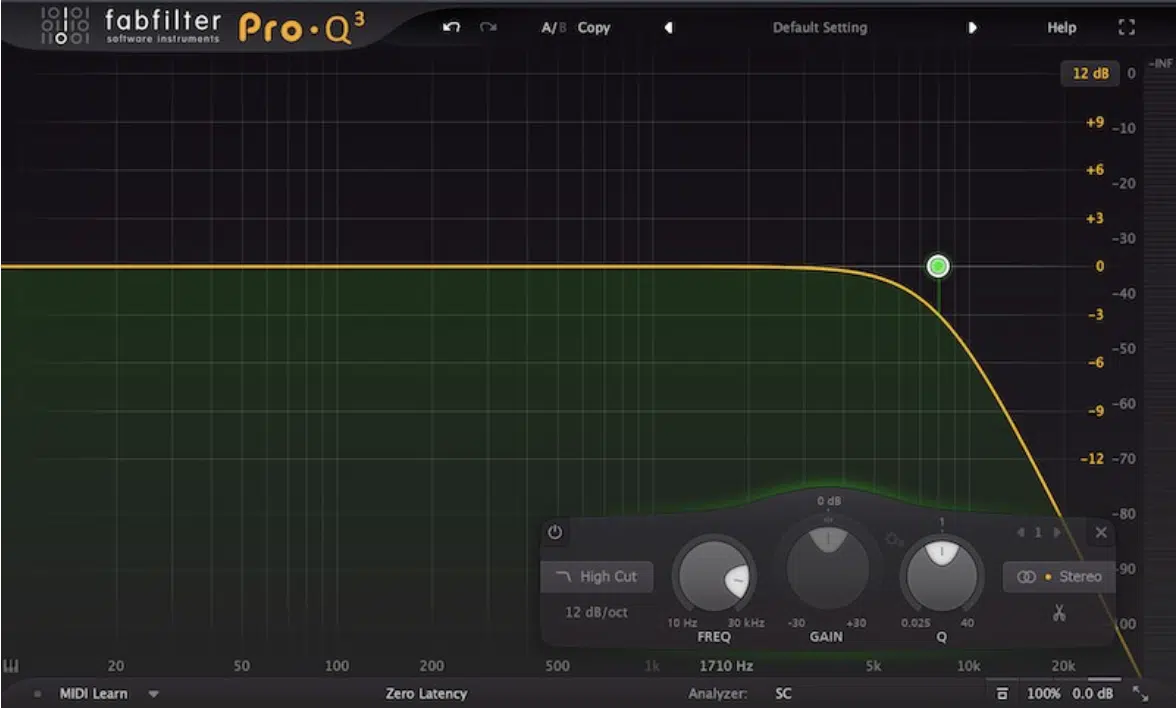
Low pass filters are the polar opposites of high pass filters.
They allow frequencies below a certain cutoff point to pass while attenuating higher frequencies.
In digital music production, a low pass filter is great for isolating the low-end elements like basslines and kick drums.
Low pass filters remove the unnecessary higher frequencies that might cause noise or clashes in your mix.
However, when it comes to working with a low pass filter, it’s essential to strike a balance.
If you go too heavy on the low pass filters, you might end up with a mix that sounds too muffled or lacks brightness.
NOTE: If you’ve got a bass-heavy track but still want some sparkle on top, you can use a low pass filter to clean up the high end without entirely removing it.
Try automating the cutoff frequency of a low pass filter in your DAW for some interesting fade-in and fade-out effects.
Mastering low pass filters is one step closer to creating those insanely pristine, professional beats (and, in turn, bandpass filters themselves).
-
High Pass Filters
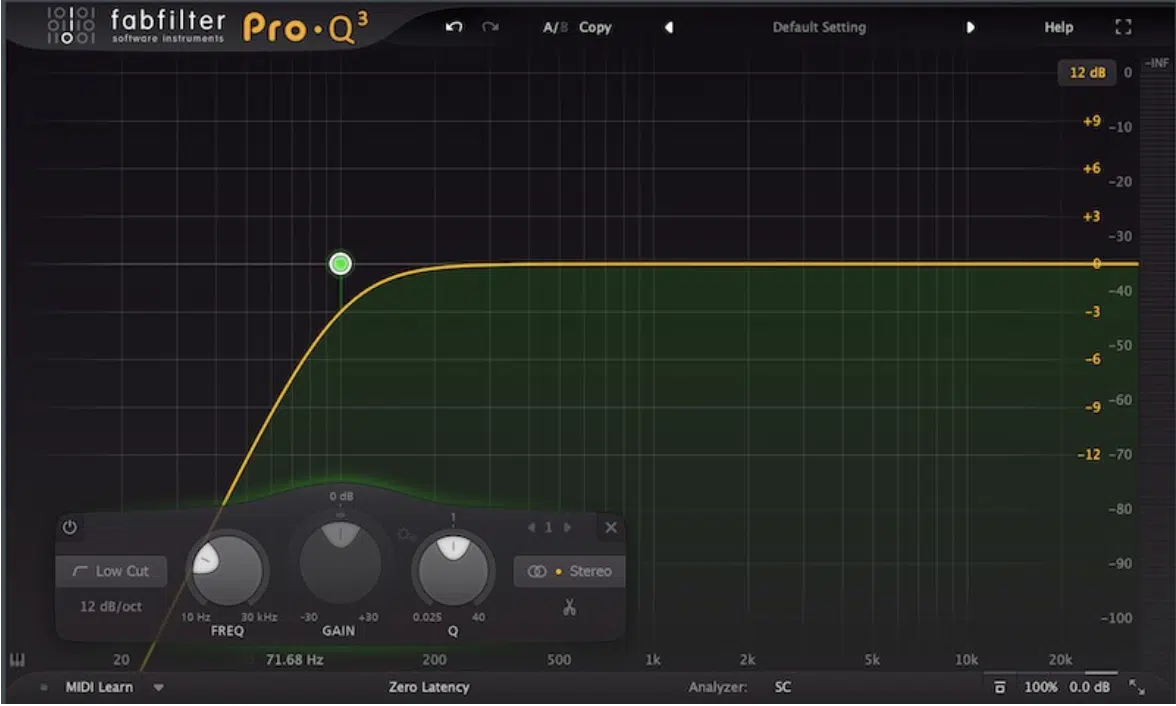
High pass filters are the yin to the low pass filter’s yang.
They let frequencies above a certain point go through while reducing lower frequencies.
High pass filters are incredibly useful for cleaning up a muddy, unprofessional mix.
You can apply a high pass filter to almost anything that doesn’t require low-end frequencies, like:
- Vocals
- Guitars
- Synths
Like a low pass filter, moderation is key when it comes to a high pass filter.
Excessive use of high pass filters can result in a mix that sounds thin and lacks body.
You can apply a high pass filter to your lead synth to make room for the kick and bass, ensuring they hit with full force without any muddiness.
PRO TIP: Apply a high pass filter to your reverb returns.
This helps to clear up any unnecessary low-end muddiness that reverb can sometimes add.
Understanding Cutoff Frequencies
We’ve discussed types of filters (low pass filter, high pass filter, and band pass filter) and the importance of frequency.
Now, let’s dive into something critical yet often misunderstood: cutoff frequencies.
-
Low Cutoff Frequency
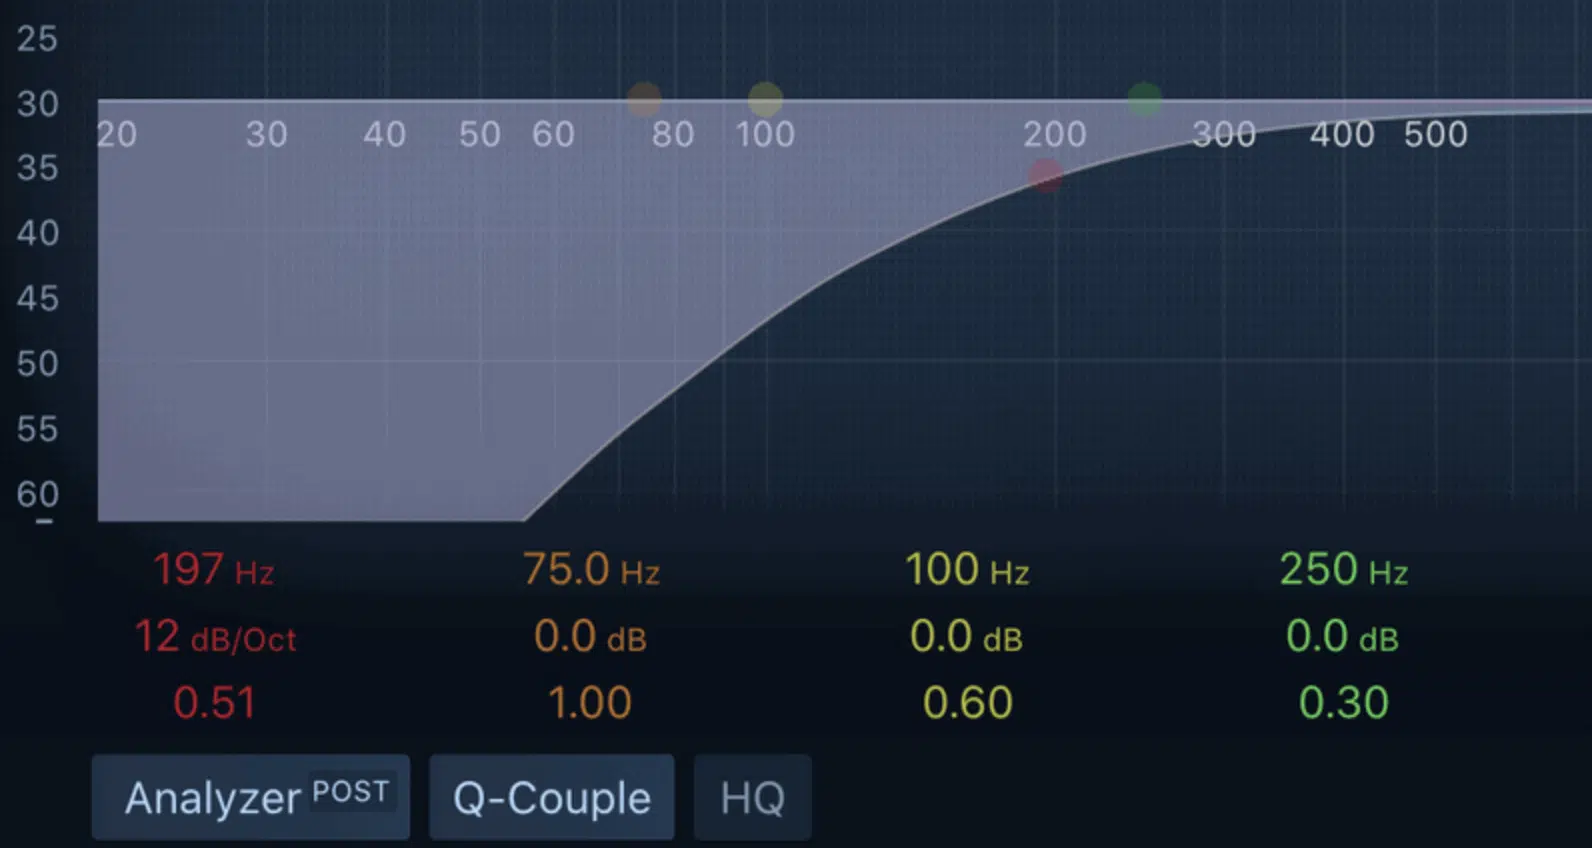
The low cutoff frequency is the point below which a high pass filter starts to attenuate the frequencies.
In the context of a band pass filter, it’s the lower limit of your pass band.
Setting this too high can result in a lack of body or warmth in your mix.
It’s like setting the foundation of a building too high 一 everything becomes unstable.
As a music producer, you often deal with multiple tracks.
Setting the lower cut off frequency wisely can help you create a cleaner mix by eliminating clashing low-end frequencies.
If you’re producing a trap beat, the low cutoff frequency for your 808s could be crucial.
- Set it too high 一 You lose the rumble.
- Set it too low 一 It clashes with the kick.
Remember always to check your mix in MONO when setting cutoff frequencies because if it sounds good in MONO, it will usually translate well to stereo.
-
High Cutoff Frequency
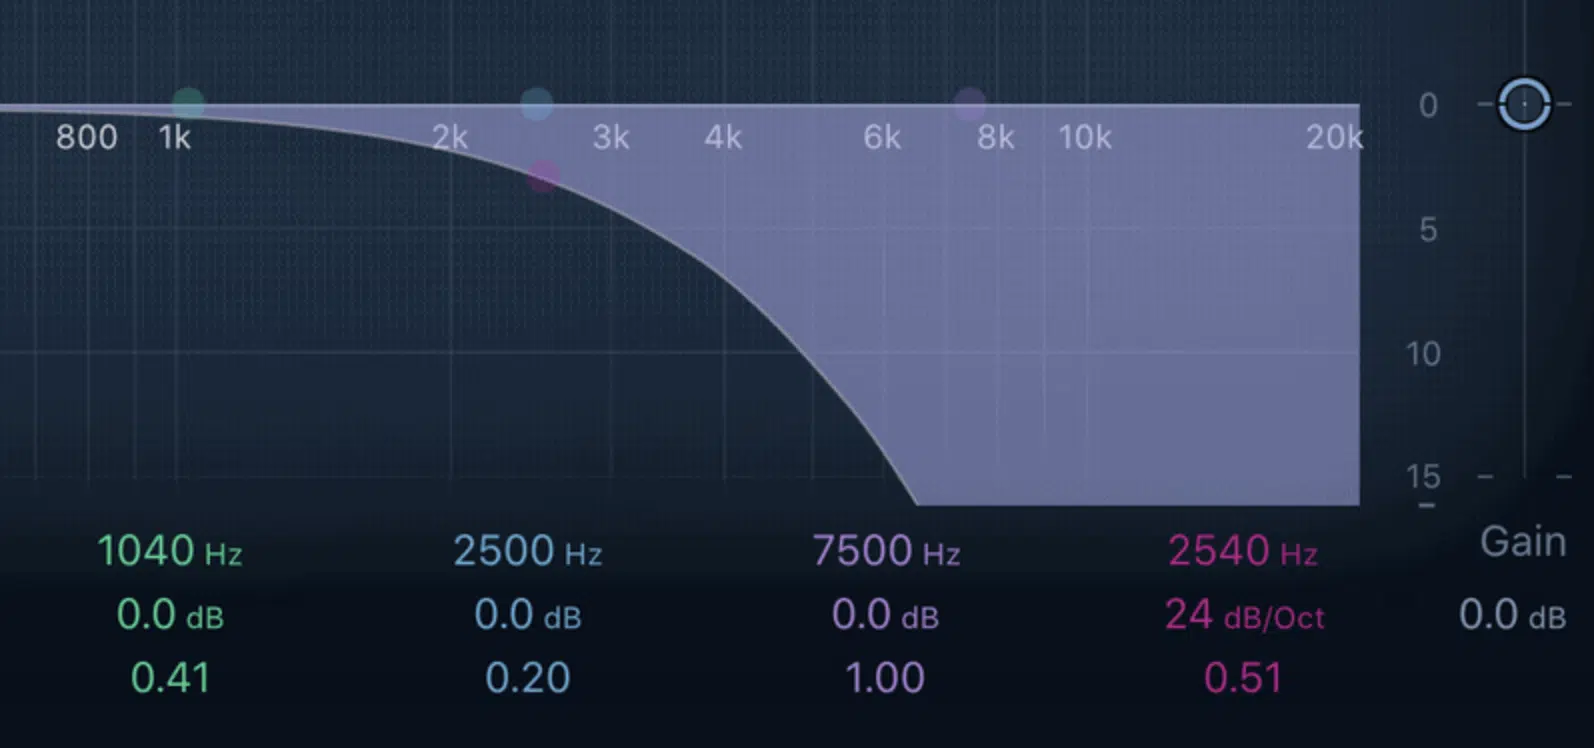
The high cutoff frequency is the ceiling of your pass band in a band pass filter.
It sets the upper limit for which frequencies will pass through.
- Setting the high cutoff frequency too low 一 Can make your track sound muffled.
- Setting the high cutoff frequency too high 一 You’ll get a harsh, brittle sound.
A carefully set high cutoff frequency allows you to remove unwanted higher-frequency range noise or sibilance, which is especially useful in digital music production.
When working on a vocal track, setting the high cutoff frequency just right can help you remove any annoying ‘ssss’ sounds.
Yes, without affecting the clarity of the vocals.
Try using a spectrum analyzer to identify where most of the high-frequency energy in your track is concentrated.
Then, use this info to set your high cutoff frequency.
Fine-Tuning Your Band Pass Filters
With the basics covered, let’s delve into some advanced topics for those who want to fine-tune their bandpass filters.
We’ll start with the concepts of Q factor and peak value.
-
Q Factor & Peak Value
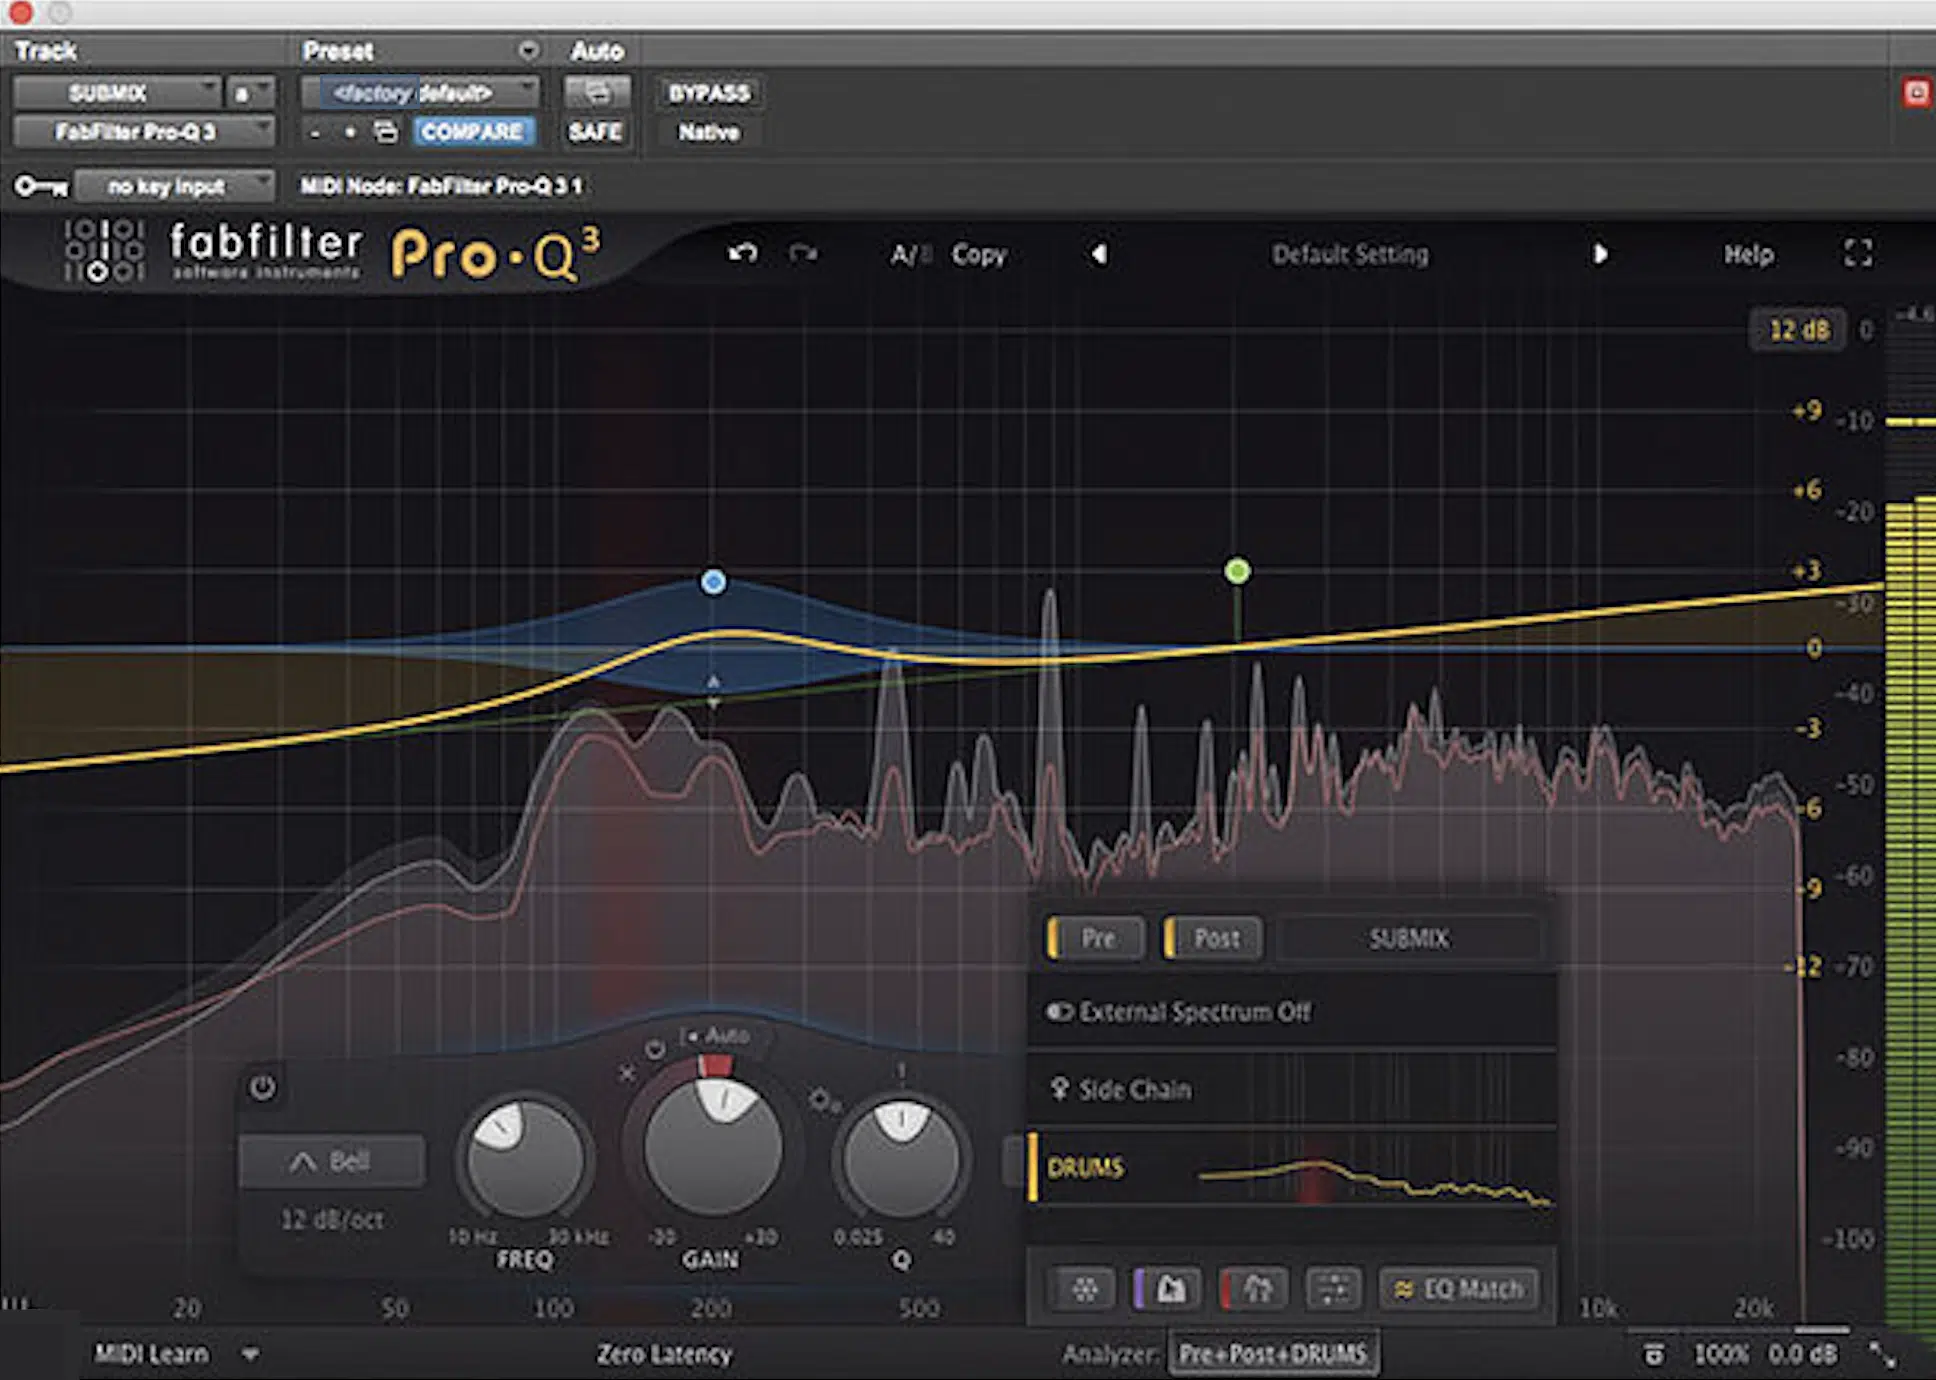
The Q factor (Quality factor) is a dimensionless parameter that describes how narrow or wide the band of frequencies is around the center frequency.
A high Q factor will result in a narrow peak 一 affecting fewer frequencies around the center.
This is good for isolating specific frequency ranges but can result in a more “surgical” or artificial sound if overused.
A low Q factor, on the other hand, results in a wider peak 一 affecting more frequencies around the center frequency.
This is usually preferable for subtle adjustments that maintain a natural sound.
Try starting with a moderate Q factor and adjusting up or down based on your specific needs.
Using your ears is key; if it sounds good, it probably is good.
-
Attenuation and Insertion Loss
Attenuation refers to the reduction in amplitude of the frequencies outside the pass band.
In contrast, insertion loss is the unintended amplitude reduction within the pass band.
Attenuation is generally desired in filtering applications, but insertion loss is typically unwanted.
The goal is to have:
- High attenuation 一 For unwanted frequencies.
- Low insertion loss 一 For the frequencies within the pass band.
To minimize insertion loss, make sure you’re using a high-quality digital filter within your DAW.
Cheaper or poorly designed filters can introduce unwanted coloration or distortion.
If you notice that your filter is causing unwanted changes in the amplitude, you may want to follow it up with a gain adjustment or a limiter to bring the level back to where it needs to be.
Tips for Using Band Pass Filters in Music Production
Now that we’ve explored the technicalities, it’s time to discuss some practical applications.
Here’s how to get the most out of band pass filters in your digital music production endeavors.
-
Getting Rid of Unwanted Frequencies
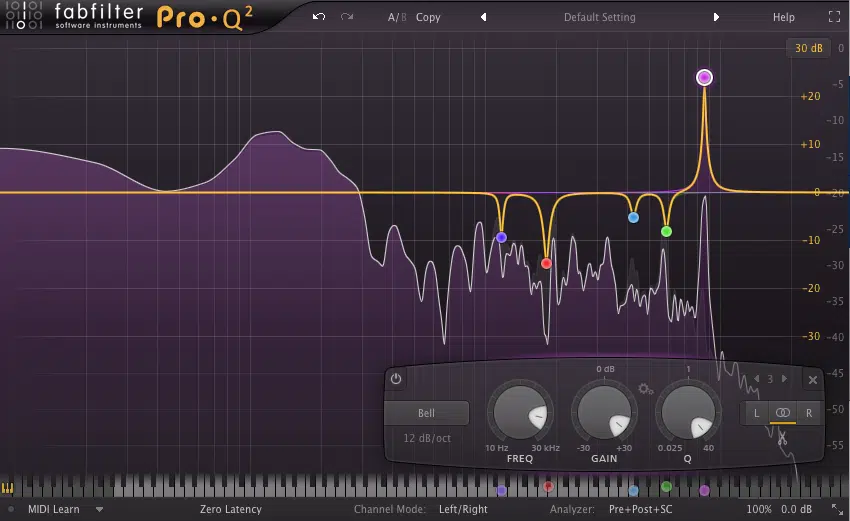
One of the most immediate uses of bandpass filters is eliminating unnecessary or detrimental frequencies to a track.
For example, if you’re working on a bass track, there might be high-frequency hiss or noise that serves no musical purpose.
You can set your bandpass filter to let through only the relevant low-end frequencies.
Avoid being too aggressive with the filter, or you could risk making the track sound unnatural, and no one wants an unnatural beat.
A subtle touch often produces the most pleasing results.
PRO TIP: Automate the bandpass filter to adapt to different song sections.
For instance, during a breakdown, you might want only the mid frequencies of a synth pad to come through, then open it up for the chorus.
-
Enhancing Desired Frequencies
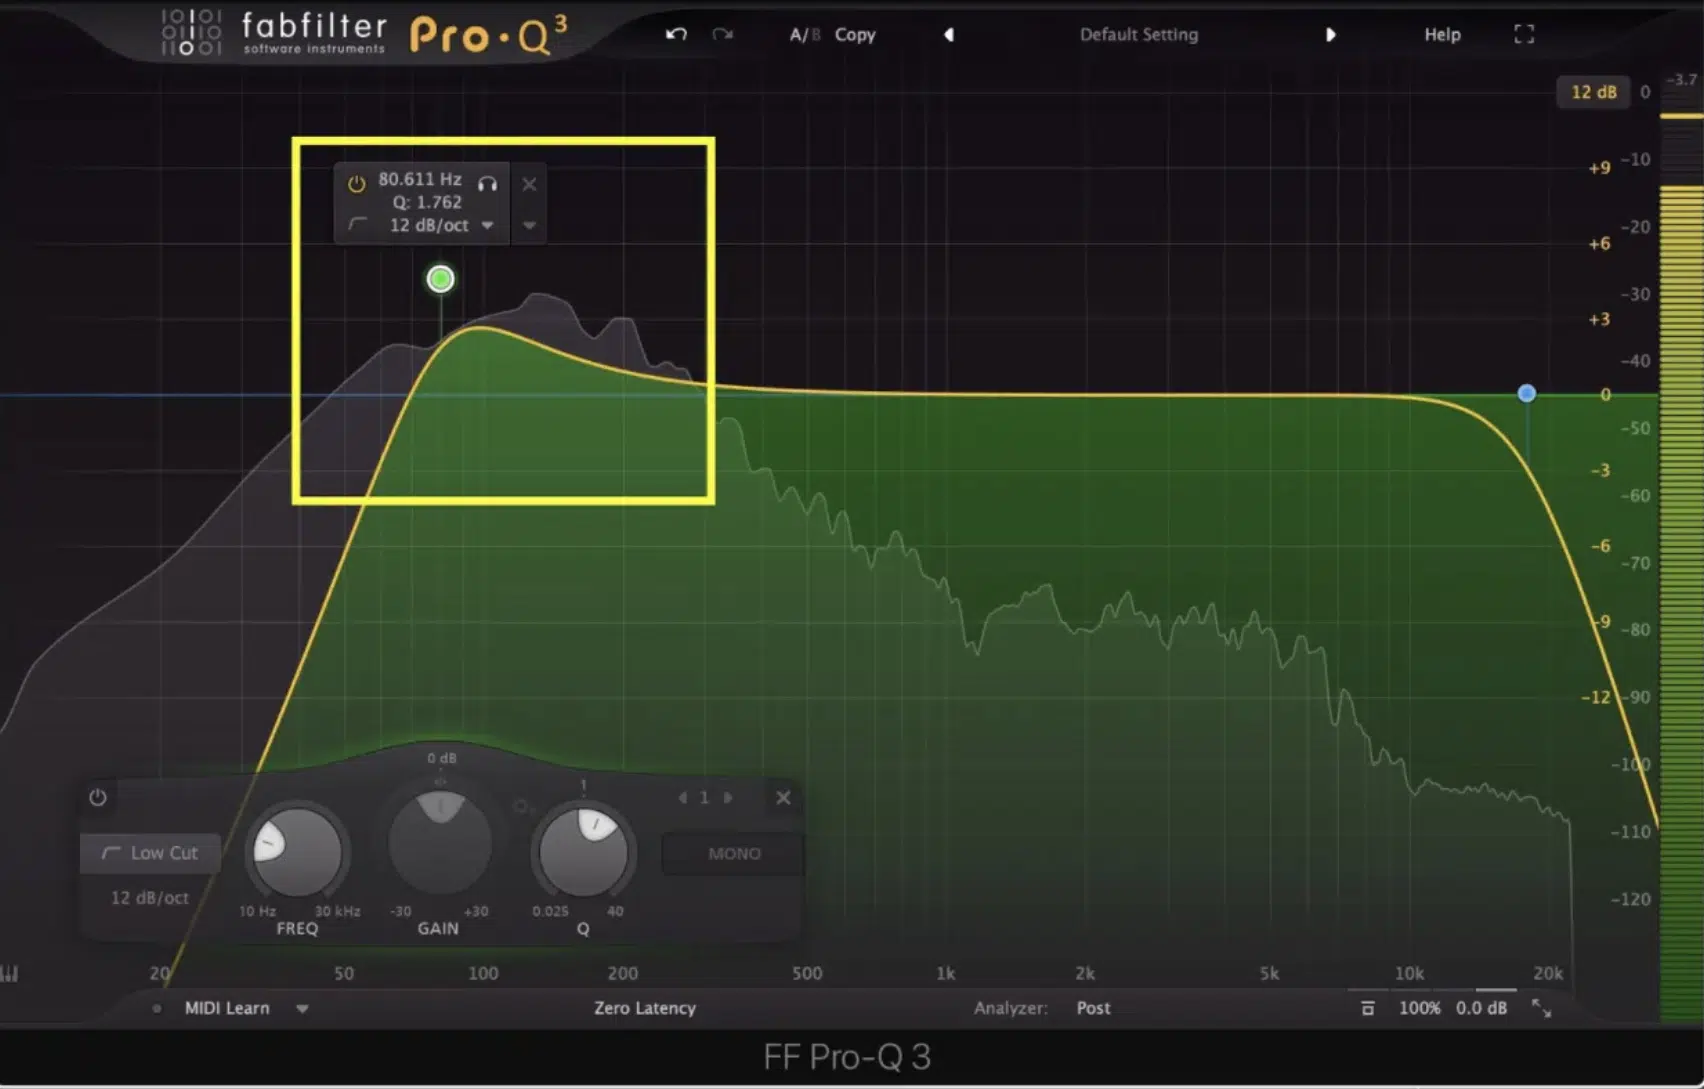
Contrary to eliminating what you don’t want, band pass filters can also emphasize what you want.
Suppose you have a snare drum that sounds a bit thin…
By using a bandpass filter, you can isolate and boost the frequencies that give the snare its “crack” or “body.”
But remember to make subtle adjustments to your Q.
- A narrow Q 一 Can make the enhancement sound surgical and artificial.
- A wider Q 一 Would offer a more organic boost.
Let’s say you’ve isolated the “snap” of the snare at 1.5 kHz.
You could set your bandpass filter to center around this frequency, then boost it slightly to emphasize that characteristic.
As always, be mindful of the overall mix.
Boosting frequencies on one instrument could cause it to clash with another, so always listen in context.
Band Pass Filters: Final Thoughts
We’ve covered everything from the basics to the more complex layers of using band pass filters.
They’re not just optional tools, they’re essential elements that can make or break your mix.
Understanding how to use and manipulate band pass filters properly can lead to a more conducive, fluid mix.
You get to keep the frequencies you want and get rid of the ones you don’t 一 all while maintaining a smooth output signal.
Now, speaking of smooth output signal leads and mastering band pass filters, let’s talk about something that’s an absolute game-changer: this Free Serum Essentials pack.
Serum has a range of filters at your disposal, including (you guessed it) band pass filters.
The best part is that the pack comes with 16 professionally-crafted presets, fully loaded with macros and flexible parameters.
What does this mean for you?…
Well, you can tweak, customize, and really make each sound your very own.
It’s like taking your understanding of band pass filters and catapulting it into a new realm of expertise.
So go on, unleash your creativity and fine-tune those tracks.
With band pass filters and these free Serum Essentials on your side, you’re well-equipped to conquer any sound design challenge that comes your way.
Until next time…


Leave a Reply
You must belogged in to post a comment.