Audio rate modulation is one of the wildest, most powerful tools we have in sound design, and it can completely flip how you go about making epic sounds.
It can help you shape tones in extreme ways, add new harmonics, and push your synth patches into uncharted territory.
Plus, by knowing all about it, you’ll be able to create textures that are impossible with regular modulation and layer multiple mod types like a pro.
And, finally get that gritty, gnarly movement that brings your patches to life.
As producers, it’s key that you know all about audio rate modulation if you want to create, tweak, and produce professional-level sounds that really stand out in the mix.
That’s exactly why I’m breaking down everything you need to know about audio rate modulation, like:
- How audio rate modulation actually works ✓
- Why it’s different from LFOs ✓
- Carrier vs. modulator roles ✓
- Modulation rate, depth, and sidebands ✓
- Key differences between AM, FM, and ring mod ✓
- How to use audio rate modulation in synth patches ✓
- Pro tips for keeping things clean and tight ✓
- How to use it to enhance textures and movement ✓
- Layering multiple types for insane modulation stacks ✓
- Advanced techniques to help you kick things up a notch ✓
- Much more about audio rate modulation ✓
By mastering audio rate modulation, you’ll be able to seriously transform any sound into something new and unpredictable (and enhance your production skills altogether).
This way, you can break the mold, lay down better patches, and help your tracks stand out like an absolute boss.
You’ll never have to worry about bland synth sounds or flat arrangements ever again, which is priceless.
And you’ll be able to experiment all day so you can produce better tracks all around.
Table of Contents
- What Is Audio Rate Modulation Exactly?
- Key Principles of Audio Rate Modulation: Breaking It Down
- How Does Audio Rate Mod Change the Way Things Sound?
- Creative Ways To Use Ring Modulation
- How To Create Super Wild Textures With Layered Modulation
- Bonus: Advanced Tricks To Take Things To The Next Level
- Final Thoughts
What Is Audio Rate Modulation Exactly?
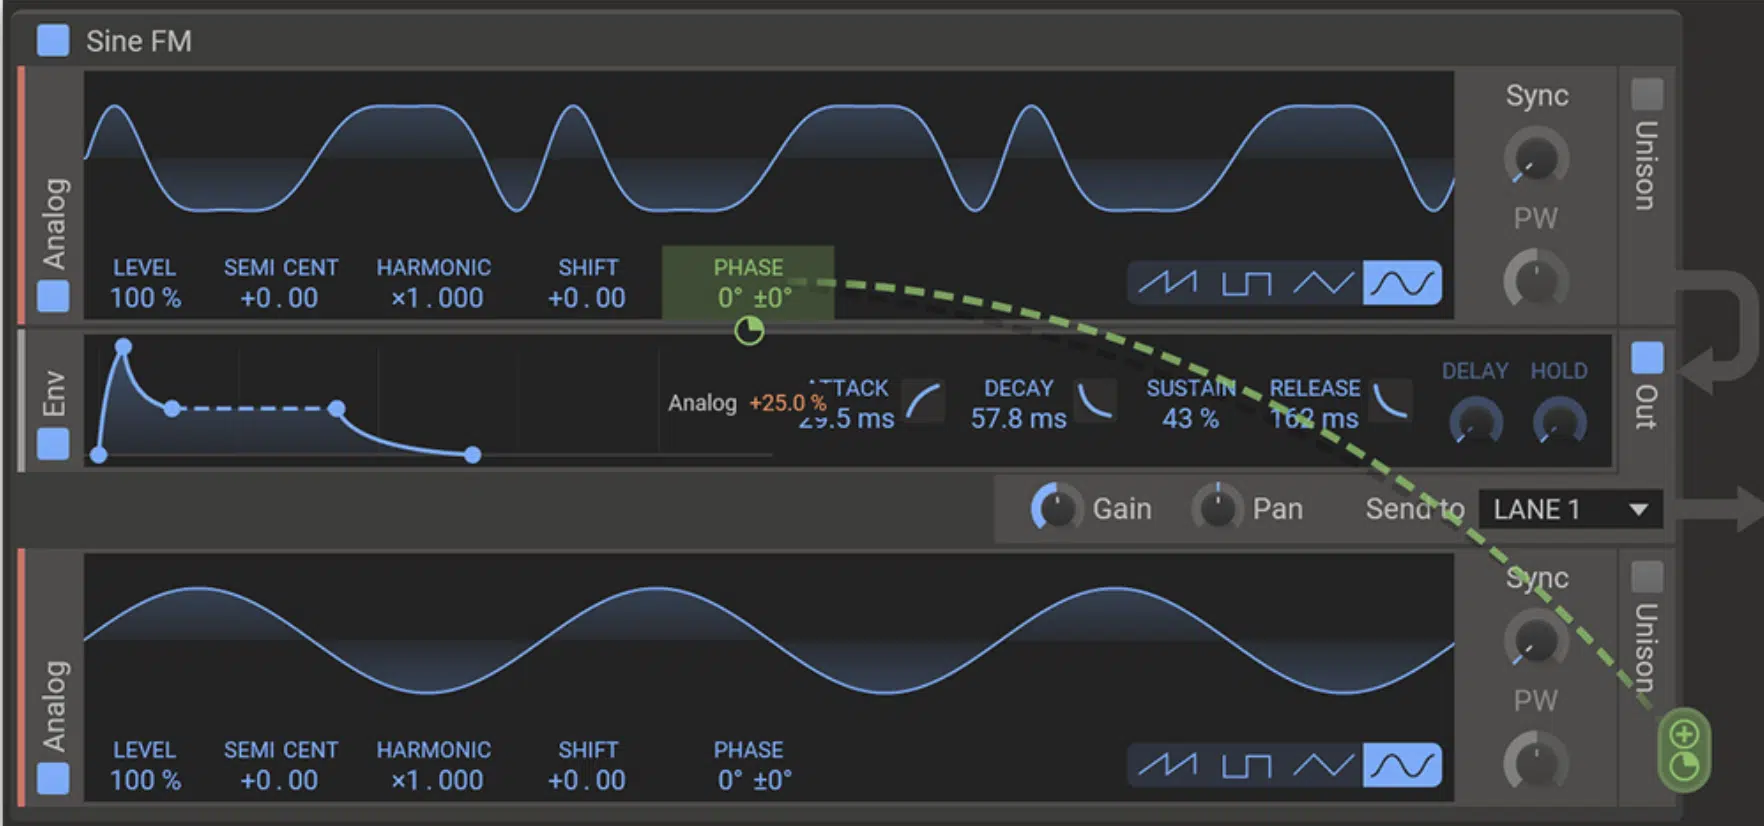
Audio rate modulation is when the modulator, usually another oscillator or LFO, is running fast enough to land in the audible range (roughly 20 Hz and above), rather than moving slowly like a typical LFO.
And that’s what makes this technique so aggressive, bold, and full of character.
It adds harmonic richness, sharp movement, and unpredictable tone-shaping possibilities to your sound design process, which I’m all about.
For example, when you modulate the pitch of a sine wave at an audio rate using another audio rate sine wave, it doesn’t just wobble anymore…
It starts generating new frequencies that weren’t there before, called sidebands.
These extra tones stack up, especially if your modulation depth is high, and create complex, sometimes metallic or vocal-like textures.
Depending on your waveforms and frequency ratios, of course.
This all matters because it opens up a new world of creative potential in your synth patches and can help you take things to the next level.
Bottom line, you’re not just filtering or shaping amplitude 一 you’re actually altering the core of the sound itself.
This is why audio rate modulation is a must-know technique for any producer serious about taking their sound design to the next level, which I hope is all of you.
Key Principles of Audio Rate Modulation: Breaking It Down
Before diving into actual patching and crazy modulation combos, there are some key pieces of the audio rate modulation puzzle that you’ve gotta understand. These aren’t just details—they’re what make the whole thing work and sound how it does. And once you get the hang of them, audio rate modulation will feel way more natural and way more useful in your day-to-day production workflow. So, let’s get it going.
Carrier vs. Modulator
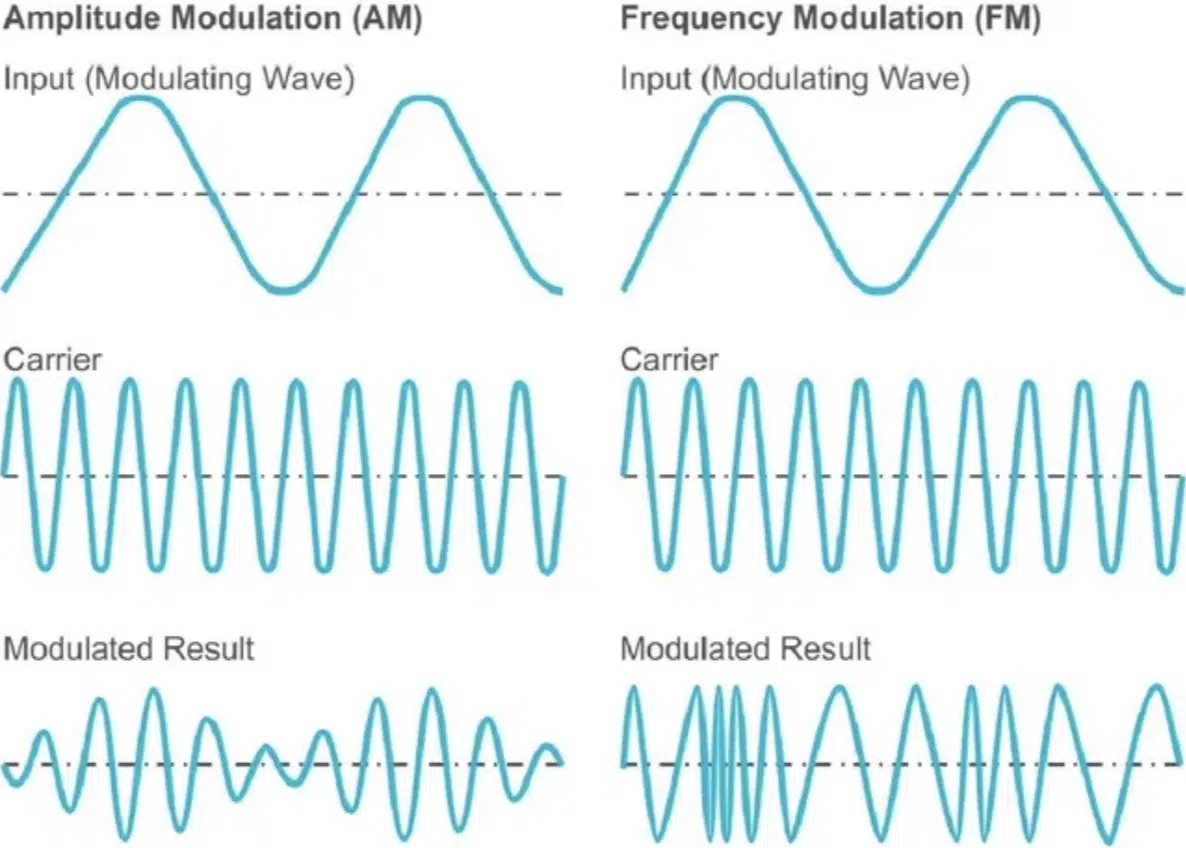
When you’re trying to really get the concept of audio rate modulation in the bag, there’s two main components that you have to know all about, and those are:
The carrier, which is the main oscillator whose frequency, amplitude, or filter cutoff frequency gets modulated.
The modulator, on the other hand, is the second audio rate signal that actually does the modulation.
Think of the carrier as your core sound source (like a saw wave playing a steady note) and the modulator as the signal that transforms it into something more complex, harmonically edgy, or wild depending on how you set it up.
For example, if you’re using a sine wave as your carrier at 200 Hz and patch in a triangle wave modulator at 600 Hz to modulate its frequency, this completely changes things.
You’ll instantly start to hear sidebands emerge, tones that weren’t there before, because of how fast the modulation is happening.
This way, you’ll get epic harmonic motion that completely changes based on the:
- Waveform shape
- Modulation depth
- The ratio between the two oscillator frequencies (in this case, 3:1)
That ratio plays a super big role in whether the tone sounds musical or totally dissonant.
In modular or some digital setups like VCV Rack or Massive X, you can try routing your modulator’s output directly into the carrier’s pitch input.
And use an attenuator to dial in modulation depth between 20%–40%.
This sweet spot is what keeps things full of movement without completely melting the original sound, and it’s a great way to build intense, dynamic patches.
All without sacrificing that musicality factor that makes things sound professional.
And remember, it’s this direct interaction between carrier and modulator that makes audio rate modulation so powerful for innovative sound design.
Modulation Rate & Depth
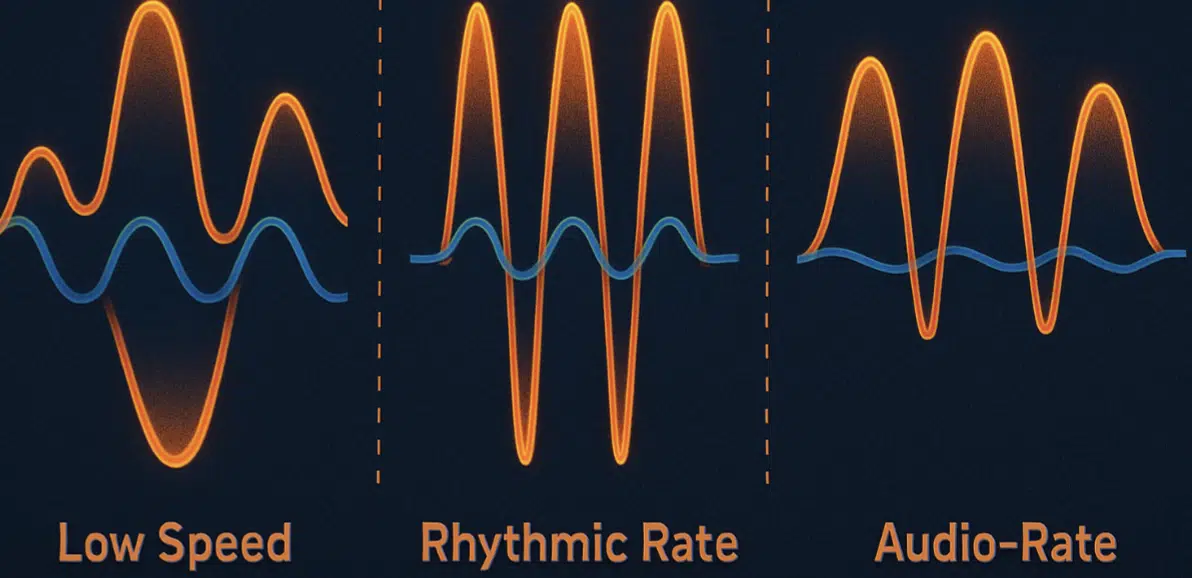
Next up, you’ll need to know about the modulation rate in audio rate modulation, naturally, which refers to the frequency of the modulator.
This typically starts at 20 Hz (the low end of human hearing) and can go way beyond 5kHz depending on your synth’s capabilities.
For example, if you set your modulator at 880 Hz and route it into a triangle wave carrier at 220 Hz with 40% depth, it will immediately generate new harmonic content that feels dynamic, textured, and alive.
On the flip side, modulation depth determines how drastically the modulator affects the parameter:
- Too shallow (like 10%) 一 It barely adds any additional harmonics/side bands.
- Too deep (like 100%) 一 You risk turning your sound into something noisy or unrecognizable.
A good starting point is to set the depth at 30%–50% and dial it in while sweeping the modulator’s frequency to hear how your sound changes.
This works great for pads or bass patches that need extra motion without overwhelming the core tone, which is key.
A good pro tip I could give you is to use an envelope to automate the modulation depth over time (over time being the key words here).
It will give your audio rate modulation dynamic shape and let you create patches that evolve throughout a track.
This is especially true when paired with LFOs controlling filter or volume layers.
Harmonics, Aliasing & Sidebands
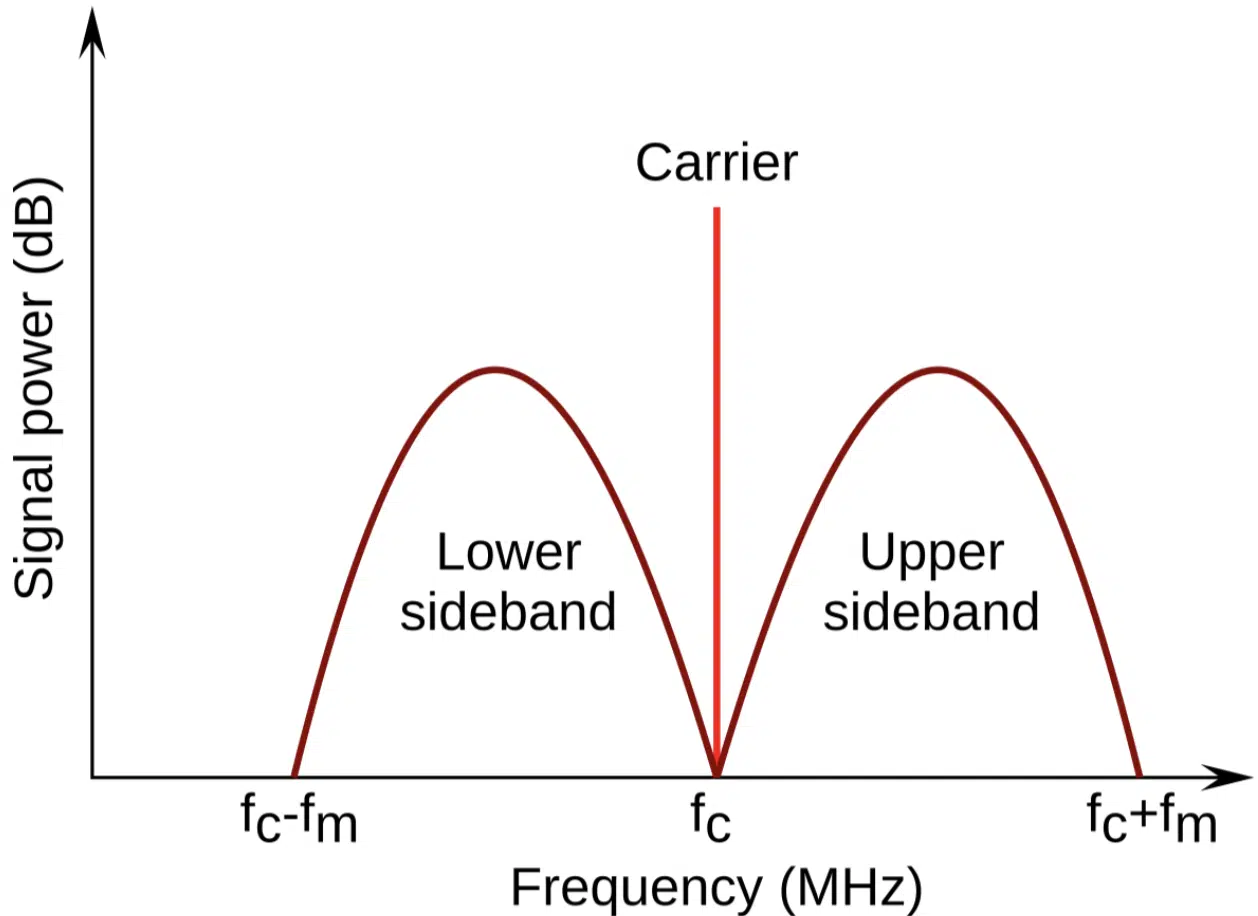
In audio rate modulation, increasing the modulation depth creates more sidebands, which are new frequencies generated by the sum and difference of the carrier and modulator.
This means (mathematically), you can actually predict what a given set of parameters will sound like, and you’ll actually be on point.
For example, modulating a 500 Hz sine wave carrier with a 300 Hz triangle modulator will result in sidebands at 200 Hz and 800 Hz, and that’s just the beginning…
Stack multiple harmonics and you’ll get a spread of new frequencies that build complex tones fast 一 talk about innovation.
However, if your modulator’s frequency exceeds half your system’s sample rate, usually 22.05kHz on a 44.1kHz system, you’ll start getting aliasing.
And if you’re unsure, ‘aliasing’ refers to ugly, digital artifacts that aren’t musically related to your patch, and far from pleasant.
This happens most often with sharp waveforms like square or saw waves modulating at high speeds when paired with high depth values or multiple stacked modulators.
For instance, modulating at 9kHz with a 90% depth on a square wave modulator will almost always introduce aliasing unless your synth has proper oversampling and it’s enabled.
PRO TIP: Use a filter after your modulated signal to clean things up because the results can sound hard without enough finesse, and you certainly don’t want that.
What you’re going to do is set a cutoff frequency around 10kHz to tame the aliasing and remove non-harmonic high-end.
Better yet, use analog-modeled synths or high-quality hardware that handles audio rate content more gracefully.
And, if you’re working with modular gear, try patching a notch filter before or after (or both), your modulation chain to carve out unwanted harmonics in real-time.
This is super helpful when layering tones or using ring modulation in aggressive patches.
You can even modulate one, or both of the filters (if you’re using 2 modulators in opposite directions) to create your own custom phaser-like effects.
It’s super dope, so I definitely suggest you give it a go.
Amplitude Modulation (AM)
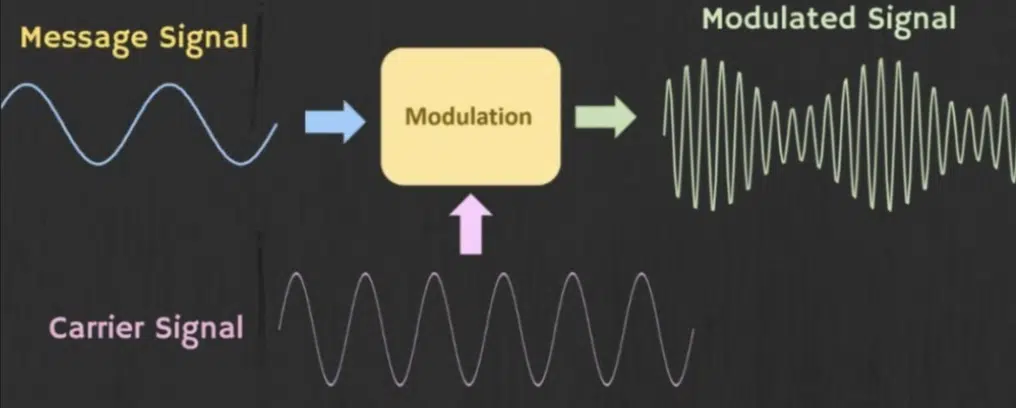
Amplitude modulation (AM) happens when an audio rate modulator changes the volume of the carrier 一 usually via a VCA (Voltage Controlled Amplifier).
This results in new frequency content in the output without affecting pitch.
For example you can:
- Set a 400 Hz saw wave as your carrier
- Use a 600 Hz sine wave as the modulator
- Patch it into the VCA’s CV input
- Set the modulation depth to around 50%
By doing this, you’ll hear a tremolo effect so fast that it actually turns into buzzing, harmonic shimmer, which is super cool.
Unlike frequency modulation, the original carrier and modulator are still present in the final sound, which makes AM slightly more predictable and often easier to mix.
That makes it great for adding shimmer to pads, subtle dirt to leads, or even creating tremolo-like effects that stay tight and rhythmic in tempo-synced patches.
PRO TIP: Try using an LFO to automate the modulation depth of your AM signal…
Dial in a depth range between 15% and 40% and use a synced rate (like 1/8th note) to give your sound design extra movement that evolves with your track.
When paired with a low-pass filter, this keeps the texture smooth while still being full of modulated energy.
Frequency Modulation (FM)
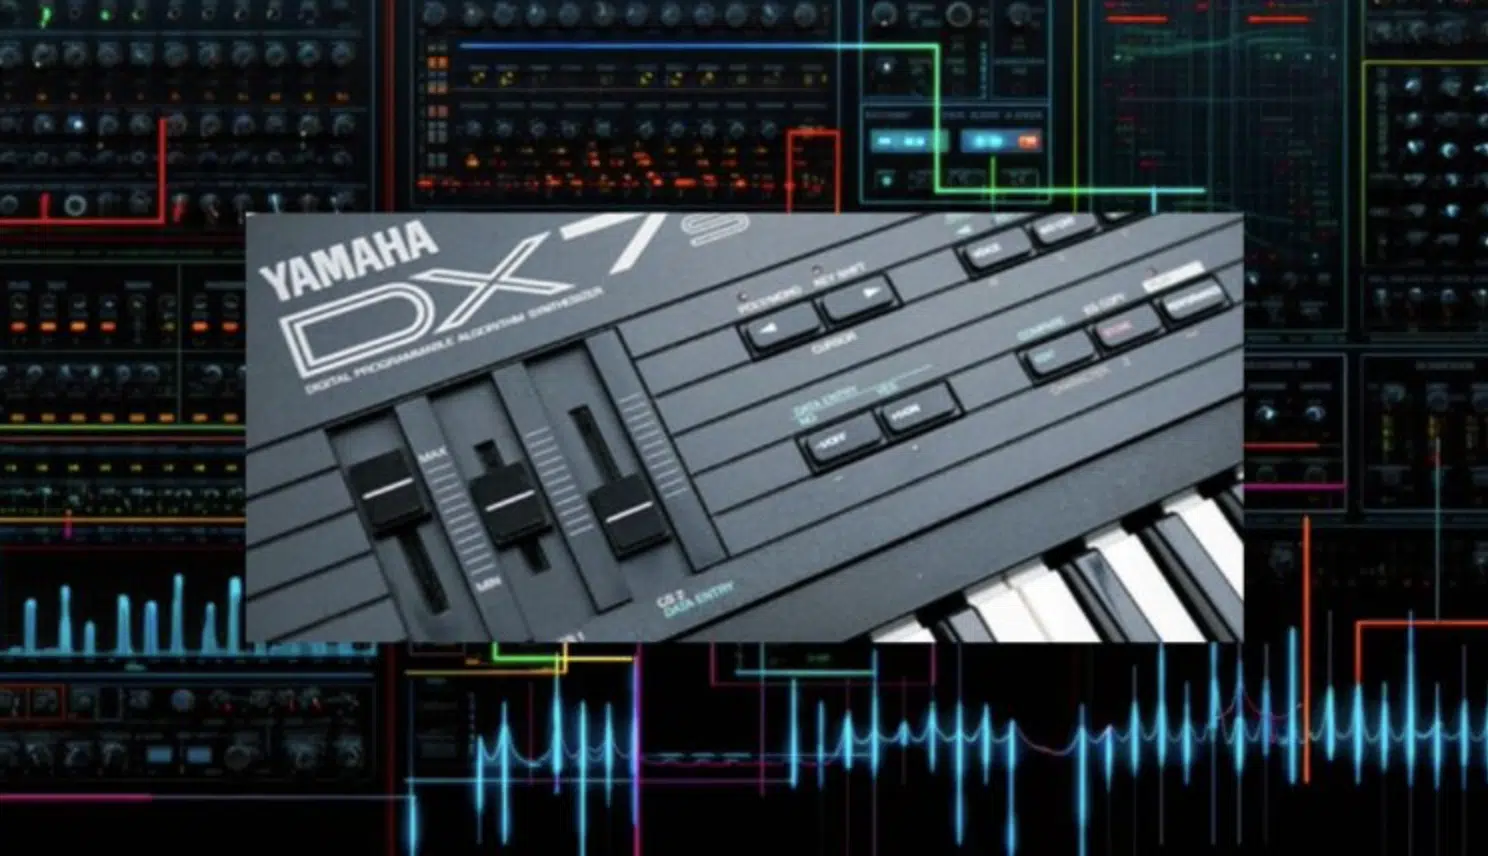
Frequency modulation (FM) is when one oscillator modulates the frequency of another at audio rate, and it’s hands down one of the most powerful tools for creating harmonically rich tones, period.
Let’s say you set your carrier oscillator to a sine wave at 220 Hz and modulate it with another sine wave running at 440 Hz…
You’ll hear new overtones appearing based on that ratio, which are called sidebands, and they’re what give FM that sharp, glassy, or bell-like character.
The modulation depth here controls how far the frequency is pushed in either direction from its original cycle, and it’s usually measured in Hz or a percentage.
A shallow depth (like 10-20%) adds subtle shimmer.
A deeper modulation (80-100%), on the other hand, can completely reshape your waveform 一 turning a clean sine into something that sounds like a metallic drone or even a growling bass depending on the modulator’s shape and pitch.
For more ‘musical’ results, you’ll want to use integer frequency ratios between the modulator and carrier (like 1:2, 2:3, or 3:4).
This will keep the harmonics in tune with the fundamental note.
But don’t be afraid to break that rule and experiment with non-integer ratios (like 1.25:1) for more interesting, inharmonic textures that feel raw and otherworldly.
PRO TIP: Inside synths like Arturia’s DX7 V or Ableton’s Operator, start with a sine modulating another sine at a 2:1 ratio, crank the modulation depth to 50%, then adjust the envelope to modulate that depth over time.
By doing this, you’ll get that classic FM pluck sound that cuts through any genre.
And this entire technique only works because you’re diving into the power of audio rate modulation, which unlocks tones you simply can’t get from an LFO or basic filter modulation alone.
Ring Modulation
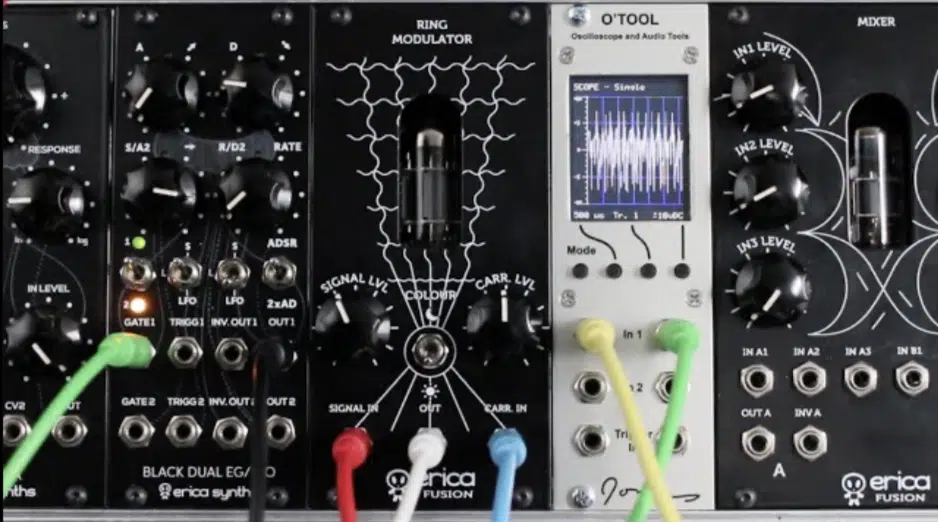
Ring modulation is another form of audio rate modulation where two signals (usually oscillators) are multiplied together, but with their original frequencies removed.
This leaves only the sum and difference of those frequencies in the output.
For example, if you feed a 300 Hz sine wave and a 700Hz triangle wave into a ring mod module, the resulting sound will only contain frequencies at 400 Hz and 1000 Hz.
This gives it that robotic, metallic, or bell-like tone you hear all the time.
Unlike amplitude modulation, you don’t hear the original carrier or modulator, which is why ring mod is so good for creating completely alien or dissonant textures.
The more complex your waveforms, the more complex and unpredictable the output becomes, especially when you start using saw waves or square waves with rich harmonic content.
And if you want to create weird percussive hits, try running a snare sample through a ring mod and use a sine wave (at audio rate speed) around 900 Hz as the modulator.
Then, automate/modulate the modulation depth so it pulses and decays.
It’s a killer way to make layered patches that have a crunchy, gritty edge without just randomly slapping on distortion like a maniac.
And again, that’s the magic of audio rate modulation…
You’re not just shaping volume or pitch 一 you’re completely transforming the frequency spectrum in ways that filters and envelopes just can’t match.
Side note, if you want to find out all the best ring modulation plugins, I got you.
How Does Audio Rate Mod Change the Way Things Sound?
Audio rate modulation changes the way things sound by injecting motion, complexity, and harmonic detail into tones that would otherwise feel static, thin, or flat.
For example, take a basic saw wave and modulate its filter cutoff frequency at 2kHz with a sine wave and it’ll suddenly feel alive, like it’s breathing or shimmering.
Yes, even though you haven’t touched the envelope or added FX.
This technique works wonders when you’re trying to make boring patches sound more dynamic, especially pads, leads, or FX layers that need more texture.
I suggest that you try stacking multiple types of modulation (like frequency modulation on pitch and ring modulation on amplitude), and then blend them using a low-pass filter at around 12kHz to keep things from getting too harsh.
Even just changing the shape of your modulator waveform from sine to triangle or square will make a massive difference in how the final sound feels.
You can also use audio rate modulation to create tones that feel like they’re constantly evolving, which is nearly impossible with standard LFOs or tremolo alone.
For example, try modulating the cutoff frequency of your vocal sample at audio rate with a triangle wave 一 add 20% depth and layer it under your lead to give it this subtle, robotic movement that blends weirdness and clarity at the same time.
And at the end of the day, that’s what makes audio rate modulation so essential.
It lets you create movement, character, and unpredictable elements inside your synth, which gives your patches a professional edge that just hits… different.
Creative Ways To Use Ring Modulation
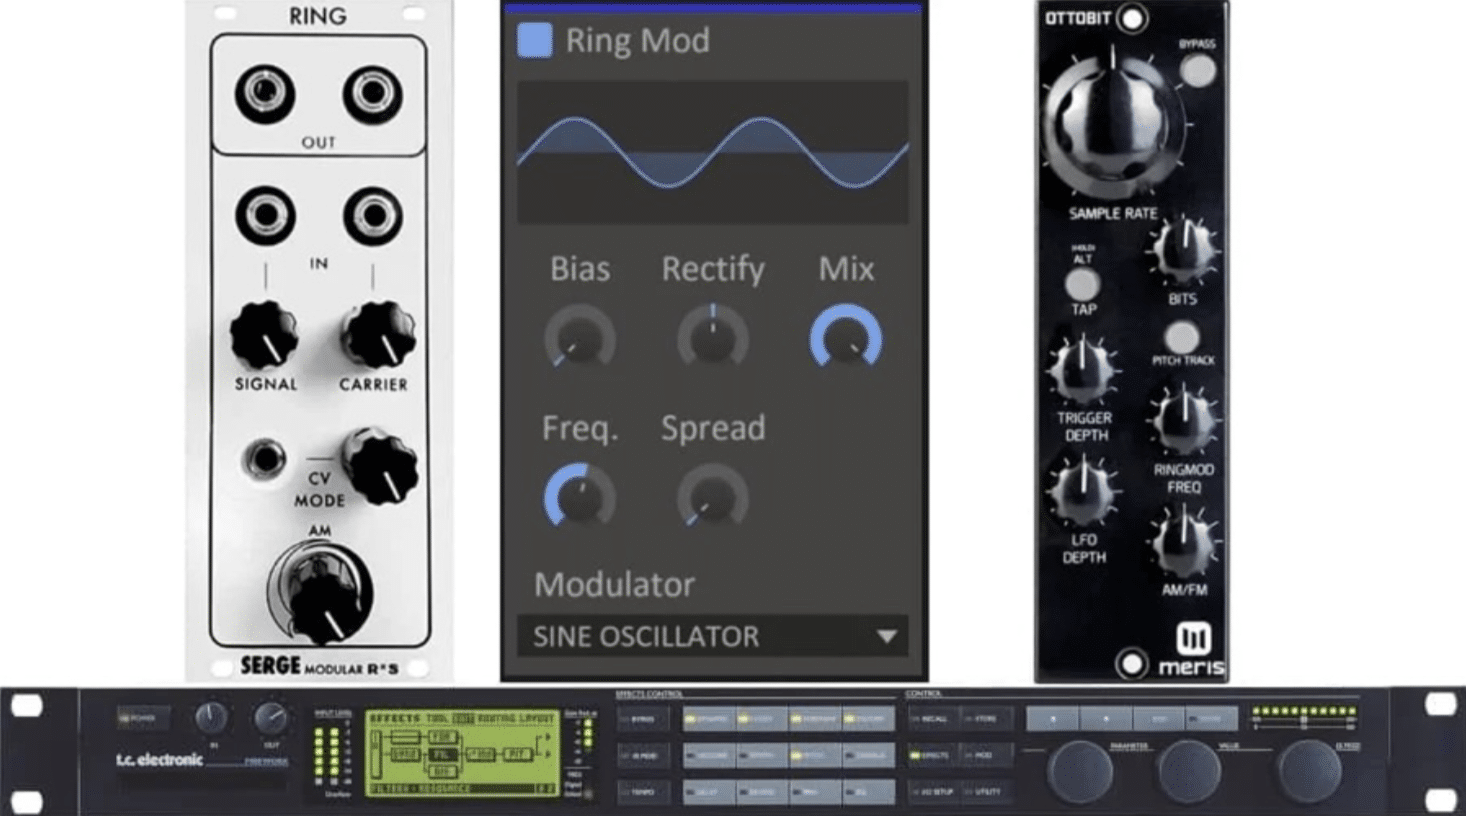
One of the most slept-on ways to use ring modulation is adding it subtly to percussion (especially hi-hats or snares) to give them a gritty, broken texture that slices through a mix without sounding like bad distortion.
For example, take a basic 808 clap, layer a sine wave oscillator running at 1.1kHz as the modulator, and apply around 30–40% modulation depth.
By doing this, you’ll hear the crisp top-end turn into something edgier and more metallic, which adds vibe instantly.
Another killer move is to apply audio rate modulation via ring mod on vocal chops to give them robotic or alien textures without totally killing their intelligibility.
To do this, simply:
- Load up a chopped vocal sample
- Set a triangle wave modulator to 800Hz
- Automate the depth between 10% and 50%
This will help you create sick evolving textures that blend the natural voice with synthetic grit in a really interesting way.
And when it comes to bass, you can try layering a clean sub underneath a modulated version using ring modulation with a saw wave modulator at 300 Hz.
Just make sure to keep the cutoff frequency on the layered signal below 4kHz so the movement is felt more than heard.
This gives your low-end a subtle crunch that feels alive, which is super popular in genres like glitch, IDM, or more left-field hip-hop.
PRO TIP: Always monitor your output on headphones when doing this because, remember, once you start stacking modulation, aliasing or harsh overtones can creep in.
Also, use a filter to roll off anything above 12kHz, and automate the filter’s cutoff frequency for even more evolving movement across your patches.
How To Create Super Wild Textures With Layered Modulation
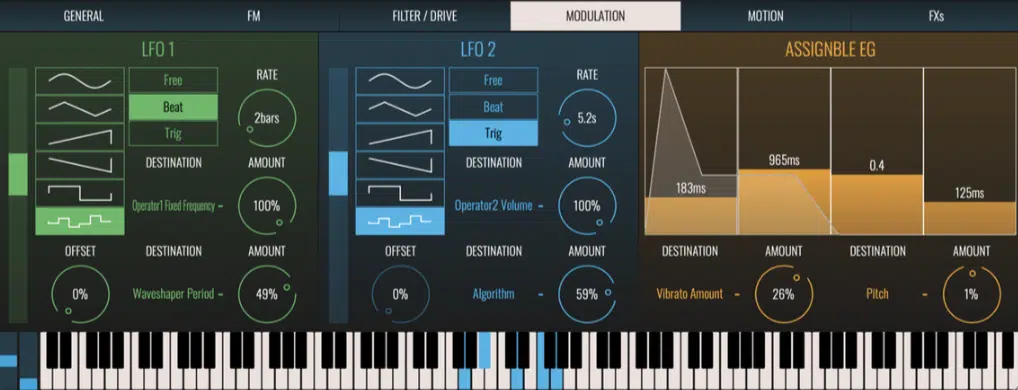
If you really want to go off the deep end, layering different kinds of audio rate modulation is how you do it.
It’s the secret to creating those ultra-evolving, chaotic-yet-controlled textures that sound completely custom.
For example, you can take a triangle wave at 220 Hz and modulate the frequency of your main oscillator, while at the same time using a square wave at 1.2kHz to ring-modulate the same signal.
That stack alone gives you multiple sets of sidebands, phase interactions, and unpredictable waveforms.
And to make things even more detailed, you can use different modulation sources with slightly offset rates…
This could be like an LFO at 5.3Hz controlling the modulation depth of one modulator while another LFO modulates the cutoff frequency of a filter post-ring mod.
It creates an organic, breathing sound that shifts with each cycle of modulation, making it feel alive without needing extra effects.
Another sick move is to stack modular patches where each module handles a different layer of modulation, like:
- One for amplitude modulation
- One for frequency modulation
- Another for ring mod
Just make sure to set each depth between 20%–40%, and use a sine wave for smoother tones or switch to a ramp wave for more aggressive, clicky edges.
Also try routing a modulated signal through a filter that’s also being modulated at audio rate using a third oscillator.
When you automate the modulation depth on both ends, you’ll create tones that feel like they’re folding in on themselves.
It’s perfect for eerie atmospheres, chaotic risers, or cinematic soundbeds.
And of course, all of this only works when you embrace audio rate modulation fully 一 combining different techniques, different waveforms, and different parameters to shape every part of your sound.
-
Pro Tip: Successfully Keeping Things From Getting Too Harsh
One of the biggest mistakes when using audio rate modulation is going too far with the depth, which can push your sound into harsh, unusable territory.
This is especially true when it comes to the high-end.
The fix is to start by keeping your modulation depth under 35%, and always run the modulated signal through a low-pass filter with the cutoff frequency set between 6kHz–10kHz 一 depending on the brightness of the source.
It also helps to blend the modulated layer with a dry version of the same patch to maintain clarity and balance.
For example, you can duplicate your synth, apply ring modulation on one layer with a 1kHz triangle wave at 25% depth.
Then, keep the original dry signal clean, and automate the mix between the two for a smooth, evolving texture.
And always keep an eye on your output levels to avoid distortion because when you’re working with fast modulation, even tiny little small changes in settings or parameters can have a HUGE impact on your final sound.
Bonus: Advanced Tricks To Take Things To The Next Level
As a special bonus, I thought I’d break down some of my most famous (advanced) techniques to help you take things to the next level with audio rate modulation.
First thing I would suggest is that you use a modulator oscillator that has its own modulation source, basically creating modulators modulating modulators.
For example, you can modulate a triangle wave’s frequency using a slow-moving LFO, then use that evolving triangle as the modulator for a 220 Hz carrier.
This will give you a living, shifting sound that never repeats the same way twice.
Another killer move is to stack three modulators with different waveforms (say, a sine at 400Hz, a square at 1.1kHz, and a ramp at 800 Hz) and assign each one to control a different parameter of the carrier:
- Pitch
- Filter cutoff frequency
- Amplitude
The result is an intricate creation that responds differently depending on where you automate each modulation depth.
It’s super useful when it comes to cinematic sound design or ambient genres.
And if you’re working with other hardware like Eurorack, modules like the Mutable Instruments Warps or the Make Noise ModDemix give you the ability to blend AM, FM, and ring mod simultaneously.
You can even add in external hardware signals (like drum machines or field recordings) to modulate your synth tones at audio rate.
It’ll open up a new world of experimental textures for you, which I definitely suggest you play around with, for sure.
Also, don’t forget about vibrato because when done at audio rate, even subtle pitch movement (say, 0.1 semitone at 40Hz) will sound like a harmonic shimmer rather than traditional vibrato.
This is crazy powerful when layered behind a lead or pluck 一 giving your patches movement that’s almost subconscious but still impactful.
And always keep the principles of harmonic balance in mind…
Too much unfiltered modulation can overcrowd your mix, so use EQ (preferably with the ability to enable dynamic bands) to tame any problem areas.
Combine all of this with proper signal routing and dynamic control, and you’ll be able to create audio textures that are truly on another level.
Raw, musical, and completely 100% your very own.
Final Thoughts
And there you have it: everything you need to truly understand and use audio rate modulation like a pro.
Once you start incorporating it into your workflow, you’ll unlock textures, tones, and movements that no basic LFO or static filter sweep could ever match.
It’s one of those techniques that separates standard patches from truly expressive, dynamic, and unique sounds that stand out across any genre.
And remember, the more you experiment, layer, and fine-tune your audio rate modulation, the more control you’ll gain over the harmonic detail and emotional impact of your tracks, so don’t slack.
Whether you’re designing futuristic leads, gritty basses, or complex ambient layers, this technique gives you the upper hand.
So push boundaries, keep creating, and remember, some of the most inspiring sounds in the world are the ones that haven’t been modulated yet.
Until next time…


Leave a Reply
You must belogged in to post a comment.