Comb filters are one of those audio tools that can seriously mess with your original sound if you’re not aware of how they work…
But they can also be used to create some of the sickest textures, FX, and movement in your tracks.
Plus they can help you tighten up your sound, enhance spatial effects, or totally destroy your mix if you’re not careful, which absolutely sucks.
And when used the right way, comb filters can help you create insanely wild resonances, stereo width, and even robotic vocals that slice through the mix.
As producers, knowing all about comb filters and how comb filtering occurs when a delayed signal interacts with the direct sound can completely shift the way you shape tones and control phase.
Plus, you’ll enhance your music production skills in the process, which is always great, which is why I’m breaking down everything you need to know, like:
- What is spectral processing ✓
- Delay time vs. delay length ✓
- Feedforward comb filter vs. feedback comb filter ✓
- Phase interference breakdowns ✓
- Magnitude response explained ✓
- Frequency response & notch patterns ✓
- Digital signal processing examples ✓
- Using comb filters in modulation FX ✓
- Delay tricks for harmonic reinforcement ✓
- Advanced sound design techniques ✓
- Much more about comb filters ✓
By knowing all about comb filters, you’ll be able to enhance synths, widen your stereo field, and create next-level movement in your mixes.
You’ll be able to fix weird phase issues all day and avoid detrimental effects before they even start to wreck your track.
This way, you won’t have to worry about any awkward tonal cancellations or resonant build-ups ever again 一 helping you to sound way more professional.
Your tracks will sound cleaner, tighter, and way more polished, especially in the mid-high range where comb filtering effects unfortunately tend to show up most.
Table of Contents
- What is a Comb Filter Exactly?
- How Comb Filters Work & Basic Comb Filter Types
- Feedforward vs Feedback Comb Filters
- Recognizing Comb Filtering in Your Mix
- Comb Filters in Modulation Effects
- Designing a Comb Filter From Scratch
- Using Comb Filters for Sound Design
- Comb Filtering in Virtual Instruments
- Combining Comb Filters With Other FX
- Advanced Sound Design Techniques
- Final Thoughts
What is a Comb Filter Exactly?
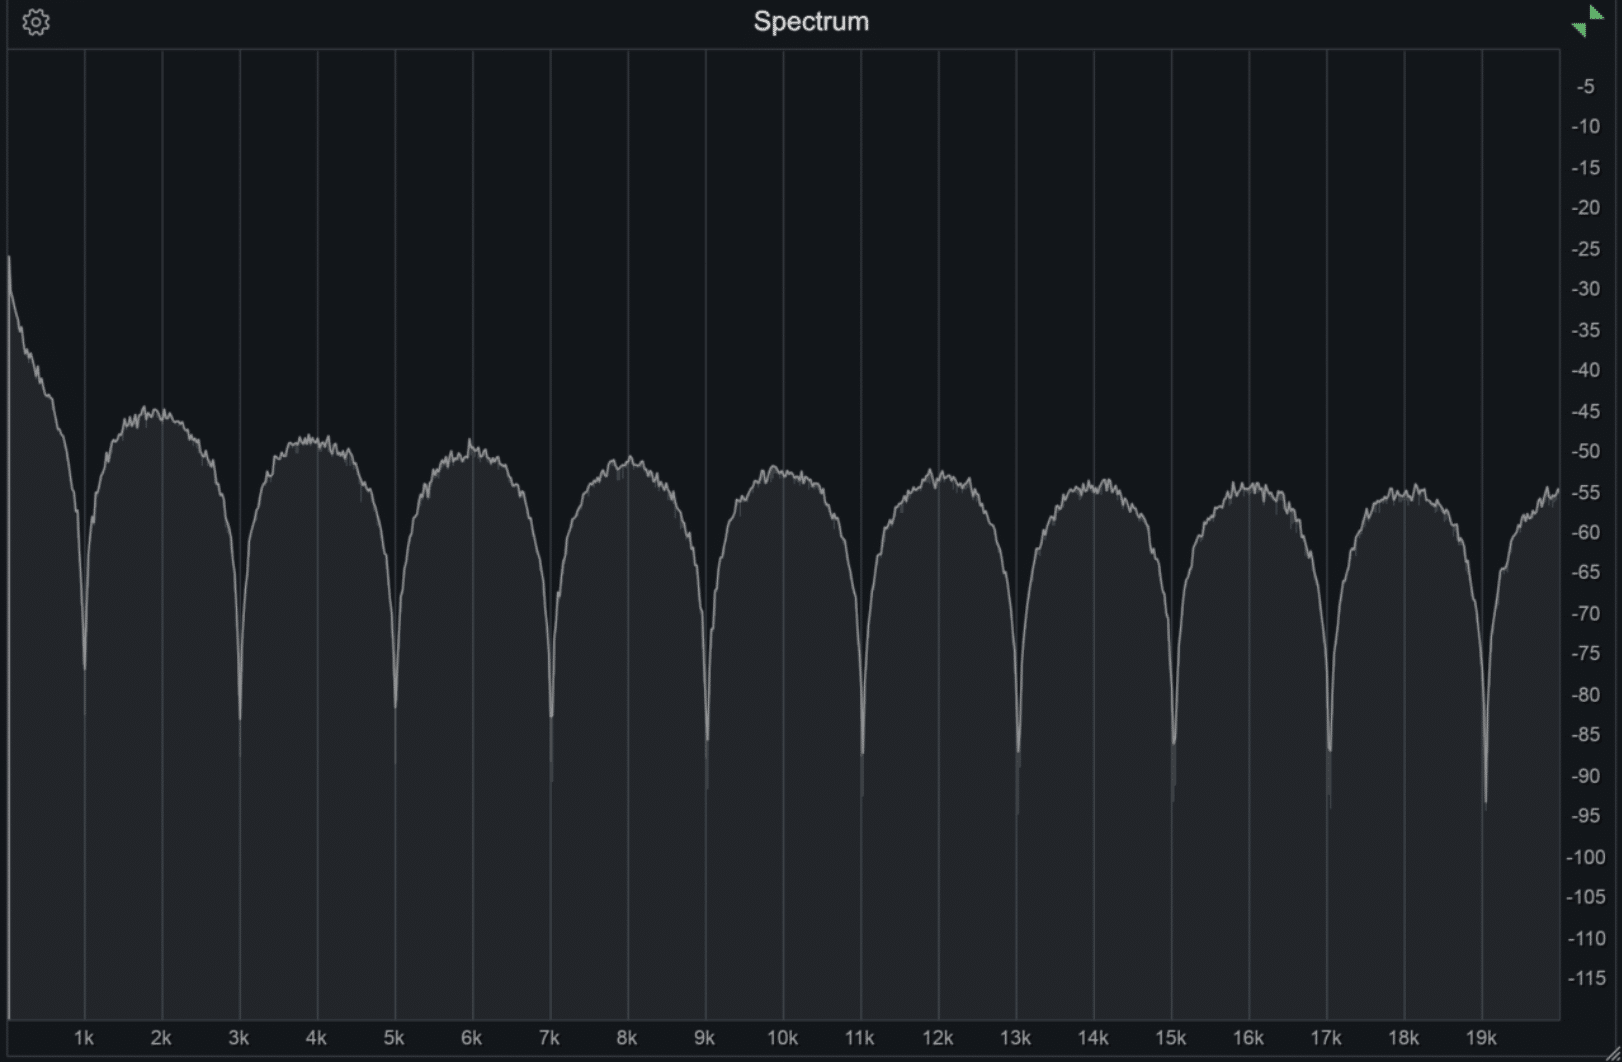
A comb filter is a type of effect created when you take an input signal, copy it, apply a delay, and mix that delayed signal back in with the original.
The result is a series of evenly spaced notches or peaks across the frequency response, which gives it that “comb-like” appearance when visualized on a spectrum analyzer.
What’s wild is how simple it is to create a comb filtering effect 一 all it takes is a few milliseconds of delay time and a clean feedback path or phase interaction.
Whether it’s a feedforward comb filter (where the delayed copy is added to the input signal) or a feedback comb filter (where the delayed copy is routed back into itself), the final sound can either enhance or destroy your tone depending on how you use it.
This means comb filters can help:
- Simulate reflections
- Simulate acoustic echo simulation effects
- Give synths that resonant, hollow edge that cuts through a dense mix
- And so much more
It’s part of what makes them so versatile, and yes I’ll admit it sometimes tricky when you’re first starting out, which is what I’m going to help you with today.
You’ll hear comb filtering caused by things like multiple microphones picking up the same sound source at different distances.
Or, simply by placing your monitors too close to a wall.
But once you know how comb filters work, you can use that knowledge to either eliminate them from your room.
You’ll be able to turn them into a weapon in your creative sound design arsenal.
And don’t worry if it sounds a little confusing, I’ll break it all down in detail so you get a much better understanding from one instance to another.
How Comb Filters Work & Basic Comb Filter Types
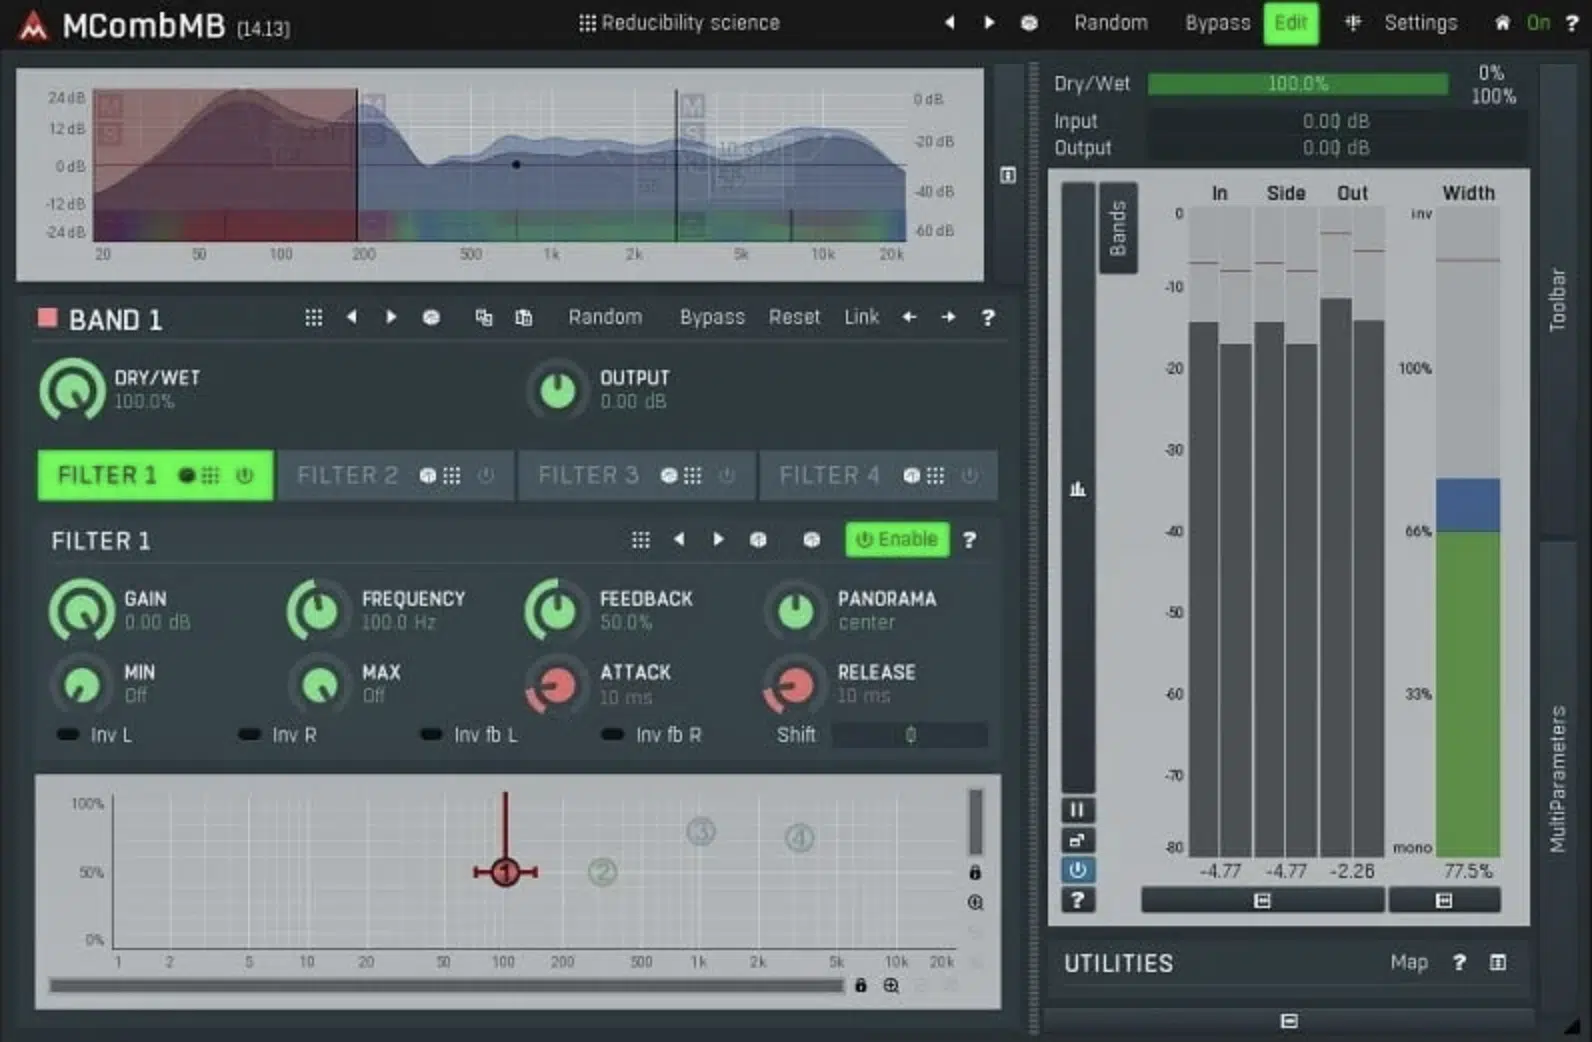
Once you understand what comb filters are, the next step is figuring out exactly how they behave in your sessions. They’re deceptively simple at first, but under the hood, comb filters are shaping your frequency response, phase relationships, and harmonic structure more than you might think.
Signal Delay and Phase Interference
When you take an input signal, delay it by a small amount (say 2 to 10 milliseconds) and blend it with the original sound, you’re gonna hear that familiar hollow tone.
That’s the comb filtering effect at its greatest right there.
It happens because the peaks and dips in each sound wave start interacting, either reinforcing each other or canceling out (depending on their alignment).
For example, let’s say you delay a snare by exactly 3.43 ms 一 that’s one full cycle of a 292 Hz wave.
Now when the delayed snare hits, the 292 Hz region will reinforce, but any frequency 180° out of phase will cancel.
This creates a very audible dip in the frequency response right where your low-mids sit.
The more you crank that delay time, the more spaced out those dips become.
A delay of 5 ms? Notches every 200 Hz. Crank it to 10 ms? Now you’re hearing them spread out every 100 Hz, starting at the fundamental.
And if you’re using a plugin like Reaper’s ReaDelay, set your delay time to around 4.5 ms with 0 feedback and 100% wet, then blend it with the dry channel.
You’ll instantly hear phase interactions, especially around 222 Hz intervals, which start shaping your midrange.
This is a powerful way to create subtle tone shifts or intense phase coloring if you push it harder (the sky’s the limit).
PRO TIP: When doing this with percussive content, make sure to properly phase-align with a tool like Voxengo’s “PHA-979” so you don’t lose punch.
It’ll keep your input and output signals tight, especially when bouncing through FX chains, so definitely try that out.
Constructive vs. Destructive Interference
So here’s where comb filters really flex in my opinion.
When that delayed signal overlaps with the direct sound, some frequencies stack up (constructive) and some cancel out (destructive).
It all depends on their specific phase angle.
Take a 1 kHz sine wave. If you delay the same signal by exactly 1 ms, that’s a full cycle delay, so the phase offset is 360°.
That gives you full constructive interference, and what you’ll get is a 6 dB boost right at 1 kHz in your magnitude response.
But if you delay it by 0.5 ms, now you’ve introduced a 180° phase shift, and the wave cancels completely 一 perfect destructive interference.
These patterns repeat across the spectrum, which is why you see those evenly spaced dips when you slap a comb filter on pink noise.
You’ll get periodic cancellations that change depending on your delay length.
For example, a 2 ms delay creates notches at 250 Hz, 500 Hz, 750 Hz, and so on—all certain frequencies that align with the phase relationships between the dry and wet signals.
In pro mixes, destructive interference can ruin your stereo image or kill punch in your drums, and nobody wants that.
So that’s why you’ve gotta watch for this when working with multiple microphones or even multiple speakers.
If two mics are spaced just 6 inches apart, you’ve already introduced a 0.5 ms time difference, which means you’re creating nulls every 1 kHz.
PRO TIP: When layering kicks or claps from different sound sources, zoom in and time align them to within 0.1 ms.
Otherwise, you’re risking cancellation at fundamental frequencies!
Frequency Notch Spacing and Harmonic Impacts
Frequency notch spacing and harmonic inputs is where comb filters go from “just an effect” to a full-blown tone-shaping weapon.
The distance between each notch (called the notch spacing) is determined entirely by your delay time, and that’s what gives comb filters their harmonic personality.
If your delay is 2 ms, your notches in the frequency response will land every 500 Hz. With a 5 ms delay time, they’ll hit every 200 Hz.
And if you want a more resonant sound, you can simply introduce a feedback loop and bump up the feedback gain to 30%.
Suddenly, those notches start to resonate, and the output signal develops harmonic teeth, so to speak.
This is huge in sound design, so definitely pay attention.
Say you’ve got a saw wave playing a sustained note… Throw a feedback comb filter on it, set the delay length to 4.5 ms, feedback to 40%, and dial the wet/dry to 50%.
Now your synth has notches every 222 Hz, which creates emphasis and cancellation that gives it that vocal (almost tube-like character).
If you’re using Soundtoys FilterFreak or Filterscape by u-he, you can dial in the transfer function manually and automate movement across key frequency ranges.
And here’s where it gets crazy: comb filters are sensitive to tuning.
If you want them musically locked, set your delay time to a multiple of 1,000 divided by your desired frequency. For example, to target 440 Hz (A4), use a 2.27 ms delay.
That’s how you create comb filtering effects that actually reinforce your song’s key.
PRO TIP: If you’re designing plucks or metallic textures, add a feedforward comb filter with no feedback, a delay of 1.8 ms, and sweep it subtly with an envelope.
That’ll emphasize upper harmonics around 555 Hz and up, giving your sound sharpness without harshness.
Feedforward vs Feedback Comb Filters

When it comes to shaping your sound with comb filters, understanding the difference between feedforward comb filters and feedback comb filters is everything.
A feedforward comb filter takes the input signal, applies a delay, and mixes that delayed signal directly with the original without feeding it back into the loop.
This type gives you clean, linear notch patterns in the frequency response, which is perfect when you want precise tonal cuts or notches without heavy resonance.
A feedback comb filter routes the output signal back into its own input signal 一 creating a feedback loop that introduces sharper notches and stronger resonant peaks.
If you increase the feedback gain past 40%, you’ll start hearing intense ringing or metallic characteristics.
Especially around frequencies where the delay aligns with harmonics, I might add.
For example, a 6 ms delay length with 50% feedback on a pad can create strong 166 Hz-spaced notches, which add grit and character to boring, dull textures.
Both types affect the phase of your original signal differently too.
A feedforward comb keeps the phase relatively tame, while a feedback comb filter tends to introduce much more intense phase shifts, especially near the cancellation points.
That’s why you’ll hear feedback-based versions more in aggressive sound design (think flangers, metallic hits, or synthetic textures).
And if you’re trying to simulate string resonance or body tone, use a feedback comb with a short delay time of 2–5 ms.
Just make sure to keep the feedback gain at 20–30% to avoid overwhelming the mix.
NOTE: Plugins like MFM2 or FL Studio’s Delay Bank can handle both basic comb filter types with tweakable transfer functions, so you can A/B easily and dial in the right vibe.
How the Comb Filtering Sound Happens Naturally
Before we get too deep into wild sound design tricks, it’s very important to know that comb filters also sneak into your setups when we’re not even trying.
For starters, whenever multiple microphones pick up the same sound source at different distances, you’re introducing slight time differences between the input and output signals.
These cause comb filtering effects that can dull clarity, especially in acoustic instruments or drum overheads.
For example, if you’ve got two mics on an acoustic guitar (one at the 12th fret and one near the bridge) just 12 inches of distance between them makes a huge difference.
It introduces about 1 ms of delay, which means you’re unintentionally building notches every 1 kHz in your frequency response.
That’s why time alignment during editing is key for multi-mic recordings.
Room reflections are another common cause…
If your monitors are too close to a wall or desk surface, the reflected sound bounces back just milliseconds after the direct sound, forming natural comb filters.
A reflection delay of just 4.9 ms creates notches at 204 Hz, 408 Hz, and so on 一 right in the range where vocals and snare drums live.
Even multiple speakers in club setups can introduce this.
When you’re listening to the same sound arriving from two speaker towers spaced 10 feet apart, you’re dealing with a delay period of nearly 9 ms depending on your position.
That means combing artifacts in the 100–200 Hz range, which are often perceived as phasey bass or scooped vocals.
PRO TIP: To avoid comb filtering in these cases, always use the 3:1 rule with mics and angle them properly.
And in studio monitoring, use acoustic panels behind the speakers and keep them off reflective surfaces, which will keep your comb filtering sound clean and controlled.
Recognizing Comb Filtering in Your Mix
Once you know what to listen for, spotting comb filters in your mix becomes second nature, for sure. They don’t always show up as obvious problems. But, if something sounds hollow, metallic, or like it’s fighting itself tonally, there’s a good chance comb filters are involved. So, let’s get into it.
Comb Filters in Modulation Effects
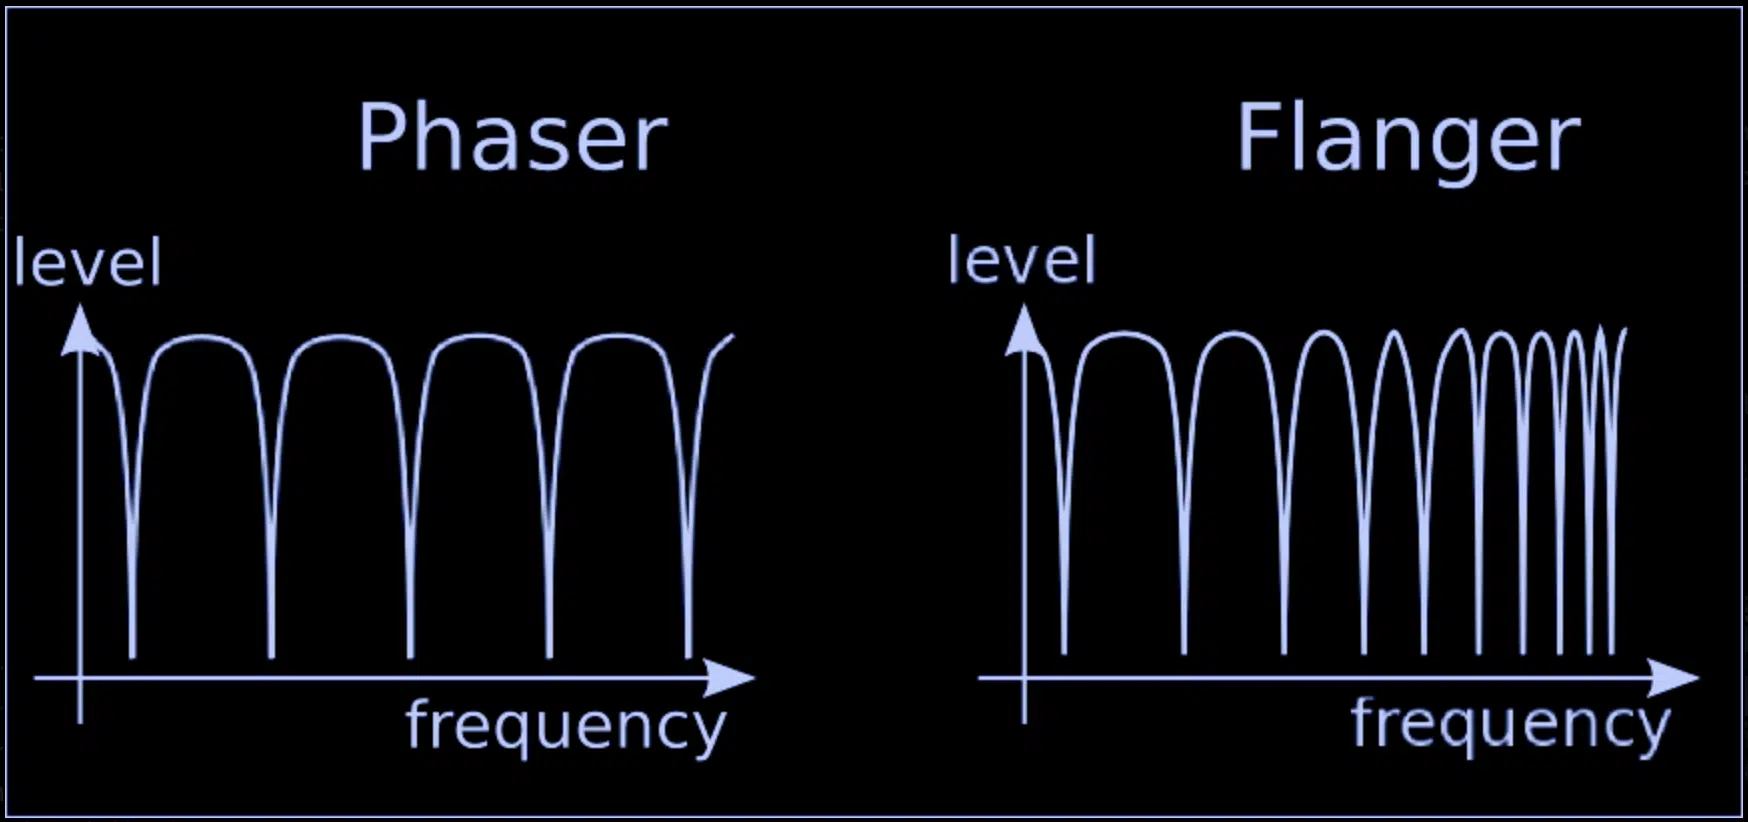
Modulation-based FX like flangers, phasers, and choruses all use comb filtering at their core 一 they just move it over time.
Take flanging, for example…
It’s literally just a delayed signal (usually between 0.5 and 5 ms) being swept via LFO to create a moving comb filtering effect across the frequency response.
With phasers, it’s not just a delay, it’s a series of all-pass filters that mimic the phase shift behavior of a feedback comb filter.
This creates deep, swirling cancellations in specific frequencies.
Set your phaser’s depth to around 50%, keep the rate slow (0.1–0.3 Hz), and you’ll get slow-moving notches that breathe life into pads, vocals, or ambient textures.
Even basic chorus effects use comb filters by doubling the signal, detuning or delaying the copy slightly (usually 10–30 ms), and blending it back in.
That tiny delay range softens transients, thickens the audio signal, and spreads it across the stereo field by introducing tiny little phase offsets.
NOTE: Ableton’s Flanger and Phaser-Flanger devices give you full control over delay time, feedback gain, and modulation rate.
This means you can literally morph from a subtle movement tool into a fully resonant feedback comb machine, which is freakin’ awesome.
Just don’t overdo the feedback 一 keep it under 50% or things get real ringy, real fast.
And don’t be afraid to use pink noise as a test signal, either, by running it through a flanger set to a delay of 1.7 ms (no modulation).
The static notches in your analyzer will show you exactly how your comb filters are working, and that’s a killer way to visualize the magnitude response before using it on a more dynamic audio source.
Flangers as Moving Comb Filters
Flangers are built entirely around comb filters, but with one major twist…
They use an LFO to move the delay time in real time, which makes the notches sweep up and down the frequency response like a swirling jet.
You’ll want to keep in mind that flangers operate within a delay range of 0.1 to 5 ms.
For example, a 2 ms center delay creates cancellation around 500 Hz, 1 kHz, 1.5 kHz, and so on, while the modulation makes these dips sweep continuously.
When you increase feedback gain (say to 60% or more), you’ll start getting intense resonance and that “metallic” sound flangers are known for, especially on leads or atmospheric textures.
Ableton’s Flanger or Eventide Instant Flanger give you control over:
- Depth
- Rate
- Polarity
- Feedback loop
This is 100% essential when you want a more subtle or dramatic comb filtering effect.
I also suggest that you try using a flanger on pink noise with the modulation depth set to 100%, rate at 0.25 Hz, and a delay time of 1.8 ms.
This way, you’ll hear a slow sweeping of notches spaced every ~555 Hz, which is a killer way to spot how your comb filters are moving across the spectrum.
Phasers and Their Phase Cancellation Behavior
Phasers don’t use literal delay, but they mimic comb filters by stacking multiple all-pass filters to introduce phase shifts at very specific frequencies.
It will give you a very similar cancellation pattern that’s more subtle and harmonic.
A basic phaser might use 2 to 6 stages…
For example, a 4-stage phaser introduces four notches whose spacing depends on the modulation depth, which you can tweak between 100 Hz and 2 kHz for textural variety.
The movement is driven by an LFO, and as the phase shift increases, the frequency response develops distinct notches that sweep like a slow-motion combing effect.
The difference between a flanger and a phaser lies in how they achieve cancellation 一 flangers use delay, phasers use internal phase manipulation.
But, the tonal results can be surprisingly similar, especially with added feedback gain.
So, when you’re using a phaser on a pad, start with a 6-stage phaser, set your center frequency to 500 Hz, depth to 75%, and rate at 0.1 Hz.
This will give you evolving, deep comb filtering effects without overcrowding the mix.
Chorus, Delay & Stereo Imaging Enhancements
While chorus might not scream “comb filters” at first glance, that’s exactly what’s happening under the hood…
You’re duplicating the input signal, delaying it slightly (typically 15–35 ms), detuning or modulating the copy, and blending it back in to thicken the sound.
For example, with a delay length of 25 ms and ±10 cents of pitch modulation, you’ll get a lush stereo effect, and the natural comb filtering creates subtle dips and boosts in the frequency response that spread your sound out.
Unlike flangers, choruses use longer delay times to avoid tight notching and instead focus on smearing transients for stereo width.
Stereo imaging comes from panning the delayed version left/right or modulating the delay period independently per side, like in Valhalla Space Modulator or TAL-Chorus-LX.
What you can do is add subtle feedback gain (around 10–20%) and your chorus starts sounding fuller without phasing out.
PRO TIP: Use a chorus on hi-hats or vocals with 20 ms delay, 0.3 Hz LFO rate, and about 30% wet to introduce stereo width without obvious movement.
The low-level comb filters work behind the scenes to spread and smooth transients.
Designing a Comb Filter From Scratch
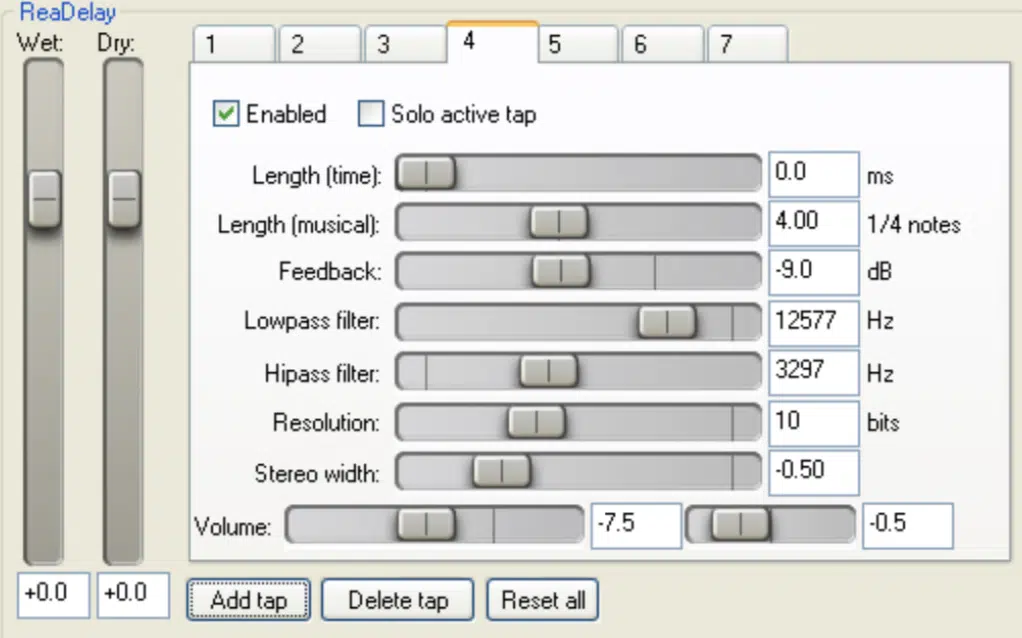
To design your very own comb filter, start with a basic input signal and duplicate it so you can delay one copy by a short amount.
Somewhere between 2 and 10 milliseconds is the sweet spot for most tonal shaping.
Then what you’re going to do is set the delay time to match the frequencies you want to emphasize or cancel using the formula Delay (ms) = 1000 ÷ Target Frequency (Hz).
For example, a 3 ms delay gives notches every ~333 Hz in the frequency response.
Next, decide between a feedforward comb filter, where the delayed signal is simply added to the original, or a feedback comb filter, where that delayed signal is fed back into the input signal using a feedback loop to enhance resonant peaks.
In a plugin like ReaDelay or Ableton’s Echo, set feedback gain between:
- 20–40% for subtle tone shaping.
- 50–70% if you’re going for aggressive metallic textures.
Don’t forget to dial in the wet/dry mix 一 start at 50% and adjust to taste depending on how prominent you want the comb filtering effect to be across your output signal.
Finally, tweak the transfer function or polarity (if available) to further shape phase interaction and gain full control over how your comb filter interacts with the spectrum.
Once you’re comfortable, automate the delay length with an LFO or envelope for animated movement.
This turns a static comb filter into a dynamic tonal shaper that can evolve across a track, which you’re really going to love playing around with; I guarantee it.
Using Comb Filters for Sound Design
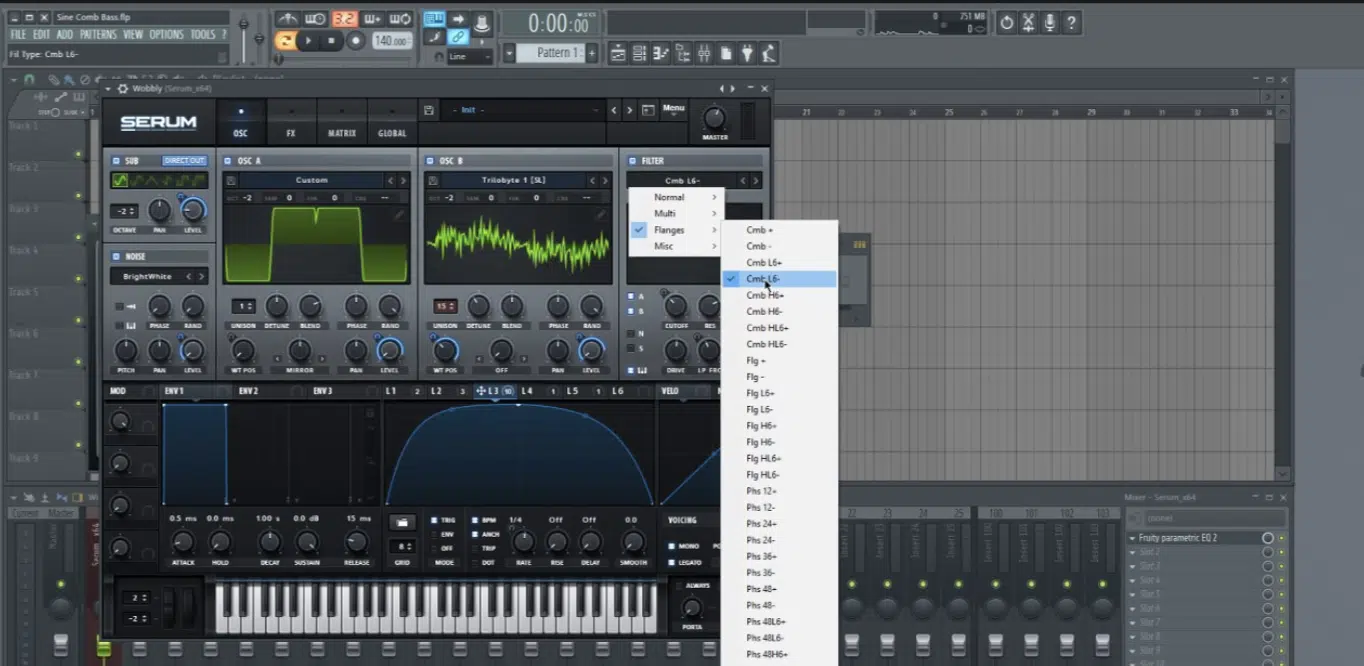
Once we’ve nailed the technical side, it’s time to flip the switch and get creative with comb filters. They’re not just for correcting phase issues; they’re tools for designing crazy textures, vocal effects, and movement that stand out in modern production. So, let’s talk about it real quick.
Sharpening Synth Textures and Leads
One of the fastest ways to make a synth lead sound sharper, more focused, and tonally aggressive is by running it through comb filters with a short delay time between 2–4 ms.
This will help you successfully hype up the upper harmonics and carve tight notches across the frequency response.
For example, adding a feedback comb filter with 40% feedback gain and a 3.3 ms delay to a saw wave can introduce reinforcing peaks around 303 Hz, 606 Hz, and so on.
It instantly makes it slice through a busy mix all day.
NOTE: Plugins like Native Instruments’ Replika let you stack multiple feedback loops, tune them to exact frequencies, and modulate the delay period to keep the texture evolving without sounding static.
By adjusting the wet/dry mix to around 60%, you still keep the body of the original sound while letting the comb filtering effect add definition and a crisp edge.
And the last tip I could give you here, is to pair your comb filter with some light saturation or harmonic excitation after it.
This boosts the tonal artifacts you’ve created and makes the output signal feel more alive and detailed.
Creating Robotic Vocals and Aliasing FX
To get that classic “robotic” vocal tone, run a vocal through a comb filter with high feedback gain (try starting at 65%).
And set your delay length to something tight like 4.5 ms to introduce artificial harmonics that mimic formant distortion.
The key is blending the delayed signal with enough dry signal (around 40–50% wet) so that the intelligibility of the input signal stays intact while the metallic texture takes over.
For aliasing-style FX, pitch a vocal sample up by 7 semitones and apply a feedforward comb filter with a 2 ms delay time.
This creates sharp, unnatural peaks every 500 Hz across the magnitude response.
Also, add a slow LFO to the delay parameter and automate the transfer function for a broken-modem or degraded AI effect that still feels musical.
PRO TIP: Use a sine modulator on the feedback loop with 100% depth and 0.1 Hz speed to slowly morph the timbre across the track.
This is especially sick if you’re stacking digital audio effects or layering with vocoded textures.
Creative Uses for Rhythmic and Spatial FX
When timed right, comb filters can actually be used rhythmically by syncing the delay time to your BPM.
Eighth-note delays (~375 ms at 128 BPM) create rhythmic notches that pulse in sync with your groove.
You can also layer multiple comb filters with different delay lengths, like 3 ms and 6 ms, to generate evolving rhythmic patterns with overlapping notch intervals that create pulsing movement across the frequency response.
For stereo widening, offset the delay between left and right channels by 0.3–0.5 ms; this introduces phase variance between sides.
It’ll give the illusion of width while still maintaining mono compatibility.
And side note, if you’re using Ableton, load two Auto Filters in parallel, apply tiny delay offsets with Utility.
Then, automate the transfer function or phase to create unique spatial textures that play off each other without crowding the center image.
Pro Tip: How to Avoid Comb Filtering That’s Unwanted
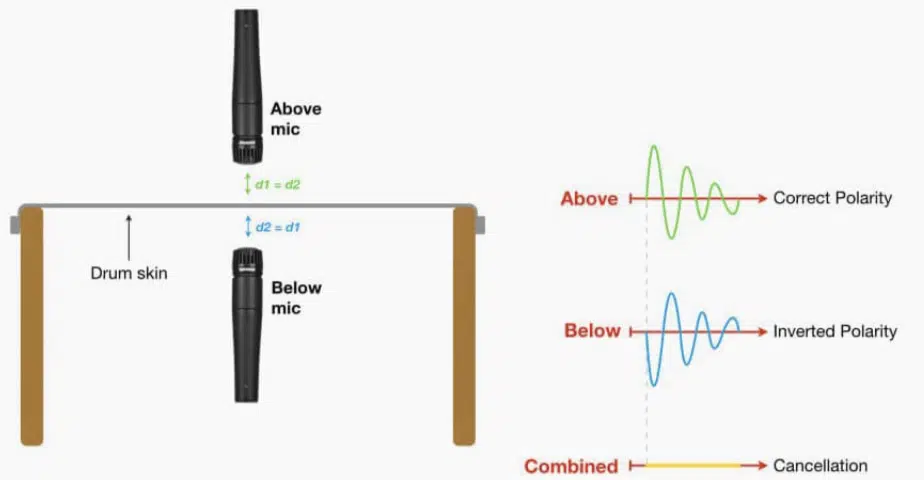
To avoid comb filtering in your mix that you absolutely don’t want there, make sure any two microphones capturing the same sound source are spaced using the 3:1 rule and time aligned in post with sub-millisecond precision.
If you’re mixing live mics with DI tracks (like a mic’d guitar amp plus DI) always check the delay between them and nudge the track forward or back by 0.2–0.6 ms.
You’ll hear the comb filtering sound vanish altogether.
Also, always treat reflective surfaces around speakers to eliminate short delay periods that can lead to comb filtering caused by the blend of reflected sound and direct sound.
PRO TIP: Keep an eye on your impulse response if you’re working with convolution reverb or room modeling.
It can reveal phase anomalies before they start smearing your audio signal.
Comb Filtering in Virtual Instruments
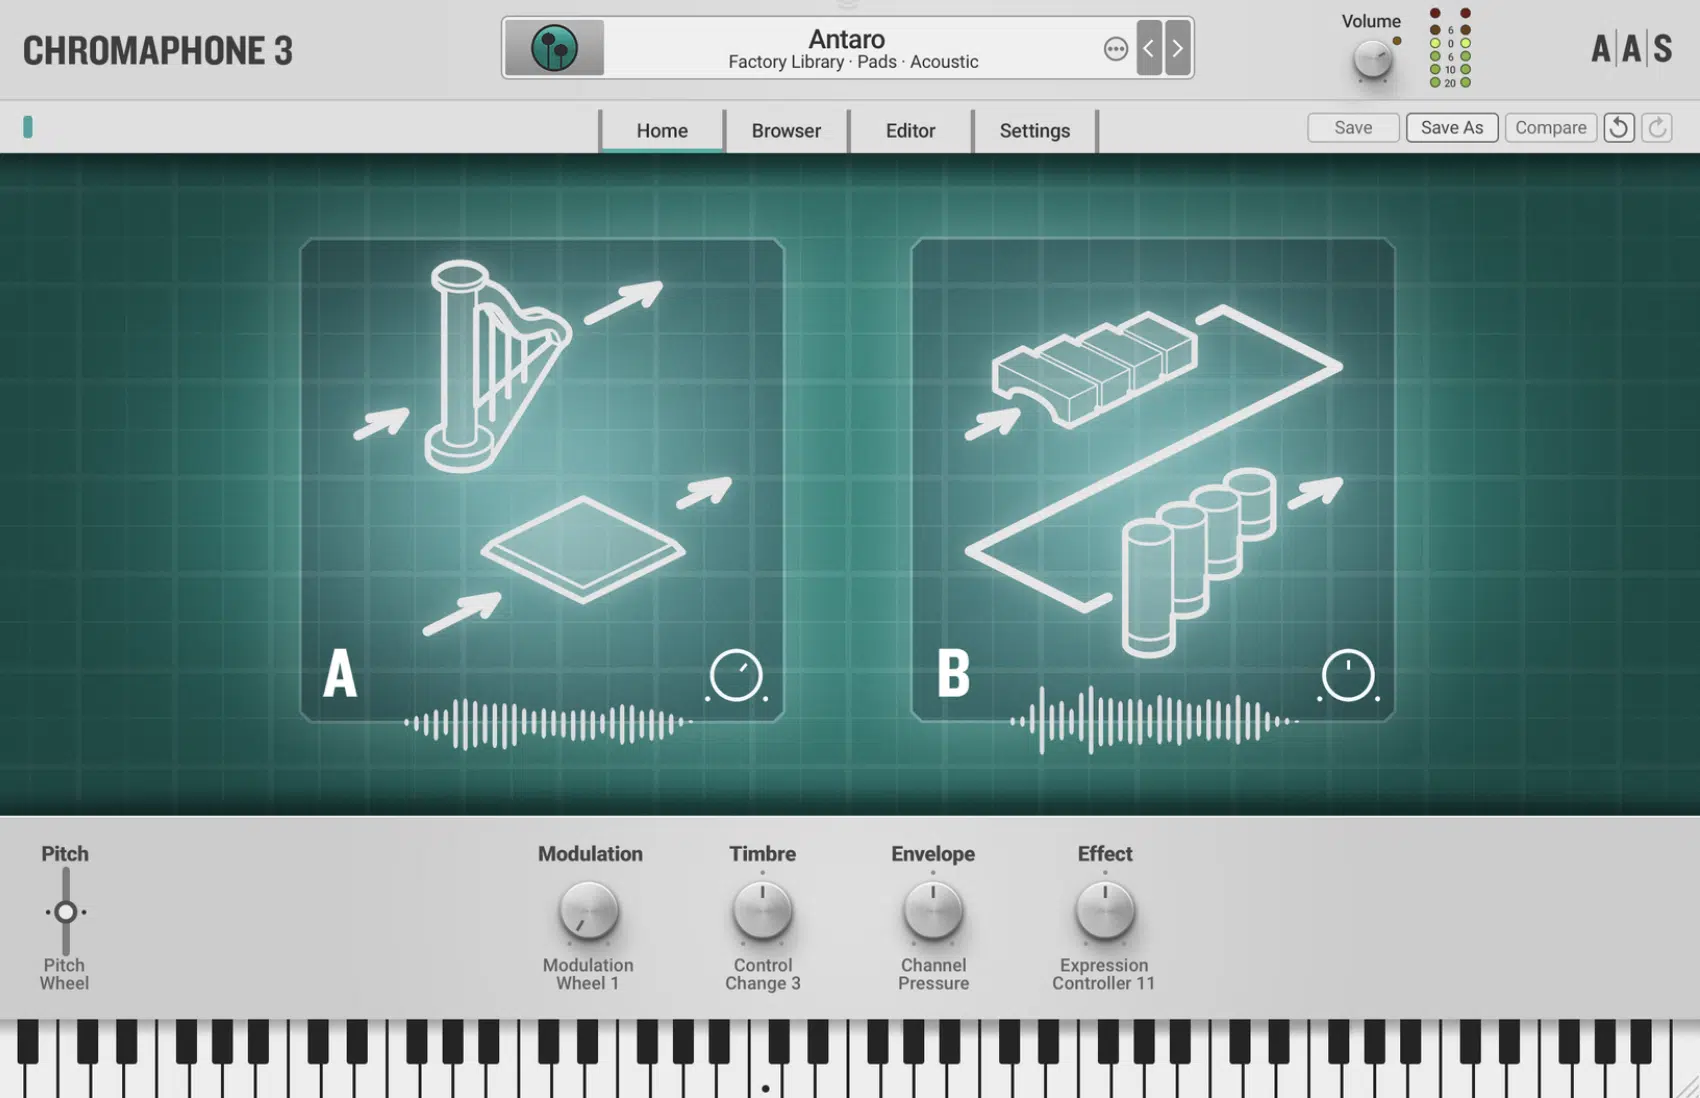
A lot of modern synths and samplers actually have comb filters built right into their architecture, especially those designed for acoustic modeling or physical modeling synthesis.
Instruments like Logic Pro’s Sculpture or AAS Chromaphone 3 use comb filtering to simulate sound wave propagation through strings, pipes, or plates.
The delay time acts as a stand-in for physical length.
In Sculpture, for example, a 2.5 ms delay length simulates a 440 Hz pitch, and the amount of feedback gain determines how long the vibration sustains.
These synths let you set various positive values for:
- Feedback loops
- Filter damping
- Excitation characteristics
They’re essentially the basic building blocks of realistic instrument behavior.
You can also get creative with Reaktor 6 or Max for Live devices that let you patch Z transform equations or tune comb filtering effects per key for dynamic tone shaping.
PRO TIP: For bowed or plucked string simulation, set a feedback comb filter to 3 ms with a feedback gain of 65%.
Then, layer soft noise as an excitation input to replicate how a physical sound source would behave under tension.
Combining Comb Filters With Other FX
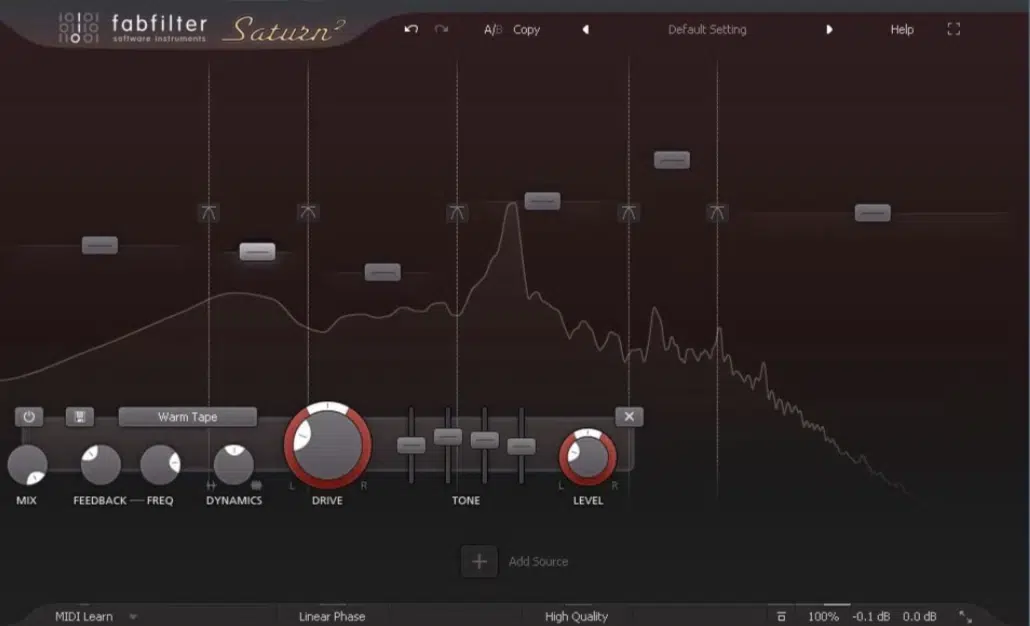
Comb filters stack perfectly with other processors when you know how to set them up, especially when used before or after distortion, reverb, or surgical EQ.
What you’re going to do is start with pre-EQ to notch out any specific frequencies that might exaggerate cancellations…
For example, cutting 250 Hz and 500 Hz before a 2 ms delay helps smooth the comb filtering effect without muddying the frequency response.
Post-EQ is great for adding back body or scooping harsh resonant peaks caused by high feedback gain (especially if you’re pushing 50–70% feedback through a flanger).
And when combined with convolution reverb, watch your impulse response to avoid stacking reflections with the comb filter’s notches.
Otherwise, you risk creating unintended comb filtering caused by the reverb tail.
Also, adding distortion or tape saturation after the comb filter can enhance the harmonic contrast 一 especially if your output signal is pushing upper mids (around 2.5–3.5 kHz), which tend to get reinforced by short delay times.
I also suggest that you try FabFilter Saturn 2 after a feedforward comb filter with 3 ms delay time and 30% wet.
Then, use multiband saturation to boost different frequencies across the stereo field and create movement that still sounds tight in mono.
Advanced Sound Design Techniques
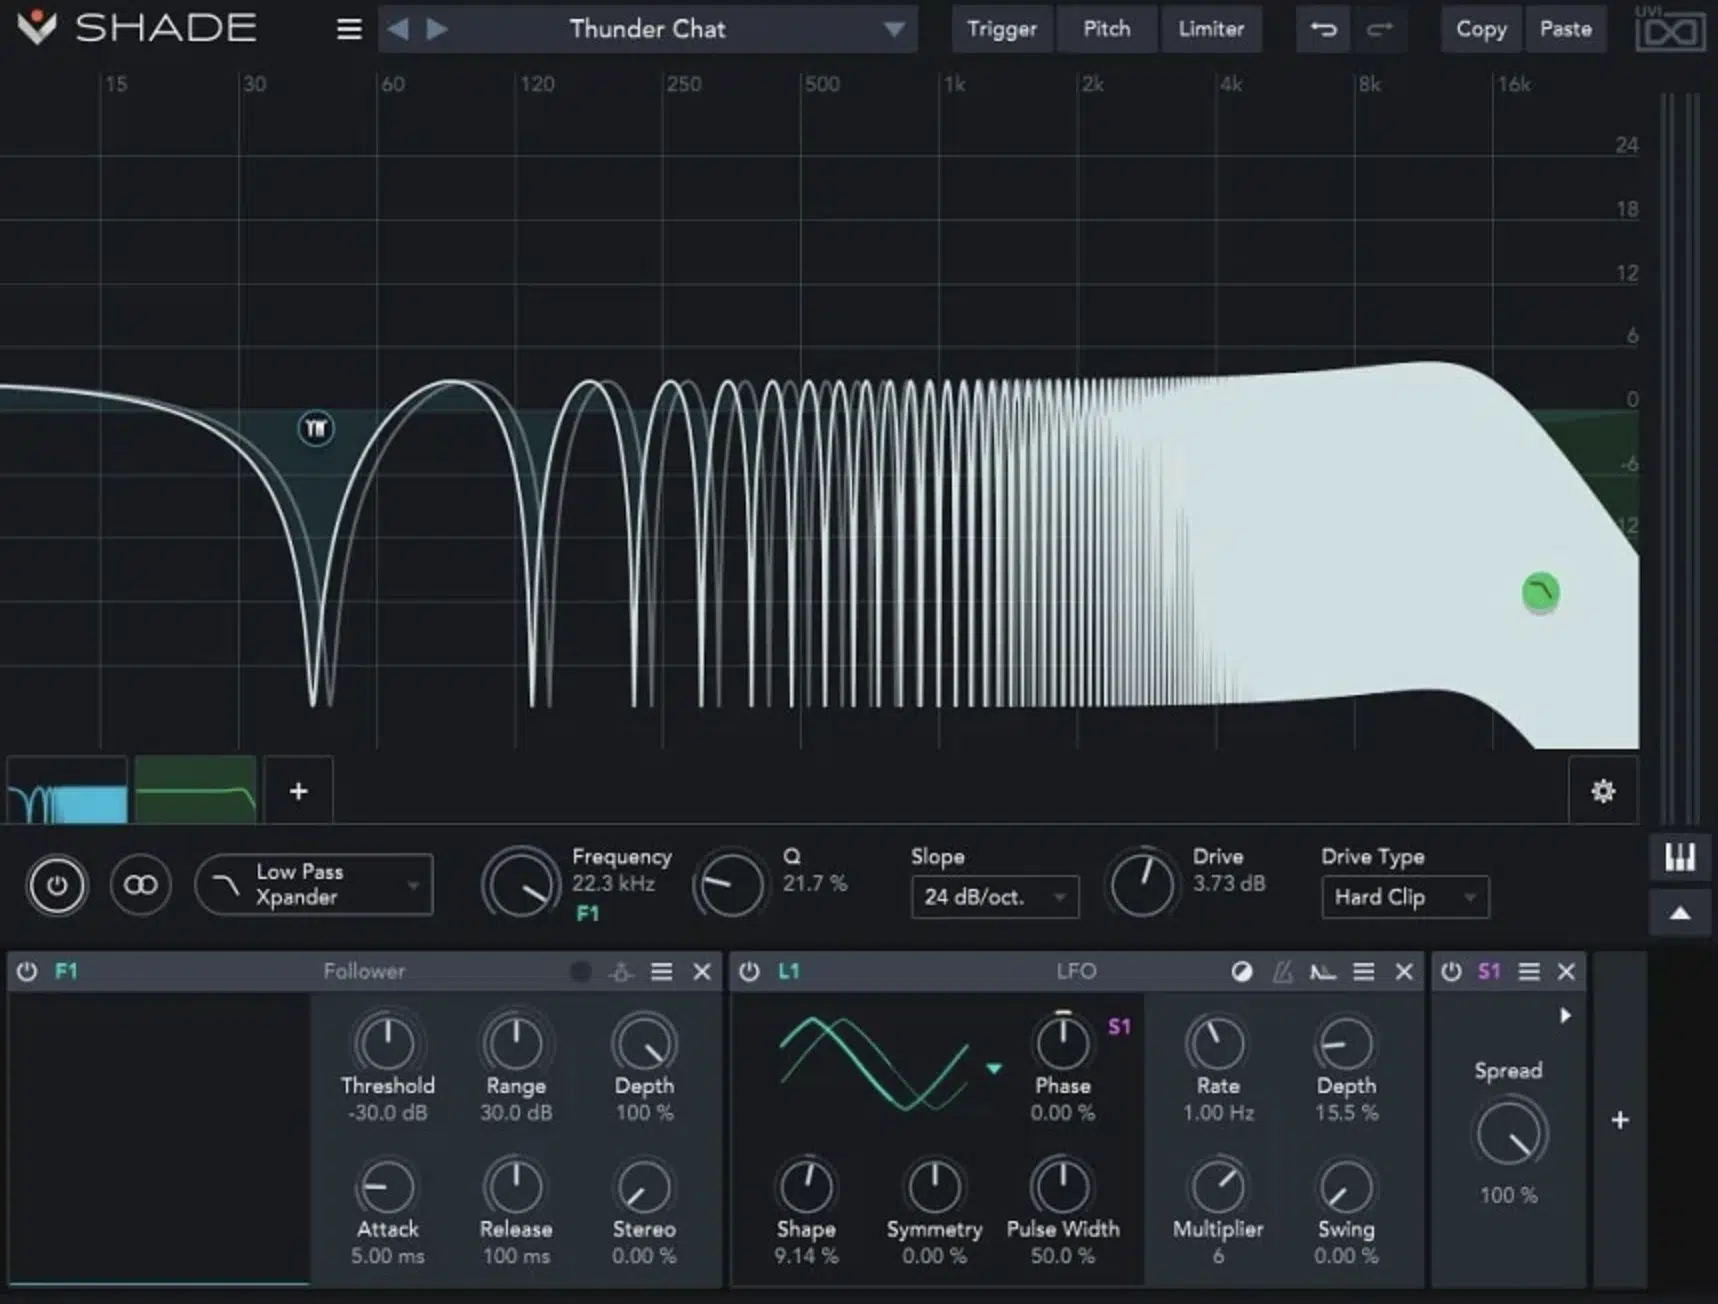
When it comes to experimental processing, comb filters are one of the most versatile tools for transforming a basic sound into something fresh/unpredictable.
You can take a bland pad or percussive loop and instantly give it motion, tension, and attitude just by shaping its frequency response with a few carefully tuned filters.
One wild trick is using high-resonance feedback comb filters (feedback 70–80%, delay around 2.3 ms) on transient-heavy loops.
For example, drop this setup on a raw clap loop, and it’ll sound like it’s morphing into liquid metal every time it hits, especially when layered with short reverb tails.
This turns snares or claps into pseudo-granular, resonant artifacts that shimmer and smear.
You’ll hear tiny metallic harmonics start to trail behind each transient, almost like you’re creating your own reverb impulse using the comb filter’s own resonance.
For modal synthesis, you can layer two or more comb filters tuned to harmonic intervals (e.g., 2.27 ms for 440 Hz and 1.5 ms for 666 Hz) and feed them parallel white noise or pink noise.
Also, try throwing this chain on a noise burst, and suddenly you’ve got a bell-like tone that’s totally synthesized from filtering; not oscillators.
It will help you create pitch-resonant timbres like bells or mallets, controlled entirely by your delay length and feedback loop settings.
The tighter the delay time, the brighter and more percussive the tone, and longer delays stretch it into vibraphone or marimba territory.
When using plugins like NI Reaktor, you can patch in Z transform modules to manipulate the transfer function of each stage and simulate damping or string decay.
With Reaktor Blocks or Core modules, you can even create tunable comb filters that mimic plucked strings decaying over time with surprising realism.
Another next-level trick is the Barber Pole sweep illusion…
This is where multiple comb filters are modulated at slightly offset rates (e.g., 0.07 Hz, 0.09 Hz, 0.11 Hz) to create a rising or falling phase sweep that never ends.
You can automate them manually or sync each modulation rate to slightly different divisions of the BPM for a hypnotic, lopsided phase scroll.
It’s perfect for ambient intros or evolving textures.
Layer that behind evolving pads or field recordings, and suddenly your background elements become the star of the show!
You can even mimic time-stretching artifacts by modulating the comb filtering effect in reverse 一 sweep from 10 ms to 2 ms and automate positive values of feedback gain to accentuate higher frequency movement while letting the lows roll off.
It gives you that granular-crushed stretch tone, like a digital audio file gasping for breath in the coolest way possible.
Stacking these tricks lets you build hybrid FX chains where tonal, spatial, and rhythmic elements are controlled by the same basic building blocks.
And once you start modulating multiple parameters (delay, wet/dry, feedback, and pitch at the same time) it starts sounding less like a filter and more like a living, breathing sound engine.
PRO TIP: Use three comb filters in series, each with different delay times (e.g., 3.33 ms, 2.5 ms, and 1.6 ms), and automate their wet/dry mix over time.
You can even map them to different controller knobs or macros, so each and every movement interacts with your source sound in a very unique way.
This creates dope, unpredictable textures that evolve over the track and give static loops serious depth.
Bottom line, whether you’re scoring ambient soundscapes or mangling drum loops for experimental bass music, comb filters give you total control over how things move, shimmer, and break apart, so get as crazy as you’d like.
Bonus: Tuning Delay Length/Time for Harmonic Reinforcement
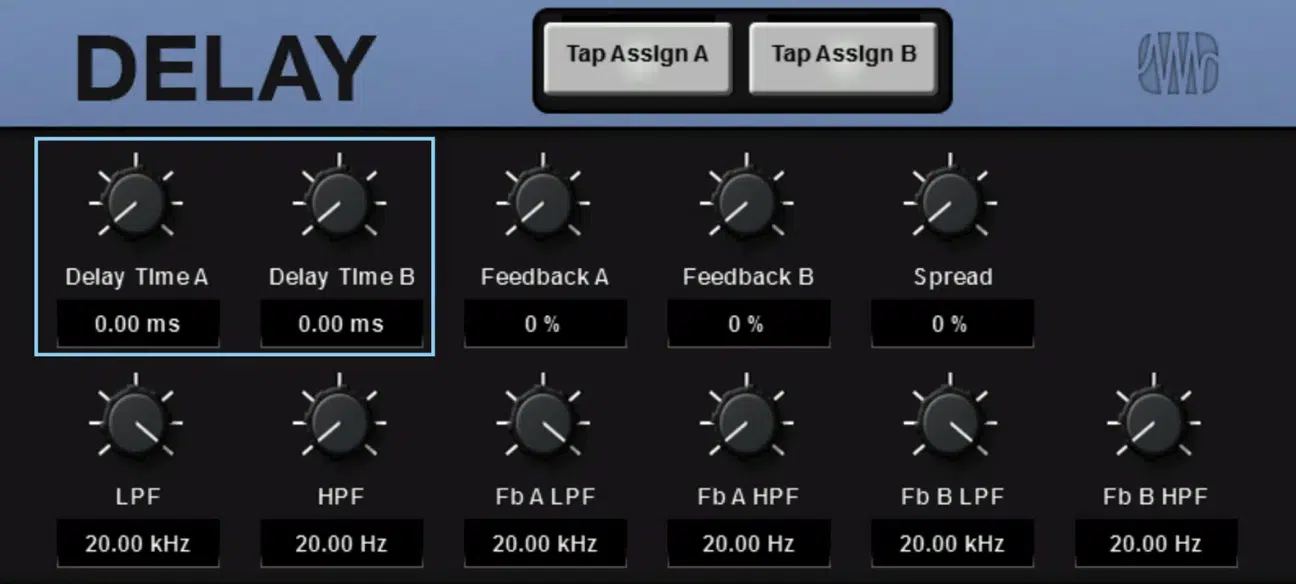
If you want to lock comb filters to your musical key, use the formula Delay (ms) = 1000 ÷ Target Frequency (Hz) and fine-tune it by ear.
2.5 ms highlights 400 Hz, while 2.27 ms hits 440 Hz dead-on.
You can even double this for sub-octaves (e.g., 4.54 ms for 220 Hz) or halve it for overtones (1.13 ms for 880 Hz).
Then, adjust feedback gain to around 35% to keep the tone clear without overwhelming the mix.
This technique is killer for reinforcing the root note of a pad or creating subtle harmonic movement on basslines when placed in parallel.
PRO TIP: Set up two instances 一 one tuned to the root, one to the third.
Then, alternate their delay lengths slightly using automation for harmonic evolution that stays locked to the progression (thank me later).
Final Thoughts
And there you have it: everything you need to know about comb filters and how absolutely epic they can help you make your tracks.
With this new information, you’ll be able to shape textures, reinforce harmonics, and design otherworldly effects all day.
Plus, you’ll never have to worry about phase cancellation wrecking your tone or spatial artifacts throwing off your stereo image ever again.
Just remember to always lock in your delay times, watch your feedback gain, and keep things musically aligned. This way, your sound stays tight, intentional, and elevated.
And, as a special bonus, if you want to see comb filters in action firsthand, you’ve got to check out these invaluable Free Project Files.
These 3 project files will show you exactly how to automate movement, reinforce harmonic keys, and modulate stereo width like a professional.
Plus, you can actually see how short delays, high feedback, and filter combinations react in real-time across drums, synths, and FX chains.
It’s like having all of the cheat codes at your disposal (think of the possibilities!).
Bottom line, when it comes to comb filtering, just don’t forget to experiment with extreme settings and always trust your ears.
This way, you can avoid unwanted phase issues and sculpt fresh, expressive tones with total confidence.
Your tracks will always stand out in the best way possible, and you’ll know how to handle these tools like an absolute expert.
So make sure to practice constantly, play around with all the techniques I broke down for you today, and remember to always push boundaries with intention.
Until next time…


Leave a Reply
You must belogged in to post a comment.