Flangers are like the secret spices of the audio production world.
They can help you transform a basic sound into an otherworldly sonic experience, breathe life into a static mix, and add movement and depth to any track.
But to truly grasp and apply the power of a flanger, you’ll need to understand what it is, how it works, and how to use it creatively and effectively.
And that’s exactly what you’re going to learn in this ultimate flanger guide.
By the end of this article, you’ll have gained:
- A deep understanding of what a flanger is and how it works ✓
- Knowledge of the flanger effect, phase shifting & comb filtering ✓
- Insight into how to adjust frequency response & frequency spectrum ✓
- Mastery of manipulating delay time & phase shift for unique soundscapes ✓
- Comparison knowledge between flanging & other audio effects ✓
- Skills for perfecting the flanger effect in your DAW ✓
- Insider tips, tricks, and flanger techniques ✓
From the basics to more advanced techniques, we’ll be covering everything there is to know about flanging in digital music production.
Whether you’re a beginner or a seasoned pro, there’s something to gain from this article.
This way, you’ll never have to ask yourself “what is a flanger” again.
Let’s dive in…
Table of Contents
- What is a Flanger?
- Understanding Phase Shifting & Comb Filtering
- Embracing the Flanger Effect in Your DAW
- The Impact of Flanging on Your Audio Signals
- Flanging vs Other Audio Effects: The Digital Comparison
- Mastering the Flanger Effect in Your DAW
- Achieving a Unique Flanger Sound
- Tips & Tricks Using a Flanger
- Transitioning from Digital to Physical: The World of Flanger Pedals
- What Is A Flanger: Final Thoughts
What is a Flanger?
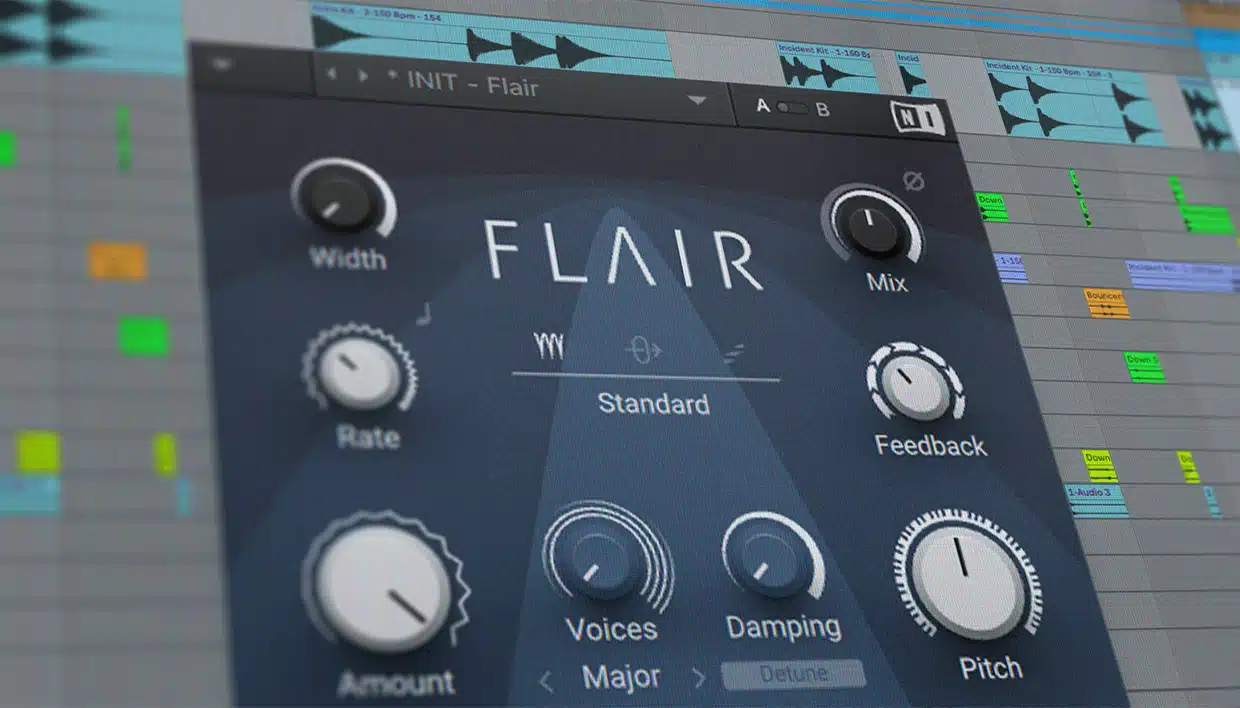
In the world of audio effects, Flangers can be a super beneficial tool in your production arsenal.
It’s this sweeping, whooshing, almost jet-plane-like sound, making everything just a bit more…alive.
The flanger effect is a type of phase shifting.
It works by taking an audio signal, duplicating it, and then slightly delaying one of the signals.
This creates what we call a “comb filter” effect.
Because of the delay, certain frequencies are canceled out and others are amplified, creating a pattern like the teeth of a comb (hence the name).
In the digital world of music production, flanging is like the secret ingredient, adding that unique flavor that makes a track stand out.
It’s used across all genres, from hip-hop to trap, jazz to trance, and most things in between.
The versatility of the flanger effect makes it an invaluable tool in your DAW.
Whether it’s giving a drum loop an otherworldly vibe or making a guitar riff shimmer, the flanger effect adds depth and complexity.
It can transform a simple, dry signal into an intriguing, dynamic sound that captivates your audience.
And in today’s competitive music scene, having that unique sonic signature is crucial.
Understanding Phase Shifting & Comb Filtering
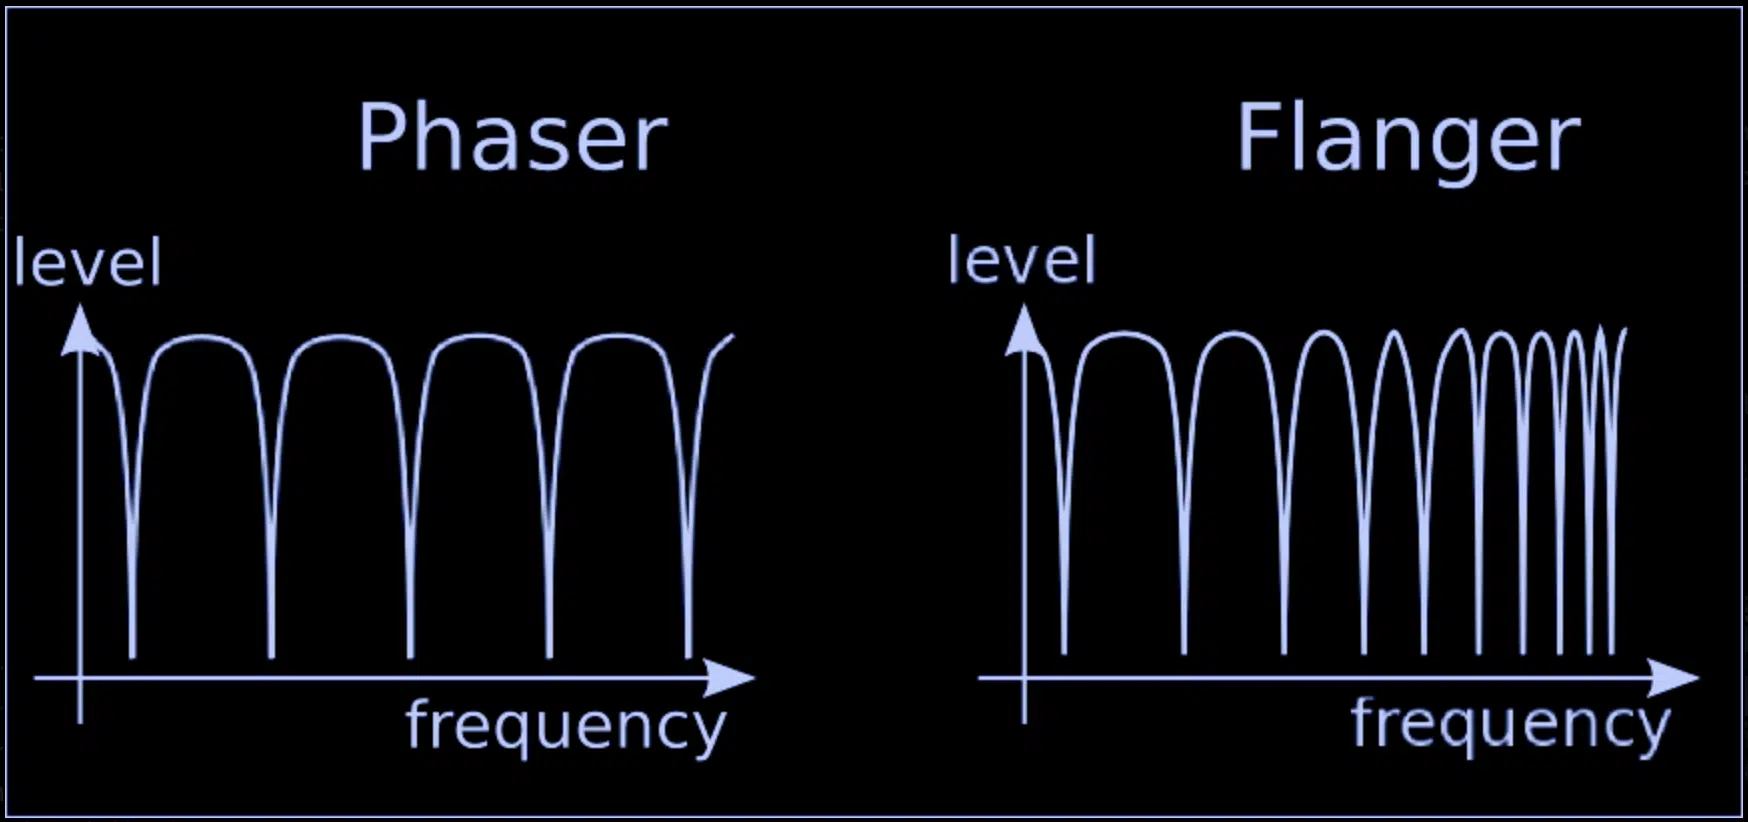
So what is a flanger and how does a flanger create its unique effect?…
Well, the magic lies in the process of phase shifting.
Remember, flanging is a type of phase shifting where one audio signal is slightly delayed.
This delay time can be manipulated to create different effects, allowing you to dial in that perfect sound for your mix.
A critical element in the process is the comb filter.
It’s called this because, on a frequency spectrum, the peaks and troughs created by the delay look like a comb.
By adjusting the delay time, you can change the frequency response of the comb filter 一 affecting which frequencies are amplified and which are canceled out.
This is how flanging can add both richness and texture to a sound.
Embracing the Flanger Effect in Your DAW
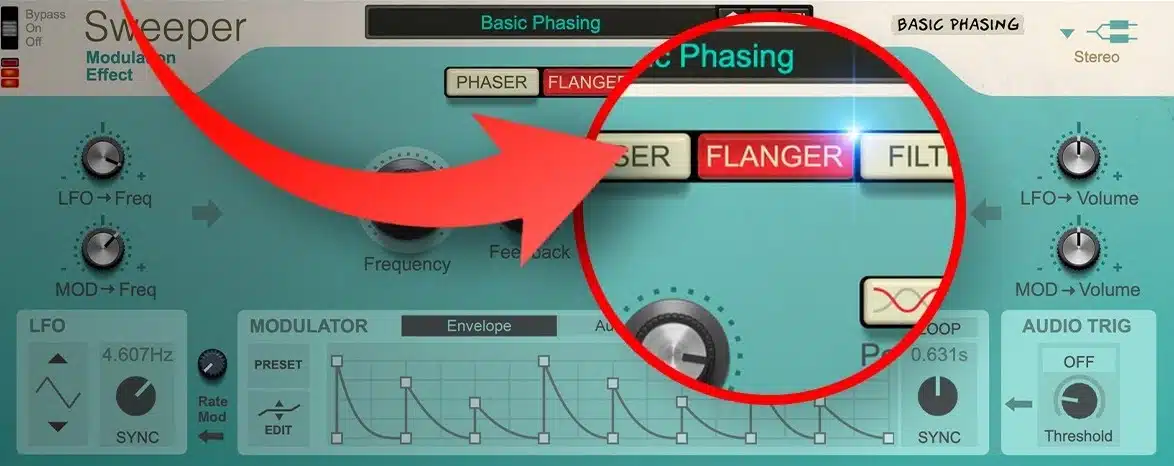
Digital music production provides a range of flanger plugins that recreate this mind-bending effect within your Digital Audio Workstation (DAW).
As a digital music producer, understanding how these plugins work can give you a greater grasp over your music’s sonic qualities.
-
A Deep Dive into Digital Flanger Effects
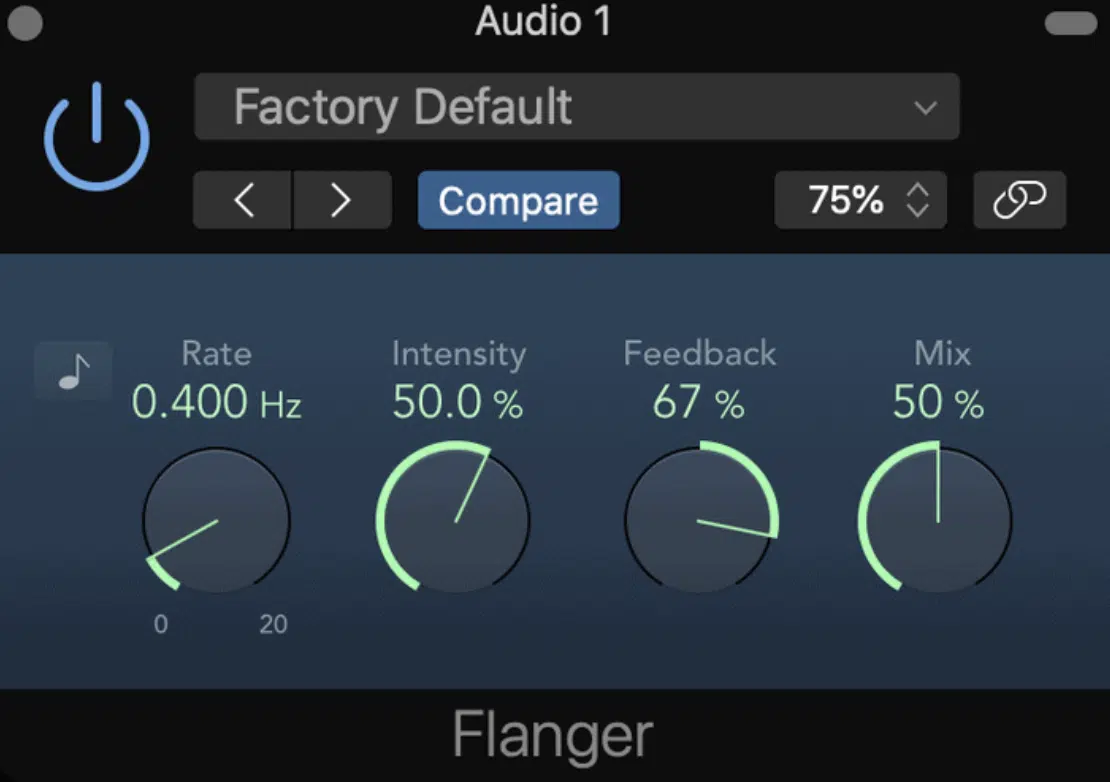
First, a quick refresher: a flanger plugin introduces a slight delay to your input signal, creating what we call a ‘delayed signal.’
This delayed signal is then mixed with the original ‘dry signal’ to form the output signal.
This process produces that distinctive flanging sound.
Now, let’s look at the various parameters of a typical flanger plugin:
- Depth (Intensity) 一 This controls how much the delay time varies. A higher depth setting results in a more dramatic flanging effect.
- Rate 一 This refers to the speed of the flanging effect. At higher rates, the flanger effect will sweep back and forth more quickly, creating a more intense sonic experience.
- Feedback 一 This determines how much of the output signal is fed back into the plugin. More feedback will create a more pronounced and resonant flanging effect.
- Mix 一 This sets the balance between the original dry signal and the wet signal, i.e., the signal affected by flanging. A higher mix setting will make the flanging effect more dominant in your output sound.
In order to truly grasp the concept of flangers, let alone implement them into your tracks, knowing these parameters is crucial.
-
Low Frequency Oscillators
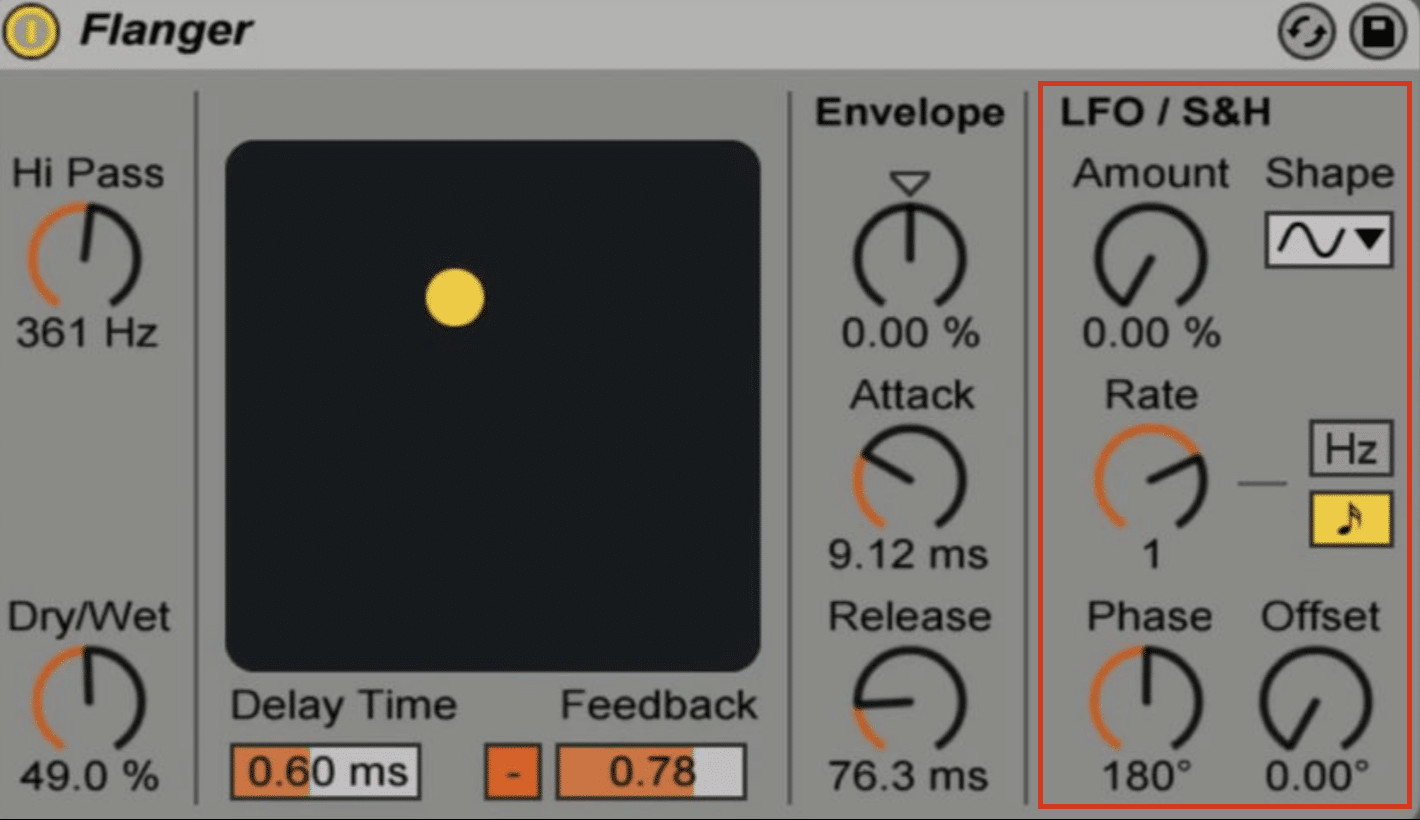
It’s worth mentioning at this point the role of the Low Frequency Oscillator (LFO) in flanging.
The LFO is the engine that drives the cyclic nature of the flanger effect.
It modulates the delay time in a regular, repetitive manner.
The speed at which this oscillation happens is typically controlled by the ‘Rate’ parameter on your flanger.
So, when adjusting your mix, don’t forget that the LFO is in the background 一 tirelessly working to give the flanger its characteristic whooshing sound.
-
Adjusting Frequency Response & Spectrum for the Ideal Flanging Effect
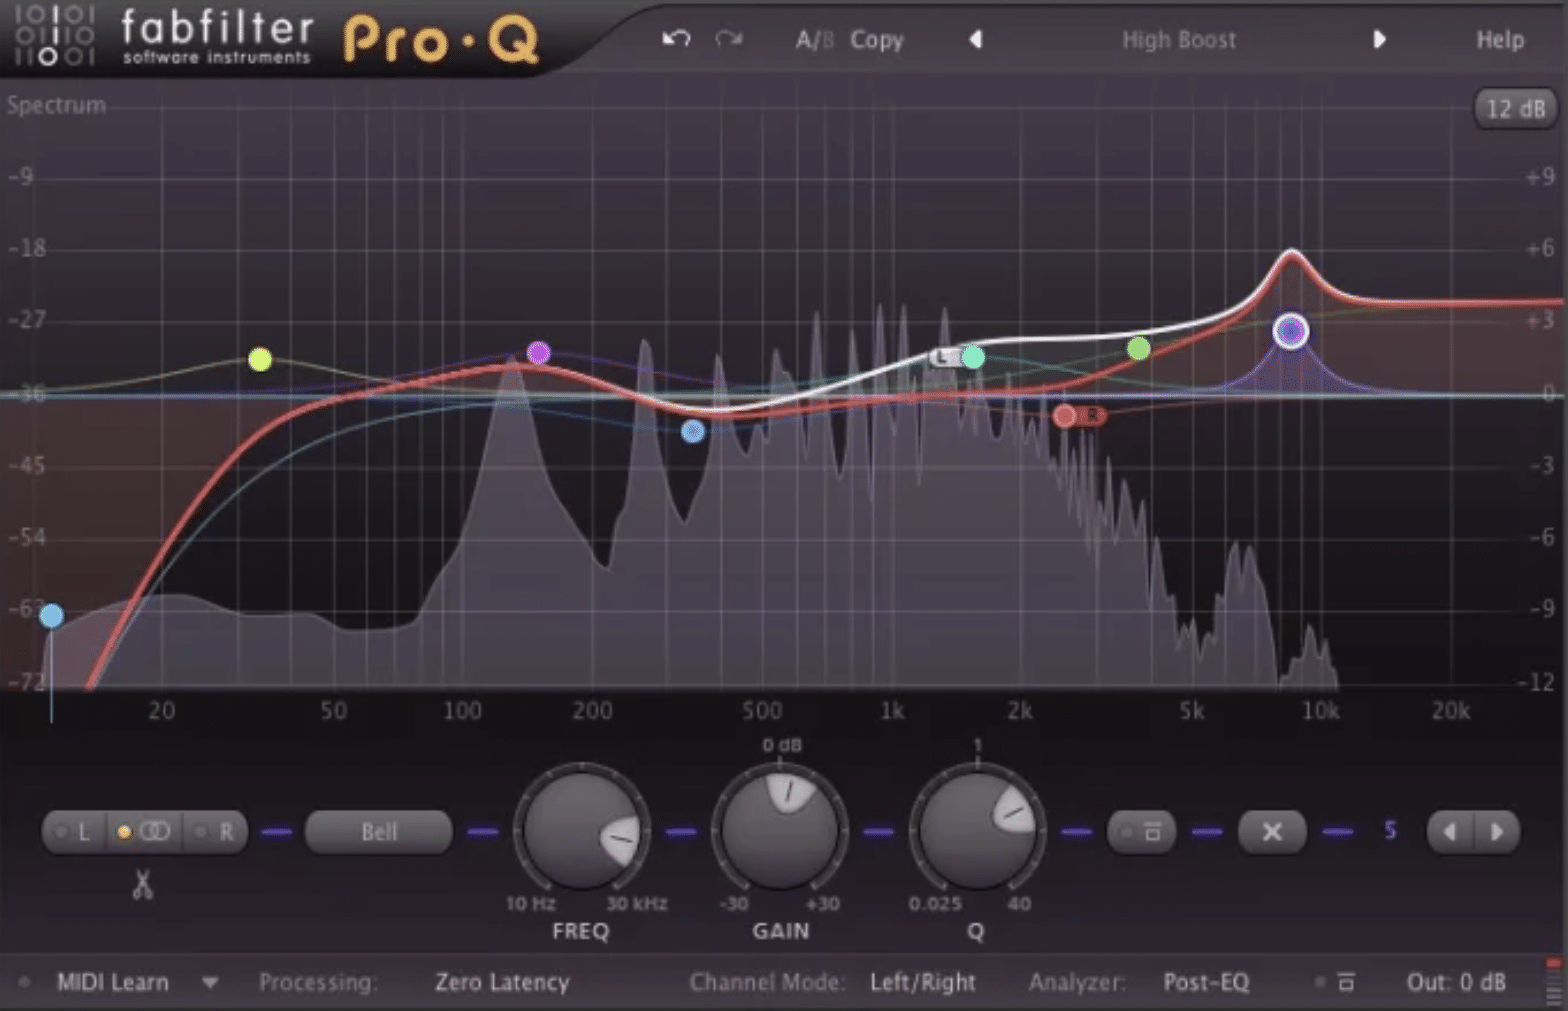
A digital flanger plugin gives you complete control over your sound’s frequency response and spectrum, letting you tailor the flanging effect to suit your mix perfectly.
But how does this work in practice?
The frequency response of an audio signal is essentially a map of how different frequencies within the signal are boosted or attenuated.
In a flanger plugin, you can shape this response to enhance or diminish certain frequency bands.
It affects how pronounced the flanging effect is across the frequency spectrum.
For example, you might want to enhance the flanging effect in the high frequencies to add some sparkle to your guitar track.
Or, perhaps reduce it in the low-end to prevent your bass from becoming too muddy.
And then there’s the frequency spectrum, a visual representation of all the different frequencies present in your audio signal.
By adjusting the frequency spectrum within a flanger plugin, you can subtly color and shape your sound.
This could be as simple as amplifying certain frequencies to make them stand out or dampening others to create more space in your mix.
-
Manipulating Delay Time & Phase Shift for Unique Soundscapes
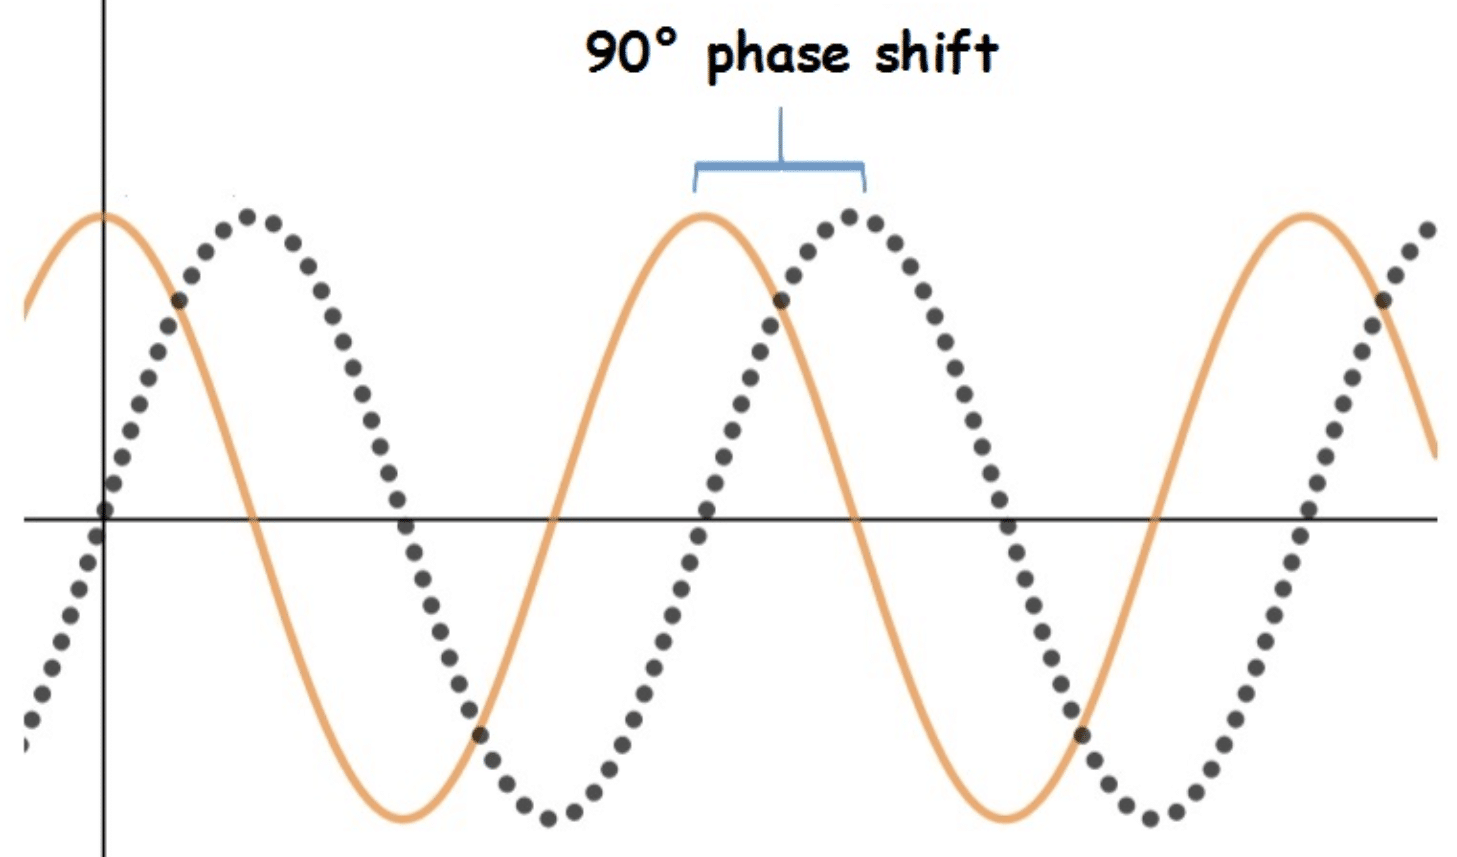
The key to unlocking the full potential of flanging lies in the manipulation of delay time and phase shift.
By playing around with these two elements, you can create unique soundscapes that defy the conventional boundaries of sound.
Consider this: short delay times between 1-5ms create subtle phase shifts 一 infusing a sense of motion and dimension to the sound without it sounding overly affected.
But if you stretch the delay time further, say to around 10-20ms, you end up with a strong, swooshing flanging effect that’s unmistakable.
Remember, it’s all about shaping the sound to fit the mood and character of your track.
And with flanging, you have a powerful tool at your disposal to do just that.
The Impact of Flanging on Your Audio Signals
Following the flanging effect’s impact on audio signals, you may find yourself asking, “How does this all tie into the interaction between different types of audio signals?”
That’s a great question…
Our next focus will be on understanding how flanging plays a role in the complex dance between dry & wet audio signals.
-
Exploring the Interplay Between Dry & Wet Audio Signals
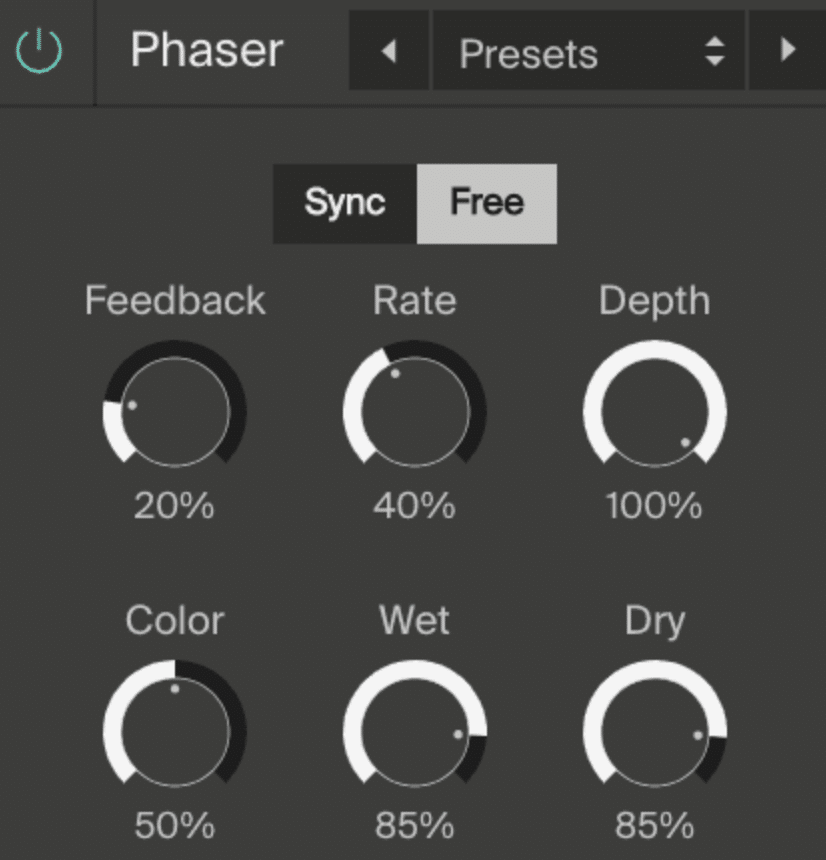
In the realm of audio effects, we often talk about the balance between dry and wet signals.
- Dry signal 一 The original, unaffected audio signal.
- Wet signal 一 The audio signal after it’s been treated with an effect.
With flanging, the dry and wet signals are blended together, creating a sound that is both familiar and alien.
The resulting sound is more than just the sum of its parts: it’s a new sonic entity that takes on a life of its own.
-
Understanding the Phase Delay & Comb Filter Effect on Your Output Signal
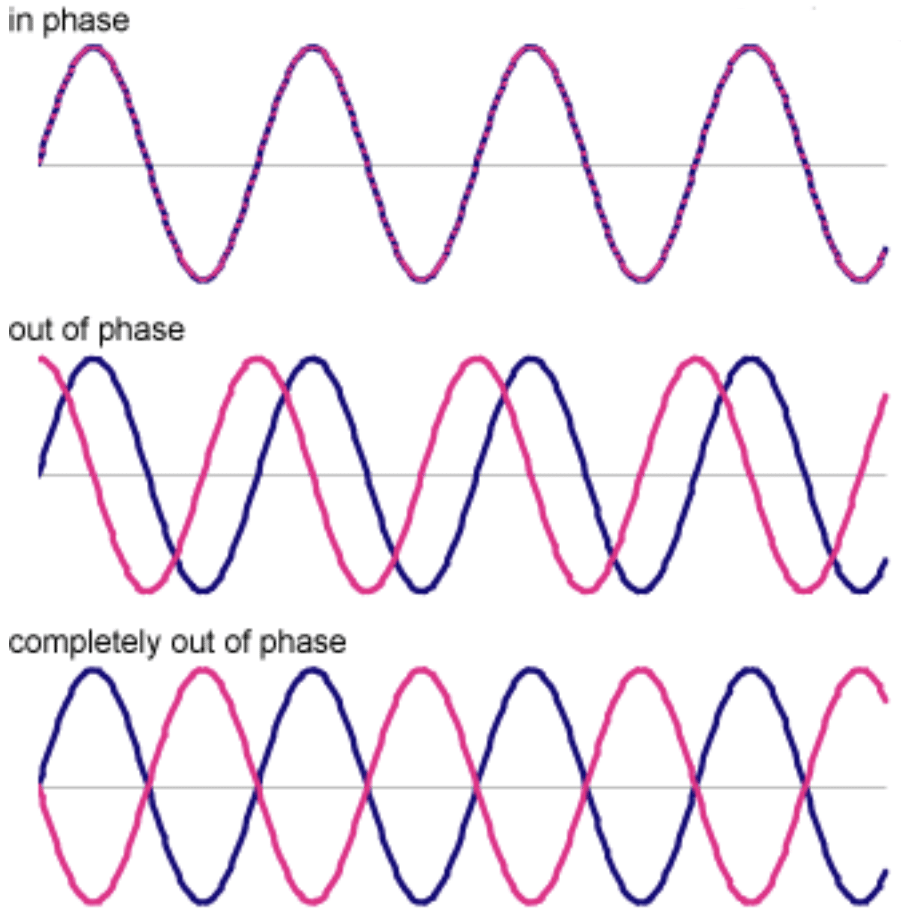
As we delve deeper into the inner workings of a flanger, it’s worth taking a closer look at phase delay and the comb filter effect.
The flanging effect occurs when two identical audio signals are mixed together, with one signal experiencing a slight delay.
This delay causes a phase shift between the two signals, creating constructive and destructive interference.
- When the signals are in phase (meaning their waveforms align perfectly): they combine to produce constructive interference, amplifying the sound.
- When the signals are out of phase (their waveforms are opposite): they create destructive interference, canceling each other out.
This alternating pattern of amplification and cancellation across the frequency spectrum forms the basis of the comb filter effect.
-
Manual Control, Depth Control & Variable Speed Control
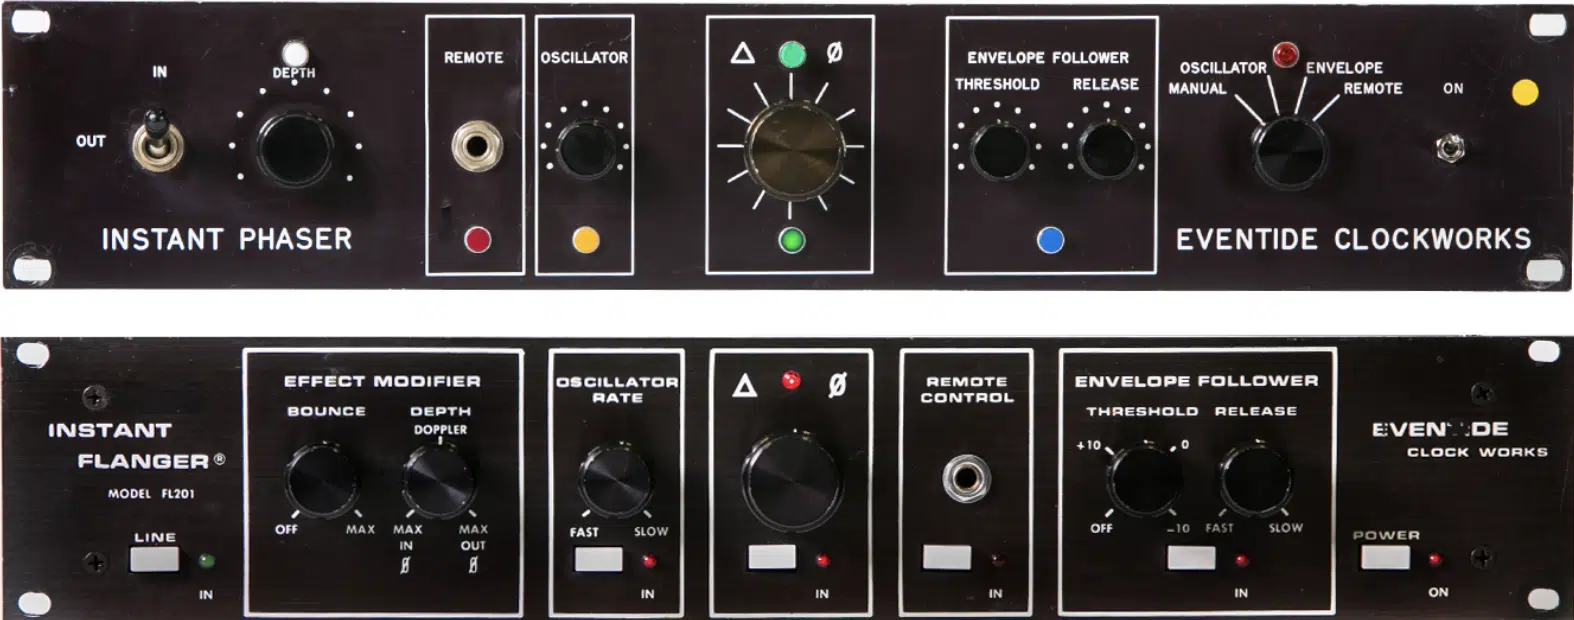
Let’s dive deeper into the parameters that offer more control in creating unique music.
Manual control adjusts the point in the delay time at which the flanger effect starts.
Manipulating this can lead to creative effects, such as:
- A sudden whoosh of flanging introduced at the peak of a synth line.
- A gradual, mysterious emergence of the effect as a track unfolds.
Depth control determines the range through which the delay time varies.
Manipulating this parameter is key to uncovering new and exciting effects, from subtle to intense.
- A lower depth setting will result in a subtler flanging effect.
- A higher setting will create a more intense, dramatic effect.
Picture a light ripple on a pond versus a tidal wave crashing against a cliff – that’s the kind of sonic range we’re talking about here!
Variable speed control affects the rate at which the flanging effect oscillates back and forth.
- Slower speeds can produce a haunting, ethereal sound.
- Faster speeds can create a disorienting, psychedelic vibe.
Each of these parameters can be adjusted individually or in combination, allowing you to craft a flanging effect that’s unique to your music.
Flanging vs Other Audio Effects: The Digital Comparison
Having broken down flanging and its unique characteristics, it’s now time to set it up against its counterparts.
This will allow you to further understand what sets flanging apart and when to use it over another audio effect.
-
Flanger vs Chorus Effect: The Battle of Modulation Effects
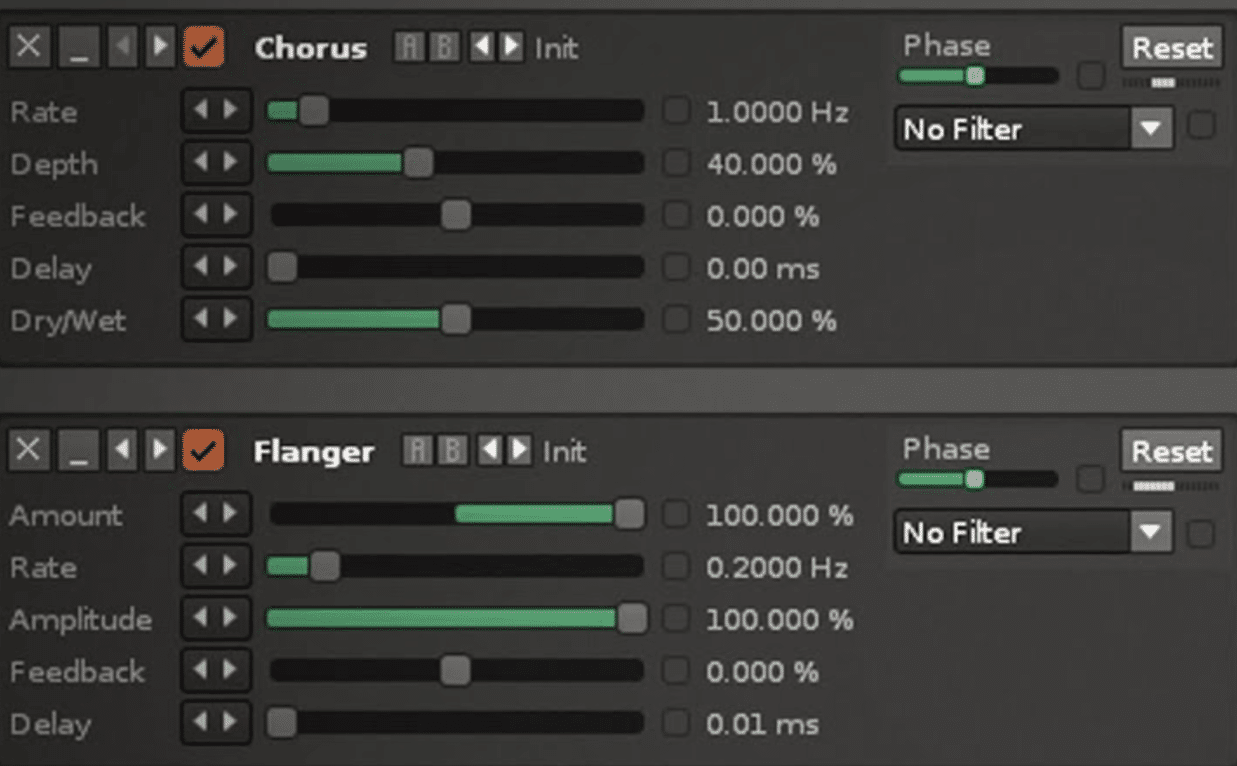
Flanging and chorus both belong to the family of modulation effects, altering a sound’s tone, pitch, or time to create unique audio experiences.
The distinction lies in the nuances of how they process the signal.
Flanging, as we’ve discussed, mixes a signal with its delayed version to produce an oscillating ‘comb filter effect.’
This effect creates a sweeping, spacey sound reminiscent of a jet engine or the whoosh of a speeding train.
For example, the flanger effect is a signature element in the Beatles’ “Lucy in the Sky with Diamonds,” giving the song an ethereal, trippy quality.
On the other hand, chorus introduces a pitch-modulated delayed signal into the original to create a rich, fuller sound.
Imagine a choir singing in unison — though they’re all singing the same melody, slight differences in timing and pitch give the overall sound a lush, full-bodied quality.
This is the effect the chorus pedal strives to emulate.
Nirvana’s “Come As You Are” prominently uses the chorus effect, lending the song its instantly recognizable underwater-like guitar tone.
-
Flanger vs Phaser Effect: Differences in Phase Shifting Circuit
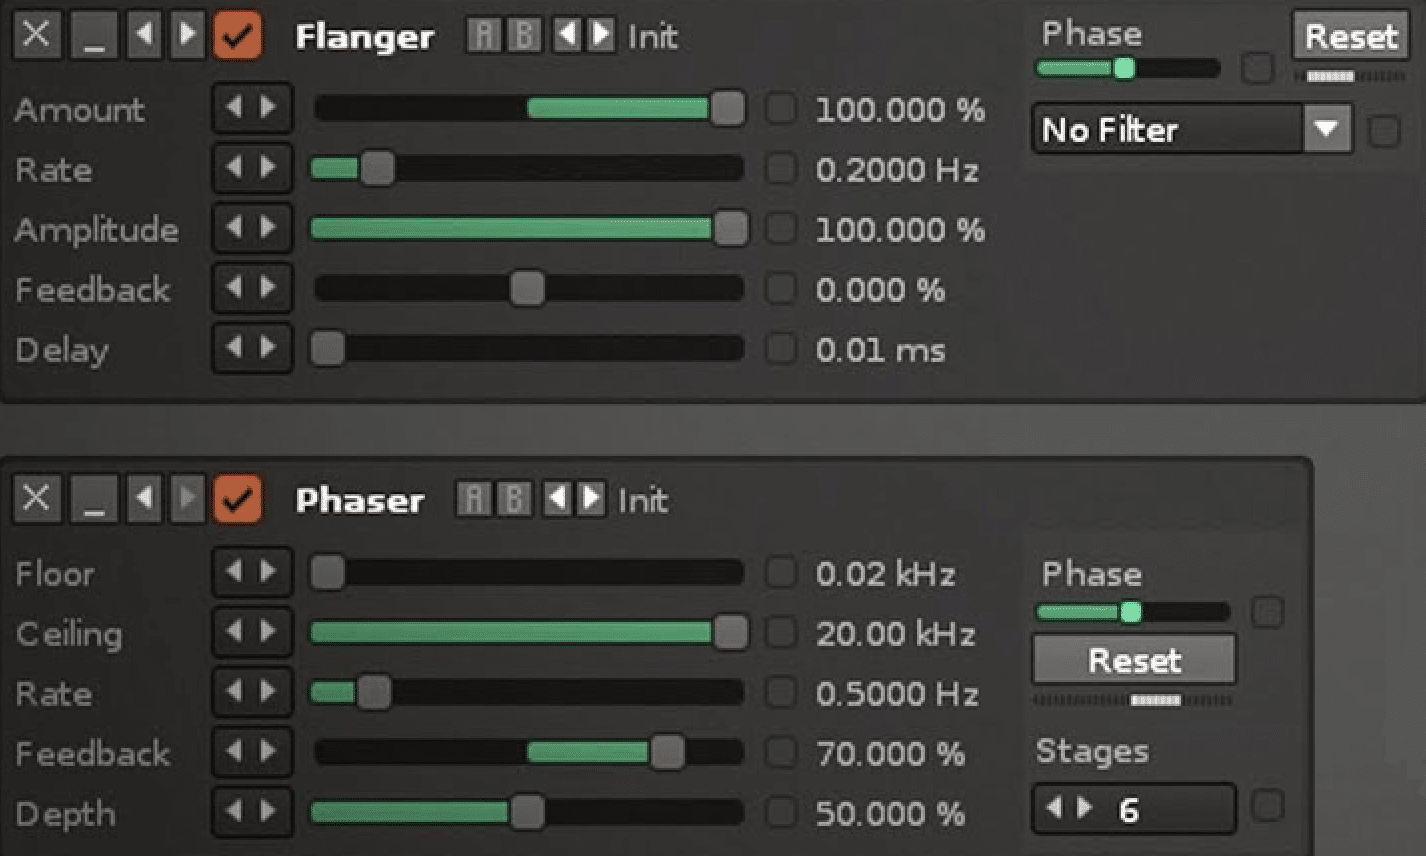
While both flanger and phaser are phase-based effects and share a psychedelic, swirly character, they use different methods to achieve their respective sounds.
A flanger, as you know by now, works by introducing a delay between two identical signals.
This delay produces a series of peaks and troughs across the frequency spectrum, giving us the distinctive ‘comb filter’ effect.
A phaser, on the other hand, splits the signal, leaving one part unaffected while the other is processed through an all-pass filter.
This results in certain frequencies being phase-shifted, while others remain unaltered.
When mixed back together, these phase differences create the characteristic ‘whooshing’ sound.
An example of phaser use is in Billy Joel’s “We Didn’t Start the Fire,” where it’s applied to the drums to give them a unique, swooshing character.
-
Comb Filtering vs Phase Shifting: What’s Best for Your Mix?
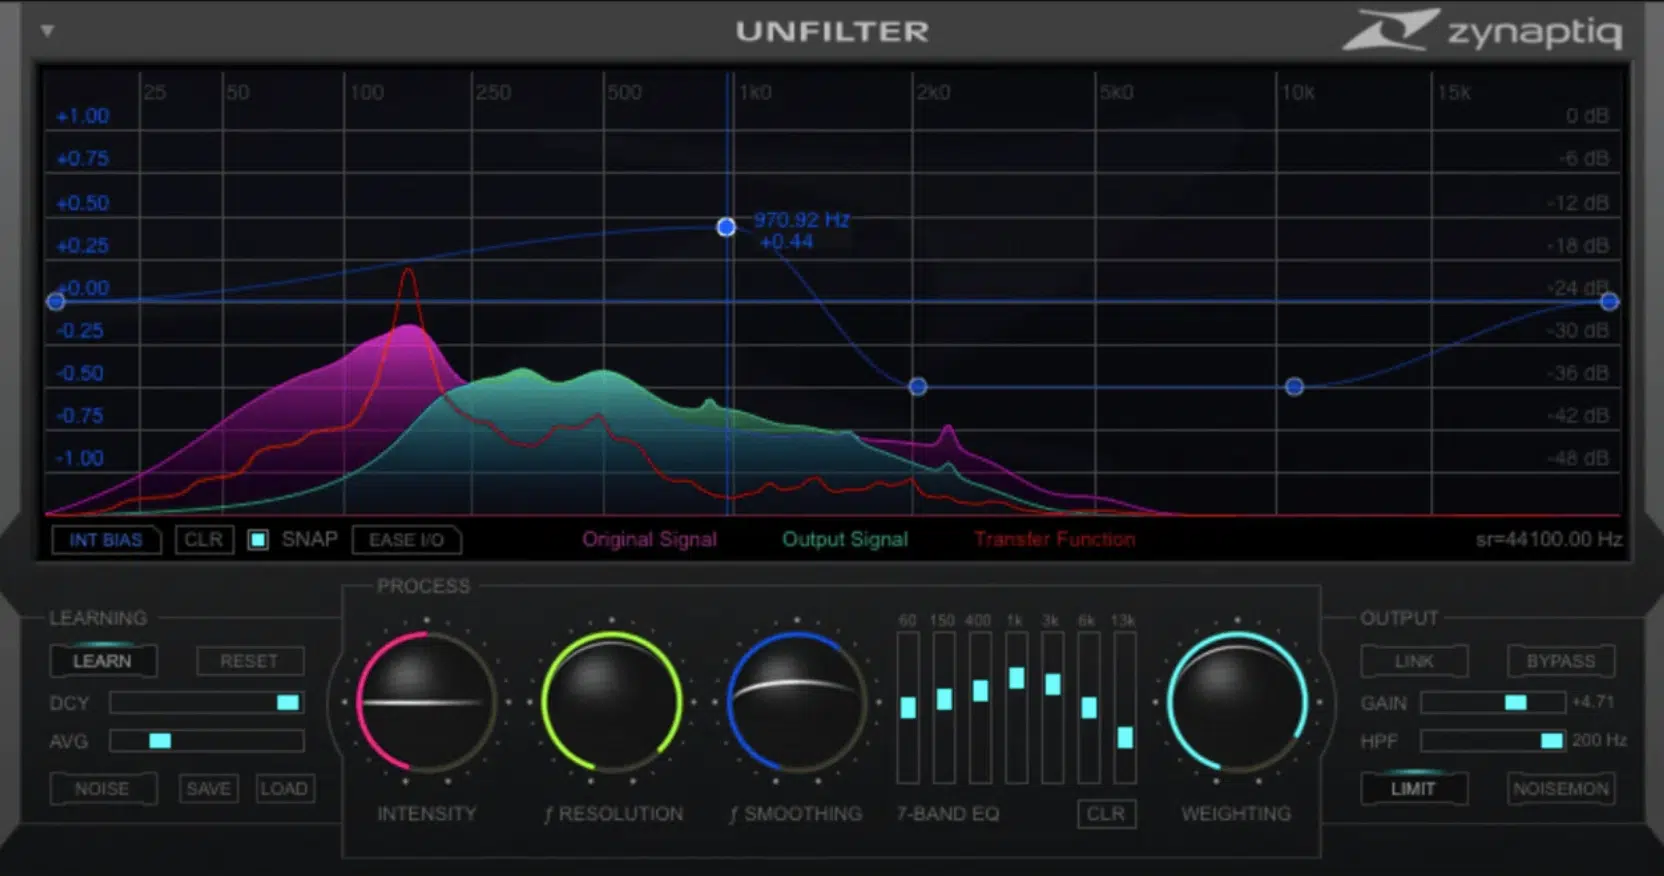
So, between comb filtering and phase shifting, which one is the best?… Well, that really depends on the sound you’re going for.
Comb filtering and phase shifting both provide interesting ways to manipulate your audio signals.
Understanding how they work can help you decide which effect to use in a given situation.
- Comb filtering 一 Can add a resonant, coloration effect that can be used to create a sense of space and depth.
- Phase shifting 一 Can create a lush, swirling effect that can add movement and interest to static sounds.
There’s no right or wrong here…
It all boils down to your personal taste, your unique vibe, and the requirements of your mix.
Mastering the Flanger Effect in Your DAW
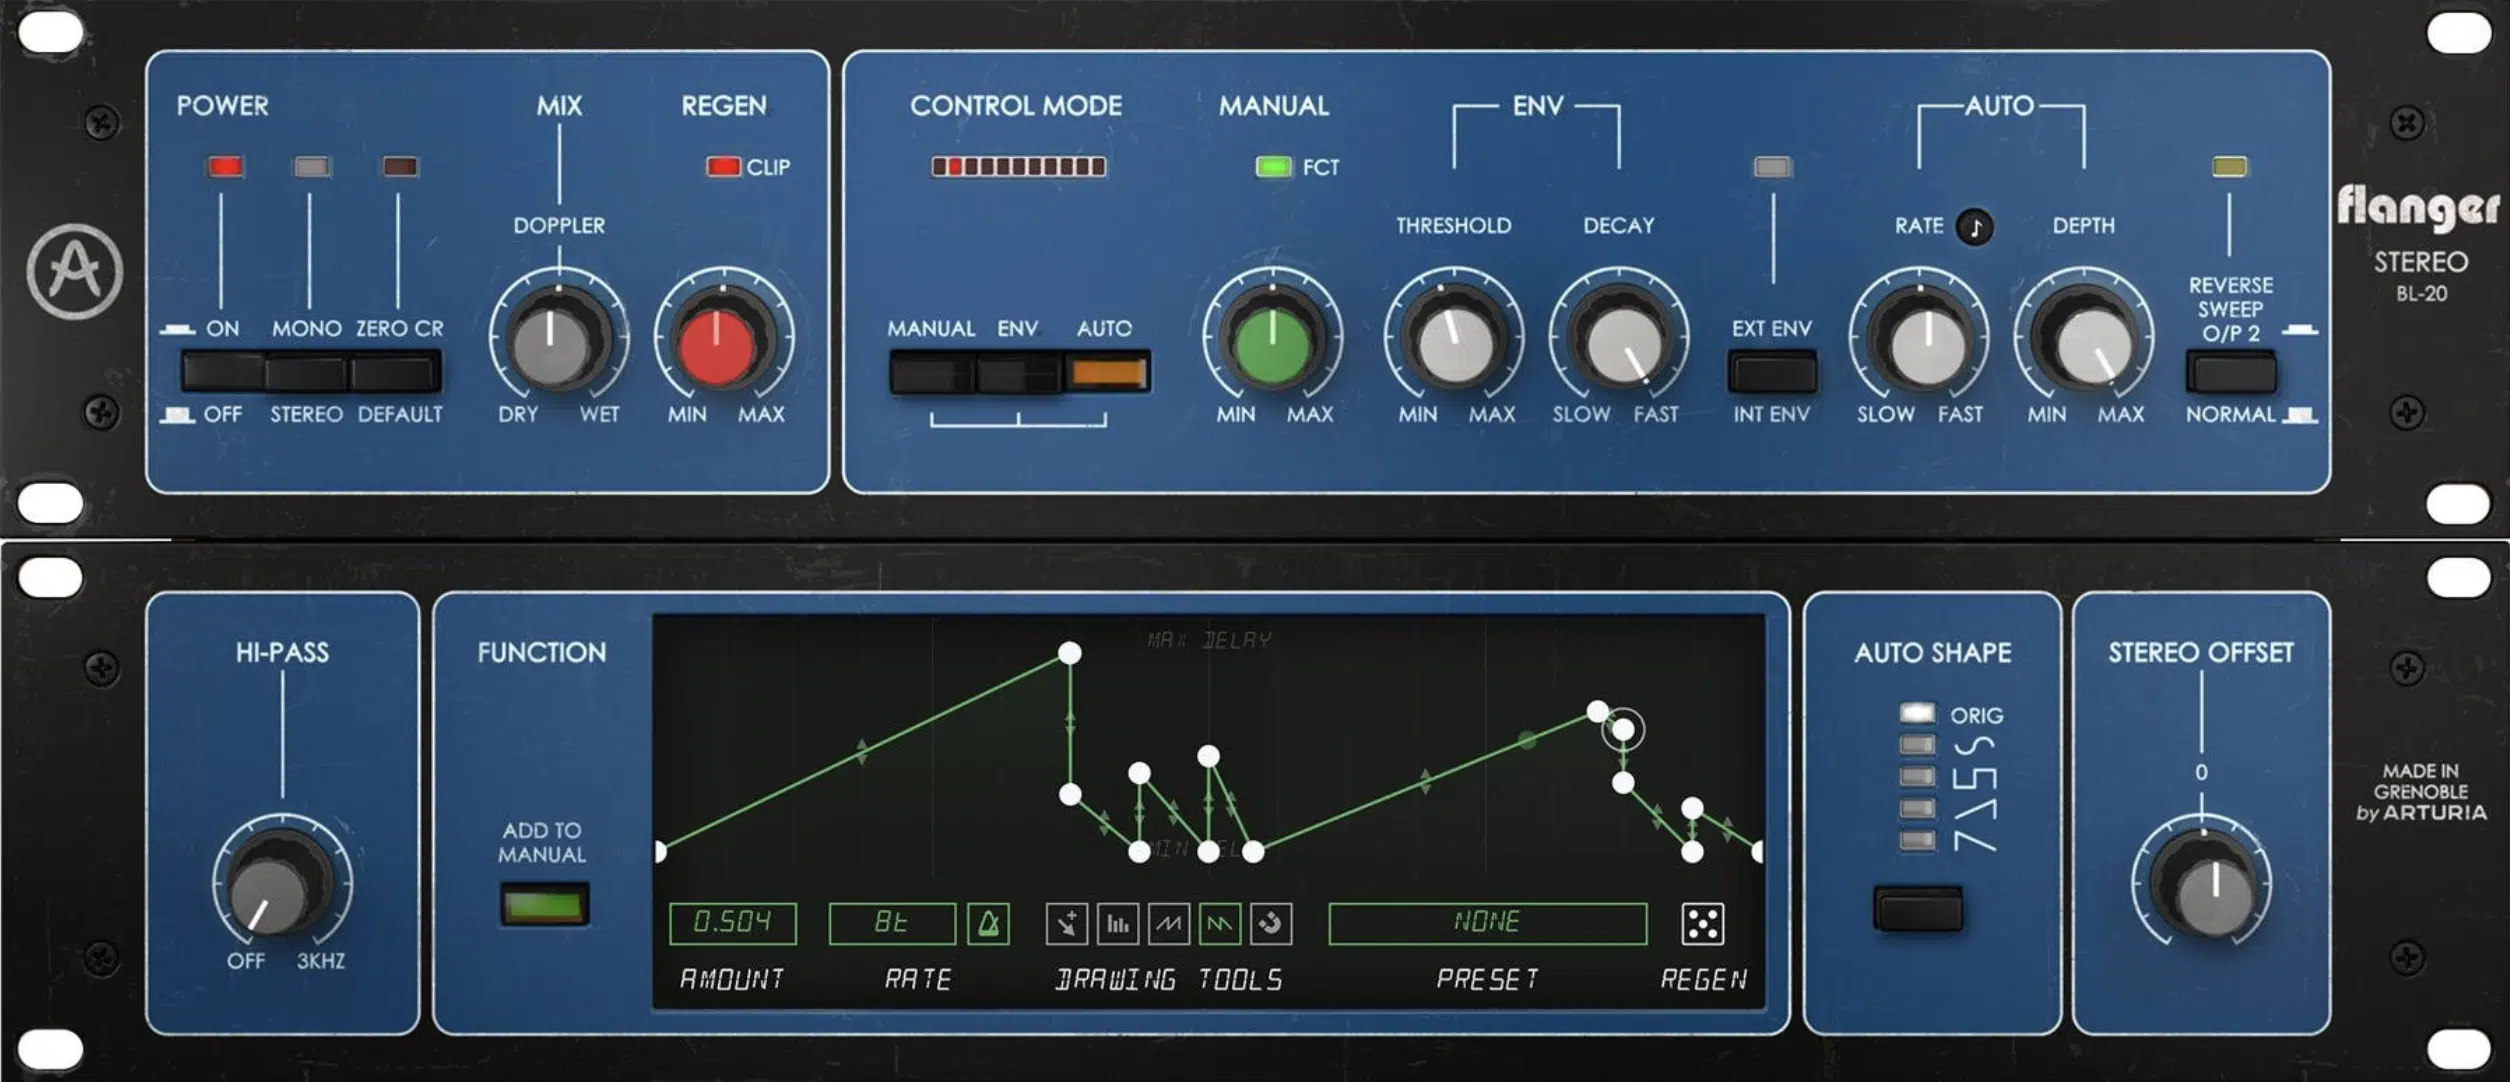
With a deeper understanding of the flanger effect under your belt, you’re ready to take things a step further.
In this section, we’re going to delve into how you can effectively master the flanger effect right within your DAW.
Optimizing Phase Shift & Delay Times
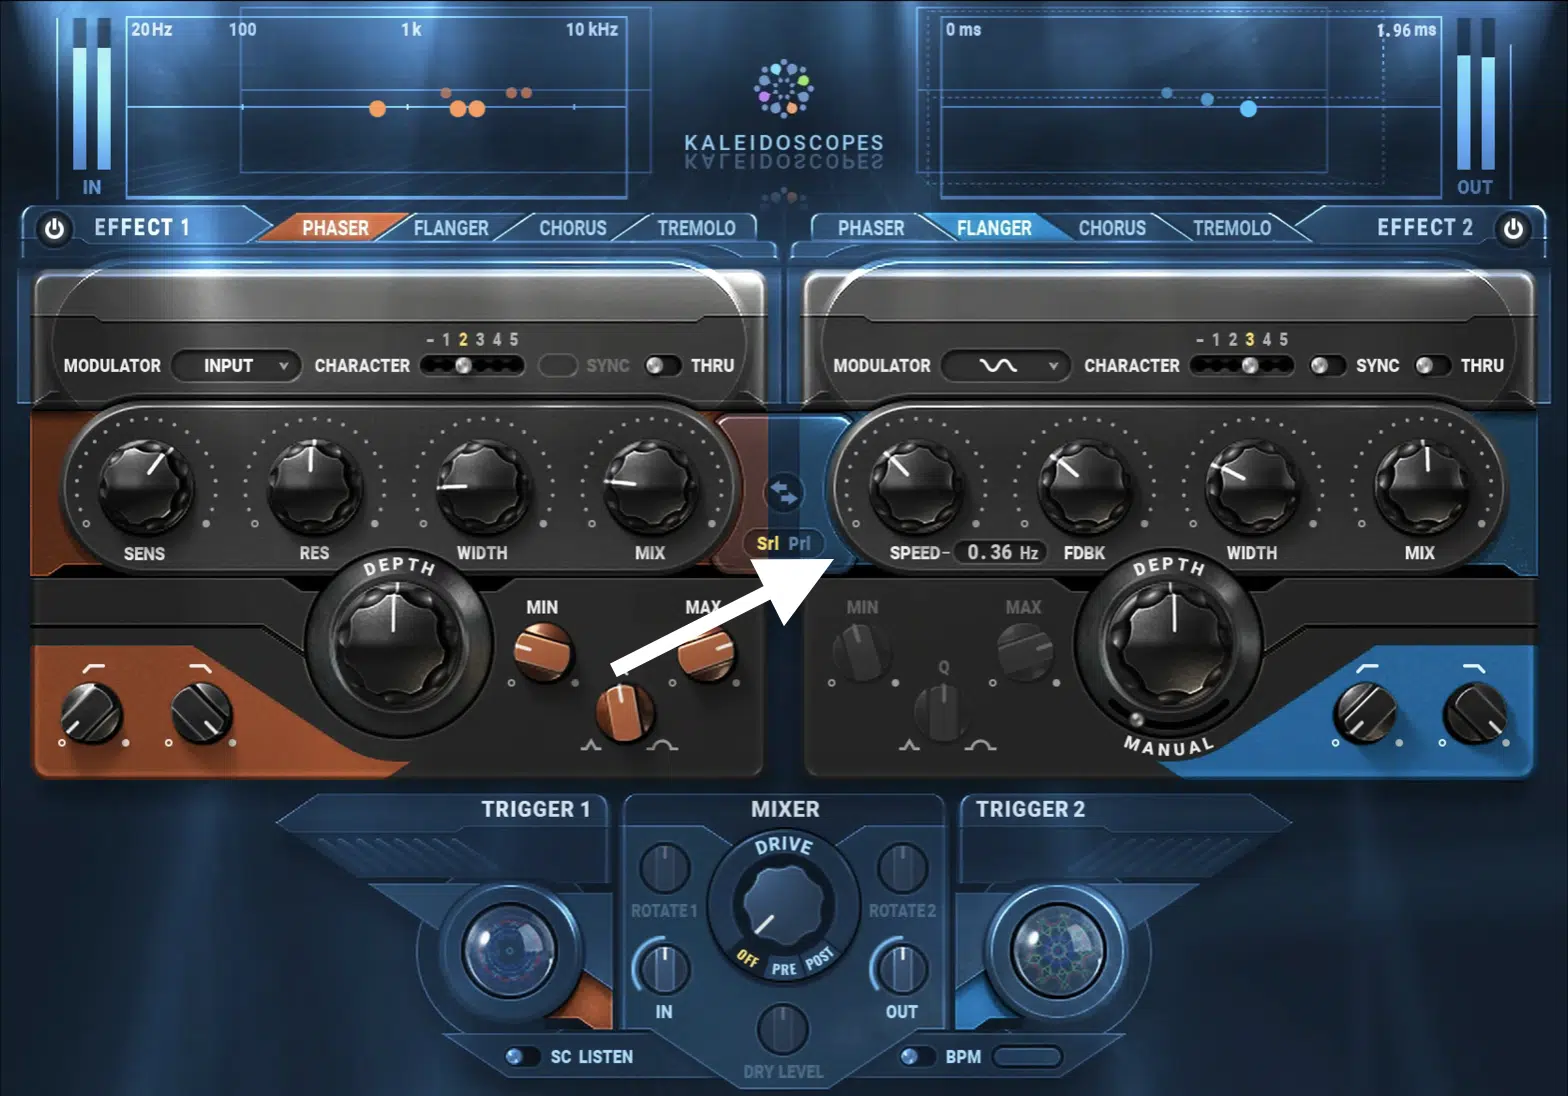
Mastering the flanger effect in your DAW involves getting a grip on parameters like phase shift and delay times. Here are a few pointers:
- Phase Shift
Adjusting the phase shift can drastically alter your flanger sound.
A positive phase shift can make your sound brighter, while a negative shift can result in a more muted, mellow tone.
Experiment with different phase shift settings to discover the sweet spot for your mix.
- Delay Times
Messing around with different delay times can also change your flanger sound in unique and creative ways.
Smaller delay times (less than 5 ms) will produce a more intense, metallic flanging effect.
Larger delay times will give a subtler, smoother result.
Remember, small adjustments can make a big difference, so take your time tweaking this setting.
- Sync Your Flanger with Your Track’s Tempo (pictured above)
Most DAWs allow you to sync delay times of a flanger effect with the tempo of your track.
By experimenting with different delay times and seeing how they match up with the beat of your music, you can create rhythmic flanging effects.
These effects can enhance the groove and drive of your track.
For example, setting a delay time to match a quarter or eighth note of your song can create a pulsating effect that adds an exciting rhythmic element to your mix.
Achieving a Unique Flanger Sound
There’s no one-size-fits-all when it comes to achieving a unique flanger sound.
It’s about understanding the tools at your disposal and how to wield them creatively.
However, here are a few of my personal favorite ways to achieve a unique sound with the help of a flanger:
-
Push the Boundaries of Depth and Rate

Depth and rate are two of the fundamental parameters that dictate the overall intensity and speed of the flanging effect.
By pushing these parameters to their limits, you can create extreme flanging effects that range from slow, massive waves to rapid, shimmering textures.
Try starting with a high depth and a low rate for a dramatic, sweeping flanger effect, then gradually increase the rate for a faster, swirling sound.
-
Get Creative with Feedback
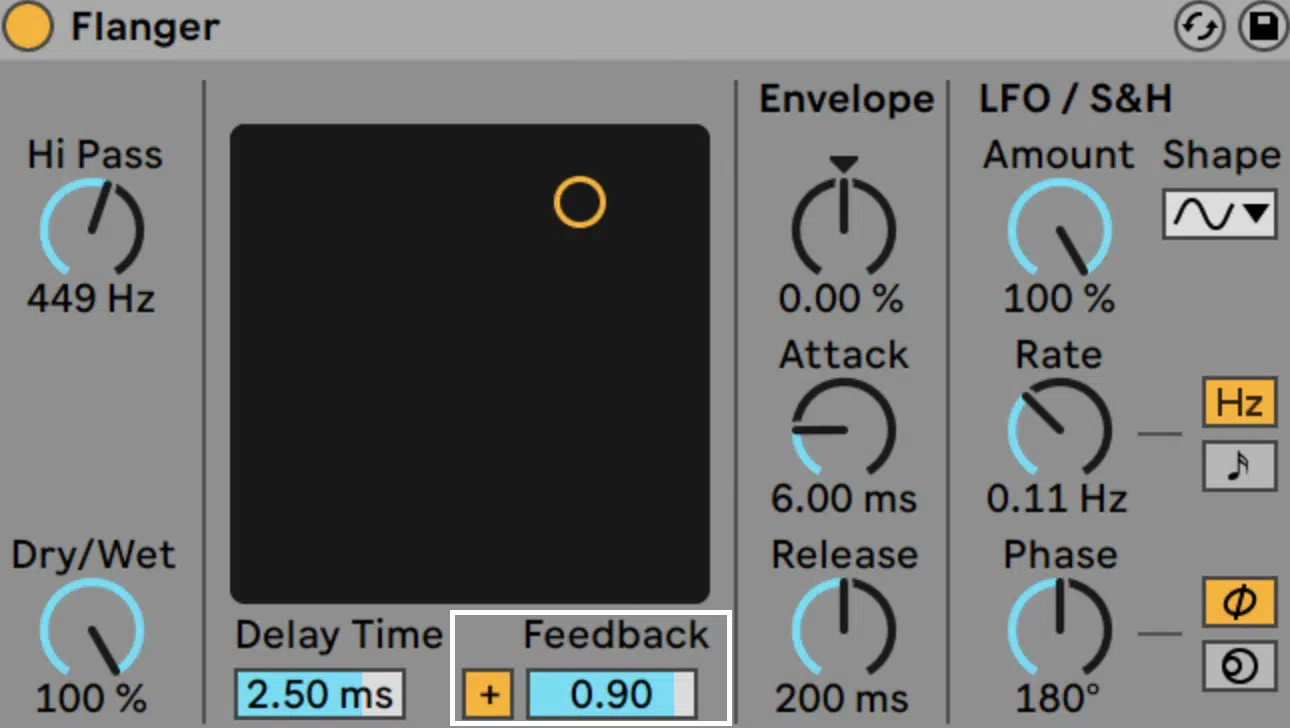
The feedback parameter controls the amount of processed signal that’s fed back into the flanger, resulting in a more pronounced and intense effect.
Positive feedback produces a sharp, resonant flanger sound, while negative feedback results in a softer, subtler effect.
By experimenting with different feedback settings, you can add an intriguing twist to your flanging sound.
-
Mix Dry and Wet Signals
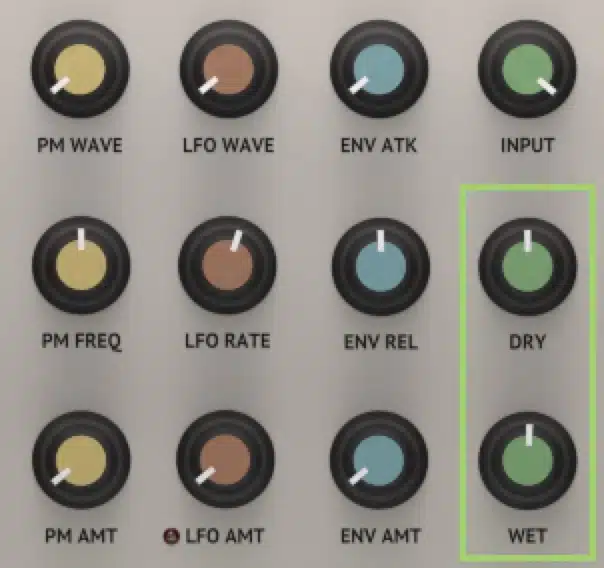
Remember, flanging is essentially a blend of dry (original) and wet (processed) signals.
Playing around with the mix control allows you to balance the level of the original signal with the flanged signal.
A mix of 50/50 often gives a balanced flanging effect, but don’t be afraid to tweak the balance in favor of the wet signal for a more pronounced effect.
Or, vice versa, the dry signal for subtlety.
-
Automate Flanger Parameters
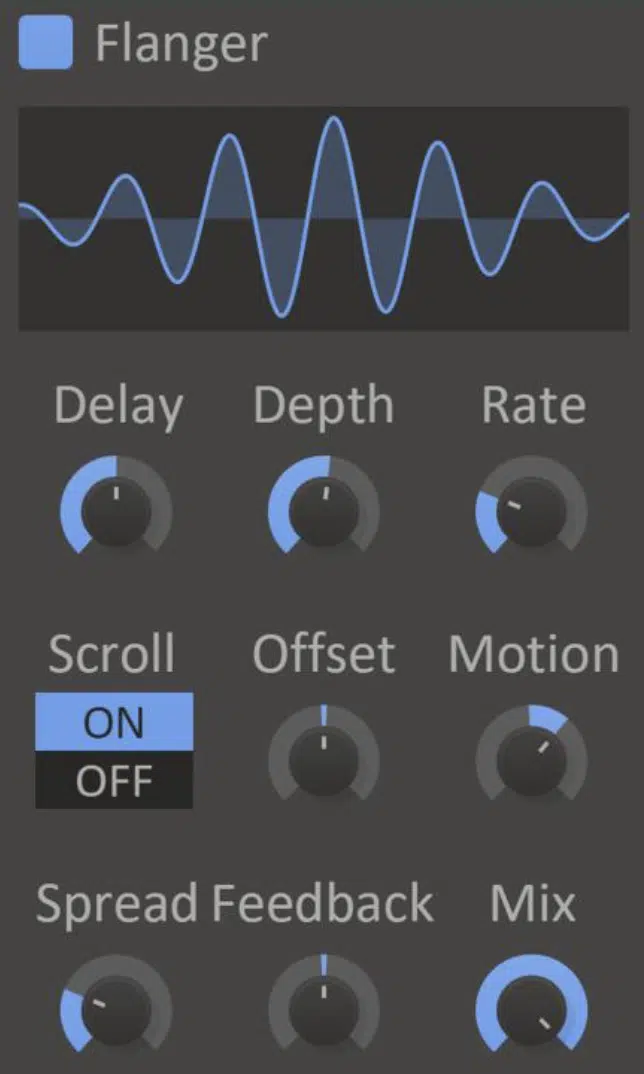
Many DAWs allow you to automate the flanger parameters over time.
For instance, you could start a track with a subtle flanger effect and gradually increase the depth and rate as the song progresses for an evolving, dynamic sound.
This is particularly effective in electronic music genres where build-ups and drops are crucial elements of the song structure.
Remember, the beauty of flanging lies in its versatility.
Each song, each track, and each moment in your music might call for a different flanging approach.
It’s all about trial, error, and discovering what works best for your beats.
-
Using Resonance Control & Variable Speed Control
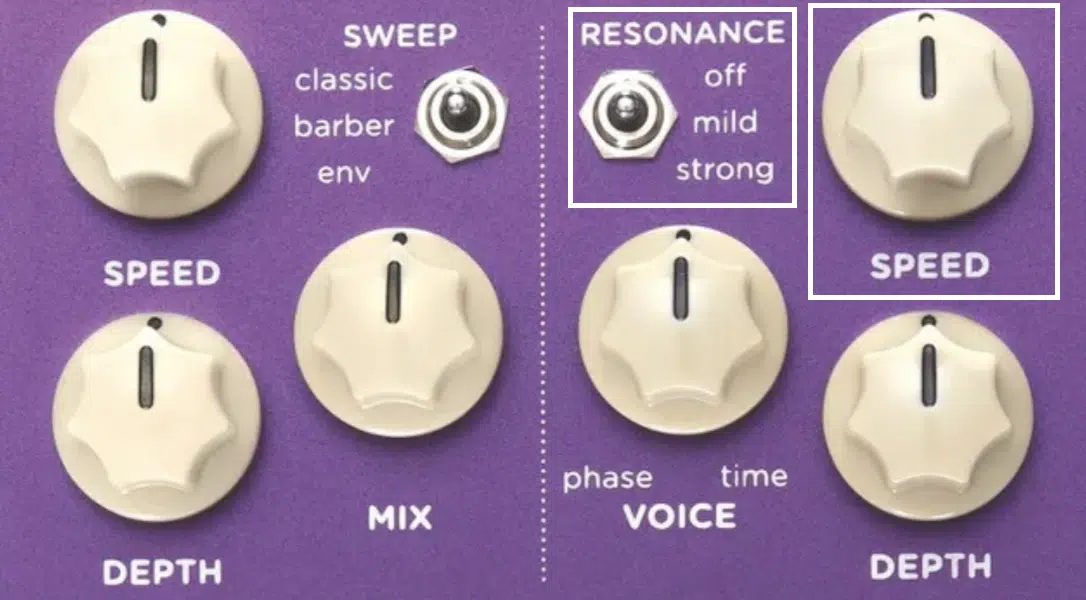
Exploring the full breadth of your flanger plugin includes understanding the resonance and variable speed controls.
Resonance Controls adjusts the amount of signal that’s fed back into the flanger.
This feedback process can amplify the flanging effect, creating a stronger, more resonant sound.
- A higher resonance setting 一 Yields a dramatic, swirling flange effect, adding intensity to a lead guitar or synth line.
- A lower setting 一 Adds a subtle, shimmering quality to your mix, giving a background element a touch of movement and depth.
Variable Speed Control is another parameter that offers a significant influence on your flanging effect.
By controlling the speed at which the delay time changes, you can shape the character and intensity of your flanger.
- A slow speed 一 Produces a languid, dreamy effect, which is great for adding a sense of space and depth to an ambient pad or backing vocal.
- A fast speed 一 Creates an intense, dizzying flange that can add excitement and energy to a lead line or drum fill.
Remember, every piece of music is unique, and there’s no one-size-fits-all approach.
Don’t be afraid to experiment with these controls and explore the different sounds they can create.
Start with subtle settings and gradually dial them up until you find the sweet spot for your particular mix.
Tips & Tricks Using a Flanger
Flanging, like any audio effect, is an art form.
Knowing the basic parameters is one thing, but applying them creatively and effectively requires some insight and experience.
Let’s delve into some insider knowledge on using flangers creatively, avoiding common pitfalls, and making the most out of your flanger.
Creative Ways to Apply Flanger in Your Mix
A basic flanger can spice up any mix by adding a sense of movement and depth.
But to make your music stand out, you need to think out of the box.
- Vocal Processing: One of the most classic applications of a flanger is on vocal tracks. A slight flanging effect can add an otherworldly quality to your vocals, making them more captivating.
- Drum Enhancement: Try applying a flanger on your drum bus, specifically on your hi-hats or cymbals. This can create a sweeping effect that brings a sense of life and movement to your drum sounds.
- Subtle Flanging on Pads: For your synth pads or string sections, a light touch of flanging can add a sense of depth and dimension, creating a swirling soundstage that captivates the listener.
Remember, creativity knows no bounds. Don’t be afraid to break the rules and experiment with unconventional applications of flanging.
Avoiding Common Pitfalls with Flanging
While flanging can add a unique texture to your mix, it’s easy to overdo it and create an overwhelming sound, such as:
- Over-Flanging: One common pitfall with flanging is using too much of it, which can make your mix sound messy and chaotic. Start with a subtle flanging effect and slowly increase it until you find the sweet spot.
- Wrong Timing: It’s important to synchronize the flanger’s rate to your track’s tempo. This will ensure that the sweeping effect of the flanger aligns with the rhythm of your track.
- Frequency Clashing: Be cautious when applying flangers on low-frequency elements like kick drums or basses. The comb filtering effect can cause unwanted frequency cancellations that weaken your low end.
By avoiding these pitfalls, you’ll be well on your way to becoming a flanging master in no time.
Making the Most of Your Flanger: Insider Information
You have the ability to manipulate every aspect of your flanger effect to match your creative vision.
But to make the most of your flanger, you need to go beyond the basic parameters and delve into the advanced features.
- Automate the Flanger: Most DAWs allow you to automate the parameters of your flanger plugin. You could automate the depth, rate, or mix parameters to create a flanging effect that evolves over time. This can add a dynamic element to your mix that keeps the listener engaged from start to finish.
- Experiment with Different Flanger Models: Many flanger plugins offer different flanger models that emulate the sound of various iconic flanger units. Each model can have a unique character, so don’t be afraid to experiment with different models to find the one that best suits your mix.
- Explore Multi-Effect Plugins: Some plugins combine flanger with other modulation effects like chorus or phaser. These multi-effects plugins can provide a wide palette of sounds, allowing you to create complex, evolving textures that are unique to your music.
Remember, a flanger is just a tool, your creativity is what brings it to life.
Transitioning from Digital to Physical: The World of Flanger Pedals
As we delve into the world of flanger pedals, it’s crucial to remember that they’re not an entirely different beast from their digital counterparts.
Rather, they embody the same principles of phase shifting, comb filtering, and modulation effects that we’ve discussed so far.
The key difference lies in their operation and interaction:
-
How Flanger Pedals Mirror Digital Flanging Effects
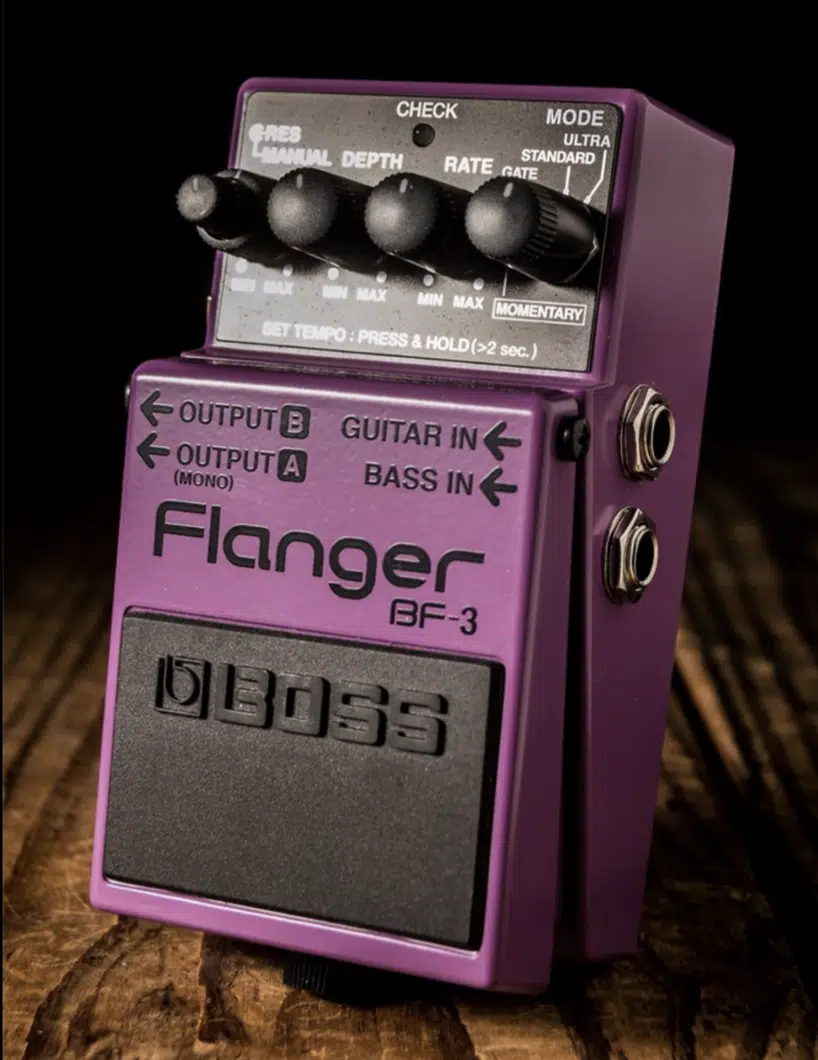
Despite the obvious differences, the fundamental principles of flanging remain the same, whether you’re working with a plugin or a physical flanger pedal.
They both use the same phase-shifting and delay techniques to create that distinctive flanging effect.
The main difference lies in the interface and the tactile experience.
A physical flanger pedal allows for real-time control and manipulation, making it a popular choice for live performances.
Meanwhile, digital flanger plugins offer convenience and flexibility, with easy-to-use interfaces and a vast range of options.
When it comes to most flanger pedals, there are a few models that stand out from the crowd.
The Boss BF 3, for example, is known as one of the best flanger pedals for its deep, powerful flanging effect.
It’s perfect for adding intensity and drama to your sound.
Another popular choice is the TC Electronic Vortex, known for its rich, lush flanging effect, the Vortex also features a TonePrint option.
This allows you to download custom settings created by professional musicians.
-
Bonus: Phaser Pedals
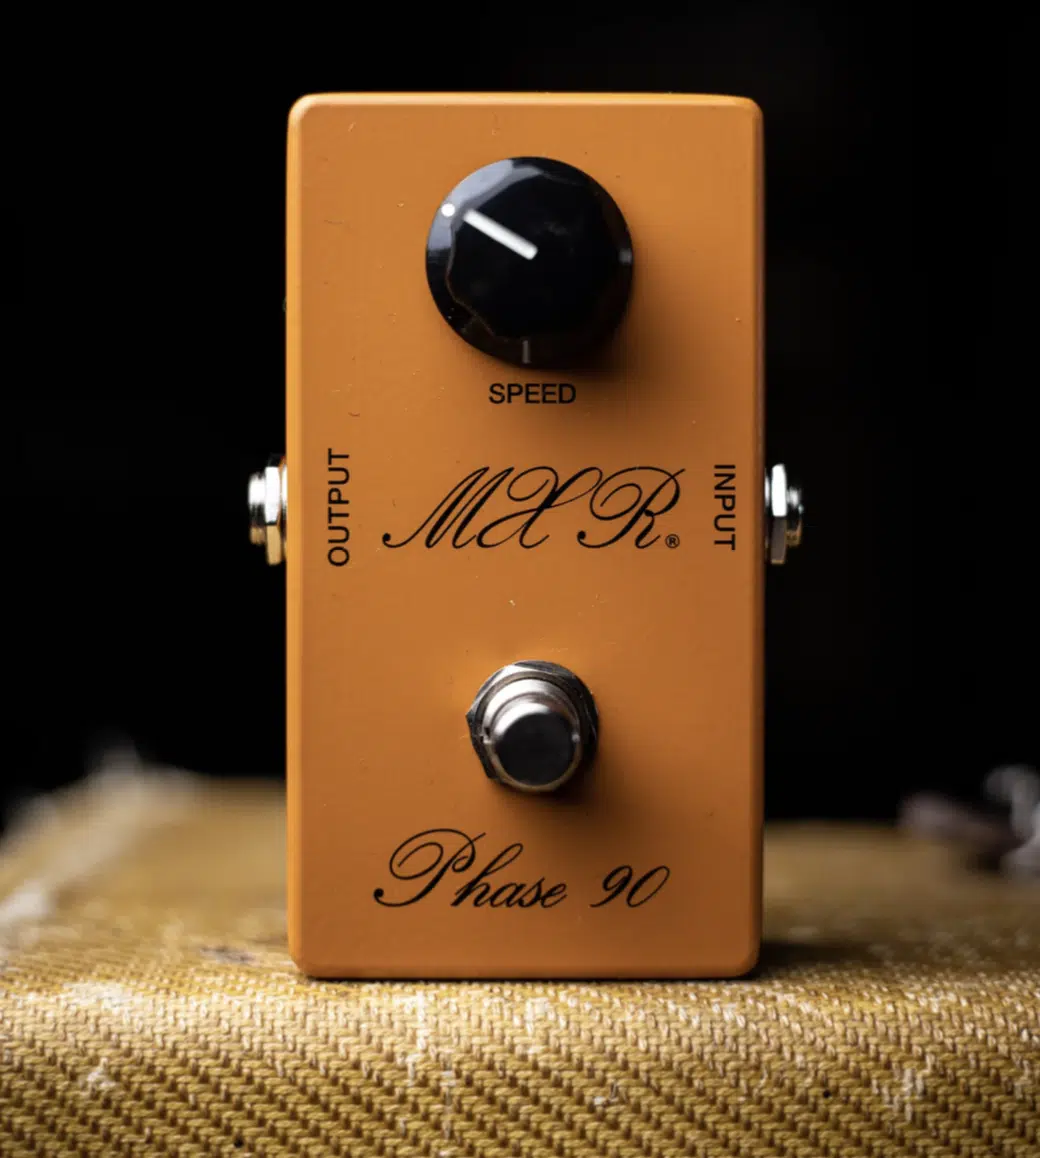
It’s worth noting that while we’re on the topic of flanger pedals, phaser pedals are closely related in their effect and operation.
Phaser pedals, like flanger pedals, rely on the principle of phase shifting to create their signature sound.
But instead of mixing the original signal with a delayed version of itself, a phaser splits the original signal and changes the phase of one part.
This results in a more subtle, swirling sound, which is often compared to the effect of a rotating speaker.
In practice, phaser pedals are used similarly to flanger pedals (and guitar pedals).
They can add depth and movement to your guitar solos, create a swirling effect on your piano tracks, or even give your vocals a twist.
So, if you’ve enjoyed using flanger pedals, or want to in the future, don’t hesitate to try out a phaser pedal.
You might just find it’s the missing piece in your pedalboard puzzle.
What Is A Flanger: Final Thoughts
So there you have it, we’ve peeled back the many intricate layers of the flanging effect.
But remember, all this knowledge is just the start of your journey.
The real magic begins when you start applying these principles in your own workflow.
There’s a world of audio signals waiting for you to manipulate, so, don’t hold back.
You might be thinking, “Where do I begin?”
Well, the best place to start is by downloading these beautifully-crafted, professional, free melody loops.
Adding a flanger effect to the included melodies is an excellent way to practice your newfound knowledge.
Whether you choose a subtle application to add some space & depth or go all out to create that intense, warping effect, these loops provide a fantastic canvas.
In the end, remember that exploration and experimentation is key.
The more you do so, the more you will understand the intricacies of the flanger effect.
This knowledge won’t just help you answer the question “what is a flanger?” but will equip you to use flanging as an effective tool in your production arsenal.
So go ahead, embrace the flanger and see what stunning soundscapes you can create.
Until next time…


Leave a Reply
You must belogged in to post a comment.