Automation is all about controlling movement over time…
And in the world of digital music production, it can seriously take your tracks from sounding flat and looped to dynamic and alive.
It lets you shape energy, morph effects, and add just the right amount of unpredictability 一 all while keeping your workflow fun and flexible, of course.
Plus, it can help you control transitions, tweak mix clarity, and give every section of your song a purpose like a professional.
As music producers, knowing all the most creative automation techniques will help you reach a whole new level of expression and control.
That’s exactly why I’m breaking down everything you need to know, like:
- Volume automation for clean transitions ✓
- FX blending with dry/wet morphing ✓
- Creative automation tips for space and width ✓
- Delay throws for special effects and energy ✓
- Mix automation techniques for better dynamics ✓
- How to create automation curves that move with emotion ✓
- Using advanced tools for glitchy, rhythmic control ✓
- Automating reverb to build tension ✓
- The key to making music that will impress ✓
- Stereo panning moves that lock in listener’s attention ✓
- Pitch shifts and risers that glue your transitions ✓
- The best, most effective ways to explore/experiment with ✓
- The downfalls and benefits to that you can achieve enabling ✓
- Advanced techniques for experienced/motivated producers ✓
- More creative automation techniques ✓
By knowing all the best, most creative automation techniques, you’ll open up new doors for your sound and hit new levels in your music production.
Plus, it’ll help you shape contrast, reduce masking, and actually create space in your mix like an absolute boss.
This way, your tracks will always keep the listener hooked (and you’ll never have to worry about muddy builds or boring drops ever again!).
Table of Contents
- What is Automation Exactly?
- Key Parameters You Can Automate
- 11+ Creative Automation Techniques/Creative Automation Tips You Need to Know
- #1. Reverb Throw Automation on One-Shots or Phrases
- #2. Filter Sweep Automation into Drops or Breakdowns
- #3. Delay Feedback Ramping for Controlled Chaos
- #4. Manual Volume Ducking Instead of Sidechain
- #5. Dry/Wet FX Morphing Between Sections
- #6. EQ Morph Automation for Section Transitions
- #7. Stereo Panning Automation on Percussion for Movement
- #8. Pitch Automation for FX and Risers
- #9. Modulating Grain Size or Wavetable Position
- #10. Gate Threshold Automation for Rhythmic Glitching
- #11. Distortion Drive or Bitcrush Amount Automation
- #12. Reverb Freeze Automation for Sudden Impact
- Final Thoughts
What is Automation Exactly?
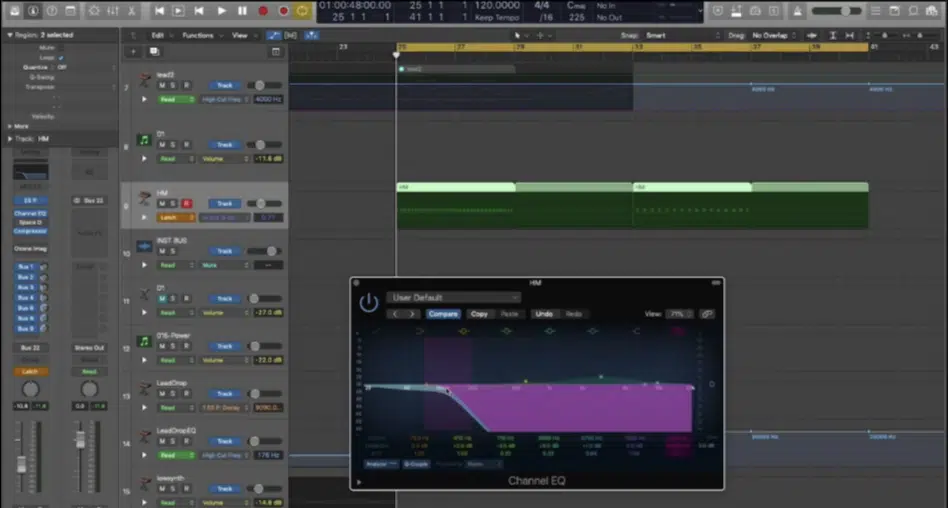
Automation in audio production is basically your secret weapon for controlling changes in your track over time, whether it’s:
- Volume
- Delay feedback
- Even your synth’s wavetable position
Instead of keeping everything static and stale, creative automation techniques give you full control over your track’s evolution (from start to finish).
For example, you can automate the volume fader on a vocal to slowly rise into the chorus, or sweep a low-pass filter to mute the highs right before a drop to really hit the listener with contrast.
These kinds of moves don’t just sound cool 一 they also help create dynamics, guide the listener’s attention, and keep every section of your song feeling intentional and exciting.
I promise you, by mastering this, you’ll achieve the most legendary sounds in the game, and I’ll break down everything you need to know throughout the article, so buckle in.
Key Parameters You Can Automate
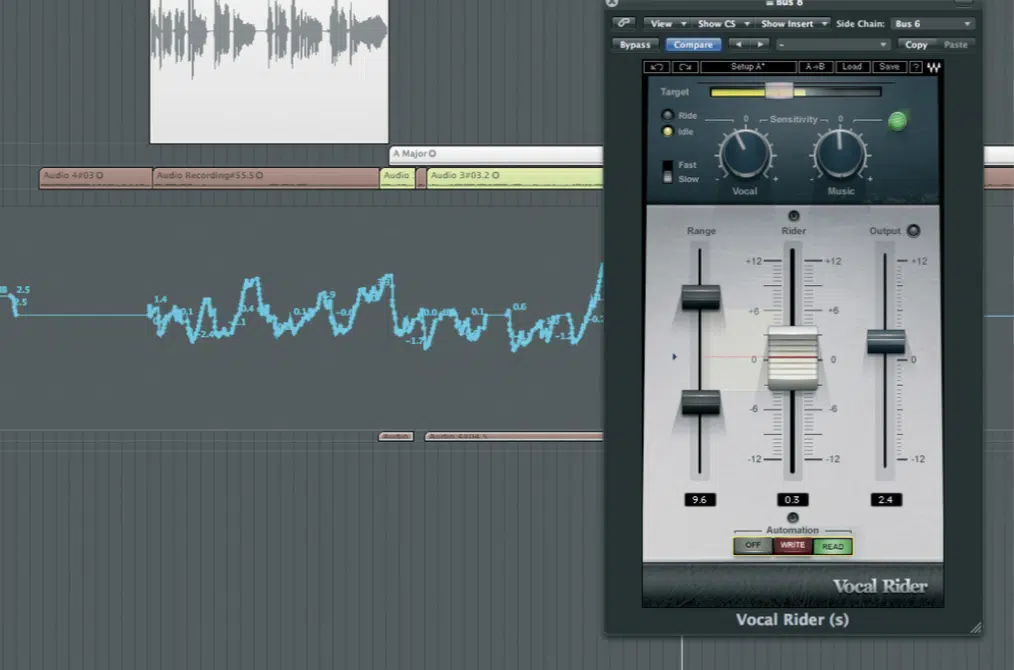
Before I dive into the actual creative automation techniques, it’s important to know exactly what you can automate in a typical mixing session. These parameters are the building blocks. And, once you know how to automate each one, you’ll start seeing all kinds of new ideas during your workflow. So, let’s get into it.
Volume
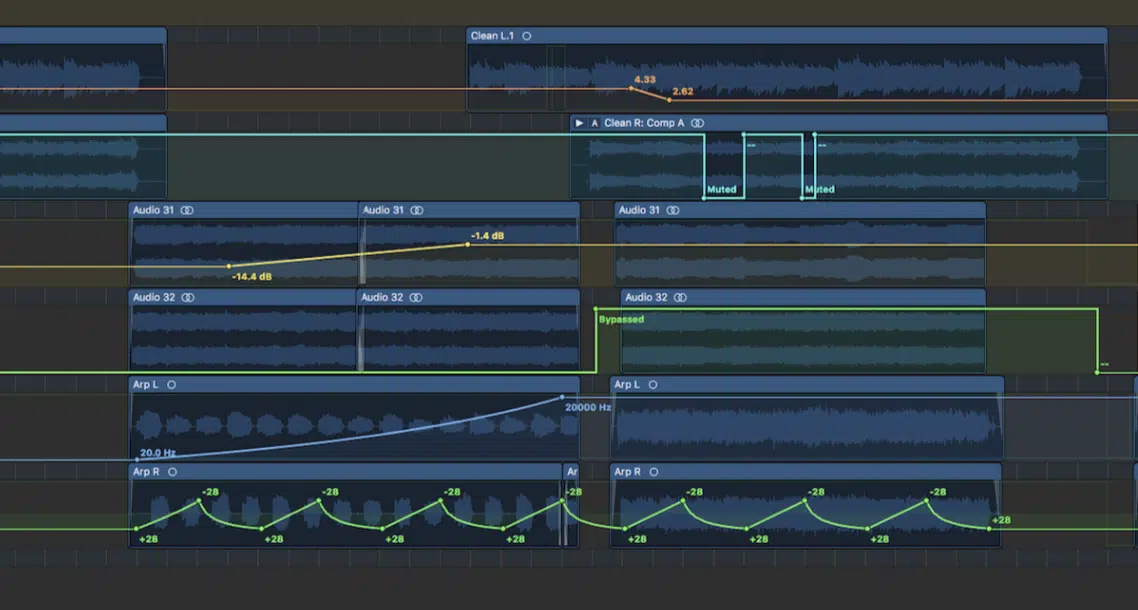
Volume automation is the process of controlling how loud or soft a sound is over time, using either volume fader, clip gain, or track-level envelopes to shape dynamics manually.
This is one of the most important creative automation techniques in any mix because it lets you:
- Create space
- Emphasize transitions
- Hype up key moments without over-relying on compression
For example, you can automate a vocal’s clip gain to fade in gently across four bars.
Or, add a 2–3 dB swell on your drum track leading into a hook to boost impact while still preserving headroom.
When layered with other moves (like delay throws or EQ morphing) it becomes one of the cleanest ways to shape dynamics, period.
And, not to mention, pull the listener’s attention exactly where you want it.
Pan
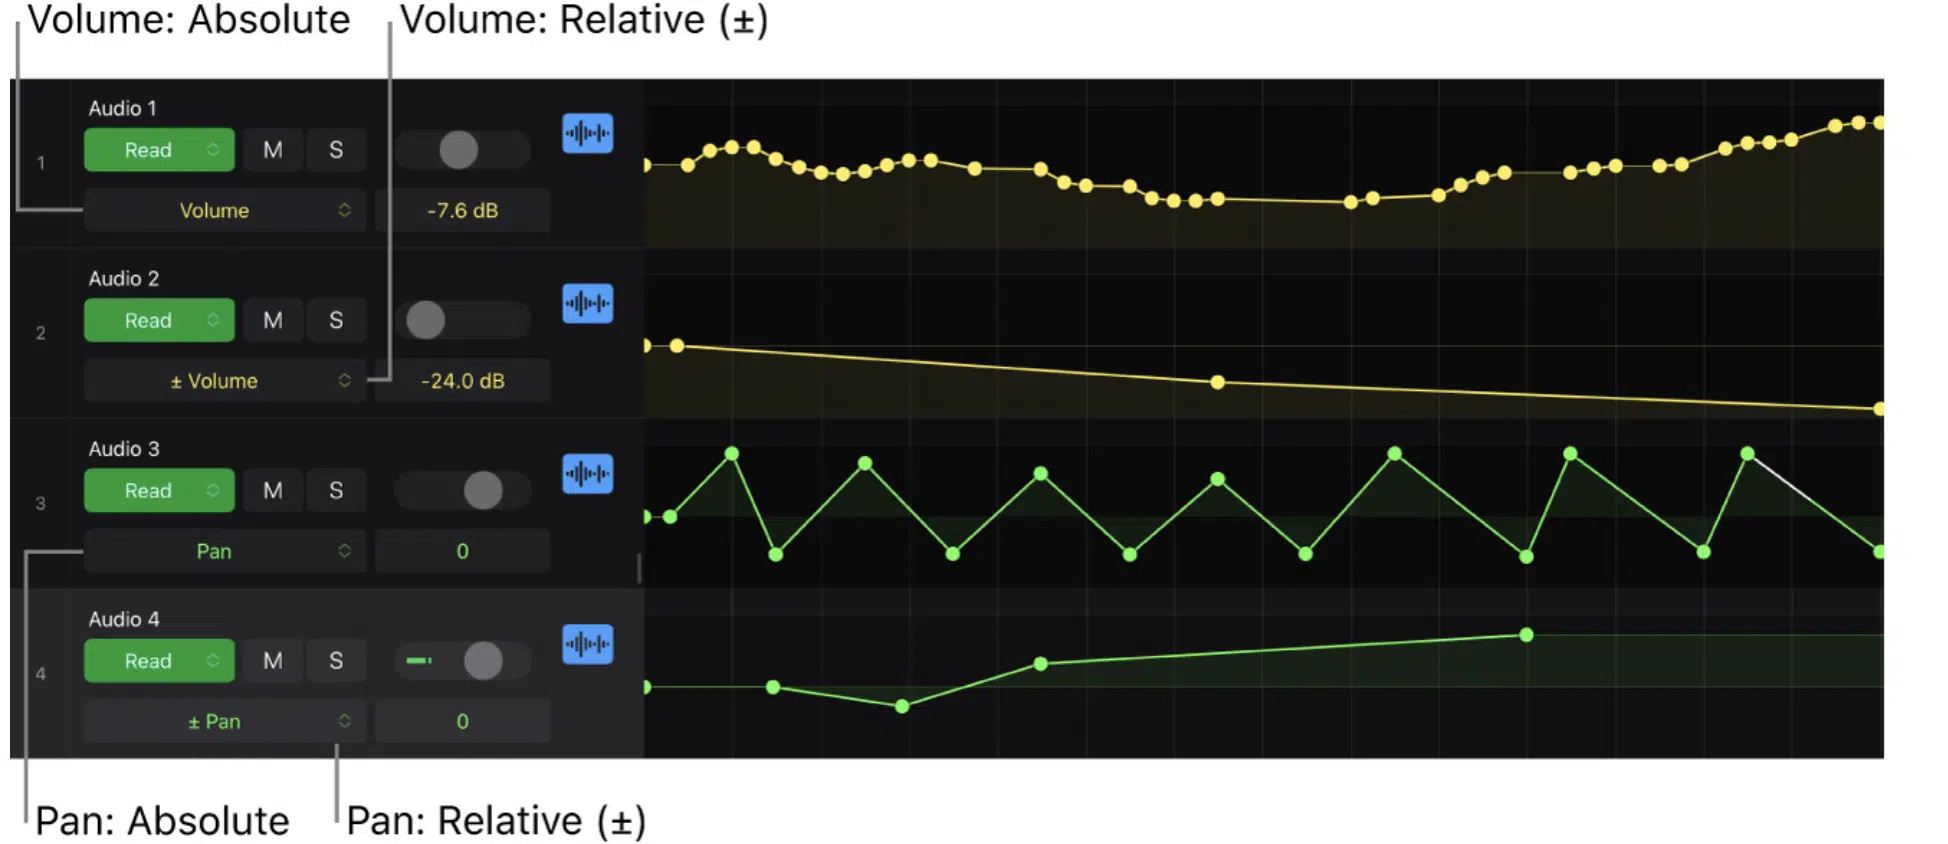
Pan automation refers to adjusting the stereo position of a sound over time.
With this one, you’re going to shift it between the left and right sides of the stereo field to add width, contrast, or rhythmic movement.
It’s one of the most overlooked creative automation techniques, but it can completely change how a listener perceives space in your mix.
For example, you can play around with panning a percussive shaker from hard left to hard right every quarter note to add bounce.
Or, automate a riser to slowly pan across the stereo field during a build to make your transitions feel more immersive.
And when you combine it with subtle volume automation or dry/wet FX blends, you can bang out ear candy moments that move with your track.
Plus, make the entire groove feel wider, deeper, and more alive than ever.
Filter
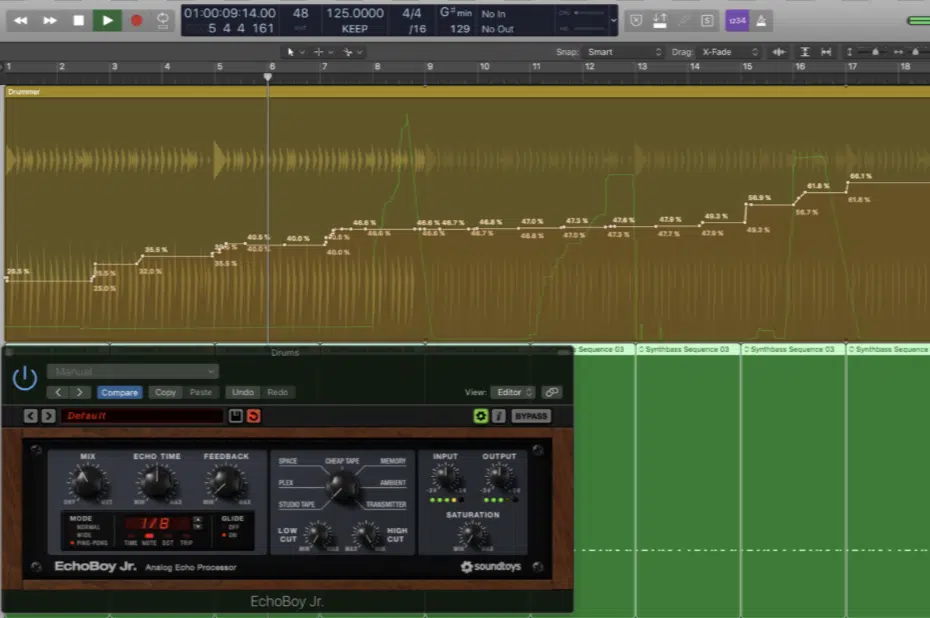
Filter automation involves changing the frequency cutoff and resonance points on EQ filters or synths over time to shape tone, carve out room, or build anticipation.
These parameters are key to creative automation techniques because they let you highlight or hide certain frequency ranges.
This is perfect for transitions and section changes.
For example, you might automate a low-pass filter’s cutoff frequency from 250 Hz to 16 kHz over 8 bars to bring in brightness, while bumping the resonance around 4.5 dB to add edge/tonal flavor to the build-up.
And when you automate both the filter and its dry/wet balance together, it gives your sound more motion.
Plus it’ll help you successfully create space without removing it from the mix entirely.
FX
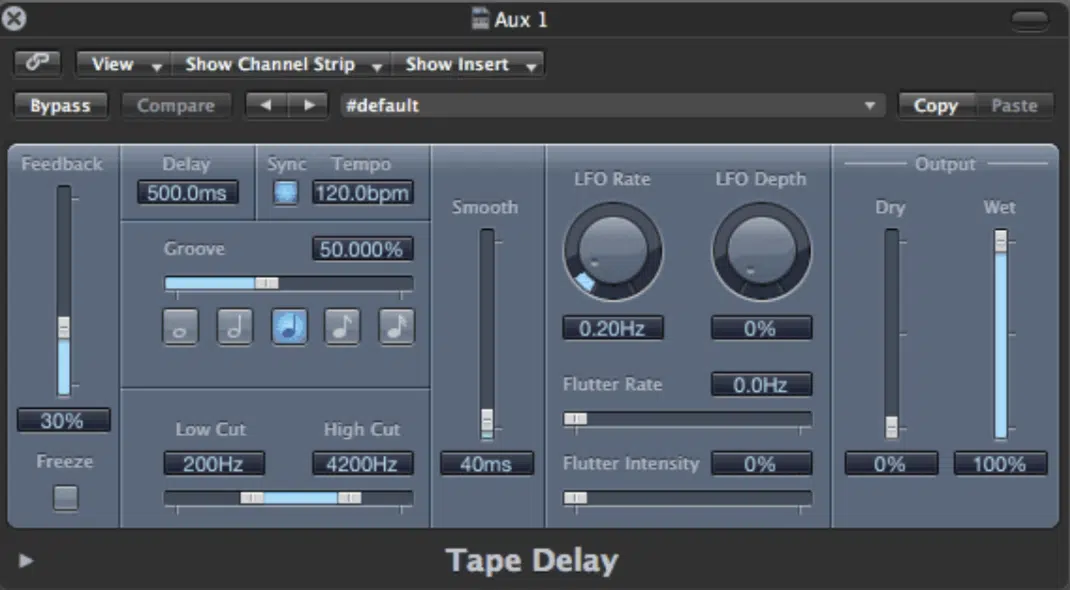
FX automation is all about controlling how your effects evolve over time, like:
- Reverb decay
- Delay feedback
- Chorus depth
- Distortion drive
It can help your mix stay dynamic,interesting, and on point every single time.
These are some of the most creative automation techniques you can use to create contrast, build tension, or add ear candy in the background of your mix.
For example, try automating the delay feedback to rise from 15% to 85% right before a drop, or push the reverb time from 1.2s to 4.5s at the end of a vocal phrase.
This will help make it bloom into the next section without muddying up your low end.
And when you combine these automation curves with panning, gain automation, or EQ moves, you’ll have full control over how your sound shifts between clean and processed.
Meaning, every element in your track will feel razor-sharp and alive.
Pitch/Formants
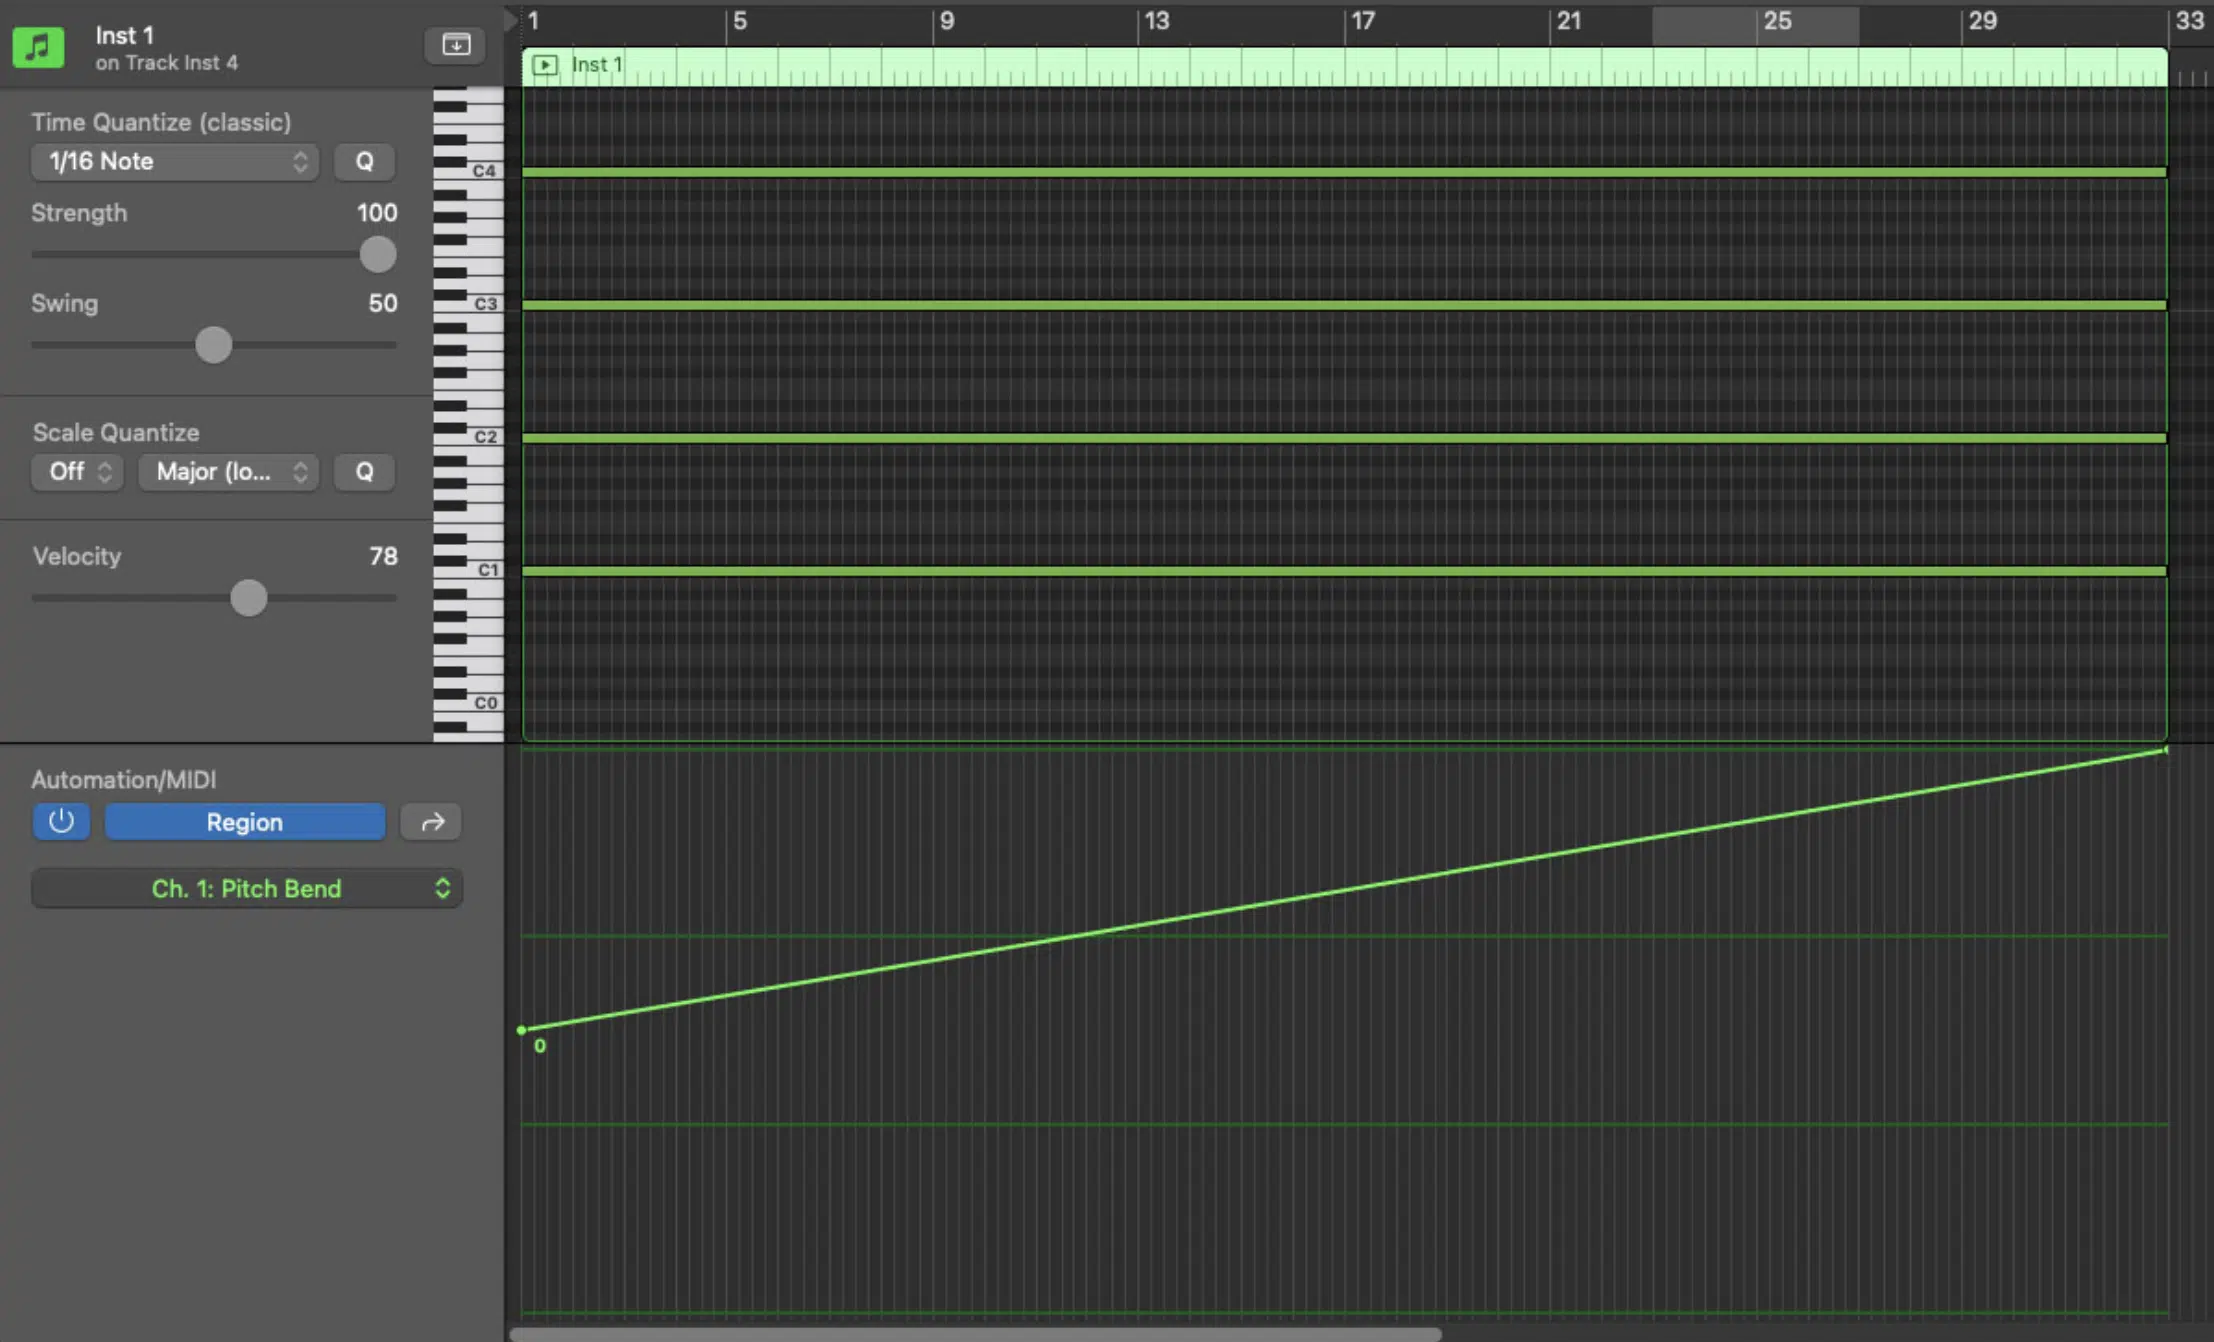
Pitch and formant automation is the technique of shifting the pitch of an audio signal, or its perceived vocal quality (formants), across time to add:
- Variation
- Movement
- Character
This technique is super powerful in sound design, where pitch bends, glides, or warped formant shapes can help you make your samples or vocals feel alive.
For example, you could automate pitch up +7 semitones on a riser to build hype.
Or, shift a vocal’s formants down -3 units on the last word of a chorus to give it a darker, more processed vibe without affecting the actual note.
And when layered with delay throws, reverb, or subtle volume automation, pitch and formant changes can completely reshape a moment in your track.
All while keeping everything musical and focused, which is always what you want.
EQ Points
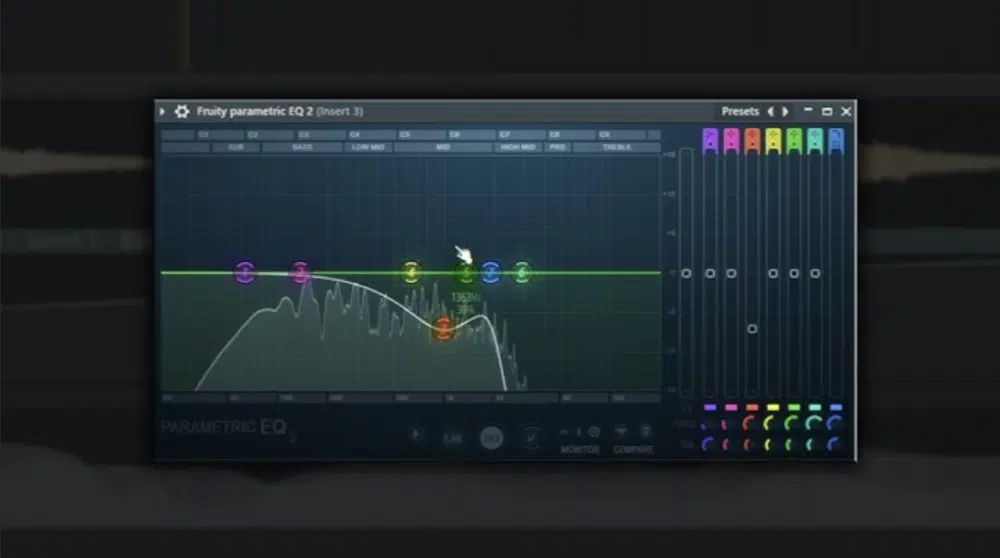
EQ point automation refers to controlling the frequency, gain, and Q (bandwidth) of an EQ band over time.
It lets you dynamically reshape the tone of an element inside the mix.
These parameters are key for mix automation and give you the ability to emphasize or tuck specific elements during certain sections without committing to static EQ moves.
For example, you could automate a high-shelf boost at 8 kHz (+2.5 dB, Q of 0.7) on your vocal during the chorus to make it cut through more clearly.
Then, gradually bring it back down for the verse to create contrast.
NOTE: One of the best creative automation techniques is using dynamic EQs like FabFilter Pro-Q 4 or SplitEQ to automate a narrow notch at 300 Hz (Q of 3.2, gain -3 dB).
This reduces masking between your vocal and guitar only when both are playing together.
And when used across your mixing session, these subtle EQ morphs add movement, control, and transparency that really tighten up the final result with no static vibes.
Side note, if you want to check out the absolute best EQ plugins in the game right now, I got you.
Plugin-Specific Controls (Advanced Automation Tools)
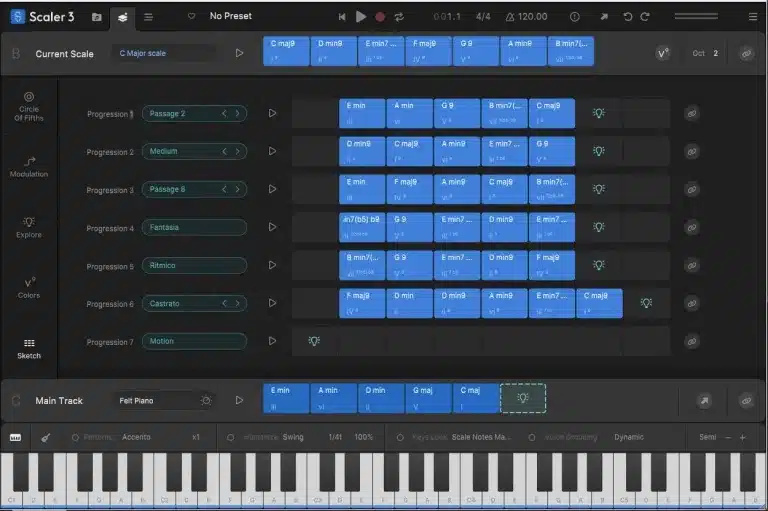
Automating plugin-specific controls opens up the deepest level of sound design and mix automation because you’re targeting the actual internal engine of your instruments or effects.
For example, automating a wavetable position in Serum 2 from 25% to 80% over 8 bars can give your bass patch a morphing texture that keeps evolving.
Yes, even if the MIDI note stays the same.
Another powerful move is automating a compressor’s threshold.
This could be like pulling it down from -14 dB to -28 dB right before a drop to smash the room mic bus for extra punch, then releasing it after impact.
Or, if you’re working with distortion plugins like Decapitator or Soundtoys Radiator, you can automate the drive knob from 2 to 6 for warmth in one section.
Then, pull it back to clean things up in quieter moments 一 giving you total control over tonal saturation without flattening your dynamics.
11+ Creative Automation Techniques/Creative Automation Tips You Need to Know
Once you understand how all these individual parameters work, it’s time for the fun part: actually applying them in creative, super sick ways. These creative automation techniques/creative automation tips are built to enhance your transitions, improve your mix, and help you create sounds that grab the listener’s attention from the first bar to the last. So, let’s get into it.
#1. Reverb Throw Automation on One-Shots or Phrases
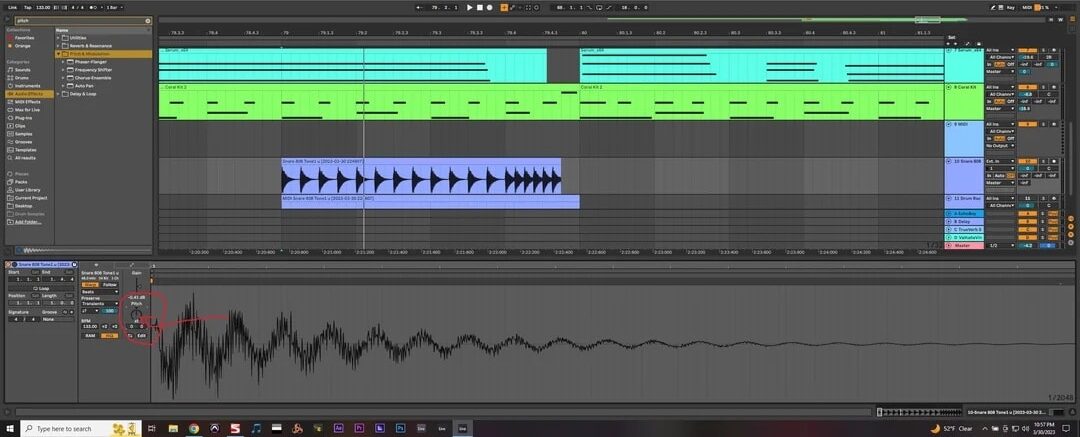
Reverb throw automation is where you temporarily increase the reverb send level or reverb mix amount on a specific moment, usually a:
- Snare
- Vocal phrase
- Transition effect
It’s all about giving it an explosive, space-filling tail.
One of the most common creative automation techniques, it’s especially sick when paired with longer reverb decay times (like 4.5 to 6.2 seconds) and high pre-delay settings (around 60–80 ms).
So, the dry sound stays clear while the tail blooms afterward.
For example, automate the reverb send level of your snare on the very last hit before a drop to shoot it into a lush ambient wash.
Then, pull the send back down immediately after to keep your low end clean.
NOTE: If you’re using ValhallaRoom or Pro-R 2, try automating the decay and high-frequency damping simultaneously.
You can even automate an EQ after the reverb to reduce muddy lows during the tail.
And don’t ever forget to keep an eye on how this affects your master bus balance, and make sure it doesn’t cause unwanted buildup in the 200–500 Hz range.
#2. Filter Sweep Automation into Drops or Breakdowns
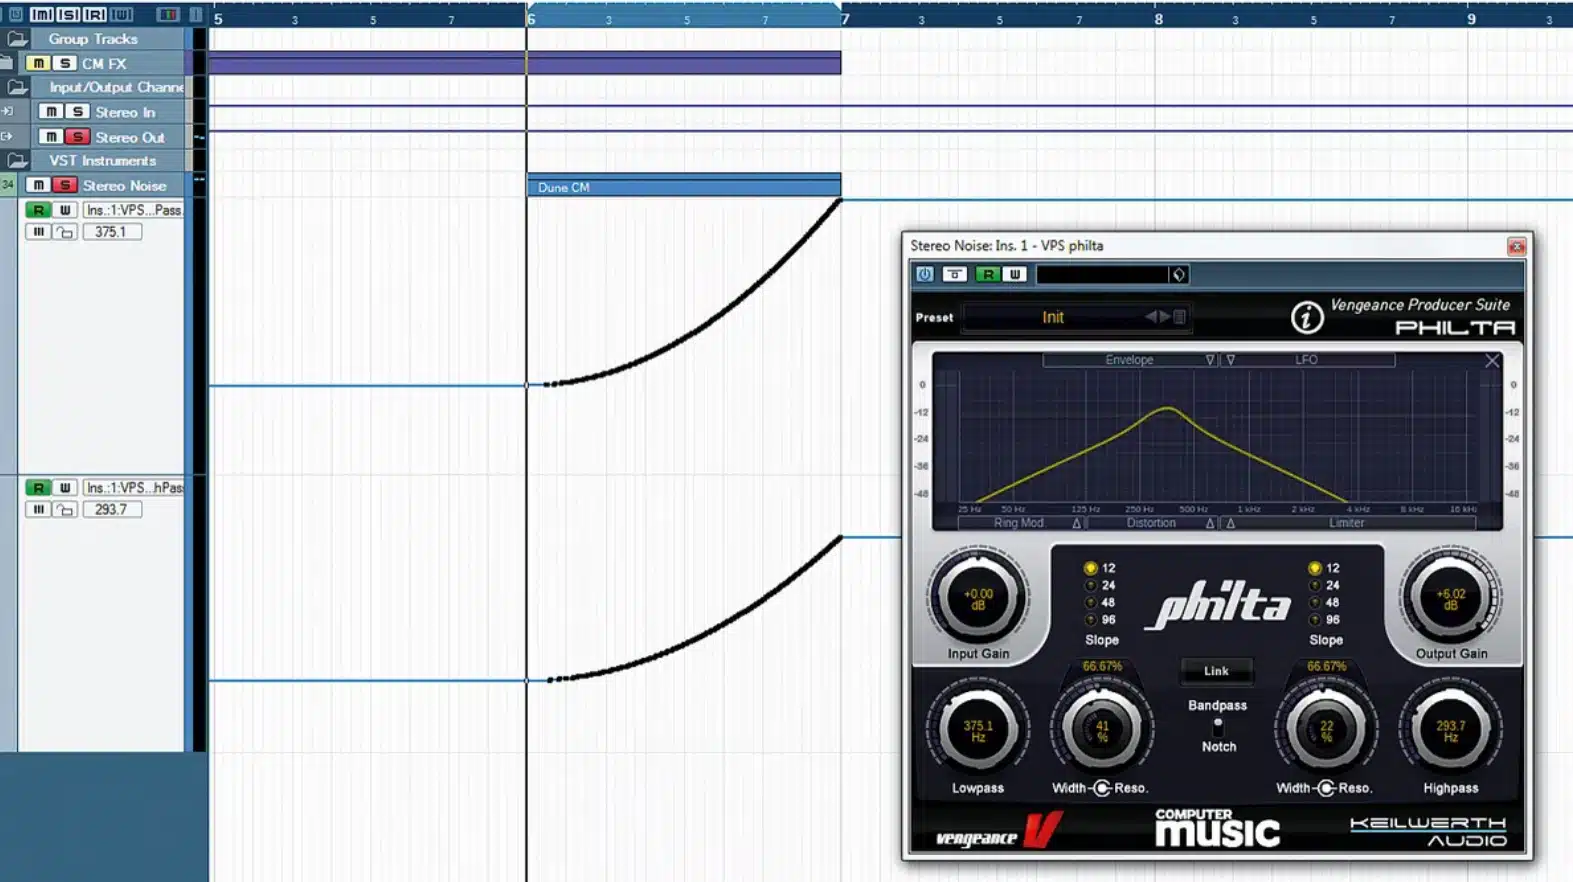
One of the most classic yet show-stopping creative automation techniques involves using a filter sweep to shape the tension before an impact moment
Usually with a low-pass or high-pass filter.
Automating the cutoff frequency from around 300 Hz to 18 kHz (or vice versa) over an 8–bar build-up can make a section feel like it’s either tightening up or opening wide.
Especially when paired with an increasing resonance setting of 2.5 to 4.5 for added intensity, I might add, so keep that in mind as well.
For example, sweep a high-pass filter on your drum track right before the chorus hits, then slam it back off on beat one to bring back the full volume and low end.
This not only builds contrast but helps create space during transitions, so your drop can hit harder and stay cleaner.
PRO TIP: Automate the Q value on the filter (aim for 0.7 to 1.2 during the sweep) to introduce some tonal color or even a slight whistle-like special effect as it moves across the frequency spectrum.
#3. Delay Feedback Ramping for Controlled Chaos
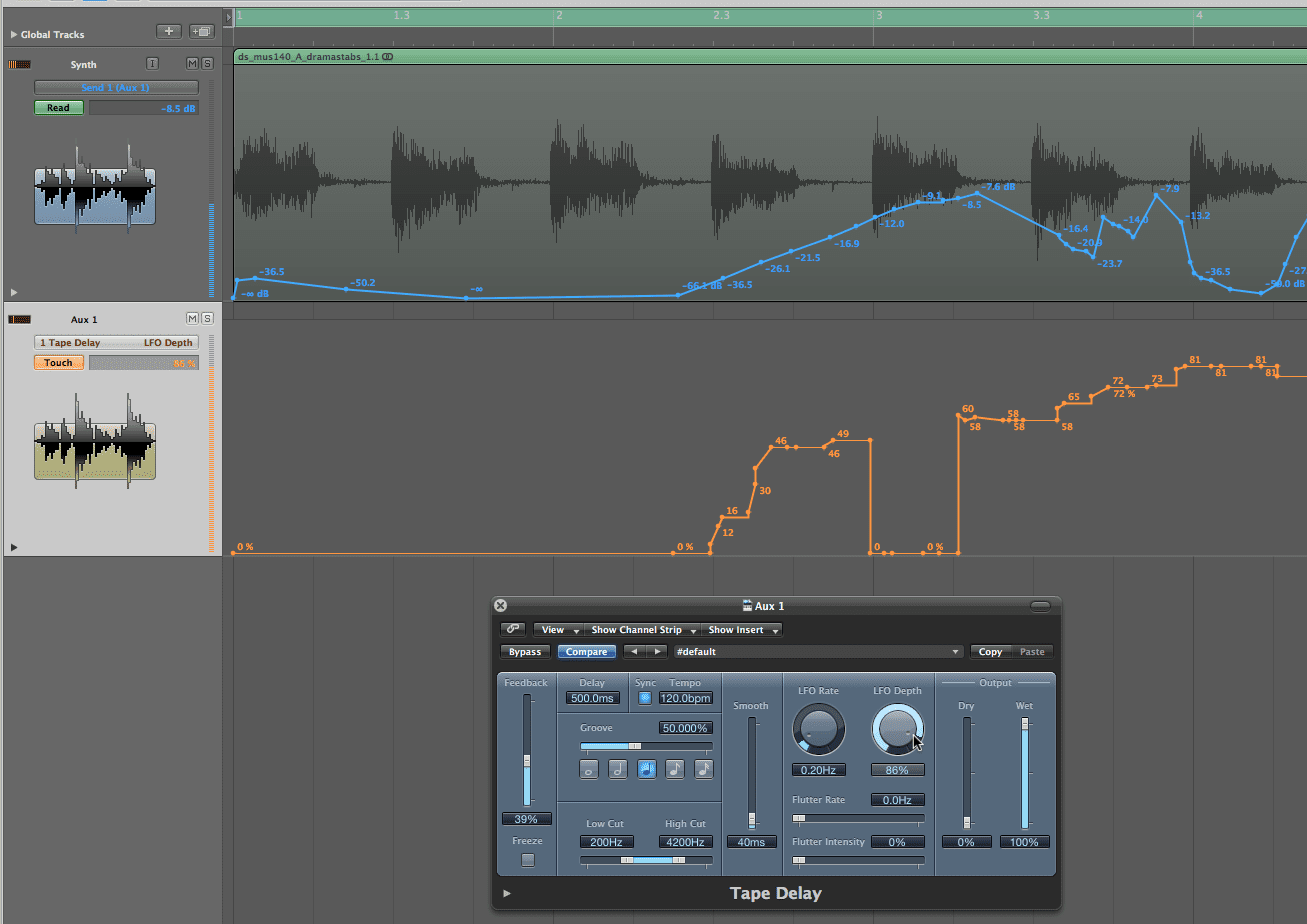
Delay feedback ramping is one of those creative automation techniques that lets you lean into sonic chaos 一 but still keep it controlled and professional.
By automating your delay plugin’s feedback parameter from 20% up to 90% over the course of a riser or transition, you can build swirling, repeating echoes.
Ones that spiral into a wash of sound.
For example, automate the feedback on a quarter note stereo delay on a synth stab 一 letting it climb until the echoes blur together.
Then, slam the feedback back to 0% right before the drop to keep your mix clean.
This gives you a high-energy lift without muddying up the next section, especially when paired with gain automation or a reverb tail.
PRO TIP: If you’re using EchoBoy or ValhallaDelay, try modulating the delay time slightly (±5 ms) while ramping feedback.
It will add subtle pitch drift and ear candy that glues the listener’s attention to that moment so it’ll really be unforgettable.
#4. Manual Volume Ducking Instead of Sidechain
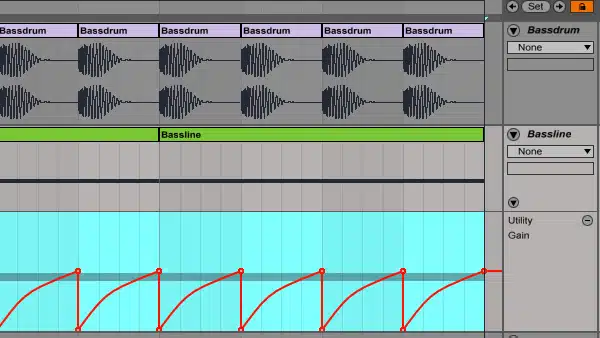
Manual volume ducking is one of those creative automation techniques that gives you way more control than sidechain compression, believe it or not.
This is because you can shape the exact envelope of how the signal ducks and recovers.
Instead of relying on a compressor’s attack/release settings, draw your own volume automation curve (usually dipping by -3 to -6 dB) on the volume fader of your instruments, basslines, or FX to clear room for the kick drum.
For example, you can automate a sharp dip on your pad’s volume every time the kick hits, but draw a slightly slower fade-out and a curved return.
This will make sure it sounds super natural and rhythmic all day, and you’ll create space in a really transparent way.
One that still moves with the groove and lets your drum track cut through clean.
PRO TIP: Use this technique in genres like hip-hop, where the drum skin has more low-end weight 一 manual ducking helps you preserve the punch without over-compressing.
#5. Dry/Wet FX Morphing Between Sections
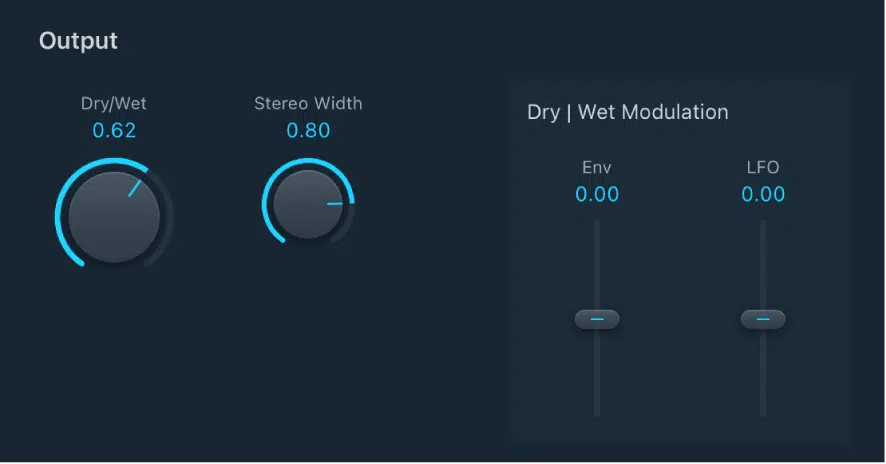
Dry/wet FX morphing is one of the most underrated creative automation techniques for creating smooth, flawless transitions between sections of your song.
By automating the wet/dry balance of a plugin, like chorus, delay, or reverb, you can slowly shift a sound from dry and upfront to dreamy and washed out (or vice versa).
All without having to mute or swap it out, which is awesome.
For example, you can increase the wet amount of a ValhallaShimmer reverb from 0% to 75% over the last two bars of a verse.
Then, drop it back to 10% as the chorus hits to bring clarity and presence back to the lead.
This keeps the listener engaged, makes the song feel like it’s breathing, and gives you the ability to pull focus from one element to another in a really natural way.
PRO TIP: Pair this with volume automation and subtle panning shifts to create movement in the stereo field as the wet signal blooms or retreats.
#6. EQ Morph Automation for Section Transitions
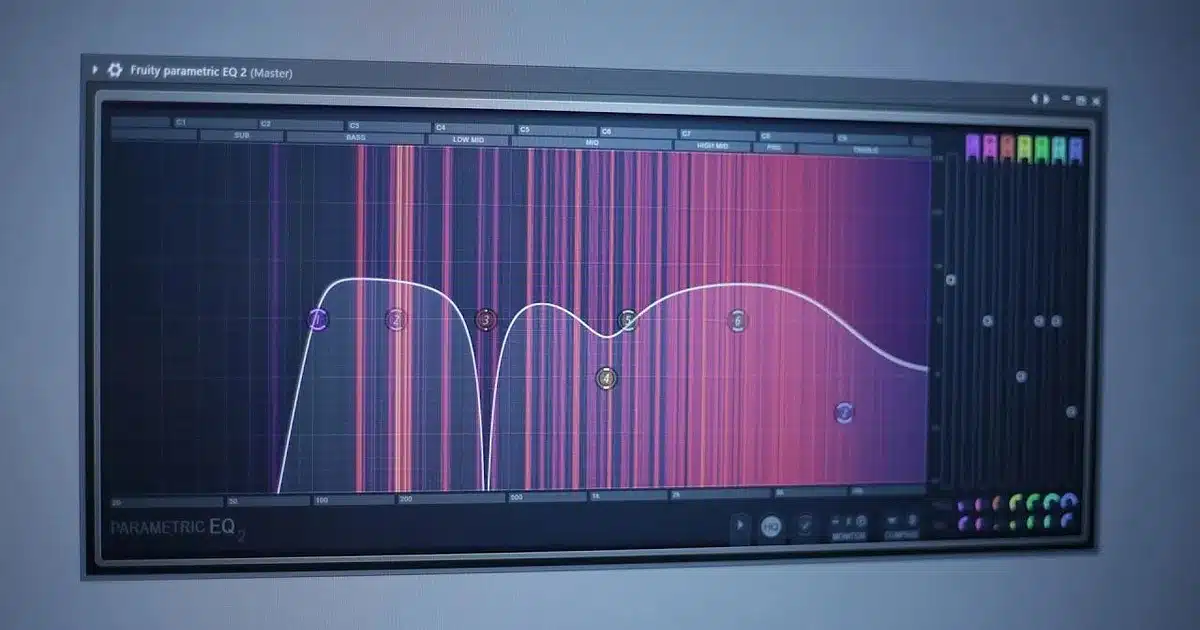
EQ morphing can completely change how your song moves between sections, especially when it comes to building energy and release.
Instead of keeping your EQ settings static, you can automate the gain of specific EQ bands to shape your track’s tone as it evolves.
It’ll help you successfully highlight or mute certain elements at key moments.
For example, during a breakdown, you could cut 6–8 dB from your highs (above 8 kHz) and automate them back in over 4 bars, so when the drop hits, it feels:
- Bright
- Wide
- Full of impact
Try using a low-shelf filter on the master bus, rolling off the lows below 120 Hz gradually during a build-up to thin things out.
Then, snap the shelf back up to 0 dB as the full mix slams in, which enhances perceived loudness and weight all day.
And keep in mind that plugins like Pro-Q 4, SplitEQ, or even Ozone’s Dynamic EQ are perfect for this.
And, if you pair your EQ automation curves with subtle gain automation, you’ll keep ample headroom while making the moment feel way louder.
#7. Stereo Panning Automation on Percussion for Movement
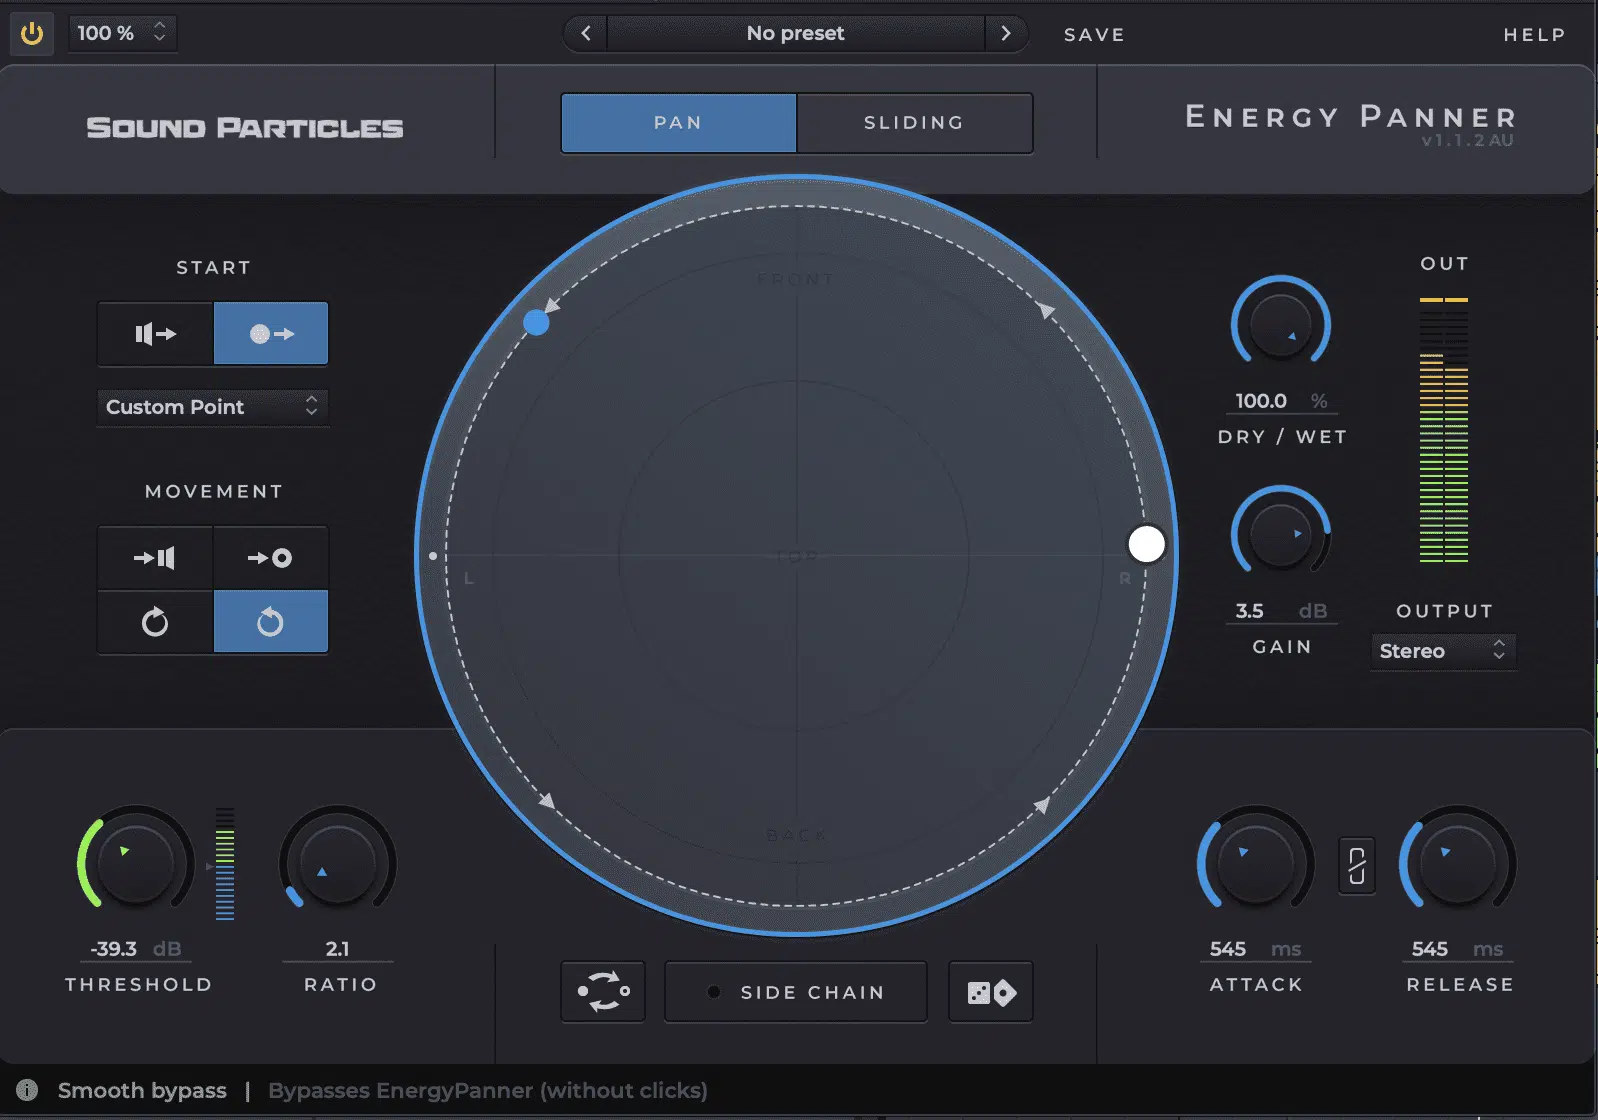
Stereo panning automation is one of the most fun and effective creative automation techniques for adding movement and width to your drum track.
So, if you’re working with fills, risers, or busy layers, you definitely need to lock this one in your memory bank.
Rather than just panning static elements left and right, you can automate percussion to move across the stereo field over time.
It’ll give the entire section a sense of fluid motion that captures the listener’s attention.
For example, try taking a short hi-hat loop or tom fill and panning it from -50 (left) to +50 (right) over one bar to give it that swirly, moving energy.
Or even more advanced: automate each percussive hit to ping-pong across space, like:
- Kick at center
- Snare at -20
- Clap at +30
With an auto-panned shaker subtly oscillating between them all using a sine LFO.
This type of automation works incredibly well on FX-based layers too (like white noise sweeps or reverse cymbals) when they lead into a dope transition.
PRO TIP: In genres like hip-hop or pop, panning your percussion elements in time with the groove, like on alternating quarter notes, not only opens up the mix but also makes your drums feel like they’re dancing with the beat, which is awesome.
#8. Pitch Automation for FX and Risers
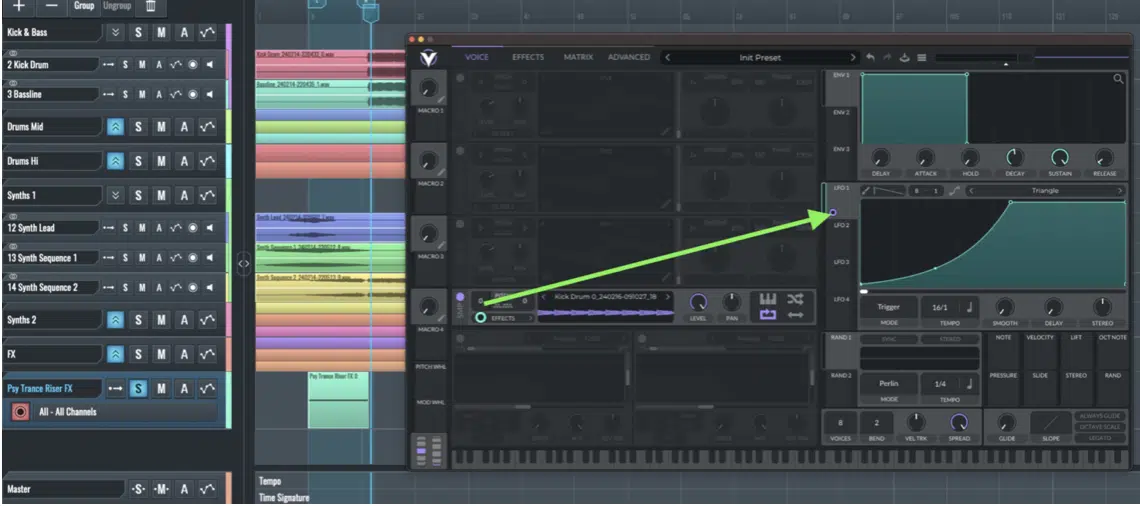
Pitch automation is hands-down one of the most versatile creative automation techniques when it comes to creating legendary:
- Energy
- Tension
- Dramatic transitions
By automating pitch bend or transposition on FX, vocals, synths, or even one-shots, you can turn simple sounds into evolving risers, downshifters, or glitchy textures that help glue sections together.
For example, take a crash sample or synth stab and ramp it +12 semitones over 4 bars using automation.
Or, if you’re like me and like to get crazy, you can even automate a formant shift alongside it (like +5 units) for a weirder, more alien vibe.
On the flip side, you can drop a snare riser -7 semitones with pitch automation right before a chorus hits…
It feels like the floor drops out and makes the next section hit even harder.
And for even more smooth results, use automation curves instead of linear ramps.
An exponential curve will sound way more natural when gradually increasing pitch from one section to the next, especially when combined with delay throws or reverb sweeps.
#9. Modulating Grain Size or Wavetable Position
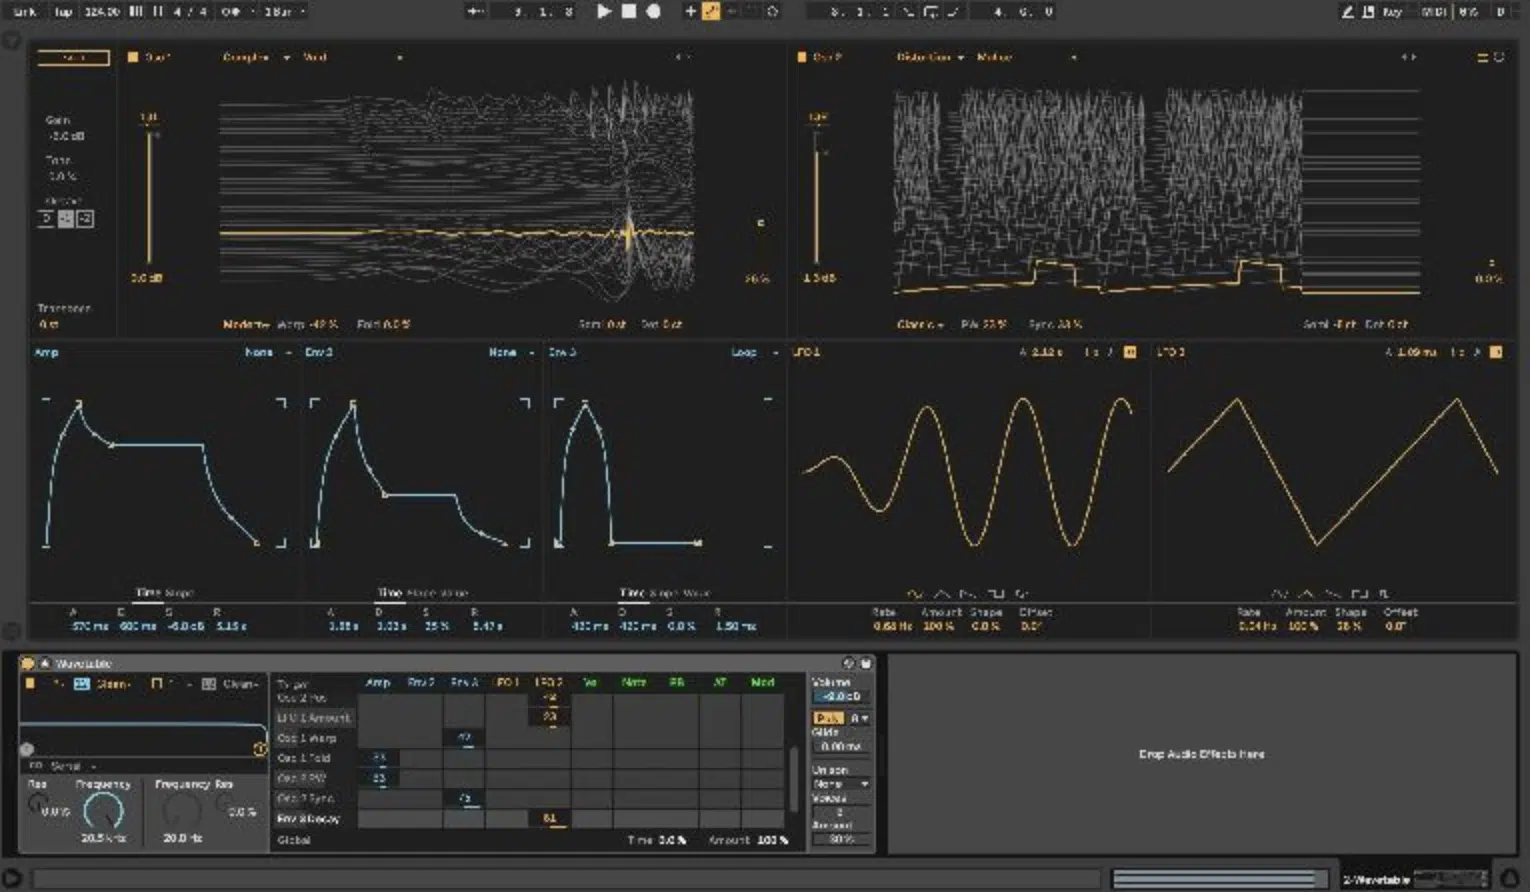
Modulating grain size or wavetable position is one of the most advanced and expressive creative automation techniques in innovative sound design.
When you’re using a granular synth, like Output’s Portal or Ableton’s Granulator II, grain size automation controls how much of the audio is being:
- Chopped
- Stretched
- Layered
And changing it over time can lead to otherworldly, constantly evolving textures.
For example, try automating the grain size from 80 ms down to 8 ms across 4 bars for a rising “tightening” effect that you’ve probably heard and love.
Then, automate pitch or spread for added width and movement in the stereo field.
With wavetables (like in Serum 2 or Pigments), morphing the wavetable position from frame 0 to 127 lets you create a synth tone that transforms dramatically in real time.
And remember, it’s super dope when you pair it with delay throws, chorus, and filter sweeps, so definitely try that out.
PRO TIP: If you’re using Vital, try automating both wavetable position and warp amount at the very same time.
Just make sure you adjust your volume automation at the same time to balance out any gain spikes in your mix.
#10. Gate Threshold Automation for Rhythmic Glitching
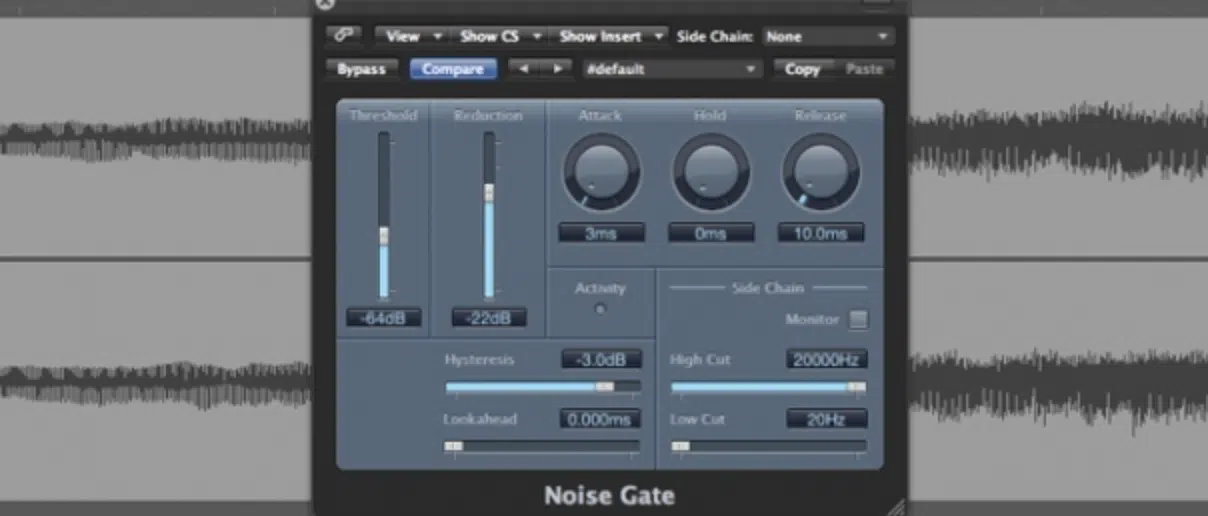
Gate threshold automation is all about leaning fully into rhythmic special effects and can inject serious movement into any track.
A noise gate works by only allowing audio to pass through when it crosses a certain volume threshold…
But, when you automate that threshold to move up and down rhythmically, you can literally chop your sound in time with the beat.
For example, if your signal hovers around -24 dB, try automating the gate threshold from -26 dB to -16 dB over quarter notes.
It’ll create pulsing, glitch-like bursts that sync up with your groove.
This is absolutely great when you throw it on reverb returns, chopped vocals, or pads when you want to reduce masking and create space for more transient-heavy elements like your drum track.
PRO TIP: Automate fast attack (1–3 ms) and release (around 20 ms) on the gate for sharp rhythmic cuts, and pair it with chorus or pitch shift FX to give the glitches even more ear candy.
#11. Distortion Drive or Bitcrush Amount Automation
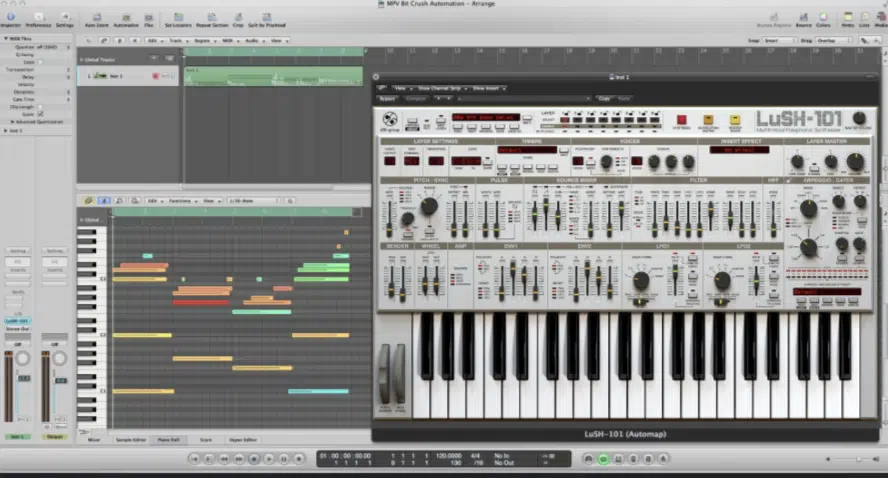
Automating distortion drive or bitcrush amount is one of the most aggressive creative automation techniques.
And if you do it right, it can completely transform a boring loop into something nasty, gritty, and full of vibe.
Start by automating a distortion plugin’s drive knob (like Decapitator’s Drive or Saturn 2’s Drive) from around 1.5 to 6.5 across 8 bars to gradually introduce saturation into your sound 一 especially on synths or drums.
For a more digital, lo-fi feel, automate a bitcrusher’s sample rate and bit depth.
Like taking your hi-hats from 44.1kHz/16-bit down to 11kHz/4-bit and then back up for a sweepy, broken-radio-style FX pass, for example.
This is super dope during breakdowns, when you want to create tension, add texture, or even shift focus onto more minimal elements.
And for an extra gritty mix automation move, try routing your instruments through a parallel channel and automating the bitcrush dry/wet balance.
It lets you toggle between dirty and clean sections while maintaining overall balance in your master bus.
My advice here would be to automate the post-effect gain automation to keep the loudness in check because distorted peaks can sneak in and mess with your dynamics if you’re not watching your levels a LOT (many producers make this mistake!).
#12. Reverb Freeze Automation for Sudden Impact
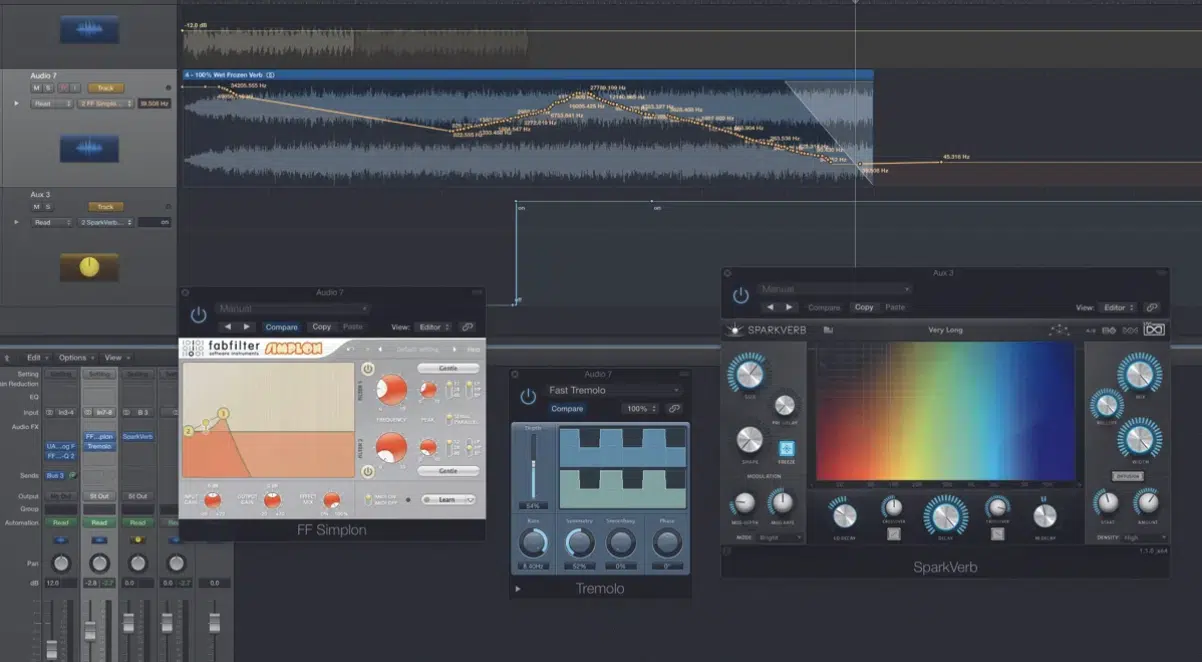
Reverb freeze automation is one of the most cinematic and unexpected creative automation techniques, so you definitely want to try this one out.
It can help you turn short sounds into massive walls of reverb that crash or bloom into the next section.
Many modern reverb plugins (like ValhallaShimmer, Crystalline, or Ableton’s native reverb) include a freeze or “hold” function that captures the current reverb tail and sustains it indefinitely.
For example, you can automate the freeze to trigger on the last word of a vocal phrase, then automate the reverb send level and filter to swell into the next drop or breakdown.
It’ll create a super lush, ambient transition, which is super sick actually.
This technique is amazing for adding emotion and space to moments that would otherwise feel abrupt, and it works well on:
- Vocals
- Snare fills
- Even FX-based instruments
And my final pro tip would be to use a high-pass filter (cutting below 250 Hz) after the reverb freeze to clean up any boominess.
Then, automate a slight chorus or panning movement to keep the tail evolving while it sustains.
It’s a subtle way to keep your listener’s attention locked in while still feeling natural.
Final Thoughts
And there you have it: the absolute best creative automation techniques to help you change the game and enhance your skills.
With all these epic creative automation techniques, you’ll be able to reshape transitions, boost energy, and knock out jaw-dropping moments like a true professional.
Plus, you’ll be able to take full control of your FX, space, and dynamics all day — without having to rely on generic presets or static automation curves.
And, as a special bonus, since we talked about FX so much, here’s the most legendary free FX pack in the entire industry for all genres and styles.
Inside, you’ll get access to 20 professional-quality FX 一 including uplifters, impacts, downlifters, misc sounds, and so much more.
They were all created by the absolute best producers and sound designers in the entire music industry.
And they’re freakin’ perfect for pairing with filter sweeps, delay throws, and reverb freezes, I might add.
Whether you’re building a drop or designing cinematic transitions, these FX will give you endless new ideas for layering, sculpting, and automating your sound like a total boss.
Bottom line, when it comes to these creative automation techniques, just don’t forget to use intention, listen in context, and always automate with the listener in mind.
This way, you can carve out more emotion, movement, and depth in your mix, plus shape how your song evolves from section to section.
Your tracks will always feel polished, dynamic, and sicker than ever (and you’ll know how to build tension, drop energy, and shape moments like a true boss).
So make sure to always try new shapes, explore different parameters, and experiment with layering multiple techniques.
Plus, play around with these moves every day to sharpen your workflow, make your instincts more sharp/on point, and help you dominate the competition in the process.
And never be afraid to think outside the box, because that’s where the real magic happens, and that’s where you definitely want to be.
Until next time…


Leave a Reply
You must belogged in to post a comment.