When it comes to building chord progressions, you have pieces to an unidentified puzzle, which you can mix and match to create any ‘picture’ you want… as long as you stay within a given scale, that is.
When it comes to Melodies, on the other hand, the rules are not so clear-cut.
This is absolutely amazing because you have the freedom to express yourself however you want.
On the flip side, it can also be super daunting if you don’t know the basics, especially when you’re lacking inspiration or direction.
Today, we’re breaking down both the fundamentals of creating and building melodies, as well as how to spice them up to create unique, intriguing, addictive variations.
You’ll be able to generate a melody both from scratch and through the use of building blocks; leveraging the material you’ve already composed or imported into your session.
Let’s dive in…
Table of Contents
- THE 3 ELEMENTS OF A MELODY
- RESTS
- MAKING A MELODY
- 1. MAKING MELODIES MORE HUMAN
- 2. SOUNDING OUT THE MELODY
- 3. ADDS 4THS & 5THS AS SPICE
- 4. MOTIFS AND THEMES
- 5. REPETITION
- 6. ROLLER COASTER TECHNIQUE
- 7. COUNTER MELODIES
- 8. CONTRAST MELODY
- 9. ARP YOUR CHORDS
- 10. BUILD MELODY FROM EXTENDED CHORDS
- 11. HARMONIC INTERVALS
- FINAL THOUGHTS
THE 3 ELEMENTS OF A MELODY
- TIME 一Tempo, meter, rhythm, and groove
- VELOCITY 一 Volume, dynamic range, and movement. Softer notes sound farther away and darker; notes played harder seem closer and brighter.
- FREQUENCY 一 Pitch (the musical note values themselves) and tone.
Don’t look at pitch and tone as one and the same.
- Pitch 一 describes the fundamental/center frequency of a given note.
- Tone 一 determines the overtones and the overall brightness/darkness (timbre). It’s influenced by pitch, but it is not pitch-dependent. High notes can still give a darker vibe, for instance, and vice versa.
Essentially all sonic aspects (other than the frequency) are represented, and therefore influenced by tone. It’s more the description of how a given sound is perceived, versus the actual definable note or frequency value.
RESTS
A Rest indicates the absence of a sound. It is considered one of the most important ‘notes’ in music.
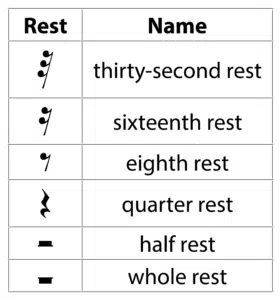
The absence of noise or sounds is a major factor responsible for groove and making the instrument/composition sound real, natural, and fluid; not awkward or computerized.
Think about the feeling you get right before, let’s say, a drop, or when a note is unexpectedly left out.
By breaking away from the consistency with an unforeseen rest, it adds a sense of tension that your listeners will greatly appreciate.
MAKING A MELODY
The following is the easiest way to jump-start a song or melody, regardless of the technique you use to initially compose it… especially if you don’t have extensive knowledge of Music Theory.
- Select/determine the scale of the song or chord progression.
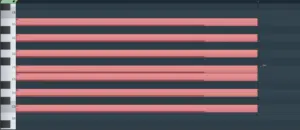
- Create a MIDI clip containing a ‘map’ of that scale. To do this, simply plug in all the notes in the scale, stack one on top of the other.
- Make sure it’s not connected to any sound source, so it can be used as a guide or cheat sheet.
With this at hand, you can rest assured, even if your melody doesn’t sound great, it’s a foolproof way to ensure you’re only using the notes within the scale.
You won’t have to ever second guess yourself, plus it reveals the available options you have for the composition stage [shown below 一 C major is mapped out].
1. MAKING MELODIES MORE HUMAN
When creating MIDI parts from the ground up, it can oftentimes end up sounding super robotic, and not in a cool way.
Humanizing your midi requires taking the 3 elements of melody [and MIDI] and making the static, fully-quantized part less ‘perfect.’
TO DO THIS:
- Alter/randomize any static values (such as velocity)
- Move notes off of the grid (or not quantizing them in the first place)
- Depending on the track/instrument in use, possibly even alter the pitch of certain notes by a handful of cents throughout.
For a full detailed description of how to master this technique, click here.
The more dynamic range you introduce to your melody, the more realistic it ends up sounding.
Unlike when mixing and using compression, the idea is not to limit the dynamic range, but rather extend (increase) it.
You can also incorporate natural-sounding Expression by randomizing any parameters or values relating to select notes/sections of a track.
Be sure to take advantage of the stylizing modulation types below:
- PITCH BEND 一 Smoothly raises/lowers the pitch of a sound.
- VIBRATO 一 A rapid, slight variation in pitch.
- TRILLS 一 A rapid alternation between two adjacent notes, usually a semitone (or tone) apart.
- LEGATO 一 A group of notes played together in one down-bow or up-bow.
- PORTAMENTO 一 A pitch that slides from one note to another.
- AFTERTOUCH 一 MIDI data sent when pressure is applied to a keyboard after the key has been struck, and while it is being held down or sustained.
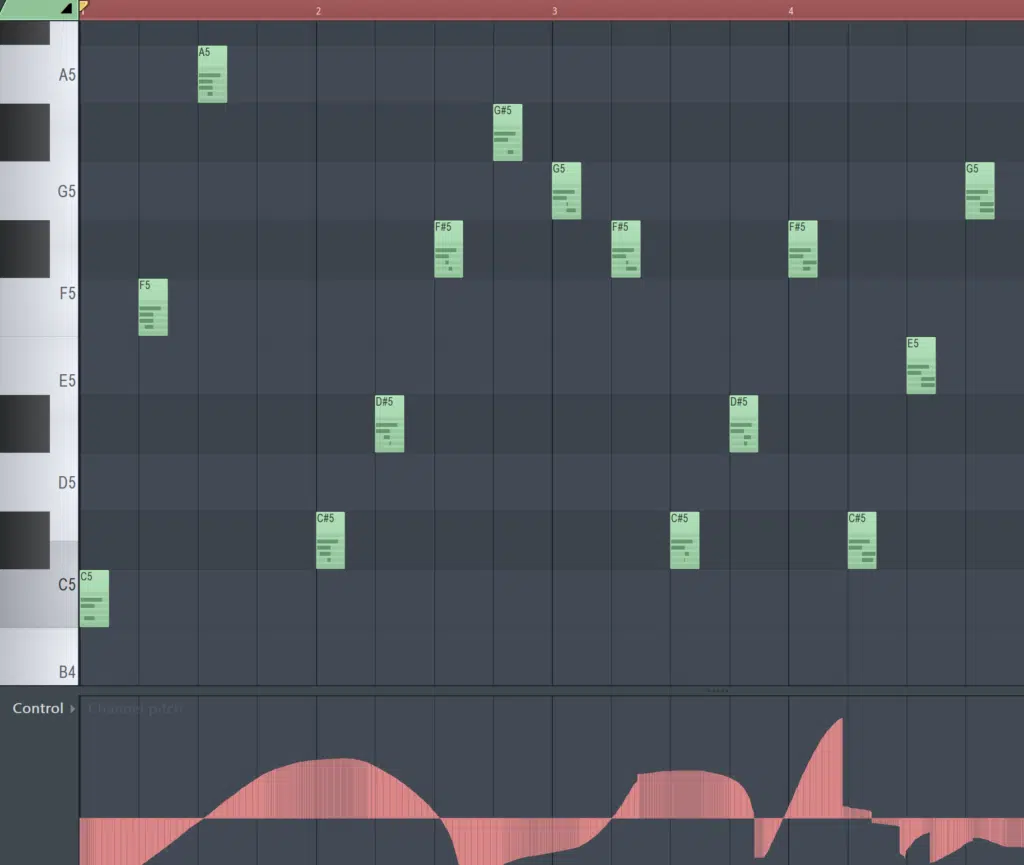
No need for an aftertouch-supported controller, you can just draw it in.
These types of stylized modulation are also ideal when attempting to add a little something extra to elements like synths and non-acoustic instruments.
They too can benefit from more natural expression, even when the instrument only resides in the digital domain.
The best parameter to play around with when it comes to humanization or a realistic (un-computerized) melody/riff/solo is Velocity. After that are Accent Notes, Slurs, and Slides.
2. SOUNDING OUT THE MELODY
Before you begin this technique, it’s important that you have a chord progression locked down, and/or the percussion elements already programmed.
Otherwise, this Prediction method will be more like picking notes out of thin air.
Once you have your progression laid down:
- Loop it
- Indicate the notes you can draw from [the scale]
- Select a note to start from
- Let your brain do the rest
Simply hum it to yourself and see how your subconscious thinks it should play out; essentially creating a Top-Line Melody.
Let it come naturally, don’t just pick a random note, that defeats the purpose. Turn your producer’s mind off and just let it flow out.
It may seem weird but, truth is, it’s sometimes the most effective way to break out of writer’s block because the ‘writer’ is on autopilot.
This one is the definition of simple yet effective.
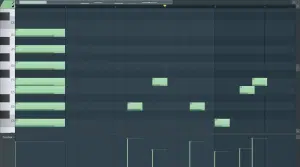
Above, the MIDI clip starts at bar 3. The mapped is used to guide you in how to put your puzzle together.
3. ADDS 4THS & 5THS AS SPICE
- TO FIND A SCALES 4TH 一 Go up 5 semitones from the root note [for any scale type]. A Perfect Fourth.
- TO FIND A SCALES 5TH 一 Go up 7 semitones from the root note; considered A Perfect Fifth.
NOTE: This can also be figured out by looking at the scale in use and counting up to the 4th and 5th notes within that scale (from the Tonic). These are known as scale degrees.
You can add these as Tone Colors [timbre] for variation in the melody. They can be placed back to back like 1-4-5. You can also turn your melody into chords or modes doing this.
Try swapping any note in your melody with its associated fifth.
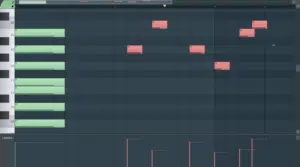
The entire melody is transposed up 7 semitones; A Perfect Fifth.
4. MOTIFS AND THEMES
- MOTIFS 一 Small, repetitive patterns or parts that never change.
- THEMES 一 Multiple motifs combined to create repetition on a macro level.
You do not need to keep the same notes in your motifs, as long as the Timing is the same [shown below].
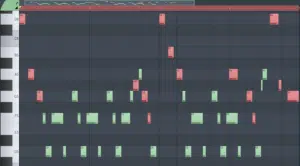
Same motif, different note values, same timing.
Your melody should be able to be played using only one hand on the keyboard, using the 5 notes in your chord progression.
Make sure your motifs are simple enough and easy for the artist to sing. You can add them to a progression in different pieces.
Jot down a quick riff that sounds good over your motif, find another one, and then add it to the Motif Bank.
- Begin with little pieces like accent notes; around 4 is good to start with.
With just two little motifs, it can create the beginning of a melody needed to produce the entire melodic basis of your song.
They once played along with the chords, but will now become either the core of the melody or the entire melody itself.
Don’t forget the chords are playing in the background, technically they play the first note of your melody.
Once you have the foundational shape of your melody, you can then go on to transposing and playing different notes. It will still retain the same shape.
5. REPETITION
Repetition does not always mean repeating the same sequence of notes. You can play completely different note values while just repeating the shape you used previously.
The subconscious will recognize (and be drawn to) shapes in music just as much as the notes being played.
Fun fact, it wasn’t until the advent of the Piano Roll that it became possible to even see the shape of melodic elements.
Below, the first four bars all contain different notes, but they are played using the same shape as the section before it.
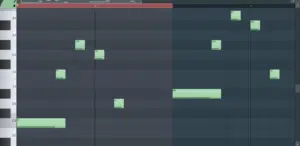
Always calculate the space between notes and make it so just the notes change, never the shape itself.
The secret to producing great melodies is repetitive motifs throughout the entire song.
In fact, the best way to ensure your song sounds cohesive is to have the entire melody itself be made up of multiple motifs pieced together (to make a giant one).
6. ROLLER COASTER TECHNIQUE
The Roller Coaster technique consists of repetitive motifs that have the same time structure and shape, and oftentimes the same note lengths.
The melody (below) has 6 individual motifs that repeat themselves throughout the entire melody; essentially one giant motif repeated, at times, in different octaves.
BREAKING IT DOWN:
- Pick a root note
- Then go up to its peak
- Back down to root note (or close to it)
- Back up to an even lower peak
- Finally, back down to the note’s fifth, root note, or something close to it
You should stay within an octave range or within a zone close to it.
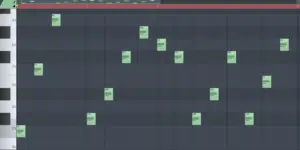
NOTE: When using the roller coaster technique, do NOT suddenly jump from low to high or high to low. Only very small steps (or ‘gaps’) are required.
7. COUNTER MELODIES
- Counter Melodies 一 Two different melodies that, when played together, make a new entity.
- A countermelody differs from a harmony part sung by a backup singer.
- Whereas the harmony part typically lacks its own independent musical line, a countermelody is a distinct melodic line.
Best to utilize this technique with a song containing no chords that back it up.
This is not essential, especially if you’re a pro when it comes to Theory, however it is much easier to contain your countermelody, so it doesn’t get lost in the mix.
Remember, many melodic elements will be present and played simultaneously.
You can place your countermelodies on the same scale, but it adds a lot more depth and contrast if carried out with different, interchangeable [relative] scales (like A Minor and C Major) as well as a separate octave than the lead melody.
8. CONTRAST MELODY
A contrast melody is basically just a melody that works well with the backup melodies and supports the main melody, yet differs greatly from them; hence the name ‘contrast.’
This means the contrasting melody should be placed in a different pitch/octave (as well as a different rhythm).
For example, if the original melody is fast, the ‘contrast’ melody should be slower, or vice versa.
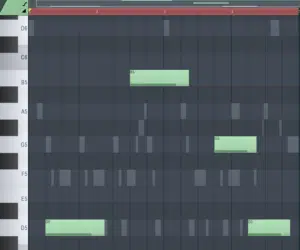
The main melody (the ghost notes), and the contrasting melody (highlighted).
It ends up sounding the best if the first melody is fast-paced, and the additional one slower (or vice versa).
Transpose the second melody up to its 5th (or 4th) for even more contrast. Instead of repeating normally, it will then repeat the melodies’ 4th or 5th.
NOTE: The same melody can sound very unique when expressed with a different set of notes (using relative or parallel scales).
You could also reserve this trick for the bridge or (less commonly) the hook.
9. ARP YOUR CHORDS
How often do you have your progression (or even the rest of the tracks’ foundation) laid out but don’t know where to go with melody?… If you’re a producer or artist with a heartbeat, it’s probably all the time.
That’s where arps (arpeggiators) come in!
An arp 一 takes the note, or notes you’re playing and changes the way they play; usually in the form of jumping octaves.
You can control the direction(s) in which they jump [up, down, both, at random].
For this technique, however, instead of using an arp, you’re just going to do it by hand.
Although, you could choose to use one if it’s at your disposal or your preference.
Simply take 1, or all of the notes in your chord and, at the desired speed [every 1/4th note for example] have it rhythmically jump octaves by going up, down, or both.
You can do this to just one note, but when it comes to chords, it’s typically best if, for every few notes, you switch to a different note (within the chord).
This can be applied to each chord and can switch as the chords do, but try to pick a few [select] notes, and go crazy with it.
Below, is an example of an arp made using the notes in the melody above. It’s going in an upward direction and spans across 3 octaves.
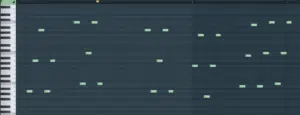
This is accomplished by Note Divisions of 1/8th (8th).
10. BUILD MELODY FROM EXTENDED CHORDS
The basic chord triad is the foundation for a wide variety of different chords and variations built off of it.
For instance, a C Major chord can be extended to become a C Major 13th or a C Major Diminished.
Regardless of the method being used 一 whether you’re building your own chords or using a premade progression 一 this trick is a beneficial addition.
- Limit your actual progression (at first) to Triads, as you’re going to incorporate the notes that would be used in the (given) chords many variations. Excluding anything other than triads from the progression is best.
- From here, if your chords were not originally more than 3 notes, find the notes that the extended version contains.
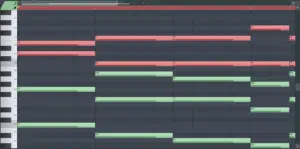
Once you know the notes that are appropriate, plug them in, but in the context of a melody.
The red notes indicate that you’re going to use (or can use) them for the song, based on these extended chords [shown below].
11. HARMONIC INTERVALS
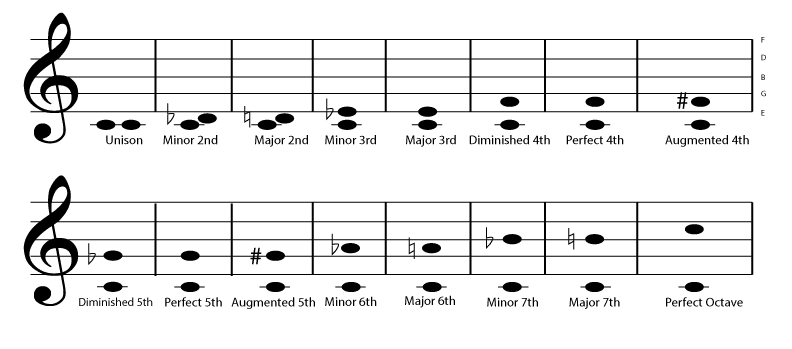
Use the same method above, except this time you’re going to use intervals/notes that would work in harmony; usually a perfect fifth
This will most likely not be the only notes you use within the melody, but it’s a great starting off point.
Below, is a chart that lays out all the intervals you have at your immediate disposal.
FINAL THOUGHTS
Melodies are very personal, and you’re going to want to create them yourself. That’s why it’s extremely important you have these techniques in your melodic arsenal.
It’s just a matter of following the steps and letting your brain guide you.
You want to produce melodies you’re proud of, and trying these different methods won’t only help you discover new ways to build them, but can also help you create powerful, addicting, and [most importantly] unique variations as well.
Plus, they can seriously help you with inspiration, or break you out of melody block as well.
To hear examples of perfectly executed melodies that you can simply plug and play, download the FREE Unison Essential Melody Loops.
They are hit-worthy melodies that are guaranteed to get stuck in the minds of your listeners. They will never stop hitting that repeat button.
Until next time…



 40 Chord
Progressions
