Clip gain automation is all about fine-tuning your audio before it even hits your plug-ins.
And, making every phrase, hit, or sample sit perfectly in the mix without touching your faders, which is a true professional move.
It can help you clean up inconsistent vocals, fix obnoxious peaks, and keep everything tight before you even start compressing.
Plus, successfully adjusting clip gain helps you balance dynamic ranges in a way that sounds clean, natural, and way more controlled than ever.
As producers, knowing all about clip gain automation means you’ll be able to make faster decisions, tighter edits, and cleaner signal paths all day.
That’s exactly why I’m breaking down everything you need to know in today’s post, like:
- What clip gain automation actually does ✓
- When to use clip gain vs compression ✓
- Key differences between clip gain and volume automation ✓
- How to use it in Pro Tools and Logic Pro ✓
- Adjusting clip gain without messing up your signal path ✓
- Tips for cleaner gain staging ✓
- Fixing vocals and drums with clip gain ✓
- Automating volume the right way ✓
- How to tweak clip gain for FX and saturation ✓
- Bonus tips to take things to the next level ✓
- Much more about clip gain automation ✓
By knowing all about clip gain automation, you’ll always have full control over your audio and clean gain staging at every step.
This way, your tracks will sound tighter, smoother, and way easier to mix 一 you’ll really never have to worry about harsh peaks or over-compressing ever again.
And I’ll also be including bonus tips, tricks, and techniques to bring things to the next level.
Table of Contents
What Clip Gain Automation Really Is (And Why It’s So Useful)

Clip gain automation is basically the way we control how loud or soft (the level) of a specific file or section of audio is before it hits any:
- Plug-ins
- Compressors
- Volume faders in your DAW
This is also known as pre-fader level/volume, which you might be familiar with hearing.
Unlike volume automation, which happens post inserts, clip gain is applied directly to the raw audio itself 一 at the very beginning of the signal path.
So, instead of adjusting a full track’s fader or automating a whole section with automation lanes, you can dive right into the waveform and just boost or reduce the clip volume where it matters.
That means smoother vocals, tighter transients, and way less work for your compressor or EQ later on, which is awesome.
For example, if you’ve got a vocal where just one word jumps out 3–4dB too loud, adjusting the clip gain is way cleaner than automating the whole phrase.
Plus, with clip gain, you can avoid over-triggering dynamics processors and clean up messy takes at the editing stage, long before you even think about dialing in your final automation.
Or, if a particular plugin doesn’t have an input gain option.
And because it affects the audio pre-fader and pre-processing, it keeps your gain staging super clean without forcing you to add extra plug-ins just to fix levels.
So overall, clip gain automation gives you way more control and flexibility, while helping you balance your entire mix from the ground up.
It’s a simple move that makes a huge difference in just about every session, so you definitely don’t want to overlook this one.
When and Why You Should Adjust Clip Gain
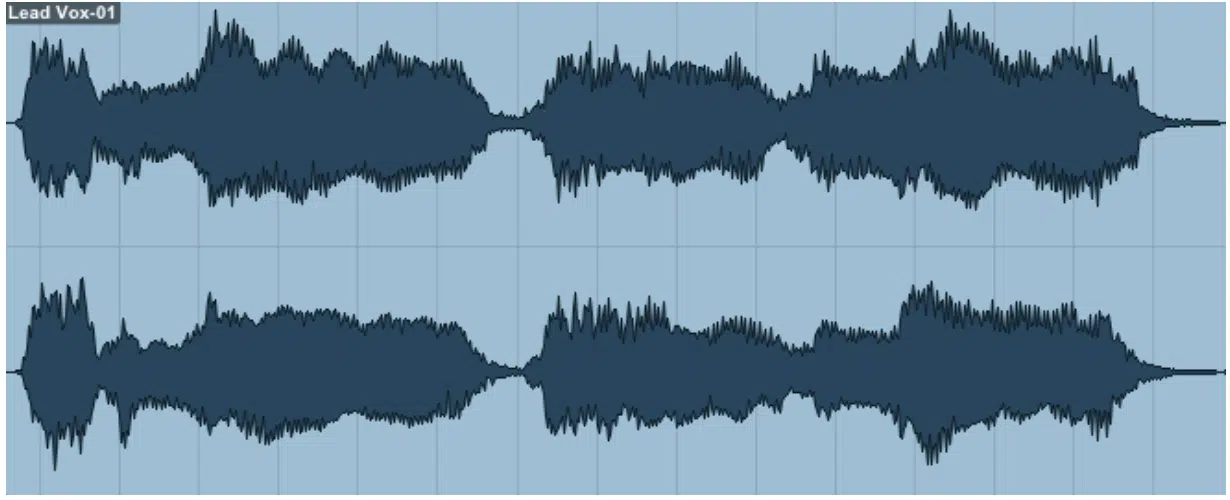
Alright, so now that we’ve covered what clip gain automation is and where it fits in the signal path, let’s talk about when and why you’d actually reach for it. There are tons of situations where adjusting clip gain makes more sense than relying on faders, compressors, or volume automation. So, let’s dive in.
Leveling Out Vocals, One Phrase at a Time
When it comes to editing vocals, clip gain automation is a total cheat code.
Let’s say you’ve got a vocal take where the first half of the verse is chill, sitting around –18dB RMS, but then halfway through, the delivery jumps to –10dB RMS…
Instead of slamming a compressor harder, just go in and use clip gain to adjust that loud section by –4 to –6dB so it matches the rest.
This way, your compressor isn’t working overtime, and you keep the tone more natural.
For example, in Pro Tools, you can highlight the word or phrase in the edit window, hit Shift + Ctrl + Up/Down (clip gain shortcut), and instantly match the energy.
In Logic Pro, just pull up the gain handle on the clip itself (super smooth).
Also, sometimes certain plosives or breaths spike randomly, right?
Well, instead of automating with a fader, a quick –2dB clip gaindip on that one part keeps your signal path clean and your vocal chain happy.
That’s the kind of control you want, especially when stacking harmonies or doing surgical processing on vocals.
It also keeps your mix cleaner overall, especially when stacking layers, FX, and automation later on.
This way, you’re not stuck fighting volume problems that could’ve been handled in two seconds with a quick clip gain tweak.
Cleaning Up Drums Without Killing the Groove
Cleaning up your drums with clip gain automation is one of those pro-level moves that instantly tightens up a track.
Say your snare hits are all over the place:
- Some are at –8dB peak
- Others barely hitting –13dB
Instead of relying on compression to fix it (and possibly kill your transients), you can just go in and boost the weak ones by +3dB using clip gain.
In Logic Pro, dragging the clip volume up or down by hand is fast, but if you want precise values, go with +2.5dB to +3dB for softer ghost notes.
In Pro Tools, you can even draw clip gain using the pencil tool and smooth things out visually across various points in your performance.
The main difference here is you’re preserving the natural dynamics, while still locking in the punch you want.
No compressor artifacts, no strange pumping 一 just raw volume control, where it counts.
And if you’re working with a loop that was sampled with uneven hits, adjusting clip gain before running it through distortion or a transient shaper makes a HUGE difference in keeping the groove locked in.
This technique also helps if your kick is too dominant in certain sections, like dropping 2dB during the hook to let your bassline breathe.
The balance is much smoother, and your mix won’t fall apart when the compressor starts reacting to random peaks.
Making Samples Sit Better Without Compressors Doing All the Work
When it comes to chopped samples, clip gain automation becomes an actual game-changer, no joke.
For example, let’s say you’ve got a vocal chop loop where one hit jumps out 4dB louder than the others.
Instead of throwing a compressor on the entire loop and destroying its dynamic vibe, just pull that one clip down with clip gain and keep the character intact.
In Logic Pro, zoom in, drag the clip volume handle down by about 3.5dB, then loop it back, and you’ll suddenly hear the balance improve right away.
Or in Pro Tools, split that one file, select the hot part, and lower its dB value directly in the clip gainlane. Super clean. No artifacts. Just maximum control.
And another trick would be, if you’re slicing drum breaks or tonal loops and the tail end of the sample fades out too slow, a short clip gain fade can fix the pacing without even touching your faders.
So, if you’ve got delays or reverb inserts reacting to overall volume changes, it’s key.
What you’re doing here is keeping your signal path lean and efficient.
No overprocessing and no piling on plug-ins to compensate for something that could’ve been handled manually in 5 seconds.
And of course, clip gain automation helps you control how your samples react to saturation, distortion, and transient designers later on.
If the input volume going in is off, none of those FX will respond right 一 so this move helps you achieve cleaner results right out the gate.
That’s why I always adjust clip levels on tonal samples before sending them into any processing chains, and I suggest you do the same.
It will give you more control and makes my mix way more consistent down the line.
Clip Gain Automation vs Compression
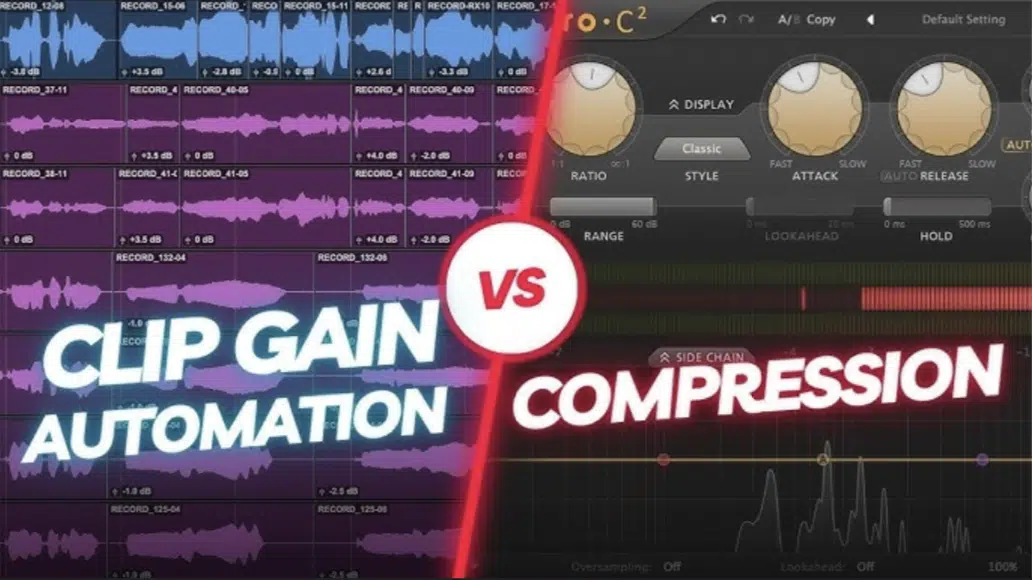
The main difference between clip gain automation and compression is when and how the volume gets changed in your signal path, and how natural the end result sounds.
Compression works by reacting to the audio as it plays, pulling back peaks automatically based on your threshold, ratio, attack, and release settings.
But with clip gain automation, you’re controlling those volume shifts manually before the compressor ever kicks in (pretty simple, right?).
For example, if a snare hit peaks at –6dB but the rest are closer to –11dB, a compressor would catch the loud hit, but it would also affect the rest of the signal.
And possibly flatten absolutely everything by another 3dB or more depending on your settings, and you definitely don’t want that.
Instead, you could lower that one hit manually using clip gain by exactly –5dB, which keeps the dynamic movement on point while avoiding over-compression.
This kind of manual editing is especially useful for vocals…
If a singer’s breathy word is too quiet, you can boost it +4.5dB with clip gain, instead of pushing a compressor harder, which might pull down the whole phrase and trigger your de-esser too early.
You maintain the natural feel of the take while still locking it into place.
There’s also a nonlinear element with compression 一 how fast it reacts and how it releases changes the feel of the performance.
But with clip gain automation, you’re setting exact dB values at precise points, so it’s predictable, transparent, and doesn’t affect timbre or tone.
PRO TIP: There’s no reason why you can’t combine both! To do so, manually adjust clip gain across your track so the compressor works less.
Then, simply use some subtle compression (2:1 ratio, –18dB threshold) to gently glue everything together.
That combo gives you control, clarity, and vibe all at once.
That’s why in most sessions (vocals or live instruments) you should always go through and do a round of clip gain automation before you go for a compressor.
It’ll save you massive time and make every move downstream much more effective.
Working With Clip Gain Smoothly in Your DAW
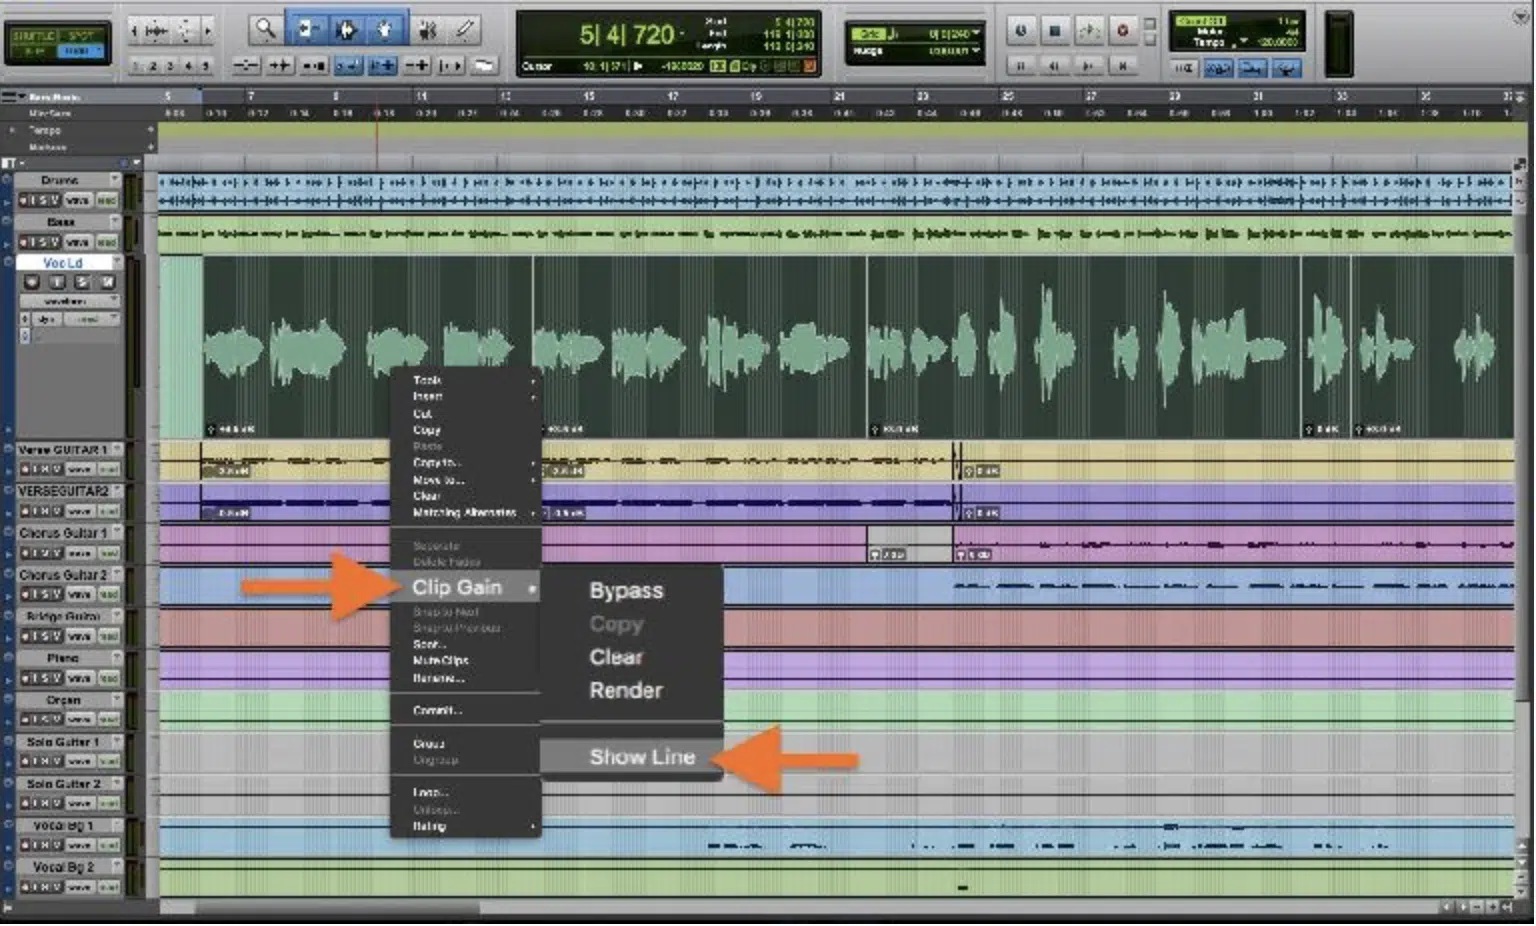
Getting hands-on with clip gain automation is easier than most producers realize, and every unique DAW has its own way of handling it.
In Pro Tools, click the tiny line under your audio clip, and you’ll see the clip gain line appear, and this is pre-inserts.
So, anything you do here directly affects your raw audio before any plug-ins react.
You can drag the line up/down or enter a precise dB value in the info view, which is great for making +3.2dB or –5dB changes across phrases.
In Logic Pro, things are just as smooth…
Just click on any clip, hit “Gain” in the Region Inspector, and you’ll be able to adjust the gain with a slider.
If you’re working on tight editing, you can also split the file and adjust individual sections separately 一 giving you more control over each part of the performance.
For faster edits, I highly recommend zooming way in so you can see the waveform details more clearly.
Then, you’re not guessing, you’re setting clip gain precisely where the waveform spikes.
In Pro Tools, hitting Shift + Ctrl + Up/Down is your go-to shortcut, and in Logic Pro, you can drag that line manually and still keep the mix clean.
Just remember to avoid over-correcting at all costs.
If you drop something 8 dB and then boost it again later with volume automation, you’re just creating unnecessary gain swings that clutter the signal path.
Keep your changes simple and logical. A +2dB or –3dB adjustment is usually enough to fix most issues, honestly.
And always double-check how your changes sound through post-inserts.
NOTE: Clip gain automation is powerful, but it works best when you’re using it to shape the audio right at the gain staging stage, not just to fix things that should’ve been re-recorded.
Creative Ways to Use Clip Gain Beyond Just Fixing Levels
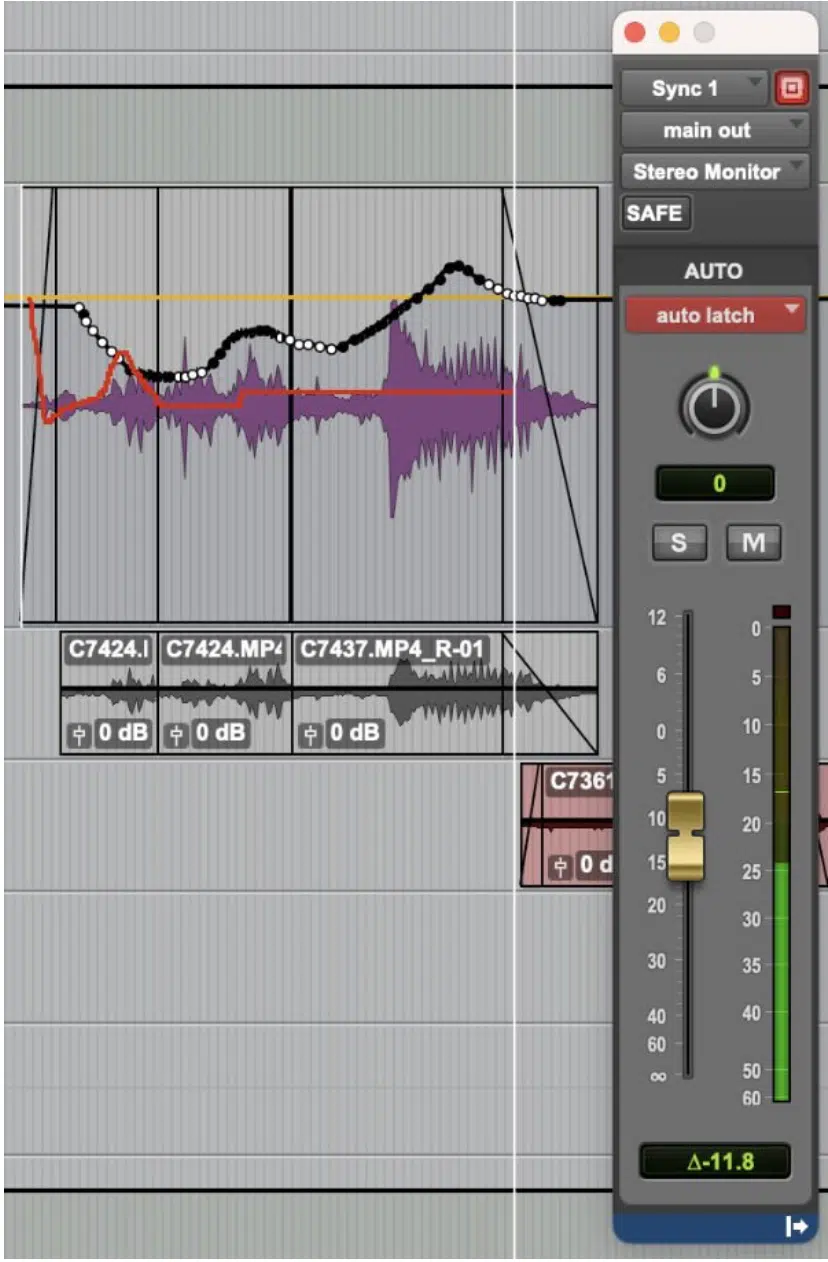
So, we’ve talked a lot about how clip gain automation helps fix uneven recordings and makes your mix cleaner, but that’s just the beginning. If you think about it differently, it can also help you create movement, tension, and emotion without even touching your volume faders. That’s why the next few sections are all about using clip gain automation as a creative weapon (not just a technical fix).
Adding Subtle Movement Without Automating Faders
Sometimes you want a pad or riser to slowly swell in volume, naturally.
But, you certainly don’t want to use volume automation or automate your fader, especially if you’re already using it elsewhere.
With clip gain automation, you can draw in a curve using the pencil tool, so your audio builds from –12dB to 0dB over 8 bars.
This creates a super clean ramp in the signal path without messing with post inserts.
Let’s say you’ve got a vocal effect layer (like a reversed reverb tail or tonal riser) that’s too static…
You can try cutting it into four bar sections, then boost each clip slightly: +1.5dB, then +3dB, then +4.5dB, and finally top it out at +6dB.
The build feels dynamic, but you didn’t have to automate anything at the fader level.
This trick is especially sick for intros or transitions, so keep that in mind.
If you’re trying to achieve a feeling of momentum, clip gain automation lets you manually shape the energy of a track.
All without cluttering your automation lanes or affecting other elements.
And because this all happens before your plug-ins, it gives your FX more consistent input, so if you’re feeding that riser into a saturation insert, the build gets more intense as the signal gets hotter.
PRO TIP: Save these kinds of clip gain moves as presets or templates in your DAW. In Logic Pro, you can duplicate the region with the gain already applied.
In Pro Tools, copy the clip gain data between sessions and reuse your favorite builds with one quick paste.
Controlling Saturation or FX Without Touching a Knob
One of the most truly underrated uses of clip gain automation is sculpting how hard your audio hits your FX plug-ins.
Let’s say you’re using a tape emulator or analog-style saturation on your vocals, and it starts sounding too crunchy when the input signal spikes.
Instead of automating the saturation knob, just pull down the clip gain by 3–4dB on those sections, and you’re good to go.
For example, if a shouted ad-lib goes into FabFilter Saturn 2 or Softube Tape, it might jump +5dB above the average signal.
By using clip gain to bring that down –4dB before it even hits the insert, you keep things from distorting while still keeping the vibe on point.
This trick works on drum busses too.
If your snare is smacking the clipper plug-in too hard, shave 2dB off the clip volume with a quick adjustment, and you’ll hear a smoother hit without losing punch.
You’re basically controlling how the audio feeds into your processing chain (without having to constantly babysit knobs or automate parameters).
In Logic Pro, you can even automate clip gain across loops with slight boosts on fills (+1.8dB) and dips on the quieter bars (–2dB) to keep the saturation from feeling too boring and basic.
And if you’re using parallel distortion, this kind of clip gain automation helps you set a consistent input level so you’re not overdriving one moment and undercooking the next.
It’s a clean way to keep your mix in check without endless knob turning.
Using Clip Gain Like a Volume Envelope Tool
Here’s where clip gain automation gets really fun: you can literally use it like a manual volume envelope to shape:
- Transients
- Tail-offs
- Fades
All at the clip level with surgical precision.
For example, if you’ve got a layered snare with a harsh transient, you can dip the first 10ms of the waveform using the pencil tool.
This will shave 2–3dB off just the spike without affecting the body of the sound.
In Pro Tools, zoom way in, draw a sharp downward point at the start of the hit, then ramp it back up over 20–30ms.
You’ll soften the transient without needing a transient shaper or multiband compressor, which means less processing, less CPU, and a more transparent result.
For ambient sounds or vocal reverb tails, draw a custom line that fades out over time. For example, from 0dB down to –12dB over the last 4 beats.
That fade will feel natural and dynamic, and since it’s pre-insert, it won’t interfere with post-FX decay, which is sick.
This technique also lets you carve space in your mix.
If a background texture is clashing with your lead, cut a tiny notch in clip gain (-3dB) at that exact point, instead of automating your fader or sidechaining something unnecessarily.
And since these adjustments are happening at the clip level, you’re not clogging up your volume automation lanes or risking any gain staging issues later on.
You get clean, manual control with zero drama all day.
Bonus: 5 Pro Tips For Gain and Volume Automation
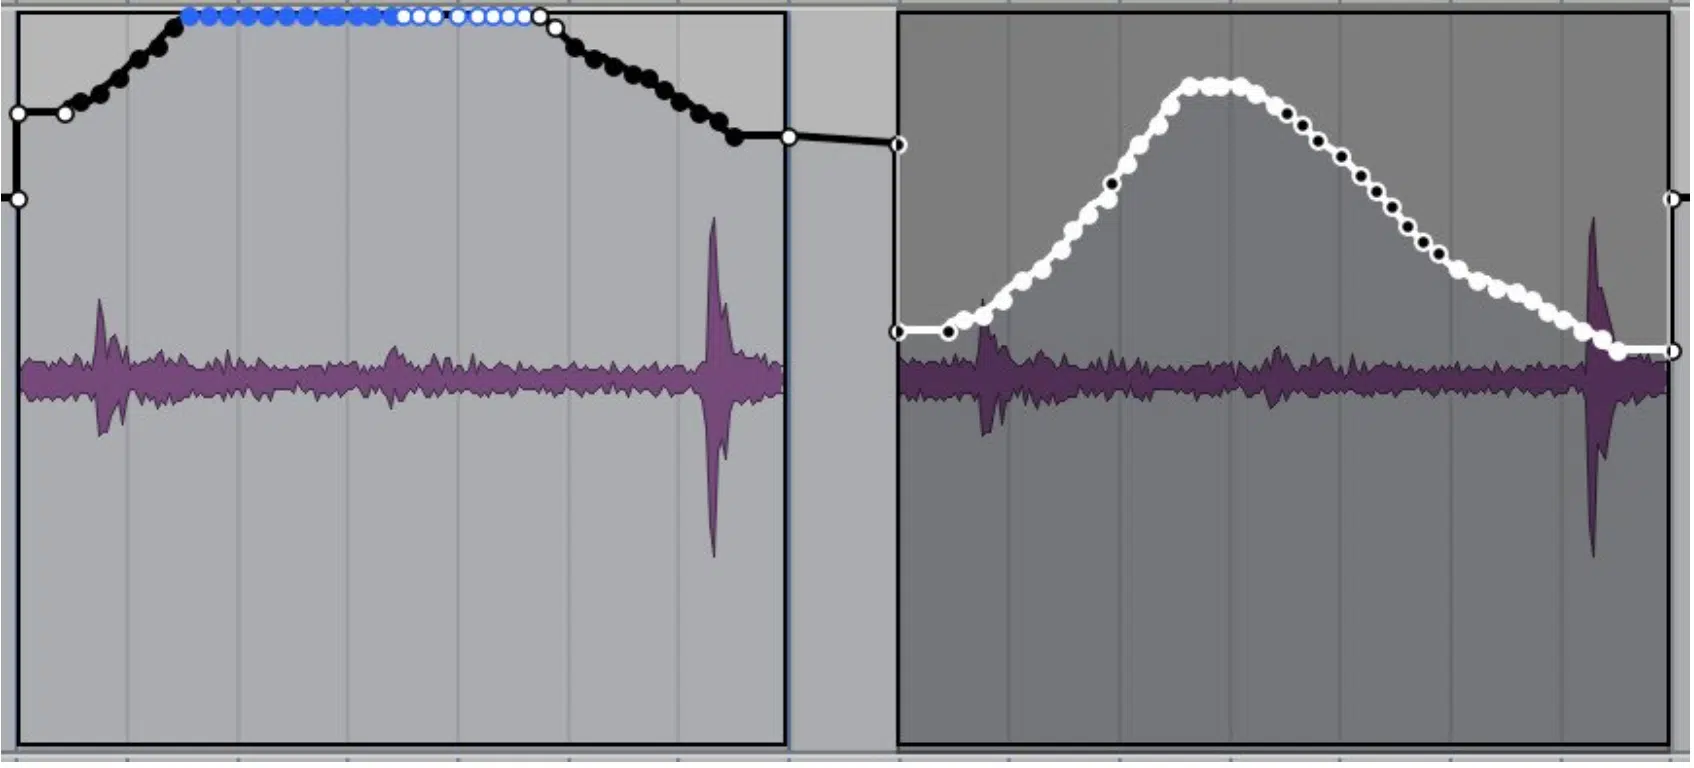
Now that we’ve covered everything from leveling to creative shaping, let’s talk next-level. These last few techniques take clip gain automation from being just a correction tool to something that locks in real control and vibe. Each of these clip gain automation tips is designed to make your adjustments faster, cleaner, and way more dialed-in across your mix. So, let’s break it down. And no, it’s nothing I mentioned earlier, so stay tuned.
Always Tweak Gain Before You Compress
When you’re in your home studio, before even thinking about touching a compressor, get your clip gain automation right (I cannot emphasize this enough).
For example, if your vocal take has a loud breath at –9dB and the rest sits at –18dB RMS, that spike is gonna make your compressor work way too hard.
Instead, just dip that breath –6 to –7dB using clip gain, and now the whole track hits the compressor evenly.
This keeps your compression smoother, avoids overworking the attack/release, and helps preserve the tone.
It also prevents you from having to push the compressor harder, which can start to make things feel squashed or lifeless; you get a better end result with less processing.
PRO TIP: Always check your input meter before and after your clip gain edits so you can keep things balanced.
Think of it like prepping the signal before it hits any inserts, because that’s literally what you’re doing.
Use Your Eyes and Ears, Not Just the Meters
Sometimes your meters say things are fine, but your ears know something’s off 一 that’s when clip gain automation really shines.
For example, if a kick looks like it’s peaking at –6dB but sounds way too loud, trust what you hear.
Make sure to properly:
- Zoom in
- Check the waveform
- Adjust the clip gain until it sits where it needs to in the mix
This is where having your edit window set up properly helps.
In Pro Tools, enable the clip gain view so you can actually see the line right on the file. In Logic Pro, keep the Region Inspector visible.
This way you can reference dB values in real-time while you tweak.
Just remember people: visual feedback is helpful, but it’s not everything.
That’s why you should always go back and listen to each adjustment on repeat in context with the full session, especially when working with dense layers.
Don’t Overuse It: Let Some Dynamics Breathe
Look, clip gain automation is powerful, but that doesn’t mean you need to flatten every single track because things will start getting… off.
Sometimes the natural dynamic movement is what makes a vocal or synth line feel alive. If you go in and chop every peak and valley, your mix starts sounding robotic fast.
For example, leave that +2dB spike on a lead vocal right before the hook 一 it’ll help the emotion cut through.
Just don’t shave it down just because it’s louder than the rest.
Instead, focus on taming the stuff that’s actually distracting, like a +6dB plosive or an uneven syllable that throws off your balance.
This is where gain staging meets restraint. Use clip gain for control, not just conformity. Let your music breathe.
Combine With Automation for Final Polishing
One of the best ways to use clip gain automation is in combination with volume automation.
Use clip gain to level everything at the pre-insert stage, then let volume automation take over for:
- Movement
- Transitions
- Emotional flow during the mix
For example, you can use clip gain to set your lead vocal to hover around –15dB RMS, then automate a +2dB push right before the chorus.
The main difference here is that clip gain sets your foundation, while volume automation gives you the final polish.
This keeps your fader rides clean, avoids messy automation curves, and helps every element hit just right across the track, which is what you want.
NOTE: Don’t forget that you can convert volume automation into clip gain in some DAWs. In Pro Tools, just right-click your automation lane and hit “Convert to Clip Gain” to lock it into the file.
Trust Your Loop (Listen on Repeat When Adjusting)
When you’re doing detailed clip gain automation, the best thing you can do is loop the section and zone in, period.
For example, if you’ve got a guitar stab that needs to come up +2dB for impact, don’t just make the move and move on 一 loop it, listen on repeat, and feel the change.
Just be sure to set your loop markers a little before and after the section you’re focusing on so you’re also able to hear the transitions of the surrounding audio.
Not doing this is pretty much like mixing and making adjustments in solo.
In Logic Pro, set your cycle range, solo the track, and make subtle +1dB tweaks while the loop plays.
In Pro Tools, use dynamic playback while you adjust the clip gain line in real-time, and remember that every adjustment should feel intentional (not rushed).
Over time, this looping habit builds instinct.
You’ll essentially start knowing exactly how much to decrease or boost by values like +1.5dB or –2dB without even second-guessing.
And that’s how your sessions stay tight and sound super professional/on point without becoming overwhelming.
Final Thoughts

And there you have it: absolutely everything you need to know about clip gain automation and all the sick things you can do with it.
By using these techniques, you’ll seriously clean up your takes, gain full control of your signal path, and dial in perfect levels without ever over-processing.
Plus, you’ll be able to fine-tune vocals, tame your drums, sculpt your FX sends, and shape your transients in no time.
Just remember that it’s all about making clean, intentional adjustments that improve the mix without killing the vibe.
Otherwise, you’ll just end up fighting your faders, overloading your plug-ins, and losing the natural dynamic feel of your audio like a total amateur.
And, as a special bonus, since we talked about FX so much throughout, I’m giving you access to the most legendary free FX pack in the entire industry.
Inside, you’ll get 20 free FX to add some ear candy to your tracks and instantly captivate your listener’s attention.
All of the uplifters, downlifters, transitions, risers, vocal chops, mic sounds, and impacts are designed to be layered, processed, or enhanced using clip gain automation to build movement and create tension at exactly the right moment.
You can even use clip gain to automate swells, cut tails short, or push transitions harder into reverbs or delays without touching any faders.
Bottom line, when it comes to clip gain automation, just don’t forget to zoom in, trust your loop, and always use it as your first line of defense when leveling anything.
This way, you can keep your gain staging solid and your processing clean.
Your tracks will always sit right, your FX will hit harder, and you’ll know how to handle gain like a true boss.
And never ever think the sky is the limit, because it definitely is not.
You can always push things further, try something new, and shape your audio with even more control using clip gain automation as your secret weapon.
Until next time…


Leave a Reply
You must belogged in to post a comment.