When it comes to music production, compression is one of the most important (yet surprisingly misunderstood) effects in the game.
It can shape the dynamics of your beat, control loud peaks, and enhance your mixes.
Plus, help your tracks achieve a professional polish and consistency.
Aand it all starts with understanding how to manipulate the compression threshold and other key elements effectively
That’s exactly why we’re breaking down the perfect compression settings to ensure you can take full advantage of this powerful tool.
In today’s article, we’ll be breaking down:
- Audio compression basics ✓
- What the compression threshold is ✓
- The ideal compression threshold settings ✓
- How to adjust attack and release times ✓
- Choosing the correct ratio ✓
- Soft knee vs. hard knee settings ✓
- Advanced compression techniques ✓
- Optimizing compression for vocals & drums ✓
- Common mistakes to avoid ✓
- Much more about the correct compression settings ✓
You’ll have a good grasp of compression and the correct compression threshold settings so you can master the dynamic range of your mixes.
As well as make sure the energy and emotion translates perfectly.
Plus, be able to create soundscapes that really make an impression on your audience like a true professional.
So, let’s dive in…
Table of Contents
Audio Compression Basics: A Quick Breakdown
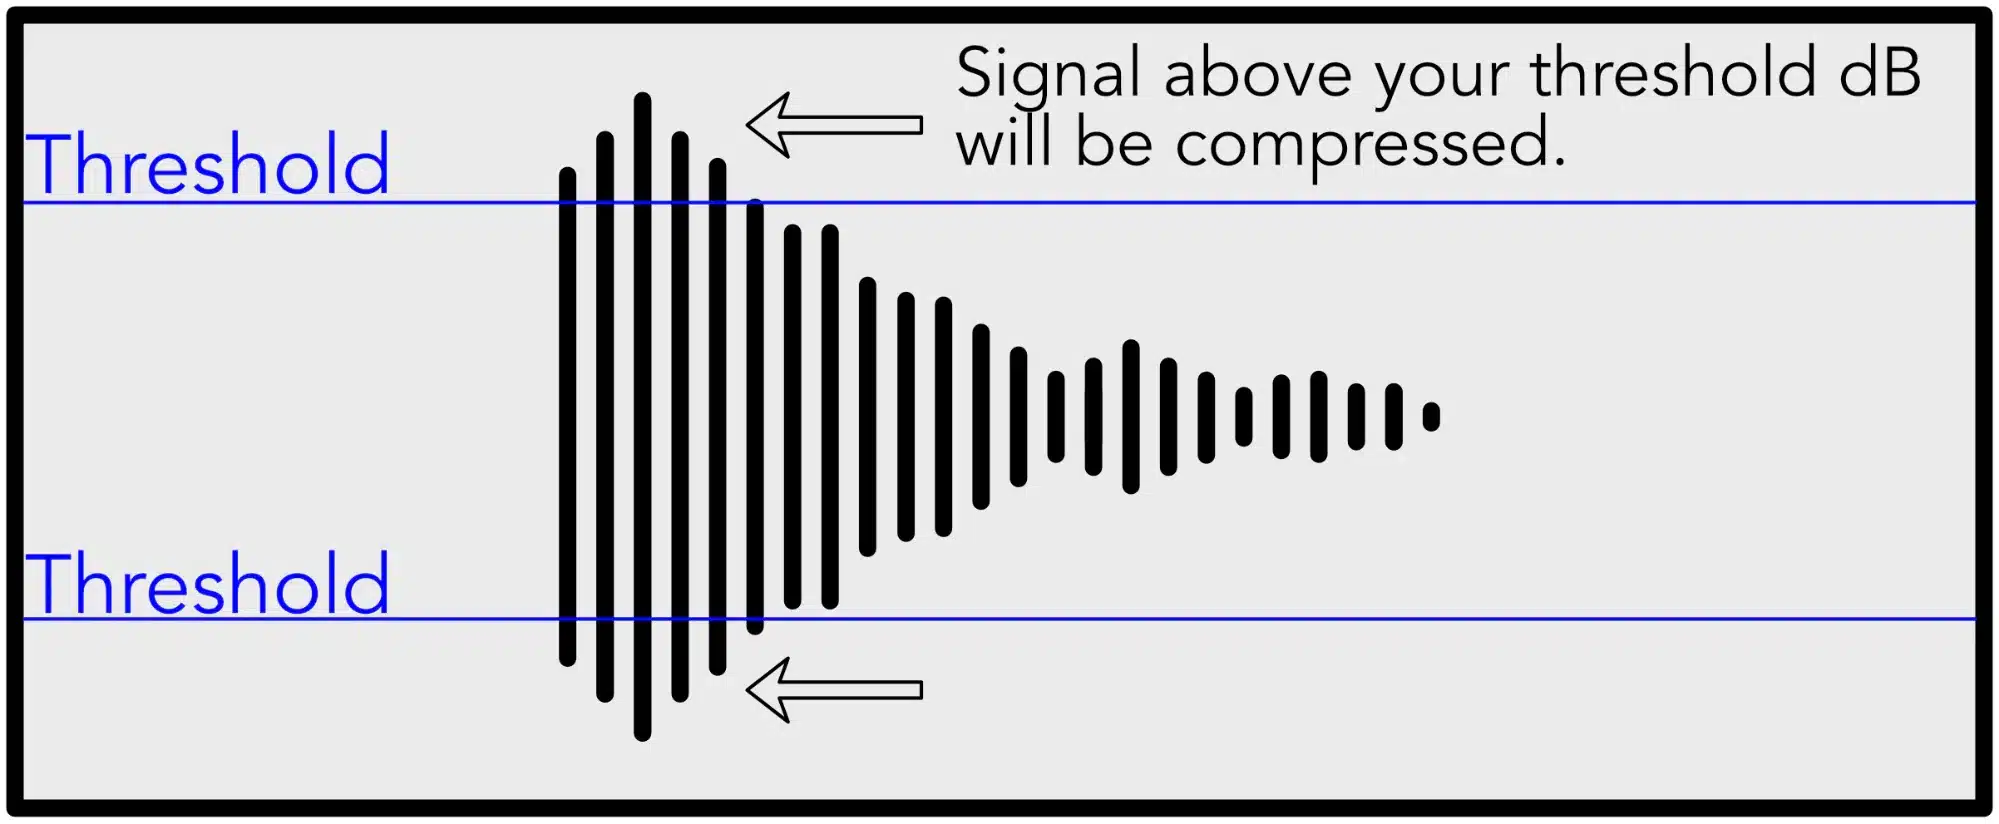
When you’re a producer, mastering the art of audio compression and different compressors (digital compressors/hardware compressors) is super important.
Audio compression is a fundamental technique used to balance the loudest and quietest parts of your track.
It ensures that each individual element is heard clearly without any one component overwhelming the mix or sounding like trash.
An audio compressor works by automatically reducing the volume of the loudest parts of an audio signal while leaving the quieter sections relatively untouched.
This process (dynamic range compression) allows you to compress the dynamic range, meaning the difference between the loudest and quietest parts is minimized.
For example, in a vocal track where the chorus might peak dramatically compared to the verses, a compressor applies just enough reduction to the loudest parts to maintain a more consistent level throughout.
Compressors are versatile tools that can be used on any element within a mix 一 from vocals to guitars to percussion and everything in between.
The essence of compressors and their effect lies in the main compression settings:
- Threshold
- Ratio
- Attack
- Release
The threshold, which is our main focus today, determines how loud the signal needs to be before compression is applied.
It sets the boundary between the loudest parts that need taming and the quieter parts that shouldn’t be messed around with.
Once the signal crosses this threshold, the compressor activates, applying gain reduction to only the parts of the signal that exceed this set point.
This allows the audio compressor to selectively target and compress the dynamic peaks to smooth out the overall sound.
Don’t worry if it sounds a little confusing, we’ll be breaking it all down throughout the article.
-
What is the Compression Threshold?
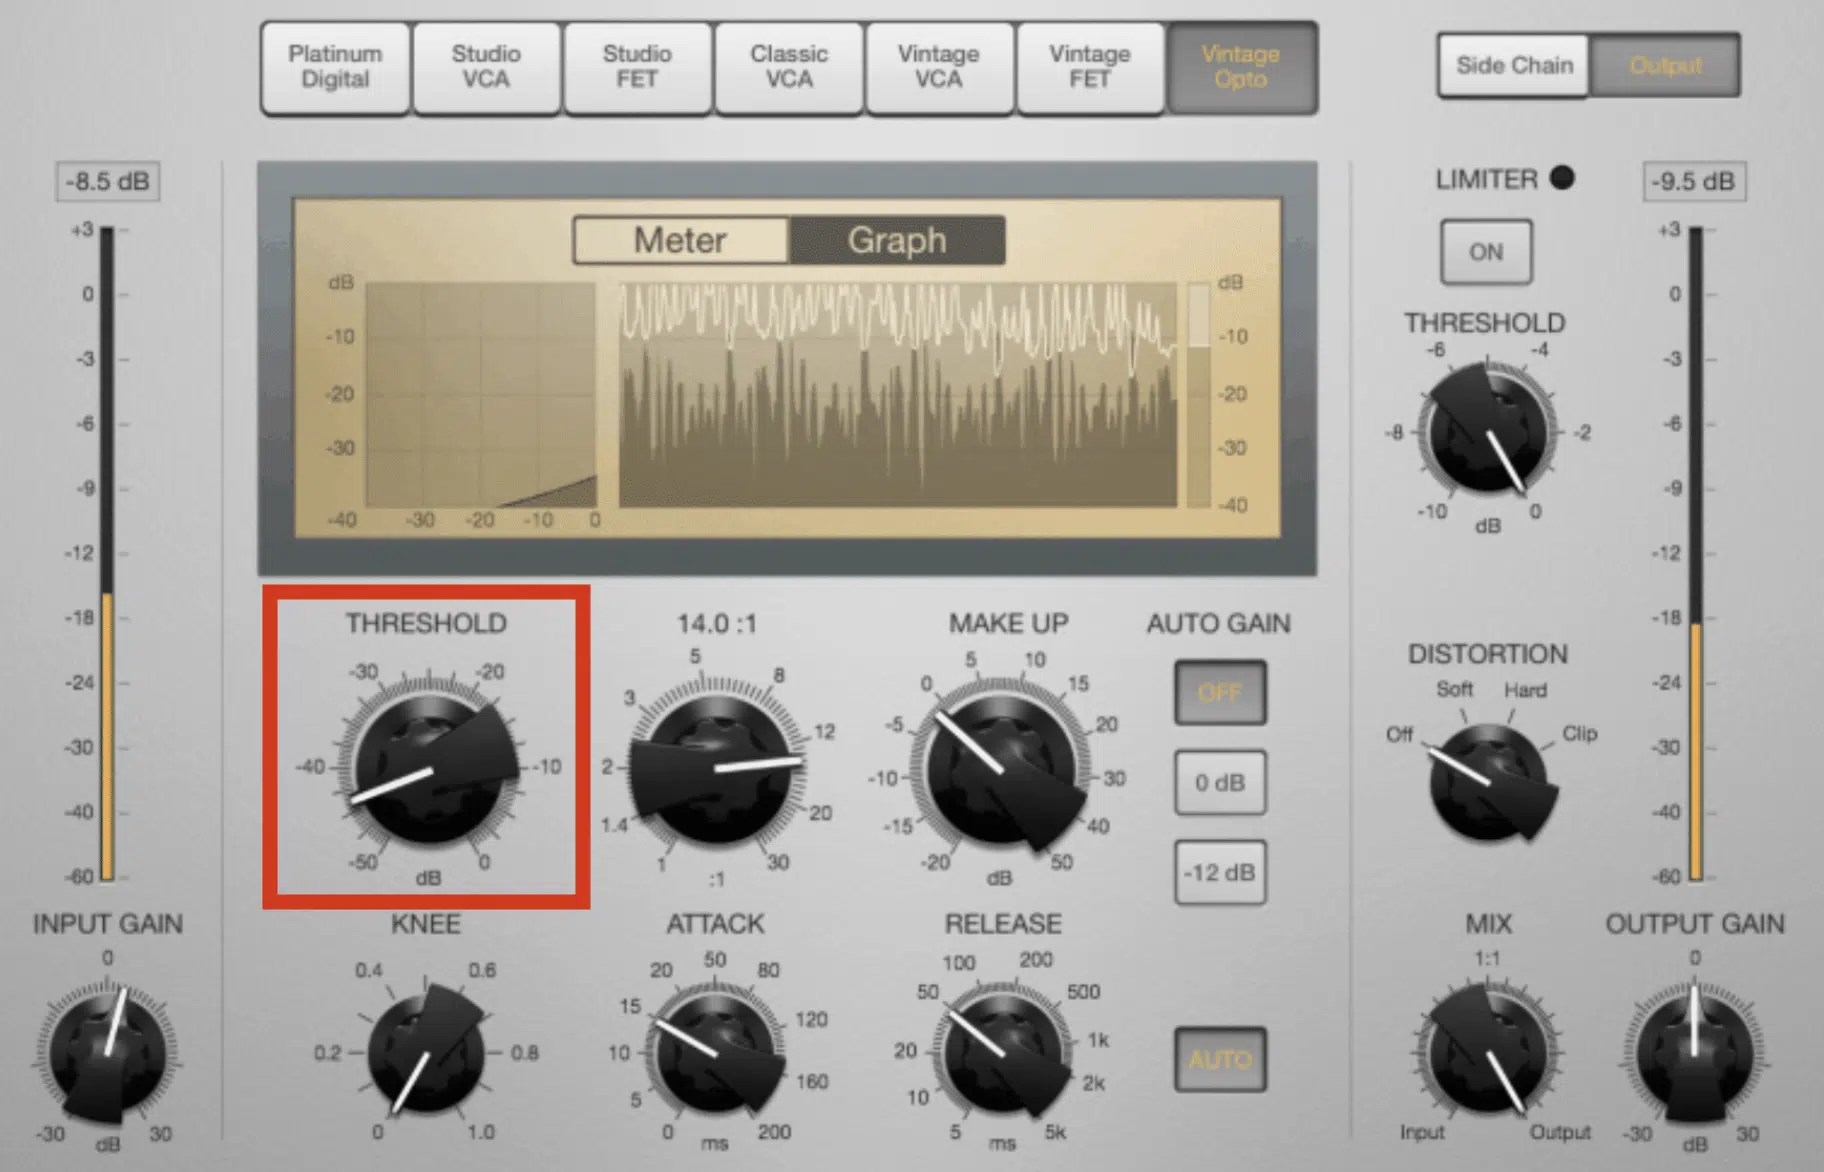
The compression threshold is a key control in an audio compressor that designates the decibel level at which compression begins to affect the audio signal.
Its essential for managing how loudly an audio signal can get before it is attenuated.
For example, setting a compressor threshold setting at -20 dB (dB = decibels) means that any part of the signal exceeding this level will trigger the compression process.
The precision of the compressor threshold setting is key for maintaining the integrity of your sound, especially with dynamic recordings where loudness varies like crazy.
A properly set threshold ensures that the compressor activates only to:
- Preserve the natural dynamics of quieter parts
- Control peaks that could lead to distortion/imbalance in the mix
Don’t worry, we’ll break down everything you need to know about the perfect compression threshold settings in the following sections.
With the knowledge you’ll learn, you’ll be able to ensure your mix is always up to industry standards and immediately makes people think “professional.”
Setting Your Compressor: A Step-by-Step Guide
Now that you have a basic understanding of compression, let’s break down how to set your audio compressors correctly. You’ll need to understand each setting’s role and how they combine to affect your overall sound. We’ll cover everything from selecting the right threshold setting to manipulating other key components like ratio and knee.
-
The Right Compression Threshold Setting
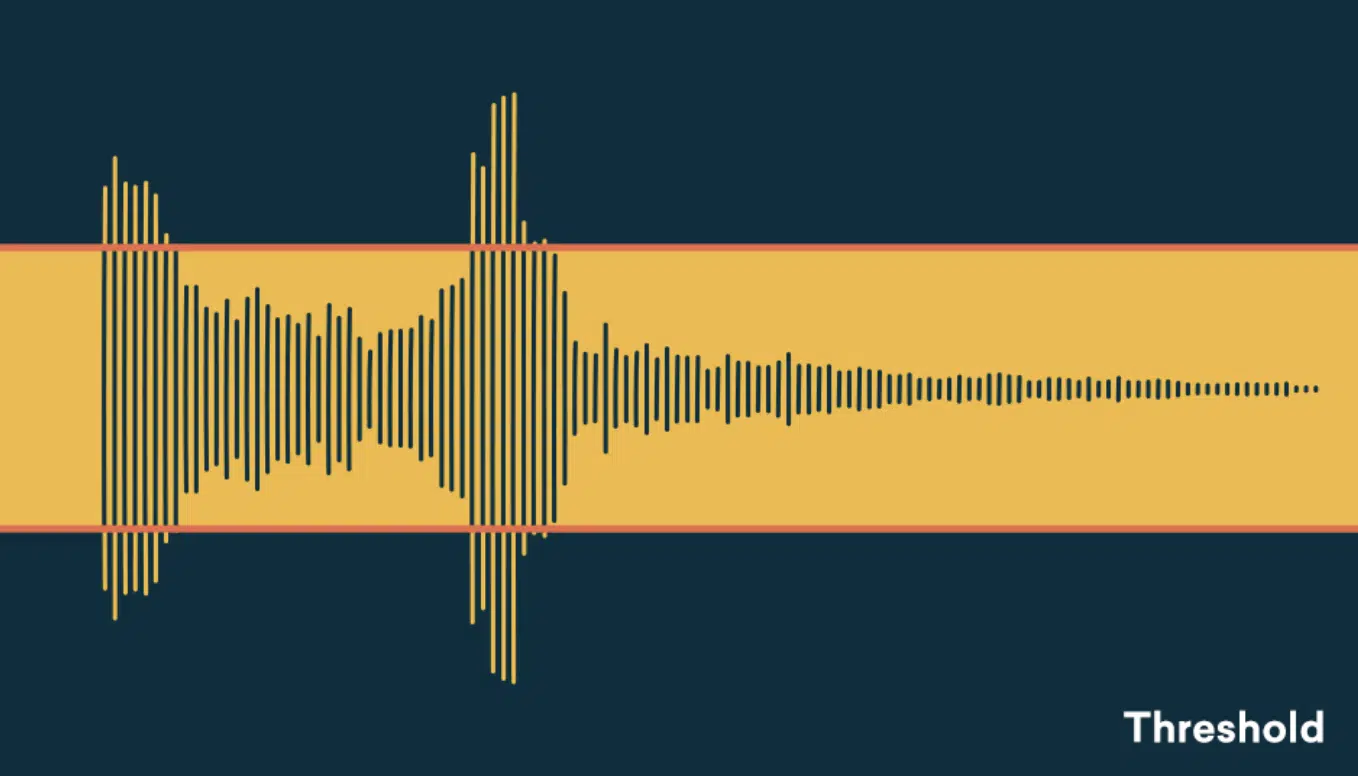
Selecting the ideal compression threshold setting involves understanding both the dynamic range of the source material and the desired impact on the audio signal.
You’ll want to start by identifying the loudest parts of your track as these are your main targets when setting the compression threshold.
For example, in a rock beat, the crashing cymbals during a chorus might be your focus.
So make sure to initially set your compressor threshold setting high, and then gradually lower it while the track plays 一 looking for when the compressor starts to engage.
Adjusting the compressor threshold requires careful listening…
The goal is to find a balance where the compressor acts on the audio just enough to achieve the desired leveling effect without destroying your track’s dynamic feel.
Just remember that the ideal compressor threshold setting will tame peaks while allowing quieter, expressive parts to breathe.
It will enhance your tracks overall texture (and, let’s be honest, appeal).
-
Adjusting Attack and Release Times
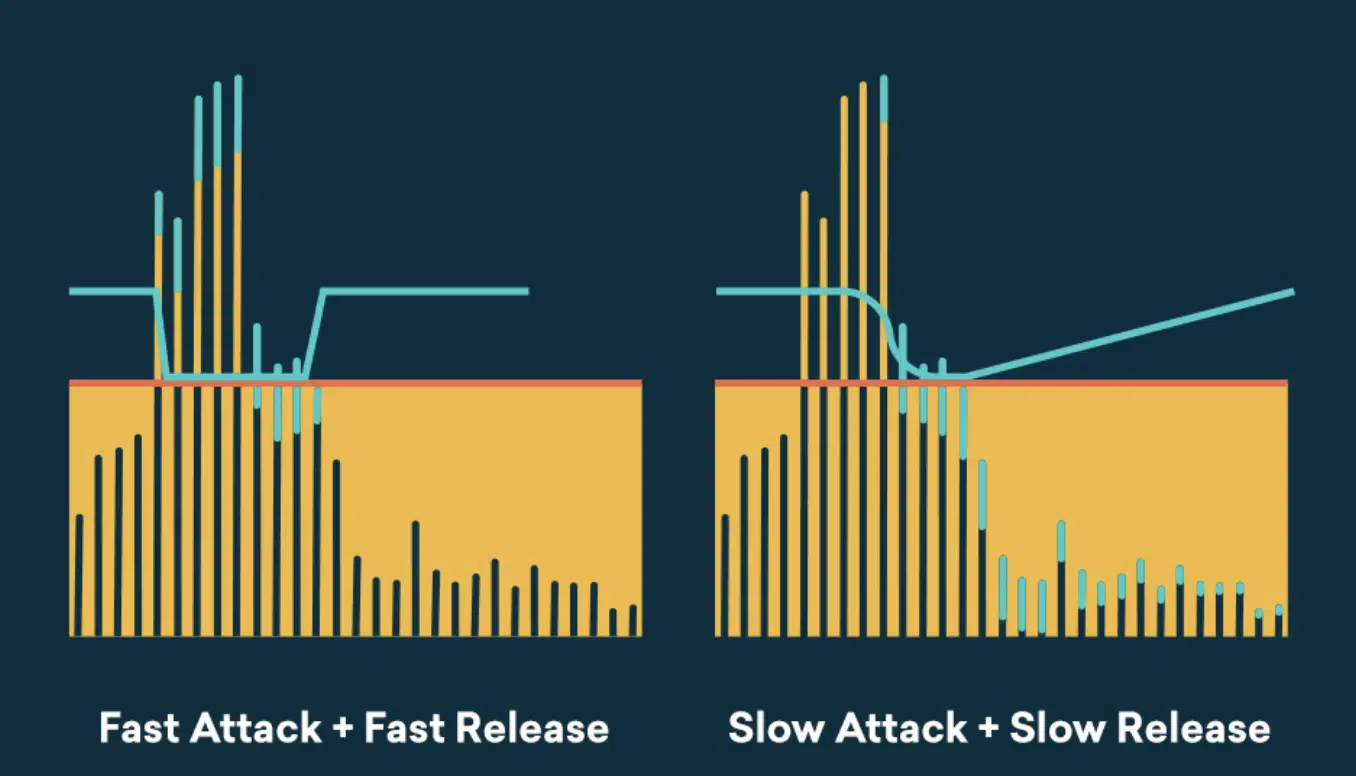
The attack time on a compressor dictates how quickly it clamps down on an audio signal once it exceeds the set threshold setting.
It’s measured in milliseconds and can greatly influence the impact and clarity of your sound as a whole.
A fast attack time (e.g., 10 ms) is ideal for aggressive compression on very transient sounds like snare drums.
This is because it’s important to immediately tame the sharp spikes in volume.
A slower attack time (e.g., 100 ms) allows the initial transient to pass through uncompressed to maintain the natural “punch” of a bass guitar or the attack of a piano note.
Release time determines how quickly the compressor stops affecting the signal after it drops below the threshold.
This setting helps in creating a natural decay of sounds 一 avoiding the unnatural cut-off of sustained notes for a more desirable sound.
For example, a vocal track might benefit from a medium release time (around 200-300 ms), which allows the one compressor to ease off gently as the note or phrase ends.
This will ensure smooth, continuous vocal lines that people really listen to carefully and seriously love.
NOTE: Tweaking the release time to the tempo and rhythm of the music can prevent pumping effects and maintain rhythmic harmony.
But remember, it’s not about exact numbers or which compressors used, it’s more about what your unique track requires.
-
Choosing the Correct Ratio
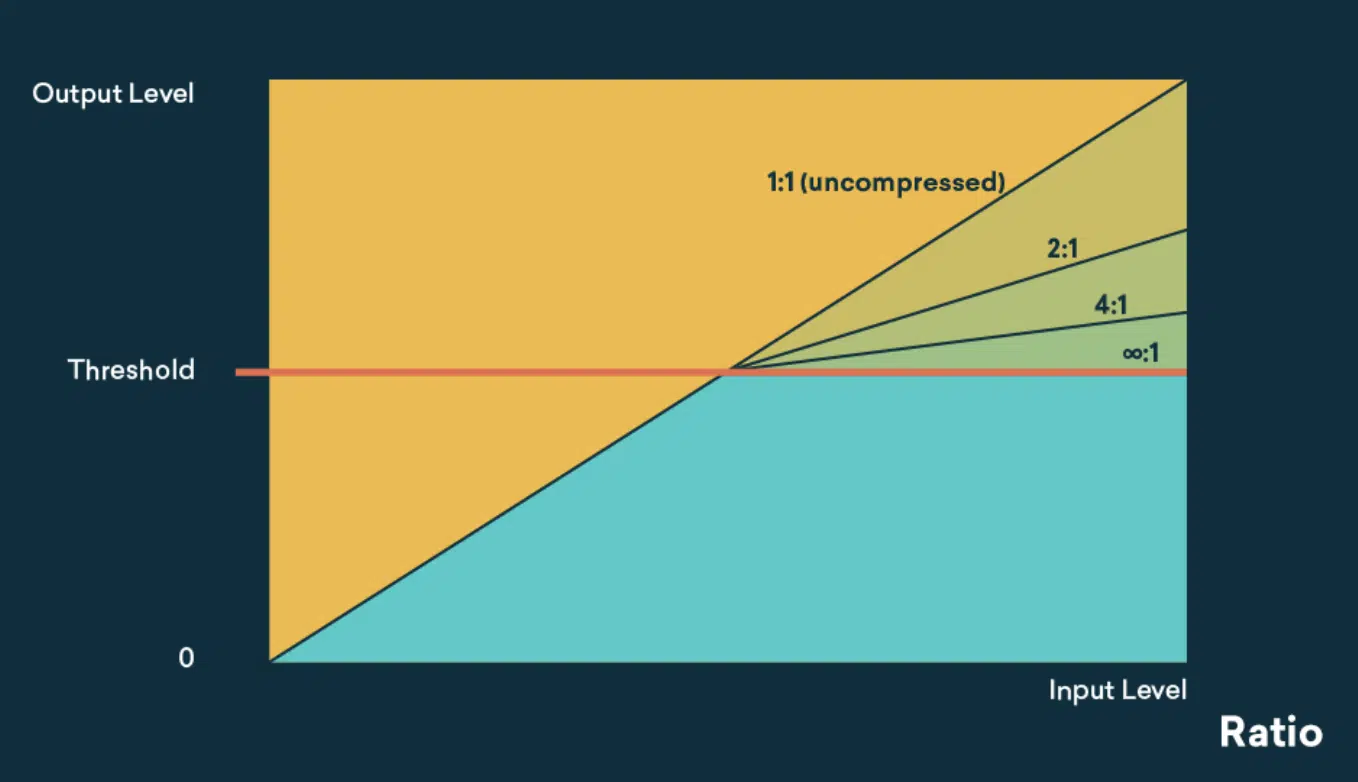
The ratio setting on a compressor determines how much the audio signal is reduced once it exceeds the threshold.
This is expressed as a ratio of input to output (e.g., 4:1).
This indicates that for every 4 decibels the input signal exceeds the threshold, the output signal will only increase by 1 dB; simple enough, right?
Choosing the right ratio is crucial for the musical genre (like hip-hop or trap) and the specific track element you are compressing (like vocals/drums).
For example, for a vocal track in pop music, you might use a moderate ratio of 3:1.
This will ensure your vocals are consistently present in the mix but still retain some natural dynamic range.
For more drastic compression, such as in a heavily layered EDM track where you need to tightly control the dynamic range for a more uniform sound, higher ratios (e.g., 8:1 or higher) are better.
NOTE: These settings are super effective in managing the explosive transients of synth leads or kick drums that may dominate the mix.
Experimentation is key, as the ratio will greatly affect the energy and drive of the music, with higher ratios leading to a more controlled but potentially less dynamic sound.
-
What Exactly is Make-up Gain?
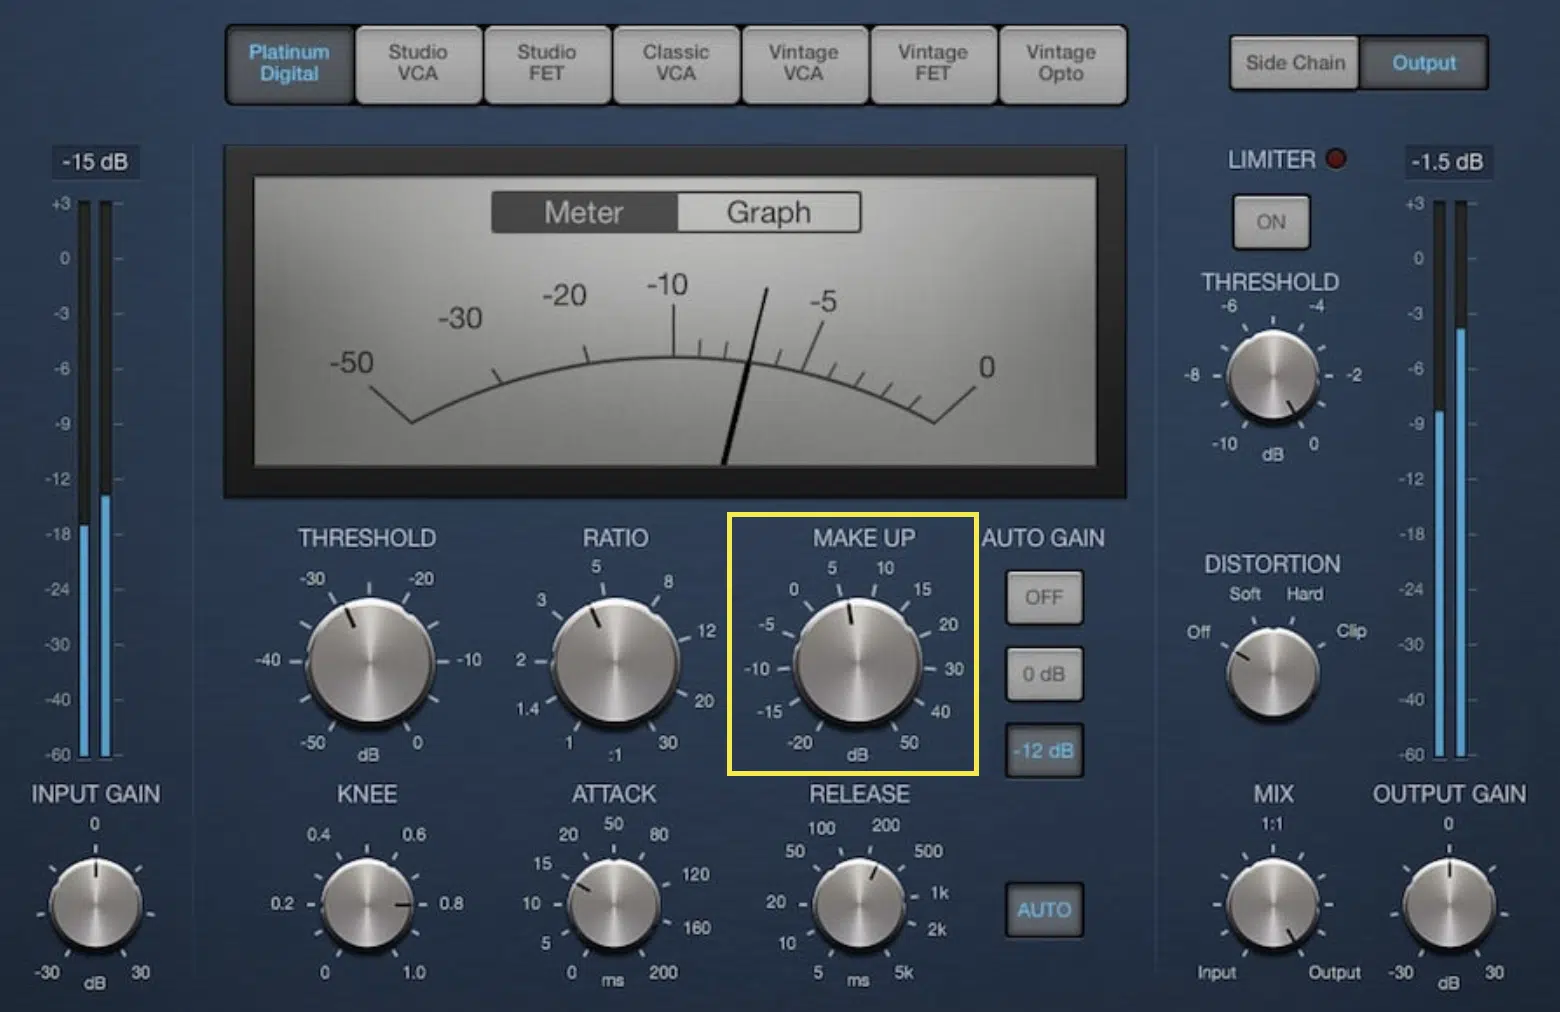
When talking about any compression threshold setting, make-up gain is going to be mentioned as well, so you’ll need to know exactly what it does/means.
Make-up gain on a compressor (like a FET compressor emulation) is a super important feature that compensates for the gain reduction applied during compression.
As we discussed, when you compress an audio signal, the primary goal is to reduce the dynamic range by lowering the volume of the louder parts.
This process naturally decreases the overall volume of the signal, which is where make-up gain comes into play.
It allows you to adjust the output gain to restore the signal to the ideal volume level so your track maintains its presence within the mix.
For example, if you’ve applied compression to tame the dynamic spikes in a vocal track, make-up gain will help bring the overall volume back up to match the uncompressed parts of the track.
Or, to stand out (still in a cohesive way) amongst the other elements in your mix.
Properly adjusting make-up gain is absolutely non-negotaible when it comes to maintaining the energy of the track after compression, so don’t underestimate it.
It’s not just about returning the signal to its original loudness 一 it’s about refining the output to enhance the mix’s overall balance and clarity.
-
Soft Knee vs. Hard Knee: When to Use Each
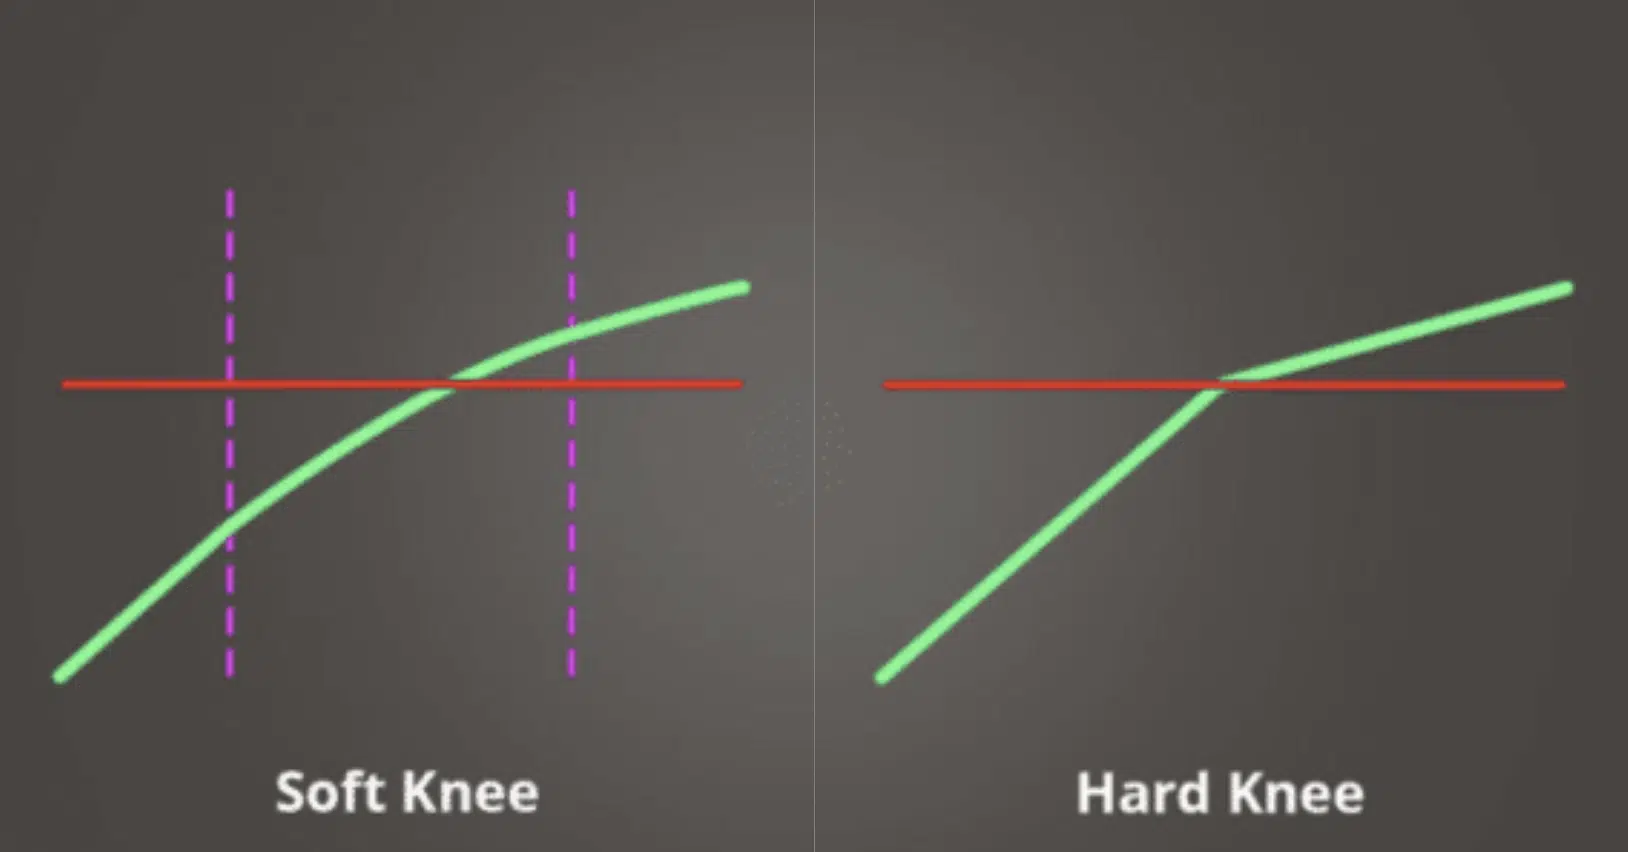
The knee setting on a compressor adjusts how the compressor (like a FET compressor) transitions from no compression to full compression once the signal level crosses the threshold level.
- A soft knee 一 Provides a gradual increase in compression so it’s less noticeable (preserving the natural expression).
- A hard knee 一 Once the compressor’s threshold is crossed; immediate compression.
Depending on the material, you might switch between a soft knee and a hard knee.
For example, when mixing vocals or strings where subtlety is key, a soft knee can smoothly integrate compression without creating sudden changes in sound dynamics.
On the other hand, for tracks with distinct rhythmic elements like kick drums or electric bass, a hard knee helps maintain a consistent level that cuts through the mix effectively.
Again, it’s all about your unique track and what it will require… I hope you’re starting to see the pattern here.
Optimizing Compression for Different Audio Signals
When you’re tweaking your compressor’s threshold and other settings, it’s important to consider the specific element of your mix. Each unique one requires different compression techniques. So, let’s look at how compression settings should be adjusted for vocals and drums 一 two key elements that can make or break your track.
-
Vocals
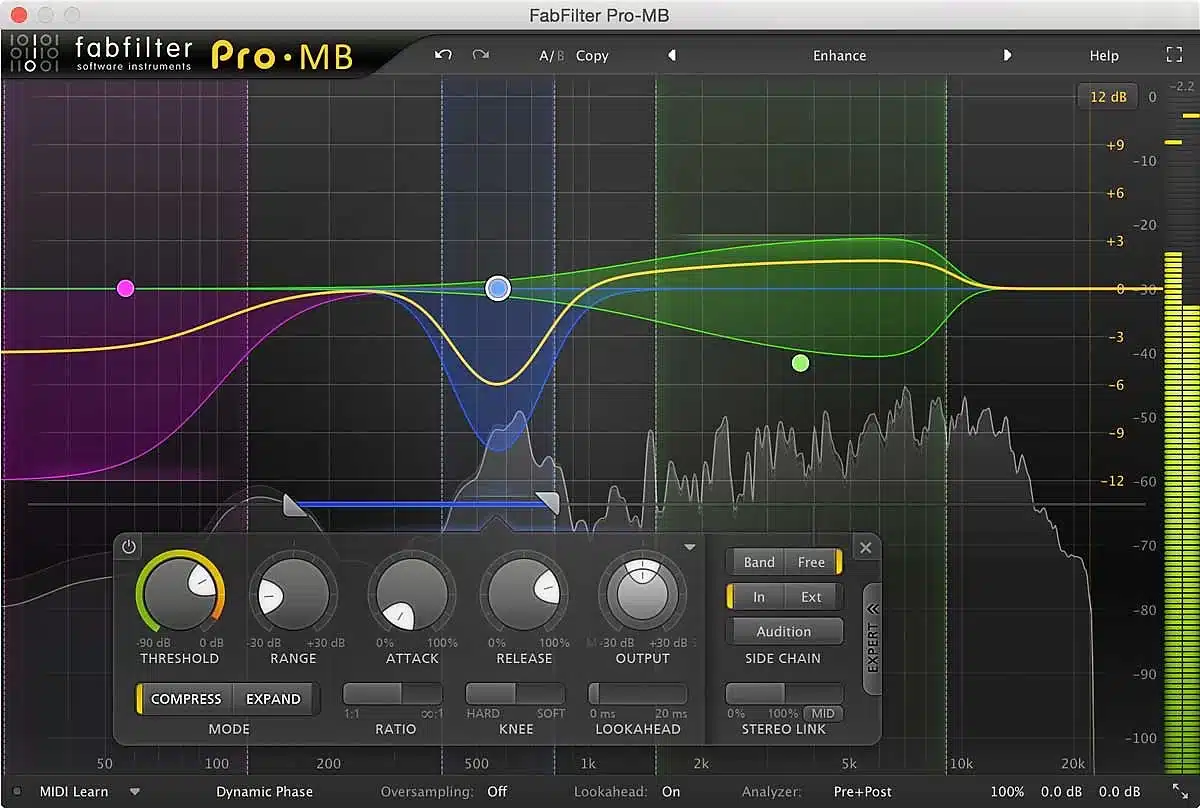
When compressing vocals, it’s best to apply a moderate compressor threshold with a ratio around 2:1 to 4:1.
This makes sure that your vocal sits well in the mix without varying too much in volume, yet retains its natural dynamics and expressiveness.
Pay attention to the attack and release times…
- A too-fast attack can make the vocal sound thin and lifeless.
- A too-slow release can make it sound unnatural and compressed (think, tube sound).
Aim for a natural sounding compression that makes your vocals sound super smooth and consistent.
Like all other elements that you’re going to be compressing, it’s a delicate balance that requires skill and practice.
-
Drums
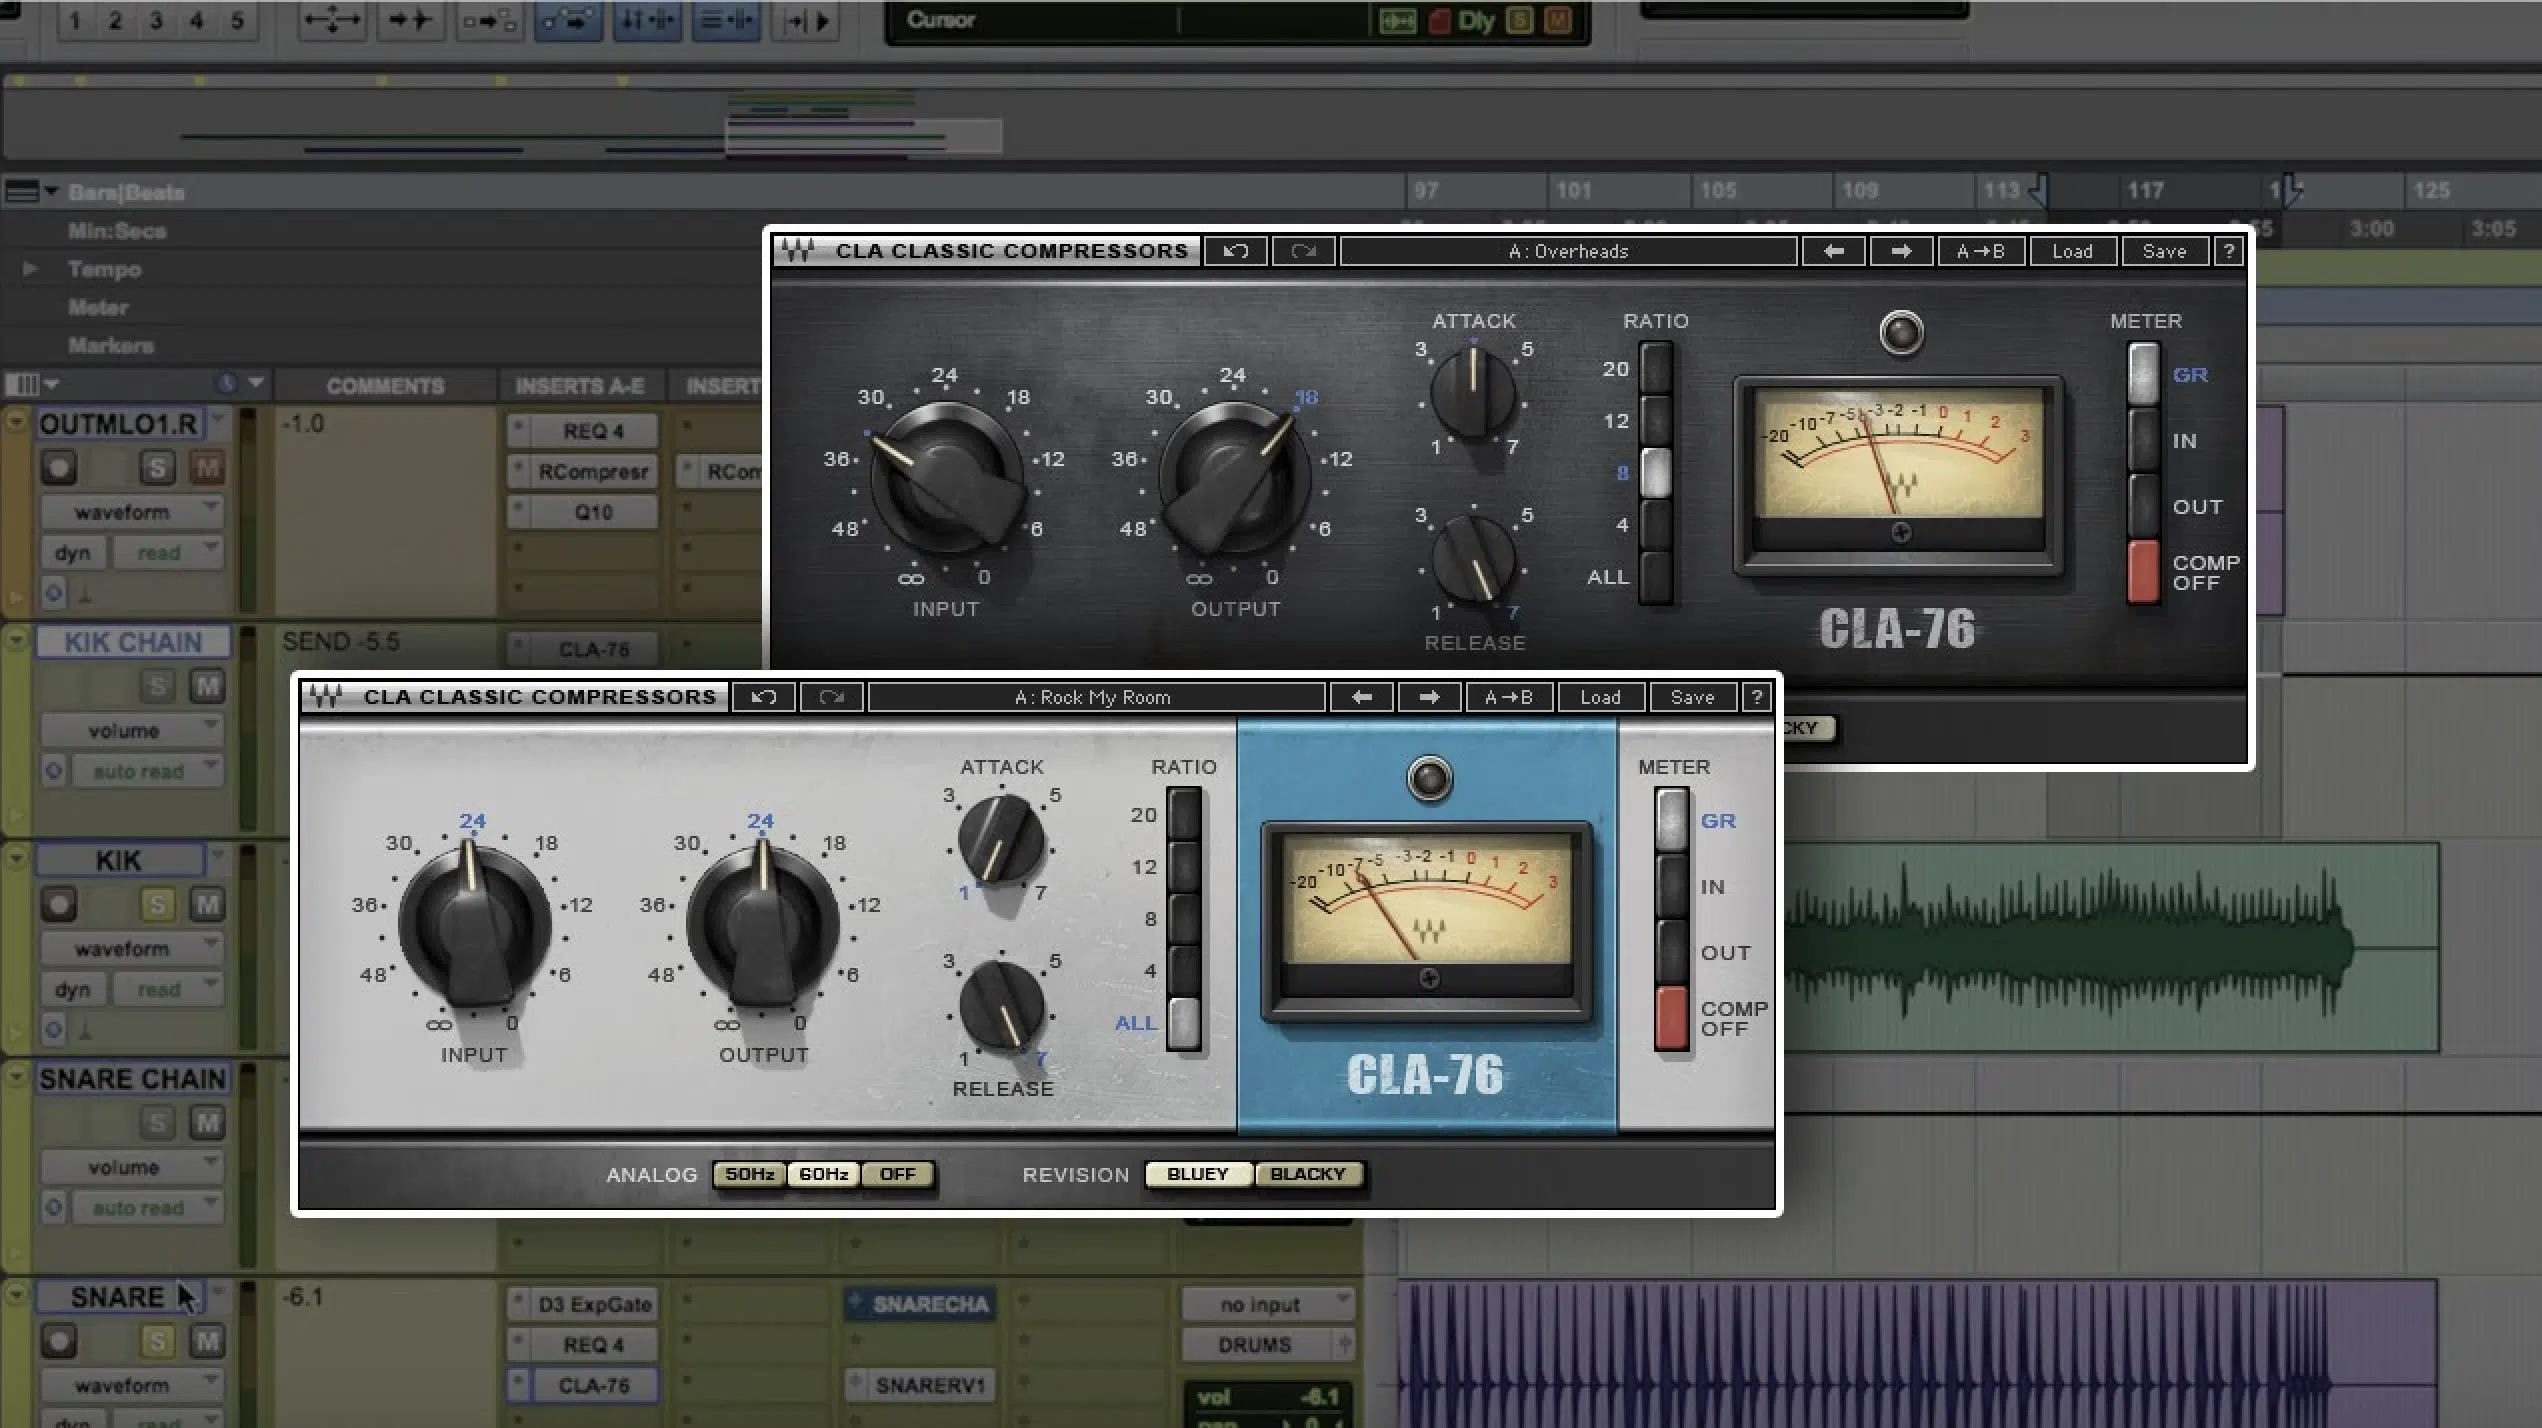
Drums, being famously dynamic and transient-heavy, will benefit from a more tailored approach to compression.
For elements like kick drums and snares, a fast attack time may be necessary to control the sharp peaks.
Depending on the style of music, drums might also benefit from a higher ratio and a lower threshold to ensure that the energy and drive of the beat are maintained without overpowering the mix.
NOTE: Parallel compression can be especially effective here because it allows the drums to knock while maintaining their dynamic range.
Advanced Compression Techniques
Now, as a bonus, let’s wrap things up with some more advanced compression techniques to further enhance your mix (for when you feel confident enough).
-
Parallel Compression for Dynamic Control

Parallel compression, or New York compression, involves mixing a dry (uncompressed) signal with a fully compressed version of the same signal.
This technique allows you to maintain the natural dynamics of the audio while still benefiting from the volume control and punch that compression brings to the table.
To apply parallel compression like a pro, start with a duplicate of your original track and apply heavy compression.
Adjust your compressor’s threshold level to a lower setting with a high ratio and fast attack to really squash the signal peaks.
Then, mix this heavily compressed track back with the original.
The result is enhanced overall loudness and presence without sacrificing your track’s dynamic expression; win-win.
-
Sidechain Compression for Clarity
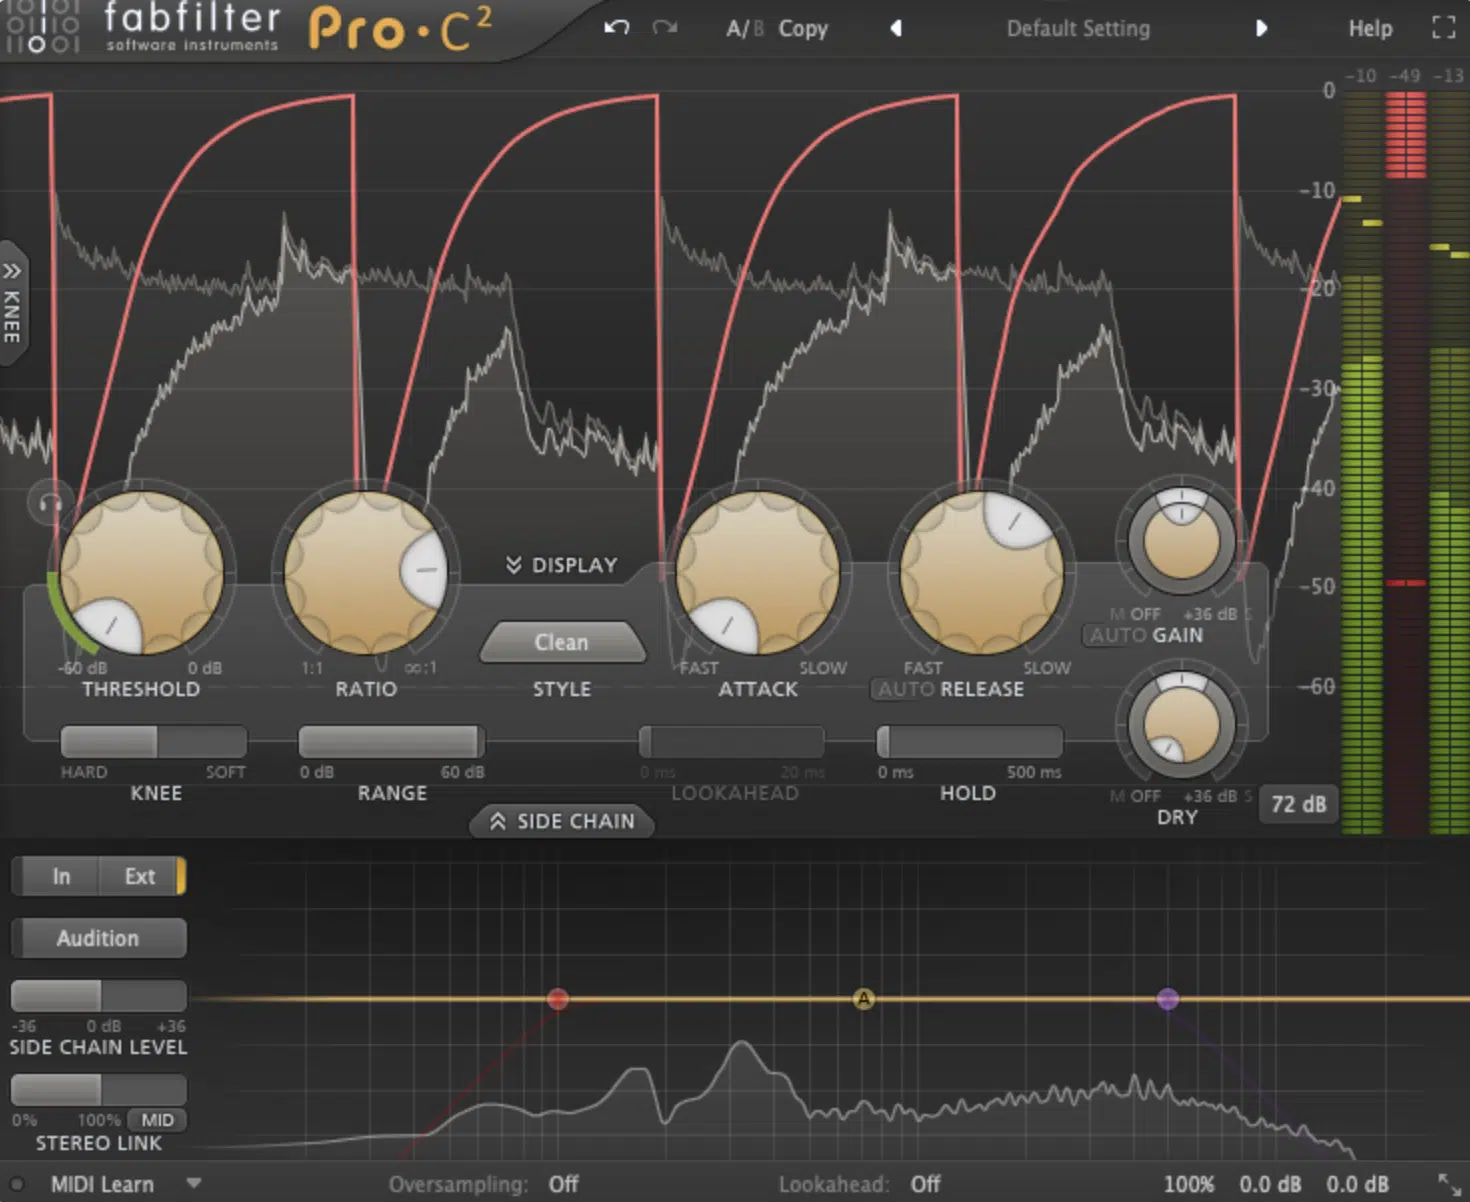
Sidechain compression is another advanced technique where the compressor is triggered by an external audio signal rather than the track it’s actually applied to.
This is often used in dance music to make the bass drum punch through a bassline every time it hits.
To set up sidechain compression, simply select your kick drum as the input signal for the compressor on your bass track.
Then, tweak the compressor threshold so that every time the kick hits, the bassline ducks 一 making room for the kick to stand out.
This not only clears up muddiness in your mix but also adds a rhythmic, mesmerizing effect that will really captivate your listeners and shut the dancefloor down.
Side note, if you want to know all about the best sidechaining plugins available, we’ve got you covered.
-
Common Mistakes and How to Avoid Them
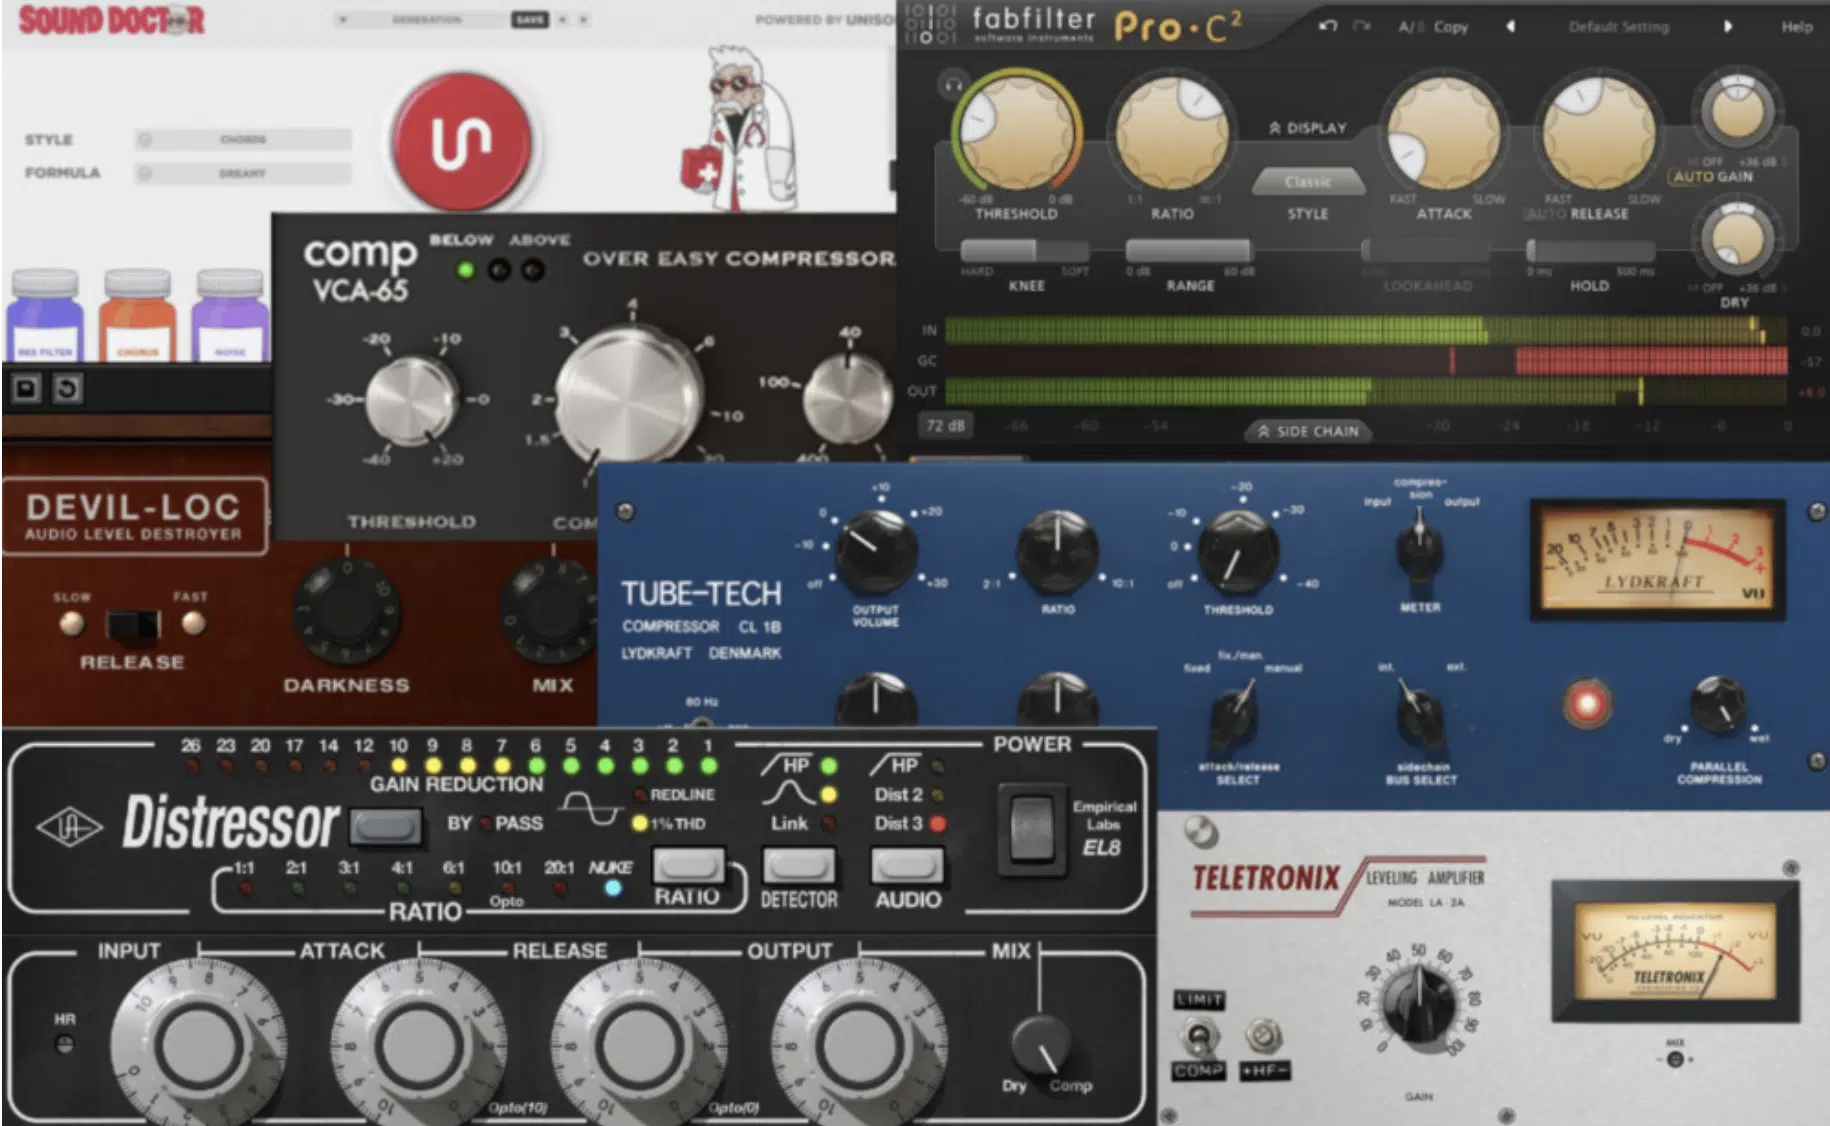
A common compression mistake I hear way too often is setting the attack time too fast.
This can lead to a loss of punch and impact, especially in percussive elements, so make sure to avoid this and always start with a slower attack time.
Then, simply gradually decrease this point until you find a setting that preserves the initial transients (which we talked about, in detail, earlier).
Over-compressing the mix is another frequent mixing mistake.
While it might seem that applying excessive compression can make your mix louder and more powerful, it actually crushes dynamic range and removes life from your music.
So, use make-up gain wisely to restore volume after compression rather than relying only on compressor threshold and ratio adjustments.
Finally, not regularly comparing the compressed and uncompressed signals can lead you to lose perspective on what the compression you hear is actually doing to your sound.
NOTE: Regular A/B testing during the mixing process helps ensure that the compression enhances rather than degrades the overall quality of your audio.
Compression Threshold Settings: Final Thoughts
Compression and the correct compression threshold settings can completely transform the quality of each beat you produce.
If done correctly, it can make your tracks sound clean, mean, and pristine, enhancing both the clarity and impact of your mix.
However, if done sloppily or not at all, your tracks will seriously lack balance and dynamism, and nobody wants that.
Mastering the right compression threshold settings ensures that every element in your track fits perfectly within the overall mix.
It ensures that each detail/element shines without overshadowing the rest.
To further enhance your mix and your skills, you’ll need the most professional, show-stopping sounds around, am I right?…
Well, that’s where these highly-renowned Free Percussion Samples come into play, containing 20 legendary samples designed to make your drums dominate.
These samples are not only diverse and rhythmically engaging but are polished, and perfectly processed as well 一 compression techniques included, of course.
Now that you have a solid understanding of compression threshold settings, it’s time to go practice your compression skills.
Experiment with these settings across different tracks to truly pin down the correct compression threshold settings for each unique genre, element, and intended goal.
Your tracks deserve the best, and mastering compression is the first step to delivering top-notch audio quality every single time.
Until next time…


Leave a Reply
You must belogged in to post a comment.