Logic Pro is one of the most powerful and versatile digital audio workstations (DAWs) in the game, hands down.
It can help you compose, record, edit, and produce professional-level tracks, whether you’re working on a complex arrangement or a simple beat.
However, the last thing you want to do when you’re in the groove is waste time hunting through menus or clicking endlessly to perform basic tasks.
That’s why we’re breaking down all of the essential Logic Pro shortcuts and key commands you need to know to speed up your workflow and stay focused.
This includes Logic Pro shortcuts like:
- Creating a new project quickly ✓
- Opening the Piano Roll with a single key ✓
- Looping specific regions on the fly ✓
- Reversing audio regions for creative effects ✓
- Easily muting multiple tracks at once ✓
- Setting up automation fast ✓
- Organizing your session with track stacks ✓
- Copying and pasting channel strip settings ✓
- Quickly navigating between markers and tracks ✓
- Global commands, global commands, global commands ✓
- Many, many more Logic Pro shortcuts ✓
By the end of this guide, you’ll know all the Logic Pro shortcuts that can save you hours of time and make your workflow far more efficient.
This way, you’ll be able to create, edit, and mix your music with ease 一 spending less time on technical tasks and more time focusing on your creativity.
Plus, with each key command you learn, you’ll gain more control over Logic Pro so you can work faster and smarter.
So, let’s dive right in so you can get to know all of the most important Logic Pro shortcuts like the back of your hand…
Table of Contents
- 1. ⌘+⌥+N: Create New Tracks
- 2. P: Open Piano Roll
- 3. Command + U: Set Locator Point by Regions/Events and Enable Cycle
- 4. Command + Z: Undo Last Action
- 5. Command + ⇧ + D: Create Track Stack
- 6. M: Toggle Channel Strip Mute
- 7. Command + Shift + T: New External MIDI Track
- 8. Command + 6: Open Audio File Editor
- 9. Command + N: New Project
- 10. Control + Command + O: Toggle Current Track Automation
- 11. Option + C: Show/Hide Color Selection Window
- 12. Command + R: Repeat Region/Events
- 13. X: Open/Close Mixer
- 14. Option + Shift + M: Mute All Selected Tracks
- 15. Control + Shift + S: Save As
- 16. Option + Command + P: Copy Plug-in Setting
- 17. Command + Option + S: Show/Hide Smart Controls
- 18. Shift + Command + I: Import Audio
- 19. Option + Command + C: Copy Channel Strip Setting
- 20. Option + Command + V: Paste Channel Strip Setting
- 21. Command + Shift + C: Capture Recording
- 22. Shift + Command + N: Create New Auxiliary Channel Strip
- 23. Command + F: Flex Mode On/Off
- 24. Command + J: Join Regions
- 25. Command + E: Export Region as Audio File
- 26. Command + L: Loop Selected Region
- 27. Command + K: Show/Hide Musical Typing
- 28. Command + Left Arrow: Go to/Select Previous Track
- 29. Command + Right Arrow: Go to Next Track
- 30. Control + Option + N: Set Nudge Value, Mute, and Solo Selected Tracks
- 31. Option + Left Arrow: Go to Previous Marker
- 32. Command + Shift + Up Arrow/Down: Move Track Up/Move Track Down
- 33. Shift + Command + M: Create MIDI Region
- 34. Command + Option + P: Show/Hide Global Tracks
- 35. Control + Option + R: Reverse Audio Region
- 36. Command + 5: Open Score Editor
- 37. Control + Option + Command + P: Toggle Automation Quick Access
- 38. Command + Option + R: Open Region Inspector
- 39. Command + Shift + Option + T: Convert MIDI Region to Audio File
- Logic Pro Shortcuts: Final Thoughts
1. ⌘+⌥+N: Create New Tracks
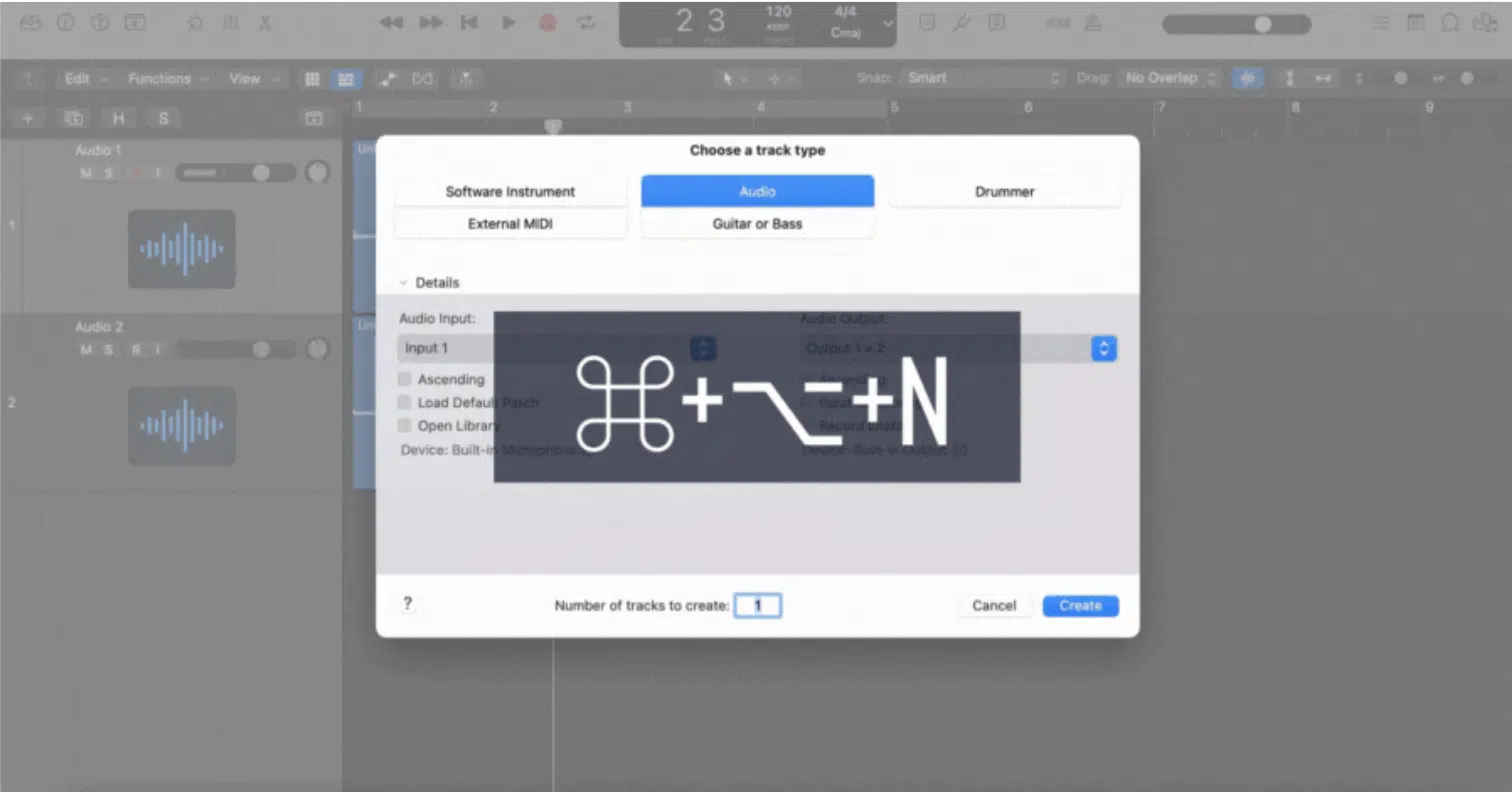
In Logic Pro, creating new tracks is a frequent and essential task, and the ⌘+⌥+N shortcut speeds up this process significantly.
This key command opens the “Create New Tracks” window so you can add audio tracks, software instrument tracks, or MIDI tracks without manually navigating through menus.
Whether you’re starting a new project or layering multiple elements, this Logic Pro shortcut is perfect for quickly building your session.
For example, if you need to record vocals, add a drum pattern, or integrate a virtual instrument, simply use ⌘+⌥+N to get the exact track type you need in seconds, keeping your creative flow uninterrupted.
2. P: Open Piano Roll
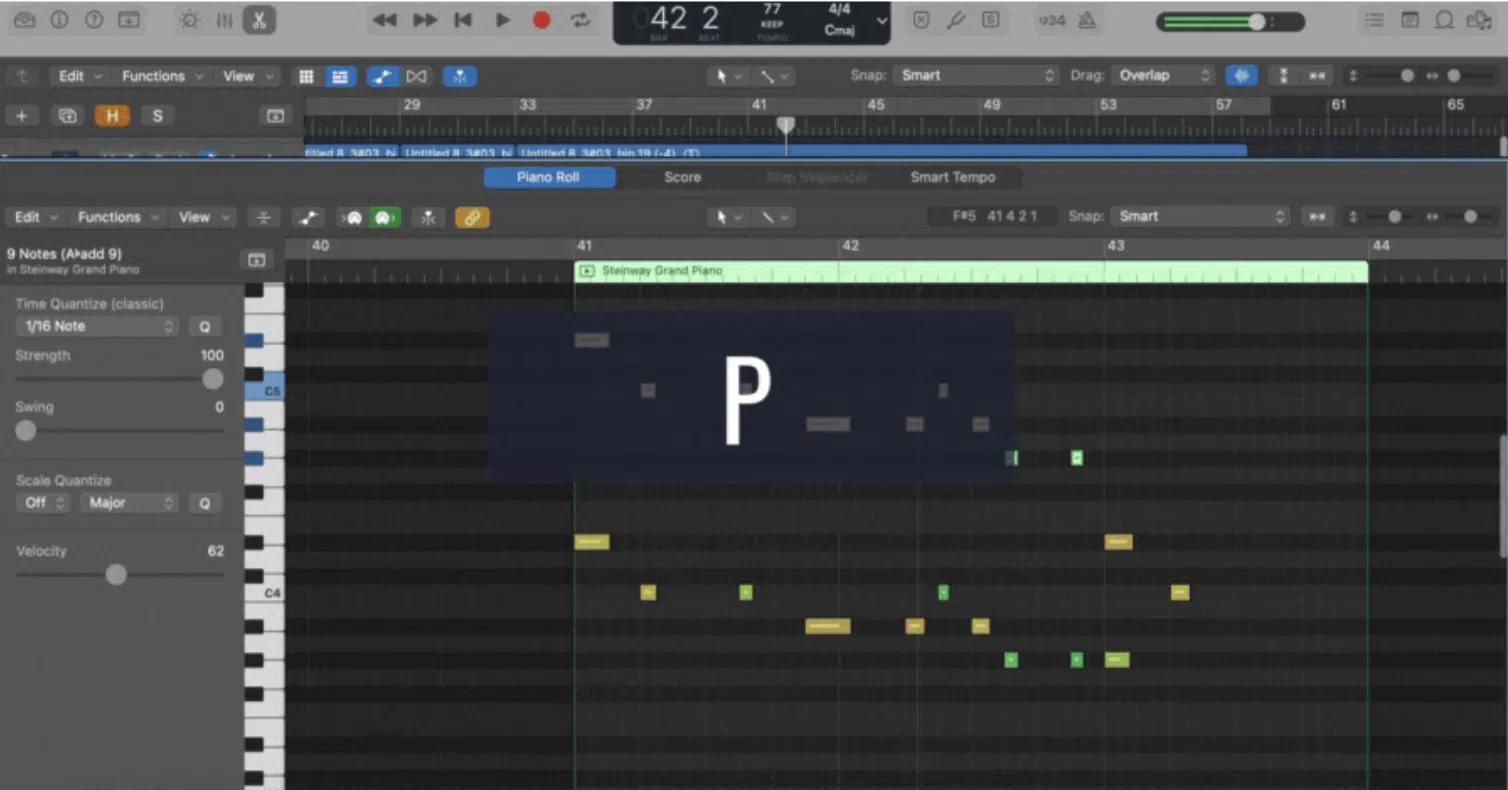
The piano roll is where you’ll spend a lot of time fine-tuning your MIDI notes, so the more Logic Pro shortcuts you know about it will surely help.
Hitting P brings it up immediately so you can tweak melodies or fix any out-of-place notes on the fly.
For example, if you’re building a chord progression and need to adjust the timing, this shortcut saves you from having to hunt through the interface.
It’s especially useful when you’ve got multiple tracks running and need quick access to detailed MIDI editing.
3. Command + U: Set Locator Point by Regions/Events and Enable Cycle
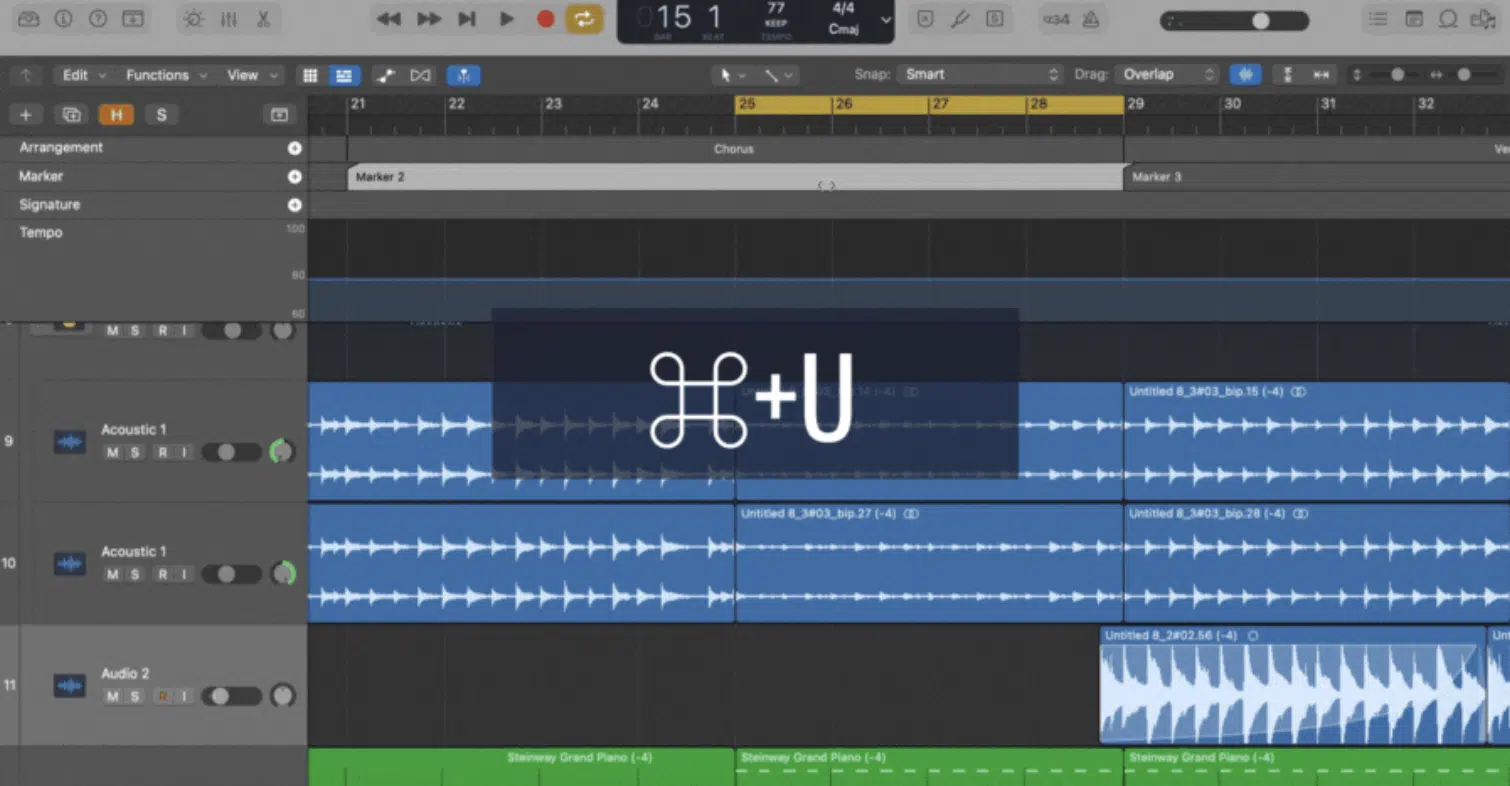
When working on loops or sections of a track, Command + U lets you cycle through specific regions or events 一 looping them until you’ve perfected every detail.
This key command is super helpful when you’re trying to lock in a drum pattern or melody, letting you focus entirely on one part of your project.
It’s a go-to shortcut for keeping your creative flow without any unwanted interruptions.
4. Command + Z: Undo Last Action
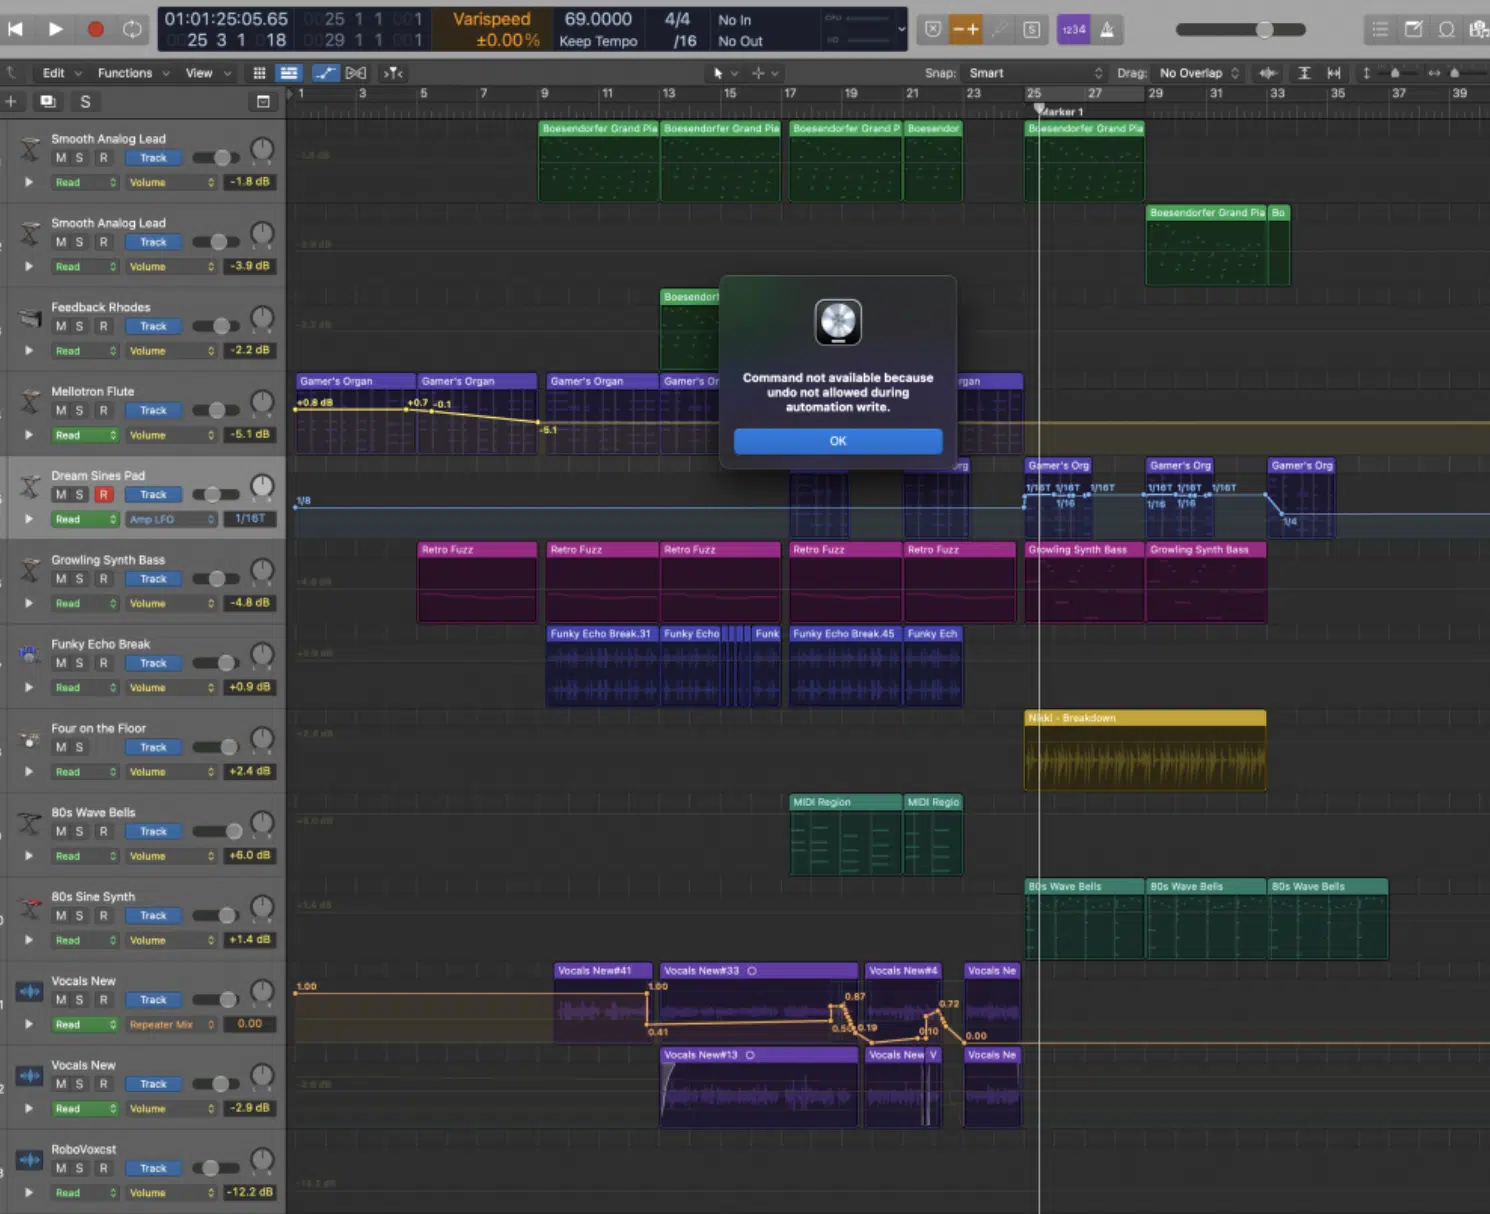
We all make mistakes, there’s no getting around it, and that’s where Command + Z comes in, acting as your safety net for things like:
- Accidentally deleting an audio region
- Moving a clip
- Changing a setting in the channel strip
It keeps your workflow smooth, especially in high-pressure moments when you’re juggling lots of ideas and it’s all coming at you at lightning speed.
Bottom line, having a quick undo is key in any music production environment, so don’t overlook the importance of basic Logic Pro shortcuts like this one.
5. Command + ⇧ + D: Create Track Stack
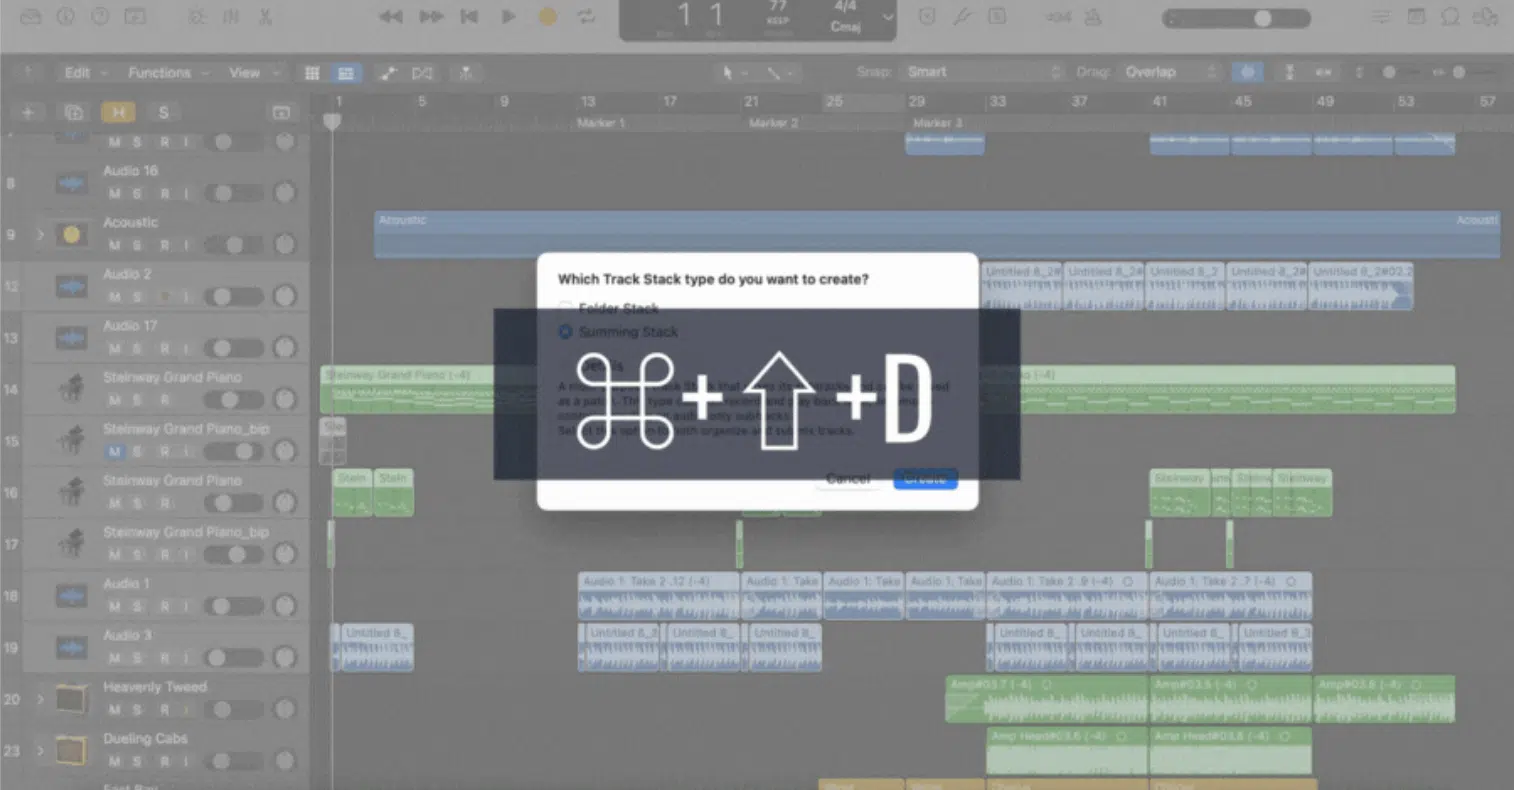
Organizing your project is super important, especially when you’re working with multiple tracks because things can get a little overwhelming.
With Command + Shift + D, you can create a track stack 一 grouping several tracks together for easier management.
This is super useful when you have layered instruments or vocals that need the same effects or volume adjustments.
It’s a game-changer for producers who want to simplify their mix in Logic Pro.
Side note, if you want to learn everything about track stacks and other Logic Pro breakdowns, we’ve got you covered.
6. M: Toggle Channel Strip Mute
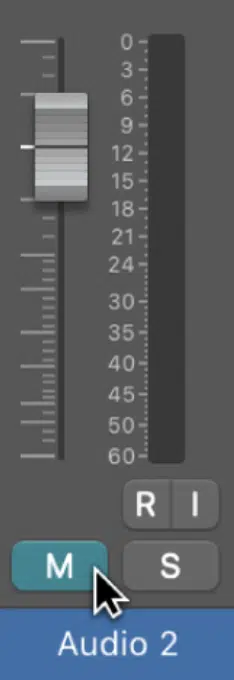
If you need to mute a track without disrupting the rest of your session, M allows you to toggle channel strip mute on any selected track you choose.
For example, if you’re working on drums and need to mute the bass real quick to focus on the rhythm, this shortcut makes it quick and easy.
It’s a small but extremely important tool for keeping your mix organized and focused.
7. Command + Shift + T: New External MIDI Track
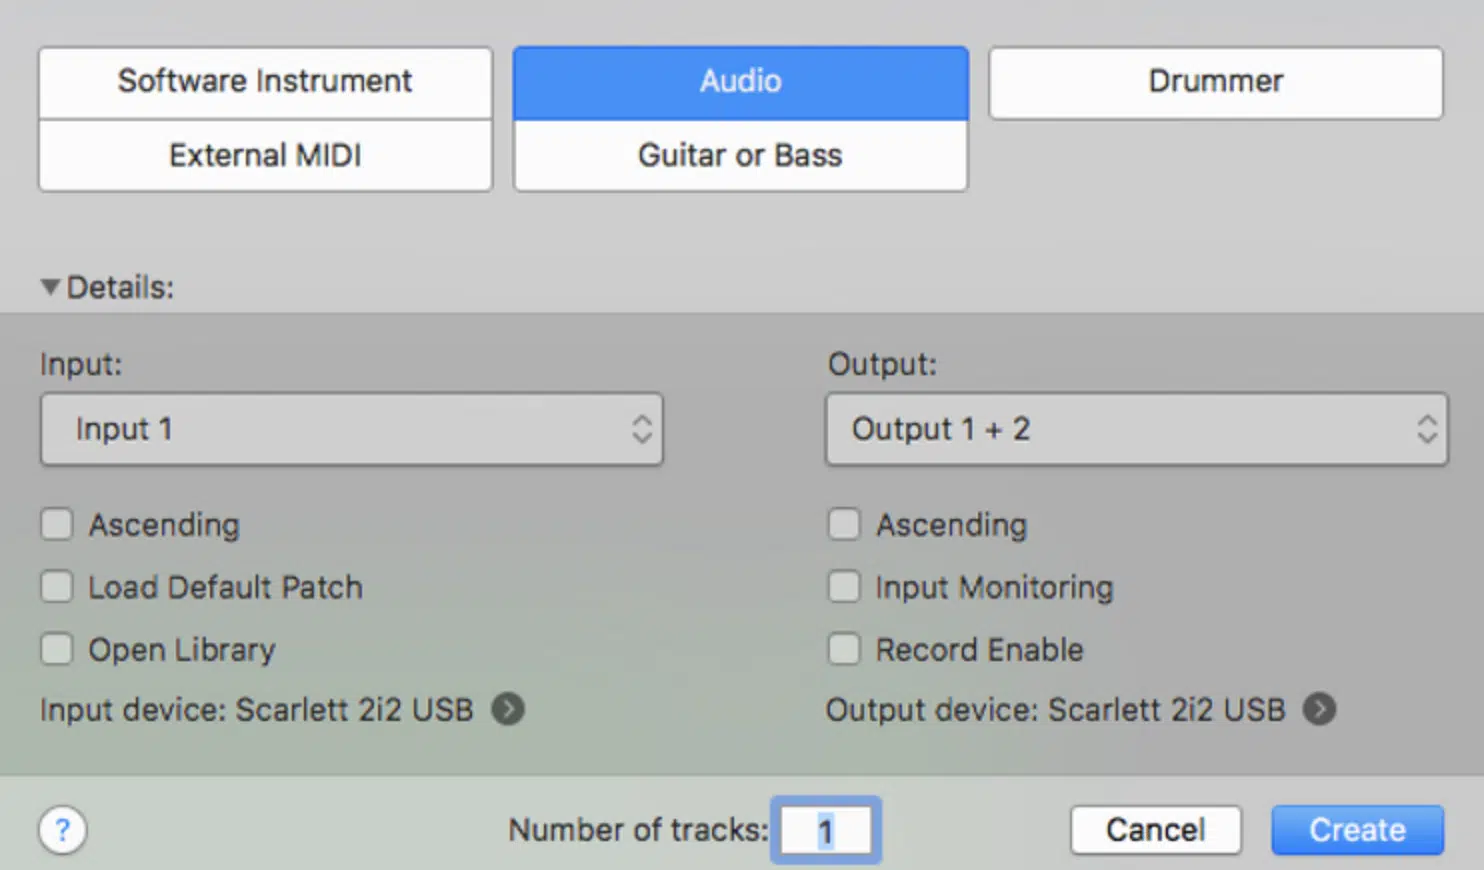
If you’re using external gear like a MIDI controller or drum pad, Command + Shift + T lets you add a new external MIDI track without extra setup steps.
Whether you’re integrating a hardware synth or a drum machine into your Logic Pro session, this shortcut speeds things up.
This way, you focus on the music rather than waste time scrolling through menus which, again, really sucks.
8. Command + 6: Open Audio File Editor
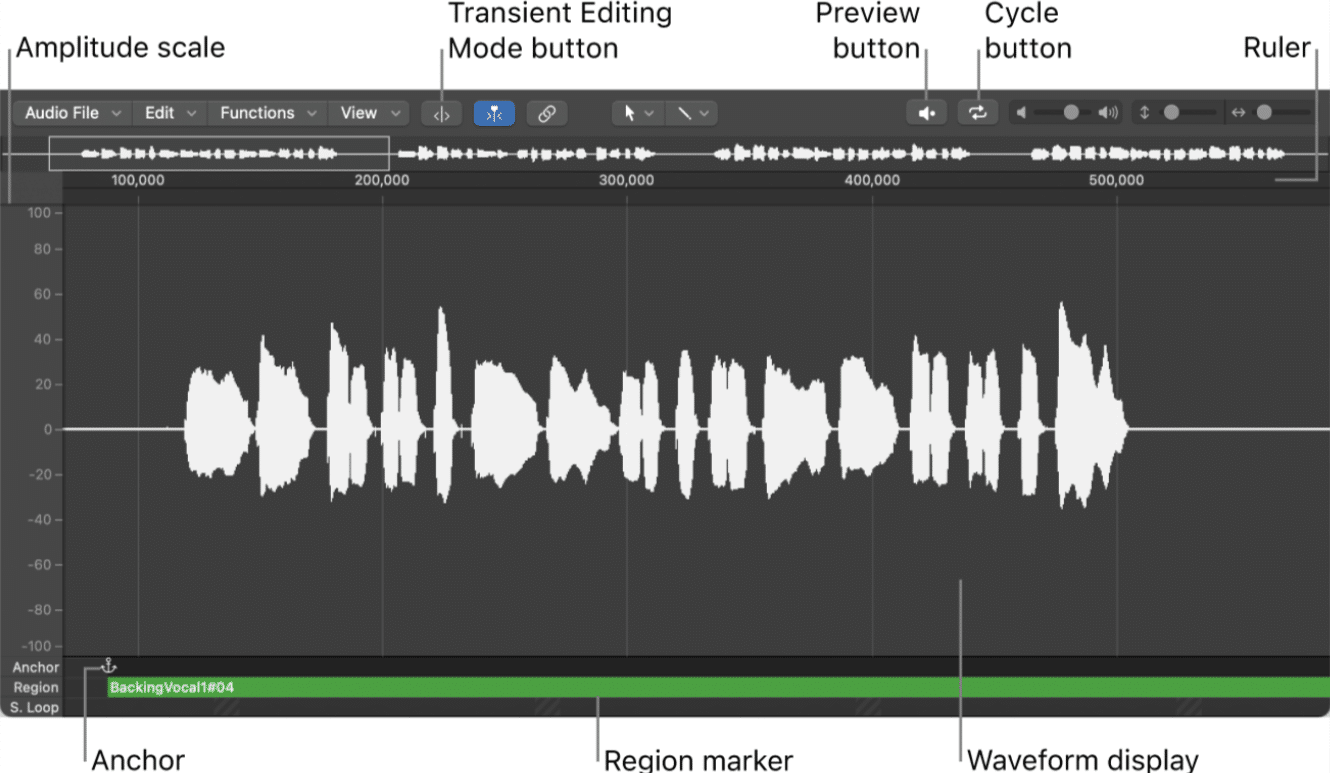
The Command + 6 shortcut opens the audio file editor in Logic Pro, where you can make precise edits to your audio files.
This tool is perfect for detailed waveform editing, allowing you to:
- Cut
- Trim
- Apply fades directly to the audio
The audio file editor also lets you tweak selected regions at the sample level 一 giving you control over every aspect of your recording.
Whether you’re adjusting timing, cleaning up unwanted noise, or applying pitch correction, the audio file editor is essential for fine-tuning your audio files with precision.
9. Command + N: New Project
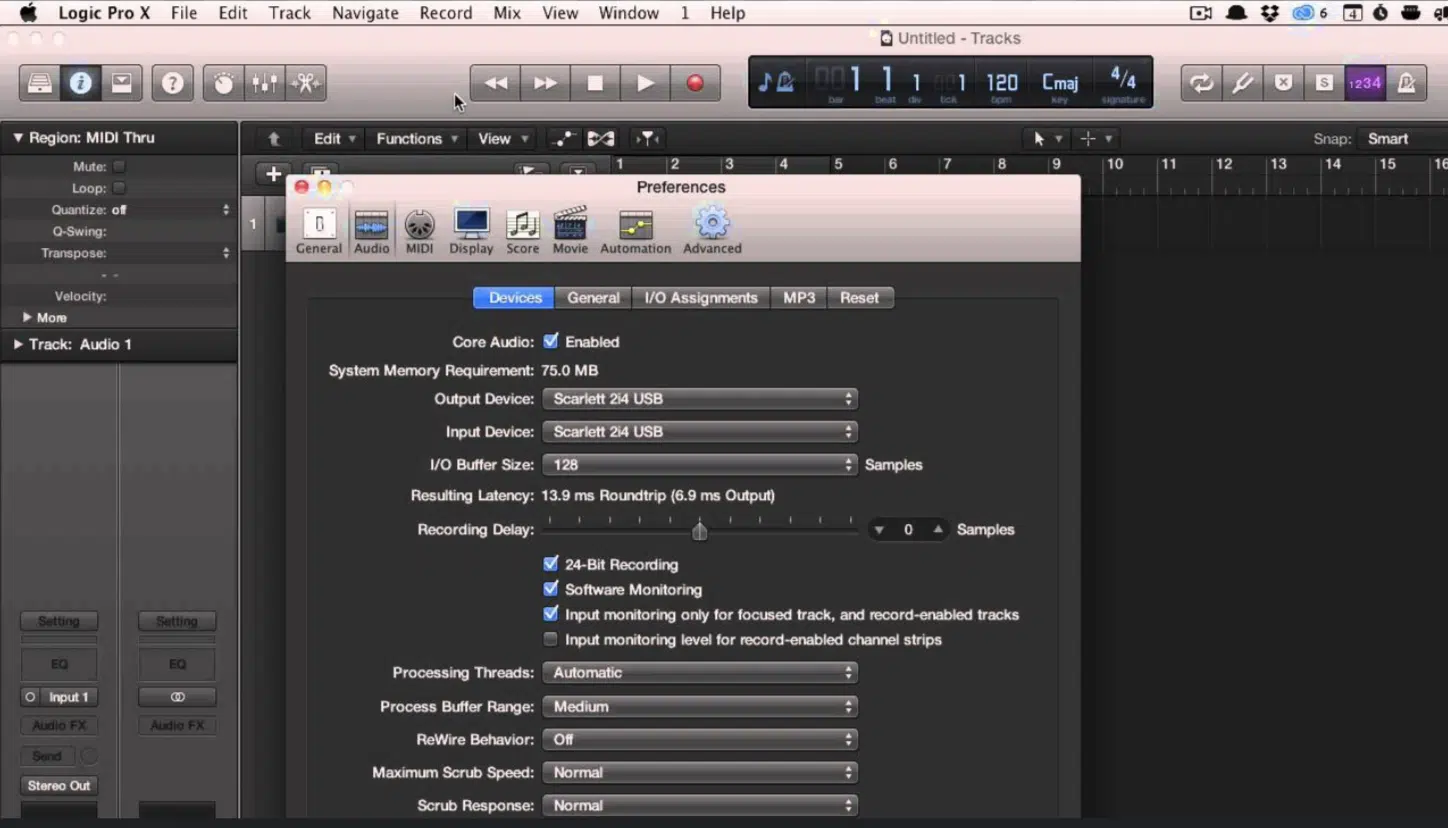
When inspiration strikes, you don’t want to waste time clicking through menus because, let’s be honest, nobody has time for that.
And, if you’re anything like me, the ideas come out of nowhere and if I don’t get things laid down quickly, they can go away right as quickly.
Command + N will get you started with a new project in Logic Pro instantly and help you avoid any frustration.
Whether you’re setting up for a new beat, recording vocals, or experimenting with sound design, this shortcut opens a fresh canvas 一 letting you dive straight into creating.
It’s perfect for music producers who need to keep the momentum going (which I hope is all of you).
10. Control + Command + O: Toggle Current Track Automation
Automation is a key part of creating dynamic mixes, and with Control + Command + O, you can quickly turn on or off the automation for the current track automation.
For instance, if you’ve automated a filter sweep on a synth and need to make quick adjustments, this shortcut gets you straight to the action.
When it comes to Logic Pro shortcuts, this one is a huge time-saver like you wouldn’t believe when working on detailed effects in a dense project.
11. Option + C: Show/Hide Color Selection Window
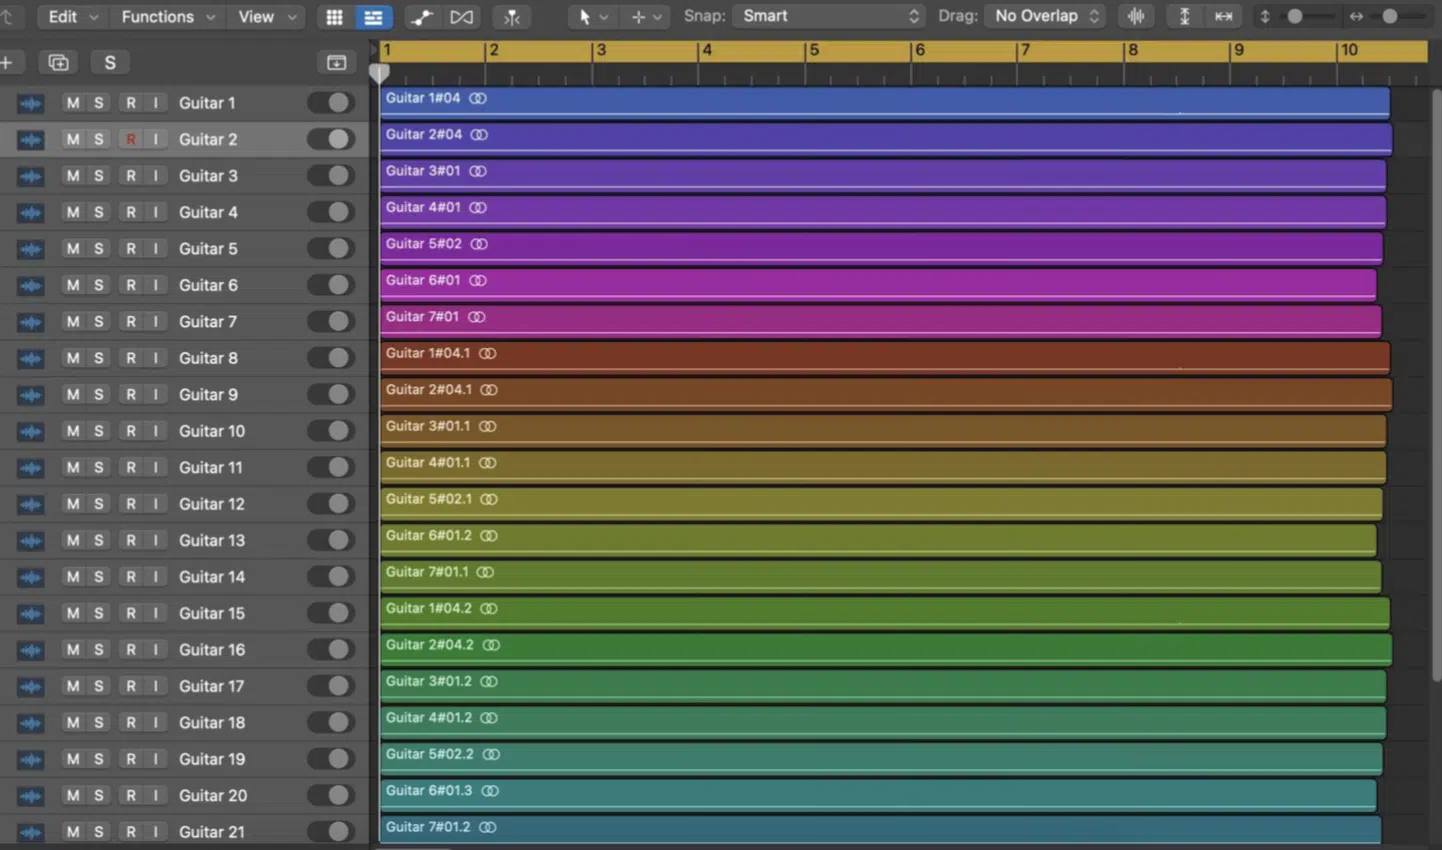
Color-coding your tracks can help you stay organized, especially in larger projects. Option + C opens the color selection window.
With this key command you can assign colors to different selected regions or tracks in your session (do NOT skip doing this).
This is great for visually separating drums, vocals, and instruments 一 making it easier to tweak a complex mix.
It’s a subtle trick that can make a big difference when you’re deep into editing.
12. Command + R: Repeat Region/Events
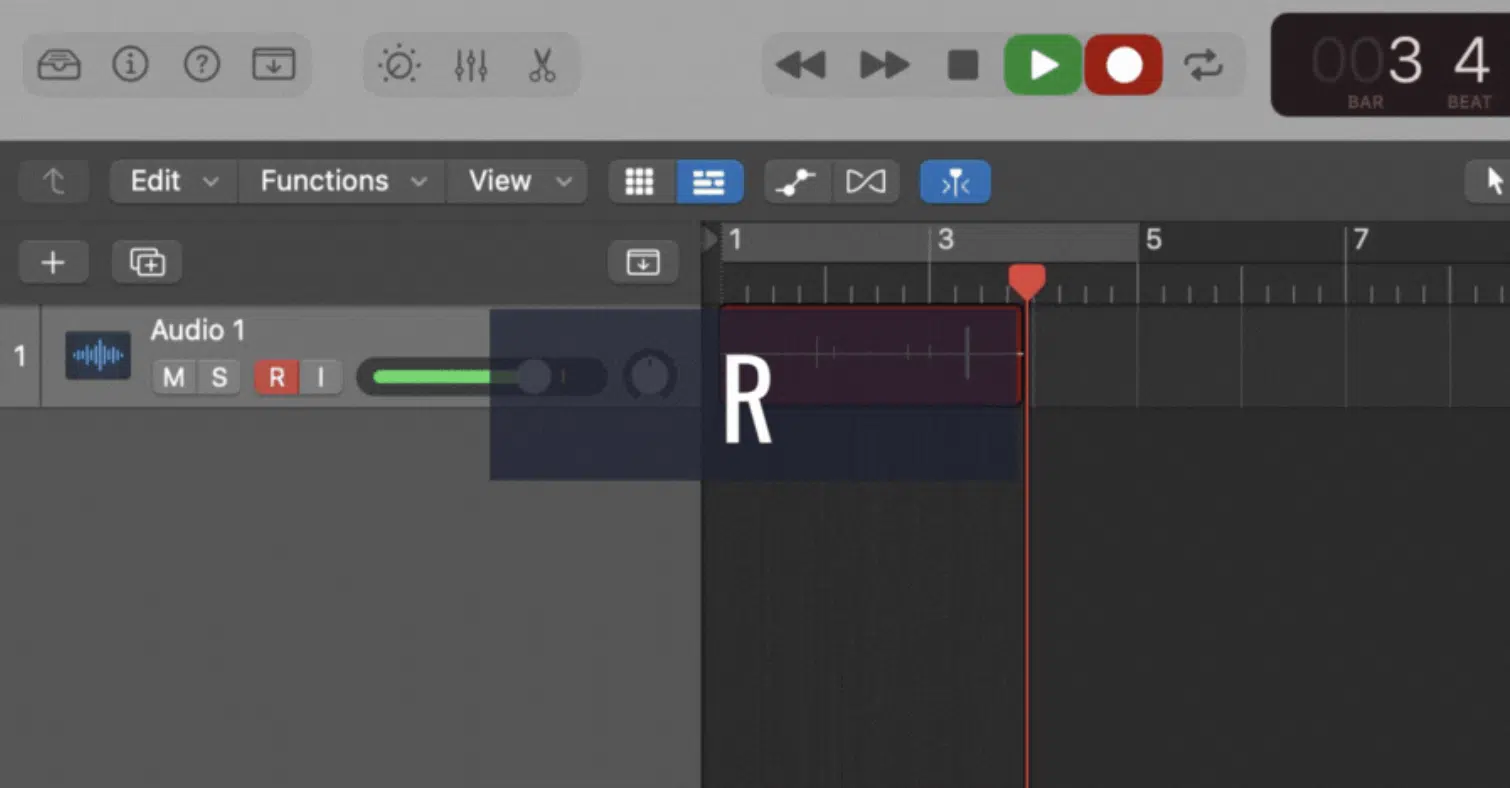
When you’re looking to quickly duplicate a section of your track, the key Command + R shortcut repeats the selected region or event without manually copying and pasting.
If we’re talking loop-based production or when you’re building out repetitive elements like drum patterns or chord progressions, it’s perfect.
It’s one of the most valuable Logic Pro key commands for speeding up your workflow (particularly when working with MIDI notes or audio regions).
13. X: Open/Close Mixer
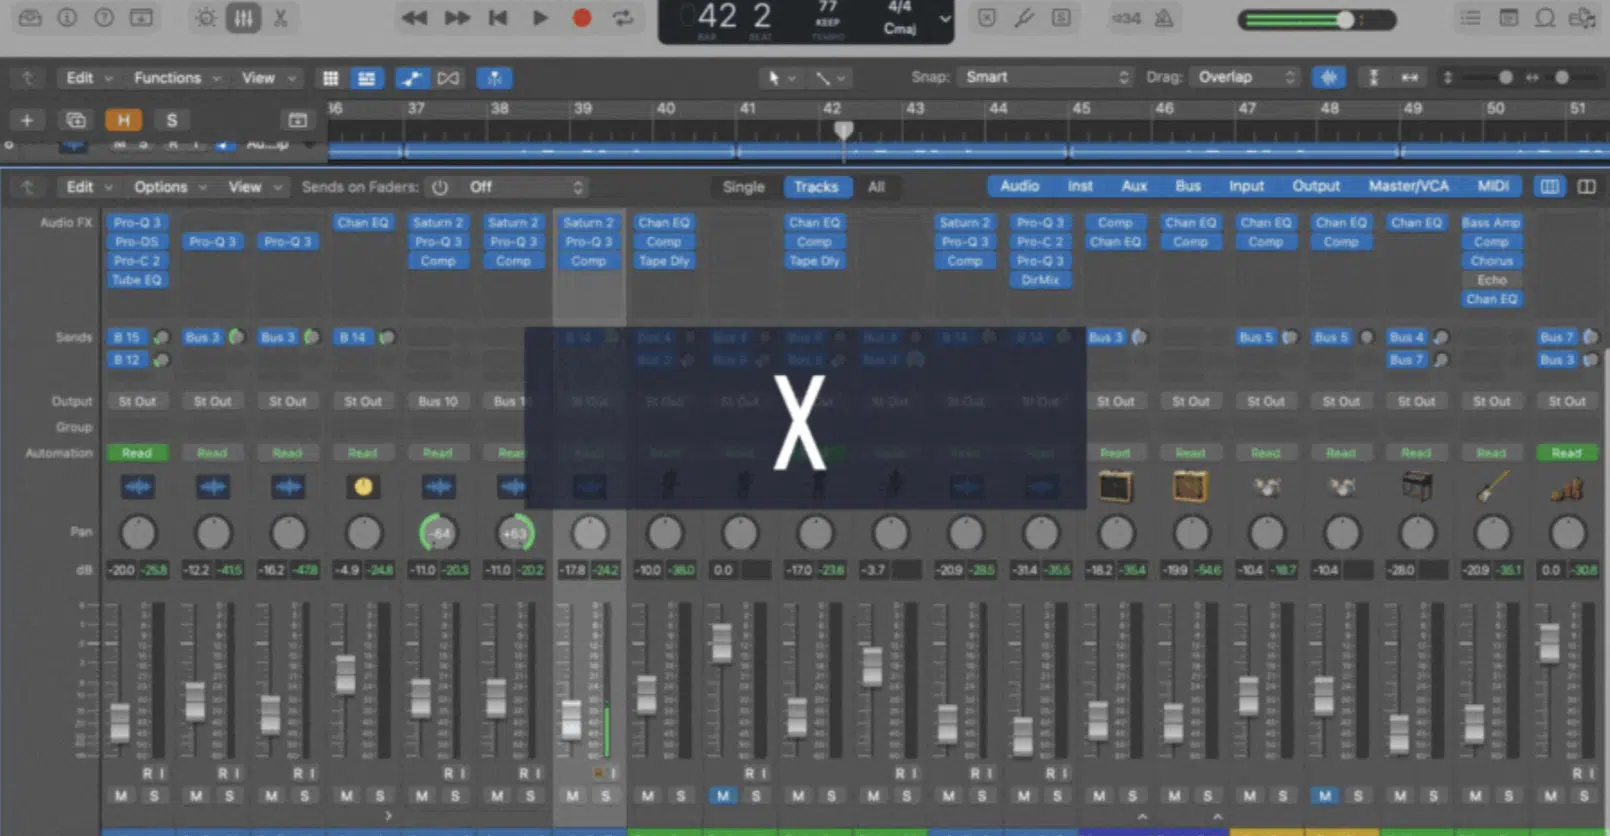
The mixer is where all your channel strip settings live, and with X, you can quickly toggle the mixer open or closed, which I personally love.
Whether you’re adjusting levels, adding plugins, or panning like a pro, having quick access to the mixer is essential.
This is one of the Logic Pro shortcuts/key commands that keeps your production efficient, especially when you’re juggling multiple tracks and need to stay organized.
14. Option + Shift + M: Mute All Selected Tracks
Muting tracks in bulk can help you focus on specific elements of your mix, and with Option + Shift + M, you can mute all selected tracks at once.
This Logic Pro shortcut is super helpful when you’re comparing different sections or instruments, such as muting your drums while listening to your vocals and synths.
It’s one of those ‘must-use’ Logic Pro shortcuts when your projects are large/complex.
15. Control + Shift + S: Save As
When you’re experimenting with new ideas but don’t want to overwrite your current project, the Control + Shift + S shortcut allows you to quickly “Save As” a new version.
Key commands like this are super useful in music production when you’re trying different arrangements/mixes and need to keep separate versions for comparison.
Saving different iterations helps you go back and forth without losing your work.
16. Option + Command + P: Copy Plug-in Setting
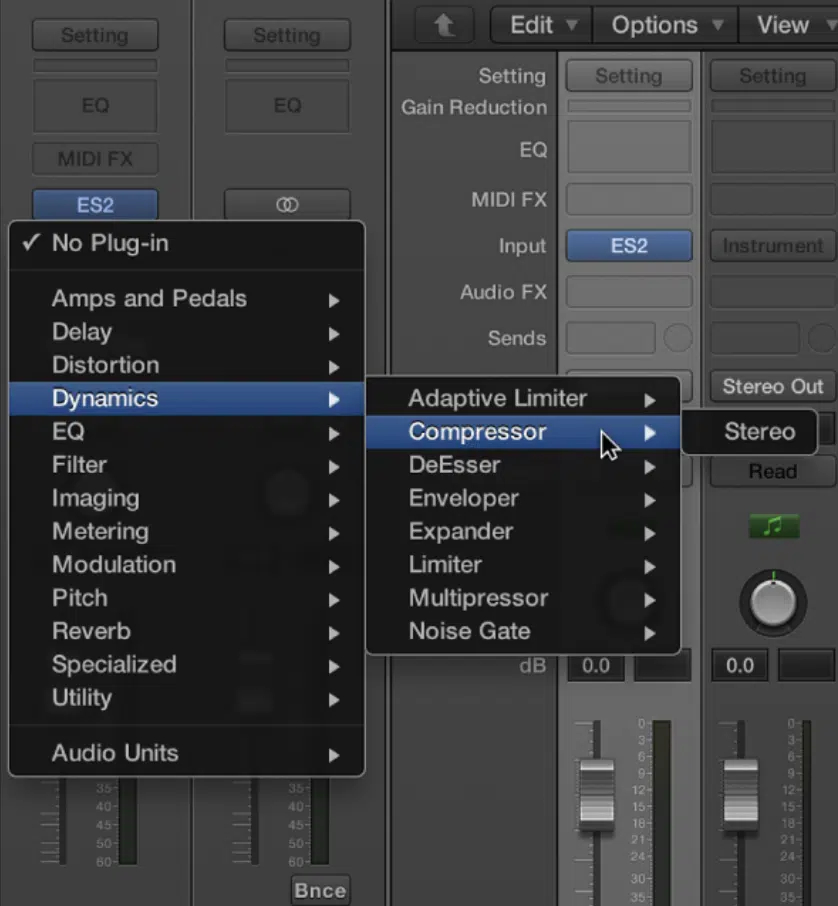
With Option + Command + P, you can easily copy the current plug-in setting from the focused track and apply it to another track in your session.
When it comes to key commands, this one is perfect when you’ve dialed in the perfect reverb, delay, or EQ and want to replicate that exact plug-in setting on other instruments.
It saves time and keeps your sound consistent across your project.
Once copied, you can quickly paste the plug-in setting onto any other track to maintain your desired effects.
17. Command + Option + S: Show/Hide Smart Controls
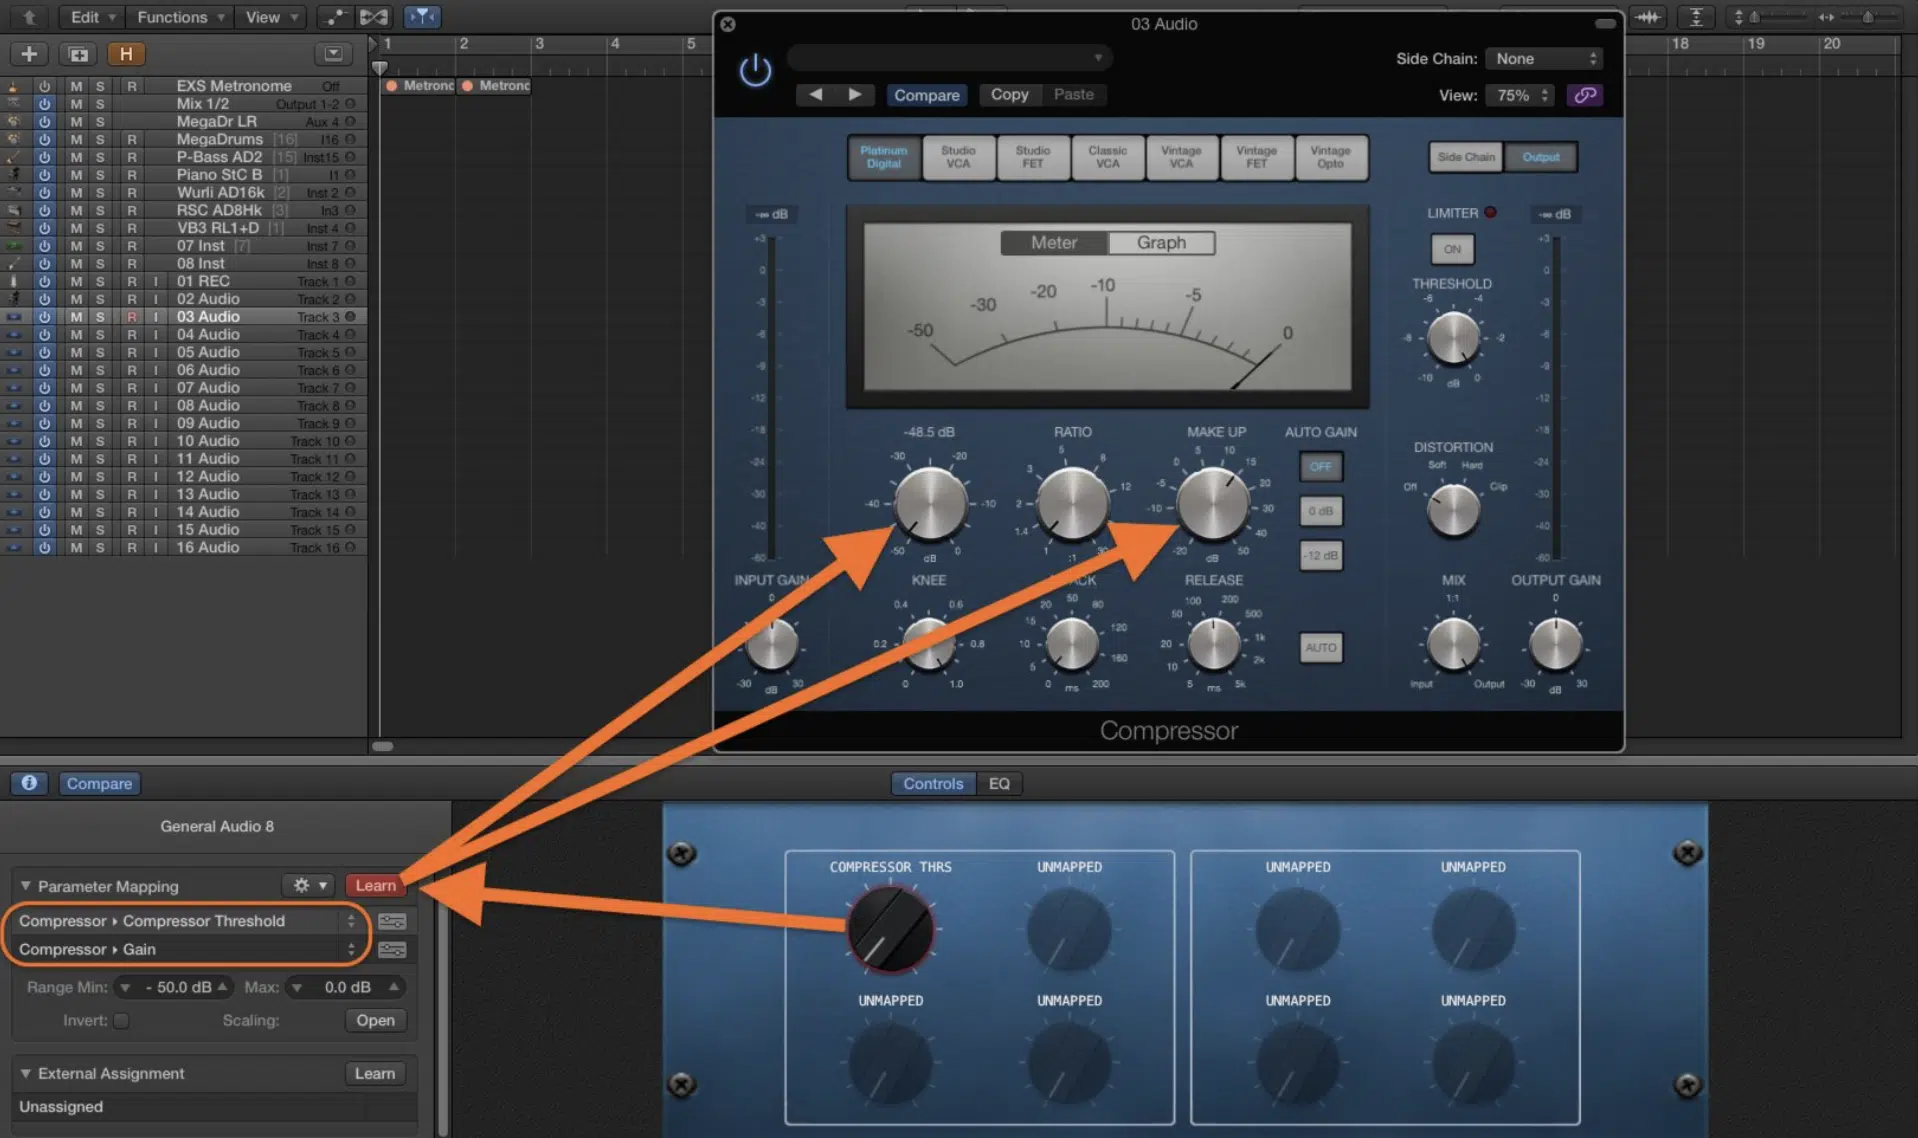
Smart Controls allow you to adjust multiple plugin parameters at once, and with Command + Option + S, you can instantly show or hide this panel.
Let’s say you’re using a synthesizer and want to adjust cutoff, resonance, and other settings simultaneously… The Smart Controls window gives you quick access.
This is one of the more advanced Logic Pro shortcuts/key commands that can fast-track your sound design process.
18. Shift + Command + I: Import Audio
Bringing in external audio files is a common task in Logic Pro, and the Shift + Command + I shortcut speeds this up by allowing you to import audio tracks directly.
It’s perfect for importing:
- Samples
- Loops
- Pre-recorded vocals
Regardless of what it’s for, this key command ensures you can add new material to your project without interrupting your creative flow.
19. Option + Command + C: Copy Channel Strip Setting
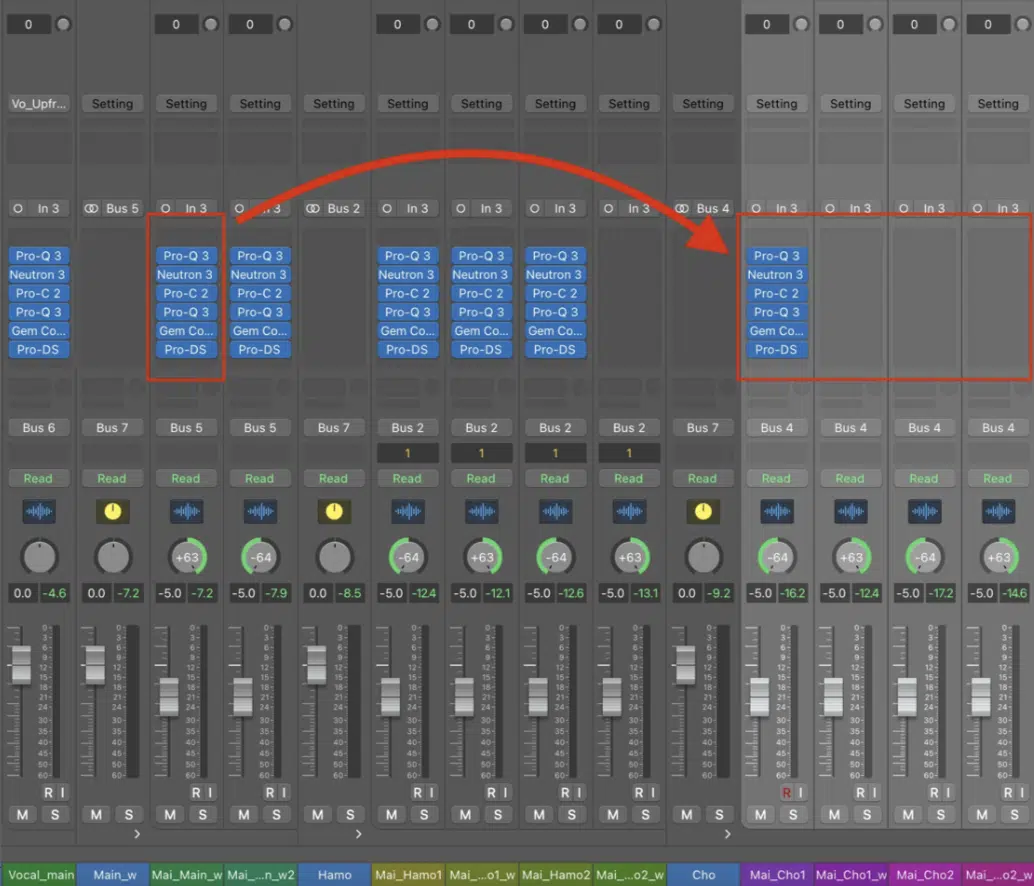
If you’ve dialed in the perfect mix on one track and want to apply those same settings to another, Option + Command + C copies the entire channel strip setting.
This includes all plugins, volume settings, and panning adjustments.
It’s perfect for applying consistent processing across similar tracks, such as applying the same EQ and compression to multiple vocal takes.
20. Option + Command + V: Paste Channel Strip Setting
After copying a previous channel strip setting with Option + Command + C, you can paste those exact settings onto a new track using Option + Command + V.
This is a massive time-saver when you’re working with multiple similar tracks and want to maintain a consistent sound across them.
Whether it’s for drums, vocals, or synths, this Logic Pro shortcut helps maintain cohesion in your mix, and that’s always what you should be aiming for.
21. Command + Shift + C: Capture Recording
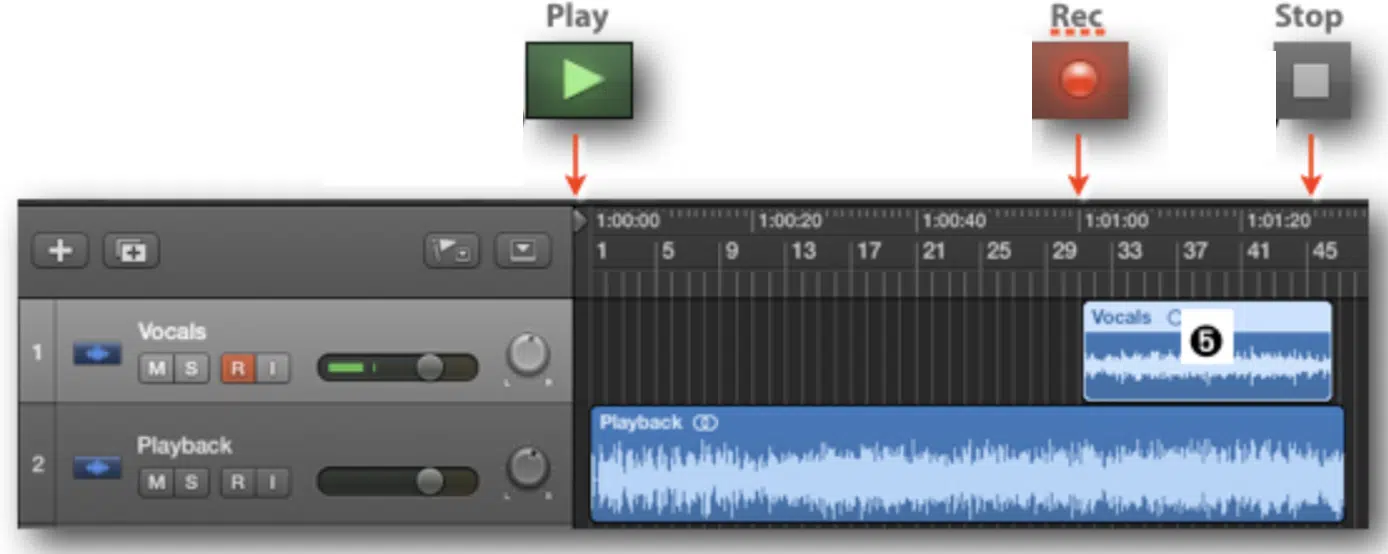
Command + Shift + C is a lifesaver when you’re improvising and forget to hit record because it lets you capture your performances after you’ve played it.
As long as you were playing in the session, that is.
It’s perfect for MIDI notes played on a MIDI controller so no great idea goes lost.
Basically, it’s one of those Logic Pro shortcuts/key commands that can save hours of re-recording when you accidentally missed recording a great take.
Side note, if you want to learn everything about MIDI controllers, we’ve got you covered.
22. Shift + Command + N: Create New Auxiliary Channel Strip
When you need to add effects to a group of tracks or set up parallel processing, Shift + Command + N creates a new auxiliary channel strip.
This is perfect for sending multiple software instrument tracks to a single bus for reverb, delay, or compression.
For example, if you’re grouping all your synths, sending them to an auxiliary bus makes it easier to control their overall sound.
NOTE: If you’re working in a large session with lots of elements, you can use the left window edge to align your mixer and keep every software instrument track organized.
23. Command + F: Flex Mode On/Off
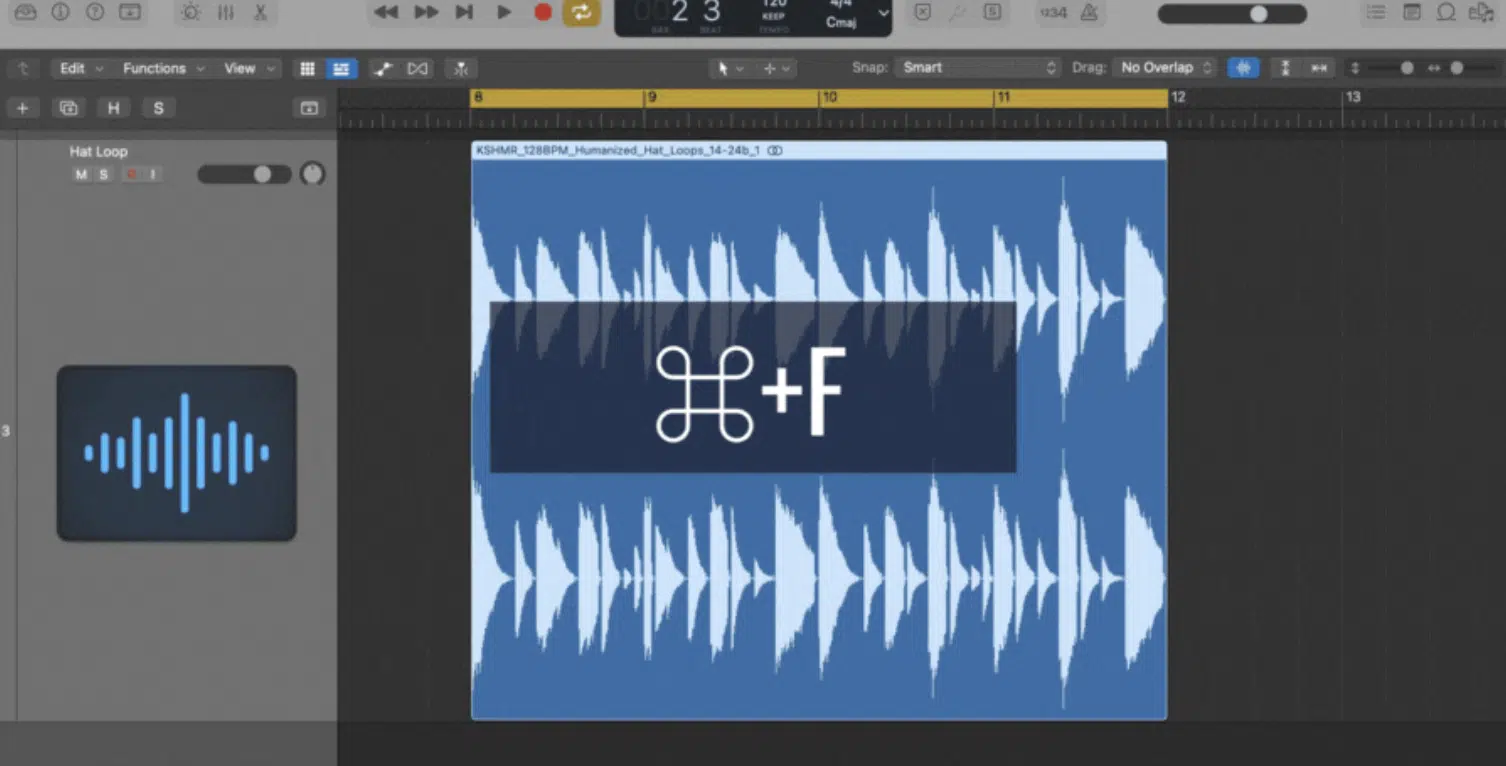
Flex Time Mode in Logic Pro allows you to manipulate the timing and pitch of selected regions without cutting or slicing.
Hitting Command + F enables or disables Flex Mode instantly, perfect for tightening up live performances or adjusting the rhythm of guitar and vocal takes.
It’s especially useful in situations where you need precise control over timing, such as syncing a recorded guitar riff to a drum loop.
24. Command + J: Join Regions

When you’ve split a recording into multiple parts (whether to edit mistakes or adjust timing) Command + J lets you quickly join regions into one flawless track.
This is incredibly helpful when you want to merge edits for cleaner arrangement, particularly after editing multiple vocal takes or arranging drum loops.
This Logic Pro key command helps maintain a tidy project without any unnecessary clutter from too many small selected regions.
25. Command + E: Export Region as Audio File
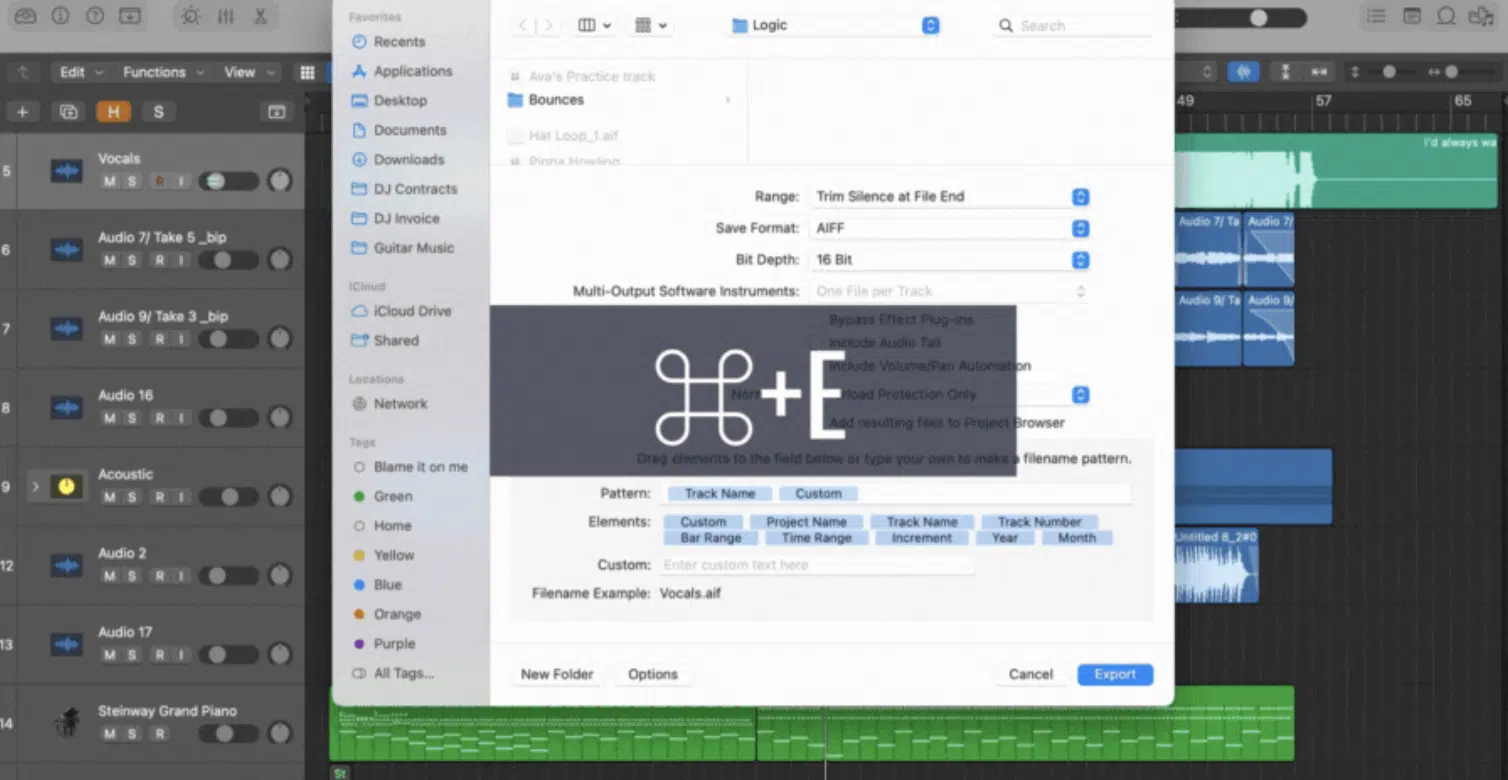
When you want to share or reuse a specific part of your project, Command + E lets you export the selected region borders as a separate audio file.
This is a must-have command when collaborating with other producers or artists, especially when you need to bounce out stems for mixing.
It’s also great for creating samples or loops from sections of your new track to be used in different projects or DAWs.
26. Command + L: Loop Selected Region
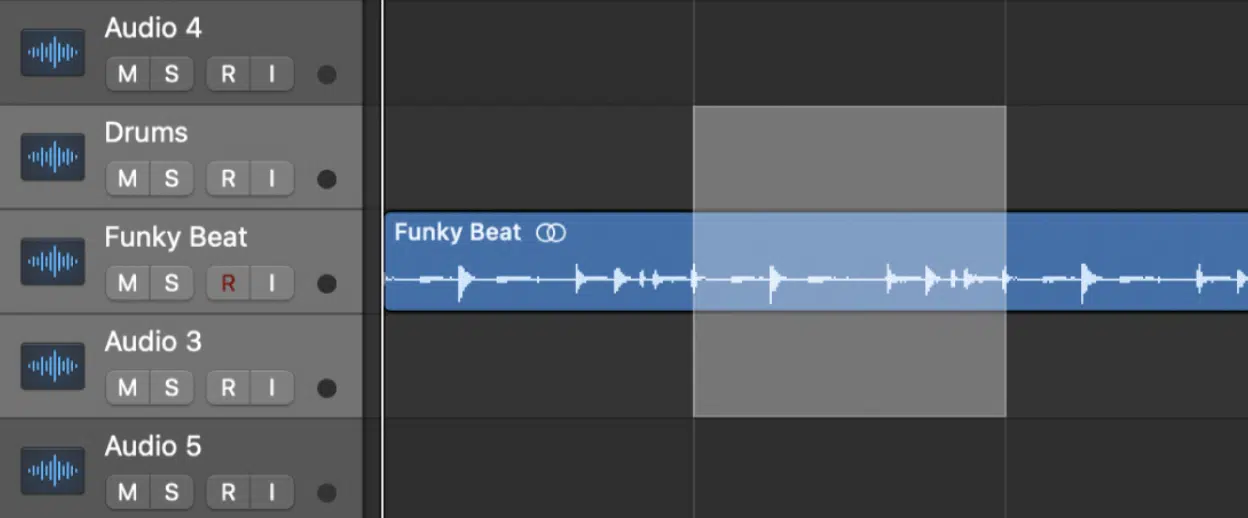
When you’re working on perfecting a loop, whether it’s a drum groove or a synth melody, Command + L will instantly loop the selected region.
When it comes to key commands, this one is essential for producers who want to focus on a specific section of their track without constantly resetting the playhead.
It’s a fantastic Logic Pro shortcut for working out ideas in repetitive music genres like hip-hop or EDM, where looping sections is a key part of the creative process.
27. Command + K: Show/Hide Musical Typing
Command + K opens the musical typing window, allowing you to play notes using your computer keyboard if you don’t have a MIDI controller on deck.
This feature is perfect for sketching out quick ideas or testing instrument patches without any extra gear.
It’s especially handy for producers on the move or those working in smaller studio spaces where setting up a full keyboard isn’t always convenient.
28. Command + Left Arrow: Go to/Select Previous Track
When you’re navigating a large project with multiple layers, using Command + Left Arrow will take you to the previous track instantly.
This is great for when you’re comparing duplicate settings across tracks, such as checking levels between the bass and the drums.
Instead of manually clicking through the new track list (which gets brutal), this Logic Pro key command keeps your workflow efficient and smooth.
29. Command + Right Arrow: Go to Next Track
Just like jumping to the previous track, Command + Right Arrow lets you quickly hop to the next track in your session.
This command is especially useful when you’re making incremental adjustments across your mix, such as going through all your vocal tracks to adjust their volumes.
It’s an essential Logic Pro shortcut when managing large sessions with many audio tracks or MIDI channel strips.
Bottom line, both the right & left Logic Pro shortcuts are great time-savers.
30. Control + Option + N: Set Nudge Value, Mute, and Solo Selected Tracks
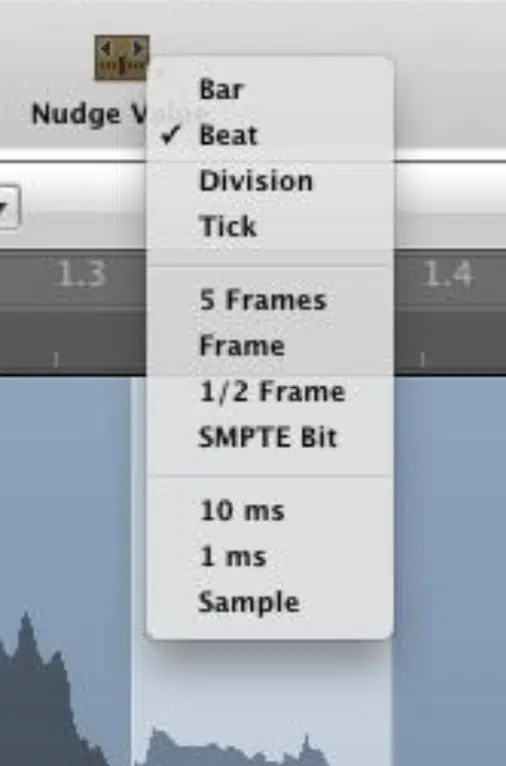
With Control + Option + N, you can quickly set nudge value to move regions incrementally 一 helping you fine-tune the timing of your edits.
This is especially useful when aligning vocals or drums with razor-sharp precision.
Also, once your regions are in place, you can easily mute selected tracks to focus on specific elements, or use solo selected tracks to isolate them during playback.
NOTE: To keep your project organized, take advantage of the rename track option to label everything clearly to help you stay on top of your mix.
Logic Pro shortcuts/key commands like this will seriously speed up your flow.
31. Option + Left Arrow: Go to Previous Marker
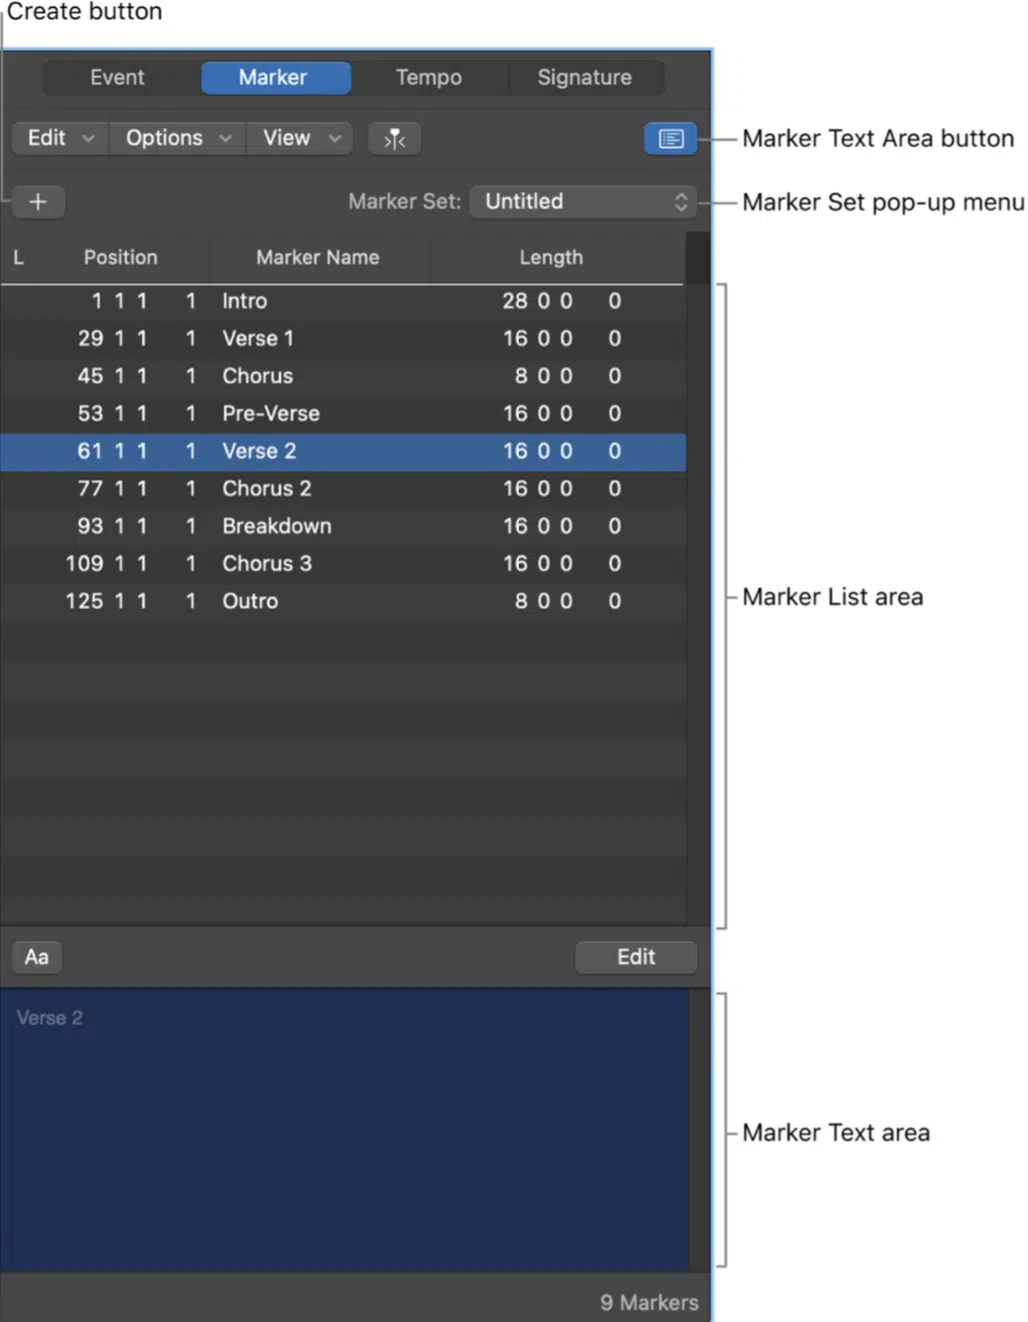
Markers are key for navigating through a project because they help you jump to important points like the:
With Option + Left Arrow, you can instantly move to the previous marker, saving you from manually scrolling through the timeline.
If you’re using markers to structure your arrangement, this shortcut makes it easy to jump back and review specific sections.
You can also go to marker number by assigning numbers to key points in your song for precise navigation.
Whether you’re making fine edits or adjusting transitions, being able to quickly go to marker number makes sure you maintain your workflow without interruption.
32. Command + Shift + Up Arrow/Down: Move Track Up/Move Track Down
Organizing your existing tracks for better clarity is crucial, and Command + Shift + Up Arrow lets you move the selected track up in the session.
Just like moving a track up, the Command + Shift + Down Arrow shortcut allows you to move the current track down in your arrangement.
Whether you’re reordering your project to group similar audio tracks together or want better visibility for certain instruments these Logic Pro shortcuts are helpful.
They’re a quick way to reorganize your project without clicking and dragging.
33. Shift + Command + M: Create MIDI Region
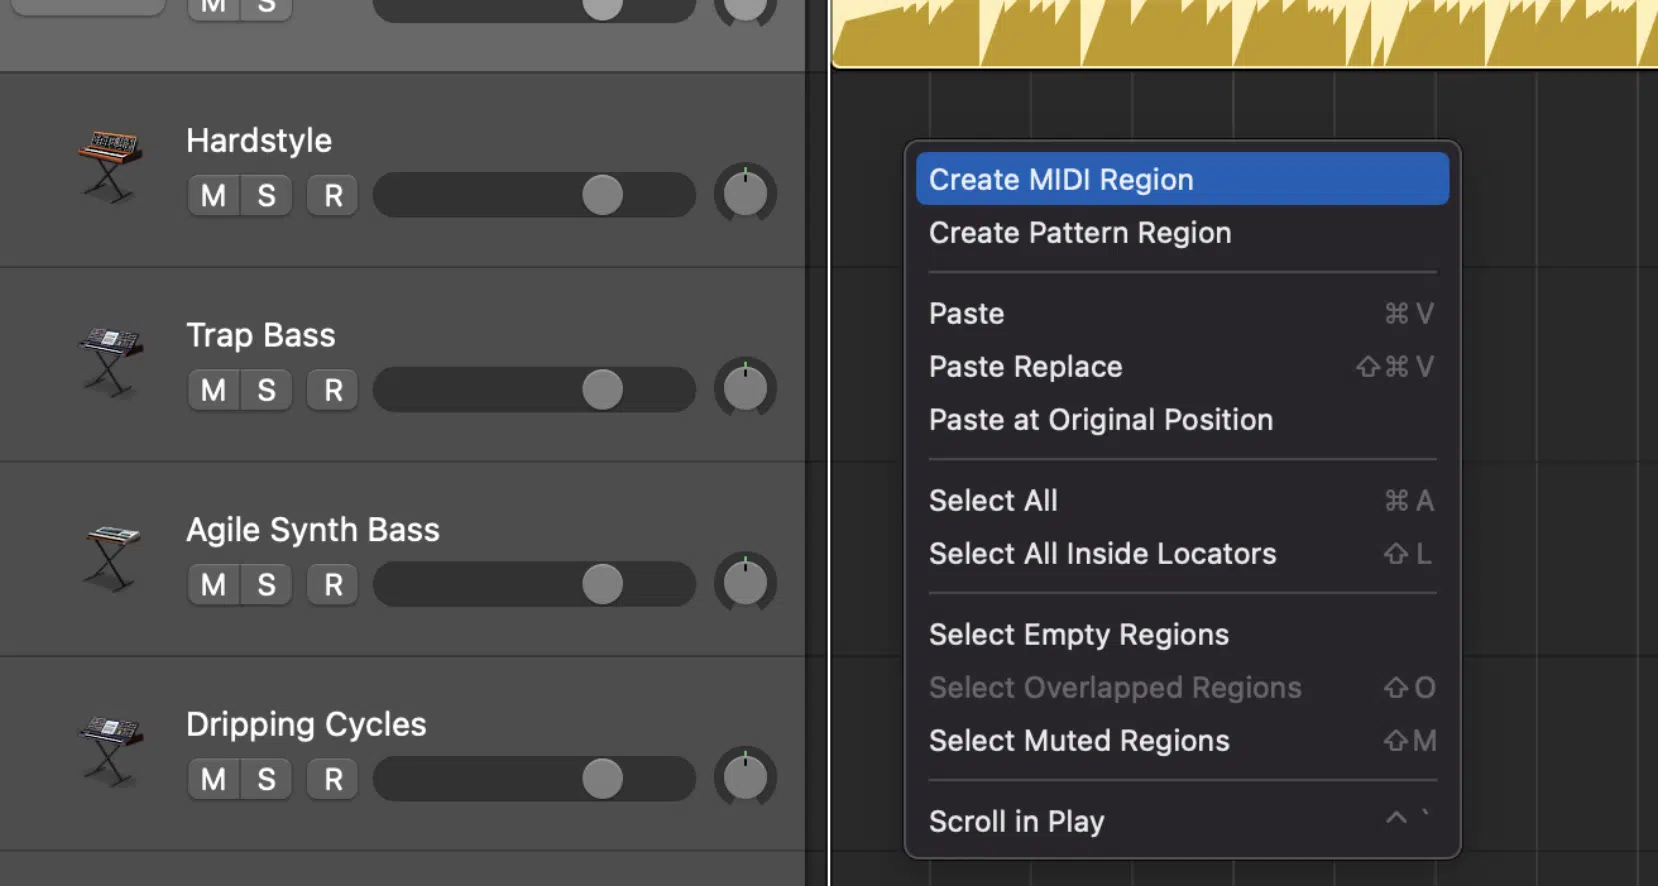
Creating a MIDI region from scratch is easy with Shift + Command + M.
This Logic Pro shortcut generates a blank MIDI region on the selected track, ready for you to start adding notes.
Whether you’re composing a new melody or programming drums, this command gets you up and running fast, without needing to record live.
It’s great for producers who prefer to program their MIDI notes manually.
34. Command + Option + P: Show/Hide Global Tracks
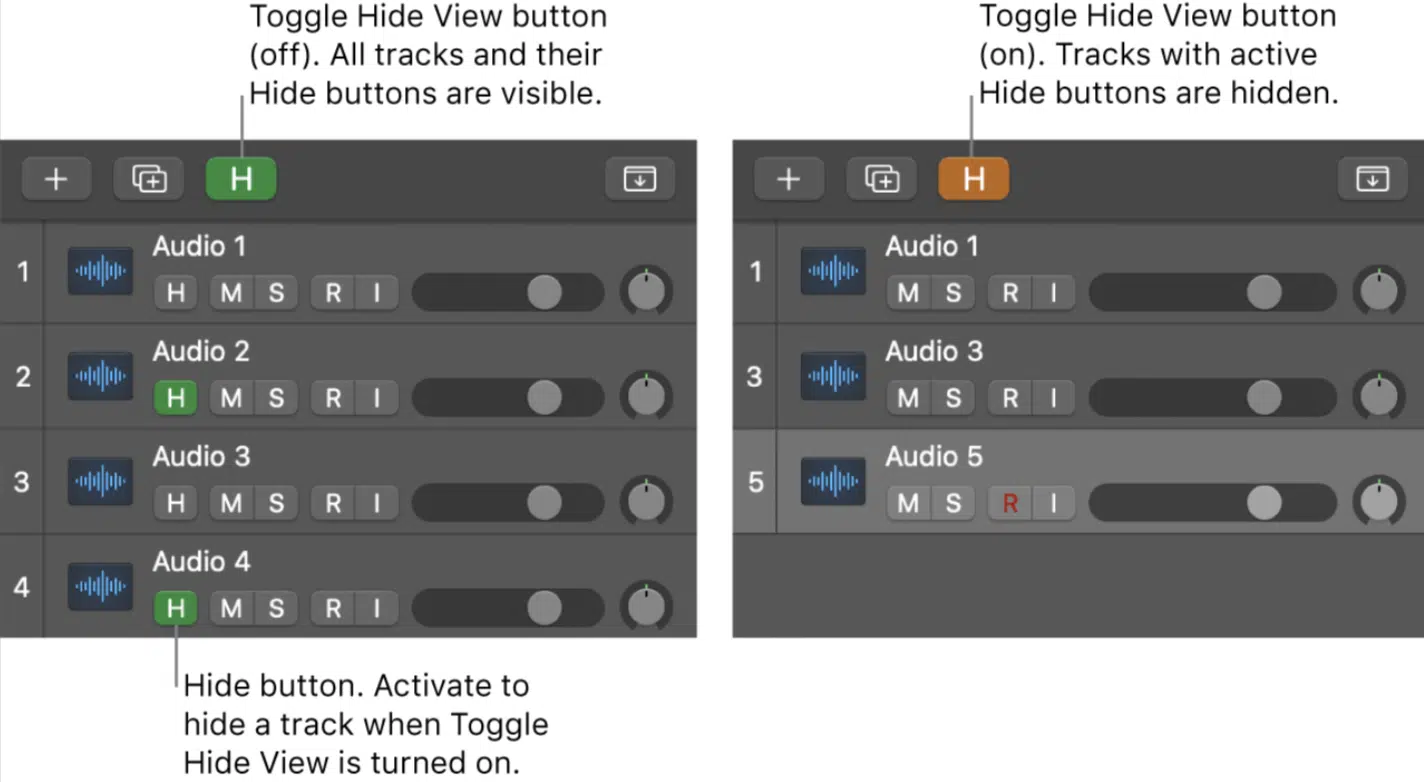
Global tracks, like Tempo, Time Signature, and Arrangement markers, help you manage the overall structure of your song.
By using Command + Option + P, you can quickly show or hide these global tracks in the main window tracks.
When you’re working on a project where you frequently adjust the tempo or time signature, this Logic Pro shortcuts is perfect.
Keeping these global tracks visible makes it easier to fine-tune transitions and timing.
35. Control + Option + R: Reverse Audio Region
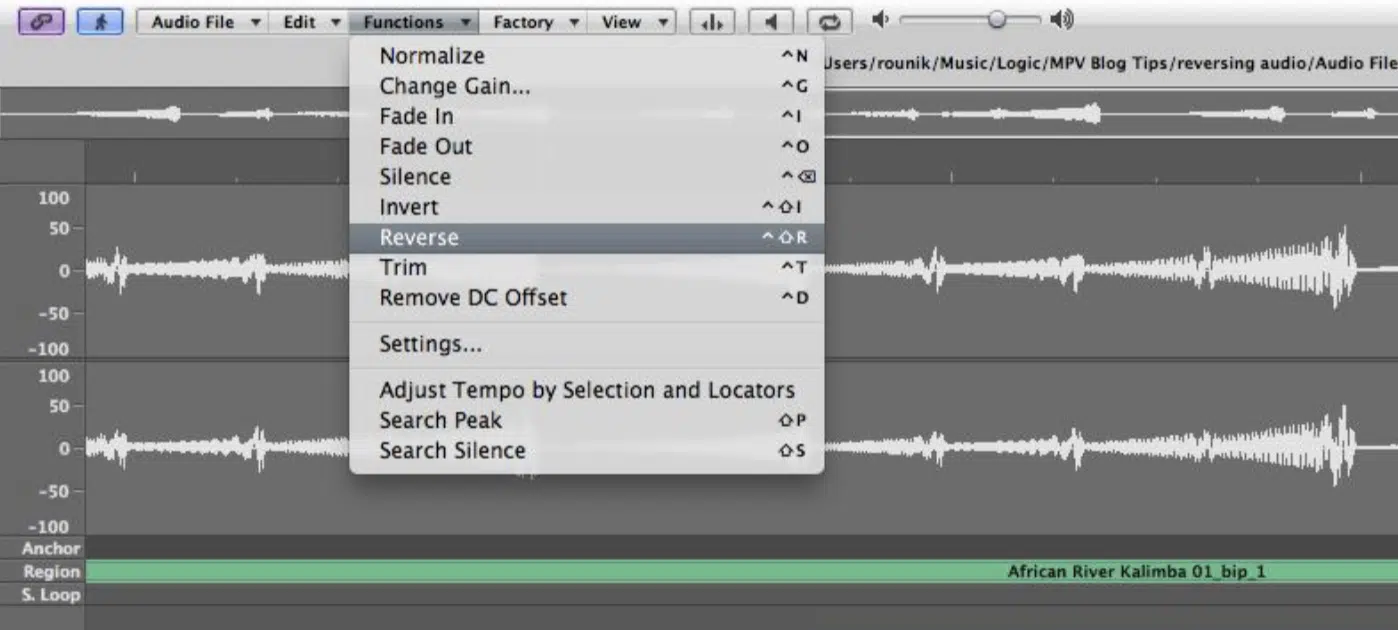
Reversing audio is a creative way to add unique textures and effects to your track, and Control + Option + R makes it easy to reverse an audio region instantly.
Whether you’re creating a riser effect from a vocal sample or flipping a snare hit for extra impact, this shortcut is a fun way to experiment with sound design.
It’s often used in genres like trap or hip-hop to build tension or create unexpected moments in a track that people really love.
36. Command + 5: Open Score Editor
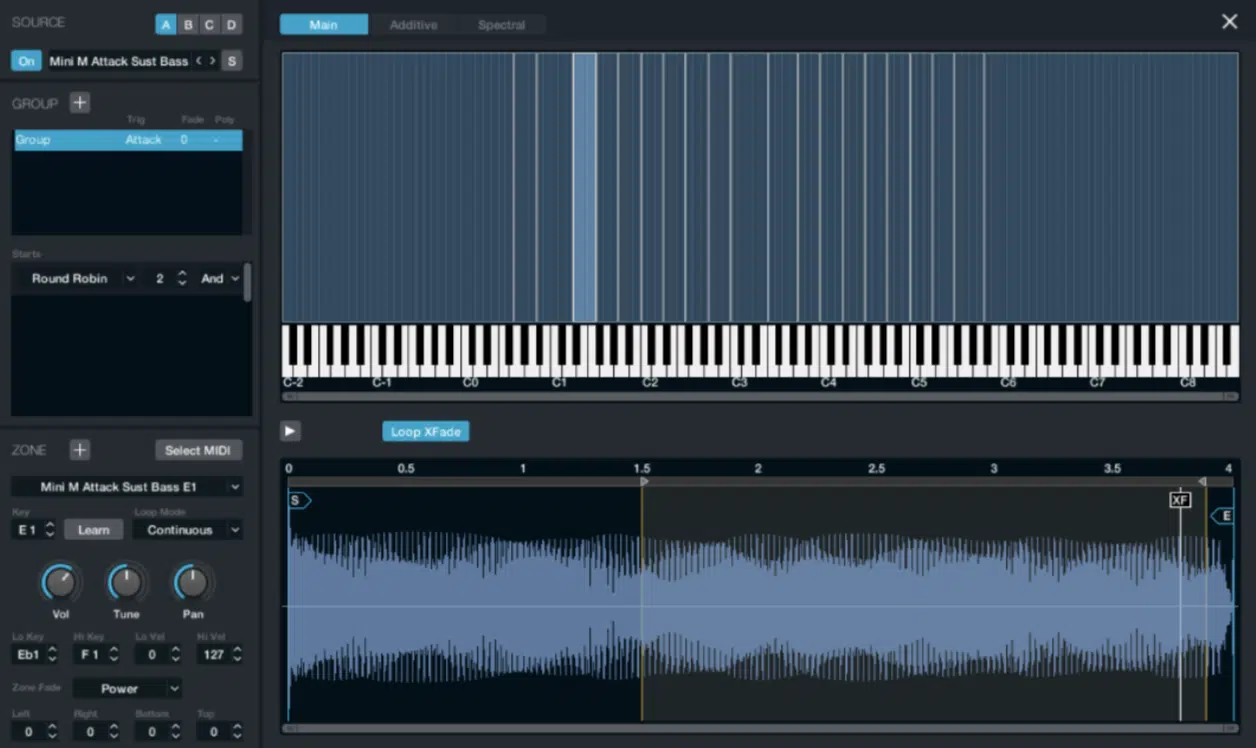
The Command + 5 shortcut is your direct line to the Score Editor in Logic Pro, where you can view and edit your MIDI data in traditional notation.
If you prefer to work with sheet music or just want to make precise adjustments in a more visual way, this one is great.
The Score Editor also allows you to adjust the track name and other details 一 giving you more control over your arrangement.
By learning these Logic Pro shortcuts, you can quickly switch between different views and stay efficient while working on your score.
The ability to access the Score Editor and other functions through Logic Pro shortcuts enhances your workflow, especially when you need to move between MIDI editing and scoring.
37. Control + Option + Command + P: Toggle Automation Quick Access
Automation, as we touched upon, allows you to control parameters like volume, panning, and effects over time.
With the Control + Option + Command + P key command, you can quickly toggle Automation Quick Access.
It lets you adjust automation data directly from your MIDI controller.
This Logic Pro shortcut is invaluable for real-time automation during live recording or performance.
It provides instant access to redundant automation points, making your workflow faster and more dynamic, especially when fine-tuning intricate automation curves across multiple tracks.
38. Command + Option + R: Open Region Inspector
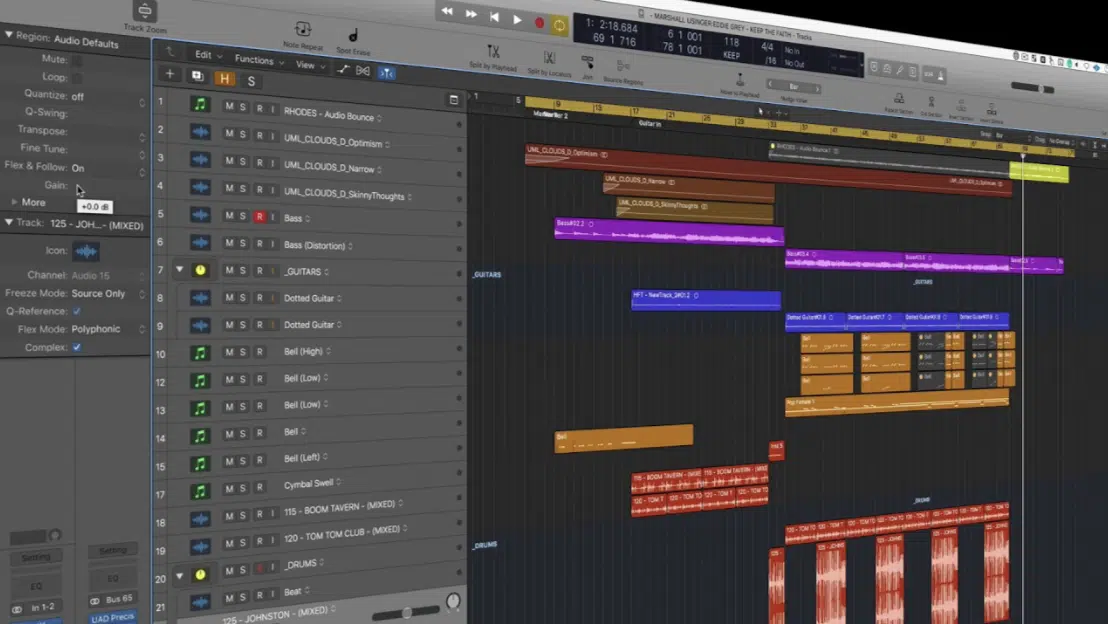
The Region Inspector in Logic Pro offers detailed control over audio regions, including:
- Quantization
- Gain
- Timing adjustments
Using the Command + Option + R key command, you can quickly open the Region Inspector for any selected region.
It’ll give you immediate access to these advanced controls.
When it comes to Logic Pro shortcuts/key commands, it’s useful when you need to make precise edits, like adjusting the gain of a quiet vocal clip or tweaking the timing of a drum hit.
Having quick access to Logic Pro shortcuts like this can enhance the editing process and your ability to make detailed adjustments like a boss.
39. Command + Shift + Option + T: Convert MIDI Region to Audio File
Converting MIDI regions to audio files is a common task when you need to commit your MIDI data to audio for further processing or to save CPU resources.
The Command + Shift + Option + T key combination lets you do this instantly without the need for separate bouncing steps.
This Logic Pro shortcut is perfect for producers who want to “freeze” their MIDI tracks 一 turning them into audio tracks with all effects applied.
It’s a great way to solidify your arrangement and prepare for mixing, especially in large sessions where too many active MIDI regions can slow down your workflow.
Logic Pro Shortcuts: Final Thoughts
Logic Pro shortcuts are the key to maximizing your efficiency and creativity while producing music in Logic.
By mastering the Logic Pro shortcuts we discussed today, you’ll save endless time and navigate through your project like a boss.
Plus, focus more on your music rather than tedious manual tasks.
If you want to dive even deeper into how pro-level tracks are built in Logic, you’ve got to check out the legendary Free Project Files pack.
It includes fully-loaded project files available for Logic Pro, designed by expert producers at the top of their game.
These files give you an insider’s look at how high-quality tracks are structured, from start to finish, to help you refine your own skills and techniques.
It’s like having the cheat codes on how to make professional beats, so you certainly don’t want to miss out (plus they’re 100% free and royalty-free).
Now that you know all the Logic Pro shortcuts, it’s time to go practice them so your workflow will be faster than ever.
Whether it’s opening the Piano Roll, managing track stacks, or exporting your work, each key command will push your production game to the next level.
So, get ready to work faster, create more, and have some serious fun doing it.
Until next time…


Leave a Reply
You must belogged in to post a comment.