Reverb impulse responses are one of the most slept-on tools in modern sound design.
They can add insane depth, realism, and spatial detail to your tracks 一 and flip how your mixes feel altogether, really.
Plus, they can help you completely transform a basic sound into something immersive and emotionally powerful.
As music producers, knowing exactly how to create your own custom reverb impulse responses can be an absolute game-changer.
That’s exactly why I’m breaking down everything you need to know, like:
- What’s involved when creating your own IRs ✓
- IR sample loading & file types ✓
- Sine sweeps & how to record them ✓
- What you need to know about acoustics ✓
- How convolution reverb plugins actually work ✓
- Capturing your own impulse responses ✓
- Field recordings & experimental IR creation ✓
- Setting up the right microphones (mics) & gear ✓
- Reverb tail sculpting & tonal shaping ✓
- Pro-level sound design IR tricks ✓
- Organizing your IR library for speed ✓
- Advanced tips, tricks, and techniques to create fire ✓
- Much more about custom reverb impulse responses ✓
By knowing how to bang out your very own custom reverb impulse responses like a professional, you can instantly give your mixes an insane upgrade.
This way, you really won’t have to worry about bland reverb tails or generic presets ever again, so think about the possibilities.
Your tracks will stand out in a crowded mix, and you’ll level up your skills in the process without watching one single video (which is always a huge plus).
And of course I’m including some advanced techniques/tricks for you guys to help you take things to the next level as well, so buckle in.
Table of Contents
- What Exactly Are Custom Reverb Impulse Responses?
- How Impulse Responses Work Inside a Convolution Reverb Plugin
- Creating Your Own Custom Reverb Impulse Responses From Scratch
- Using Found Sounds & Synthesized Sources for Unique IRs
- Reverb Tail Shaping & Frequency Sculpting in Custom IRs
- Creative Sound Design Uses for Custom IRs
- Must Knows When Creating High-Quality Custom Reverb Impulse Responses
- Common Mistakes to Avoid When Working with IRs
- Bonus: When to Use Custom IRs Over Stock Reverbs
- Final Thoughts
What Exactly Are Custom Reverb Impulse Responses?
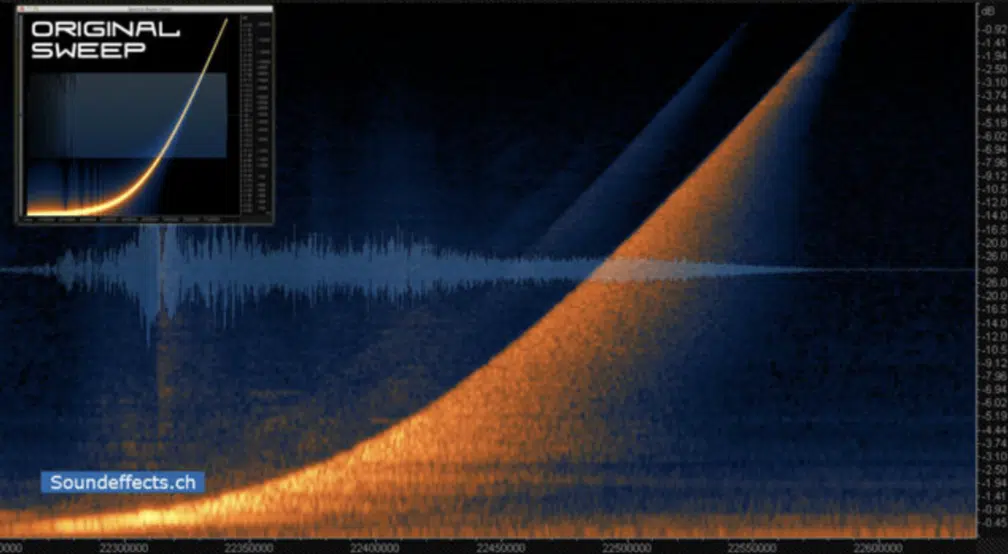
Custom reverb impulse responses are recordings of how a physical space or sound source reacts to a sharp, full-frequency sound, like a:
- Sine sweep
- Starter pistol
- Even a clap
- Etc.
These recordings are then used in convolution reverb plugins to apply the sonic characteristics of that exact acoustic space to anything in your mix.
And they’re not just random audio files…
They’re highly specific snapshots of reverb behavior, tone, reflections, and decay, captured with detail down to the millisecond.
By using your own impulse responses, you get full control over how that space behaves in your mix, which can give you a truly signature sound no one else has.
Don’t worry if it sounds a little confusing right now because I’ll be breaking down everything you need to know (in detail) throughout the article.
This way, you’ll have a super solid understanding by the end, no doubt about it.
How Impulse Responses Work Inside a Convolution Reverb Plugin
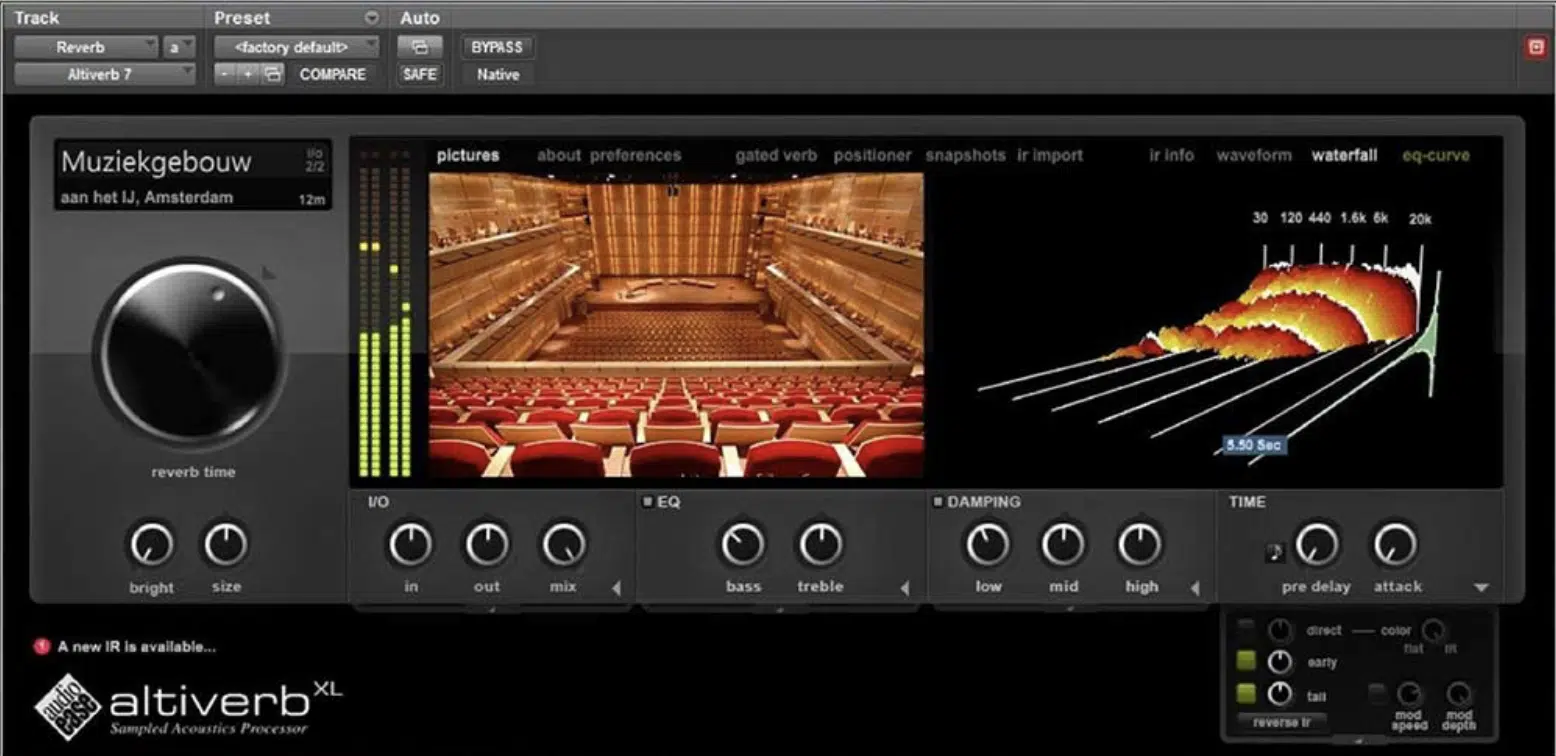
Inside a convolution reverb plugin, an impulse response is loaded as a reference that gets mathematically applied to the incoming sound, using a process called convolution.
This means every tiny reflection, decay curve, and tonal fingerprint from that space gets wrapped around your original signal.
Basically, it transforms a dry sound into one that lives in a fully immersive, three-dimensional environment.
For example, if you load a cathedral IR, it will apply the reflections, tone, decay, and reverb tail of that exact space to whatever audio file or signal you feed into it.
This can take a flat-sounding vocal, and instantly place it inside a massive stone church with soaring high ceilings and natural reverb that trails off for 4 or 5 seconds.
Most convolution reverb plugins allow you to load WAV, AIFF, or proprietary IR file types, and support features like:
- Pre-delay
- Dry/wet blend
- Tail trimming
- Even frequency filtering for tonal shaping
These features help you fine-tune how the impulse reacts in context.
For example, dialing in 20–30 ms of pre-delay helps keep your vocals punchy by giving them a slight separation from the initial reverb reflections.
Spatial accuracy and realism depend heavily on the impulse quality, and plugins like Logic Pro’s Space Designer, Waves IR-1, and Altiverb 8 are known for top-tier IR fidelity.
And each of these unique plugins will give you different strengths…
Altiverb, for instance, includes a massive library of real-world spaces like theaters, studios, and even car interiors.
IR-1, on the other hand, gives you deeper control over mic positions and damping, so it really all depends on the vibe you’re going for.
And keep in mind that advanced options like oversampling can improve reverb smoothness/realism, but they also increase CPU load and latency.
If you’re running a heavy session at 96kHz with five or more convolution reverbs, oversampling can quickly start chewing through your processor.
So you’ll definitely want to test your setup carefully, and know that when exactly you’re going to adjust these settings is key, for sure.
You might want to turn off oversampling on background elements like pads, but leave it on for your lead vocals or guitar busses where the reverb texture is front and center.
You can also tweak/adjust tail length, filter out low-end rumble, or even stretch the IR for weird, ambient effects 一 all of which give you more control over your final sound.
Plus, when you play around with reversing the impulse, adding modulation, or combining multiple IRs, you open the door to seriously creative textures that feel alive and personal, which I’ll break down in a second.
Because, let’s be honest, nobody wants to deal with boring, basic, canned, static sounds, am I right?
Creating Your Own Custom Reverb Impulse Responses From Scratch
Once you understand how this stuff works under the hood, it’s time to get your hands dirty and actually create your own custom reverb impulse responses from scratch. It’ll give you the power to lay down some serious magic. And trust me, once you go through the full process, you’ll unlock a whole new level of control over your reverbs that stock plugins just can’t touch. So, let’s get into it, guys.
#1. Capturing an Acoustic Space Using a Starter Pistol or Sine Sweep
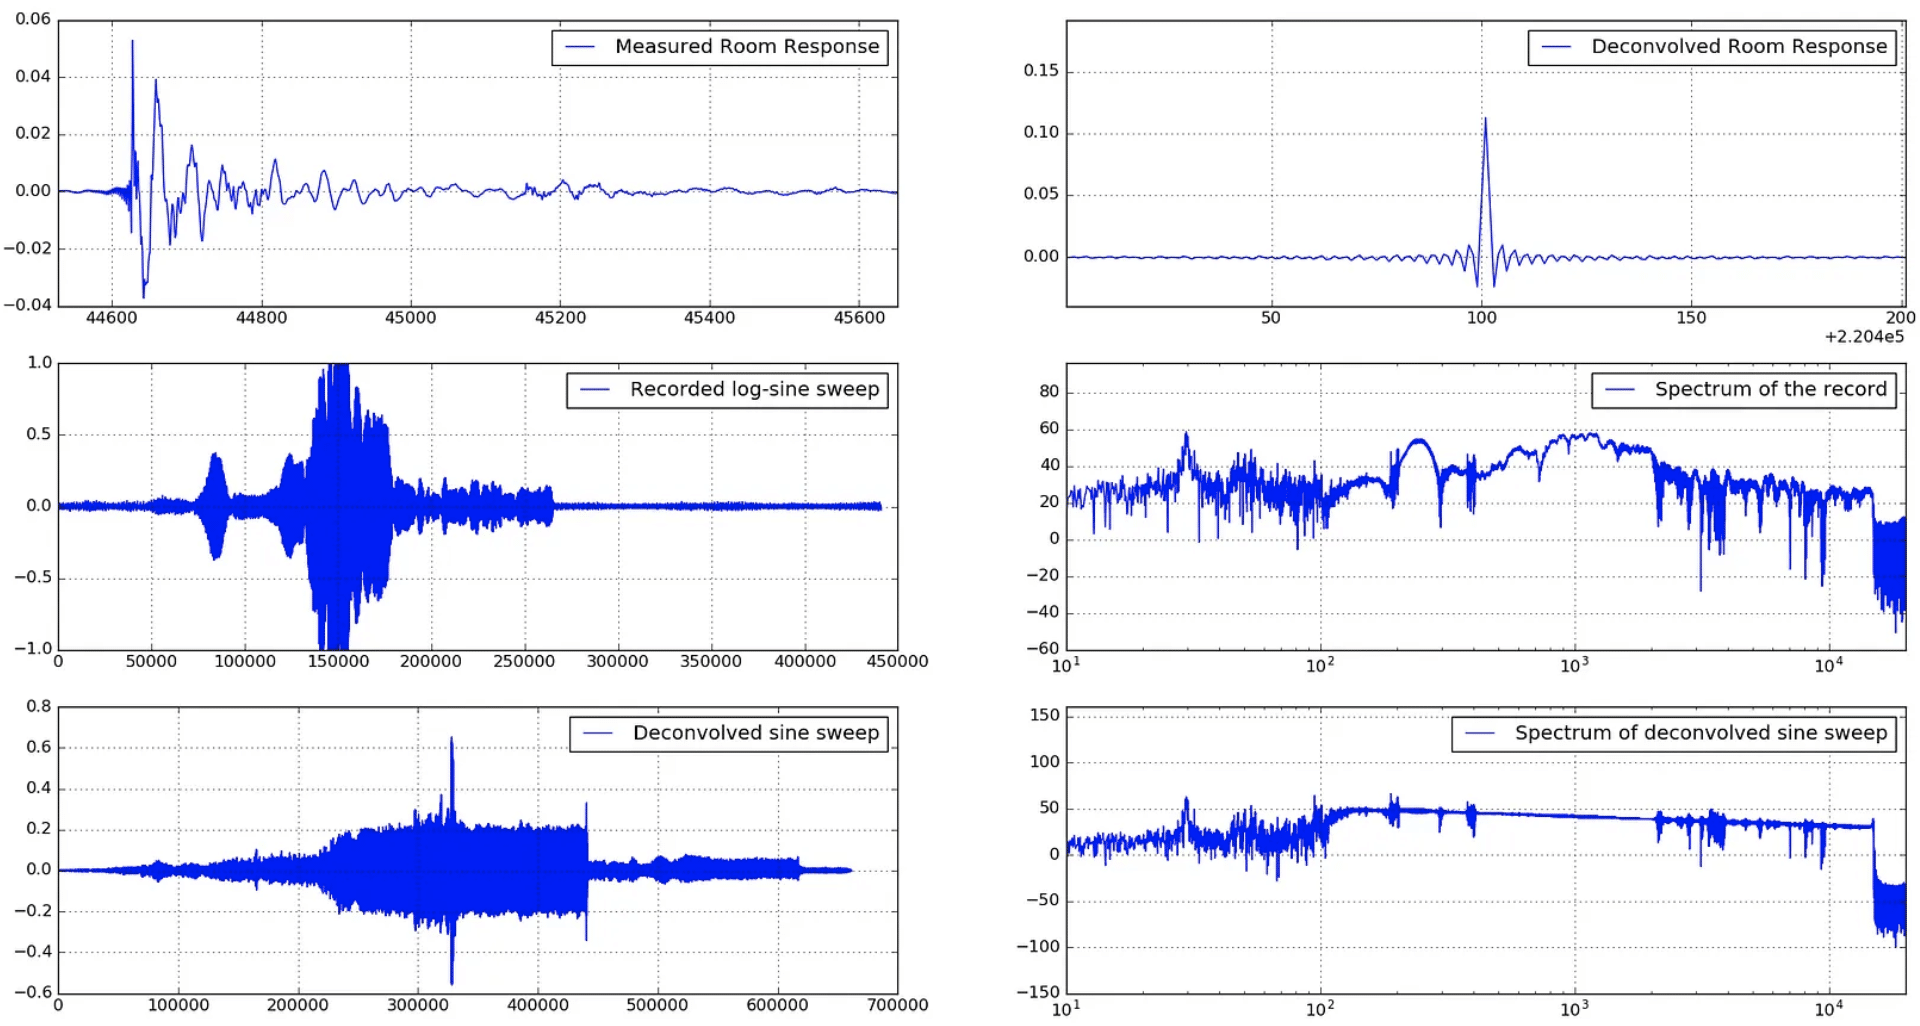
The first step to recording an impulse response is capturing how a real acoustic space reacts to a full-spectrum sound, and the two most common methods are:
- Starter pistols
- Sine sweeps
Starter pistols are super loud and deliver a sharp, broadband impulse.
But just keep in mind that they’re honestly not ideal unless you’re in a remote location or a massive hall that can handle the SPL without any risk.
That’s why most of us stick with sine sweeps, which are much more controlled and safe to use (especially in studio environments or rented rooms).
A sine sweep, on the other hand, usually lasts anywhere from 5 to 15 seconds and covers the full frequency range (20Hz to 20kHz).
It gives you the most accurate representation of the space’s tonal fingerprint.
You’ll want to record at 96kHz, 24-bit for better resolution/detail, and always make sure to leave about 5 seconds of silence after the sweep to let the reverb decay fully.
Also, remember to check your speaker’s positioning and SPL (around 85–90dB) to make sure it’s loud enough to generate strong reflections without clipping.
For example, in a concrete stairwell, a longer sweep at 10 seconds reveals some rich metallic midrange flutter that would be totally missed at shorter durations.
Once you get that raw sweep recorded, you’re on your way to building your own custom reverb impulse responses that reflect real-world spaces with unmatched accuracy.
PRO TIP: Always test the sweep beforehand with your headphones to avoid any distorted playback or sketchy setup errors. Thank me later.
#2. Setting Up a Microphone & Speaker Configuration for IR Recording
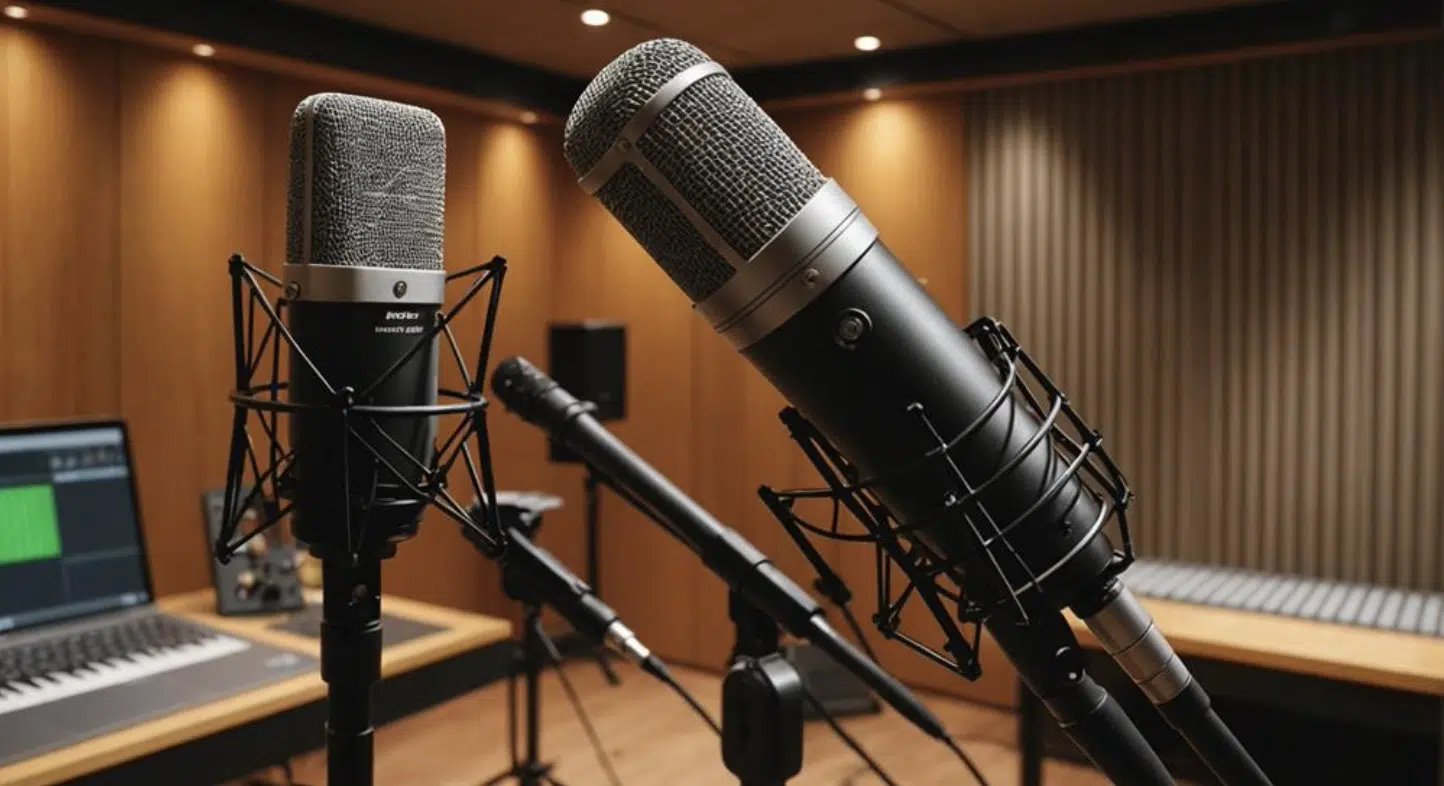
Your mic and speaker positioning directly affect the clarity, balance, and overall vibe of your final impulse, so this next part of the setup is super important.
A flat-response monitor works best as your sound source because you’ll definitely want something that doesn’t color the sweep.
I usually place the speaker at one end of the room (exactly where an instrument or vocalist would naturally perform) and then capture the response from multiple microphones positioned at key listening spots.
For example, in a medium-sized studio space, placing a cardioid condenser 6 feet away at ear level gives you a nice forward-focused IR.
While adding a second omni mic behind it adds depth and stereo width.
You’ll want to aim for at least two mics:
- One close (around 3–4 feet)
- One far (8–12 feet)
This way, you can blend the dry and ambient textures later in your convolution reverb plugin, which will be awesome.
You’ll also want to use quality gear like a Neumann TLM 102 for clarity, and a Rode NT2-A in omni mode to get the wider stereo image.
Also, keep your gain levels dialed in 一 shoot for around -6dBFS on peaks to avoid digital distortion while still capturing the overall nuance of the space, if that makes sense.
PRO TIP: Label your mic placements and bounce stems with names like “LargeRoom_OMNI_REAR.wav” so you always know which IR came from which setup.
Remember, the cleaner and more detailed your source, the more pro your custom reverb impulse responses will sound in a real mix.
#3. Deconvolution Process and Converting the Recording into a Usable IR File
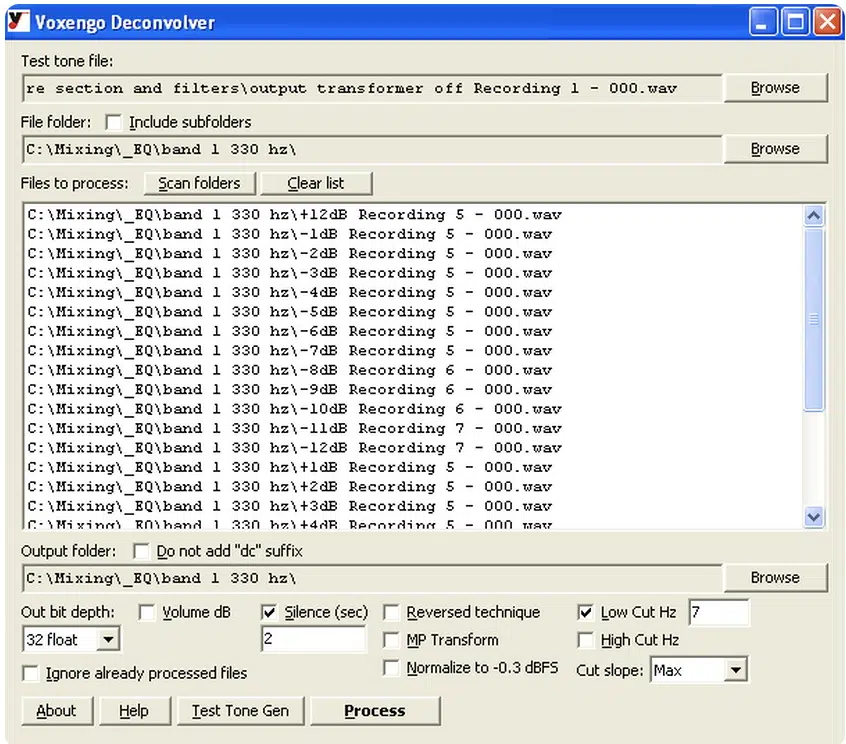
Once you’ve got your sweep recorded, the next step is the deconvolution process.
In simple terms, it’s when you subtract the original sine sweep from the recorded result to extract the actual impulse response.
What you’ll be left with is a perfectly isolated snapshot of how that space sounds when hit with a full-frequency signal 一 and this becomes your custom IR.
Most music producers use tools like Voxengo Deconvolver, REW, or Logic Pro’s Impulse Utility to handle this step, and the process is pretty simple once you get the hang of it.
For example, in Voxengo, you just drag in your original sweep and the recorded file, hit process, and it spits out a clean, balanced IR file ready to use all day.
Just make sure to trim the tail to about 2 or 3 seconds if you’re working on pop, metal, kick-heavy tracks, or modern styles that don’t need super-long reverberation.
Or, leave it extended for ambient or cinematic work.
You’ll also want to normalize the output to avoid volume jumps when switching between IRs in your convolution reverb.
Pay close attention to any background noise or phase artifacts, and if they’re baked into your IR, they’ll show up every time you load it in a session.
Always listen through good headphones or monitors before saving, and export the final audio file as a 24-bit/48kHz WAV to ensure broad compatibility.
And once you get into the habit of doing this, you can crank out entire folders of custom reverb impulse responses that sound way more real, dimensional, and tweaked than anything built into your convolution reverb plugins.
Using Found Sounds & Synthesized Sources for Unique IRs
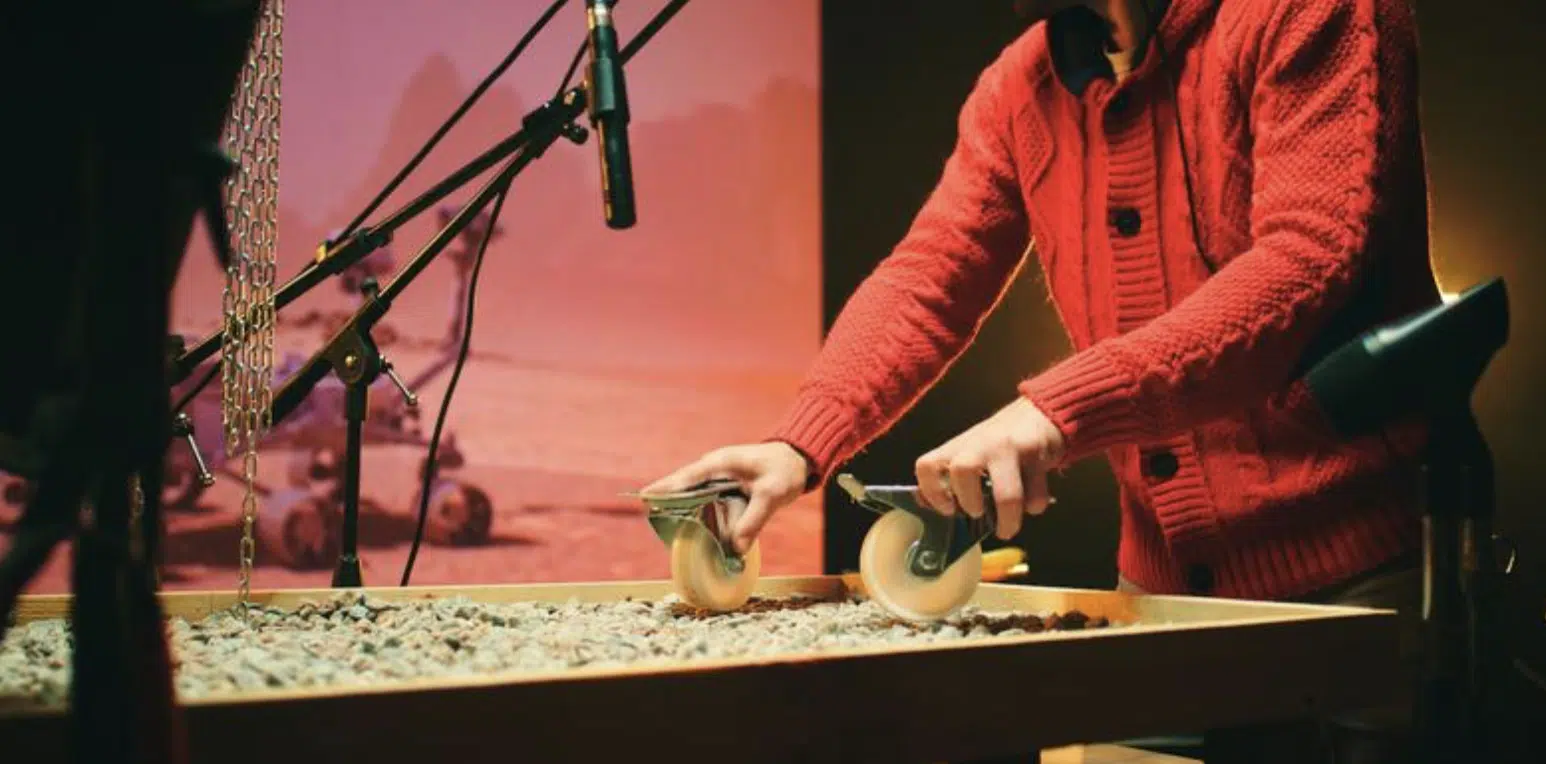
You don’t have to capture a real room to make dope custom reverb impulse responses because sometimes the most creative IRs come from:
- Field recordings
- Random textures
- Even synth patches
For example, you can record the inside of a train station, a hallway in your apartment, or even your bathroom using your iPhone.
Just make sure you capture a few seconds of silence, or even toss in a clap or knock because those short transients will help reveal the actual space and give you something to align your sweep with later.
Then, simply process that audio to extract unique ambient textures as IRs.
And if you’re into experimental sound design like myself, you can also generate IRs using white noise bursts and reverb-drenched synths.
Or even granular textures created inside plugins like Output Portal or Pigments (which are two of my personal favs).
I suggest that you try routing a Valhalla Shimmer preset into a granular delay chain, bounce the output, and then run it as an impulse.
You’ll get insane, swelling tails that feel more like pads than traditional reverbs.
Always remember, in the music production world, it’s all about getting to play around with different techniques.
You can even use short samples like metal hits, broken toys, or lo-fi radios as IR sources 一 just run them through a little EQ and trimming to clean up any unnecessary tail noise.
One trick that works great for ambient tracks is reversing a field recording and then stretching it 400% before running it through deconvolution.
This makes every transient feel like it’s breathing backward into the space, while the extended tail gives it this lush, surreal bloom that you’d never get from stock IRs.
It adds this eerie, swelling reverberation that you just can’t get from a traditional impulse (and people subconsciously love it).
It also works great on vocals if you low-pass the IR first and set your dry/wet to 20–30% because that way, the texture sits behind the vocal instead of washing it out.
And when you’re feeling adventurous, make sure to play around with modulation or pitch automation on your IRs before bouncing.
Using something like Soundtoys MicroShift or even a pitch LFO in Ableton can turn a static IR into a moving, expressive reverb layer that feels alive, so keep that in the bank.
It lets you build custom impulse responses that evolve over time and respond differently to different instruments; almost like a human performer.
And once you’ve got a few of these wild IRs saved, they become your secret weapon for adding vibe, originality, and emotion to your tracks all day.
Pro Tip: How to Load Custom IRs in Popular Convolution Plugins
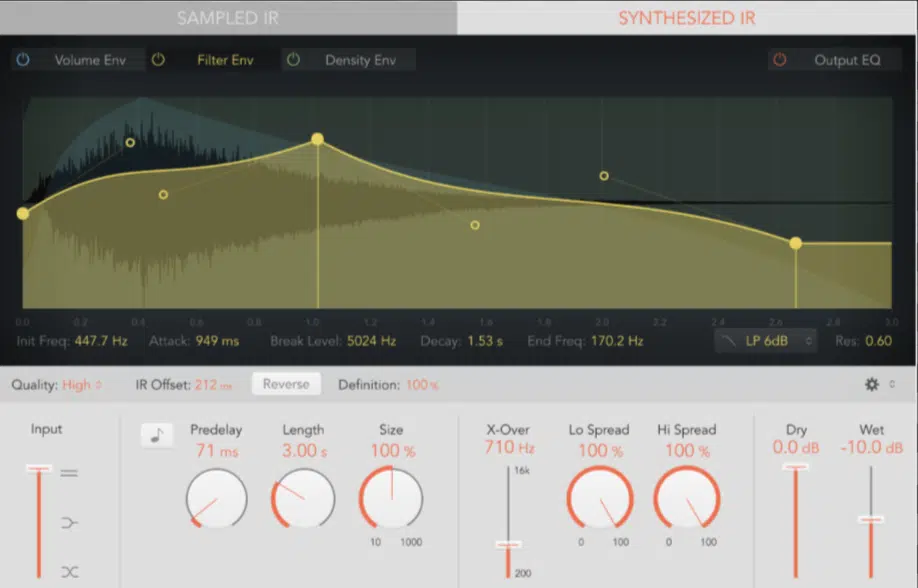
Once your IR is ready to go, most convolution reverb plugins make it super easy to load it in, so you’ll catch on super quick, for sure.
For example, in Logic’s Space Designer, just drag the audio file into the IR window and boom: it’s ready to use.
In Waves IR-1, you can navigate to “Load IR,” select your file, and even adjust mic position or virtual room depth right inside the plugin, giving you next-level control.
If you’re using Ableton’s Hybrid Reverb, just toss your IR sample into the Convolution section and mess with the EQ and decay shaping to match your track’s energy.
Also, always normalize your IRs before loading…
Some plugins interpret gain differently, and you don’t want to blow your speakers when previewing vocals, kicks, or delicate pop layers through a boosted IR by accident.
Reverb Tail Shaping & Frequency Sculpting in Custom IRs
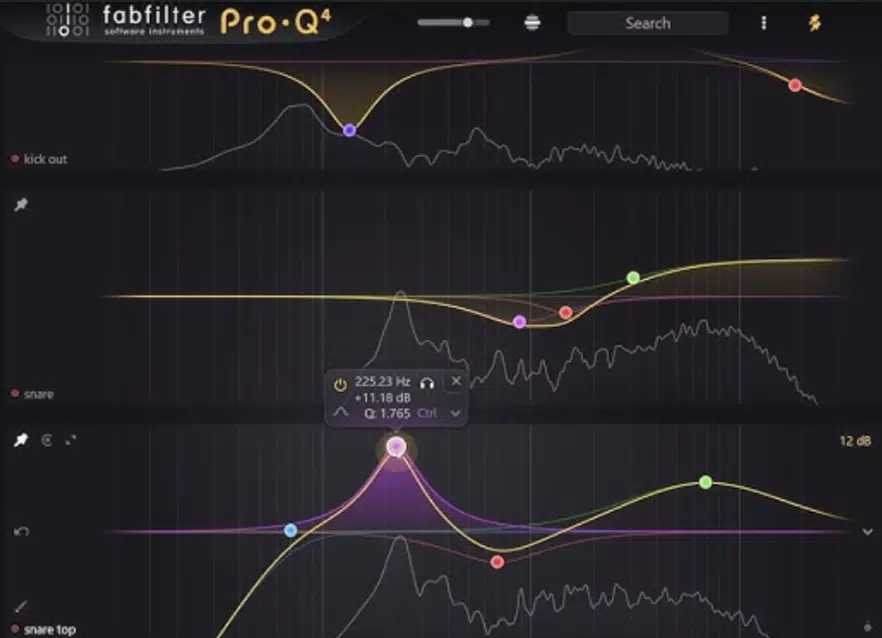
When you’re working with custom reverb impulse responses, shaping the tail and EQ is where things really get professional.
It’s the stage where you’re no longer just applying reverb…
You’re actually creating how the impulse reacts to your sound in the mix altogether, which separates a decent track from one that feels insanely on point.
A lot of raw IRs will have unwanted low-end mud or harsh highs, so running them through a linear phase EQ to cut below 120Hz and above 16kHz can tighten the response and help it blend better with your instruments.
In FabFilter Pro-Q 4, a low-cut at 18dB/oct around 110Hz and a high-shelf at -3dB starting at 15kHz usually does the trick without making the IR sound dull.
This is especially useful when working with vocals or kicks, so keep that in mind.
For example, a spring reverb IR used on snare can sound super messy unless you trim the tail down to under 1 second and apply a soft high-shelf cut at 8kHz.
If the snare has fast transients, that long tail ends up blurring the groove.
So, trimming and EQ not only keeps things tight but also keeps the snare feeling punchy and clean in the overall mix.
You can also tweak the tail shape by applying a gentle fade-out to avoid abrupt cutoffs or unnatural decay.
Even just a 200ms exponential fade at the end of the IR can smooth things out in a major way (perfect for short ambient spaces or percussive hits).
And when you leave a little subtle movement in the tail, it blends with the dry signal in a way that feels intentional, not pasted on.
This is huge when you’re mixing lead vocals or acoustic instruments.
And don’t sleep on layering multiple IRs with opposite tonal curves, either.
It’s kind like blending synth patches 一 one covers the lows, the other adds sparkle, and together they feel full.
One trick is to pair a dark, mid-focused impulse with a bright, short one to create a wider, more dynamic spacethat gives your track more power/depth without cluttering the mix.
For example, layering a room IR captured with a ribbon mic and a bright studio booth IR recorded with a small-diaphragm condenser can give drums a MASSIVE sense of space without actually extending the decay time.
So, all-in-all, shaping your custom reverb impulse responses like this gives you total control over tone, texture, and timing.
It lets you expertly sculpt space around your tracks that feels natural, intentional, and fully dialed-in to the song.
Creative Sound Design Uses for Custom IRs
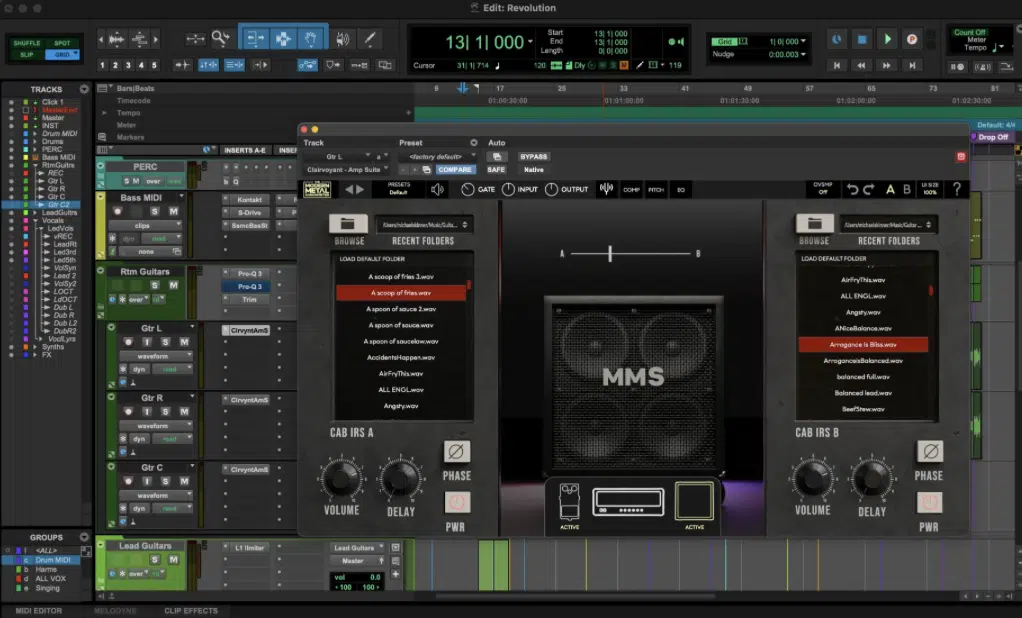
One of the sickest parts about building your own custom reverb impulse responses is just how crazy you can get with sound design.
It’s not just about reverb 一 it’s about tone, texture, and motion.
You’re literally turning static files into dynamic FX that move with the music and giving each sound a vibe you can’t get from stock presets alone, period.
For example, try running a kick or snare through a metallic pipe IR because it’ll instantly make your drums sound industrial and give them an aggressive edge.
This one is perfect for experimental or pop crossover styles.
I once ran a snare through a rusted metal vent IR captured with a Zoom H6 and a pair of omni mics, and it added this wild, metallic slap that hit perfectly on 2 and 4.
And it didn’t even need EQ, which was even more crazy.
If you want dreamy, vocal-heavy atmospheres, layer a stretched choir sample as your IR source and apply a high-pass filter at 500 Hz to make it float in the background while leaving room for lead vocals.
And if you filter the highs around 6kHz and drop the pre-delay to 10ms, you’ll get this ghost-like shimmer that enhances emotion without overpowering the center of your mix.
Short impulses, like hand claps, reversed snaps, or one-shot drum transients, work amazing for adding bite and transient character without long decay.
For example, you can take a finger snap, reverse it, trim it to 300ms, and run it on hi-hats using Space Designer (or whichever plugin you like).
Suddenly you’ll find that the top end had a poppy, percussive tail that bounced just right without messing anything up.
Also make sure to play around with using your own IRs as insert FX rather than sends…
That way, you can automate things like dry/wet balance, settings, or EQ across time and really bring your reverb alive in a way that responds to the song rather than just sitting in the back.
In fact, automating the dry/wet from 10% to 40% on just a few bars of a vocal line can shift the entire energy of a verse or chorus.
This will help it breathe, swell, or drift into a transition flawlessly.
And that’s the beauty of using custom impulse responses; they don’t just react to your sound, they actually become part of the performance itself (legendary, right?).
Pro Tip for Organizing and Managing Your IR Library
When you’re stacking up dozens (or even hundreds) of custom reverb impulse responses, proper organization is an absolute must.
Otherwise you’ll waste time digging for sounds mid-session, and nobody wants that.
So, I suggest you use folders named by:
- Space type
- Mic technique
- Specific tail length
This could be something like “Small Room_Omni_2sTail” or “Granular FX_Reverse_Short.”
Also make sure to save all IR files in 24-bit/48kHz WAV format for compatibility with pretty much all convolution reverb plugins in existence.
PRO TIP: color-code your folders in Finder or use tags in Windows to mark your go-to IRs for vocals, kicks, or ambient tracks.
This way you can pull the right vibe without killing your creative momentum.
Must Knows When Creating High-Quality Custom Reverb Impulse Responses
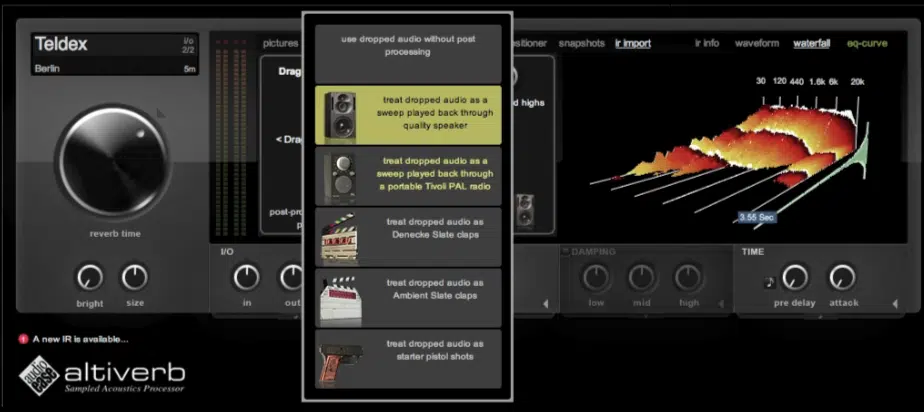
To get the best sound possible out of your custom reverb impulse responses, you’ve got to start with clean recordings.
That means no clipping, no hum, and no unwanted room reflections bleeding into your mic 一 which is what you’re ultimately going for.
So, make sure to use high-headroom preamps (like the Audient ASP800 or the UAD Volt series), set your levels with peaks between -12dB and -6dBFS.
And always monitor with headphones to catch background audio issues before you even think about hitting that record button.
For example, placing an omni mic 8 feet from the speaker, 4 feet off the ground, away from walls, gives you a nice balanced impulse that’s not too colored by the space.
Also, play around with different microphones, like a large-diaphragm condenser (AT4050) and a small-diaphragm condenser (Oktava MK-012).
This way you can capture both the low-mid warmth and high-end detail in separate IRs, which you can later blend for a polished and dimensional convolution reverb effect.
Common Mistakes to Avoid When Working with IRs
One of the biggest rookie mistakes when creating custom reverb impulse responses is using a poorly isolated sweep…
Any noise, hum, or even HVAC in the room can get baked into the IR and ruin the final sound, and you certainly don’t need that headache in your life.
Also, don’t forget to trim the tail properly…
Long IRs with 6–10 second decays might sound epic in solo but can completely muddy your track when stacked with other FX or vocals.
For example, anything over 3 seconds in a 120 BPM pop mix starts eating up space fast, so fade out your IRs or adjust decay in the plugin to match the song.
PRO TIP: avoid naming your files like “testIR_7_final_final.wav.” Instead, you’ll want to use clean, structured names like “StudioBooth_Cardioid_90dB_ShortTail.wav.”
This way, you’ll always know what mic, setup, and settings were used without having to listen every time (talk about time-saving).
Bonus: When to Use Custom IRs Over Stock Reverbs
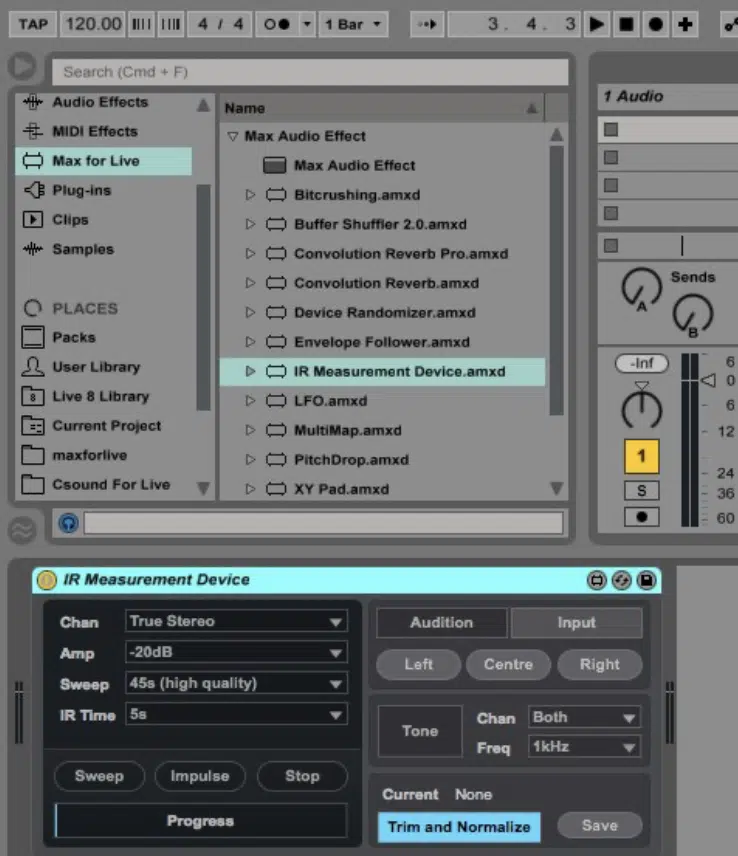
If you’re trying to match a realistic environment to your instruments, like placing a nylon guitar in a wooden hall or a vocal in a tiled stairwell, nothing beats using custom reverb impulse responses captured from the actual space.
Stock reverbs might give you a vibe, but they rarely capture the micro-reflections and spatial quirks that real impulse responses provide.
You’re missing out on all the unpredictable little details, like the:
- Flutter echoes
- Early decay rolloff
- Slightly off-center slapback you get when mics are placed just outside the sweet spot
- Etc.
And if you’re chasing realism or trying to glue a track together naturally, you definitely need these things.
For example, when mixing a lead pop vocal, I like to use a short, early-reflection-rich IR we recorded from a stairwell using a single omni mic and an ATC speaker 一 positioned 5 feet apart with about 20° inward angle.
I captured it at 96kHz/24-bit, with the mic elevated about 4 feet off the floor to avoid harsh floor reflections and catch the natural splash off the sidewalls, and it was great.
It gave just enough depth without muddying the midrange.
And if you want a little more stereo spread, you can blend in a second IR captured in the same space using a spaced pair of small-diaphragm condensers to capture a wider stereo image.
You’ll also want to reach for custom impulse responses when creating signature textures that help your song stand out.
Whether it’s a re-amped vocal tail, a one-of-a-kind sample, or a short, snappy IR made from reversing a glass tap and stretching it to 500ms, it’s about using sound in killer unexpected ways.
If you’re building a vocal chain, mixing for film, or chasing a stranger, almost alien sound you’d never find in a preset or generic plugin reverb, it’s invaluable.
And if you’re after realism with amplifiers, drums, or even old radios, IRs that you personally capture with familiar gear give you an edge no whack preset can match.
So when the track demands something special (whether it’s warmth, grit, shimmer, or intimacy) pulling out your own curated IR folder turns you from a mixer into a full-blown space designer, so go crazy!
Final Thoughts
And there you have it: everything you need to know about custom reverb impulse responses and how to use them like a freakin’ boss.
By using these epic tips, tricks, and techniques, you’ll be able to successfully build immersive, dynamic spaces that respond to your tracks with emotion and clarity.
Plus, you’ll never have to worry about bland reverbs or generic plugin presets ever again.
And, as a special bonus,since we talked about field recordings, found sounds, and creative textures, here are the best Free Foley Samples in the game.
These 20 professionally-created foley samples are perfect for building your own custom reverb impulse responses from scratch.
Whether it’s footsteps in gravel, a metal clang, or a distant mechanical sweep, each one has the potential to become a one-of-a-kind impulse.
It can help to completely transform your audio in crazy cool, unexpected ways.
And yes, they’re all 100% royalty-free, so feel free to use them however you want 一 in IR creation, sound design, or straight into your mix.
Bottom line, when it comes to IRs, just remember you always have to play around with source material and dial in the details.
This way, you can shape reverbs that are truly your own and react to your music in a way that elevates the entire track and helps you dominate the competition.
Your tracks will always feel spacious, polished, and intentional like an expert laid it down (which you will soon be if you continuously practice).
And don’t forget to always record creatively, play around with weird ideas, and think outside of the box because that’s where the magic lives.
Until next time…


Leave a Reply
You must belogged in to post a comment.