Vocal chains take your raw vocal recordings and transform them into polished, professional-sounding tracks that stand out in any mix.
They control dynamics, shape tone, and add the depth and character that make vocals truly shine.
Plus, a perfect vocal chain helps you eliminate harsh frequencies, manage sibilance, and help you make sure your vocals sit perfectly in the mix.
As a producer, knowing all the vocal chain essentials is super important.
This way, you’ll be able to create vocal tracks that sound polished and professional, ready to compete with the best.
That’s exactly why we’re breaking down everything you need to know, like:
- What a vocal chain is/processing vocals ✓
- The basics of vocal chains & vocal production ✓
- How to build a basic vocal chain ✓
- Pre-amps and their role ✓
- Vocal compression ✓
- EQ for tone shaping ✓
- De-essers to tame sibilance ✓
- Reverb and delay for space and depth ✓
- Saturation and distortion for warmth ✓
- Advanced techniques like parallel processing ✓
- Common mistakes to avoid ✓
- How to get your vocal to sound on point every time ✓
- Much more about the vocal mixing chain ✓
After this article, you’ll know everything about what a vocal processing chain consists of and how to create a vocal processing chain of your own.
It’ll give you the confidence to mix vocals that sound polished and professional, no matter the genre.
Plus, it’ll help you fine-tune your vocal tracks and find a signature sound like a true professional.
So, let’s dive right in…
Table of Contents
- What Exactly is a Vocal Chain?
- Vocal Chains 101: Understanding the Basics
- Building a Basic Vocal Chain
- Pre-Amps: Boosting the Signal
- Compressors: Controlling Dynamics
- Equalizers: Shaping the Tone
- De-Essers: Taming Sibilance
- Reverb and Delay: Adding Space and Depth
- Saturation and Distortion: Adding Warmth and Character
- Pitch Correction
- The Importance of Gain Staging
- Bonus Tip: Choosing the Right Order for Your Plugins
- Fine-Tuning Effects for a Polished Sound
- Advanced Vocal Chain Techniques When You Mix Vocals
- Common Mistakes and How to Avoid Them
- Bonus Tip: Finalizing Your Vocal Chain
- Vocal Chain: Final Thoughts
What Exactly is a Vocal Chain?
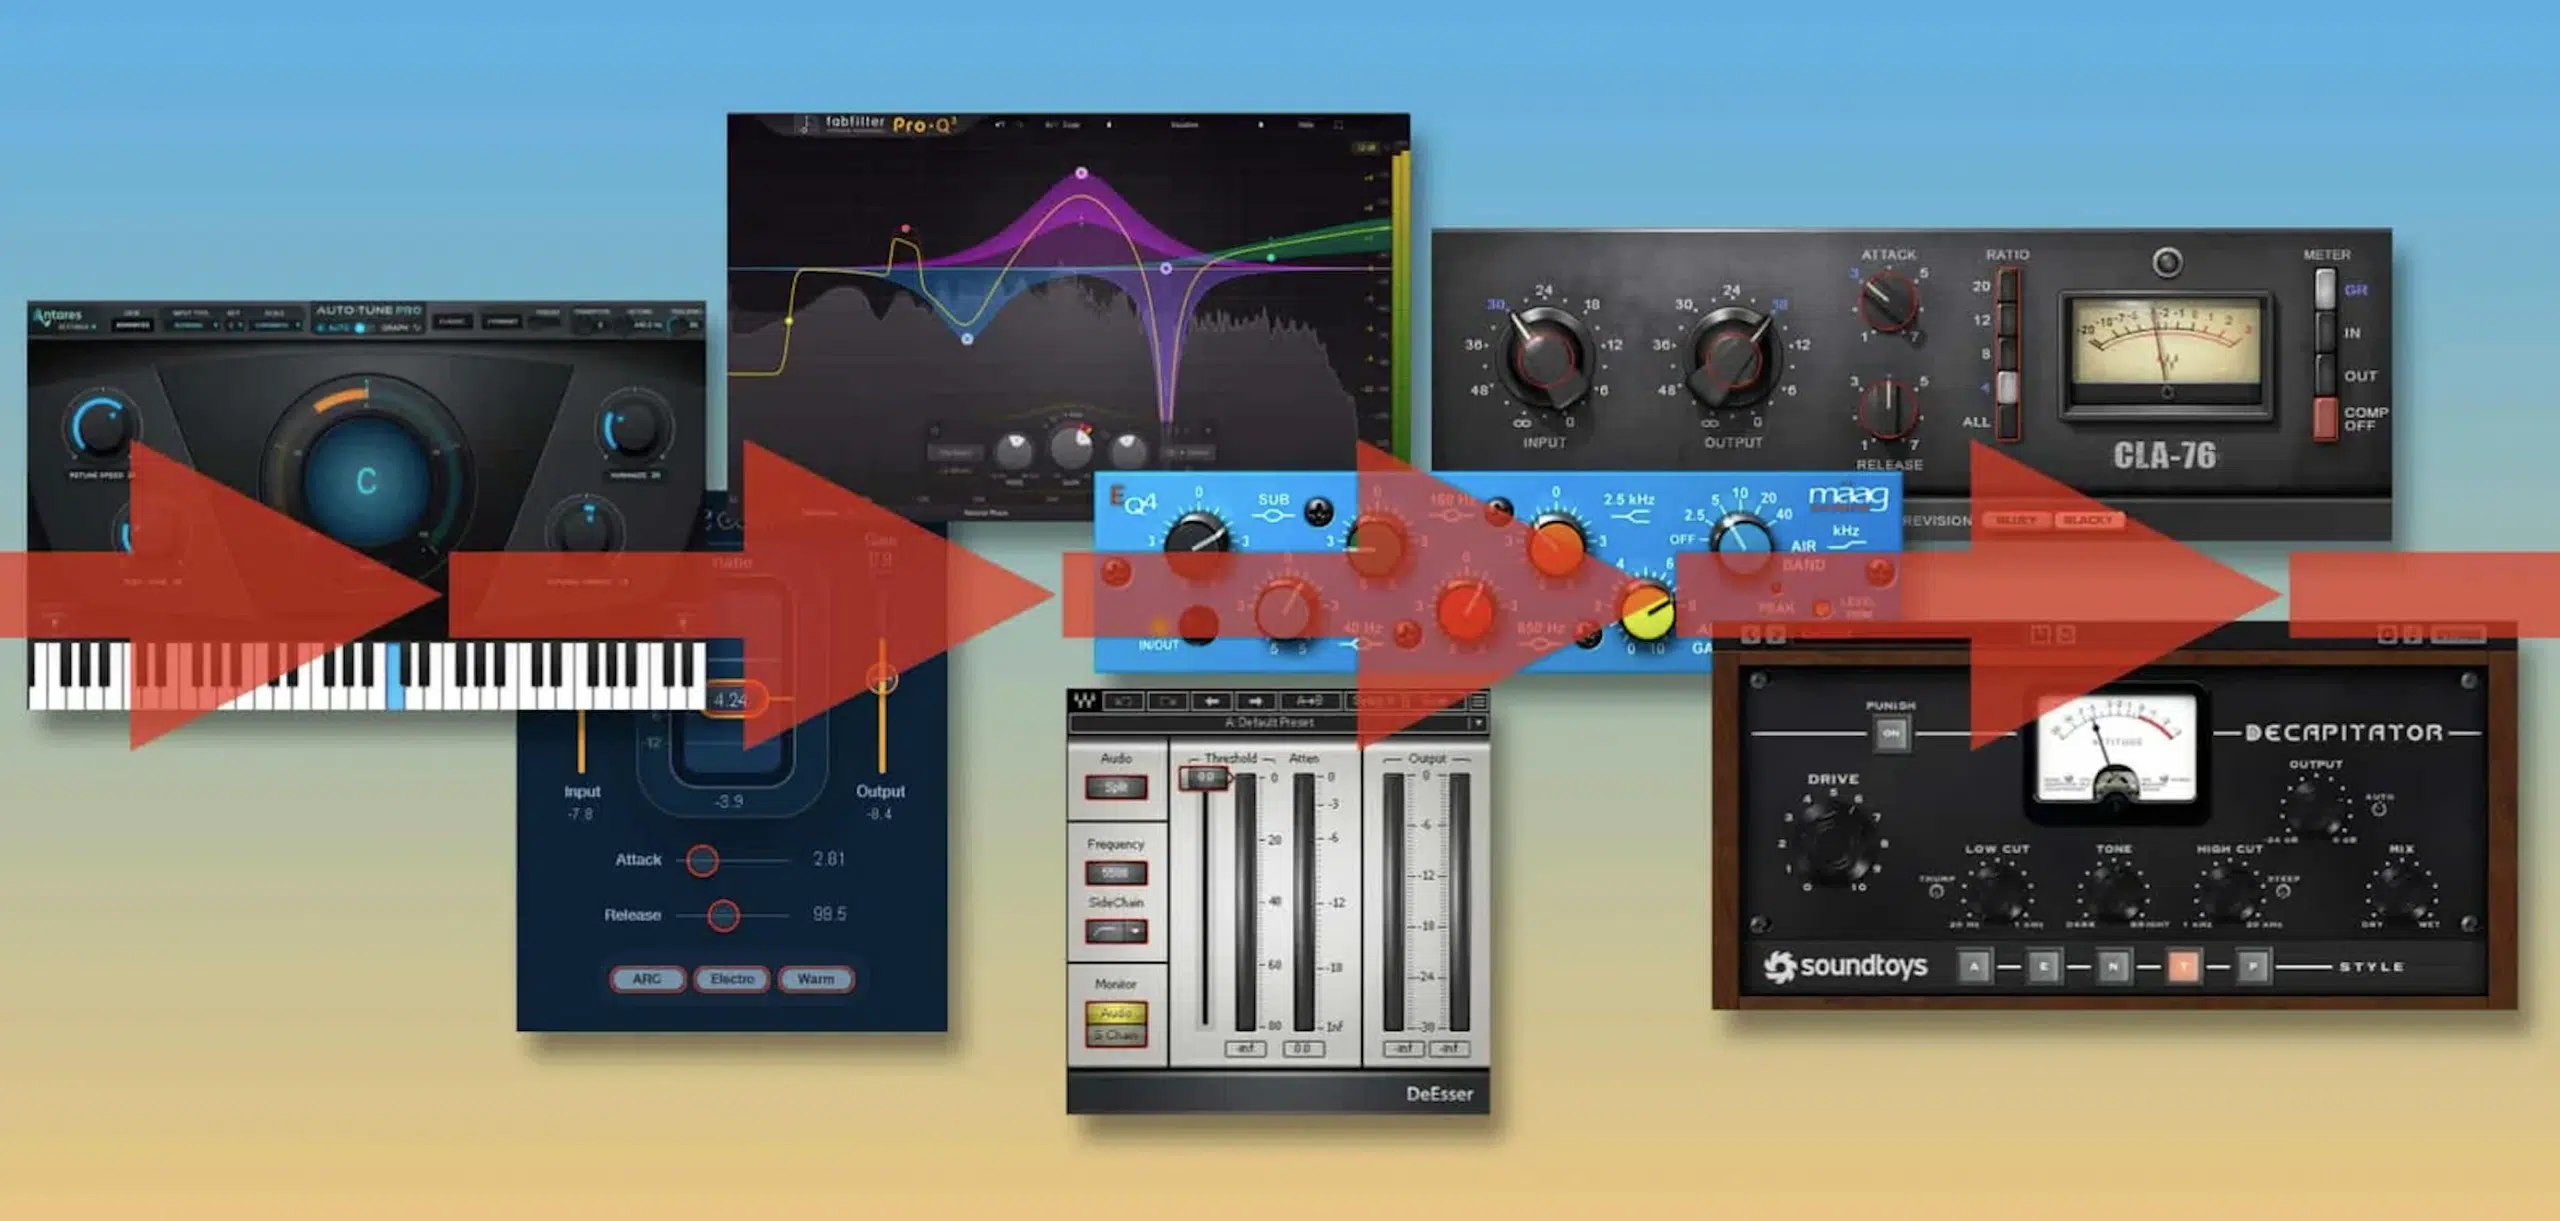
To put it simply, a vocal chain is a series of audio processing tools that capture, shape, and enhance the sound of a vocal recording, making it fit seamlessly within your mix.
Each element in the vocal chain has a very specific role, whether it’s:
- Bringing the microphone volume to an acceptable level
- Controlling dynamics
- Shaping tone
- Adding spatial effects like reverb and delay
The purpose of a vocal chain is to take a raw vocal recording and transform it into a polished sound that stands out in the mix.
Understanding how to build and tweak your vocal chain is key for achieving a vocal sound that is both captivating and professional.
Remember, a good vocal chain doesn’t just enhance the vocal track 一 it defines the final sound of not only your production but also the vocalist themselves.
NOTE: This article will mainly discuss processing tools such as compression in the plugin format, but the same theory can be applied if you’re working in the hardware domain.
Vocal Chains 101: Understanding the Basics
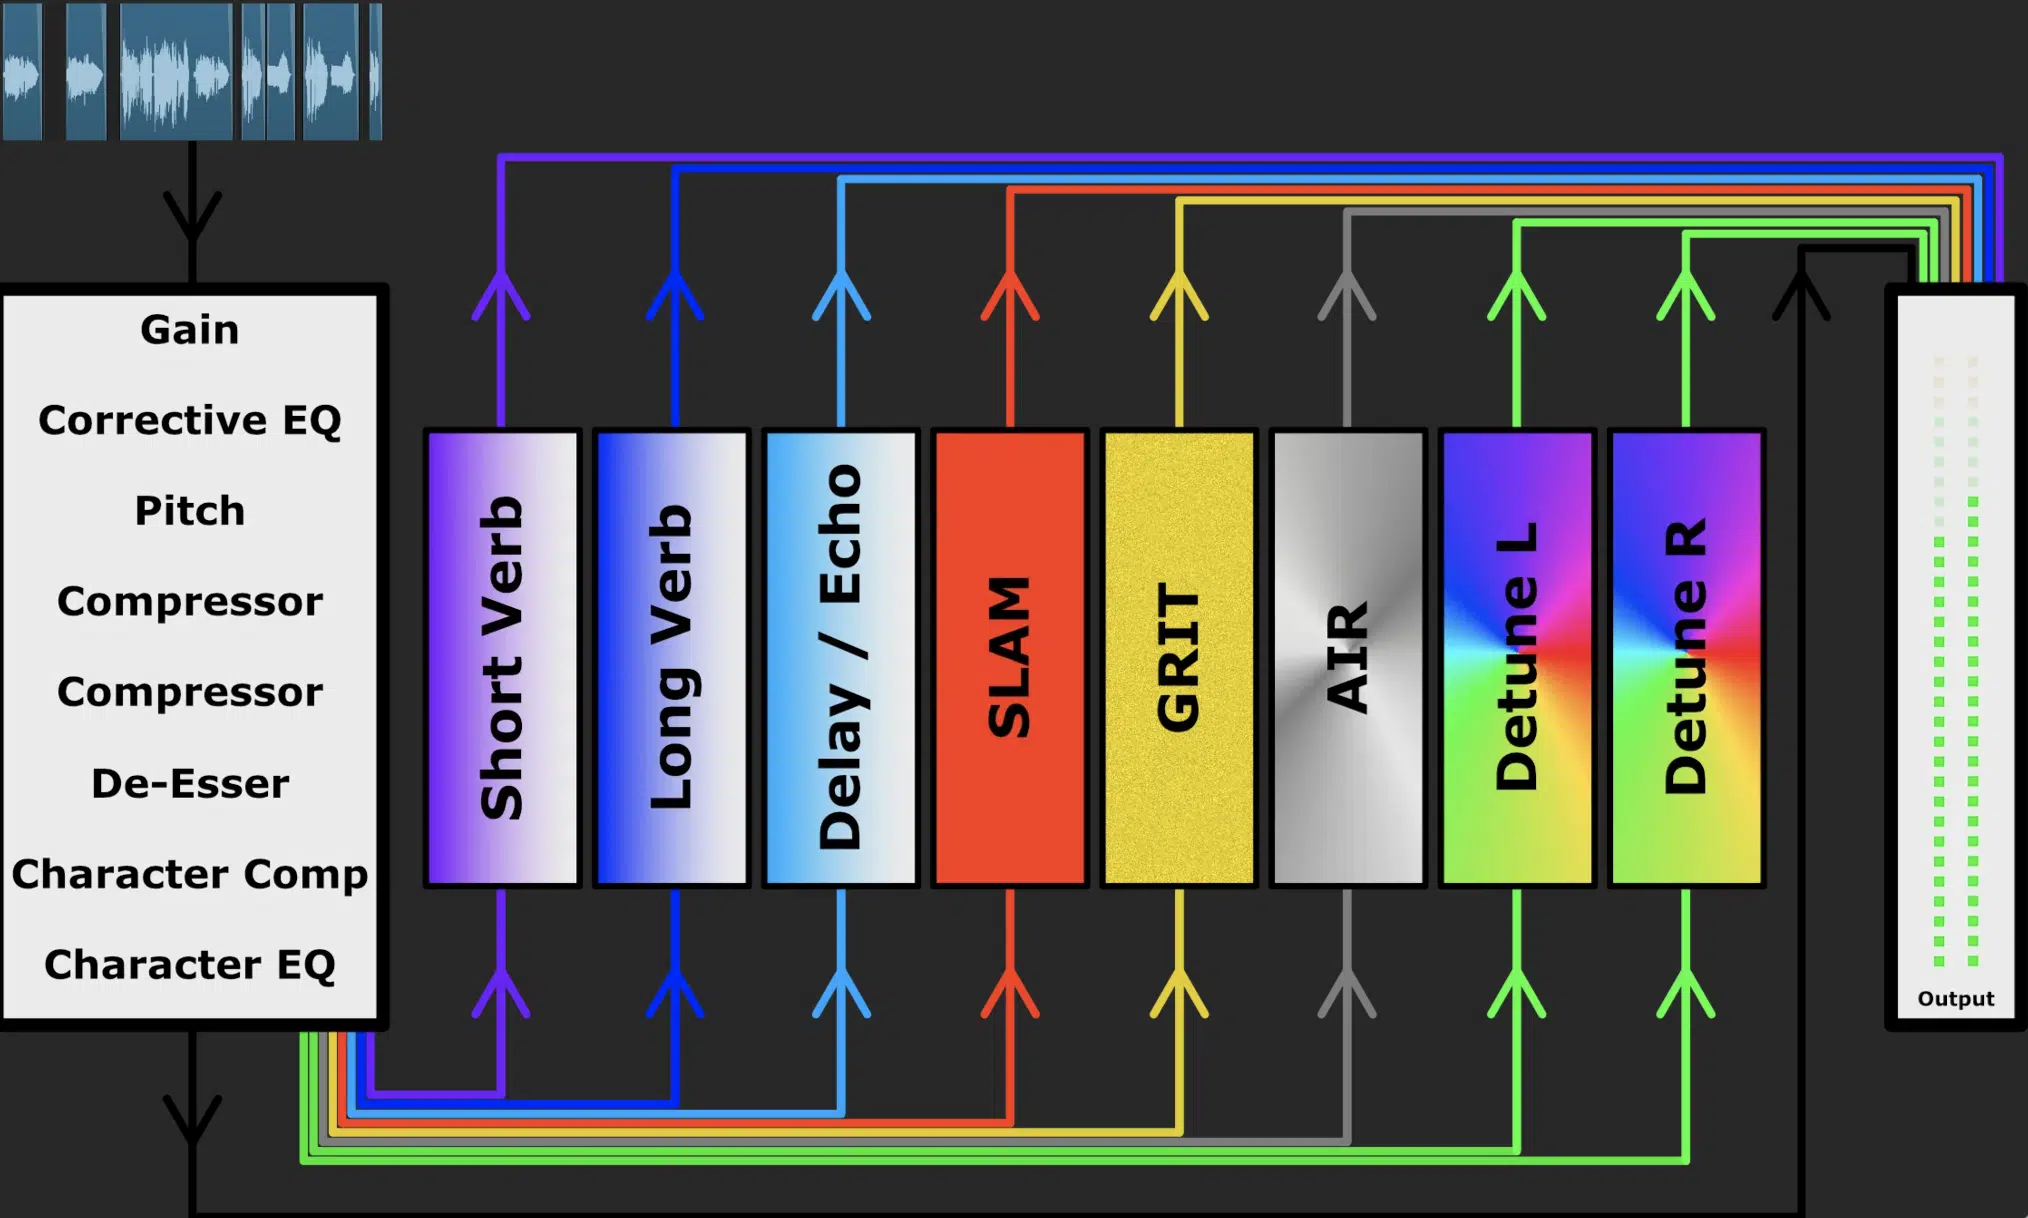
The vocal chain is more than just a series of processors and plugins… It’s the foundation of vocals that turns a basic vocal recording into a professional-grade track.
A typical vocal chain includes essential components like:
- Pre-amps
- Compressors
- Equalizers
- De-essers
- Reverb and delay effects
- Etc.
Each of these elements works together to control the dynamic range and shape the frequency spectrum.
As well as add the necessary spatial effects that make a vocal track sit perfectly.
Keep in mind that the order in which you place these processors in your vocal chain can seriously affect the final sound.
So, understanding their roles will help you create the perfect vocal chain every time.
While a basic vocal chain might cover the basics, advanced techniques such as parallel processing and multi-band compression can take your vocal sound to the next level.
Knowing when and how to apply these techniques is key for achieving a polished sound that stands out in any mix.
Don’t worry, we’ll be breaking down everything in detail throughout the article.
Building a Basic Vocal Chain
Now that you know what a vocal chain is, let’s dive into the process of building a basic vocal chain. This way you can see how each unique component of a vocal chain works so you can really knock it out of the park.
-
Pre-Amps: Boosting the Signal

Technically, the first stop in your vocal chain is the pre-amp, which boosts the signal from your microphone to a level that’s workable for further processing.
Without a good pre-amp, your vocal recording might sound weak or lack the clarity needed to mix vocals effectively.
For example, if you’re using a dynamic microphone like the Shure SM7B, you’ll need a pre-amp that provides enough clean gain to bring out the details in the vocal performance.
The pre-amp sets the stage for everything that follows in the vocal chain.
So, it’s essential to choose one that complements your sound source and the overall vibe you’re shooting for.
Whether you’re going for a clean, transparent sound or something with a bit more warmth and color, the pre-amp is where the journey begins.
Over the last few decades, audio interfaces have come a long way, and most of them include fairly decent preamps in an all-in-one solution.
With that said, nothing usually tops the results you’ll get from an external preamp.
Pro Tip: Most audio interface preamps are designed for a very clean, transparent sound. So if you’re looking for a vintage vibe and color, such as the prized vocal preamp, the Neve 1176 emulation, an external preamp is your best bet.
There are many options and different types of colorations depending on your vocalist and the type of music you’re creating.
Make sure to do your research when investing in this piece of equipment.
-
Compressors: Controlling Dynamics
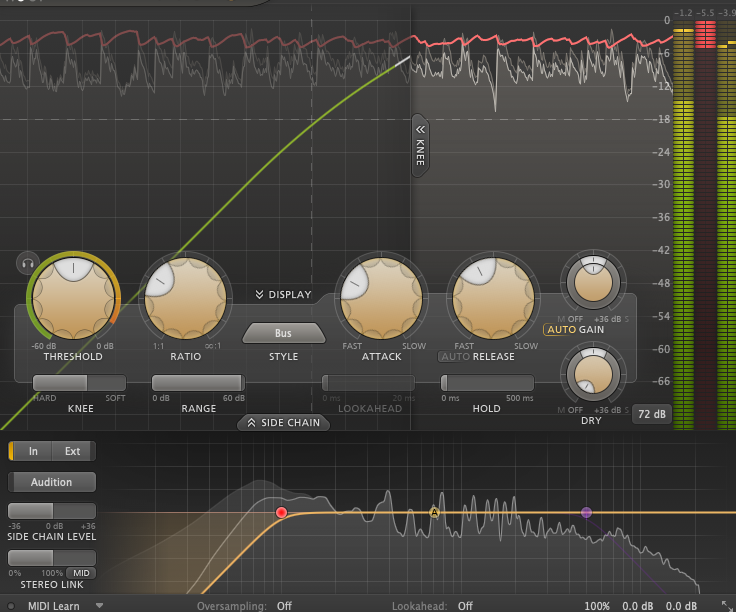
After boosting the signal, the next step in the vocal chain is compression, which controls the dynamic range of your vocal track.
Compressors help to even out the volume levels and smooth out the peaks, ensuring that the quieter parts of the vocal are audible without letting the louder sections overpower the mix.
For example, when working with a lead vocal, using a compressor like the LA-2A or an optical compressor can smooth out the performance.
While, at the same time, adding a bit of character to the vocal sound.
Alternatively, an 1176-style compressor will offer a much less transparent sound and add more “beef” to your vocal 一 it’s just about the results you’re trying to achieve.
Just remember, it’s important to strike the right balance here…
Too much compression can squash the dynamics, making the vocal sound lifeless, while too little can leave the vocal track sounding uneven.
To avoid this, start with moderate settings and adjust the threshold, ratio, attack, and release knobs to match the energy and style of the vocal performance.
-
Equalizers: Shaping the Tone
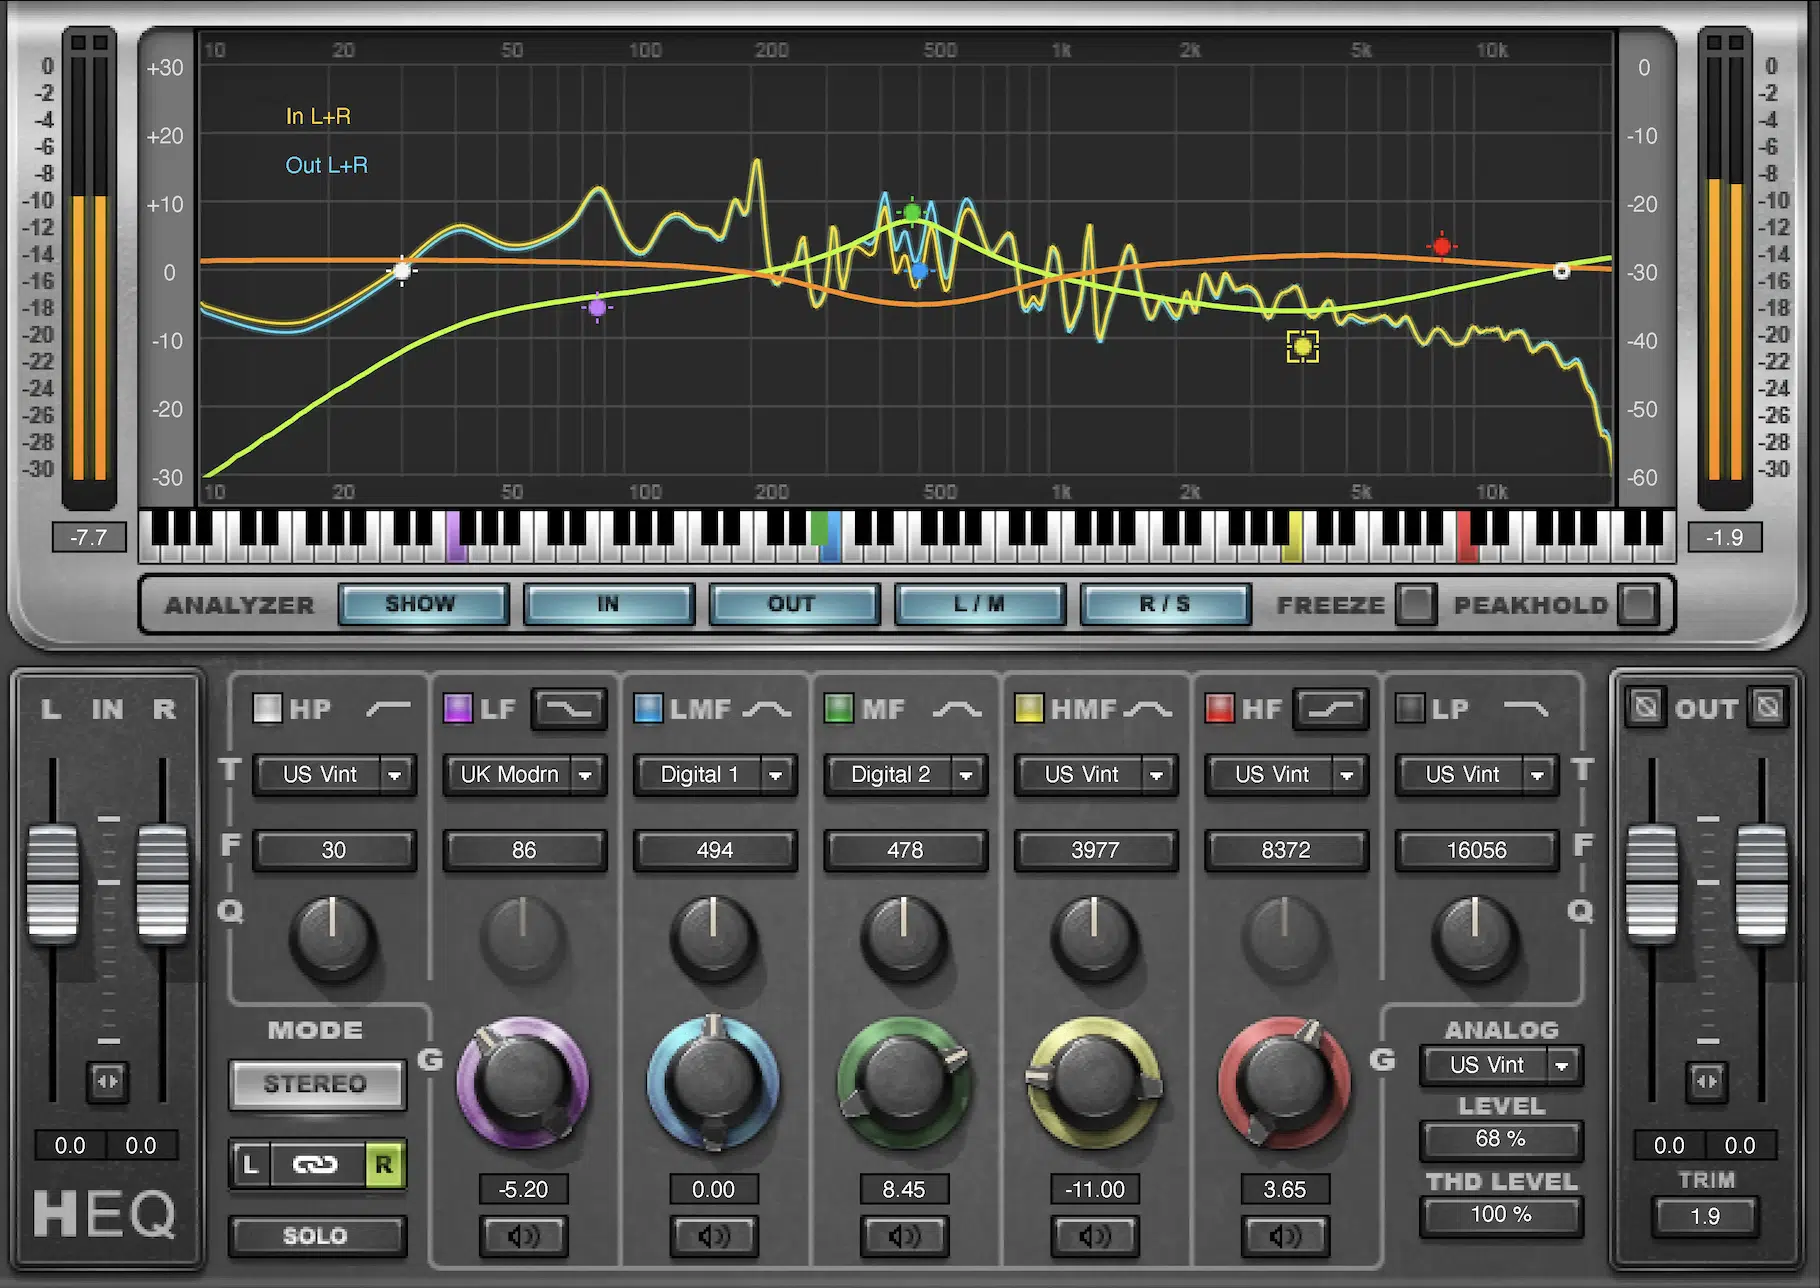
Equalization (EQ) is the next step in the vocal chain, where you shape the tone of the vocal recording by boosting or cutting specific frequency bands.
A solid approach is to use a high-pass filter to remove low frequencies that don’t contribute to the vocal sound but can muddy up the mix.
For instance, cutting frequencies below 100Hz can help get rid of unwanted background noise or rumble picked up during the vocal recording.
Side note, if you want to learn everything about high-pass filters, we’ve got you covered.
From there, you can focus on boosting the mid-range frequencies to bring out the presence in the vocal, usually around 2-5kHz, where most vocals naturally shine.
On the flip side, you might need to apply subtractive EQ to reduce harsh frequencies around 3-4kHz or any unwanted frequencies that make the vocal sound too harsh or nasal.
Remember, when you EQ vocals, the goal is to find the right balance that lets the vocal sit well in the mix while enhancing its natural sound.
Pro Tip: The frequency ranges where you should cut and boost may seem counterintuitive, and it can be tough, but the key is not to be afraid to supplement a boost with a cut in a similar range.
For example, you might boost from 2-5 kHz but make a supplementary cut around 3-4 kHz.
With that said, every vocalist is slightly different, so these ranges will slightly change based on the vocals you’re working on.
-
De-Essers: Taming Sibilance
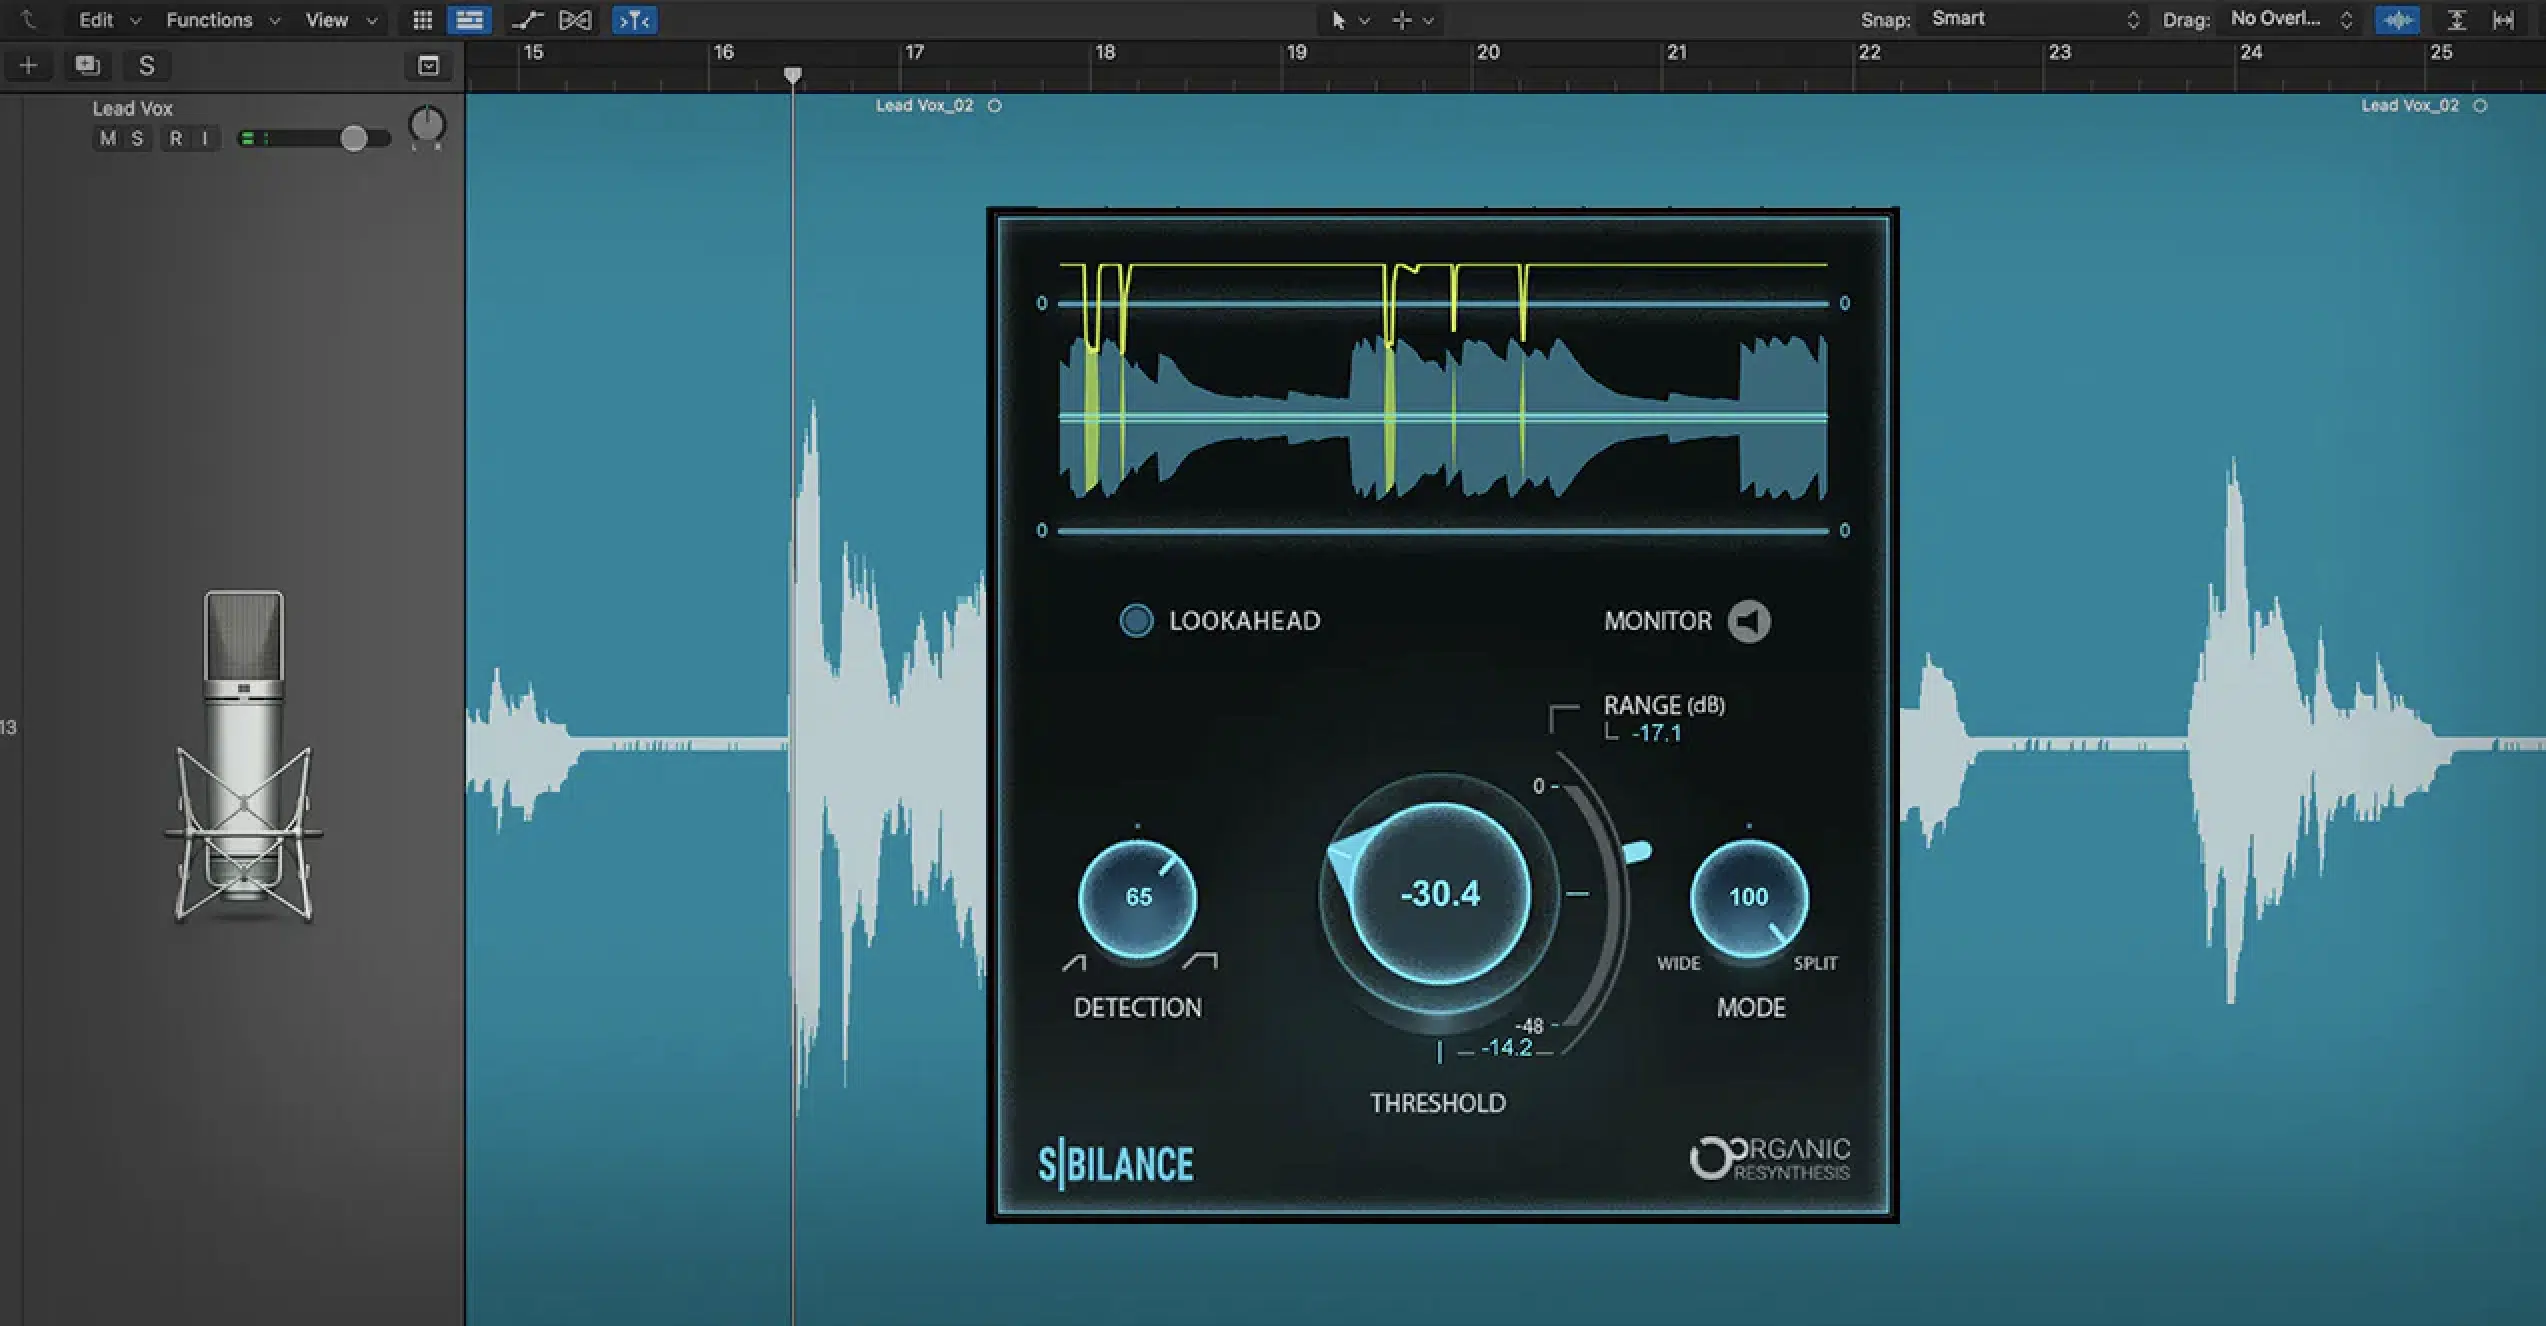
De-essing is a super important step in the vocal chain, especially when dealing with vocal recordings that have harsh “s” or “sh” sounds.
These sibilant frequencies can be distracting, make the vocal track sound sharp or unpleasant, and actually hurt the listener’s ears.
A de-esser targets these specific frequencies, usually between 5 kHz and 8 kHz, and reduces their intensity without affecting the rest of the vocal sound.
For example, if a vocalist sings with a lot of natural sibilance, a de-esser like the Waves “Sibilance” plugin can be applied to smooth out these harsh frequencies and create a smoother, more balanced vocal track.
The key is to use de-essing subtly, so the vocal retains its clarity without sounding overly processed (because, let’s be honest, nobody wants that).
Otherwise, you may end up introducing what sounds like a “lisp” in your vocalist.
A well-known example of this is one of Tupac’s verses in “2 of Amerikaz Most Wanted”; check it out for an example of overdoing it with this processor.
-
Reverb and Delay: Adding Space and Depth
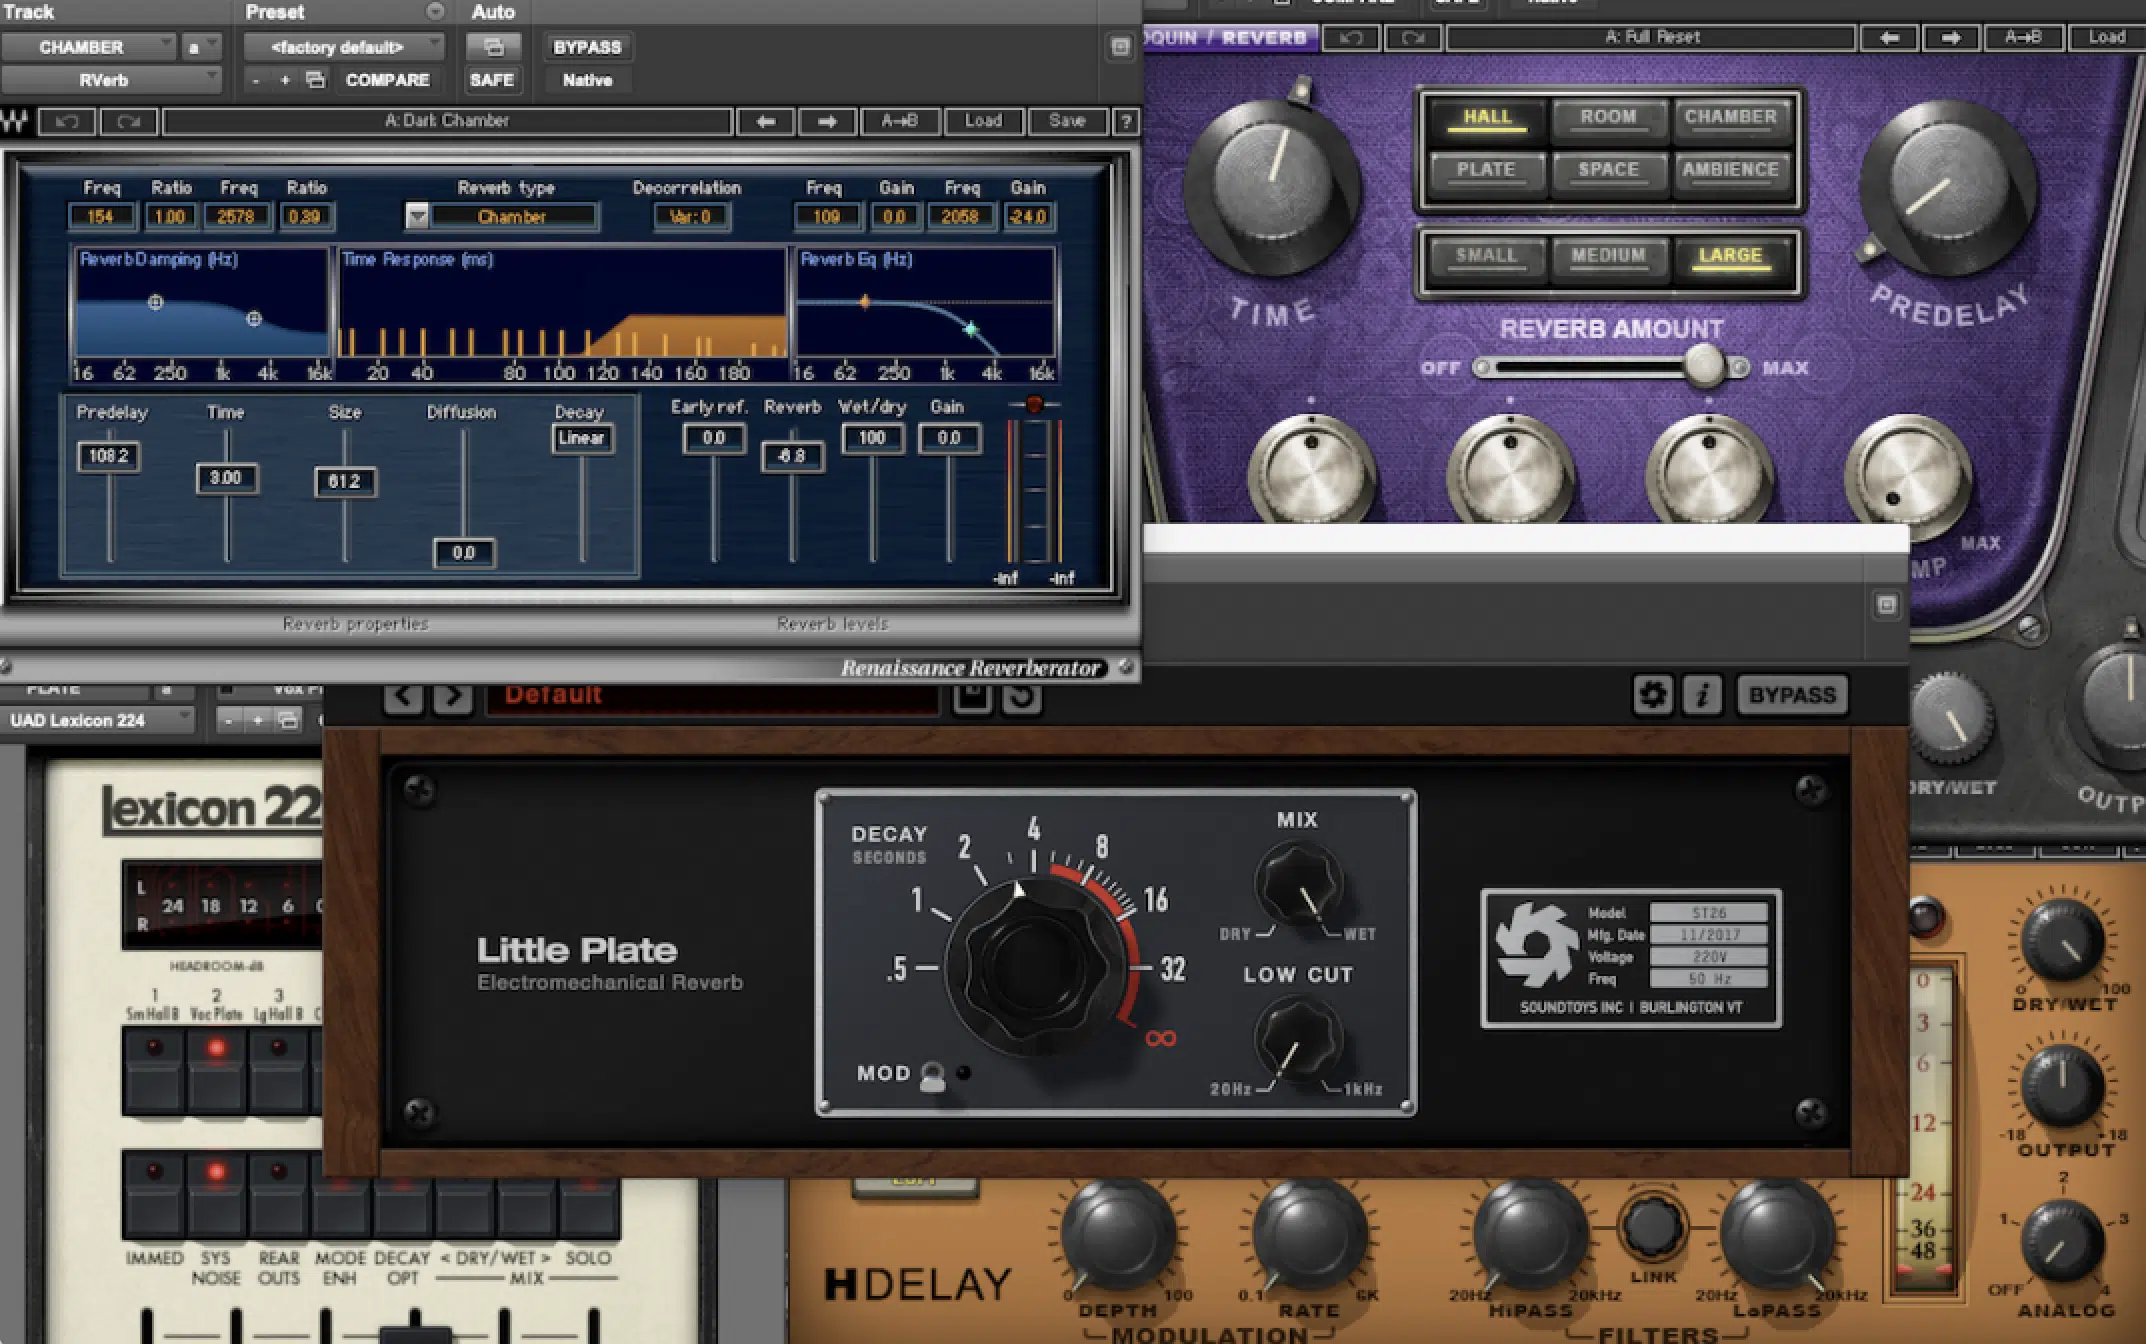
Reverb and delay are two more essential effects in a vocal chain that add space and depth, helping the main vocal sound more three-dimensional within the mix.
- Reverb simulates the sound of the vocal in a physical space, from small rooms to a massive cathedral.
- Delay creates an echo effect that can add rhythm or emphasis to certain parts of the vocal performance.
For example, using a short reverb with a pre-delay can give the vocal a natural sound that doesn’t clutter the mix.
On the flip side, a longer reverb can make the vocal sound more spacious and ethereal.
A delay plugin like EchoBoy can be used to create rhythmic echoes that enhance the vocal without taking up too much space in the frequency spectrum.
Keep in mind that it’s important to fine-tune the settings of both reverb and delay to match the style/genre of the track and the intended vibe.
It ensures that the effects complement the vocal rather than overpowering it.
Side note, if you want access to the dopest delay plugins and reverb plugins in the game, we’ve got you covered.
Pro Tip: These processors should not be placed directly in the chain but rather on a send/return track. That way, these processors won’t “blur” or negatively impact the original vocal but will instead just add to it.
-
Saturation and Distortion: Adding Warmth and Character
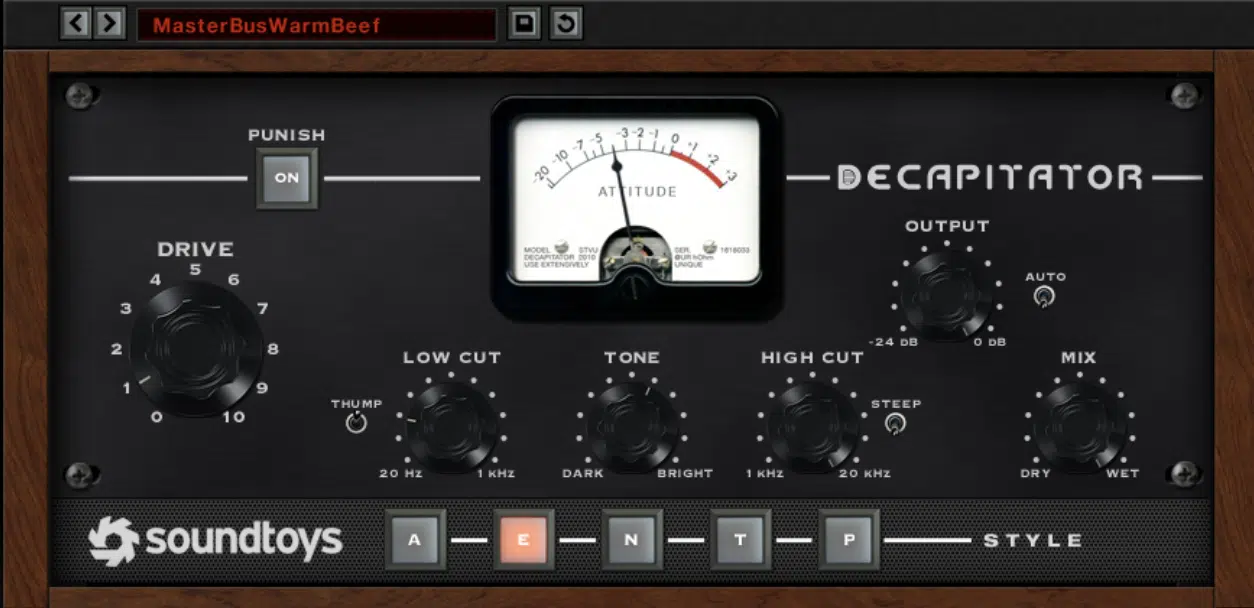
Saturation and distortion are powerful tools in a pro vocal chain that add warmth, character, and even a touch of harmonic distortion to the vocal sound.
These effects work by adding subtle or aggressive distortion to the vocal, which can make it sound fuller and more immersive.
For example, adding a touch of saturation with a plugin like Soundtoys Decapitator can give the vocal a rich, warm tone that makes it stand out in the mix.
If you’re looking for the dopest Waves saturation plugins, they’re super solid too.
On the other hand, using more aggressive distortion can give rock vocals an edge 一 making them sound gritty and powerful.
The key is to apply these effects carefully, just like with compression.
Too much saturation or distortion can make the vocal sound muddy or harsh, so it’s vital to find the right balance that enhances the vocal without compromising clarity.
Experimenting with different levels and types of saturation or distortion can help you find the perfect vocal chain for the style of music you’re producing.
Pro Tip: The only way to truly do this right is to use the wet/dry balance knob with caution and slowly dial in very small amounts.
-
Pitch Correction
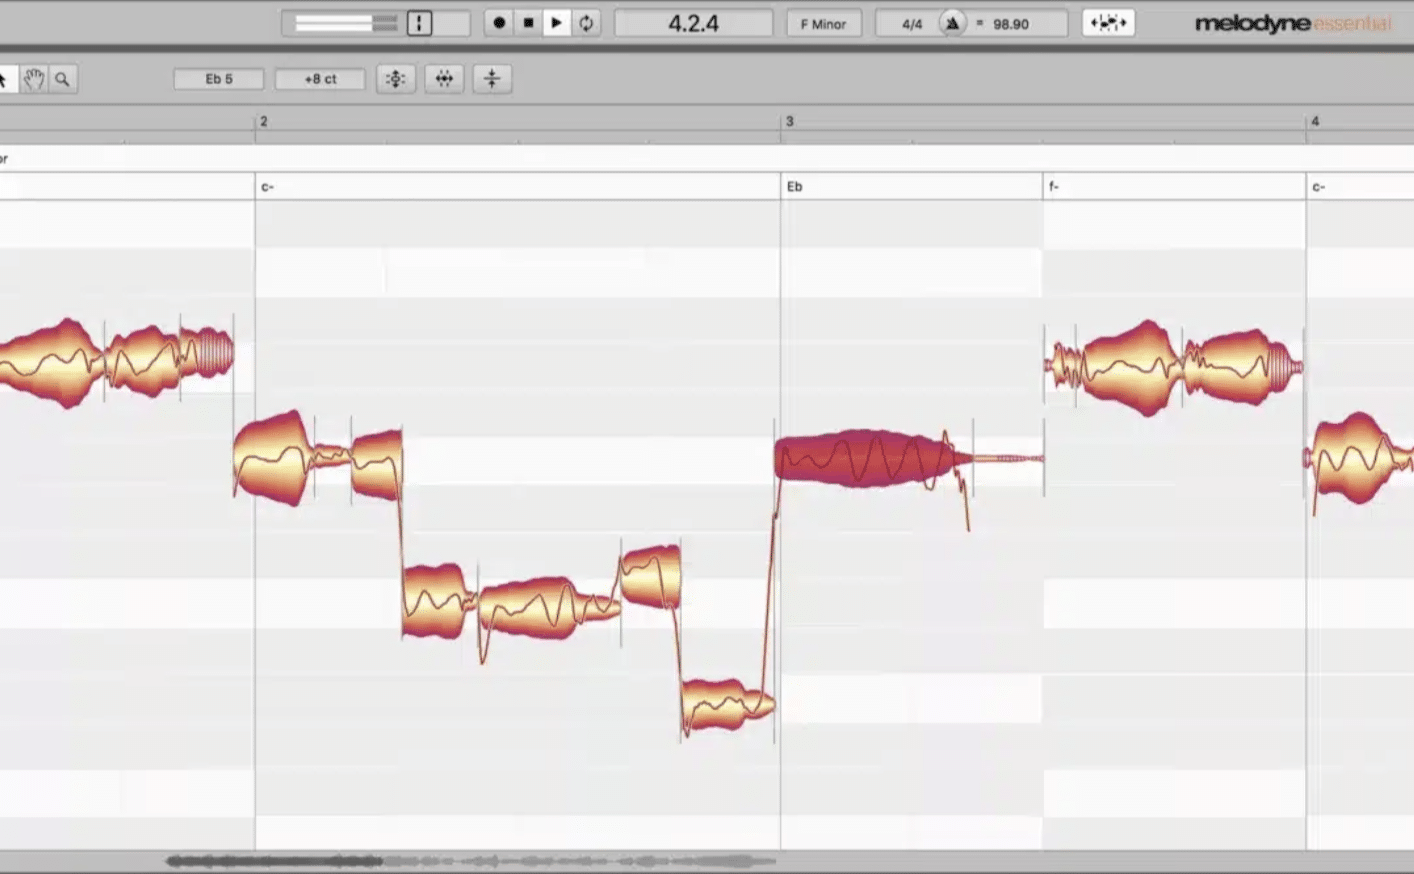
Pitch correction is another key tool in the vocal chain, especially when working with vocal recordings that need to be perfectly in tune.
While some vocalists deliver near-perfect pitch, most vocal tracks benefit from some level of pitch correction to smooth out any off-key notes.
Auto-Tune and Melodyne are super popular pitch correction plugins that can help align the vocal performances to the intended pitch without sounding unnatural.
For example, Auto-Tune is often used to achieve that signature “T-Pain” effect, where the vocal is heavily tuned for a stylized sound.
On the other hand, Melodyne offers more detailed control 一 allowing you to correct pitch while preserving the natural sound of the vocal.
It’s important to apply pitch correction subtly if you’re aiming for a natural sound; overdoing it can result in an artificial, robotic effect that might not suit the style of the track.
Whether you’re using pitch correction for subtle tuning or as a creative effect, it’s a valuable part of the vocal chain that can elevate the overall vocal sound.
Pro Tip: This should almost always be applied first to the raw vocal before any additive processing, typically before any other processor, although some prefer to apply compression and EQ first.
-
The Importance of Gain Staging
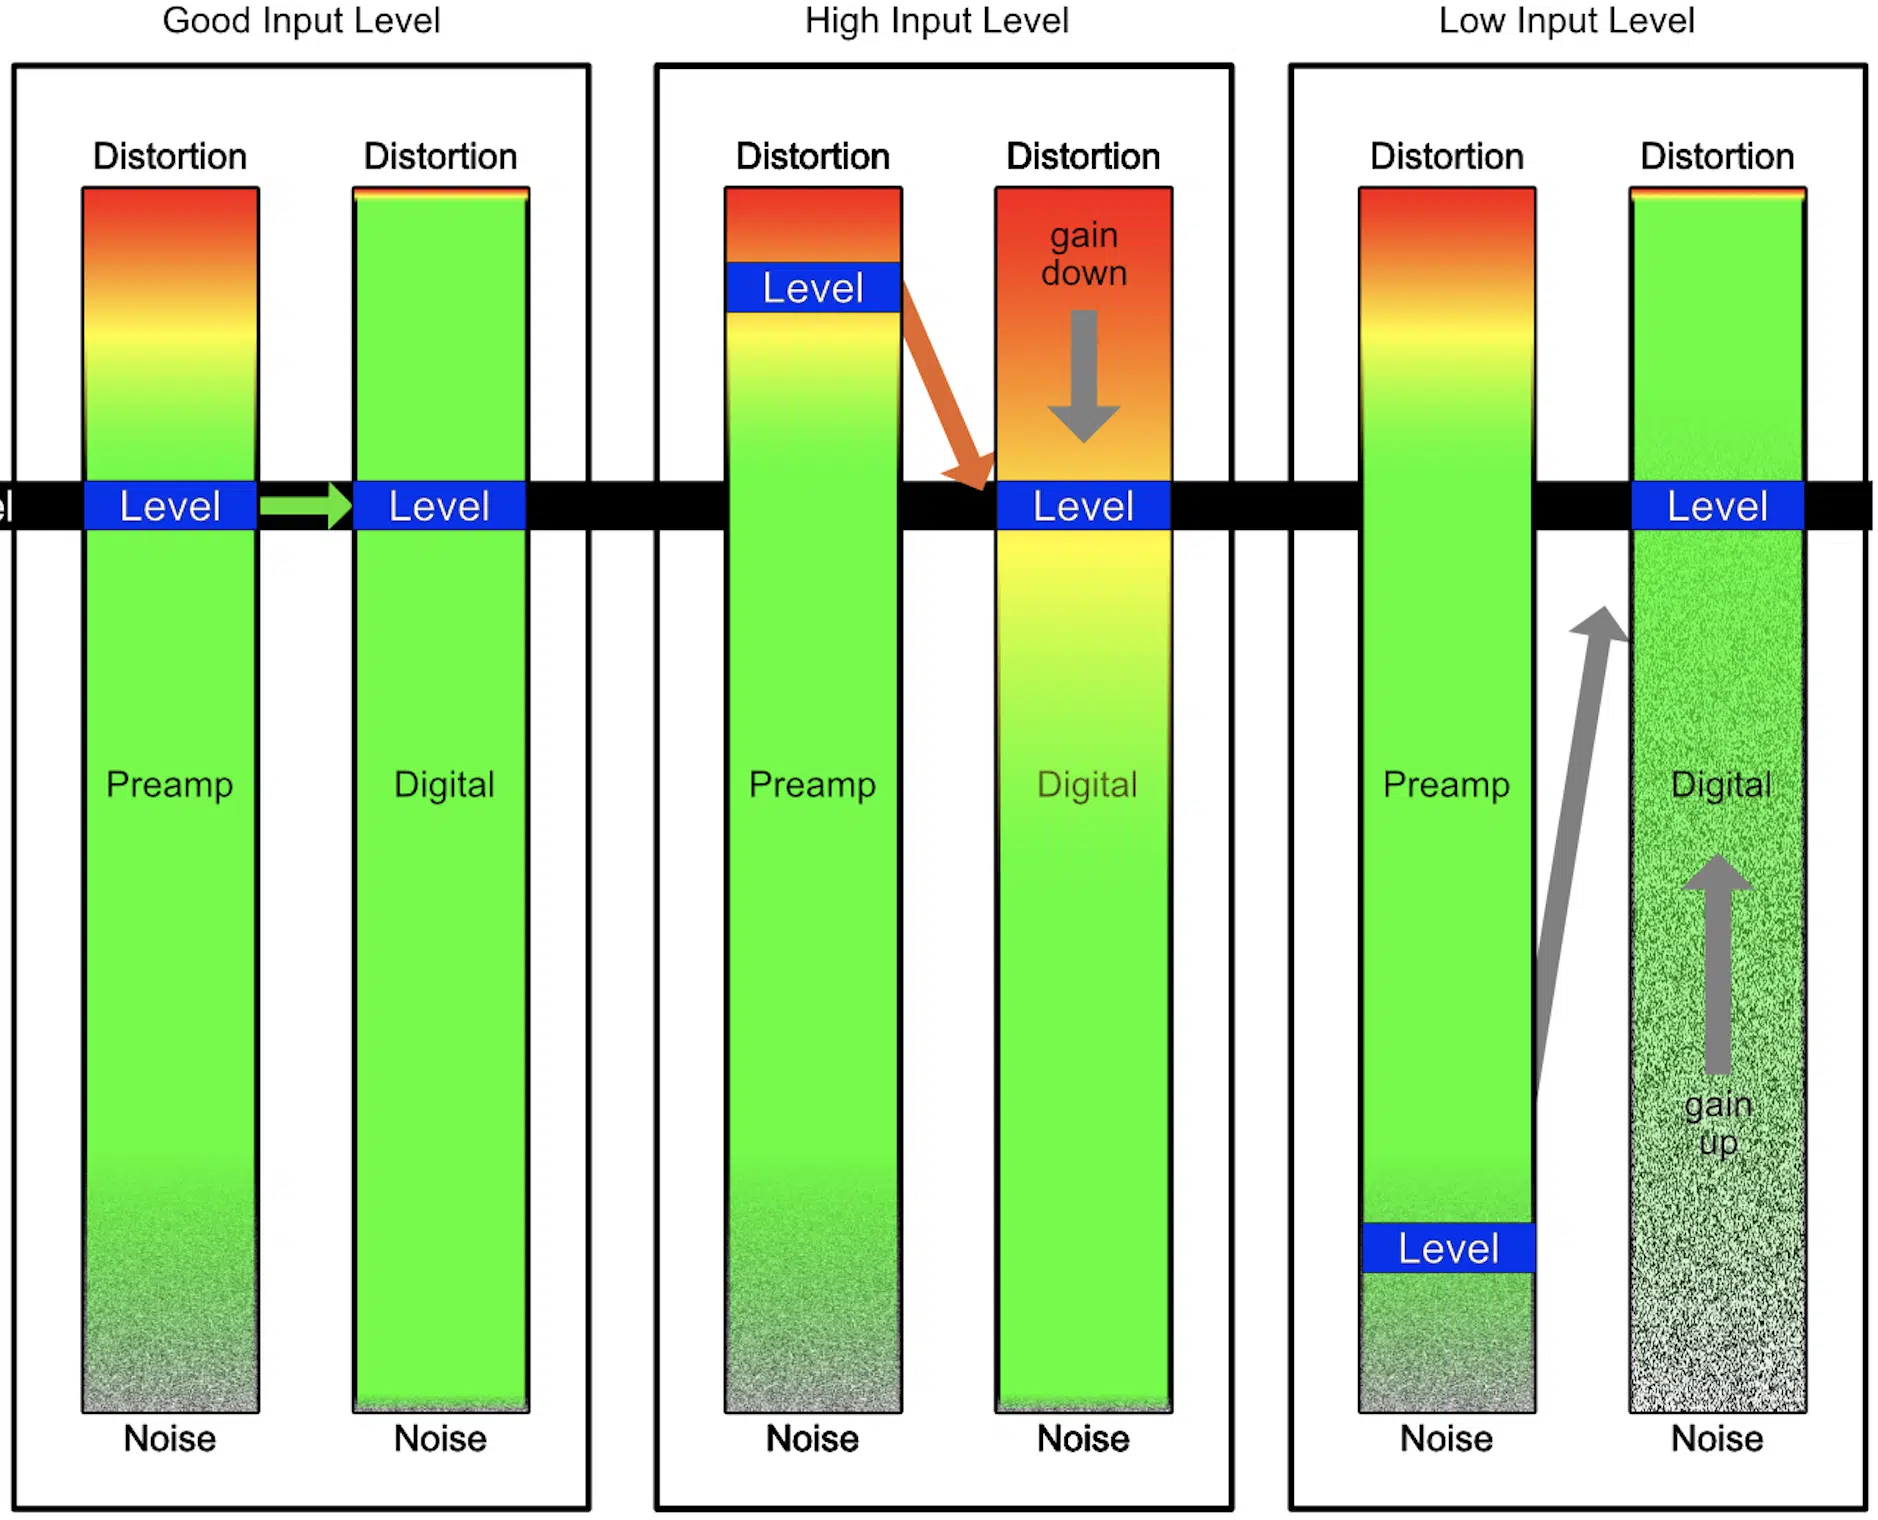
Gain staging when it comes to building a vocal chain is overlooked all day… Please don’t be one of the people who overlook it!
Proper gain staging ensures that each plugin in your vocal chain receives an optimal signal level, preventing distortion and maintaining clarity throughout the vocal track.
If the signal is too hot (too loud), it can cause clipping and introduce unwanted distortion 一 which can ruin an otherwise great vocal performance.
If the signal is too low, the vocal might not engage the compressors and other processors effectively 一 resulting in a weak or lifeless sound.
For example, adjusting the gain knob on your pre-amp to make sure the vocal is peaking around -6dB to -12dB before it hits your DAW is a good starting point.
It leaves enough headroom for further processing without risking distortion.
As you add more effects to the vocal chain, continually monitor the gain levels to ensure that each plugin contributes to a clean and dynamic final sound.
Gain staging is essential for achieving a polished vocal track that sits well in the mix.
NOTE: Remember, the input level knob on all of your processors is intended for this stage.
-
Bonus Tip: Choosing the Right Order for Your Plugins

The order in which you place your plugins in a vocal chain can seriously impact the final sound, as I mentioned earlier.
A common approach is to start with EQ and compression, followed by de-essing and then effects like reverb and delay.
This order allows you to shape the vocal sound and control dynamics before adding spatial effects that give the vocal its depth and character.
For example, placing the compressor before the EQ can help you control the dynamic range first (ensuring that the vocal stays consistent in volume) before fine-tuning the frequency balance.
However, there’s no one-size-fits-all approach…
Experimenting with different plugin orders is a great starting point and will help you find the best vocal chain for your specific track.
This flexibility allows you to adapt your vocal chain to fit the unique needs of each vocal performance.
-
Fine-Tuning Effects for a Polished Sound
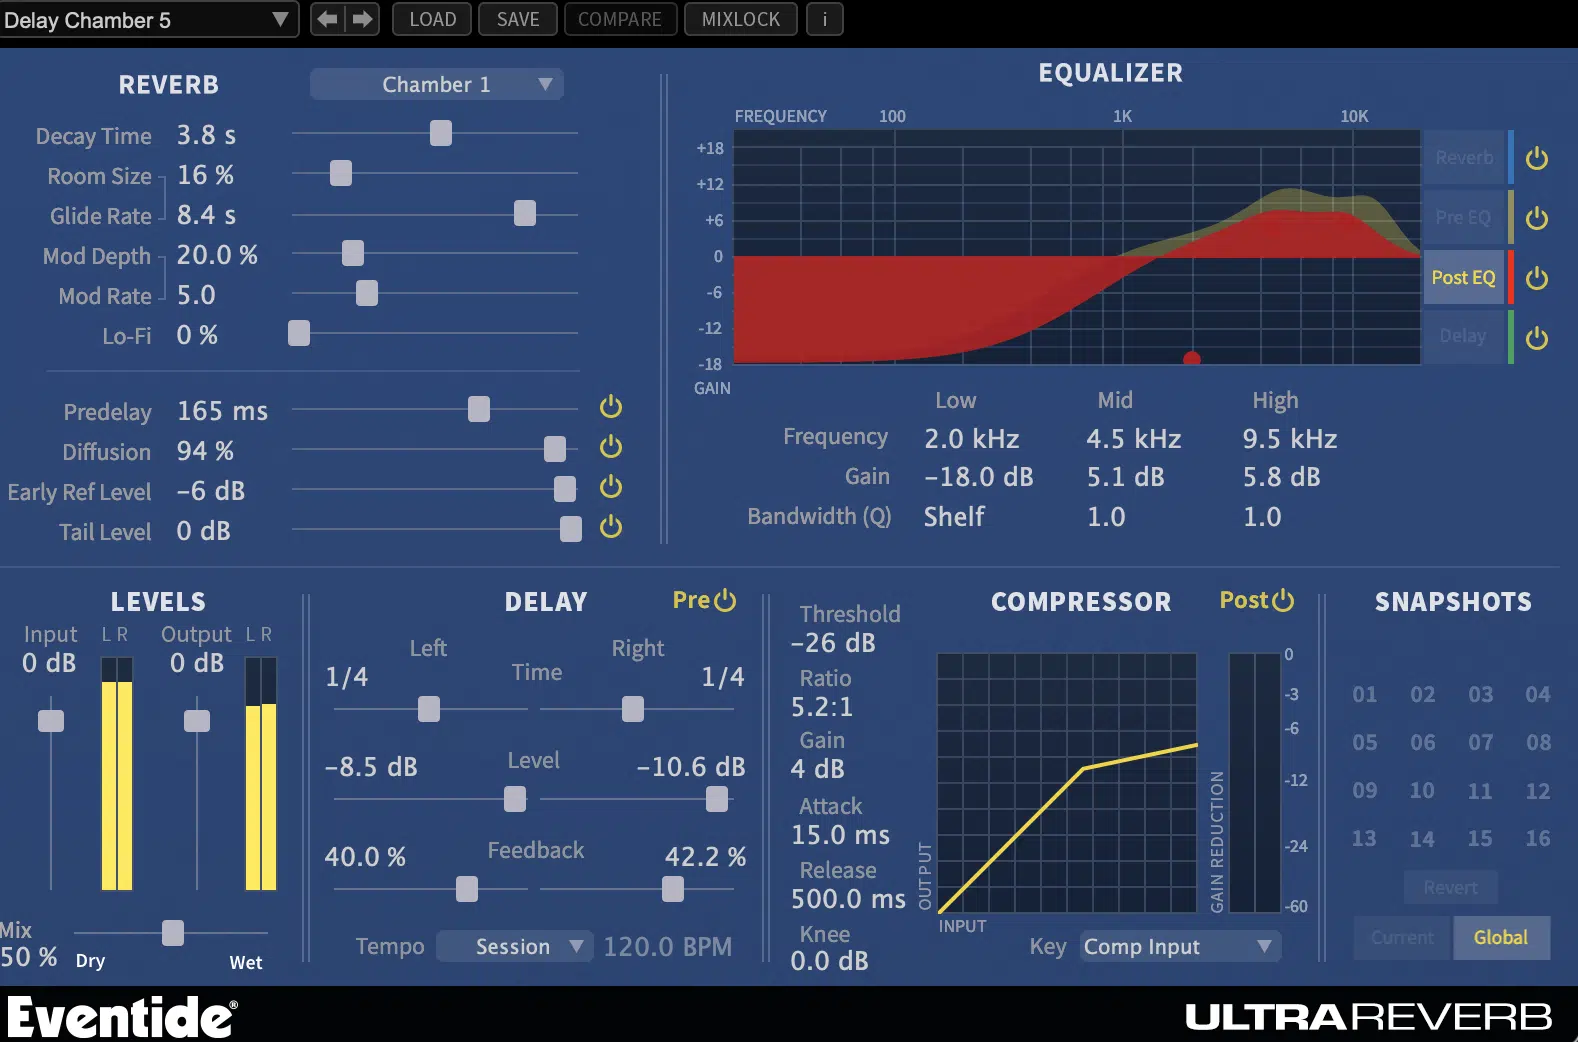
Fine-tuning your effects is the final step in knocking out a polished vocal sound that stands out in the mix.
This involves carefully adjusting parameters on your reverb, delay, and any other effects to ensure they complement the vocal rather than overpower it.
For instance, setting the reverb decay time too long can make the vocal sound washed out, while a shorter decay time keeps the vocal upfront and clear.
Similarly, adjusting the delay feedback and timing can help create a subtle echo effect that adds depth without cluttering the mix.
It’s also important to consider the wet/dry balance of each effect 一 making sure the processed vocal still has its original clarity.
By fine-tuning these effects, you can achieve a final sound that feels polished and professional, enhancing the overall impact of the vocal performance.
Advanced Vocal Chain Techniques When You Mix Vocals
Once the basic vocal chain is set up, it’s time to get to the fun stuff: the more advanced techniques that can take your vocal mixing to the next level. Let’s get into it so you can be mixing vocals like a boss in no time and master the mixing process faster.
-
Parallel Processing for Vocals
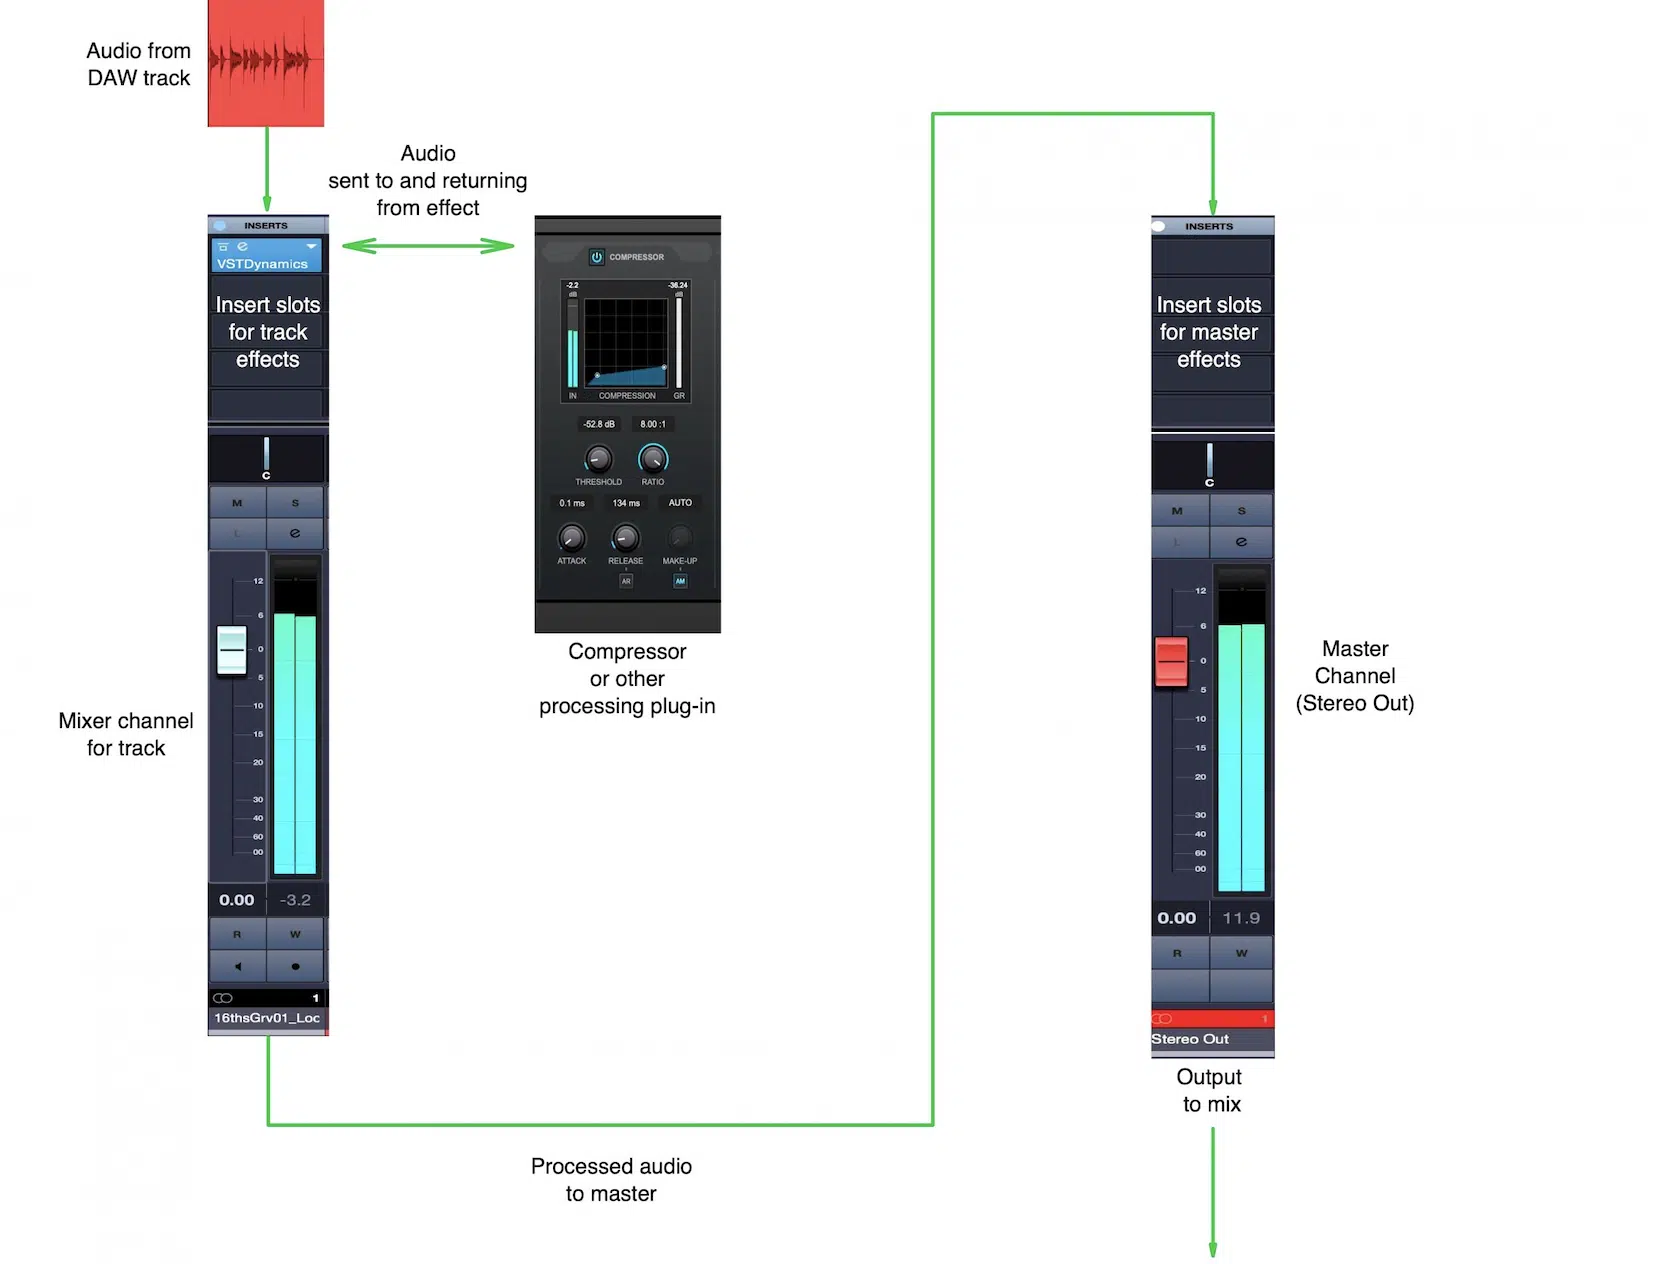
Parallel processing is a powerful technique that can add depth and presence to your vocal sound without messing with its dynamics.
By duplicating the vocal track and applying different processing to each version, you can blend the two to create a fuller, more balanced sound.
For example, you might compress the parallel track more heavily…
This will allow the original vocal to retain its natural dynamics while the compressed track adds thickness and consistency.
It’s super useful when you want the vocal to cut through a dense mix without sounding overly processed and amateurish.
Another common use of parallel processing is with reverb and delay, where you can add these effects to a duplicate track and blend them in subtly 一 enhancing the vocal without drowning it in effects.
This technique offers a lot of flexibility, letting you shape the vocal sound to really vibe with the needs of the track.
Side note, if you want to learn everything about parallel compression, we’ve got you covered.
-
Multi-band Processing (Compression & Saturation)
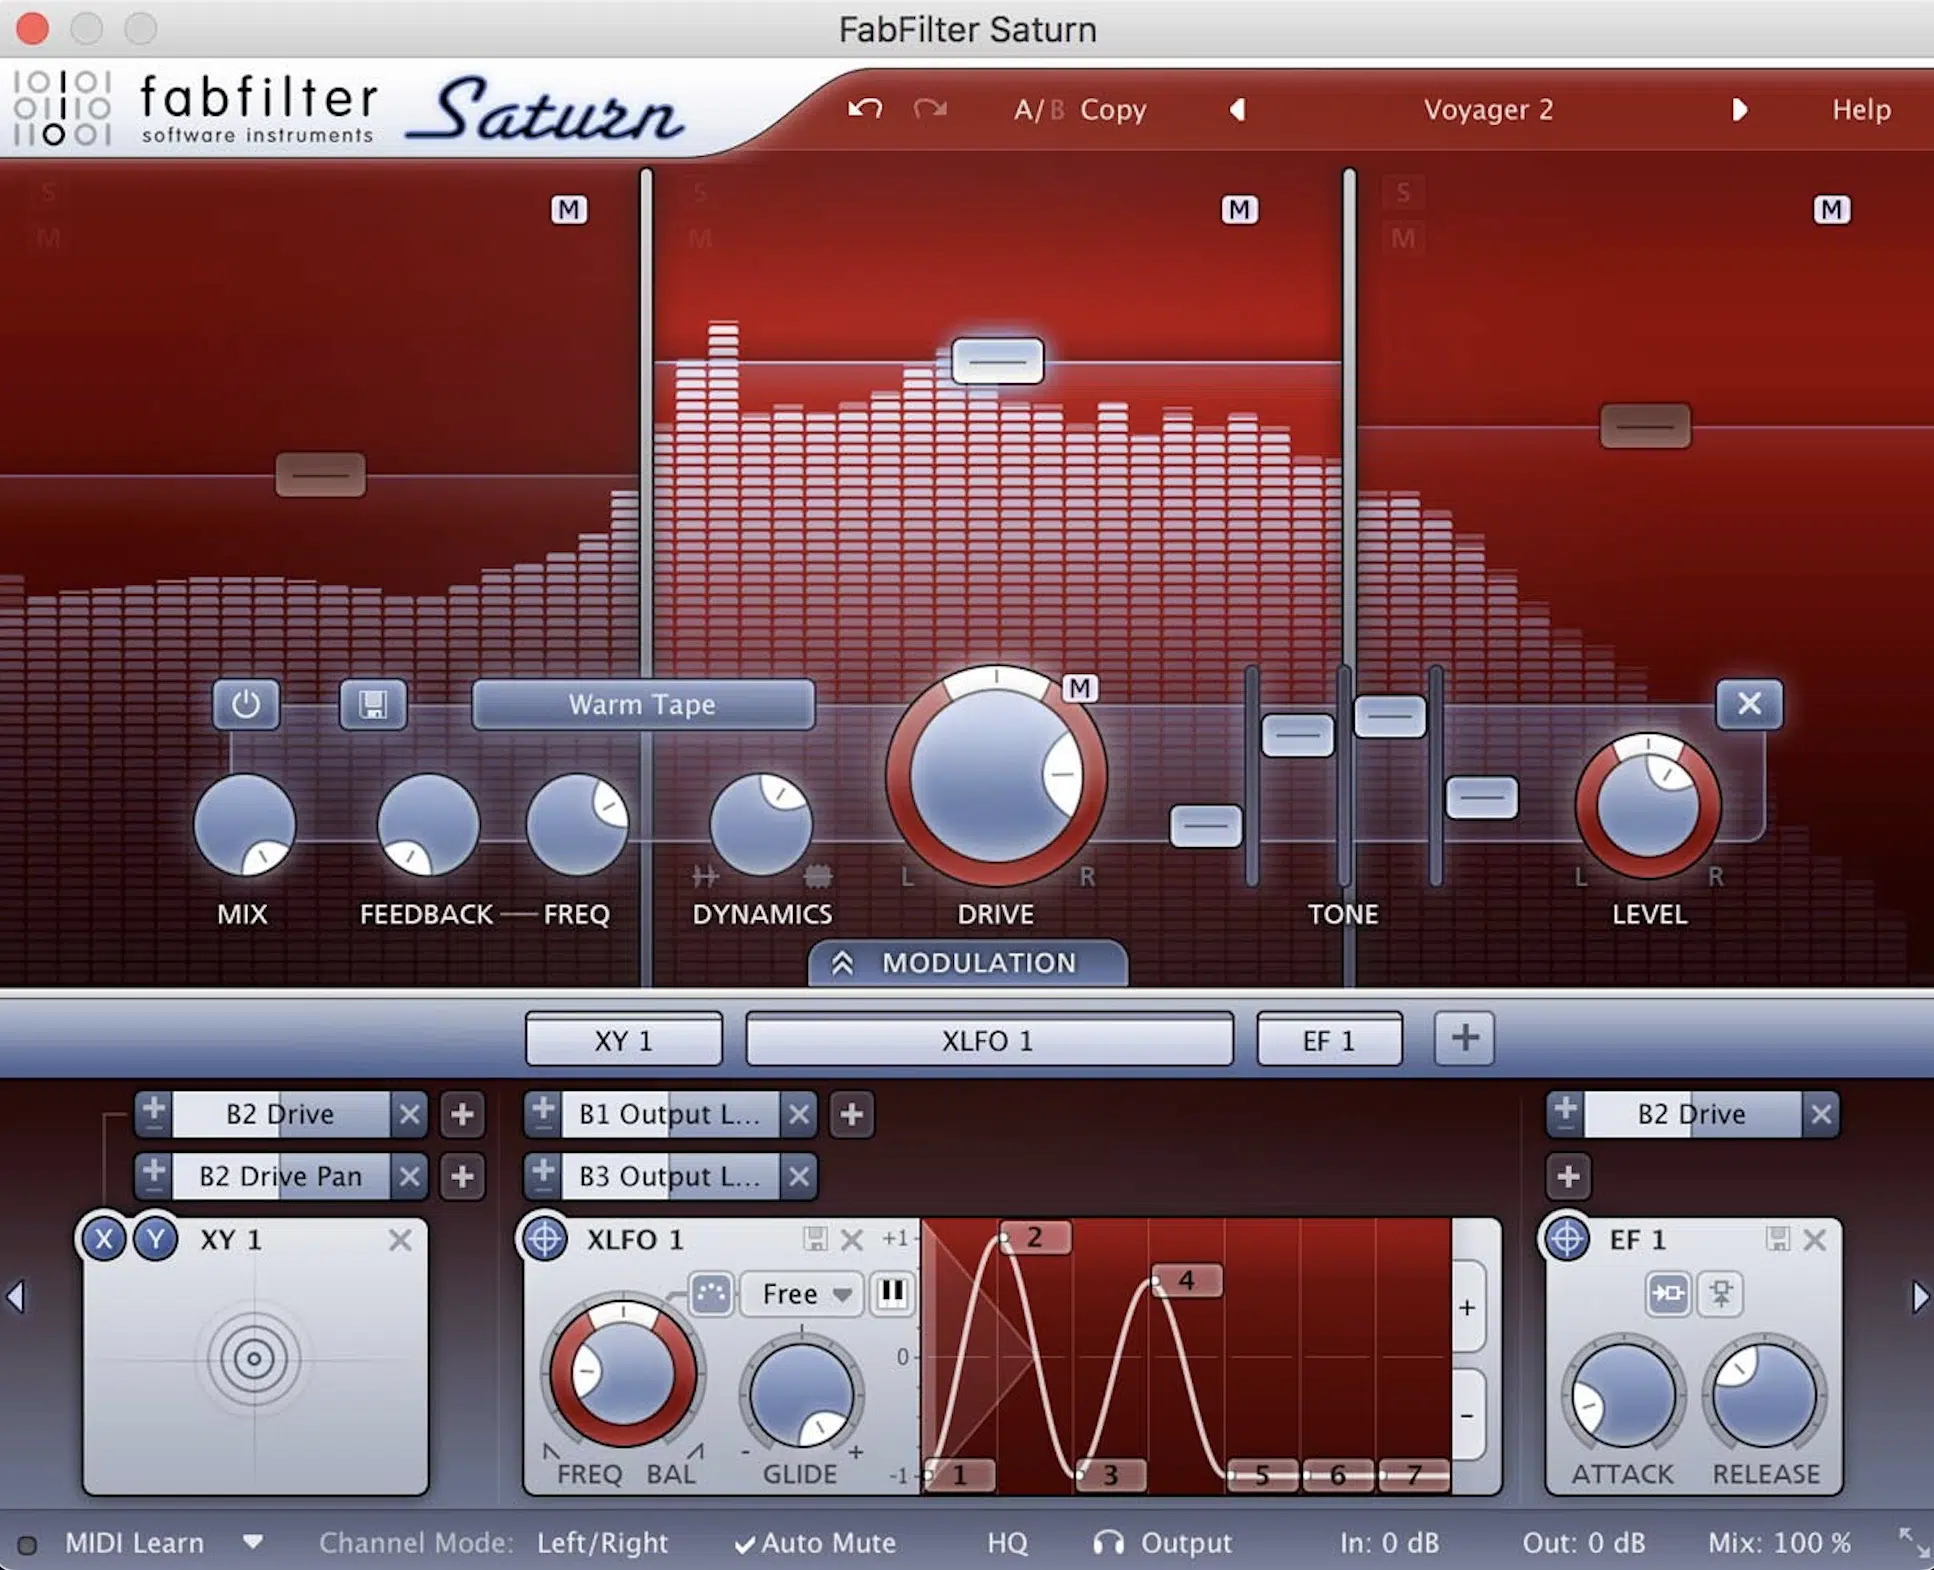
Multi-band processing allows you to target specific frequency bands within the vocal track, applying compression or saturation to each band independently.
This is particularly useful for vocals that have a wide dynamic range or contain problematic frequencies that need to be tamed.
For example, you can use multi-band compression to control the low-end rumble while simultaneously adding saturation to the mid-range, which will enhance the presence of the vocal.
NOTE: Plugins like FabFilter Pro-MB, my fav, offer precise control over multiple frequency bands, so you can tailor the vocal sound with razor sharp accuracy.
By isolating and processing different parts of the frequency spectrum, multi-band processing can help you achieve a well-balanced, polished vocal sound.
-
Automating Processors in your Vocal Chains
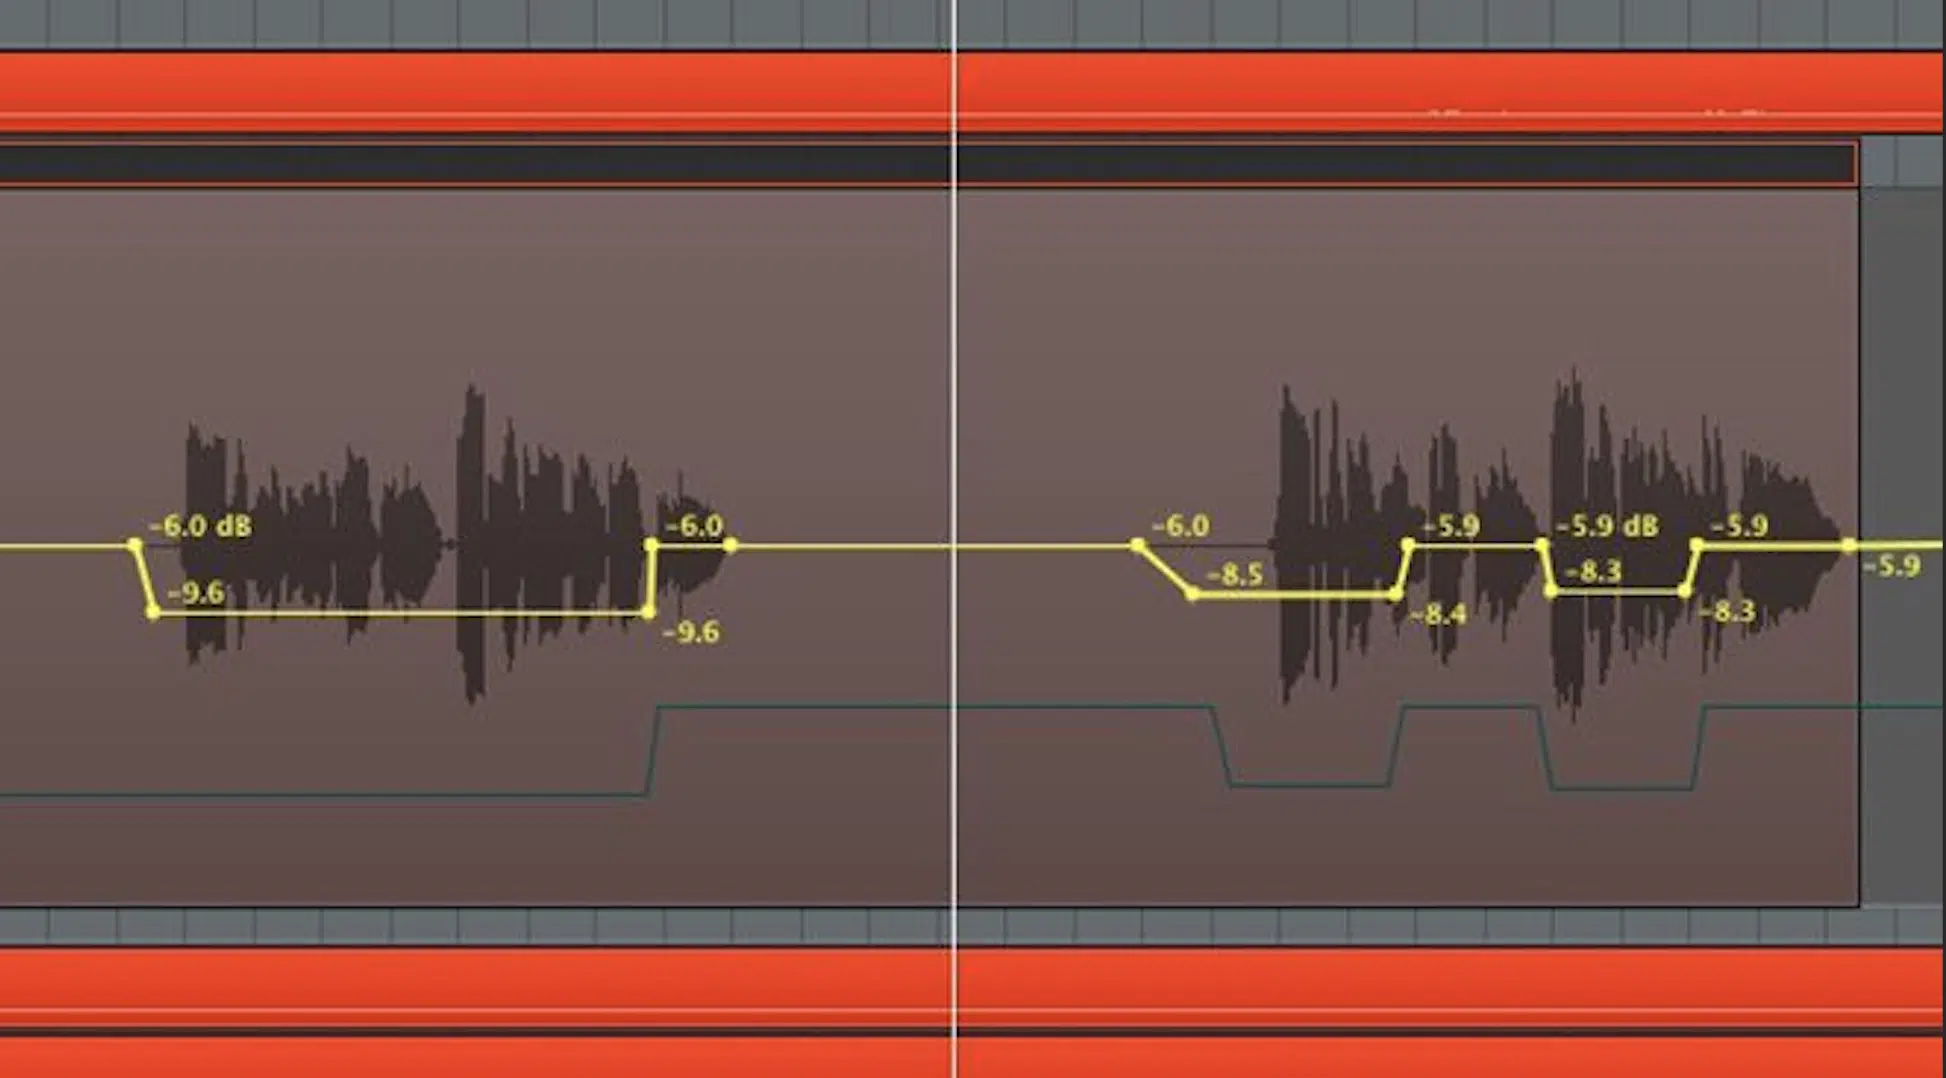
Automation is a key technique in vocal processing that allows you to make real-time adjustments to your effects and processors throughout the track.
By automating certain you can add dynamic interest to the vocal performance, like:
- Reverb level
- Delay feedback
- EvenEQ settings
For example, you might automate a high-pass filter to gradually roll off low frequencies during a buildup 一 creating a sense of anticipation before the drop.
On the same note, automating the wet/dry mix of a reverb can help the vocal sound more spacious in the chorus while keeping it dry and intimate in the verses.
Automation gives you the ability to tailor the vocal sound to fit the emotional contour of the song, making it essential in any advanced vocal chain.
Plus it’ll help you mix vocals better in general, so it’s really a win-win.
Common Mistakes and How to Avoid Them

When building a vocal chain, it’s easy to make some mistakes that can seriously mess up the final sound.
One of the most frequent mistakes is over-processing, where too many effects or too much compression can strip the vocal of its natural dynamics and character.
It’s important to remember that sometimes less is more, and subtle adjustments often bring the best results.
Another common issue is poor gain staging, which can lead to clipping and distortion if the signal is too hot or a weak, lifeless sound if it’s too low.
Also, not paying attention to the order of plugins can result in a vocal chain that doesn’t flow well 一 leading to a cluttered or unbalanced sound.
By being mindful of these mistakes and making adjustments as needed, you can avoid common pitfalls and achieve a professional, polished vocal sound.
Bonus Tip: Finalizing Your Vocal Chain
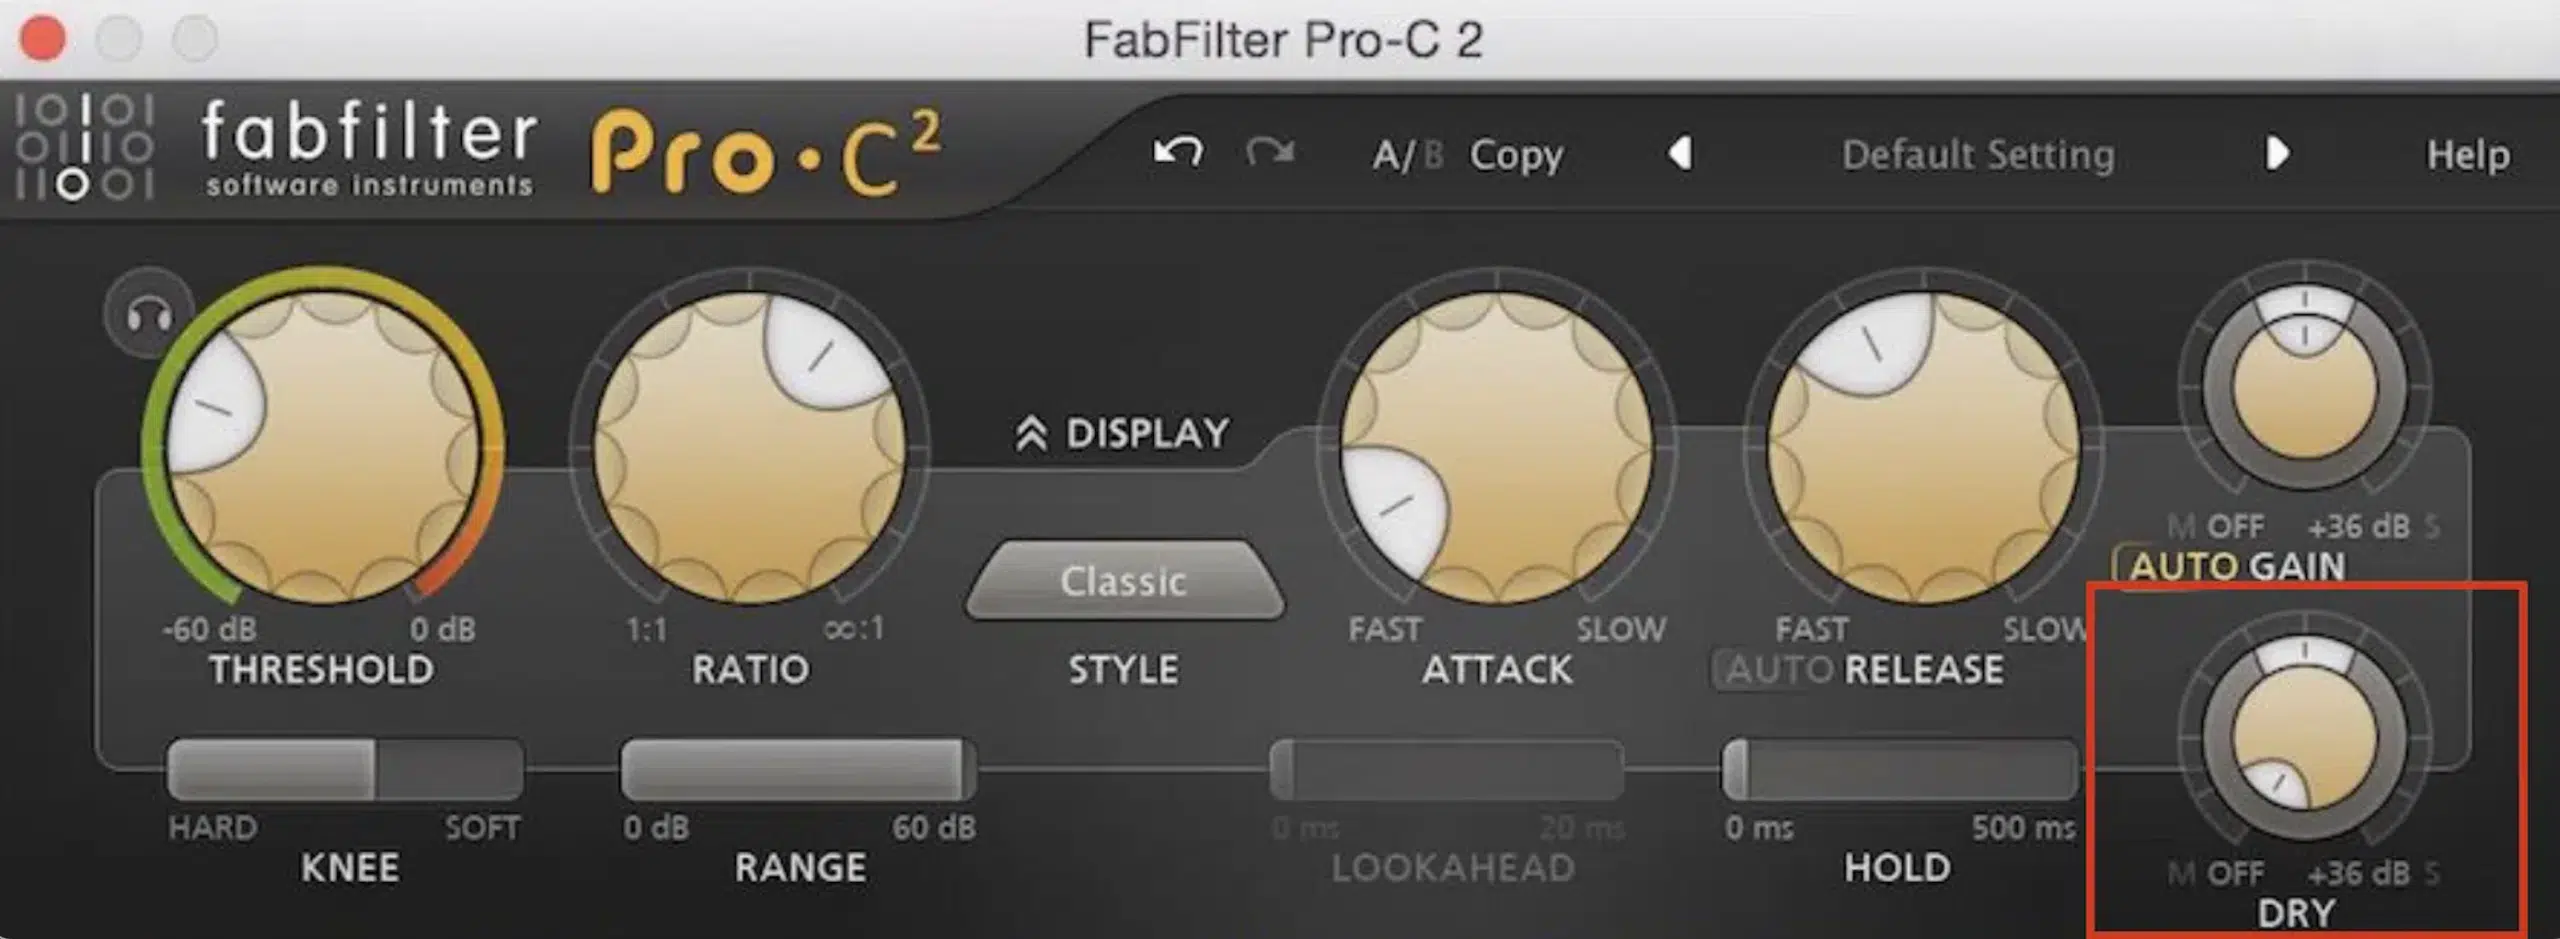
Finalizing your vocal chain is all about making sure every element works together to create the best vocal sound possible.
A/B testing is a super important step in this process, allowing you to compare different versions of your vocal chain to determine which one delivers the most polished sound.
For example, you might A/B test two different EQ settings…
One with a slight boost in the high-mids for added clarity and another with a broader mid-range cut to smooth out harsh frequencies.
Listening to these options back-to-back can help you decide which EQ setting helps the vocal track sit better in the mix and gives off the right sound.
Similarly, A/B testing your reverb and delay settings can reveal whether your current settings add the right amount of space and depth without overwhelming the vocal.
It’s also helpful to A/B test with and without certain effects, like saturation or harmonic distortion, to see if they enhance or detract from the natural sound of the vocal.
By A/B testing every aspect of your vocal chain like a boss, you can fine-tune the processing to achieve the perfect balance.
This will make sure the final sound is as polished and professional as possible.
So, bottom line, when you mix vocals, you should always, always A/B test.
Vocal Chain: Final Thoughts
Your vocal chain will determine how polished and professional your final mix sounds.
It’s the key to shaping the vocal’s tone, controlling dynamics, and making sure that your vocals stand out in any track.
If you want your vocals to sound clear, vibrant, and ready for release, then you can’t ignore the importance of a well-crafted vocal chain, period.
That’s why this article is your ticket to mastering every element, from basic setup to advanced techniques and everything in between.
And, as an added bonus, if you’re looking to take your vocal productions even further, you’ve got to check out the famous Free Vocal Samples pack.
This pack includes high-quality vocal samples that can be easily integrated into your vocal chain 一 offering a variety of styles and tones to match any genre.
With professional-grade samples ranging from sick harmonies to crisp lead vocals, this pack is a great starting point for building your own signature vocal sound.
Whether you’re layering vocals or need inspiration for your next project, this pack will help you elevate your tracks to a professional level (at zero cost).
Remember, mastering your vocal chain is all about practice and experimentation, so keep refining your process, and you’ll see your vocal productions reach new heights.
You’ve got everything you need to create truly captivating vocals, and now it’s time to make them shine.
Until next time…


Leave a Reply
You must belogged in to post a comment.