Bouncing audio is just as important in your music production process as the first step, converting individual tracks or a complete project into a single, or multiple audio files.
It requires a clear understanding of various file formats, meticulous preparation of your mix, and the right settings to optimize audio quality.
Plus, you’ll need to know how to handle file management and metadata to streamline the sharing and distribution process.
It will ensure your music not only sounds its best but also is professional and ready for any situation 一 whether it’s mastering, distribution, or live performance.
Today, we’ll break down everything you need to know about bouncing audio, like:
- Understanding what the term ‘bouncing audio’ means ✓
- Different audio file types you’ll need to know ✓
- Preparing projects for bouncing ✓
- Checking your mixes before bouncing ✓
- Setting levels and panning ✓
- Choosing bit depth and sample rate ✓
- Multiple mono vs. stereo options ✓
- Exporting individual tracks ✓
- Bouncing the final mix ✓
- Offline bouncing and real-time bouncing ✓
- Advanced techniques like stem mastering ✓
- Avoiding common mistakes when bouncing audio/exporting audio ✓
- Organization & tagging each file type ✓
- Much more to help you bounce audio ✓
After reading this article, you’ll be able to bounce audio and export tracks like a true professional so you can focus on your creative process.
It will ensure your projects are expertly managed and maintain the highest quality.
This way, your tracks will always sound professional, polished, and up to industry standards, giving you a competitive edge.
So, let’s start by breaking down exactly what bouncing audio entails…
Table of Contents
Bouncing Audio 101: Breaking it Down

Bouncing audio, simply put, is the process of exporting audio data from your DAW into a standalone file.
It’s a key step in music production that allows you to create a fixed version of your project, consolidating all tracks, effects, and processing into a single (or multiple audio files).
This is typically done in file formats such as WAV or MP3.
This makes it easier to share, distribute, or further master your music without needing the original DAW project.
Understanding how to bounce audio properly will guarantee that your final tracks are polished and ready for the next stage of production.
It’s all about helping your audio sound clean and professional every single time.
The Basics of Audio File Types
When you export audio/bounce audio, understanding all the unique audio file types can make the difference between a sloppy sound and radio-ready.
WAV and AIFF are the industry standards for lossless formats because they provide that high-quality sound without any data loss.
These lossless formats preserve every bit of your audio’s dynamic range and frequency response 一 making them ideal for professional editing and mastering.
For example, if you’re using Pro Tools or Logic Pro, exporting your final mix in WAV format at 48 kHz, 24-bit will help your audio retain its clarity and depth when you play it.
This makes it perfect for further song processing.
MP3 and AAC, on the other hand, are compressed audio formats designed to reduce file size by removing frequencies less noticeable to human ears.
While these formats are convenient for online sharing due to their smaller size, they do compromise audio quality to some extent, so keep that in mind.
An MP3 file at 320 kbps is usually sufficient for promotional uses or upload/streaming, but might not be ideal for critical listening scenarios.
Always consider the end-use before choosing a file format…
For instance, bounce your demo tracks in MP3 format for quick email sharing, but stick to WAV files for your final mix to be sent to a mastering engineer.
FLAC and ALAC are specalized formats that offer compression without losing any audio data, which is awesome.
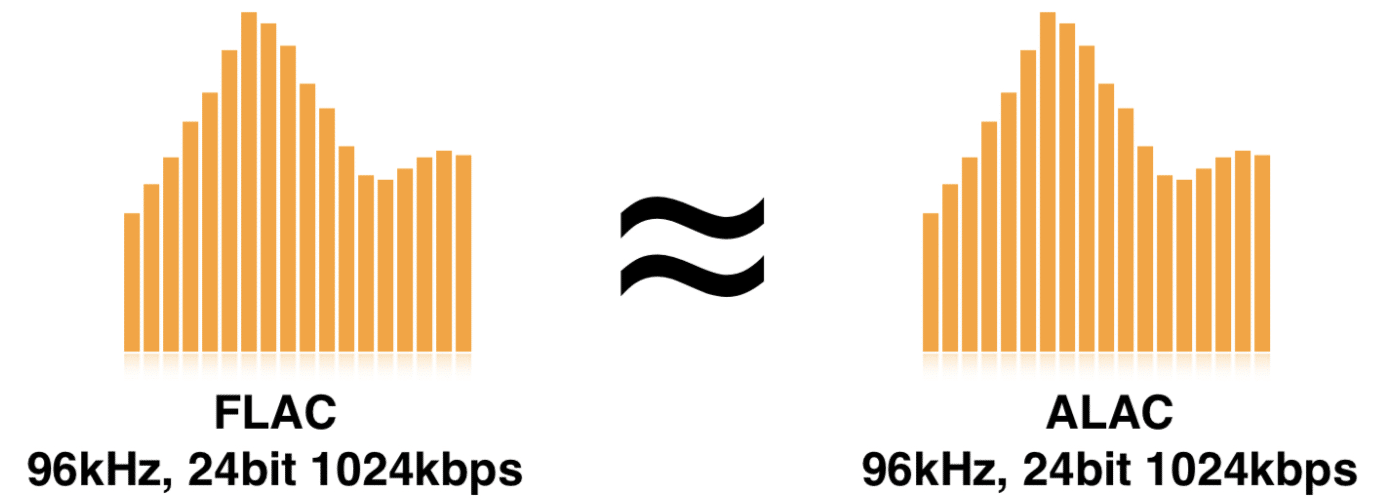
These are termed ‘lossless compression’ formats and are perfect when you need to save storage space without sacrificing quality.
They’re also useful for archiving projects or distribution/uploading where bandwidth might be a concern but audio quality cannot be compromised.
For example, using FLAC for your online music store submissions can ensure listeners experience your music at the highest possible quality.
All while keeping download times reasonable (which makes a huge difference).
Preparing Your Project for Bouncing
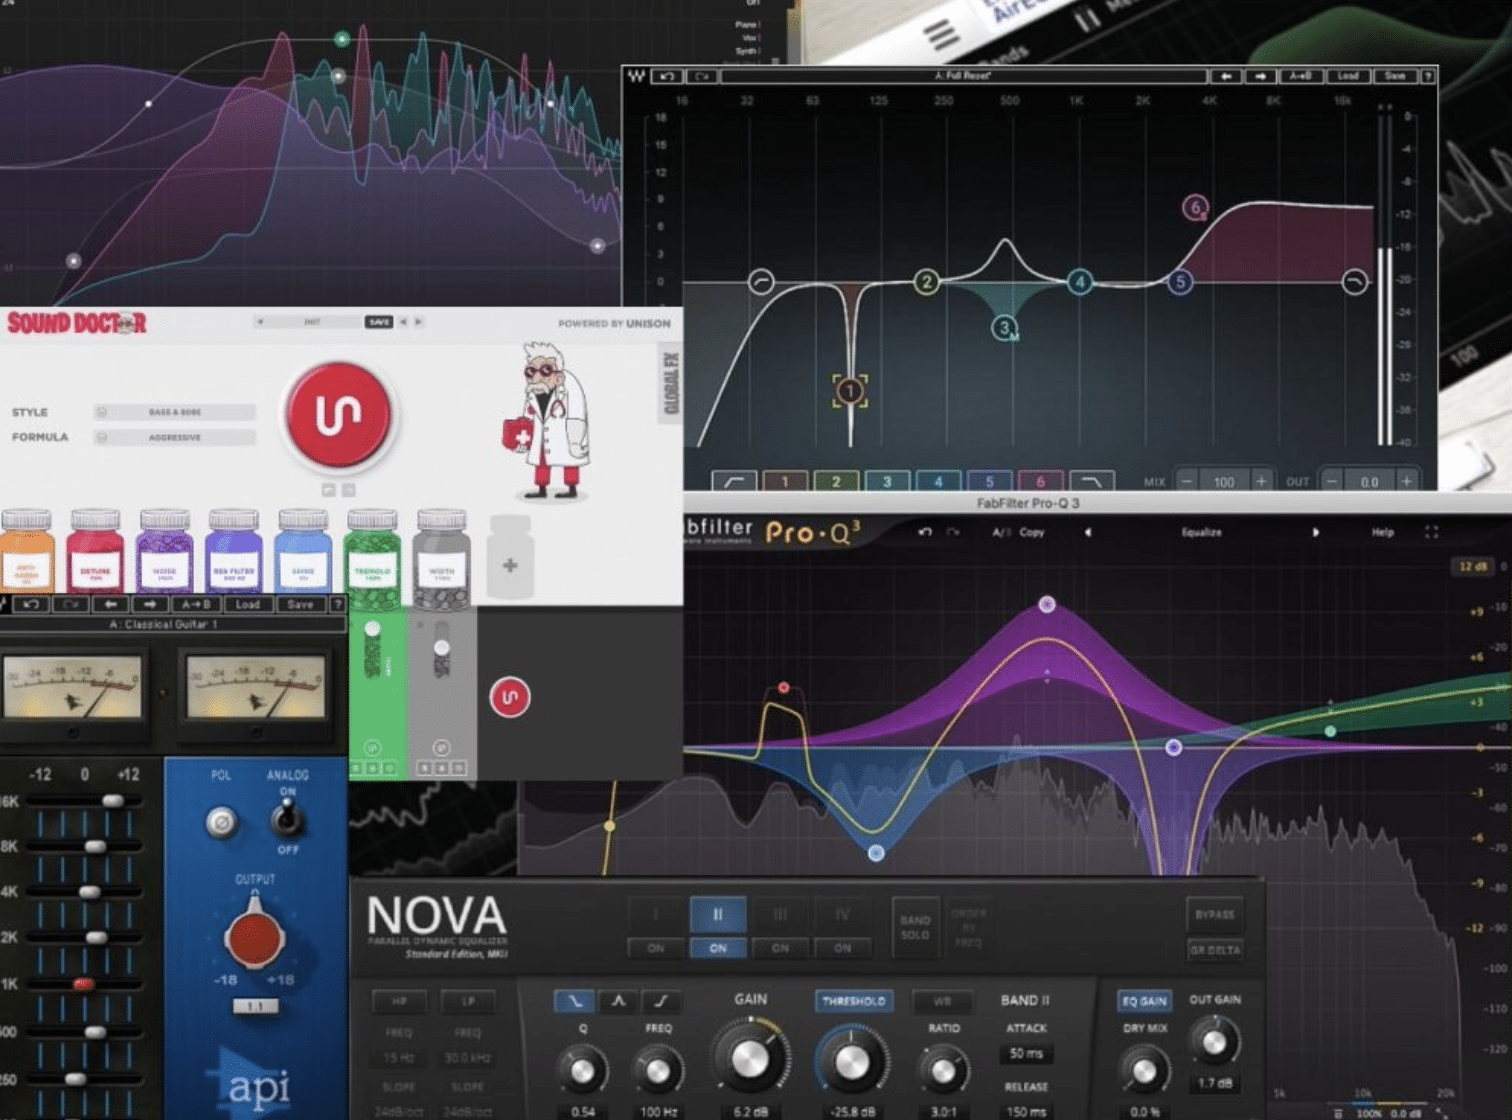
Before bouncing your tracks, it’s important to make sure that everything in your project is checked out and adjusted to perfection.
Proper preparation will:
- Minimizes errors
- Optimize your audio for the bouncing process
Start by critically listening to your entire final mix in various listening environments.
Pay attention to the balance between several tracks 一 ensuring that each element sits well in the mix without overshadowing others.
This is also the time to make final adjustments to levels and effects.
Remember, once bounced, these settings cannot be altered, so achieving the perfect mix beforehand is absolutely vital.
Make sure to use tools like EQ and compression to enhance resolution clarity and dynamics in your mix.
NOTE: Check for any unwanted noise, clicks, pops, and ensure there’s no clipping. Small issues, like a tiny clip in the mix can become pronounced once you bounced the audio and play it on different playback systems.
-
Setting Levels and Panning
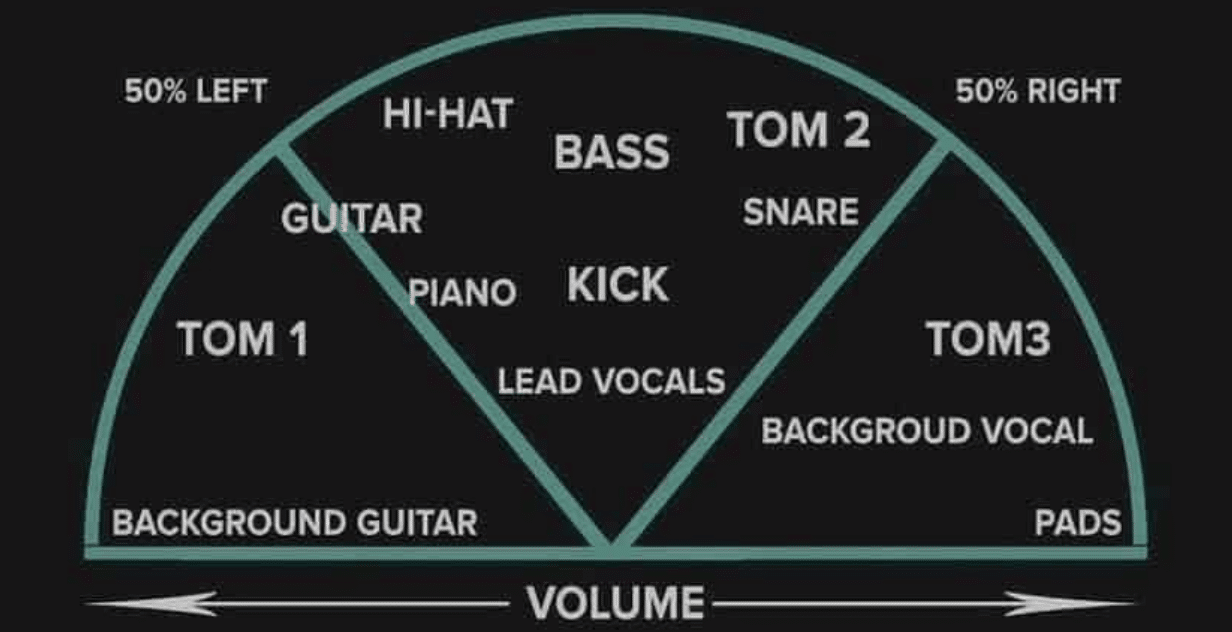
Setting the proper levels before bouncing your audio helps to avoid clipping and ensures optimal audio quality for all your placements.
Make sure that your track’s peak levels do not exceed 0 dBFS on the master channel to prevent digital distortion.
A good practice is to aim for a peak of around -3 to -6 dBFS, which gives enough headroom for mastering.
Using a metering plugin in your DAW, like the one available in FL Studio or Pro Tools, can help monitor these levels accurately.
For example, while mixing a loud rock track, you might set your drums and bass slightly higher to drive the track, while ensuring the final master fader remains below the clipping point.
Panning also plays a key role in the stereo imaging of your mix to give it a sense of width, depth, and space.
It can help separate instruments in the mix, making each one distinct and clear.
For instance, consider a standard drum kit setup in your mix…
The kick and snare are usually panned center, hi-hats slightly to the right, and toms and overheads panned to mirror their physical positions across the stereo field.
This setup mimics a natural listening environment 一 enhancing the overall spatial quality of your track.
Selecting the Right Export Settings
Choosing the appropriate export settings is super important to capture the essence of your sound as accurately as possible.
So, let’s dive into the specifics of bit depth and sample rate, and why they matter to ensure your audio bounces correctly/will convert properly.
Bit depth and sample rate are key settings when you bounce audio that determine the resolution and fidelity of your audio files.
-
Bit Depth

Bit depth refers to the number of bits of information recorded for each sample, directly impacting the dynamic range of the audio.
A higher bit depth, like 24-bit or even 32-bit floating point, provides a greater dynamic range, allowing for more precise capture/reproduction of soft and loud sounds without noise or distortion.
For instance, when recording a delicate acoustic session in Logic Pro, using a 24-bit setting will help capture the unique dynamics of acoustic guitars and soft vocals.
Therefore, the emotional impact will shine through.
-
Sample Rate
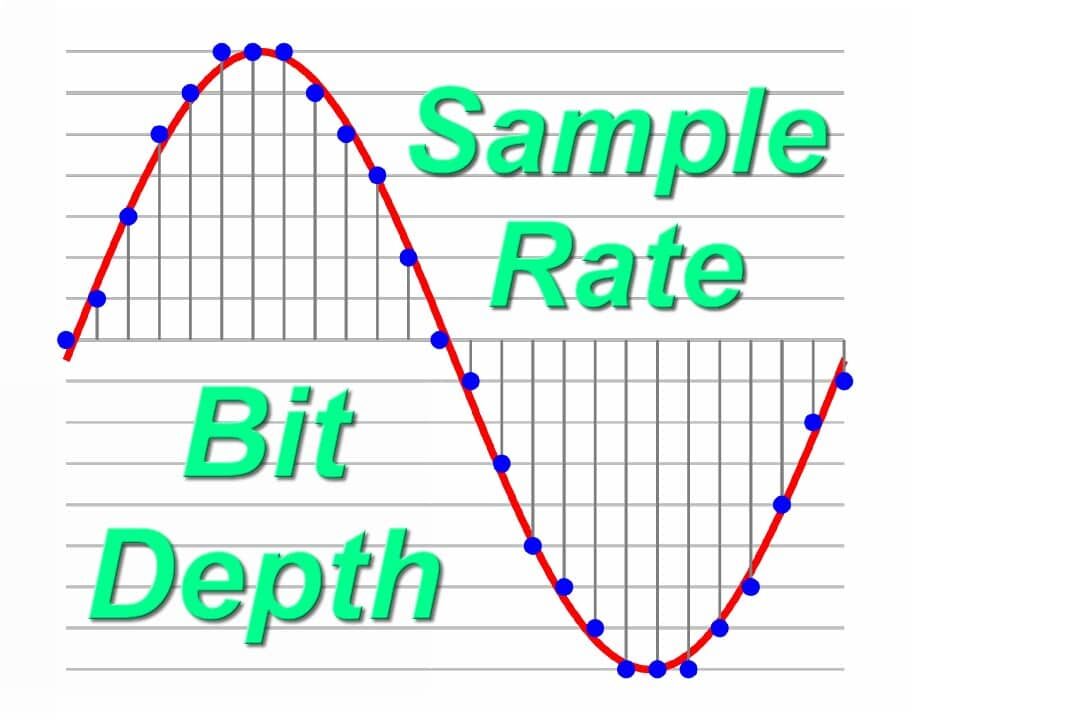
Sample rate, on the other hand, defines how many times your audio is sampled per second.
Common sample rates are 44.1 kHz, which is standard for a CD, and 48 kHz, often used in video production to align audio with standard videos frame rates.
Higher sample rates like 96 kHz or even 192 kHz can capture frequencies well above the human hearing range.
This can be super beneficial for certain types of high-fidelity recordings…
For example, more recording symphonic elements in FL Studio at a higher sample rate captures the subtle overtones and decays of orchestral instruments.
This will provide a richer, more detailed sound.
However, higher bit depths and sample rates increase audio file size and processing load, so it’s important to balance these settings with your project needs and system capabilities.
Pro Tip
When bouncing audio for final distribution, consider the target media: 24-bit/48 kHz is more than adequate for most music applications, while 32-bit float is ideal for projects requiring extensive dynamic range manipulation, like film scores or high-dynamic recordings in Pro Tools.
-
Choosing Between Mono and Stereo

Deciding between mono and stereo export depends on your track’s specific purpose.
- Mono is ideal for single sources like voice recordings, or when file size is a major concern.
- Stereo offers a more immersive experience by using two different audio channels (one for each speaker), perfect for enhancing the spatial qualities of your sound.
When bouncing tracks intended for film or television, stereo is unmatched when it comes to reflecting the environment’s dynamics for max impact.
However, for vocals in a mixed track, bouncing in mono can ensure they remain centered and consistent in the mix.
Bottom line, always consider the end goal of your bounced audio to make the best choice between mono and stereo.
Bouncing Tracks Like a Pro
Once you’ve prepared your project and decided on the settings, it’s time to start the actual bouncing audio process. The bouncing process involves a few key steps to ensure your audio is exported cleanly and efficiently.
-
Exporting Individual Tracks
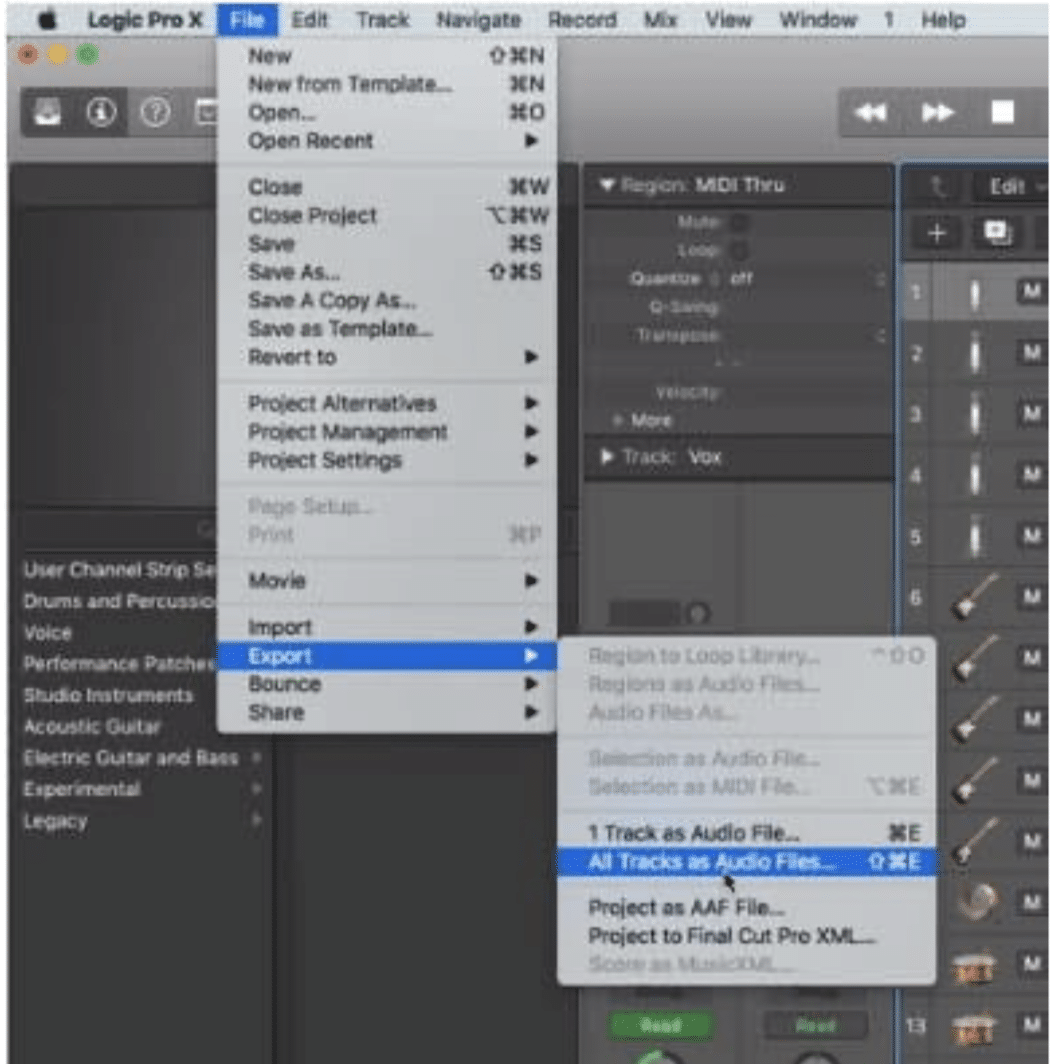
Exporting individual tracks, like when you’re preparing your song for mixing or sending to other producers and mastering engineers, is key.
It allows each element of your mix to be processed independently, which gives you ultimate control over the final sound.
For example, when exporting individual tracks in FL Studio or Logic Pro, you should ensure that each new track is named appropriately to reflect its content, such as “Lead_Vocal_Take1” or “Synth_Pad_Layer2.”
It just helps for a smoother workflow and when collabing with other producers.
Also, it’s important to export these tracks with consistent settings across all files to ensure seamless integration in the mixing stage.
NOTE: Use a uniform bit depth and sample rate, typically 24-bit and 48 kHz, to maintain audio quality.
For tracks with significant dynamic range, such as live drum recordings, make sure to apply normalization carefully to maximize signal integrity without introducing clipping.
Export options should also consider the use of effects…
For example, you might choose to render dry vocal tracks without reverb or delay 一 allowing for a more precise approach to mixing each element of your project.
Speaking of effects, if you want to know all about different free VST effects plugins (from EQ and convolution reverb to distortion and tape machine effects), we got you.
-
Bouncing Your Final Mix
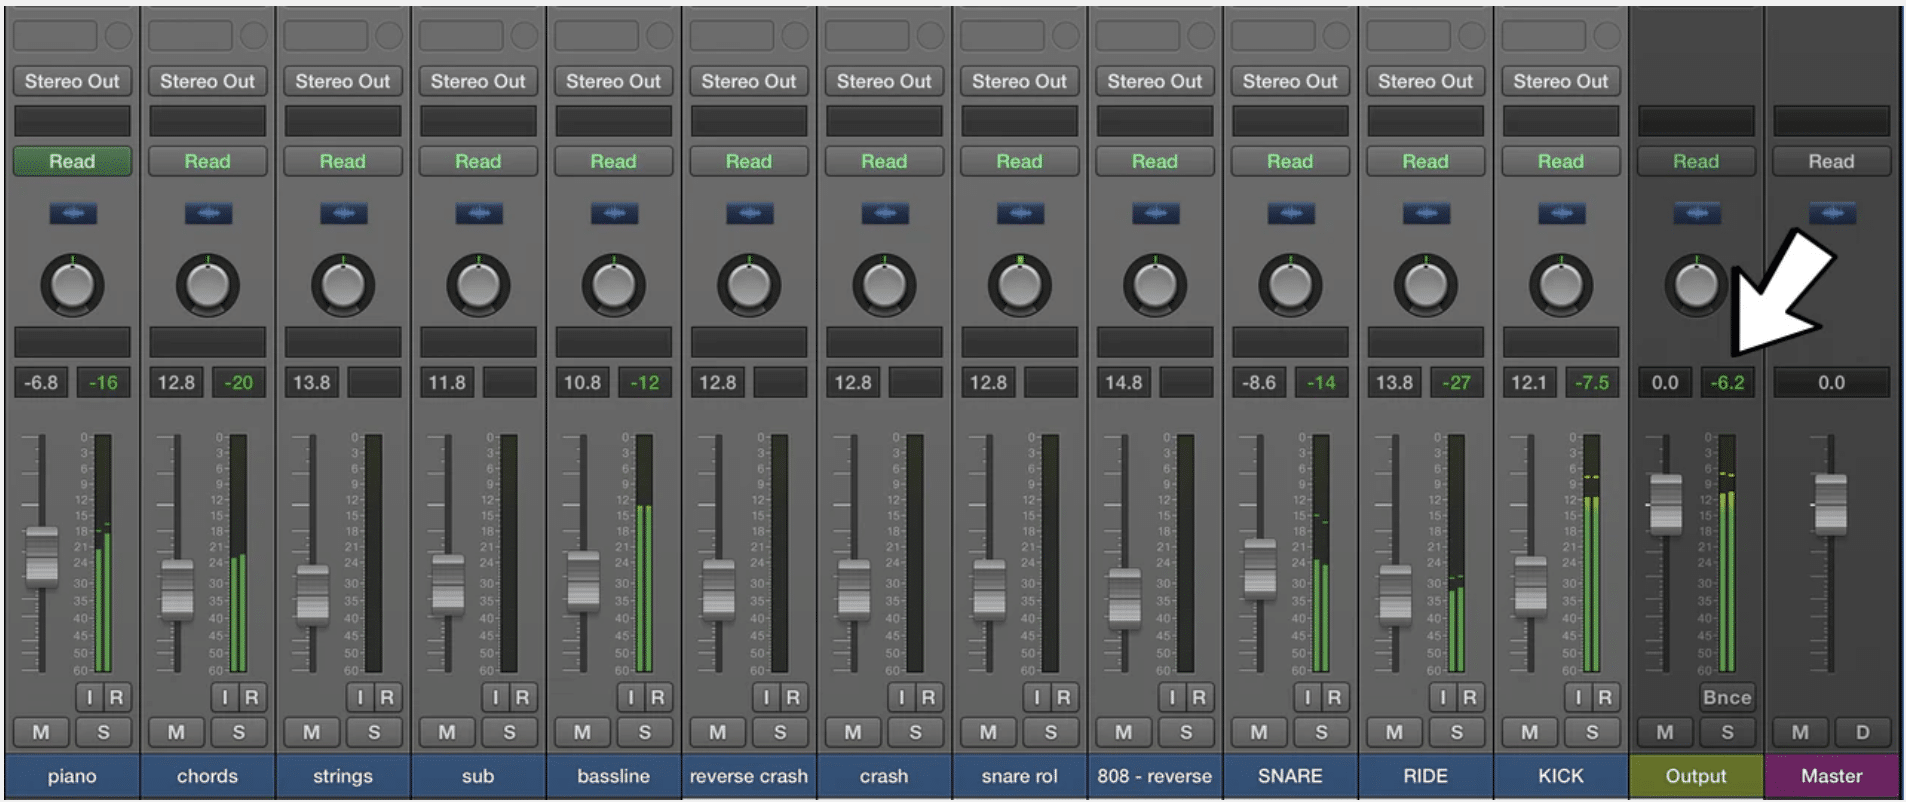
When you’re ready to bounce your final mix, you’ll need to throw all your many tracks into one stereo file.
This is the step where you ensure all your processing are exactly how you want them in the final output, like:
- EQ adjustments
- Dynamic compression
- All effects
For example, if you want to bounce a loud, club-ready recording, you might apply a slight limiter on the final master track to boost overall loudness while preventing clipping.
Before exporting, do a final check in different listening environments… Play your mix in car speakers, headphones, and studio monitors.
Make adjustments based on these tests to ensure your mix translates well across various audio systems.
Exporting the final mix should be done in a lossless format like WAV or AIFF to preserve the highest quality, especially if you’re sending the track to an engineer for further enhancements.
-
Using Offline Bouncing

Offline bouncing is a time-saving technique where the audio is bounced faster than real time, ideal for dealing with large projects or when CPU load is high.
For example, if your project includes multiple tracks (let’s say four tracks or more, for fun) with heavy plugins and sound effects, offline bouncing can significantly speed up the exporting process without sacrificing audio quality.
NOTE: For the record, it’s key to make sure that all effects and automation are correctly rendered during offline bouncing.
Some DAWs might handle plugin latency or automation differently in offline mode.
Always do a critical listen to the bounced file to ensure that everything sounds professional and exactly how you want it to.
If any issues pop up, just try bouncing in real time for accuracy.
-
Stem Mastering and Exporting Stems
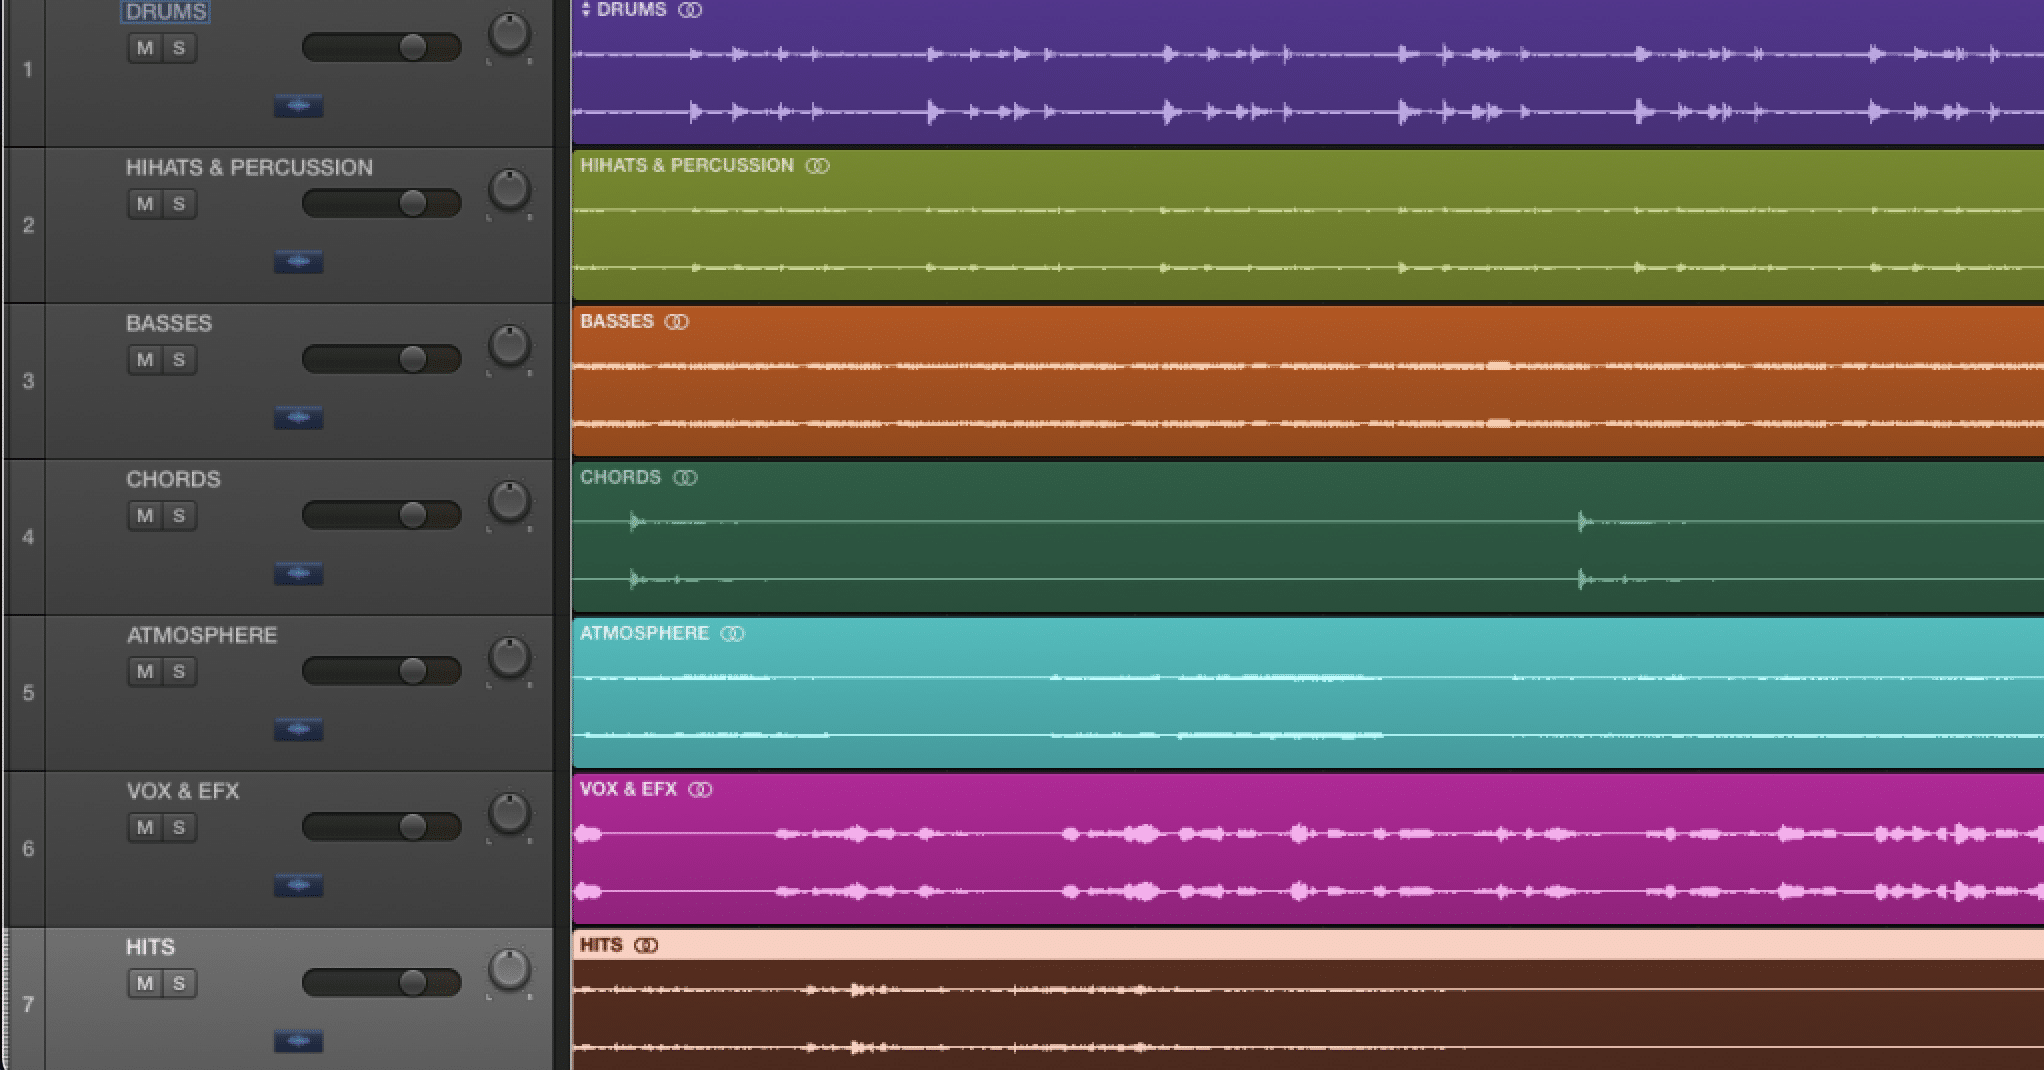
Stem mastering involves exporting grouped tracks, often referred to as stems, which provide more flexibility in mastering.
For example, you might export your drums, instruments, and vocals as separate stems.
This allows you, or the mastering engineer to make detailed adjustments to each group 一 enhancing the overall sound without altering the individual track dynamics.
When preparing stems for export, it’s important to include a bit of headroom and ensure consistent levels across all stems so mastering is smooth.
Label each stem clearly, like “Drums_Stem_Master” or “Vocals_Ambient_Stem”, and include a note of the key settings used, such as bit depth and sample rate.
This information is invaluable for your audio to get the precision it deserves (and will help your tracks sound extra professional).
Common Mistakes and How to Avoid Them
Before you bounce audio, there are a few things you need to make sure of… it can impact the audio quality of your final mix/project. So, let’s break down some common mistakes and how to swerve them like a champ.
-
Overcompression and Limiting

One of the most common mistakes in bouncing audio is overcompression and excessive limiting.
While these tools are useful for controlling dynamics and increasing loudness, overusing them can squash your mix.
It will ultimately reduce dynamic range and cause ear fatigue.
For example, setting a compressor with an attack that’s way too fast on a vocal track can make the words sound muted or ‘pumped.’
To avoid this, use compression and limiting with care…
Make sure to set moderate thresholds and ratios and ratios and always listen back to your mix at various volume levels to see if anything presents itself.
If the mix sounds consistent and clear without noticeable pumping or distortion, you’ve hit the right balance.
-
Neglecting Metadata & Audio File Organization
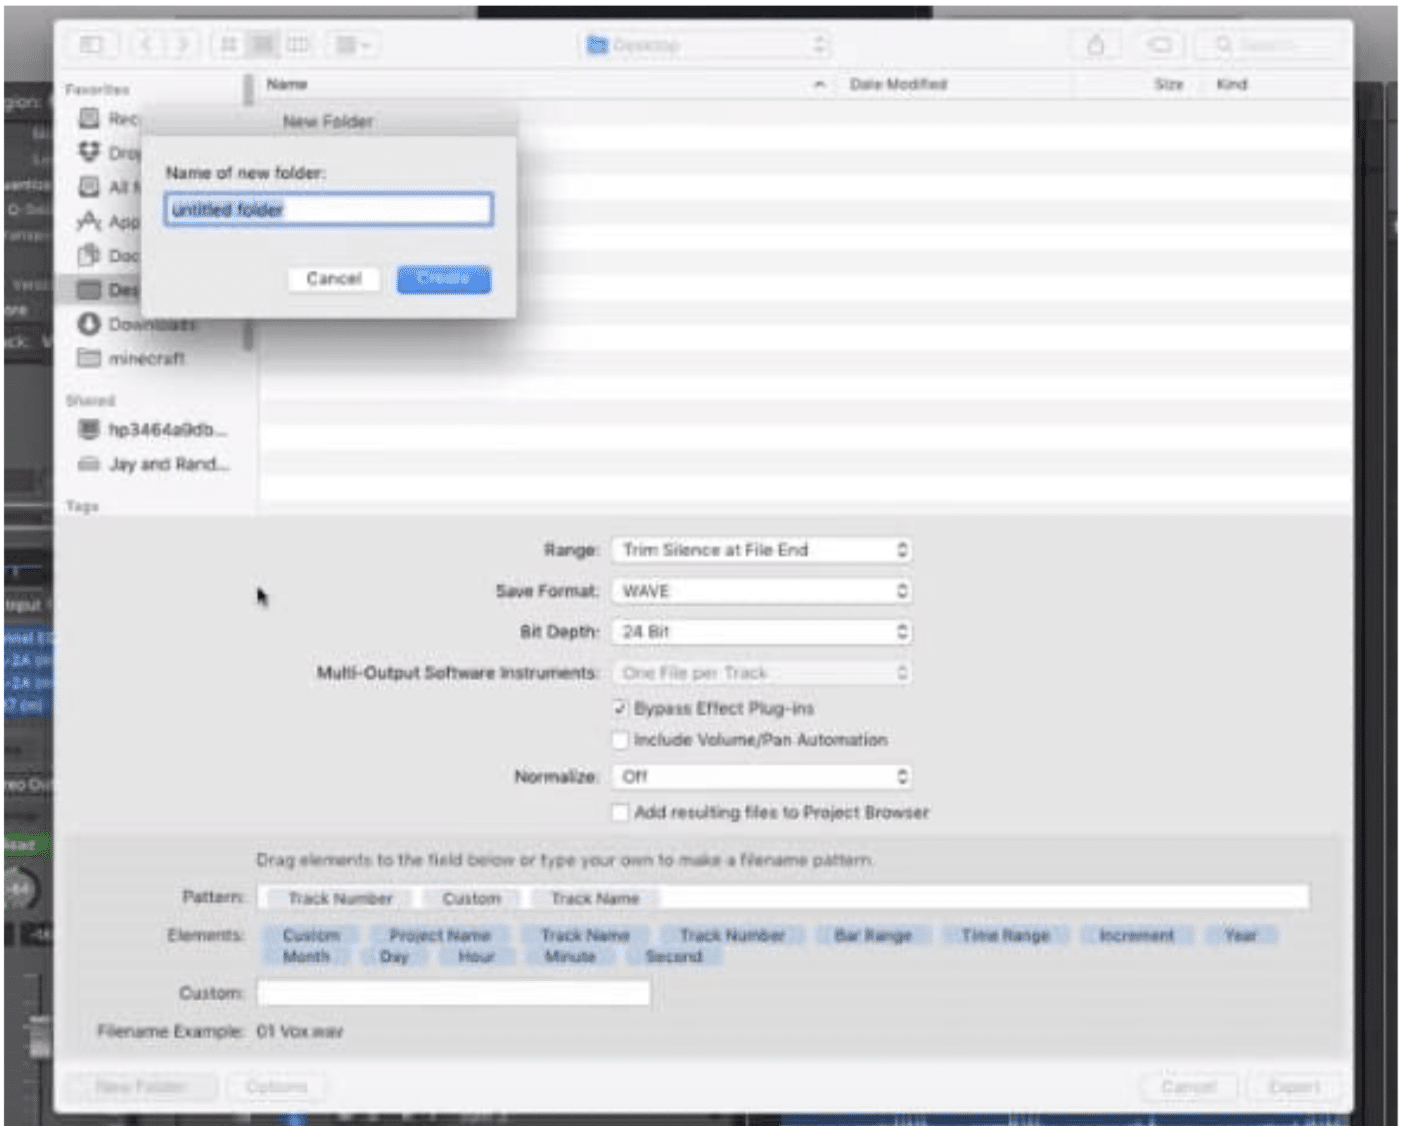
Proper audio file organization and metadata before you bounce audio is often overlooked, but it’s super useful for easy maneuvering.
Neglecting to include/save relevant metadata like can lead to issues in song copyright management and track identification during distribution.
This includes things like:
- Beat/song title
- Artist name
- Copyright information
- ISRC codes
- Etc.
Always take a free moment to fill out the metadata fields in your DAW before bouncing your final mix and make sure to organize your files logically.
It not only saves time during the search for specific file type but also presents your work professionally when sharing with collaborators/clients.
Remember bouncing audio, from start to finish, is all about organization, common sense, and overall goals.
Bouncing Audio: Final Thoughts
Bouncing audio is all about precision and organization.
You just need to make sure your settings are correct, your files are well-organized, and everything is meticulously checked before you hit export.
That’s why, by following these few simple requirements we covered today, you’ll be bouncing audio like a pro.
To give your tracks that extra bit of magic before exporting the final mix or master, consider using the new legendary (free) Zen Master plugin.
This innovative lo-fi plugin can be very subtly applied on your master bus to enhance the overall sound.
The 5 unique knobs on Zen Master will really blow your mind and add that beloved lo-fi edge to any track 一 ensuring your tracks are unique and intriguing.
Now that you have all the tools and knowledge at your fingertips, it’s time to go create epic beats that shake up the entire industry.
Until next time…


Leave a Reply
You must belogged in to post a comment.