Resampling audio is all about capturing the perfect moment… and pushing it further.
It can help you take your sound design, drum programming, and production skills to the next level all day.
When done right, it lets you transform CPU-heavy plugins and effects into clean, editable samples without killing audio quality or slowing down your process.
Plus, the right resampling techniques can turn basic loops into mind-blowing textures and give your audio channel more flexibility.
As well as help you create completely original sounds from scratch.
As producers, knowing the best resampling techniques can completely change how we approach making music 一 especially when it comes to resampling audio creatively.
That’s why I’m breaking down the absolute best resampling techniques to bring things to the next level, like:
- Resampling process must-knows ✓
- Reverse reverb effects ✓
- Advanced bit depth manipulation ✓
- Printing complex FX chains ✓
- Creating one-shots from loops ✓
- Using sample rate creatively ✓
- Time-stretching and pitching tricks ✓
- Custom textures from synths ✓
- Extreme lo-fi layering ✓
- Dynamic sound sculpting ✓
- Transforming your audio track into playable instruments ✓
- Advanced resampling techniques ✓
By knowing all the most legendary resampling techniques, you’ll seriously unlock a whole new layer of creative possibilities and super creative ways to play around with audio content.
Plus, you’ll know how to twist and flip any audio file like an absolute boss.
This way, your track will always have fresh, unique sounds and you’ll never have to worry about sounding generic (or basic) ever again.
Table of Contents
- What Is the Resampling Process & Why Is It Important?
- Killer Resampling Techniques For Music Production
- Bounce in Place, Freeze & Flatten, Print to Audio
- Gain Staging & Signal Chain Considerations
- Labeling and File Management Must-Knows
- Resampling for Drum Design & Percussive Sound Creation
- Melodic Resampling Techniques for Synths & Instruments
- Texture-Based FX Resampling
- Lo-Fi & Analog-Style Resampling Tricks
- Pitch and Time-Based Advanced Techniques
- Pro Tip: Iterative & Recursive Resampling Workflows
- Advanced Resampling Methods
- Bonus: Common Mistakes to Avoid When Resampling Reverse Reverb
- Final Thoughts
What Is the Resampling Process & Why Is It Important?
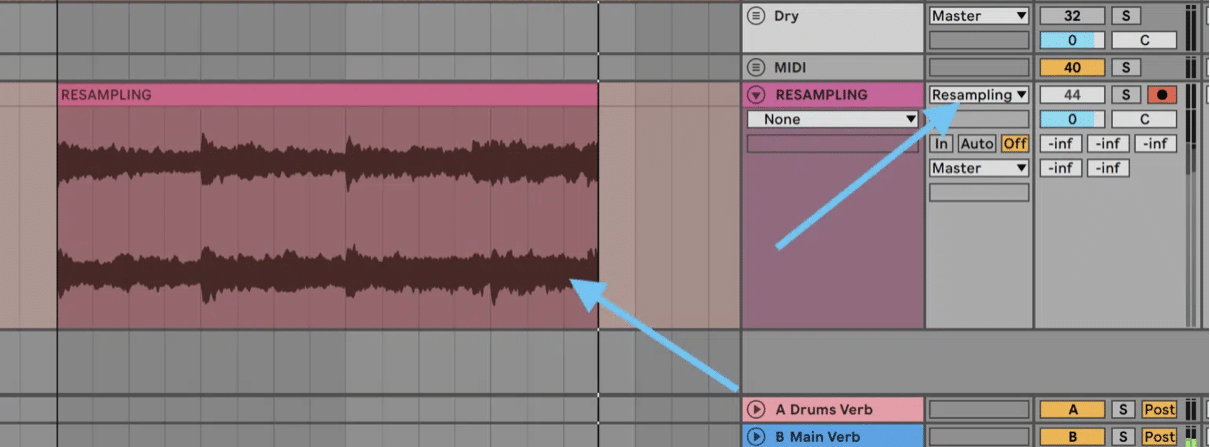
Resampling is when you take any processed audio track (whether it’s a stacked synth, layered drum loop, or FX-heavy vocal) and bounce it into a fresh audio file.
This way you can edit, slice, stretch, or flip it in new ways without reprocessing it every single time.
And it’s not just about rendering 一 it’s about making space, speeding things up, and creating brand-new ideas from sounds you already built.
A big part of resampling techniques involves flattening plugin-heavy chains to ease CPU load.
For example, if you’ve got a reverb (Valhalla Room, Decay at 4.5s, Mix at 40%), a tape saturator (J37 with Saturation at 50%), and a stereo widener on one audio channel, freezing and flattening that chain frees up power while locking in the exact tone.
When it comes to bit depth and sample rate, resampling also gives you control over your audio quality.
Exporting a sound at 44.1kHz / 24-bit preserves full resolution, while intentionally downsampling to 22.05kHz / 12-bit with added noise can give you that raw lo-fi flavor.
It’s exactly like you’d hear on a vintage sampler or tape recorder.
And if you want to move faster when producing, resampling audio gives you instant control. Instead of stacking 10 plugins on your pad, resample it once.
Now you’ve got a clean audio file you can pitch, slice, reverse, or drag into a sampler to start something new.
That’s how you speed up decisions and focus on making more music, not just randomly tweaking settings until something sticks.
Don’t worry if it sounds a little confusing, I’ll be breaking down everything for you in detail throughout the article so you get a super solid understanding.
Pro Tip: When Exactly to Resample
If you just finished sound designing a bass with two distortion units, a multiband compressor, and a reverb tail automation sweep, that’s the ideal time to resample audio.
You’ve already shaped the tone, movement, and texture, so printing it locks it all in and lets you use it like a new sample without burning more CPU.
Another key moment to resample is before you start mixing because flattening your melodic layers or FX busses gives you cleaner control over:
- Volume
- Panning
- EQ
For example, turn your ambient FX chain into a single stereo file, then apply subtractive EQ (cut 200–350Hz by -3dB, Q at 1.2) without touching any of the source plugins.
And when you’ve got a loop or melody that just isn’t working anymore, resampling techniques can completely flip the vibe.
Bounce it, reverse it, chop it into 1/8 notes, pitch it down 5 semitones, and now that failed synth idea is a textured, percussive layer you never expected.
That’s the beauty of resampling techniques for music production 一 they help you turn something old into something brand new all day (endless possibilities right here).
Killer Resampling Techniques For Music Production
If you want to go beyond basic bouncing and unlock full creative control, these resampling techniques are where it really starts to get exciting. From CPU-saving moves to full-blown transformations, these tricks will give you serious freedom over every audio signal in your session.
Bounce in Place, Freeze & Flatten, Print to Audio
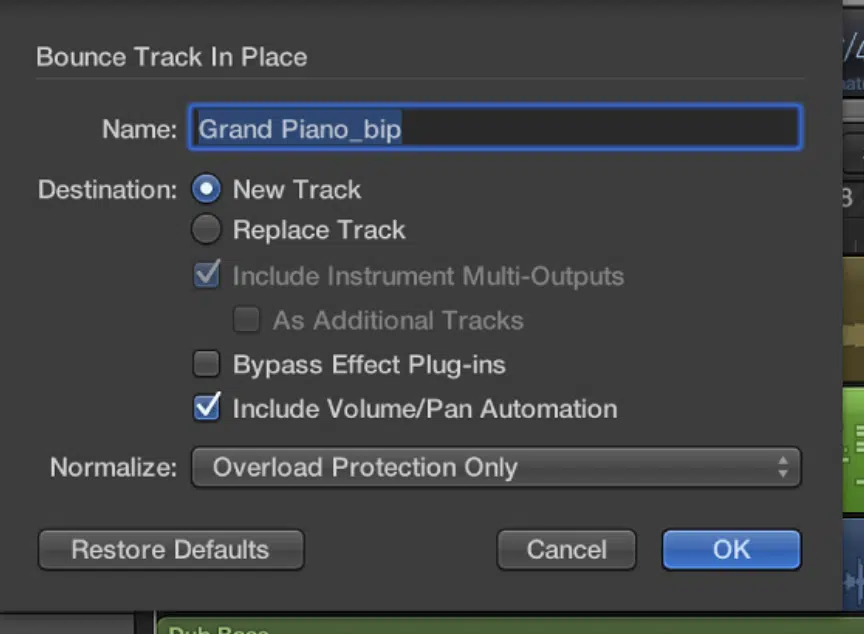
One of the fastest, cleanest resampling techniques is using “Freeze” and “Flatten” (Ableton) or “Bounce in Place” (Logic Pro).
They can help you turn plugin-heavy audio channels into clean editable clips.
For example, freeze a synth lead with Valhalla Supermassive (Delay at 1/2 Dotted, Feedback at 65%), OTT, and Soundtoys PanMan sweeping L-R at 0.7Hz.
Then, flatten it into a single audio file to chop or resample.
If you’re in FL Studio, simply load Edison on the master insert, hit “Record on Input,” and capture your chain live.
This not only lets you resample full layers but also makes it easy to rename, tag, and drop it directly into your sampler like an expert.
It’s one of the cleanest ways to create organized, fully-processed samples from complex chains.
And if you want more character, you can always try printing a reverb-affected sound with no dry signal (Mix at 100%) and reverse it.
For example, apply a shimmer reverb on a vocal chop, freeze it, reverse the bounce, and now you’ve got a reverse reverb effect that leads perfectly into a chorus or transition.
But don’t forget to play around so things match your unique style/vibe though, of course, because it’s going to be different every time.
PRO TIP: When bouncing, always print your sample rate and bit depth settings.
Exporting at 24-bit / 48kHz keeps things clean, but exporting at 12-bit / 22.05kHz adds aliasing and grit (really useful if you’re building a lo-fi sound bank for later).
Gain Staging & Signal Chain Considerations
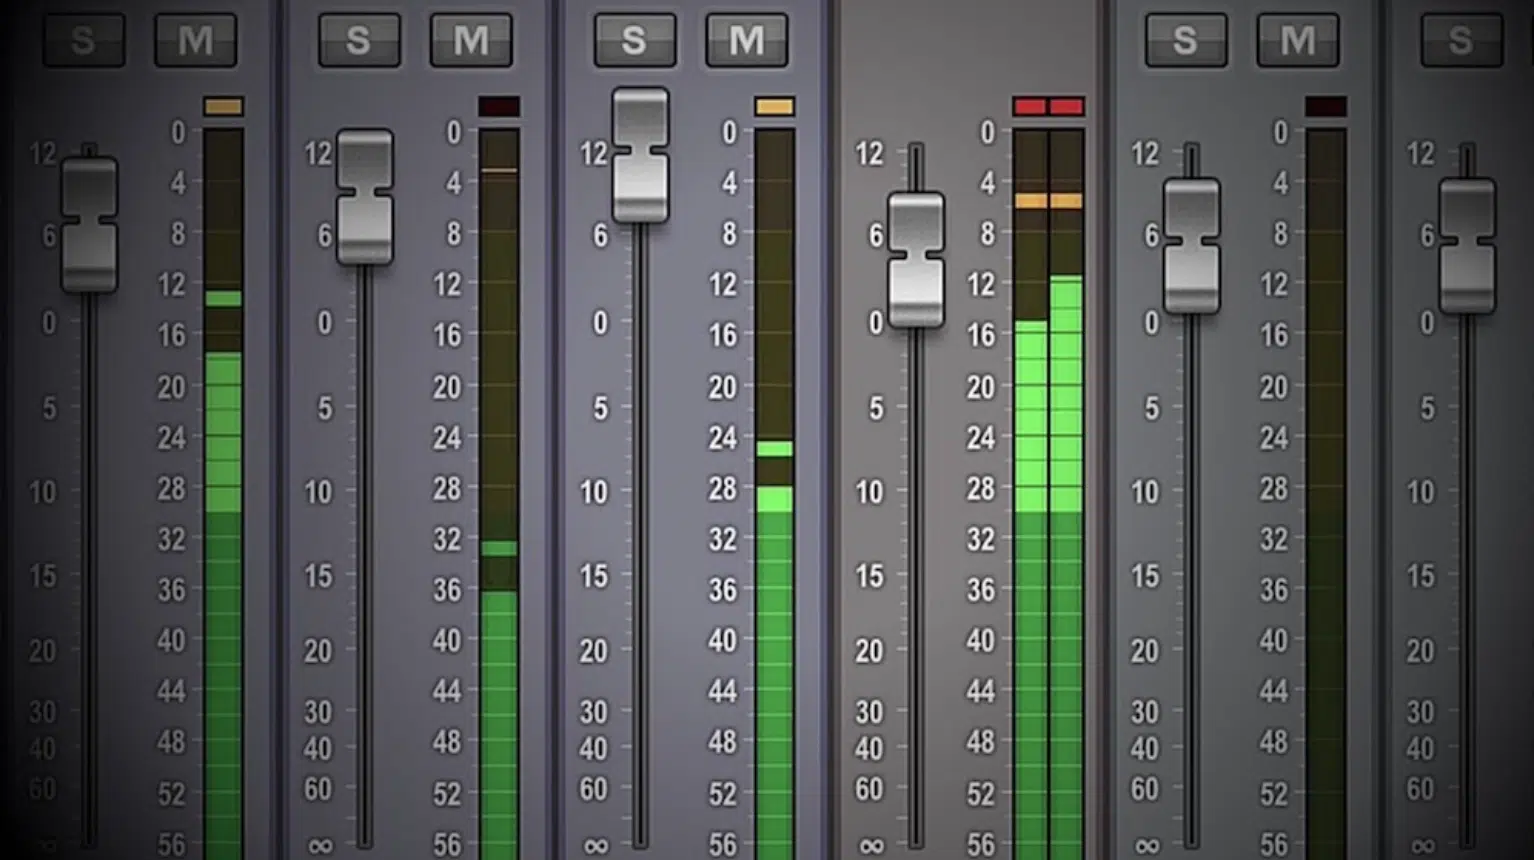
Before you bounce anything, you’ve got to ALWAYS check your levels.
Aim to resample with your signal peaking around -6dB to -8dB, especially if you’re going to run it through another chain later.
It keeps your audio quality solid and gives you headroom to stack more without clipping.
Now, pay close attention to the order of your FX chain…
Throwing a bit crusher like Krush before a compressor will give you more edge and movement, while putting it after compression will sound tighter and more controlled.
Either way, try resampling both because that’s how you’ll find the version that hits the hardest in your track, of course.
Also, don’t forget that modulation-based other effects like chorus or phaser work best when you capture them mid-movement.
Crank your Valhalla Chorus rate to 0.8Hz with a depth of 35%, bounce that audio, and instantly you’ve got motion you can’t recreate with static FX.
PRO TIP: Try stacking distortion on two different passes, like one soft-clipped and one tube-driven, then blend them after resampling.
You’ll get a super thick layer that sounds processed, but still punchy and clean.
Labeling and File Management Must-Knows
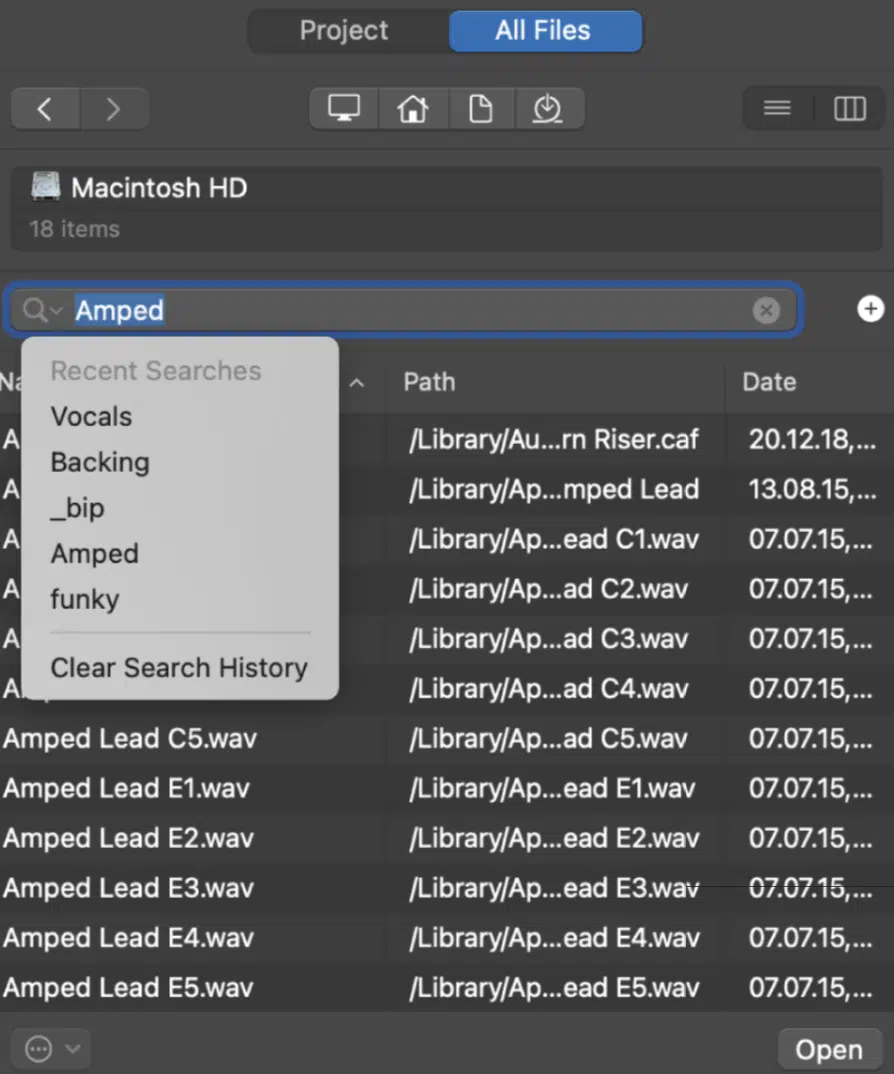
Once you start getting deep into these resampling techniques, your sessions are going to get messy fast, that’s a fact… unless you stay organized.
So, what you always want to do is label your files in a way that tells you exactly what they are, like “Snare_Bus_TapeSat_Resample_44kHz_16bit.”
Trust me, when you’ve got 30 resampled clips laying around, that name saves you.
Break your stuff down into folders, like “Drums_LoFi,” “FX_Reverse_Reverb,” “Pads_PitchShifted,” so you can find what you need without slowing down your flow.
This kind of file tagging makes a massive difference when you’re loading up samples later for a new session or flipping older material into new audio content.
Also, assign colors to new tracks or resampled layers, like:
- Orange for drum layers
- Green for synths
- Pink for transitional FX
- Etc.
Basically, anything that helps you move fast 一 visual separation in your project keeps you focused and way more locked in, period.
Also, I suggest you keep a folder on your desktop called “Resampled Gold.”
This way, anytime you make something that slaps, even if it’s just a weird glitch or pitched single drum hit, just bounce it, name it, and throw it in there.
That folder will save you on your next beat when you need something wild and original to spark an idea (big time-saver).
Resampling for Drum Design & Percussive Sound Creation
When you’re knocking out drums, one of the most powerful resampling techniques you can use is grabbing a full drum loop and breaking it into one-shots.
For example, take a 4-bar loop with layered kicks, snares, and claps, then bounce it to one single audio file.
Slice out a single transient-heavy snare at bar 2.3, normalize it to -1dB, and load it into your sampler to create something totally new.
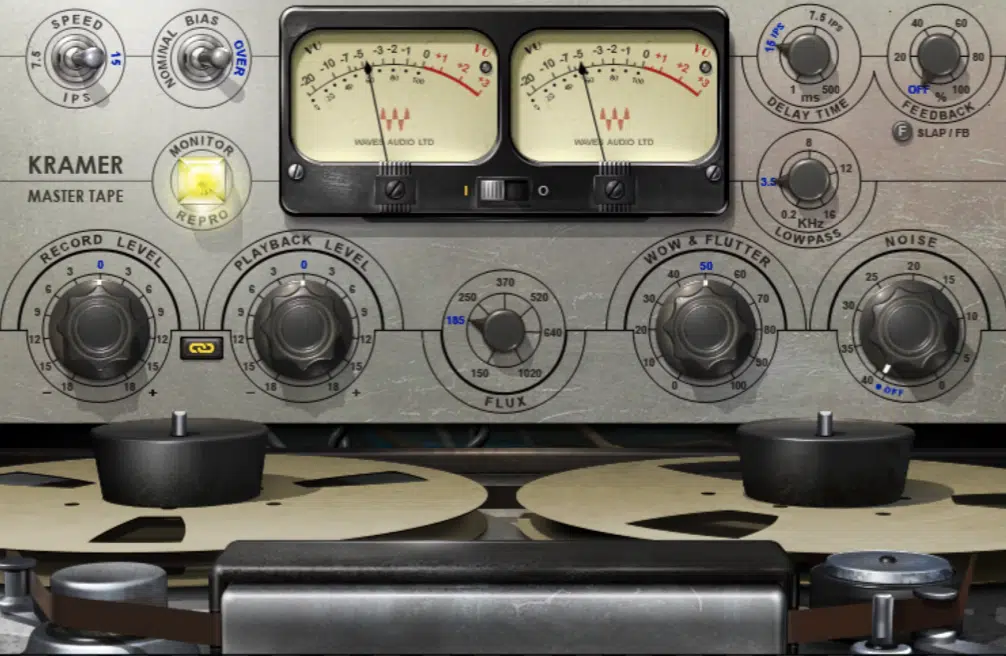
You can also layer multiple single drum hits, like three different kicks, group them, and apply light tape saturation (like Kramer Tape with Record Level at -6dB and Bias at 3).
Then, resample the bus to glue them together.
This gives you a more fluid, rounder hit that cuts through the mix without stacking unnecessary processing because, let’s be honest, nobody has time for that.
And keep in mind that processing is key here…
Run a drum group through Ableton’s Drum Buss with Drive at 20%, Crunch at 10%, and Transients boosted by 5, then bounce that processed bus as a fresh audio channel.
You’ll hear tighter low-end punch and smoother transients when you resample audio this way right off rip.
NOTE: For a grittier vibe, run your hi-hats or percs through a bit crusher like Krush with Sample Rate at 8kHz and Bit Depth at 6-bit, then blend the resampled audio with the clean channel at 40% to add textured air without harshness.
Also, my secret tip is to duplicate your resampled percussive sounds across 3 octaves, apply subtle pitch shifting (±3 semitones) and different envelopes.
Then, chop them into new grooves.
That way, you’re turning one resampled sound into a full rhythm section with movement and depth (trust me, it makes a big difference).
Melodic Resampling Techniques for Synths & Instruments
When working with synths, one of the best resampling techniques you can use is bouncing your MIDI to audio after building a melody or chord progression.
For example, you can turn a stacked piano chord progression into a single rendered audio track, then:
- Reverse sections
- Stretch certain notes
- Apply pitch automation for insane melodic variation
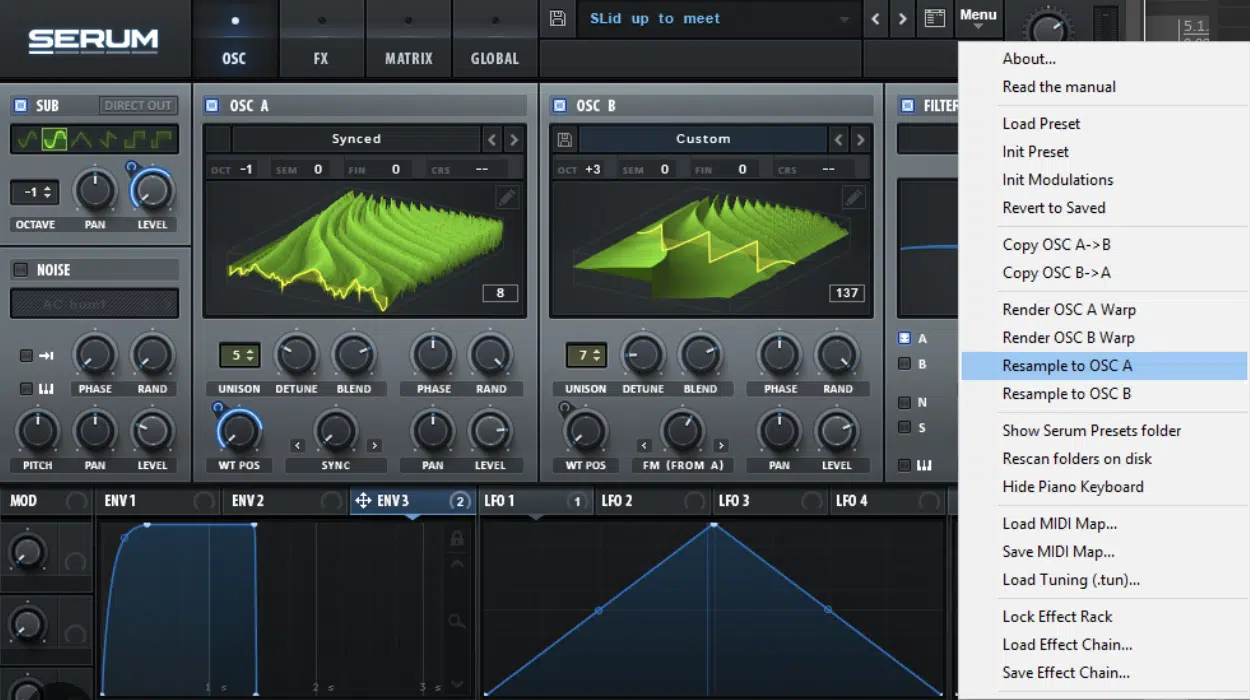
Take a pad built from three layers 一 Serum 2 (Basic Mg, Unison at 5 voices), Omnisphere (Dreamscape patch), and a granular texture from Portal.
Then you’re going to bounce that to audio, then slice at bar 3.1, reverse it, and add AutoPan with a rate of 0.15Hz for subtle left/right drift.
That one slice can become an ambient riser or retextured layer under your hook.
Another trick is to bounce monophonic lead lines and use time-stretching (Complex Pro mode, Formant at 0.70) to drag it 200% longer.
It’ll create this warped, almost vocal-like quality that works great for breakdowns or spacey intros that people go crazy for in electronic music.
You can also rewarp basslines, which I’m super keen on…
Take a Serum bass with Glide at 130ms, distort it with Trash 2, then resample that bend into a clip.
Now pitch that clip up 7 semitones, add a reverb tail (Valhalla Room, Decay at 3.5s, Mix at 50%), and you’ve turned a bass into a weird lead texture.
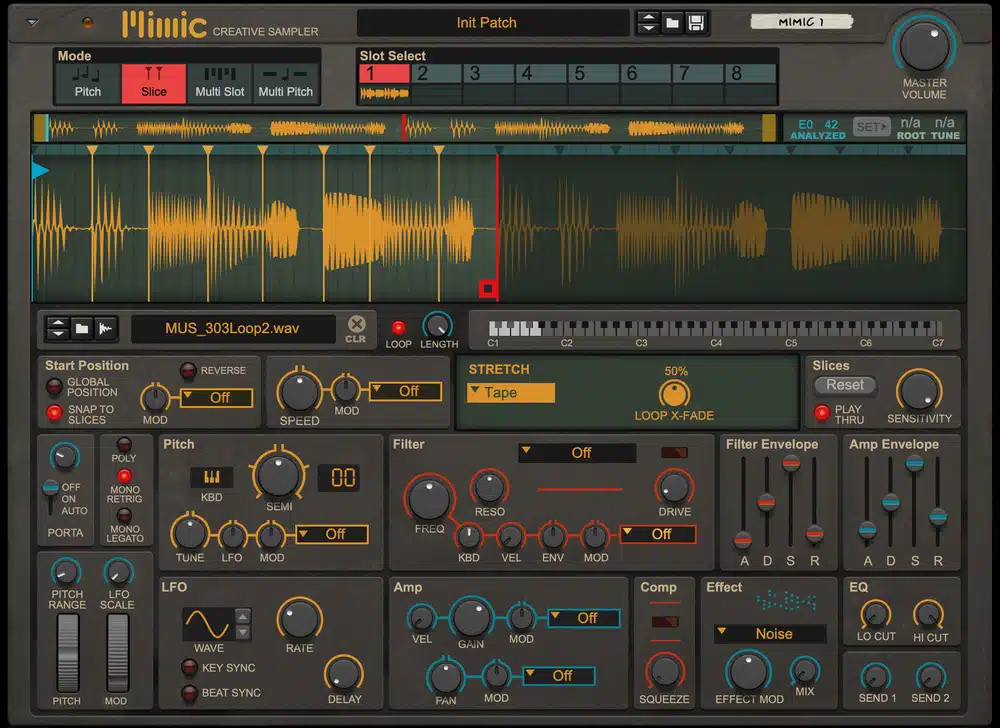
And if you want to build a playable instrument, chop a single sustained chord from a resampled synth pass, load it into Simpler or Kontakt, and set loop points with crossfade at 10ms.
Map the pitch across your keyboard, and now you’ve got a fully playable, custom sampler patch.
PRO TIP: Try pitching a resampled melody up 1 octave, high-pass it at 600Hz, then layer it subtly under the original to add some extra harmonic content and sparkle.
This is a trick that’s used in a lot of pro electronic music production, so definitely give it a go.
Texture-Based FX Resampling

Now, if you’re looking to build thick, atmospheric textures, resampling techniques that involve FX tails are absolutely everything.
For example, take a vocal chop, send it to a long reverb (Valhalla Shimmer, Decay at 9.5s, Mix at 100%), bounce that audio file, and stretch it 300% using Complex Pro.
Now you’ve got a massive evolving pad that’s completely unique/show-stopping.
Reverse reverb is another classic 一 resample your dry sound, reverse it, send it to reverb (Plate mode, Decay at 2.2s), then resample again and flip it forward.
It’ll give you that haunting swell effect that pulls straight into the next phrase.
And if you want some extra movement, simply modulate your FX before resampling, for example, automate a stereo phaser’s rate from 0.2Hz to 0.8Hz over 8 bars, then bounce that.
When you resample this automation, it becomes part of the audio file, which lets you slice or rearrange that modulation rhythmically.
You can also use this for delays, which is really cool.
To try it out, set EchoBoy to Ping-Pong mode, 1/8 dotted, Feedback at 65%, crank the Saturation to 30%, then bounce the repeats as a full layer.
After that, edit the tails into ghostly stabs or transitional fills that add motion to your track.
PRO TIP: Automate the Mix knob on any other effects (chorus, flanger, or phaser) from 10% to 80% gradually, resample the whole FX chain, then chop the most interesting textures.
You’ll get sounds you’d never be able to re-create from scratch, trust me.
Lo-Fi & Analog-Style Resampling Tricks

One of the best resampling techniques for dirtying up a clean sound is using a bit crusher combined with downsampling.
Load up D16 Decimort 2, set the Bit Depth to 6-bit, Sample Rate to 11kHz, and Jitter to 8%, then bounce the processed layer to audio.
You’ll get crunchy aliasing and low-res textures that work perfectly for intro FX or background pads.
If you’re going for a more retro vibe, try running your full drum buss through Waves J37 Tape with Tape Speed set to 7.5 IPS, Wow at 25%, and Saturation at 40%.
Then you’re going to resample the output.
That bounce will have rounded transients, harmonic distortion, and subtle pitch drift (ideal for hip-hop or vintage-inspired EDM).
Cassette-style warble is another killer move that I mess around with all the time…
Use SketchCassette II, set Wow Depth to 65%, Flutter to 20%, and Age to “Oldest,” then resample the output to get authentic pitch modulation and analog warmth.
You can even layer this under your clean audio track at -12dB to add texture without overwhelming the mix if you’re feeling froggy.
For vinyl crackle and analog noise layers, throw in a sample from Vinyl Classic or record the noise output from an old preamp, then blend it at -18dB RMS behind a lead sound.
Once it’s layered, resample audio again to glue it together, which bakes in the vibe permanently.
PRO TIP: Set a channel to 22.05kHz and 8-bit using Reaper’s Render settings or Ableton’s External Audio Effect workaround, process it through a sampler, then reimport and pitch it back up.
The aliasing, digital dirt, and crushed top end will give you a totally unique, out-of-the-box sound that still feels playable and on point.
Pitch and Time-Based Advanced Techniques

When you’re stretching audio to the extreme, one of the best resampling techniques to play around with is running it through PaulXStretch.
What you’re going to do is set the:
- Stretch factor to 16x
- Window Size to 0.25
- Tonal vs Noisy Balance to 60/40
Render a vocal or pad this way and you’ll get slow, moving textures with no rhythmic pulse 一 perfect for ambient builds or reverb-laced intros.
For vocal resampling, try bouncing a dry vocal to audio, using Melodyne or Ableton’s Complex Pro mode to drop the pitch by -3 semitones, then shifting the formants up by +2.
This gives you that low, robotic tone with a more natural brightness up top.
Then what you’re going to do is chop that up into rhythmic stabs to build a rhythmic texture layer that blends with the beat.
Tempo-warping is another go-to trick that I’m all about, and I recommend you play around with…
Take a melodic synth line originally recorded at 120 BPM, warp it to 90 BPM using Complex mode (preserve transients off), and bounce it.
Next, resample that version, pitch it up 5 semitones, and you’ve created a groove that feels fresh while still keeping the harmonic content of your original pass.
And if you want a more subtle pitch drift, you can automate the pitch of a lead synth ±25 cents over 4 bars, flatten the audio, then use it as a background layer behind the dry signal.
That slight detuning adds movement and energy without sounding “out of tune.”
NOTE: Layer a reverb tail from a pitched-up lead on top of the original at -9dB and stretch it 125% to add shimmer, space, and movement while gluing the layers.
These kinds of resampling techniques for music production unlock textures you just can’t get through basic mixing.
Pro Tip: Iterative & Recursive Resampling Workflows
If you really want to push things creatively, you can play around with running your resampling techniques in multiple stages.
For example, bounce your bassline with distortion and compression, then run that through chorus and bit depth reduction.
Then pitch that version up and crush it with saturation.
Use 3-4 iterations in a row like this (save each one as a separate audio file) then A/B which version slaps the hardest in your track.
Sometimes the third bounce sounds better than the fifth, or maybe vice versa, so always give it a super thorough listen.
And remember, every time you resample, lower the mix of your other effects just slightly (like going from 80% to 60%) to leave space for new processing in the next stage.
That’s how you keep your audio quality clean even when you’re bouncing through multiple rounds.
Side note, if you want to learn all about using reference tracks for anything, I got you.
Advanced Resampling Methods
Once you’ve got the basics down, there are some next-level resampling techniques that you can play around with. They let you twist and bend your sound into completely original textures. And these aren’t just workflow hacks that make sense — they’re high-level tools you can use to craft your track into something no one else has heard before. And when you start combining these resampling techniques for music production with sound design, modulation, and FX chains, the creative potential becomes insane. So, let’s get into it.
Resampling Granular Synth Outputs into Raw Pads
One of the most underused resampling techniques for creating atmospheric pads is pulling audio from granular synths like Granulator II, Portal, or Quanta.
For example, drop a vocal sample into Granulator II, set Grain Size to 200ms, Spray to 0.35, and File Position to LFO-controlled automation.
Then, bounce the evolving layer over 16 bars and resample audio into a new audio file.
From there, apply Valhalla Shimmer with a Decay of 12.5s, Mix at 50%, and Pitch Shift set to +5 semitones.
This completely transforms it into an airy wash with harmonic movement.
Once it’s printed, stretch it 150% and filter out everything below 300 Hz with a 24dB/oct low cut to create a pad that floats right above your mix without clashing with your bass.
For additional character, layer a vinyl crackle sample on top (at -24dB RMS), then print the whole thing together.
That glue between the granular movement and analog noise gives the pad an aged, cinematic vibe that’s tough to recreate with regular synths alone.
PRO TIP: Randomize the grain window every 2 bars with automation (0.2 to 0.7 range), then resample it.
You’ll capture unpredictable motion that adds rhythmic texture without having to draw out complicated LFO patterns.
Layering Multiple Resampled Versions for Width & Dimension
Stacking resampling techniques is a killer move when you’re trying to widen your sound or make it feel massive. Start by taking your lead and duplicate it twice.
This could be a resampled Serum pluck with 3-voice unison, saw wave, and 30% detune.
What you’re going to do is:
- Pitch one version down -7 semitones (pan it hard left)
- Pitch the other up +5 semitones (pan hard right)
Just don’t forget to bounce all three separately and load each one into its own new audio channel because this is key.
Next, apply slightly different effects on each layer.
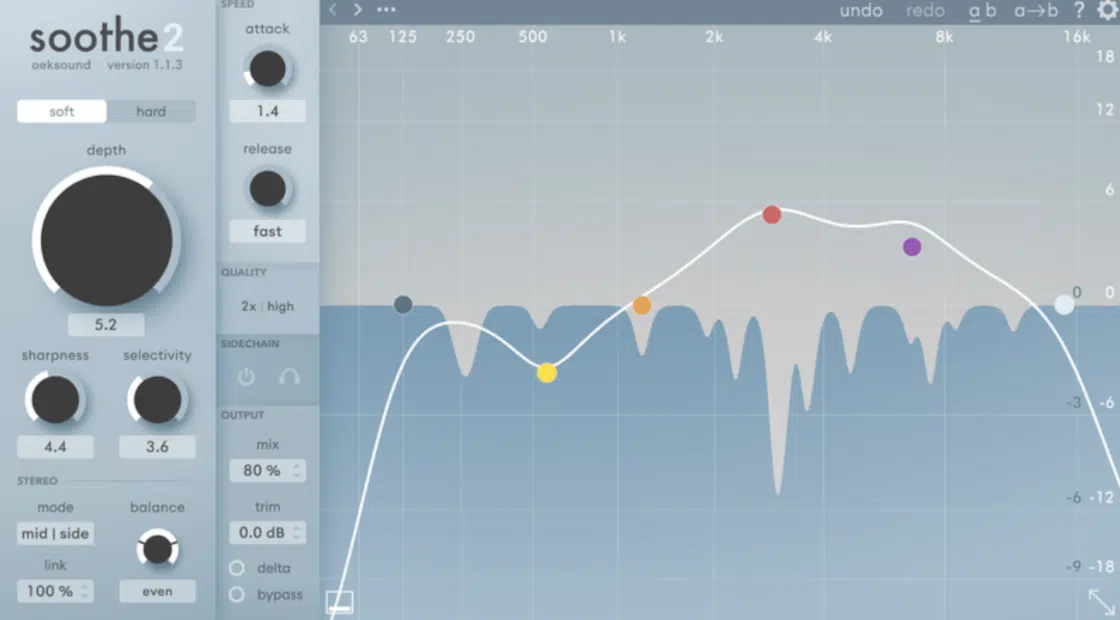
Try Soothe2 on the middle one with Sharpness at 4 and Depth at 25%, then add Valhalla Room to the left and right with slightly different Decay values (1.8s left, 2.2s right).
Bounce again and group the result, and boom: now your resampled audio feels wide but cohesive.
For even more spread, add a subtle Haas delay (15ms Left, 0ms Right) on just one layer before the final bounce.
Just be careful not to overdo it either, because that could mess everything up 一 aim for -14 LUFS on the final group to leave headroom for mastering.
PRO TIP: After you’ve layered three versions, drop the entire group into your sampler, keymap it across 2 octaves, and create playable versions of your texture for extra depth and reuse in other parts of your track.
Glitch Resampling Using Buffer, Stutter & Randomization Tools
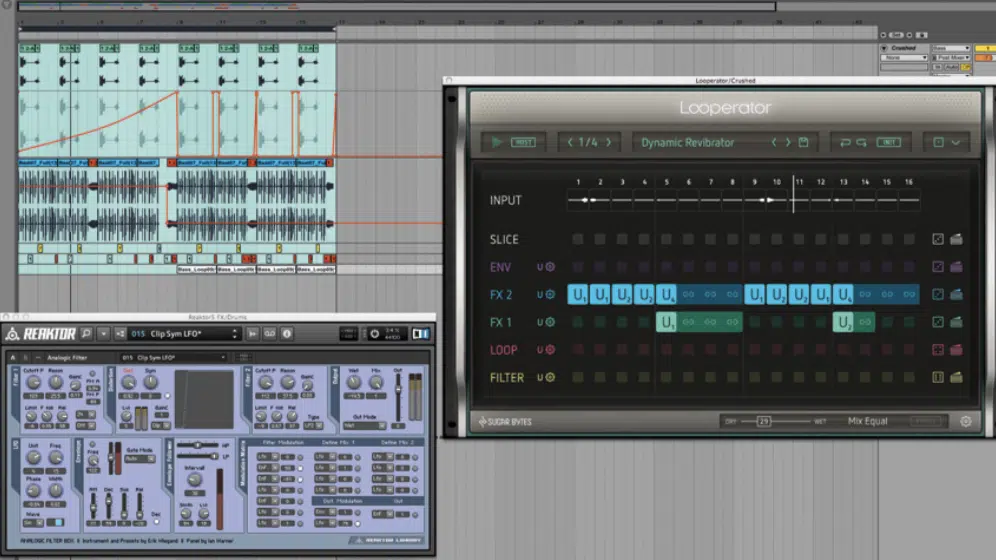
To get extra wild with sound design, use resampling techniques combined with glitch tools like Illformed Glitch 2, Fracture XT, or Ableton’s Beat Repeat.
For example, load Beat Repeat with:
- Interval set to 1/16
- Chance at 75%
- Grid at 1/32
- Gate at 60%
Run it on a vocal chop, then bounce the chaotic output as new audio content.
Next, run that layer through Fracture XT 一 set Delay Buffer Size between 150ms–200ms, Feedback at 40%, and Modulation Rate to 0.75Hz for jittery artifacts.
Render that version and layer it with your dry signal, mixed at -12dB for a stuttered, glitchy background texture.
And if you want something even more unpredictable, try Portal with Granular Density randomized from 1.0x to 4.0x and Stretch at 150%.
Then, assign Macros to pitch shift over time.
Resample 16-bar passes and slice out only the most interesting bits to re-trigger inside your sampler.
PRO TIP: Create a 2-bar loop, duplicate it four times, then apply a different random buffer or glitch effect on each one.
Resample the full 8-bar section and slice the best artifacts into new samples.
This gives you tons of unique sounds with minimal work and keeps your glitch work feeling musical/professional, not messy.
Bonus: Common Mistakes to Avoid When Resampling Reverse Reverb

And last but not least, I’m going to leave you with some must-know techniques on how to AVOID the biggest mistakes that come with resampling.
One of the biggest mistakes producers make with resampling techniques is going way too far with processing and completely killing the dynamics.
For example, stacking compression (like Pro-C2 with a threshold of -25dB, ratio 8:1) right after a limiter on a resampled audio clip might seem like a way to glue things together.
But in reality, it’ll just flatten the audio signal and leave no room for your track to breathe, and you definitely don’t want that.
A better move would be to use parallel compression and blend it back at 30–40% to keep the punch on point and intact.
Another one is forgetting to save your original audio file before resampling.
So, if you bounce your audio channel without freezing or duplicating the track first, you lose the option to go back and adjust other parameters later.
Always keep a muted duplicate tucked away or bounced at full bit depth (24-bit minimum) and original sample rate conversion before you start slicing or degrading it.
Also, don’t resample endlessly just for the sake of it.
Some producers get caught in this loop of bouncing the same loop through multiple rounds of effects without a clear plan, and you don’t want to be one of them.
After about three iterations, if you don’t have a direction or reason (whether it’s adding width, changing formants, or reworking rhythmic texture), you’re probably just muddying the audio quality and wasting time.
Be careful with naming too, even though it sounds like just a little thing.
If you’re creating 10 new clips from the same session and they’re all labeled “Pad_Resample_1,” “Pad_Resample_2,” etc., you’ll end up confused when you try to load them into a sampler or app.
Instead, name them by what they became, like “Pad_Glitch_TapeSat_44kHz_12bit,” and store them in folders labeled by type (i.e., “Lo-Fi FX” or “Vinyl Layers”)
That’s how you make your own library of samples that actually stays usable long-term.
PRO TIP: If you’re applying reverse reverb or distortion to every resample, give yourself a hard rule; only one heavy FX bounce per element.
That keeps your music production clean, controlled, and balanced.
And don’t forget to hit record after you finish rendering 一 log what FX were used, what settings, what plugins. It’ll save a whole lot of backtracking.
And finally, avoid relying too heavily on one trick like resampling techniques for music production without exploring all the super creative ways to apply them.
For example, don’t just use resampling for printing FX.
Use it to create playable synth layers, stretch a drum loop, randomize glitch automation, or even turn a chorus vocal into ambient noise.
The creative potential here is endless if you’re intentional about the process.
Final Thoughts
And there you have it: everything you need to know about the best, most professional resampling techniques.
With all of this new information, you’ll be able to flip your tracks into completely fresh ideas, layer textures like a beast, and build a personal library of one-of-a-kind sounds like an absolute boss.
Plus, it’ll help you seriously speed up your workflow, keep your CPU in check, and elevate your entire approach to sound design, arrangement, and creativity.
Just remember that it’s all about intentional resampling techniques with a clear purpose… as opposed to randomly bouncing layers without direction.
Otherwise, you’ll just end up with flat, overprocessed sounds, and you definitely don’t want that.
And since we’re talking about samples and resampling today, I’ll leave you with the most legendary Sample Packs in the entire industry.
For all genres, styles, and vibes, they’re absolutely perfect.
From melodies and FX to basslines, drums, vocals, and even full-blown project files, you’ll get access to absolutely everything you need to take your tracks to the next level.
And the best part is they were all created by top-tier producers/sound designers and are 100% royalty-free, so use them however you’d like.
If you’re going for the most epic samples in the game, they’re all right here.
Bottom line, when it comes to resampling, you have to approach it like a sound designer with purpose, creativity, and a clear goal in mind.
And just remember to never blindly stack resamples or lose track of your gain staging, file names, or why you’re bouncing in the first place.
So go ahead and experiment, flip your layers, build wild textures, and always think outside the box, because that’s where the magic lies.
Until next time…


Leave a Reply
You must belogged in to post a comment.