Let me guess, you’re here because you’ve heard all the buzz around Reaper DAW and want to explore what this powerhouse has to offer.
Whether you’re a bedroom producer or a studio professional, Reaper has something for everyone.
And that’s what we’re diving into today.
In this comprehensive guide, we’ll be covering a wide range of topics to help you get up and running with Reaper, such as:
- The installation process & initial setup ✓
- Reaper’s unique interface ✓
- Recording & editing in Reaper ✓
- Working with MIDI ✓
- Mixing & mastering in the Reaper DAW ✓
- Customizing Reaper for your unique workflow ✓
- Reaper DAW vs other DAWs ✓
- The true power of Reaper ✓
- Advanced features and functions ✓
- Bonus tips, tricks & techniques to help you master Reaper ✓
By the end of this guide, you’ll not only have a solid understanding of the Reaper DAW but also a clear roadmap on how to make the most of its supreme features.
Therefore, you’ll be well on your way to becoming a Reaper DAW master.
So, let’s dive in…
Table of Contents
- Getting to Know Reaper: A Full-Featured DAW
- Setting Up Your Audio Interface
- Getting Started: Reaper’s Recording & Editing Process
- Working with MIDI: A Closer Look
- Mixing & Mastering in Reaper
- Customizing Reaper for a Personalized Workflow
- Reaper vs Pro Tools & Logic Pro
- Unleashing Advanced Features for Complex Tasks
- Reaper DAW: Final Thoughts
Getting to Know Reaper: A Full-Featured DAW
Let’s start off by talking about the unique offerings of the Reaper DAW.
This way, you’ll be able to fully understand how versatile and flexible it can truly be.
-
The Unique Offerings of Reaper DAW
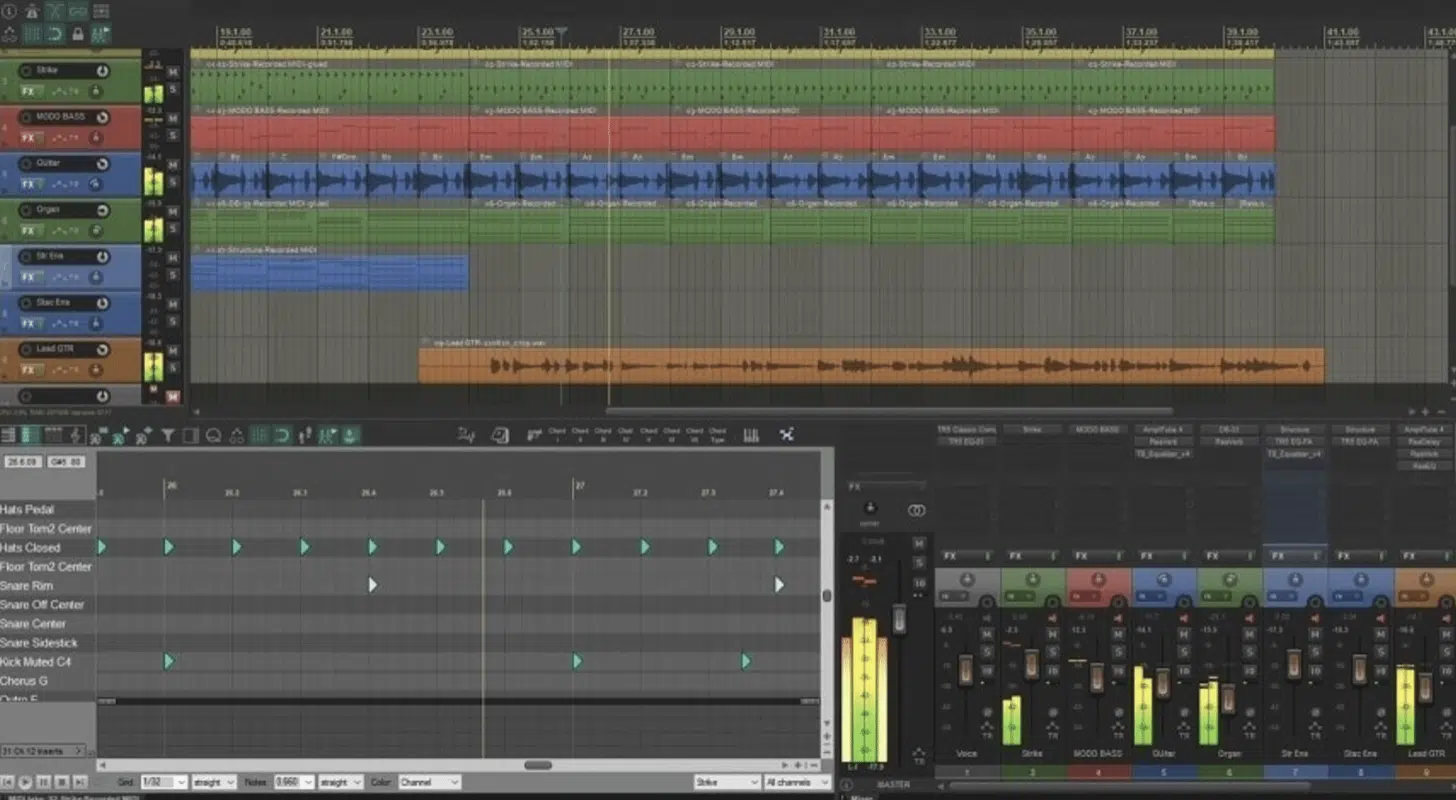
The Reaper DAW stands tall among other DAWs for several reasons.
Aside from its affordability, Reaper supports a vast array of hardware and digital audio formats.
It also runs smoothly on both MAC and Windows systems, even older hardware, which makes it accessible to virtually everyone.
Another thing I love about Reaper is the unlimited free updates.
It’s like a gift that keeps on giving.
You buy the software once, and you get a lifetime of improvements and new features.
In a world where other DAWs charge for every major update, Reaper’s offer is a breath of fresh air.
Reaper’s interface may seem a bit intimidating at first glance, but don’t let that deter you.
Once you get the hang of it, you’ll appreciate its power and flexibility.
Plus, Reaper includes several custom layouts to help you work seamlessly 一 allowing you to focus more on creating music and less on finding the right button.
Speaking of music, the sound quality you can achieve with Reaper is phenomenal.
Even if you’re just starting out, Reaper offers the tools to produce professional-quality audio tracks.
And as you grow more experienced, Reaper’s advanced features are right there to support you.
But that’s not all Reaper includes…
From its comprehensive set of stock plug-ins to a robust mixer panel, Reaper has everything you need to make the music you love.
-
Understanding Reaper’s Interface & Advanced Features
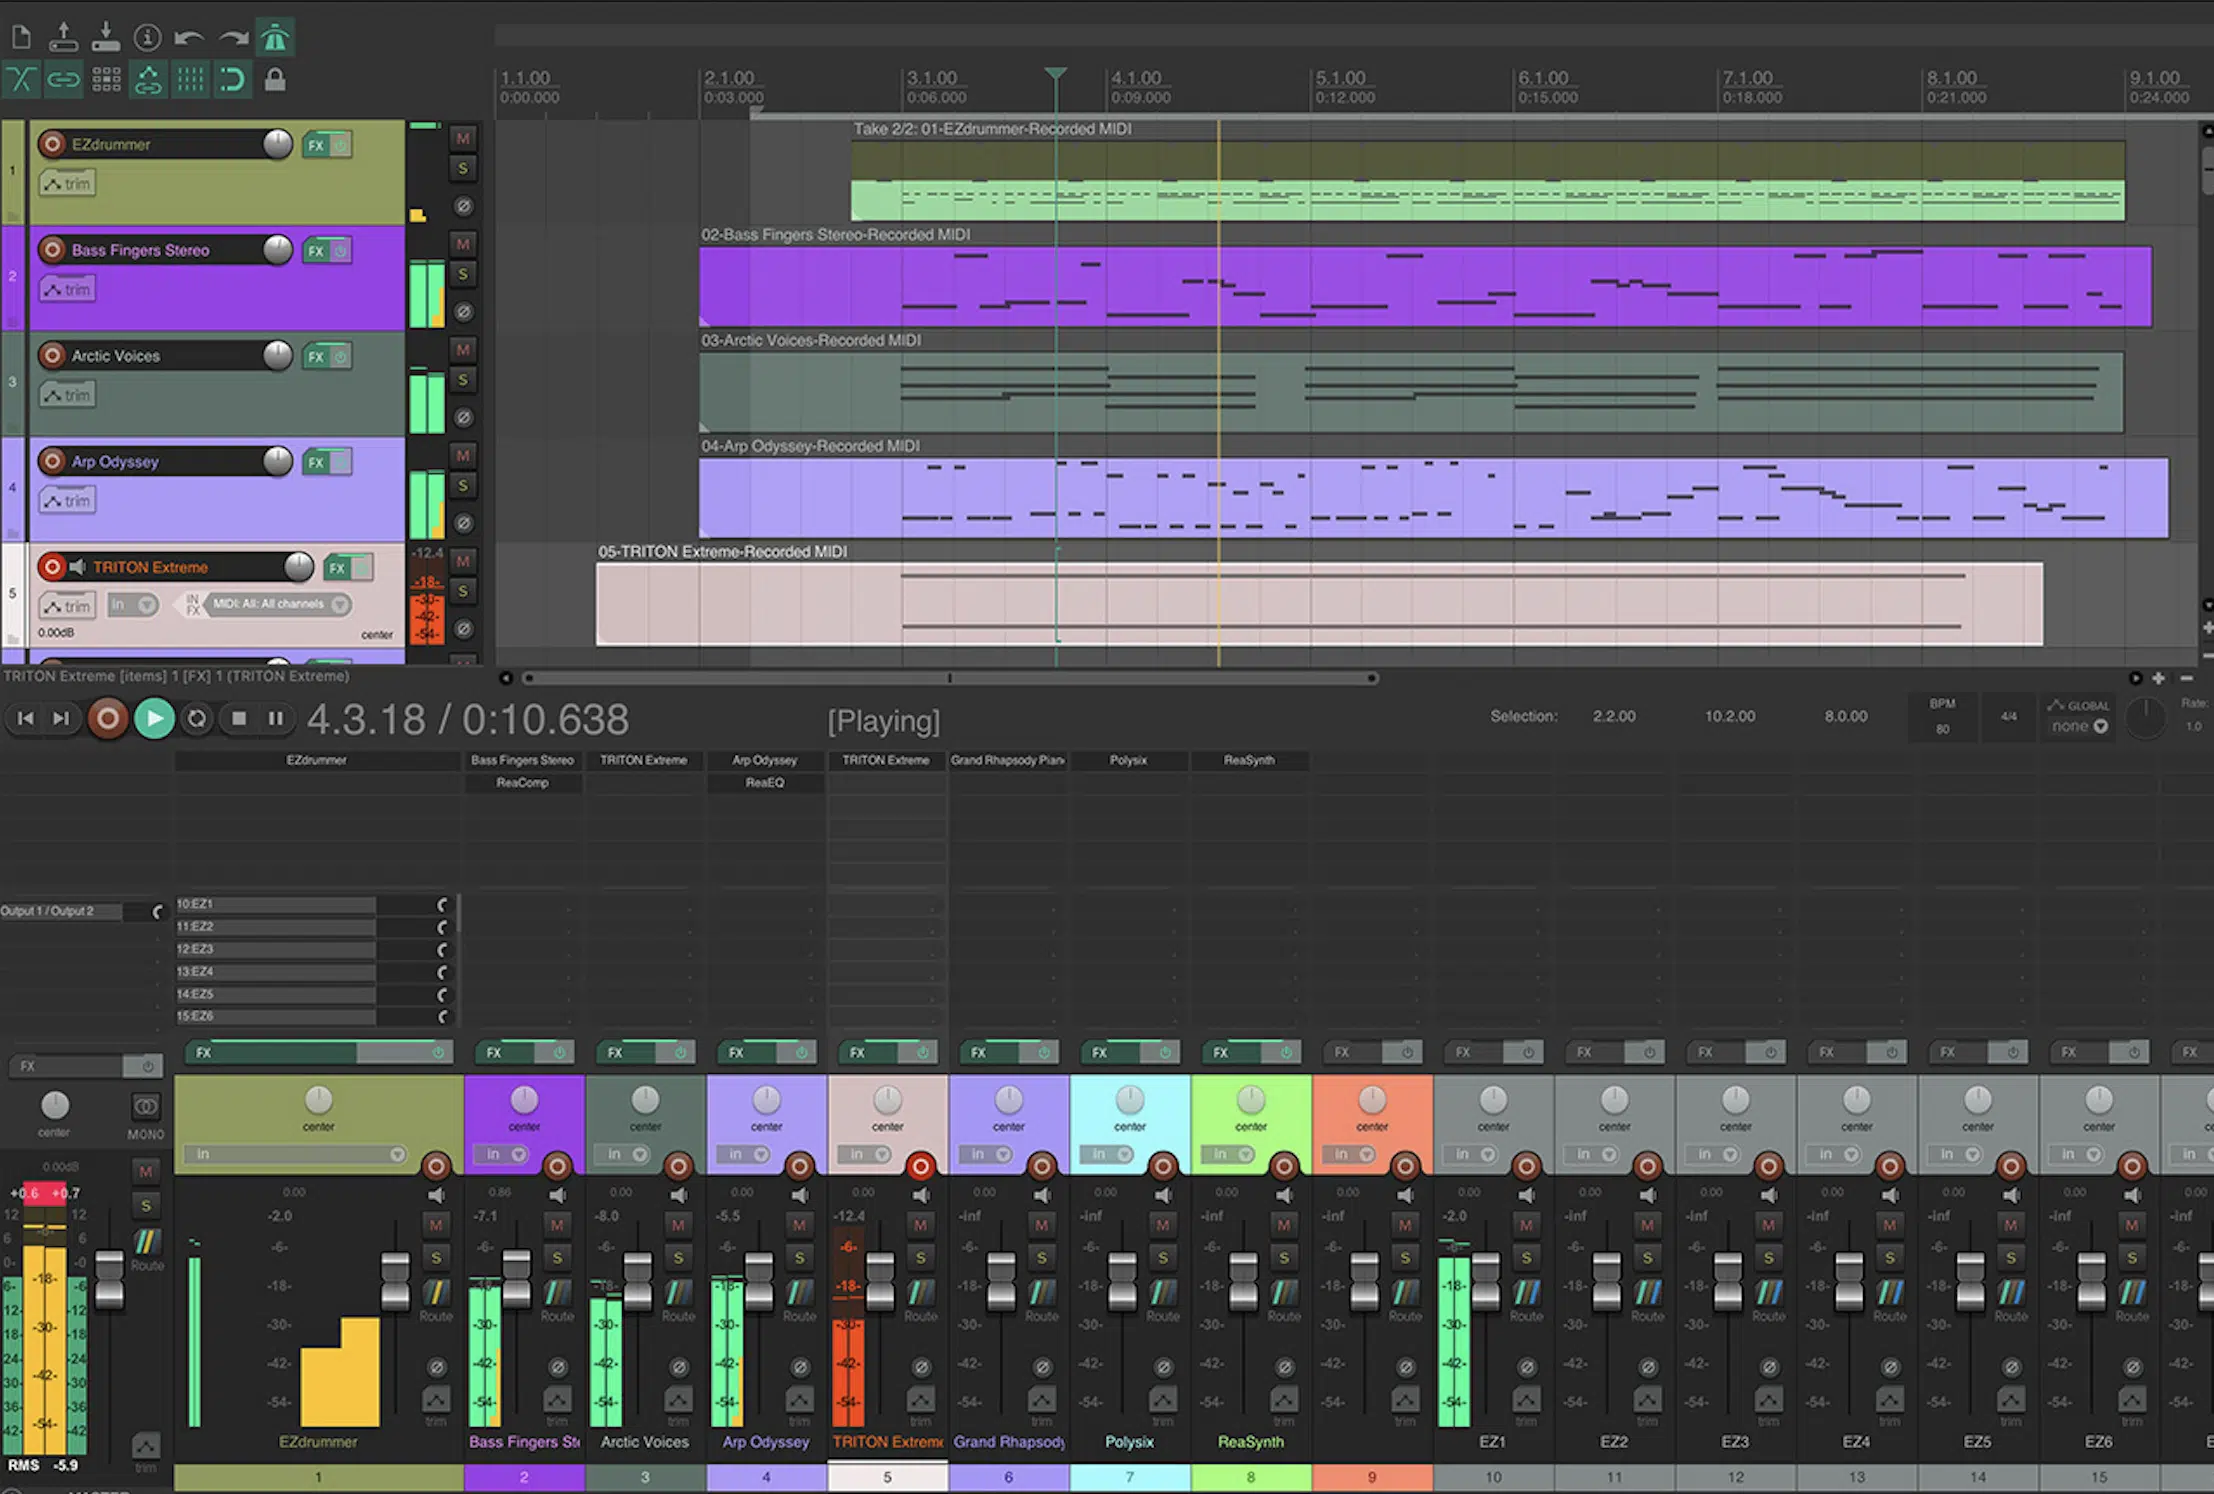
When you first open Reaper, you’ll notice the software’s clean, intuitive design.
Sure, it might seem a bit complex at first, but believe me, it’s a modern DAW that has been designed with the user in mind.
And one thing’s for sure, once you’re familiar with it, you’ll find it hard to switch to other DAWs.
The main window in Reaper includes a timeline and track area where you can add and arrange your audio clips.
The standard controls (like the play, stop, and record buttons) are located at the top.
To the left, you’ll find the track control panel where you can manage all the features of each individual track.
But what about Reaper’s advanced features?
Well, they’re hidden right in plain sight, just a right-click away.
Try right-clicking on an audio track or even an empty space 一 you’ll see a wealth of options and settings that let you customize your workflow.
The mixer panel is located at the bottom of the screen.
It gives you control over each track’s:
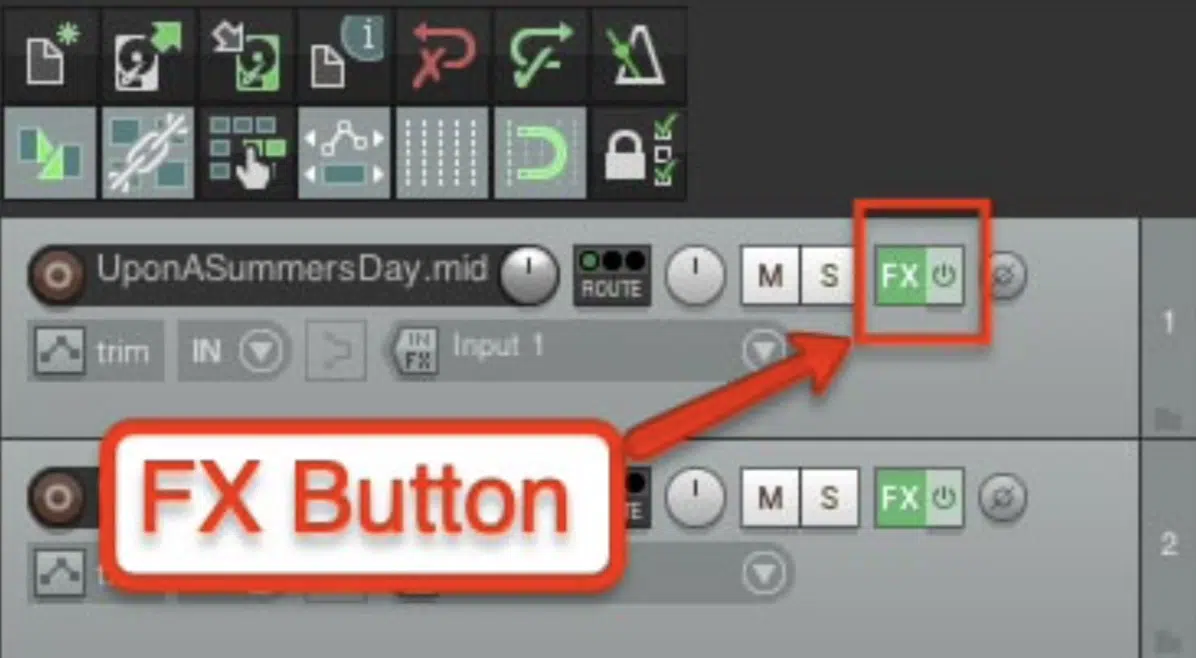
And remember the FX button?
It’s your gateway to a treasure trove of built-in effects and plug-ins that can take your music to the next level.
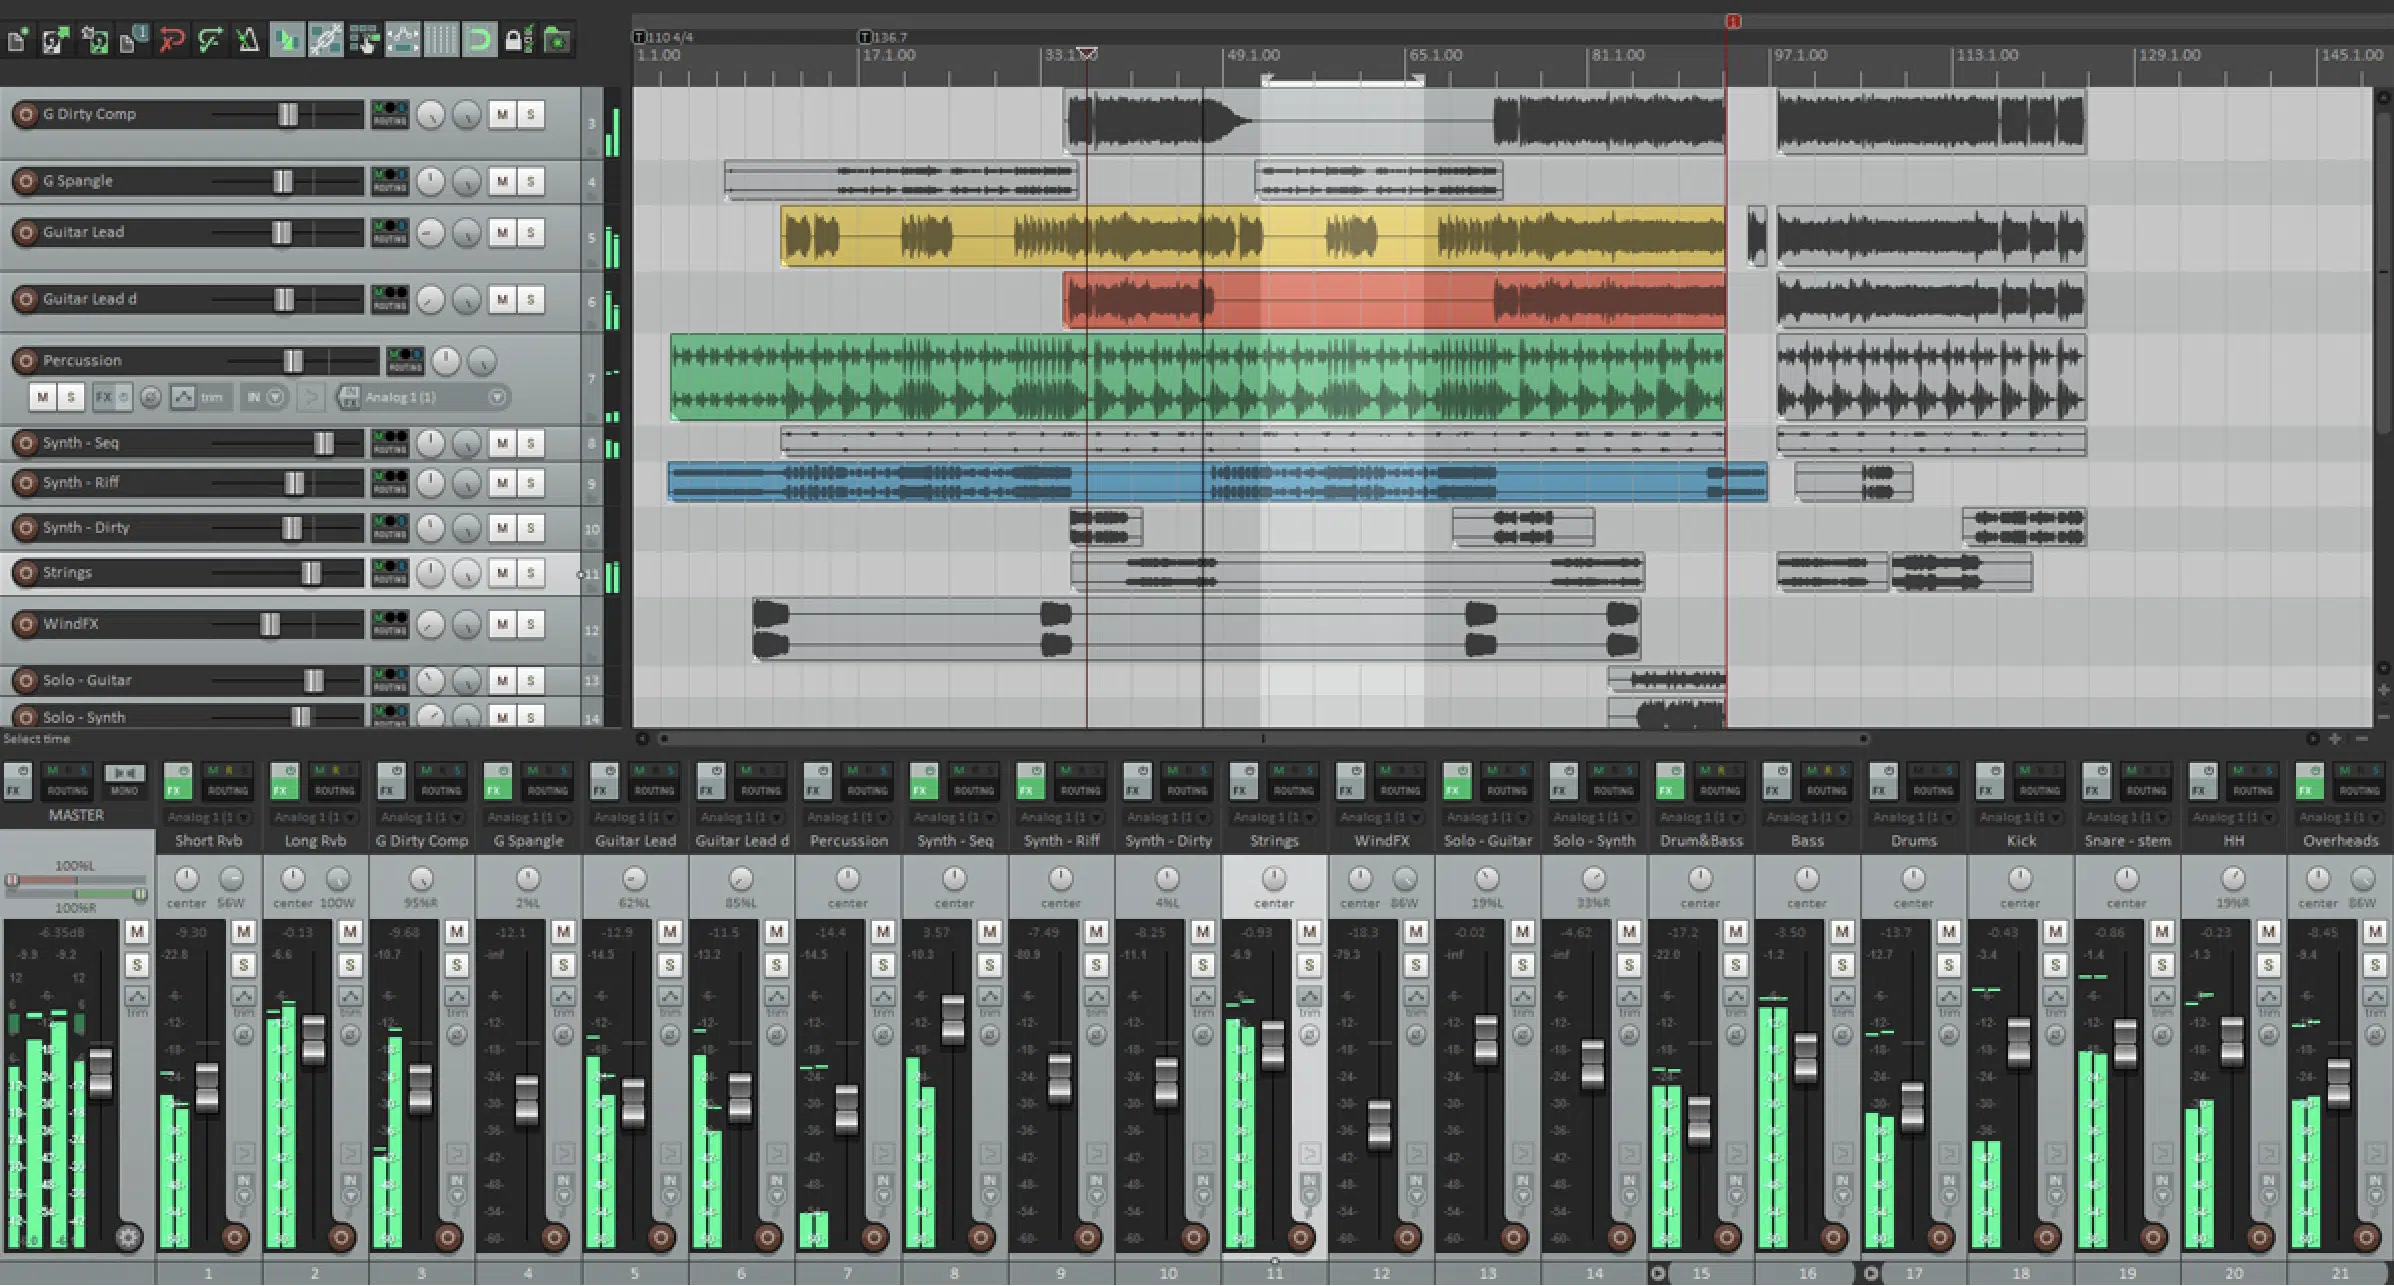
Reaper also supports custom layouts.
Meaning, you can arrange the interface to suit your working style and even save different layouts for different tasks (awesome, right?).
Setting Up Your Audio Interface
Having touched upon the importance of selecting the right audio interface, let’s dive deeper into understanding its vital role in digital music production.
As well as how to set it up properly in the Reaper DAW.
-
The Role of the Audio Interface in Digital Music Production
An audio interface is an essential part of any digital music producer’s setup.
It’s the bridge between your music and your computer; converting analog signals from your instruments into digital audio that your DAW can process.
Choosing the right audio interface depends on your specific needs.
For example:
- If you’re recording a simple lofi hip-hop beat with a MIDI keyboard 一 A basic interface with one or two inputs might be enough.
- For more complex tasks, like recording a live drum kit 一 You’ll need an interface with more inputs.
Reaper supports a wide range of audio interfaces, from budget-friendly models to high-end professional gear.
The process to connect an audio interface with Reaper is straightforward, and I’ll guide you through it in the next section.
-
Connecting Your Audio Interface & MIDI Devices
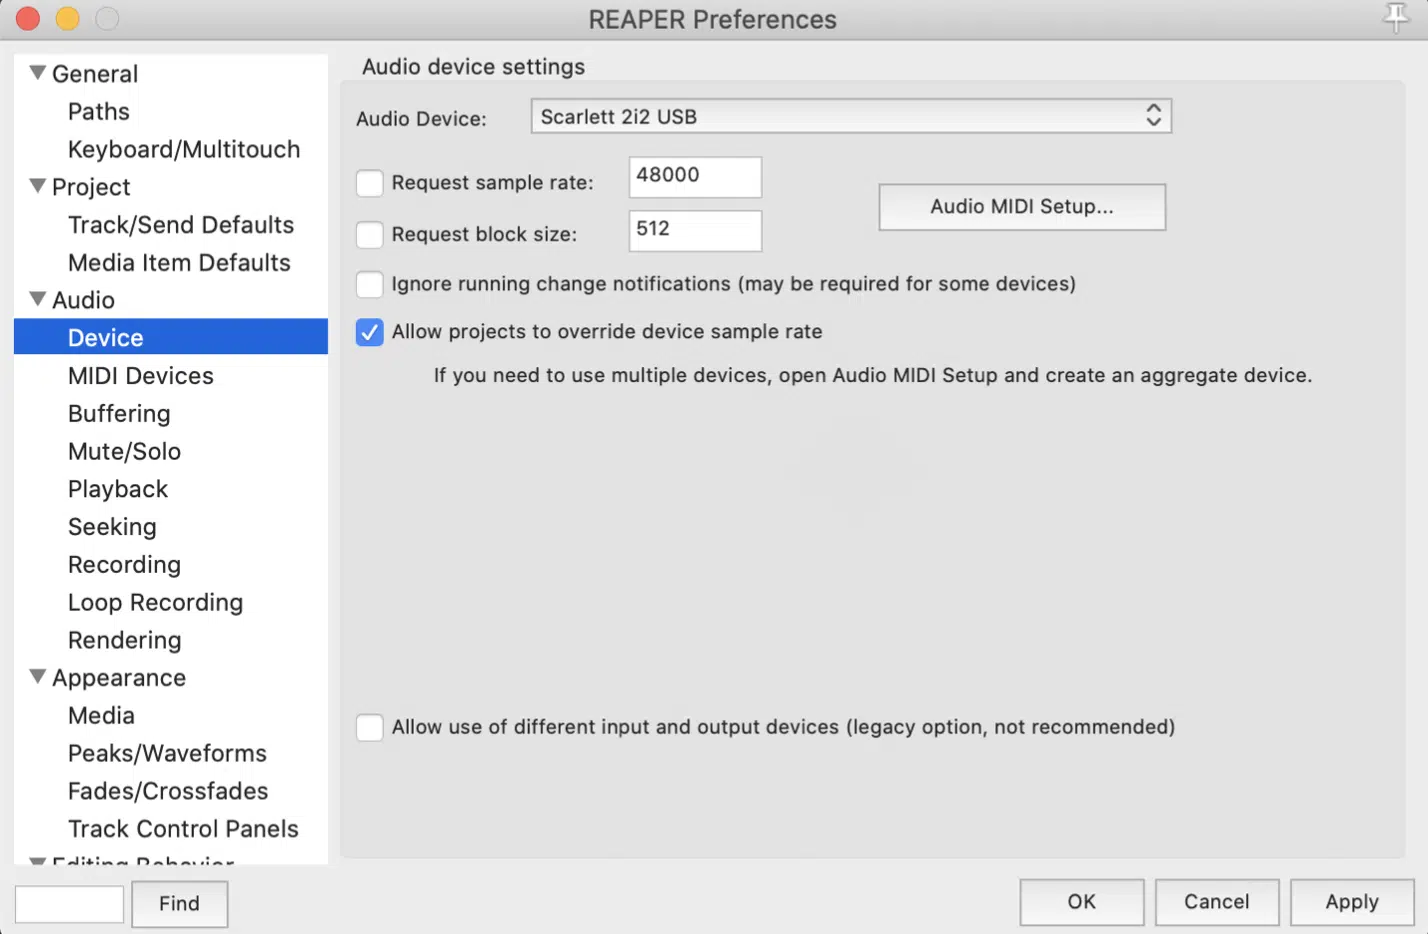
To connect your audio interface to Reaper, you’ll need to go into Reaper’s ‘Preferences.’
Here, you’ll find a section for audio device settings.
This is where you should choose your audio interface from the list of available devices.
After setting up your audio interface, it’s time to connect any MIDI devices you might have, like a MIDI keyboard or MIDI controller.
You’ll find the settings under the ‘MIDI Devices’ section in the preferences.
Simply enable your device, and you’re good to go!
NOTE: Reaper offers excellent MIDI support.
Whether you’re using a basic MIDI keyboard or a more advanced MIDI controller with multiple faders and knobs, Reaper makes it easy to connect and start creating.
After you’ve set up your audio interface and MIDI devices, you’re ready to start recording.
Which we’ll dive into next.
Getting Started: Reaper’s Recording & Editing Process
Having familiarized ourselves with the basics of the Reaper DAW and setting up the audio interface, it’s now time to delve into the meat of the matter:
Recording and editing.
-
Recording Your First Audio Track
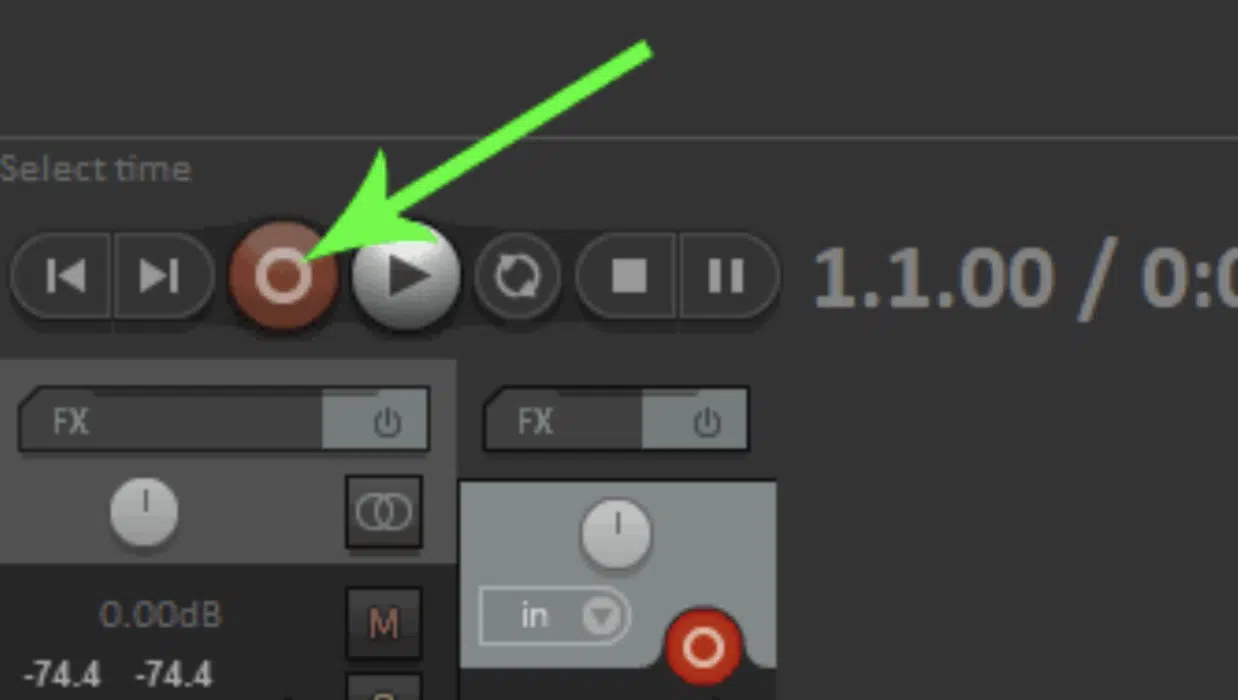
The beauty of Reaper lies in its simplicity when it comes to recording.
To start:
- Click on the ‘Track’ menu and select ‘Insert new track.’
- Or, simply press CTRL+T (or CMD+T on MAC).
Then, you’ll see your new track appear in the track area.
Before you hit the record button, make sure to arm your track for recording.
You can do this by clicking on the red ‘record arm’ button on the track control panel.
NOTE: If you’re using a MIDI device, you’ll also want to select your input.
Now, you’re officially ready to record.
Press the record button at the top of the screen and start playing your instrument or singing your song.
When you’re finished, press stop, and voila 一 you’ve just recorded your first audio track in Reaper!
-
The Power of Multitrack Recording
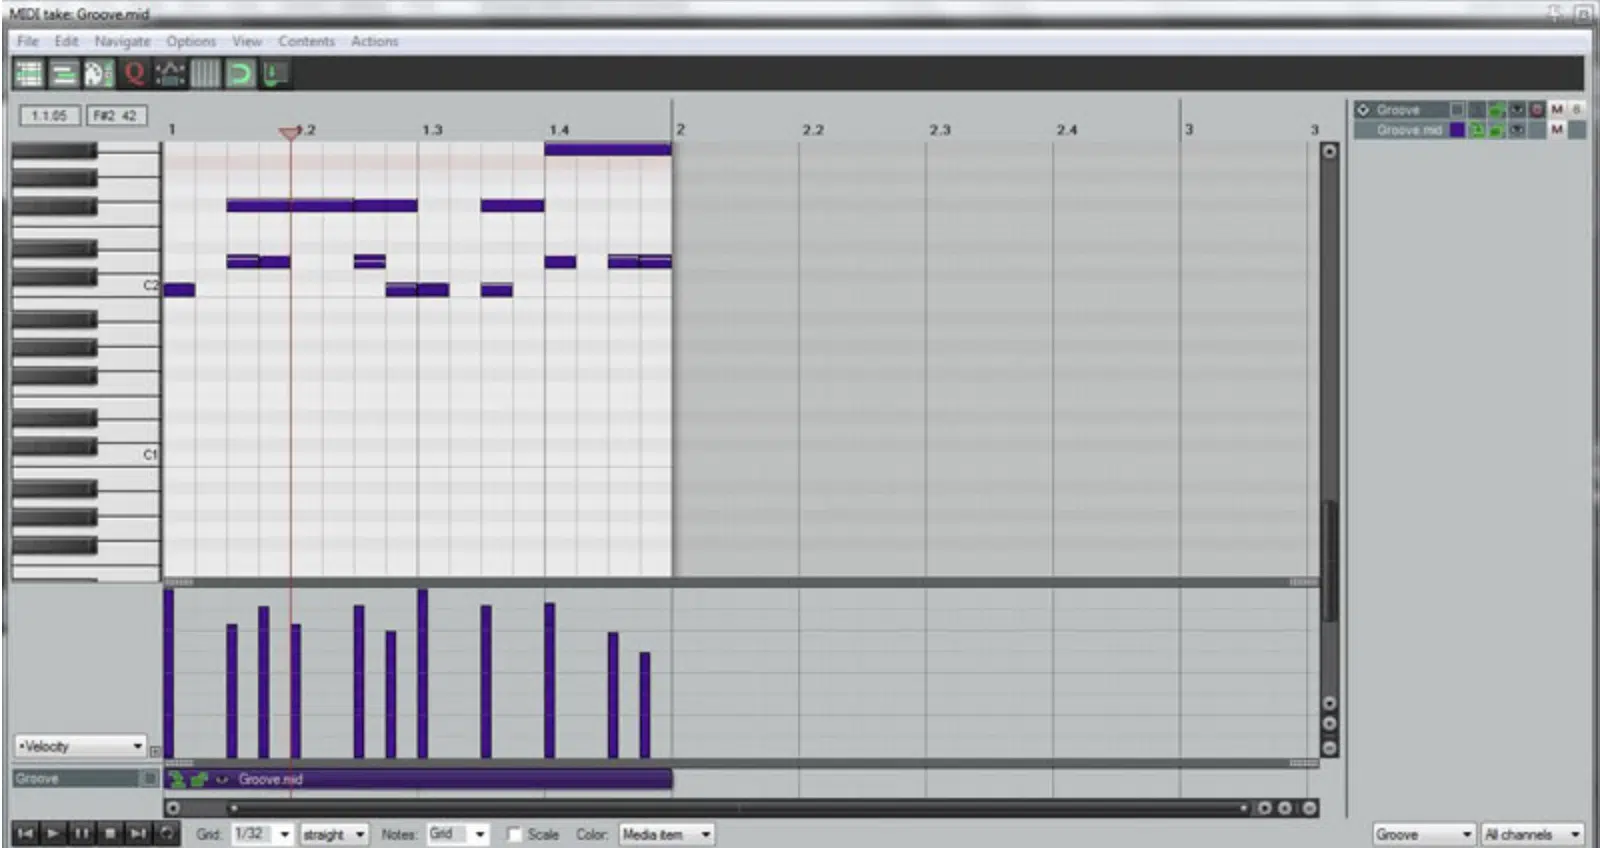
With multitrack recording, you can record multiple instruments at once or build a song one track at a time.
This opens up a world of possibilities for music production, and Reaper handles it like a pro.
- For multitrack recording in Reaper 一 Simply add more tracks and repeat the recording process.
The interface allows you to easily manage and navigate multiple tracks, keeping your recording process smooth and organized.
The key here is to plan ahead.
If you’re recording a full band, for instance, ensure each instrument is assigned to its own track (grouped tracks).
This will make your editing process much more manageable.
-
Editing Your Tracks Like a Pro
Now that you’ve recorded your tracks, it’s time to bring them to life with some editing.
In the Reaper DAW, you can adjust your audio clips in the Track area, like:
- Cut them
- Move them
- Arrange them
To cut a clip, simply position the cursor where you want to make the cut, then press ‘S’ on your keyboard.
You can also adjust the volume and panning of each track using the faders and knobs in the track control panel.
If you want to make more precise adjustments 一 you can use envelopes.
Just right-click on a track and select ‘Show envelopes’.
Here, you can draw automation curves for volume, pan, and other parameters.
Reaper also comes with a powerful set of audio processing tools.
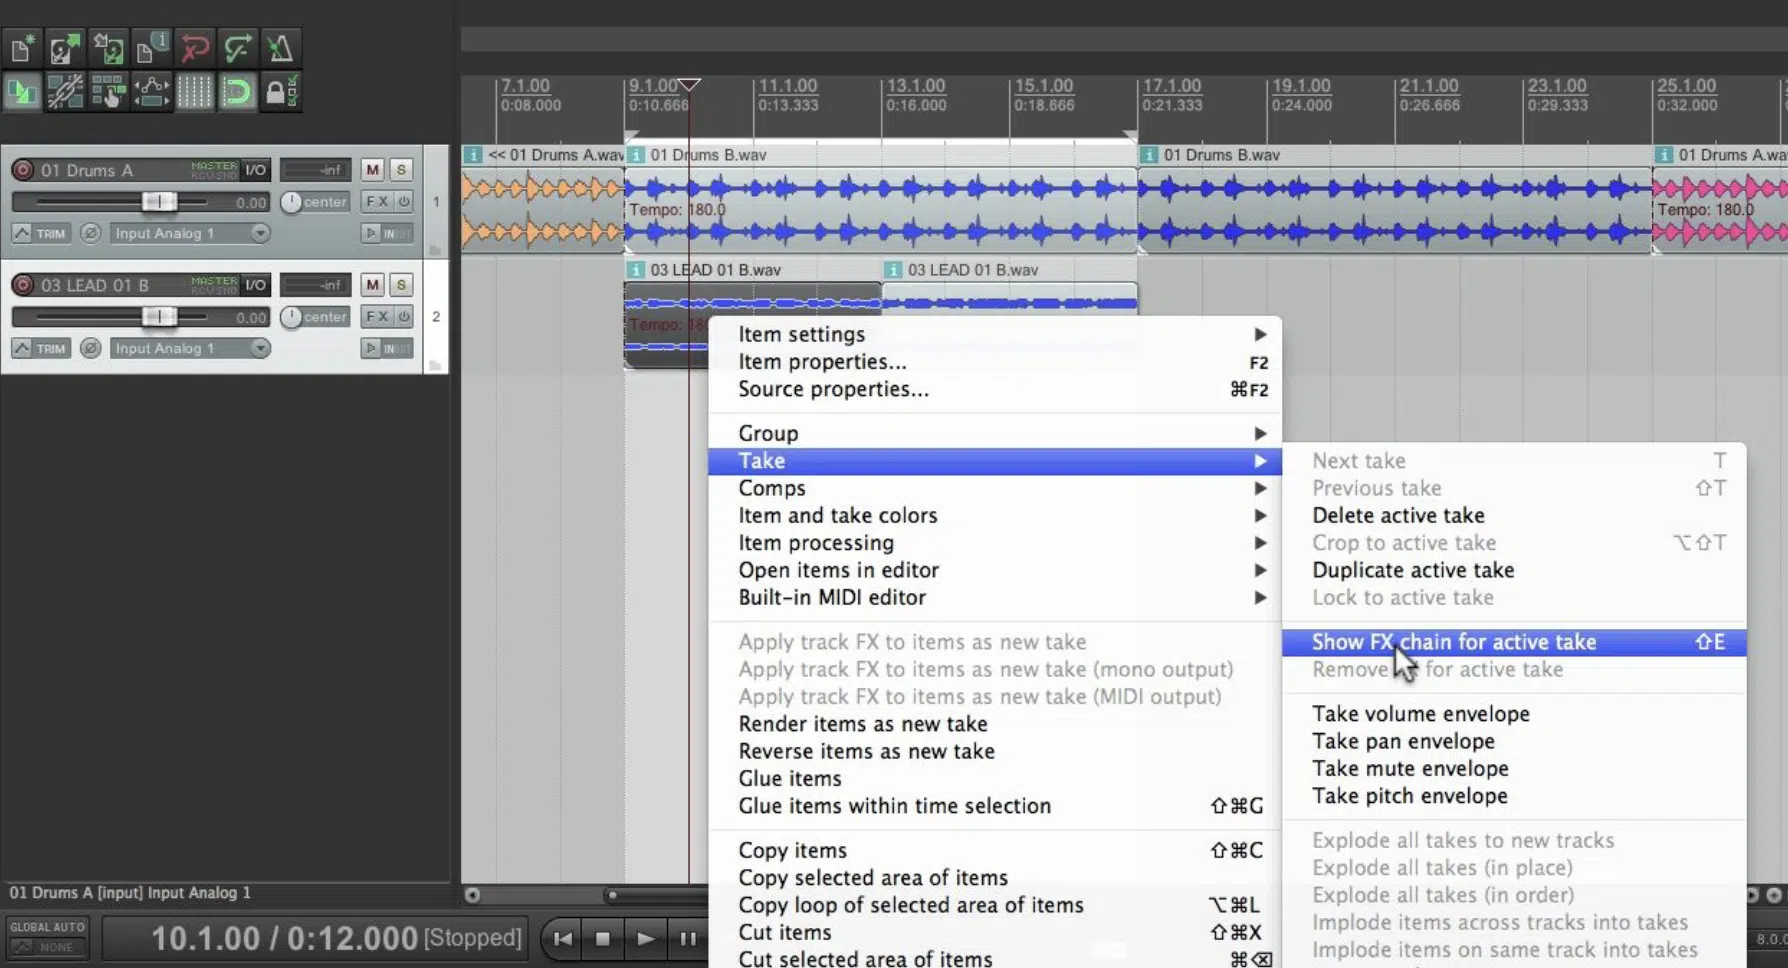
For example, you can use the ‘Take FX’ feature (above) to apply effects to individual takes within a track.
NOTE: This is incredibly useful when you want to experiment with different sounds without affecting the entire track.
Lastly, don’t forget about Reaper’s non-destructive editing capabilities.
You can make as many changes as you want without permanently altering your original audio files.
Meaning, you can experiment freely, knowing you can always undo your changes if you’re not happy with the results.
Working with MIDI: A Closer Look
Now that we’ve got a handle on recording and editing, let’s shift our focus to the world of MIDI in Reaper.
To kick things off, we’ll start with how to connect and effectively use your MIDI keyboard.
-
Connecting and Using Your MIDI Keyboard
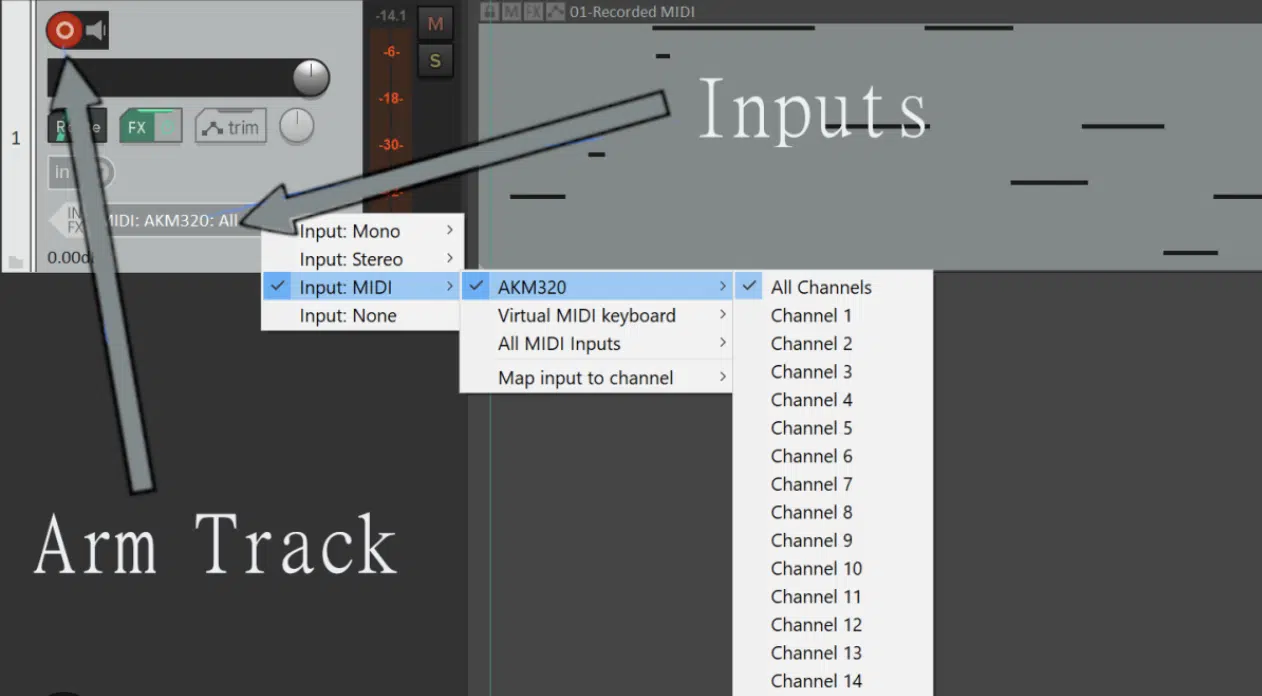
Working with MIDI in Reaper is straightforward.
Once you’ve connected and enabled your MIDI keyboard in the preferences (as we discussed in the above section), you’re ready to start playing.
To record MIDI, you follow the same process as with audio:
- Create a new track
- Arm it for recording
- Select the MIDI input
- Hit record and start playing your keyboard
Once you’ve recorded your MIDI performance, you can edit it in the piano roll editor.
Here, you can:
- Adjust the timing and pitch of your notes
- Add or delete notes
- Even draw in automation for MIDI parameters
Once you get acclimated in the Reaper DAW, it will feel like second nature.
-
Using MIDI CC Envelopes & the Piano Roll
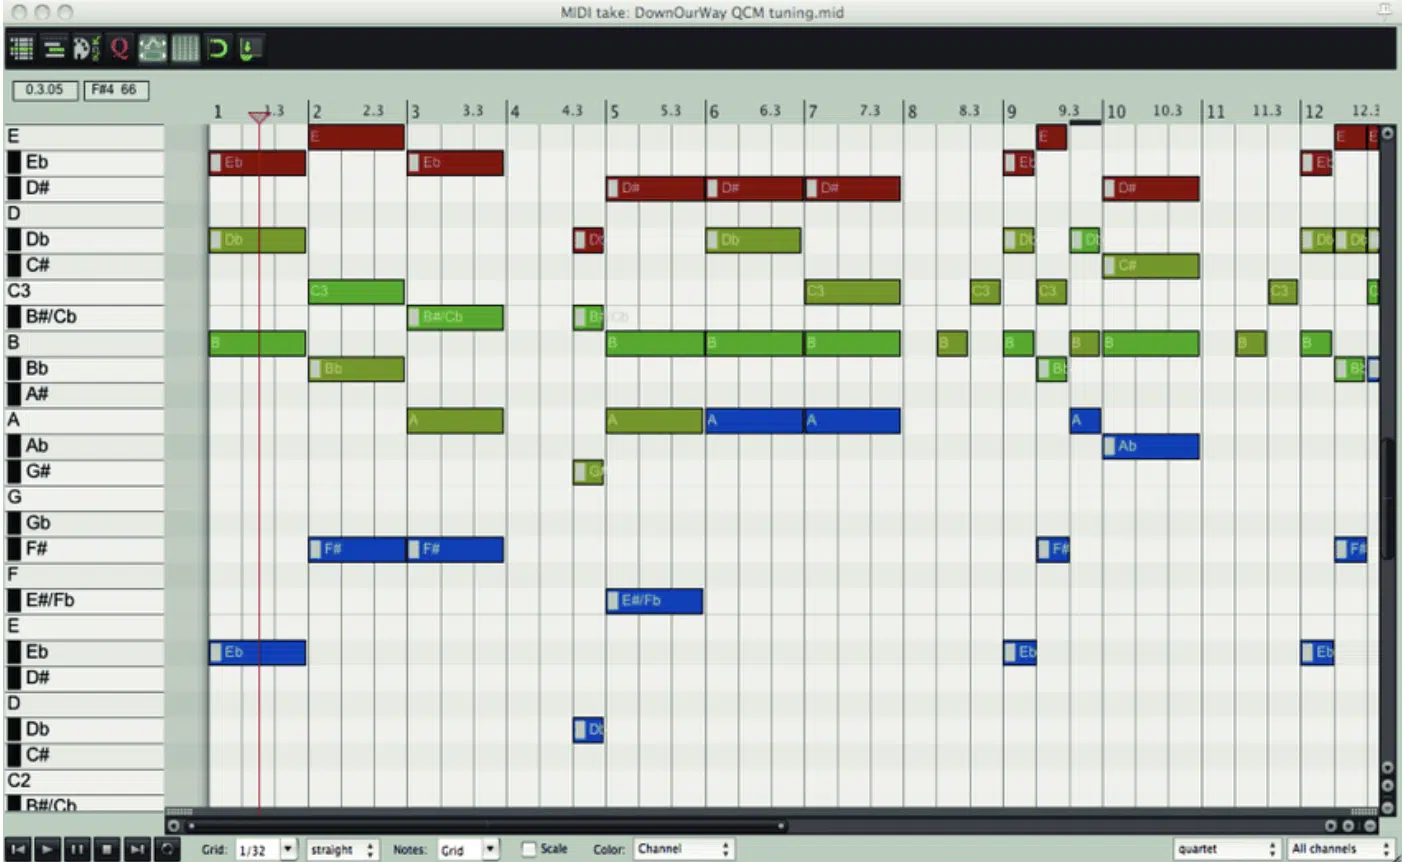
MIDI Continuous Controller (CC) envelopes are a powerful tool in Reaper.
They allow you to draw in automation for MIDI parameters and MIDI events like the modulation wheel or pitch bend on your keyboard.
To use MIDI CC envelopes:
- First, you need to record some MIDI data.
- Once you have your recording, right-click on the track and select ‘Show track envelopes’.
- Finally, Choose the MIDI CC number that corresponds to the parameter you want to automate.
The piano roll in Reaper is a versatile tool for editing your MIDI performances.
NOTE: You can access it by double-clicking on a MIDI item.
In the piano roll, you can adjust the pitch and timing of your notes, add or delete notes, and much more.
One feature I particularly love in Reaper’s piano roll is the ‘Note Grouping’ function.
This allows you to group notes together 一 making it easier to move or edit chords or melodies.
Mixing & Mastering in Reaper
With your tracks recorded and edited, and your MIDI knowledge upgraded, it’s time to venture into the crucial stages of mixing and mastering in Reaper.
Let’s begin by harnessing the power of Reaper’s versatile mixer panels and plug-ins.
-
Harnessing the Power of Reaper’s Mixer Panels & Plug-Ins
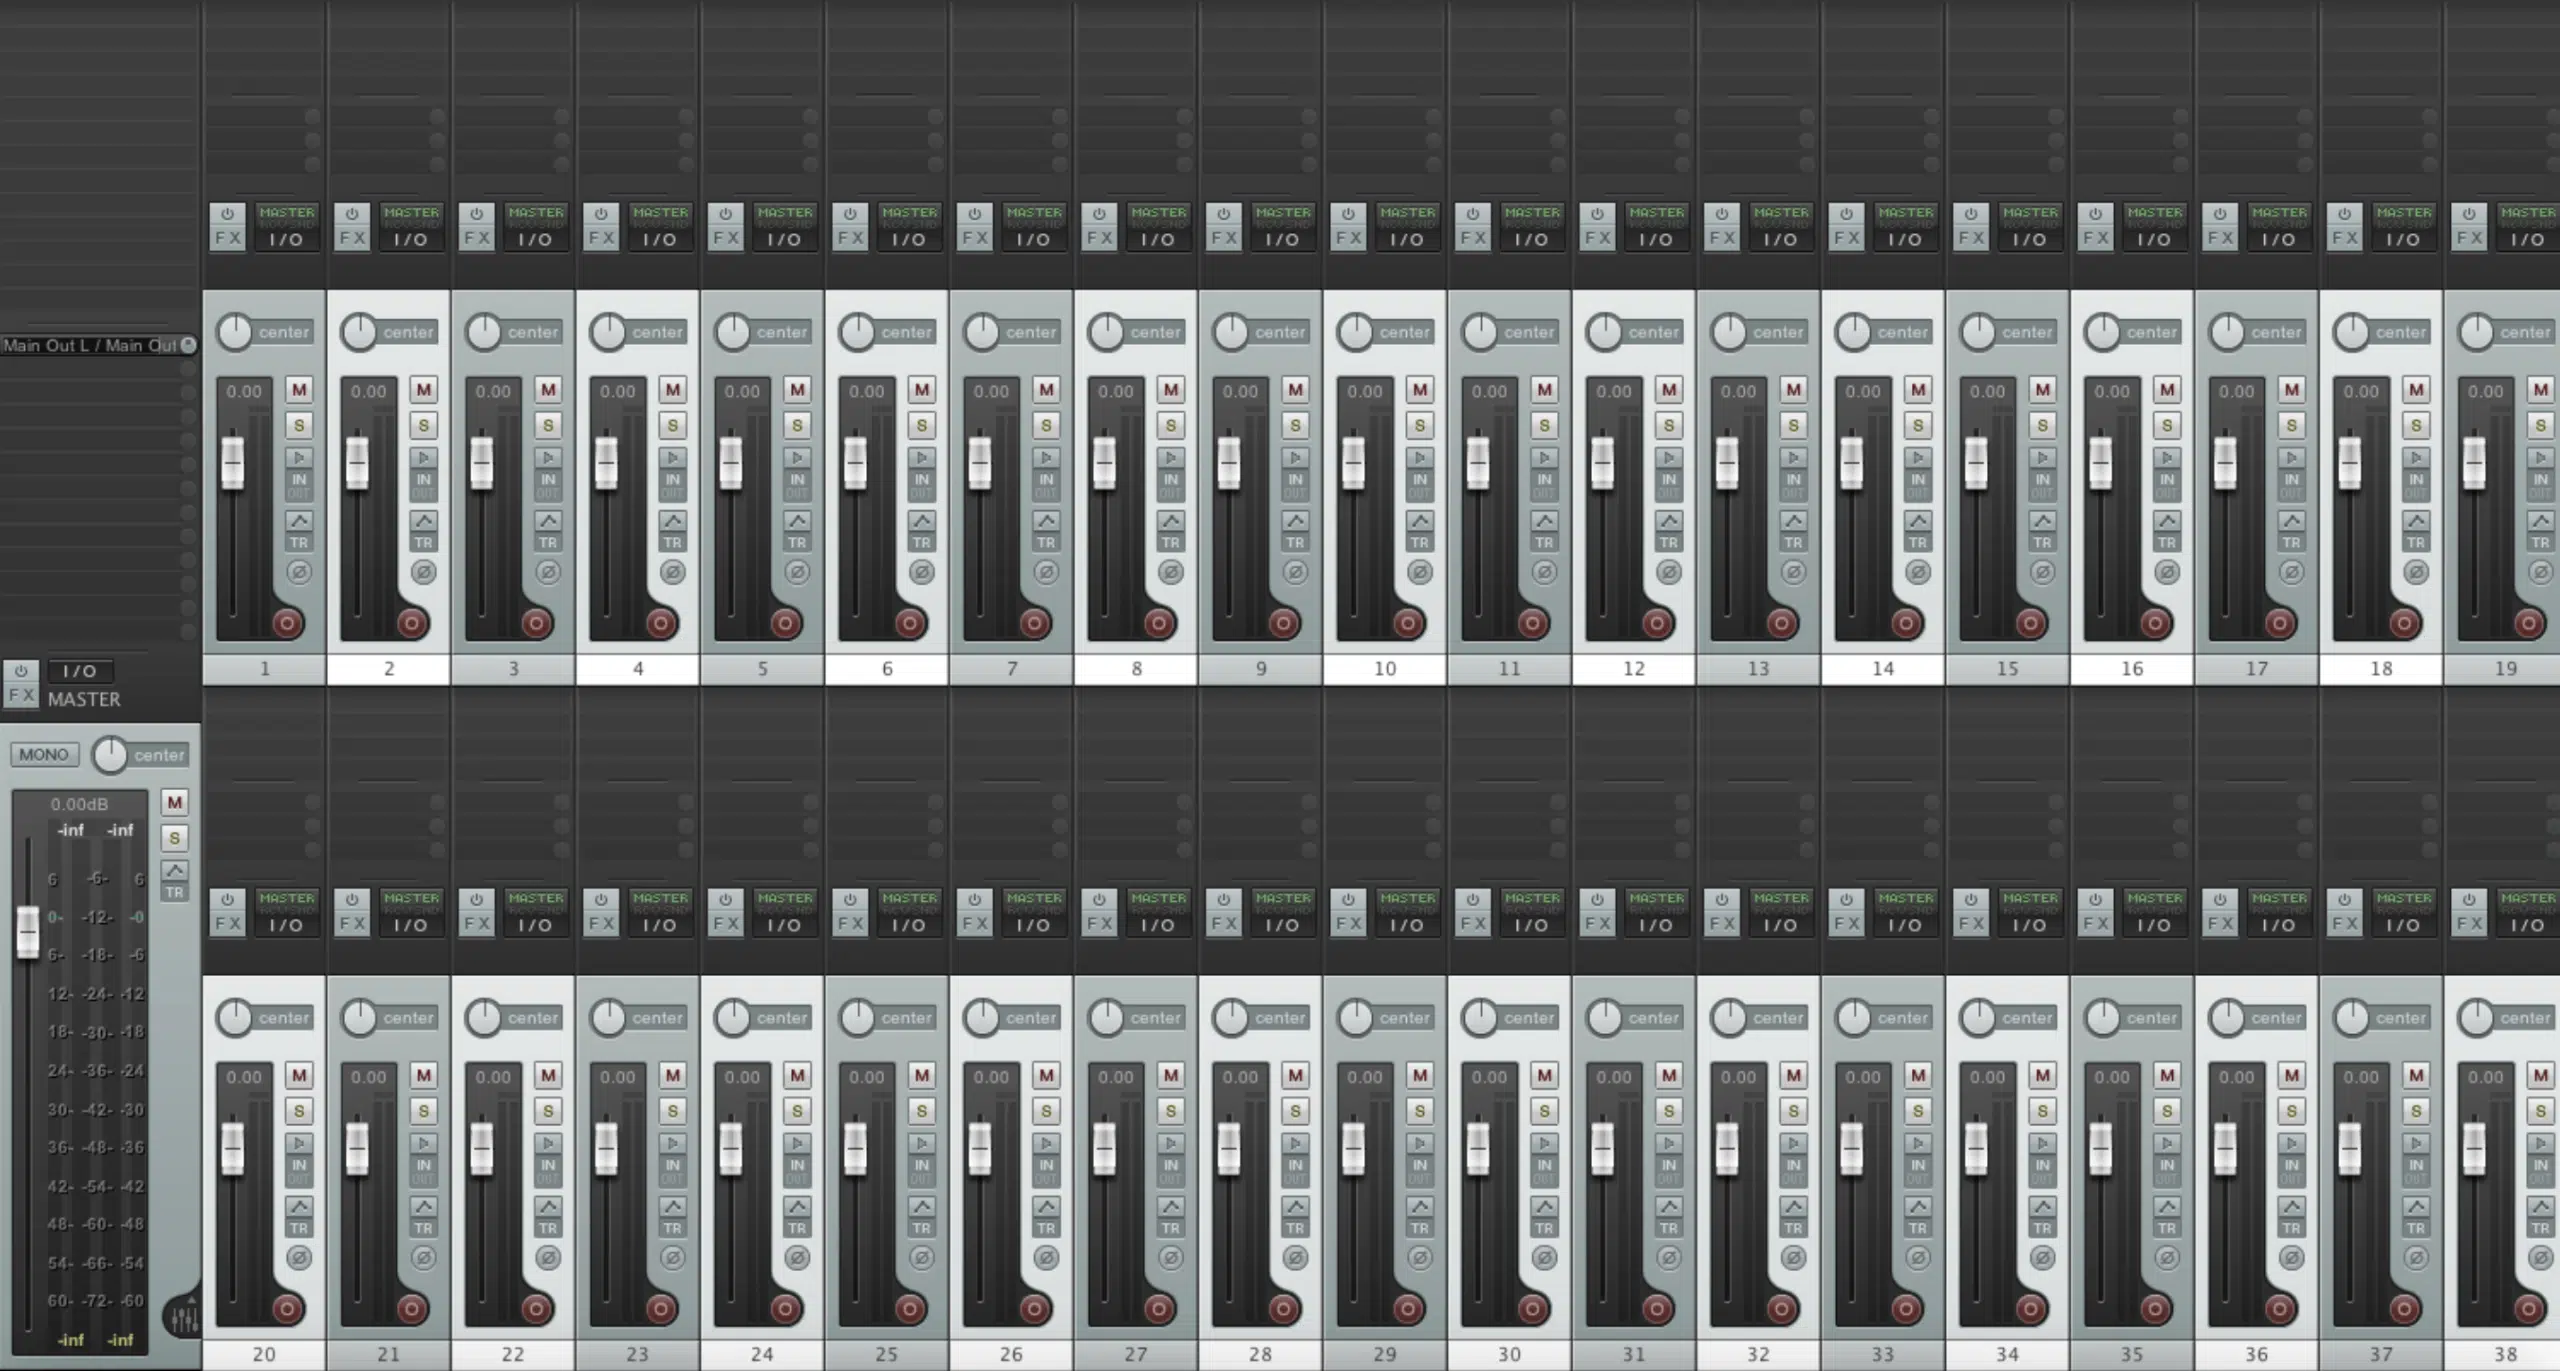
The mixer panel in Reaper is where the magic happens.
Here, you can balance the levels of your tracks, adjust the panning, and add effects.
Reaper comes with a wide array of built-in effects and plug-ins; from equalizers and compressors to reverbs and delays.
To add an effect to a track 一 simply click on the ‘FX’ button in the track control panel and select the effect you want from the list.
One thing to keep in mind while mixing in Reaper is the power of signal routing.
It allows you to:
- Send audio from one track to another
- Create complex submixes
- Even set up sidechain compression
With Reaper’s incredibly flexible routing system, you’ll be able to enhance your tracks in a major way.
-
Achieving Pro-Quality Sound with Built-In Instruments & Effects
Reaper comes with a suite of built-in instruments, from synthesizers to drum machines.
These are not just basic instruments, either…
They’re full-featured tools capable of producing professional-quality sounds.
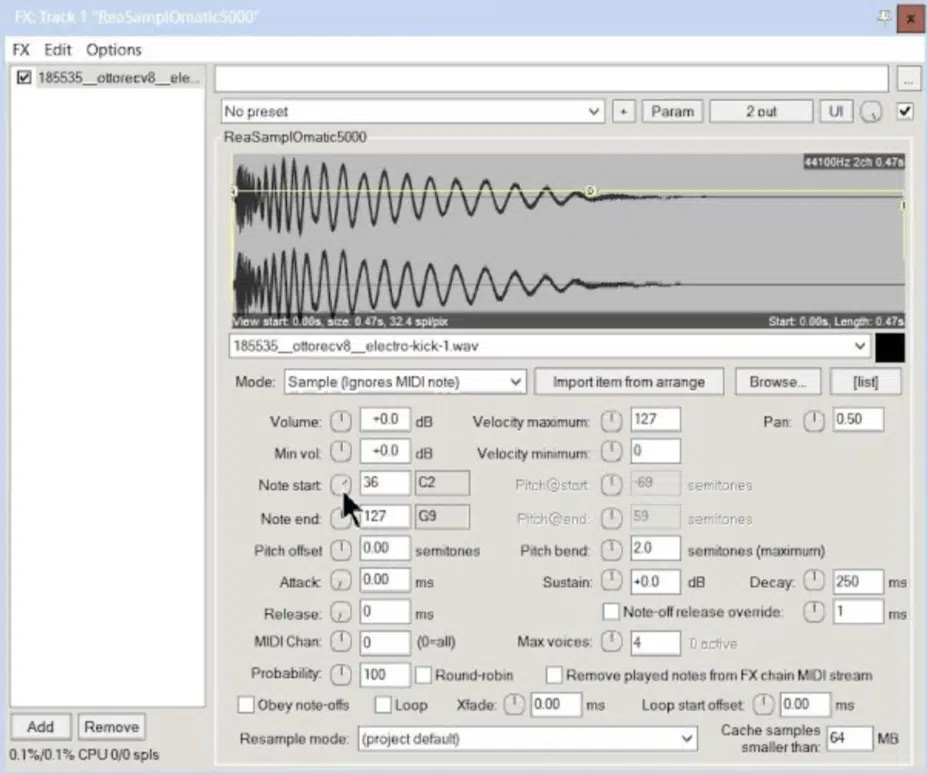
One standout is the ReaSamplOmatic5000 (above) 一 a sample player that allows you to play your own samples on a MIDI keyboard.
This is particularly handy for creating drum tracks or playing sampled instruments.
Reaper’s built-in effects are equally impressive.
From ReaEQ (a fully-parametric equalizer) to ReaVerb (a highly-flexible reverb processor), these effects can transform your tracks.
As well as help you achieve a professional sound.
It’s also worth noting that Reaper supports third-party VST and AU plug-ins, so you can expand your sonic palette with tools from other manufacturers.
This flexibility makes Reaper a powerful platform for mixing and mastering your tracks.
Customizing Reaper for a Personalized Workflow
Now that we’ve explored the recording, editing, and mixing processes in Reaper, let’s turn our attention to the customization possibilities this DAW offers.
-
Reaper’s Custom Layouts & Themes
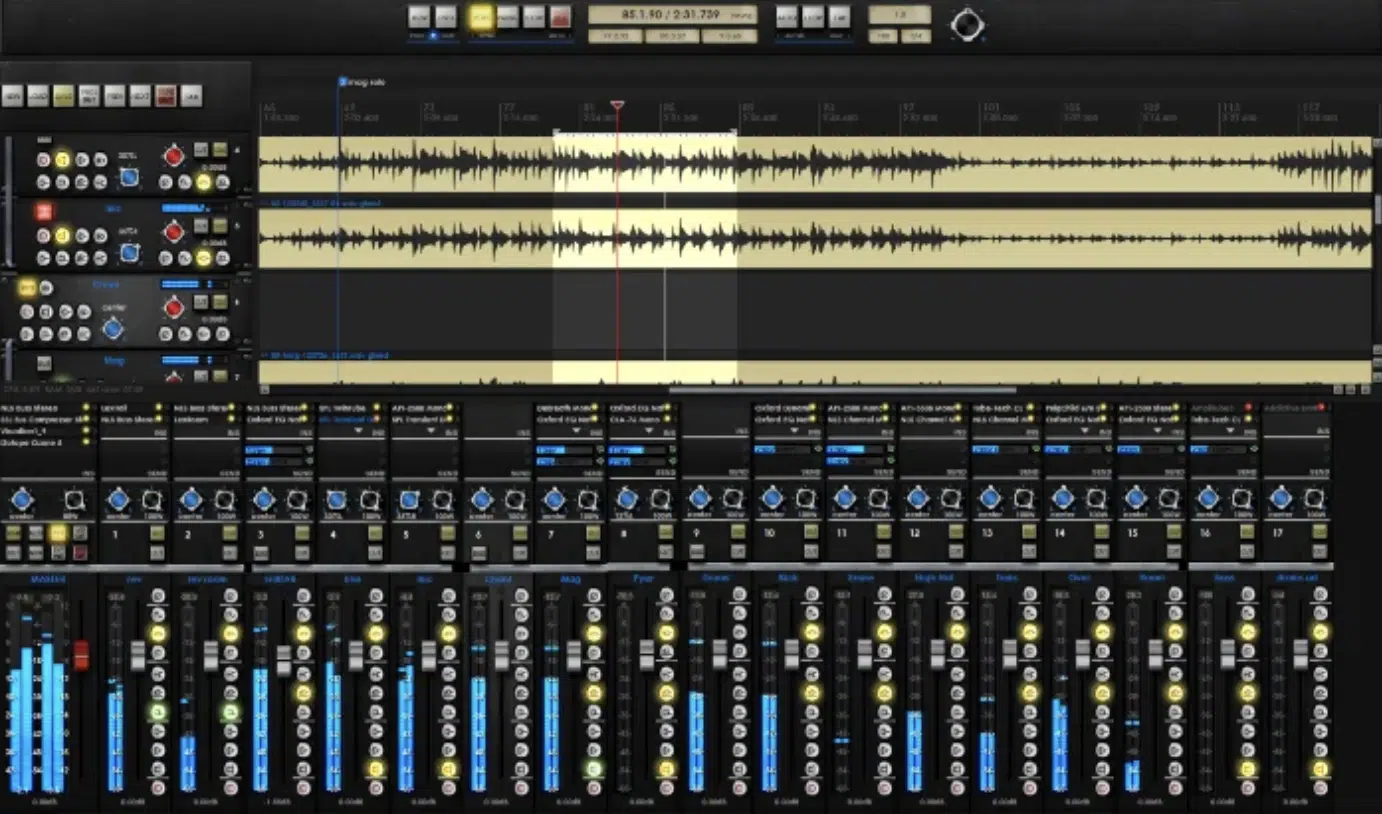
Reaper’s theme ‘Analog API’
One of Reaper’s standout features is its highly customizable interface.
Here, you can:
- Rearrange the layout to suit your workflow
- Change the color scheme
- Download custom themes created by the Reaper community
To customize the layout, simply go to the ‘View’ menu and select ‘Screen sets/Layouts.’
Here, you can save your current layout, switch between saved layouts, and even set up specific layouts for different tasks.
Changing the theme in Reaper is also easy.
Just go to the ‘Options’ menu, select ‘Themes,’ and choose from the pre-installed themes or add your own.
Customizing the look and feel of your DAW can make your music production experience more enjoyable and efficient.
-
Optimizing Reaper for Your Specific Needs
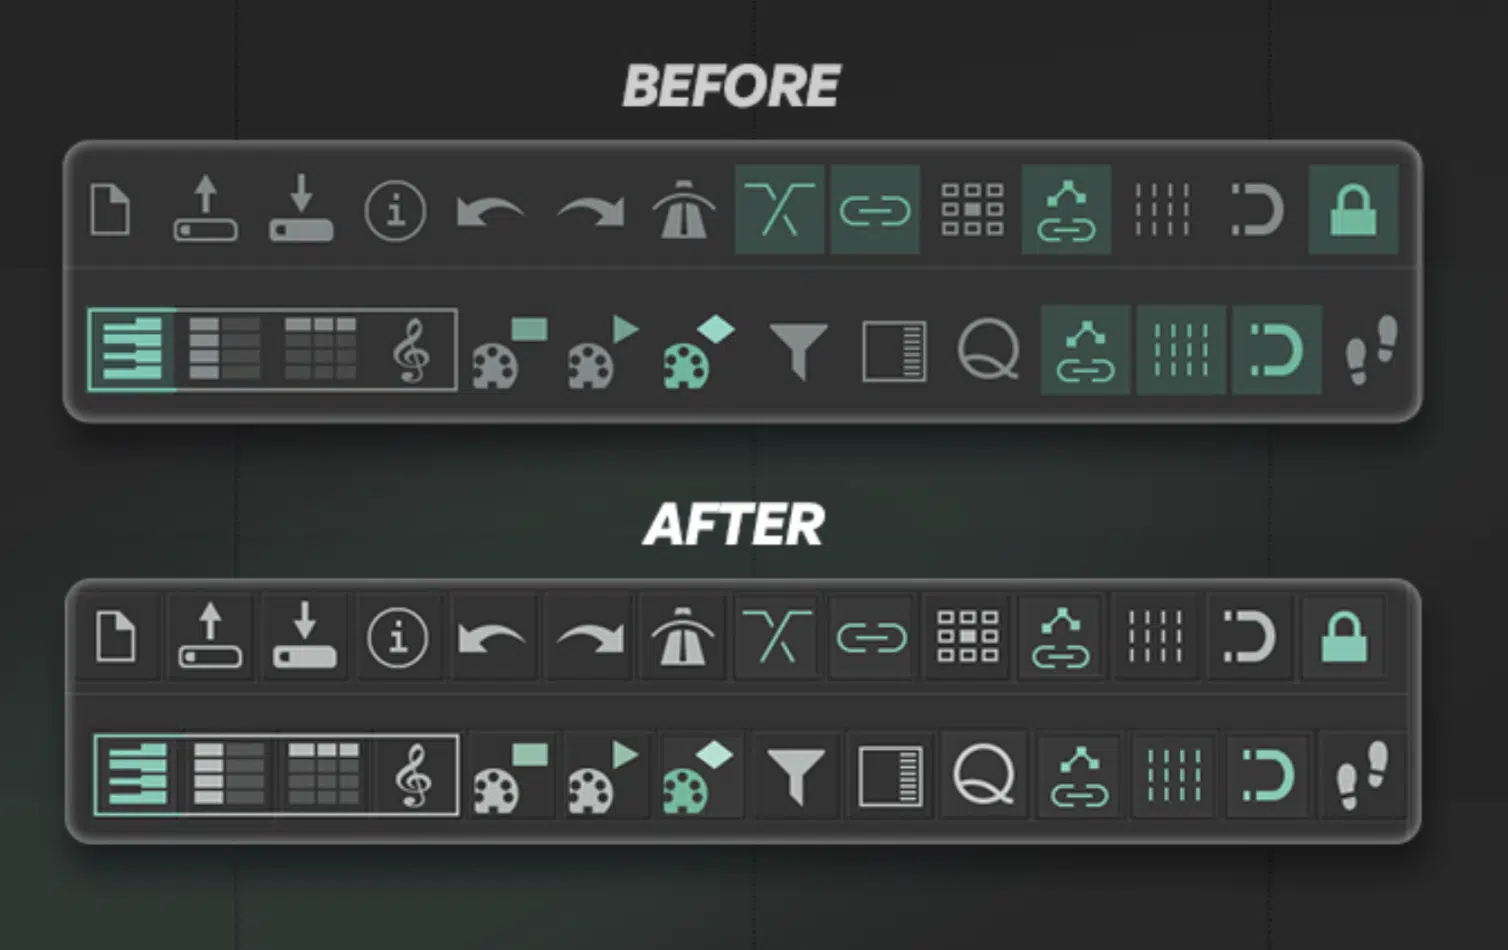
Beyond layouts and themes, Reaper offers several ways to optimize your workflow.
For example, you can customize your toolbar with the tools you use most often, or create custom actions that automate repetitive tasks.
Reaper’s powerful scripting engine allows you to create your own scripts or download scripts created by other users.
This opens up endless possibilities for customization, from automating complex tasks to adding entirely new features.
Reaper also supports custom keyboard shortcuts.
If there’s an action you use frequently, you can assign it a keyboard shortcut to save time.
You can even export your custom key mappings and use them on any computer.
Remember that Reaper is a constantly evolving platform.
The developers are continually adding new features and improvements, so it’s worth staying updated and exploring the latest versions.
NOTE: One of the often overlooked features of Reaper is its ability to run smoothly from a portable or network drive.
This makes it ideal if you’re always on the move or work across multiple studios.
Reaper vs Pro Tools & Logic Pro
I just wanted to take a second to give you a comparison of Reaper vs Pro Tools & Reaper vs Logic Pro, as they’re very popular DAWs that often get compared to Reaper.
-
Reaper vs Pro Tools
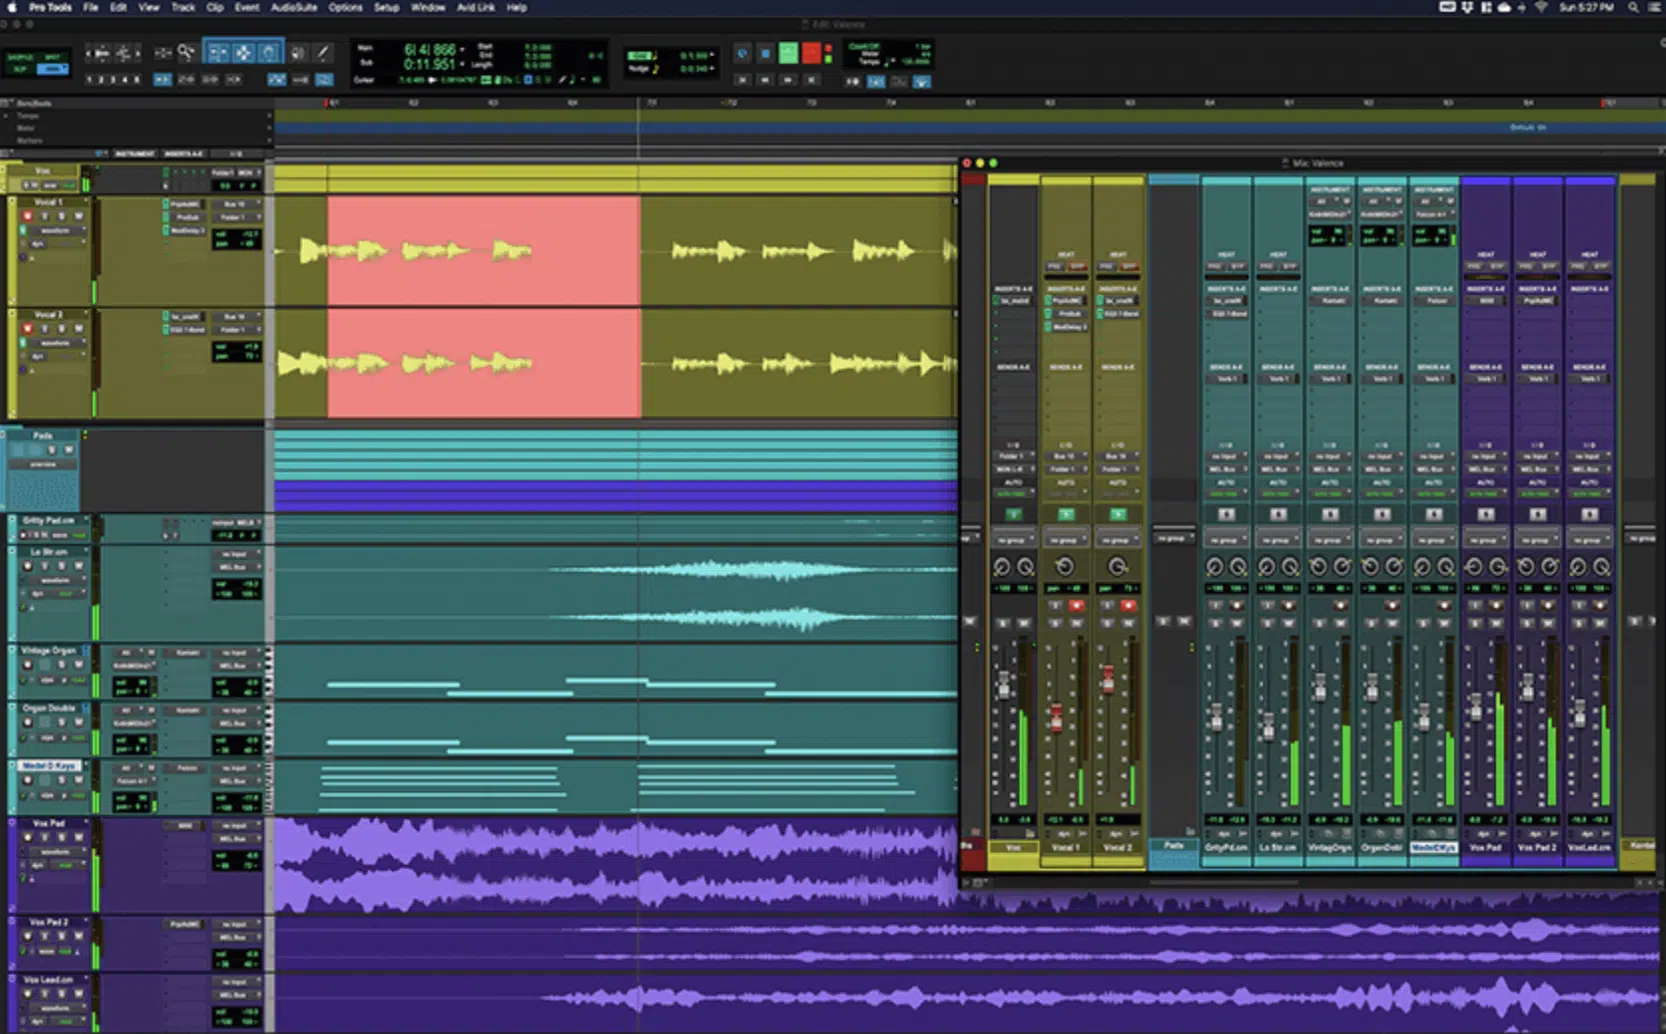
The Pro Tools vs Reaper debate is a common one among music producers.
While Pro Tools, a legendary digital audio workstation, has long been considered the industry standard, Reaper has gained a loyal following thanks to its flexibility and affordability.
Reaper supports a wide range of audio formats and plug-ins.
Its highly customizable interface can be a major advantage for producers who prefer a tailored workflow and sound quality.
Pro Tools, on the other hand, is known for its powerful recording and editing features, but it can be less flexible and more expensive than Reaper.
In terms of audio interface compatibility, both Reaper and Pro Tools work seamlessly with a wide range of devices.
However, Pro Tools is known to work best with Avid’s own hardware, whereas Reaper’s compatibility is more universal.
-
Reaper vs Logic Pro
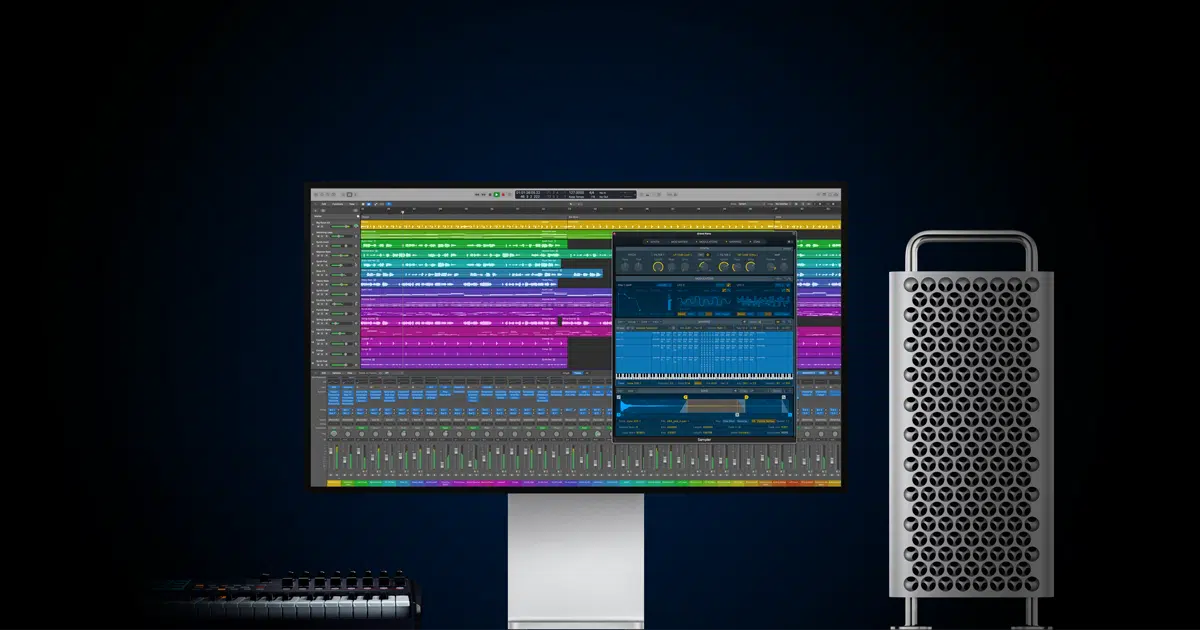
Logic Pro is another popular DAW, particularly among Mac users.
It’s well-suited to MIDI sequencing and comes with an impressive range of virtual instruments and effects, but it’s Mac-only software.
Reaper, in contrast, runs smoothly on both Windows and Mac (and even on Linux).
It might not have as many built-in instruments as Logic Pro 一 but its support for third-party plug-ins means you can easily expand your collection of tools.
In terms of cost, Reaper is also a clear winner.
While Logic Pro is reasonably priced for a one-time purchase, Reaper’s license is even more affordable, and it comes with unlimited free updates.
Unleashing Advanced Features for Complex Tasks
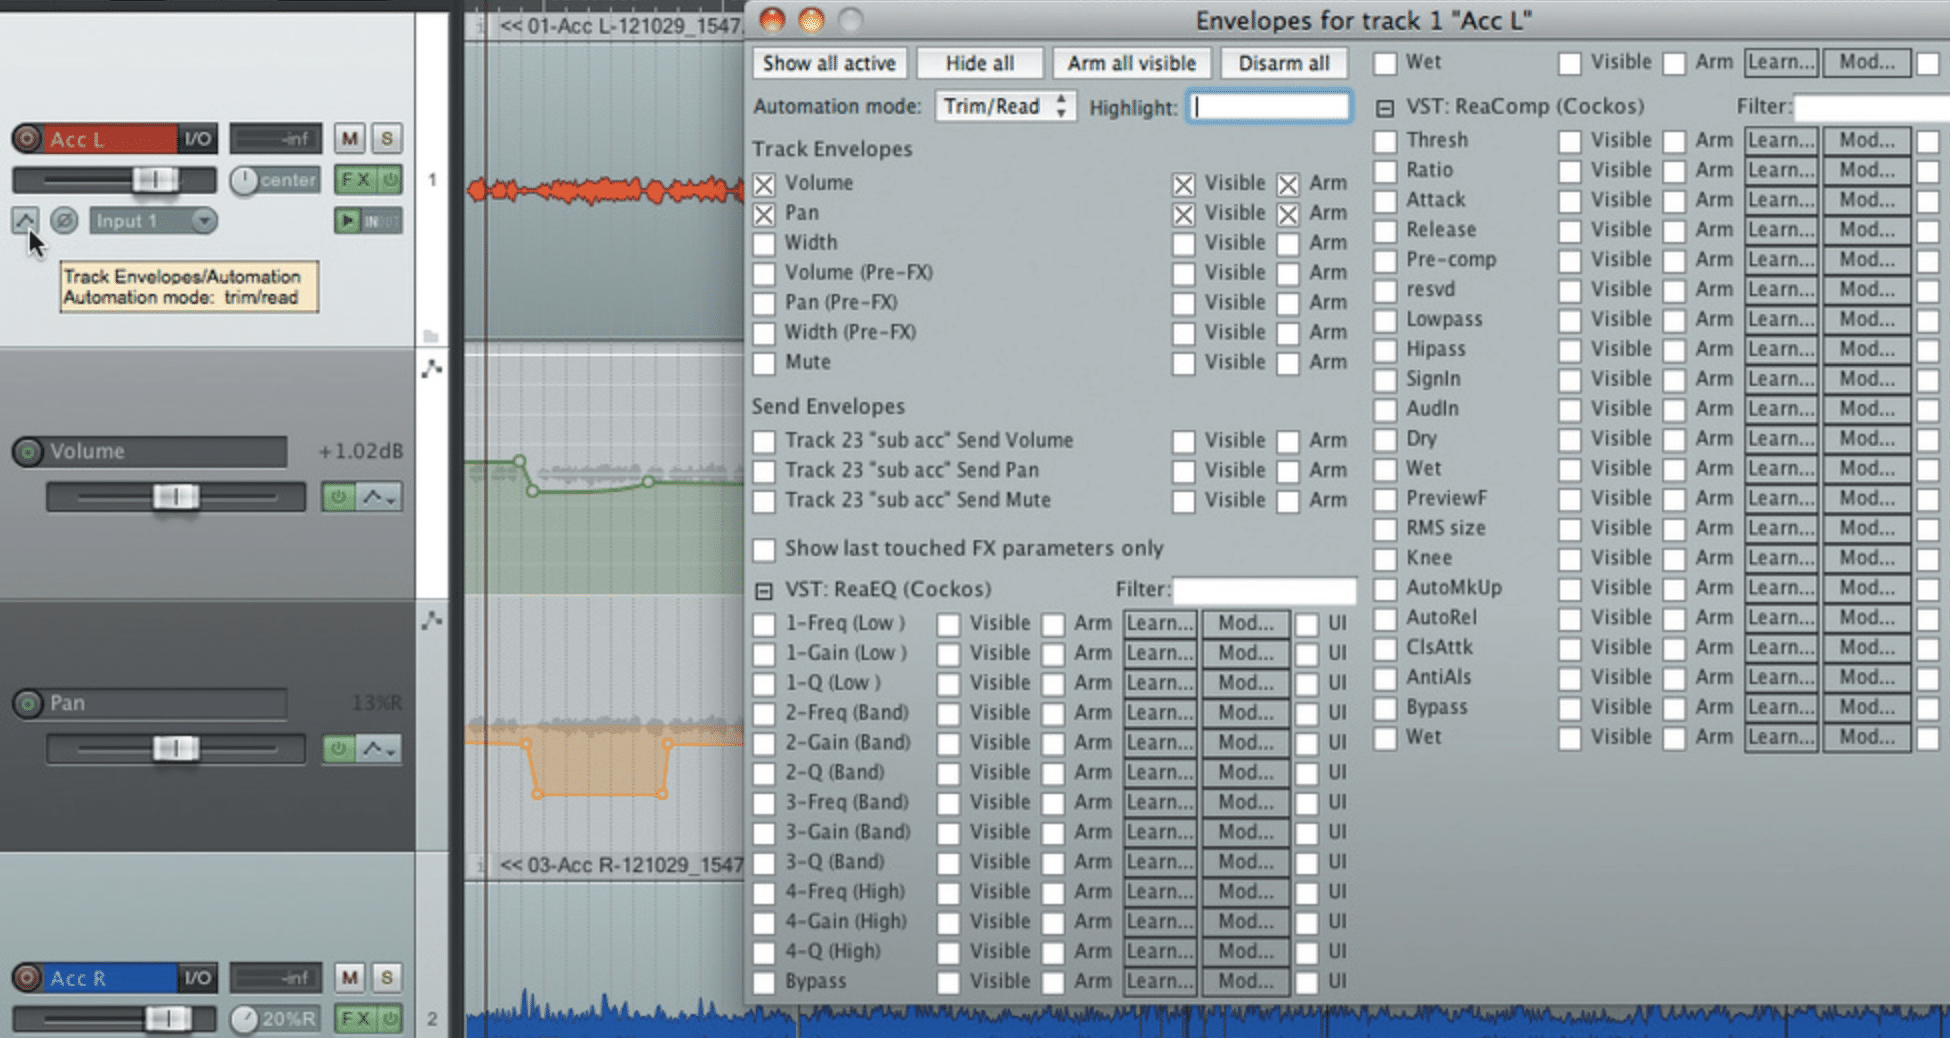
Reaper isn’t just your run-of-the-mill digital audio workstation; it’s a fully featured DAW that includes a host of advanced features that can handle complex tasks with ease.
From its powerful scripting engine to its extensive automation capabilities, Reaper is built to help you work smarter, not harder.
Let’s take a deeper dive into Reaper’s automation capabilities.
These nifty features are the unsung heroes of efficient music production.
Automation lanes in Reaper allow you to make precise adjustments to volume, panning, effects parameters, and more over time.
This means you can automate the movement of your virtual knobs and sliders 一 freeing you to focus on the broader picture while Reaper handles the hard stuff.
But Reaper’s advanced features don’t stop there… its scripting engine is another standout feature.
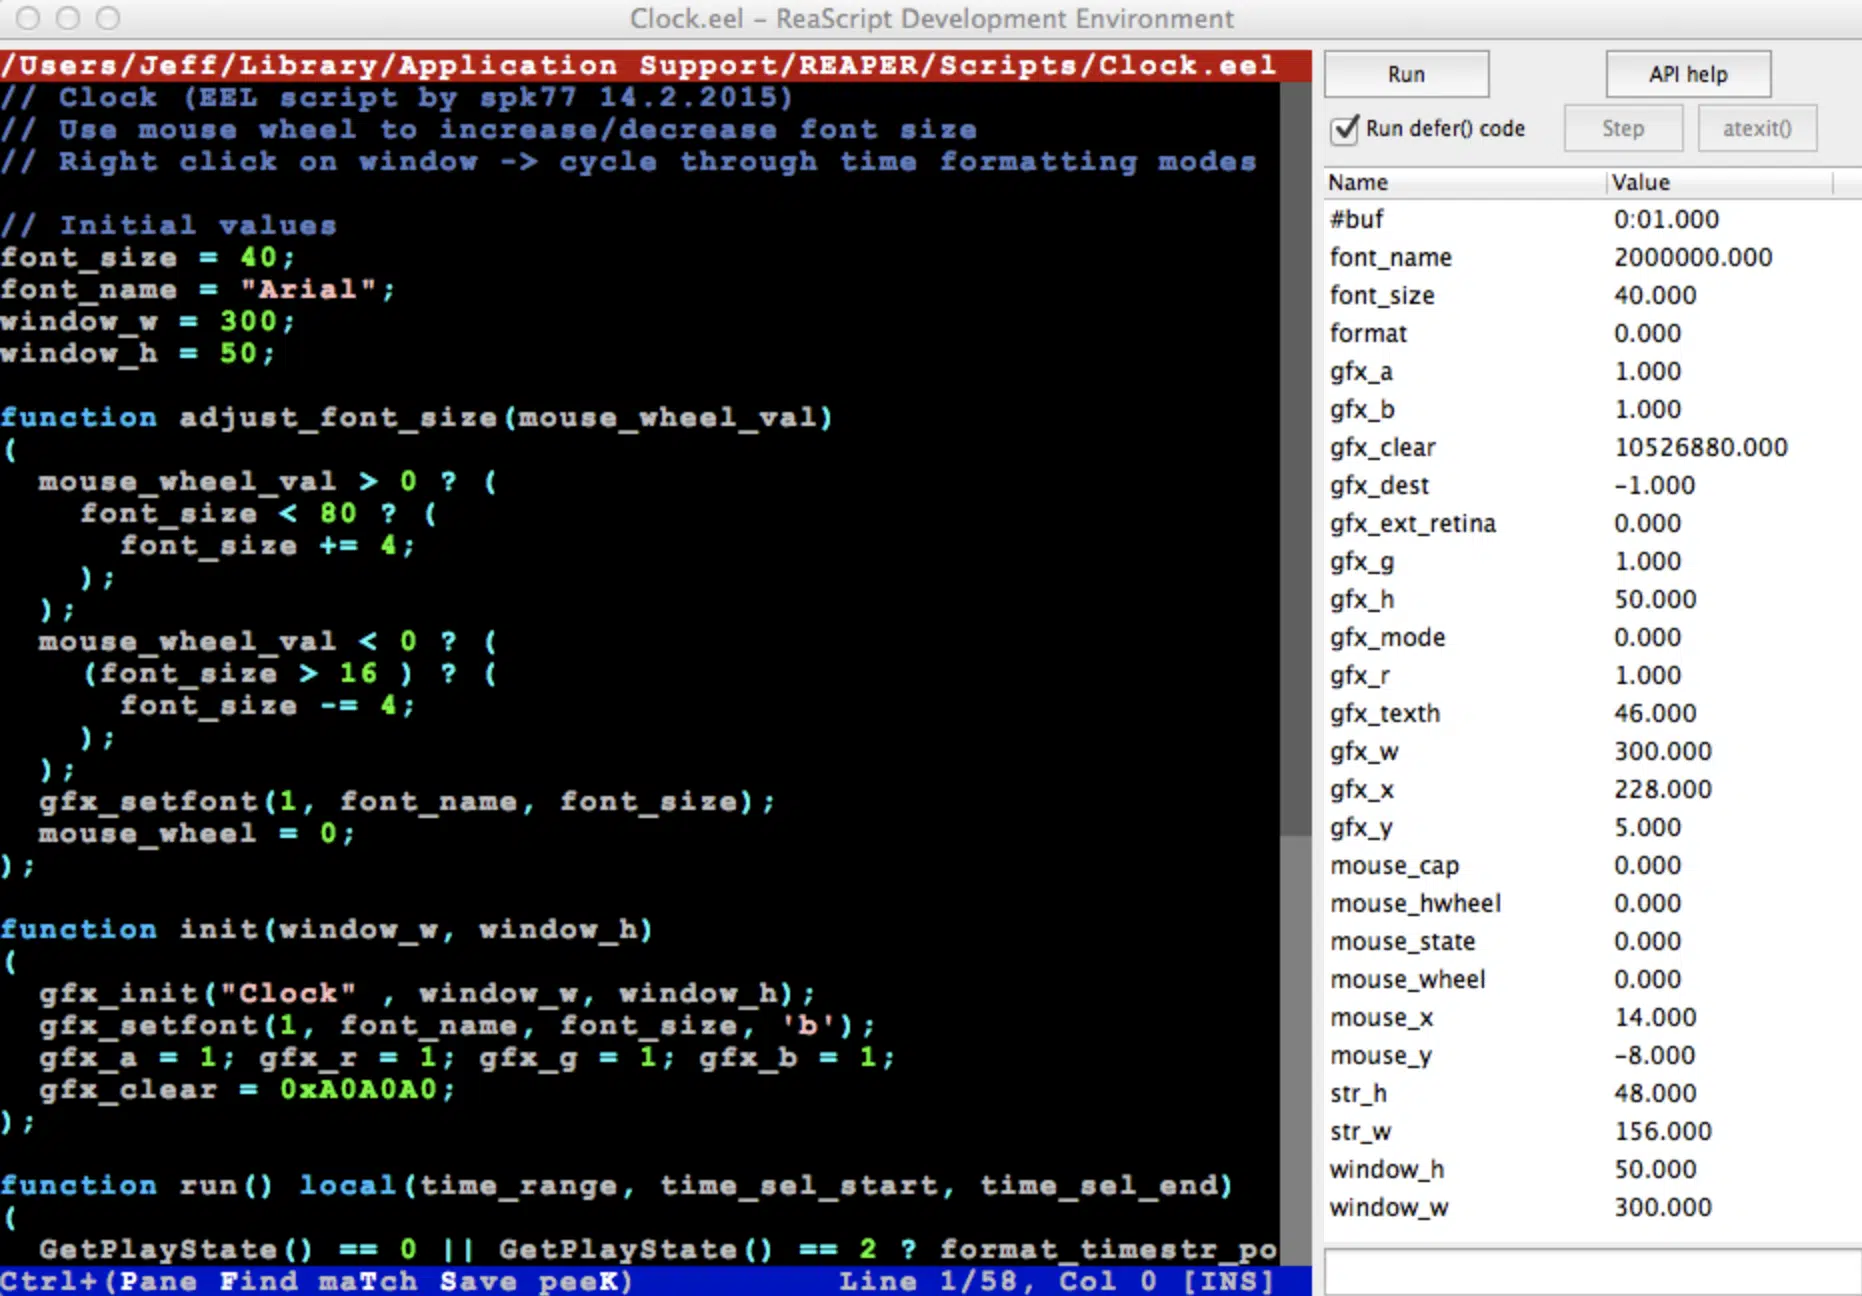
With this, you can:
- Write your own scripts.
- Use scripts created by the community to automate complex tasks.
This can drastically increase your productivity by automating repetitive tasks.
Think of it as your personal assistant, taking care of the boring stuff while you concentrate on creating magic with your music.
Now, let’s talk about spectral editing.

This advanced feature in Reaper allows you to view and edit the spectral content of your audio.
Instead of working with waveforms, you can work with frequencies.
This is invaluable for tasks like:
- Noise reduction
- Removing unwanted frequencies
- Detailed sound shaping
It might seem like rocket science at first, but once you get the hang of it, it’s an incredibly powerful tool to have in your audio editing arsenal.
The last advanced feature I want to touch on is Reaper’s surround sound capabilities.
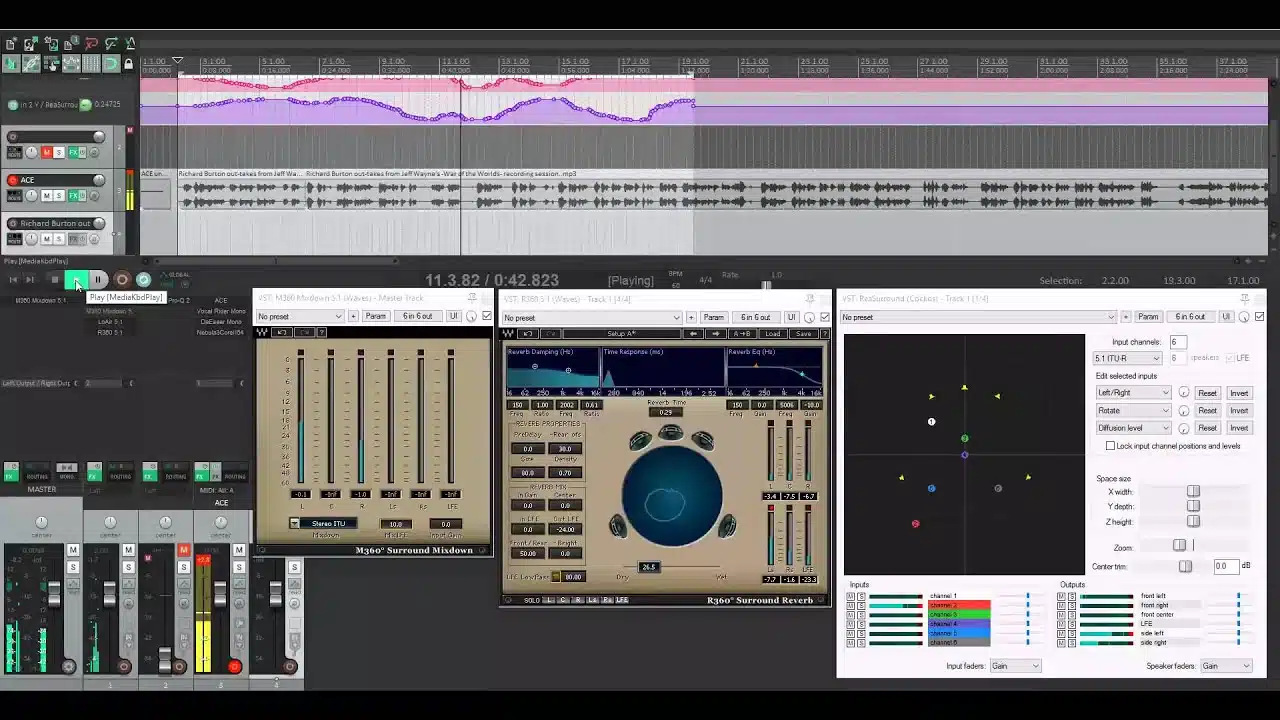
If you’re working on soundtracks for film, television, or video games, these features will come in handy.
Reaper supports multichannel audio and complex routing setups 一 making it possible to create immersive soundscapes for your projects.
Whether you’re mixing in 5.1 or 7.1, or even more expansive formats, Reaper has got you covered.
With these advanced features at your fingertips, you can tackle complex tasks that go beyond basic music production.
From film scoring and game audio design to podcast editing, sound design and more, Reaper’s advanced features open up a whole new realm of possibilities.
Just another reason why this DAW is my go-to choice for all things audio.
-
Useful Shortcuts & Workflow Enhancements
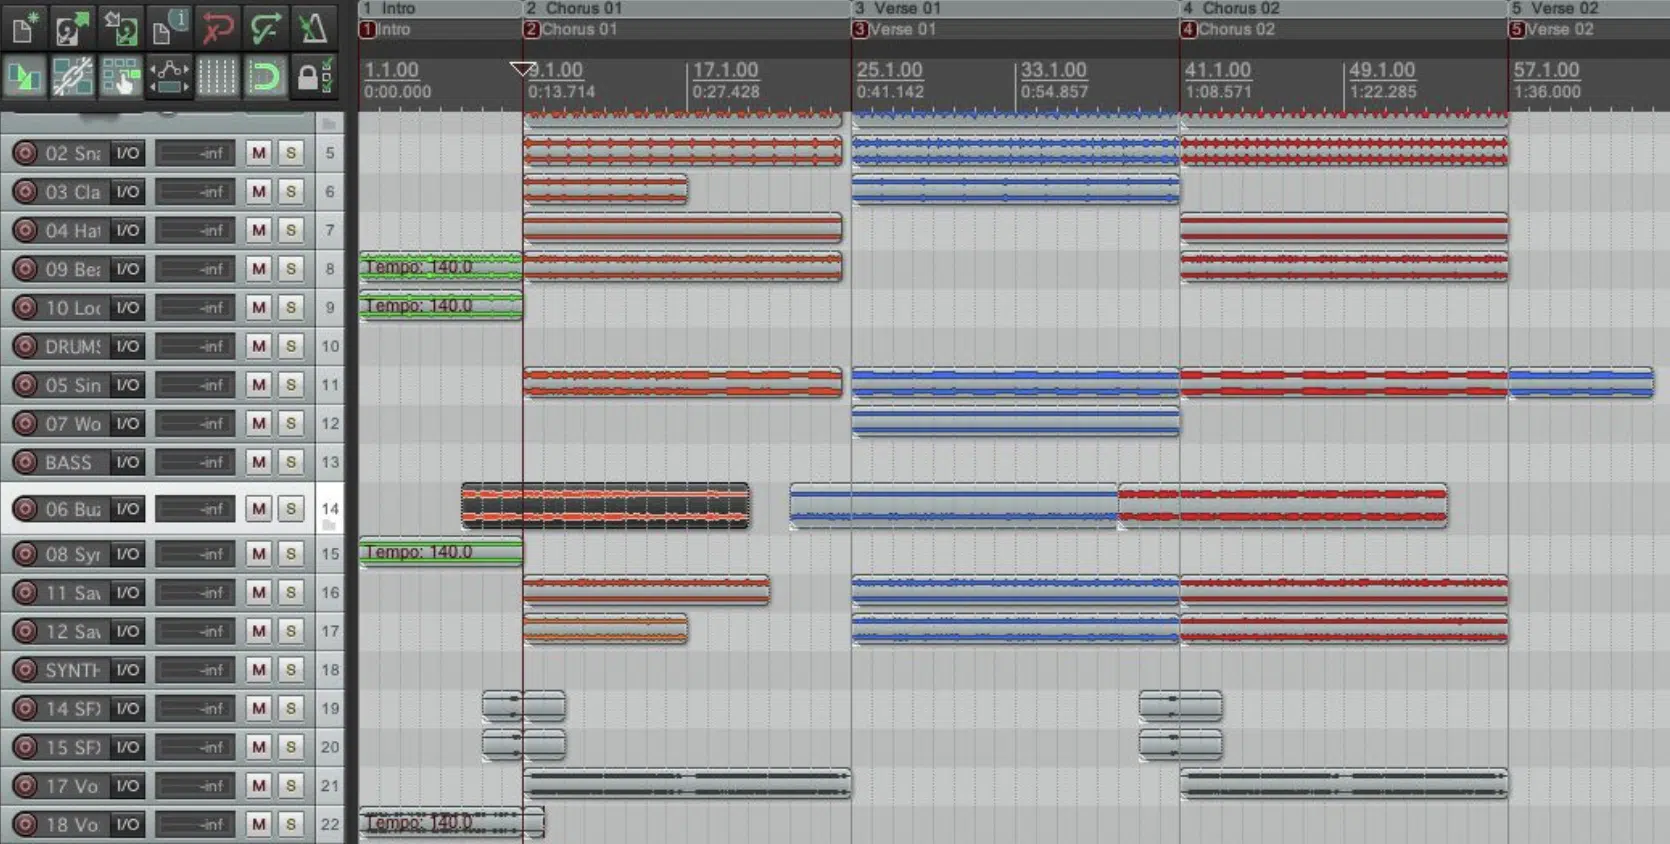
Reaper, like any other DAW, has a plethora of handy shortcuts that can dramatically speed up your workflow.
For example, hit ‘R’ to start recording and the space bar to start or stop playback.
It’s a simple thing, but once you’ve got these down, you’re already working faster and more efficiently.
Let’s not forget about Reaper’s “Ripple Editing” feature.
This is a real timesaver when making changes to a part of your track or project.
Adjustments you make can automatically propagate, or ripple, through the rest of the project 一 keeping everything synchronized and reducing the time you spend on manual edits.
Another essential trick is the utilization of track templates.
If you often use certain track configurations, with premium plugins, effects, or routing, you can save them as track templates for quick and easy recall in the future.
This can speed up your setup time significantly, allowing you to get straight into the creative flow.
-
Useful Shortcuts & Workflow Enhancements (Cont.)
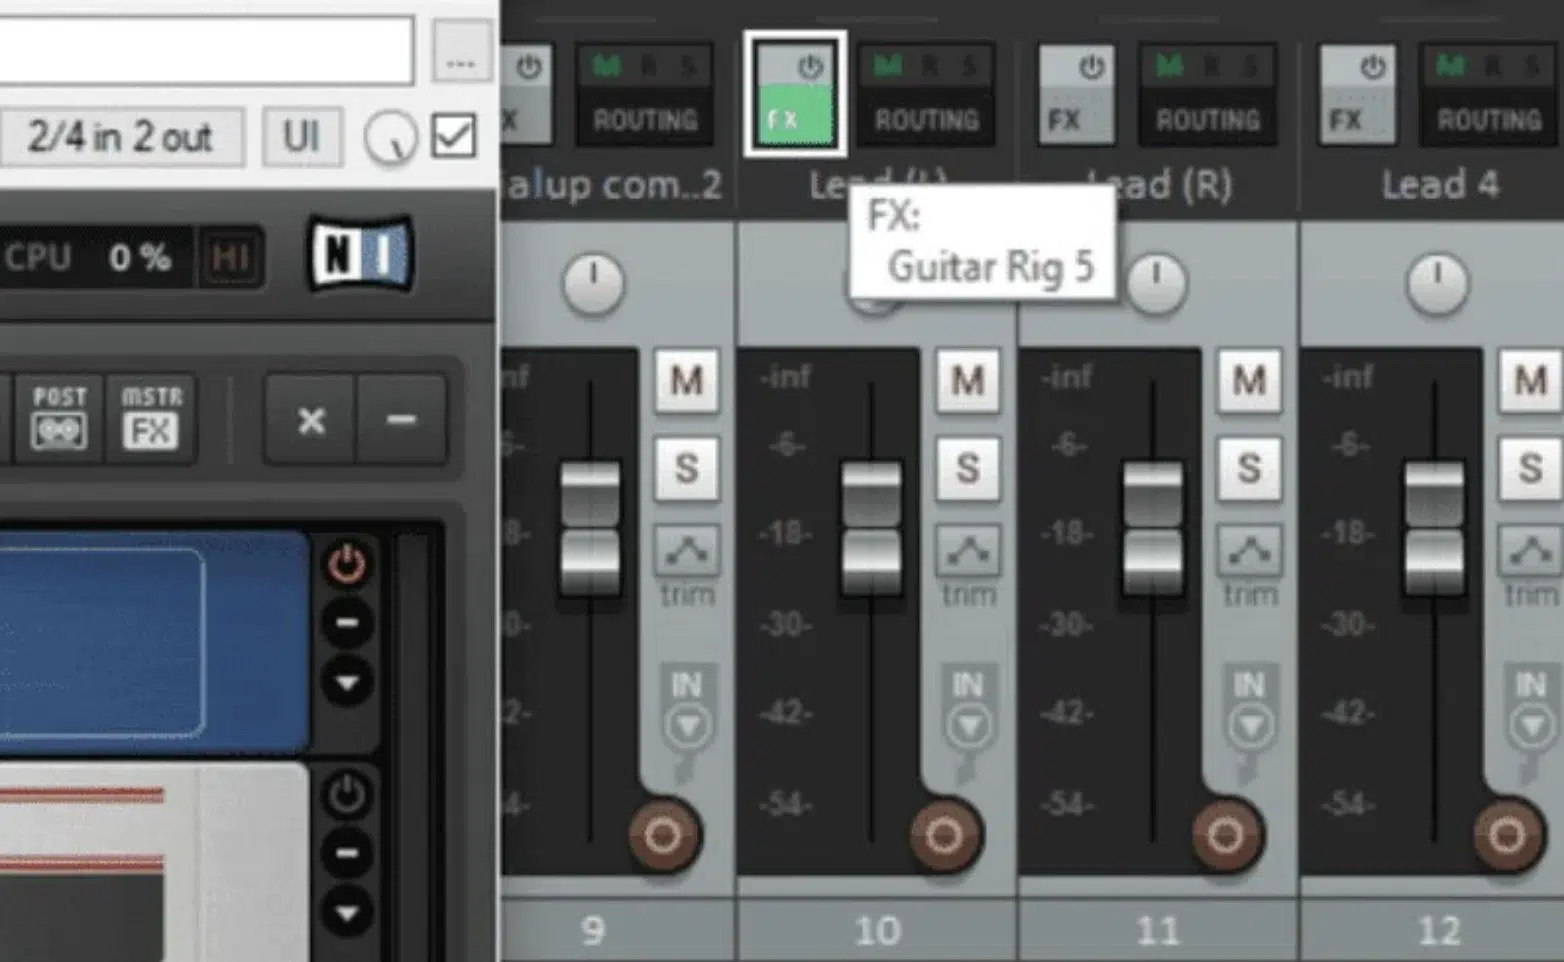
Reaper allows you to create custom actions using its in-built scripting engine.
You can write your own scripts or use scripts created by the community to automate repetitive tasks or create new features.
This is like having a digital assistant in your DAW, taking care of tedious tasks while you focus on the creative aspects of your music.
Master the use of FX chains in Reaper.
These are essentially groups of plugins that you can save and use across different projects.
It’s particularly handy if you have a specific chain of plugins that you use frequently for mastering or vocal processing.
Once you’ve saved an FX chain, you can add it to any track with just a few clicks.
These tips and tricks should help you level up your music production skills in Reaper, making you a more efficient and creative music producer.
Reaper DAW: Final Thoughts
Well, we’ve journeyed through the ins & outs of Reaper DAW together 一 discovering the plethora of features, tricks, and workflows this formidable software brings to the table.
I trust you’re now feeling confident, eager, and ready to start producing and mixing your tracks with Reaper.
But hold on a moment…
There’s one more thing I want to share with you that will elevate your productions to another level…
Let’s talk about these professionally-crafted, hard-hitting FREE drum loops.
These high-quality, genre-specific drum loops can be your secret weapon for creating epic tracks.
The beauty of using these loops is how they can seamlessly integrate with Reaper DAW.
Remember those unique processing and routing options we discussed earlier?
They’re not just for your recordings and MIDI tracks.
You can apply those innovative features to these drum loops too.
Meaning, you can manipulate, layer, and process these loops to fit your unique style and the demands of your mix.
You’ll be able to mold these professionally crafted drum loops and push them through Reaper’s in-built FX.
As well as tweak them with precise adjustments, and even layer them across multiple tracks.
The possibilities are truly endless!
With Reaper DAW as your weapon of choice and these free drum loops in your arsenal, you’re now equipped to carve out a unique sonic signature in your music.
Until next time…


Leave a Reply
You must belogged in to post a comment.