As music producers/musicians, you’re going to be working with vocals at one point or another, which is why knowing all about vocal harmonies is super important.
It can help you create more emotion, add depth to your main vocal, and enhance the entire track’s vibe in a way that connects with the listener instantly.
Plus, when you know how to build a vocal harmony line properly (using the right chord tones, understanding the melody, and adjusting for dissonant harmonies) it’s key.
You’ll be able to add depth, character, and polish like never before.
That’s exactly why I’m breaking down everything you need to know to enhance your vocal harmonies, like:
- Layering vocals the right way ✓
- Pitch-shifting and formant tricks ✓
- Using AI plugins for real-time harmony ✓
- Parallel and pedal harmonies ✓
- Getting character from your own voice ✓
- Tuning and timing for feel/emotion ✓
- Mixing creative effects into your stacks ✓
- Knocking out perfect vocal harmony for all genres ✓
- Using EQ and compression to carve space ✓
- Much more about enhancing your vocal harmonies ✓
With all of the right techniques, tips, and tricks to bring your vocal harmonies to the next level, you’ll be unstoppable and dominate the competition.
Plus, you’ll be able to create more advanced vocal arrangements, match the main melody emotionally, and lay down pro-level vocal harmonies all day.
This way, you never have to worry about clashing parts, amateur vocals, or flat-sounding harmonies ever again.
Table of Contents
- Improving Your Vocal Harmonies: Best Tips & Techniques (No Music Theory Skills Needed)
- 1. Layering & Stack Techniques
- 2. Pitch-Shifting & Formant Control
- 3. Vocal‑AI & Harmony Plugins for Unique Vocal Arrangements
- 4. Harmony Theory 101
- 5. Capturing Vocal Performance Character (Get Killer Lead Vocals & Background Vocals)
- 6. Timing & Groove Variations
- 7. Pitch‑Correction as Creative Modulation
- 8. EQ & Tonal Shaping
- 9. Dynamic Processing & Levels
- 10. Spatial Positioning & Stereo Field
- 11. Mixing Workflow & Bus Routing
- 12. Genre‑Specific Harmony Tricks
- 13. Stem Separation & Vocal Extraction
- 14. Advanced Editing & Comping Techniques
- 15. Creative Effects & Texture Design
- 16. Stereo & Width Maximization
- 17. Harmonies as Pads and Textures
- Final Thoughts
Improving Your Vocal Harmonies: Best Tips & Techniques (No Music Theory Skills Needed)
There’s no one-size-fits-all approach when it comes to vocal harmonies, that’s a fact. But, there are some killer techniques that I’ve learned throughout the years that I’d like to share with you today (for all genres and styles). So, let’s break down the best ones so you can have your vocals sounding wider, richer, and more professional than ever.
1. Layering & Stack Techniques
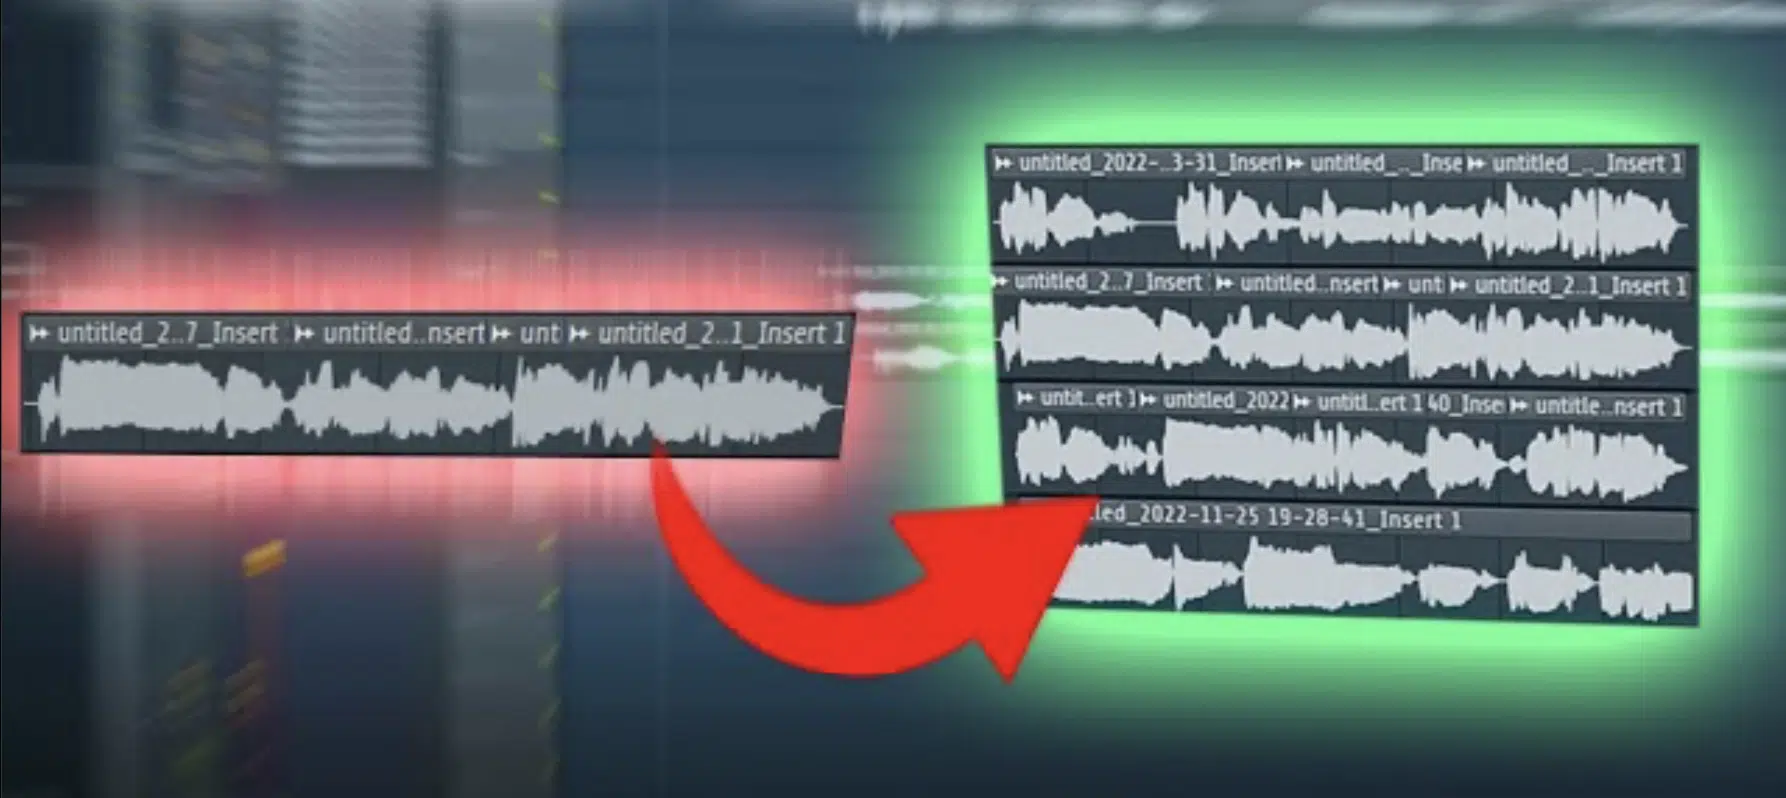
One of the most powerful ways to enhance your vocal harmonies is to stack multiple takes of the same harmony part instead of relying on a single pitch-shifted version.
For example, try recording three takes of a third-above harmony line:
- One panned left
- One center
- One right
This will help you build a fuller vocal stack without even needing a plugin.
You can also use automatic double-tracking (ADT) plugins like Waves Reel ADT or Soundtoys MicroShift to simulate that analog-style chorus effect on your background vocals.
Just be sure to dial back the modulation depth so it doesn’t sound overly artificial 一 somewhere around 20–30% usually hits the sweet spot in my experience.
Now if you’re going for that clean pop feel, stacking harmonies in unison (or just a few cents apart in pitch) gives you that locked-in sound that feels polished yet wide.
Combine that with EQ scooping around 200–400 Hz on the doubles to carve space for the main vocal, and you’re good to go.
NOTE: And if you want to create a perfect harmony with a realistic touch, always record variations in tone, maybe one whispered, one sung full chest, and one falsetto.
This way, the voices blend perfectly but don’t phase out each other, adding dimension without overpowering the lead vocal.
2. Pitch-Shifting & Formant Control

Another solid technique for enhancing your vocal harmonies is using real-time pitch-shifting with formant adjustment to simulate different voices from your own.
For example, try duplicating your main vocal, shifting one copy up a third, then nudging the formant down by -2 semitones to make it sound like a different singer altogether.
You can use whatever plugin you prefer, like Little AlterBoy (my fav), Auto-Tune Pro, or Revoice Pro 5, that gives you tons of control over pitch and formant independently.
This way, your vocal harmonization stays smooth and natural even if you’re creating three-part harmony lines from one single take.
And remember, shifting by third and fifth intervals is a solid rule of thumb when trying to harmonize vocals with the main melody.
However, don’t just rely on pitch, make sure to think about tone and timing, too.
You can create more emotional vocal harmonies by nudging the harmony slightly behind the main vocal, so it feels like it’s responding to the melody rather than mimicking it 一 this subtle change alone can add serious depth.
PRO TIP: If you’re working in a C major chord, and your vocal melody hits an E, try layering a G (the fifth) above and a C (the root) below.
These chord tones will blend naturally with the underlying chords, and with a bit of formant shifting, it’ll sound like three completely different singers even if it’s just you.
3. Vocal‑AI & Harmony Plugins for Unique Vocal Arrangements

Using vocal harmonies powered by real-time AI has changed the game, especially for producers working solo or with limited vocalists.
You got the best, like MIDI Wizard, Harmony Engine, or Waves Harmony, which lets you instantly generate layered harmonies based on MIDI input or chord recognition.
And yes, they’re fully adjustable in both pitch and formant.
In Waves Harmony, you can load four voices, assign each one to sing a different chord tone (like root, third, fifth, or seventh), and route them across the stereo field.
One great setting is assigning voice 1 to pan -40, voice 2 center, voice 3 to +40, and voice 4 to +20 with -3 formant shift.
That spacing sounds wide, clean, and musical on most background vocals.
If you’re working in C major, simply plug that into MIDI Wizard and it’ll generate vocal harmony lines in the key you’re working in.
Yes, you can include suspended or extended variations if you’re feeling froggy.
You can even create complex vocal arrangements that follow your main melody (with no theory needed), by:
- Triggering the harmonies with your MIDI controller
- Tweaking the voicing rules
And if you want that ultra-human feel, use AI plugins for the initial structure, then bounce to audio, tweak timing manually, and adjust pitch correction.
Then just blend each vocal stack with individual reverb sends.
It’s the perfect blend of tech and feel, and can help you create super advanced vocal harmonies without losing any of the overall vibe.
4. Harmony Theory 101
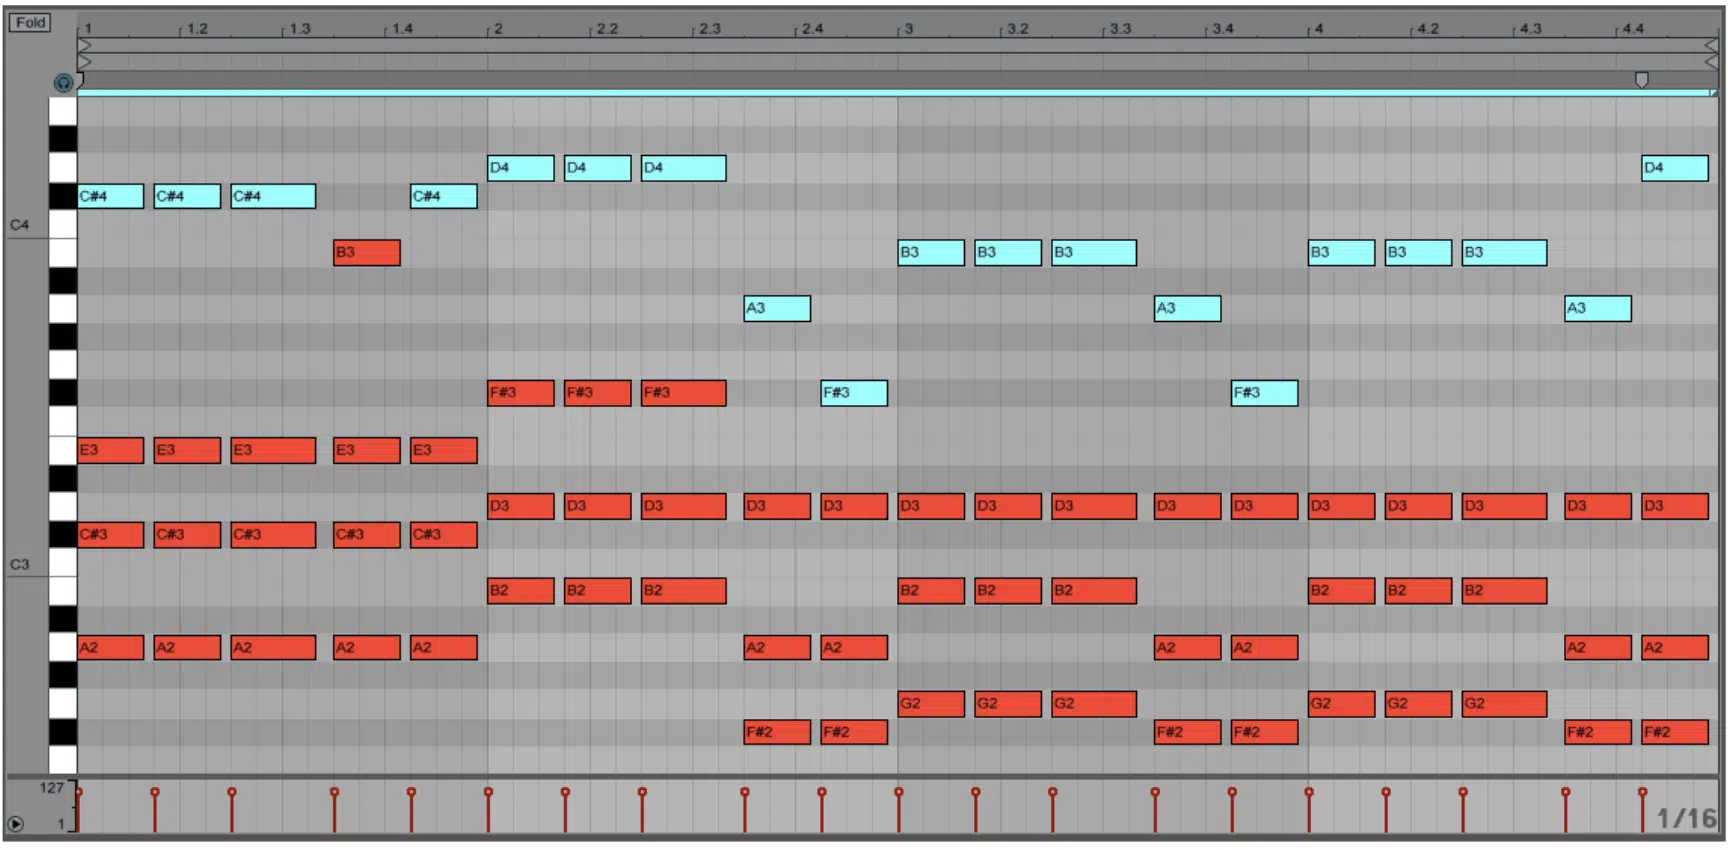
Let’s talk music theory for a second, because applying even a basic understanding will level up your vocal harmonies all day.
Start with your main chord progression…
If you’re working over something like C–Am–F–G, the chord tones you’ll want to target for each harmony line are other notes like C, E, G for C major, A, C, E for A minor, and so on.
A smart technique is to create parallel harmonies a third above or below the main melody, so if your main vocal hits an A over an F major chord, harmonize with a C for that tight third sound.
Then, automate slight panning to left/right to spread them across the stereo image.
This classic major chord trick locks in sonically with the underlying chords while still letting the main vocal lead.
You can also get into pedal intervals, which is huge in genres like EDM and House, which is when you keep one note constant across several chords.
For example, holding a G note while your chord progression changes from Em to Fmaj7 to G.
It adds harmonic tension and makes your vocal harmonies feel hypnotic and evolving, especially when layered as ambient pads or reversed textures.
PRO TIP: When mapping harmony lines, always use your ear first, especially when layering over dissonant chords 一 don’t blindly follow theory if it sounds off.
Use your MIDI controller to test different notes, and try stacking thirds and fifths over each chord tone until the vocal harmonies feel glued to the melody.
That’s how you create magic, my friends, so definitely give it a try.
5. Capturing Vocal Performance Character (Get Killer Lead Vocals & Background Vocals)

If you’re recording real vocal harmonies, don’t simply aim for clean and pitch-perfect and call it a day because character is what makes a track feel alive.
Sometimes, a whispery vocal take or a raspy voice with soft dynamics will sit better in the mix than a full-on belted part.
Try recording the same harmony line three times:
- One chest voice
- One falsetto
- One whispered
Then blend them like a vocal stack to get something that feels textured but still unified.
Also, always match the emotional impact of the lead vocal..
If your main vocal sounds intimate and vulnerable, then a robotic-sounding harmony is going to kill the vibe.
Instead, have your singers lean into the mood (maybe pull the mic back a bit, soften the consonants, or add breathiness on purpose).
Just keep in mind that you always want your background vocals to harmonize with the main melody, never distract from it.
Settings-wise, try using a ribbon mic or a condenser mic with a darker tone, like an SM7B or a WA-47 with the pad engaged, for background vocals.
Then compress gently (2:1 ratio, slow attack, medium release), so you’re retaining that vocal character without squashing it.
Also try rolling off highs above 8kHz to push the vocal harmonies slightly behind the main vocal without losing presence.
And here’s something producers skip way too often 一 record variations in timbre on purpose; don’t just “sing harmony” in one way!
You can play around with “singing” the same notes while smiling, frowning, or whispering because it all changes the sound of your own voice.
And when stacked right, adds insane depth to your vocal harmonies.
6. Timing & Groove Variations
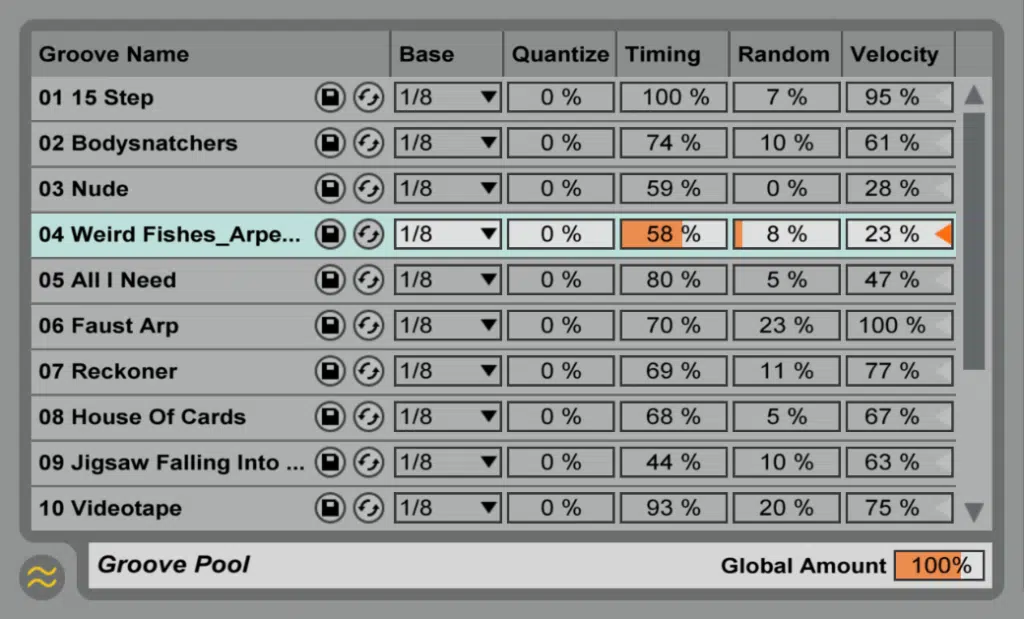
When you’re tweaking your vocal harmonies, timing is just as important as pitch, and even a few milliseconds can make a huge difference.
To get that tight yet human feel, try nudging each harmony line slightly behind the main vocal by 10 to 20 milliseconds.
This creates a relaxed pull that mimics how singers perform live, especially in laid-back pop or R&B tracks where people really want to hear that.
If you want to make your background vocals feel more rhythmic, experiment with subtle swing or groove quantization using something like Ableton’s Groove Pool or Logic’s Time Quantize at 66% swing.
Pair this with side-chaining your vocal harmonies to the main vocal or even the kick.
Just set a fast attack, 6–8 dB of gain reduction, and medium release time to let the harmonies breathe with the track’s rhythm.
You can also get creative by offsetting one vocal stack to enter a beat early or late on purpose (a common trick in popular music when layering a call-and-response feel between the main vocal and its harmonies).
Just remember, subtlety wins, and anything more than a 30ms delay between voices starts sounding like a slapback or an echo.
Pro tip: If you want even more groove, simply pan one harmony hard left and delay it by 15ms, then pan another hard right and delay it by 25ms.
This not only spreads your vocal harmonies wide but adds real movement that locks into the track’s pulse without cluttering the melody or the underlying chords.
7. Pitch‑Correction as Creative Modulation
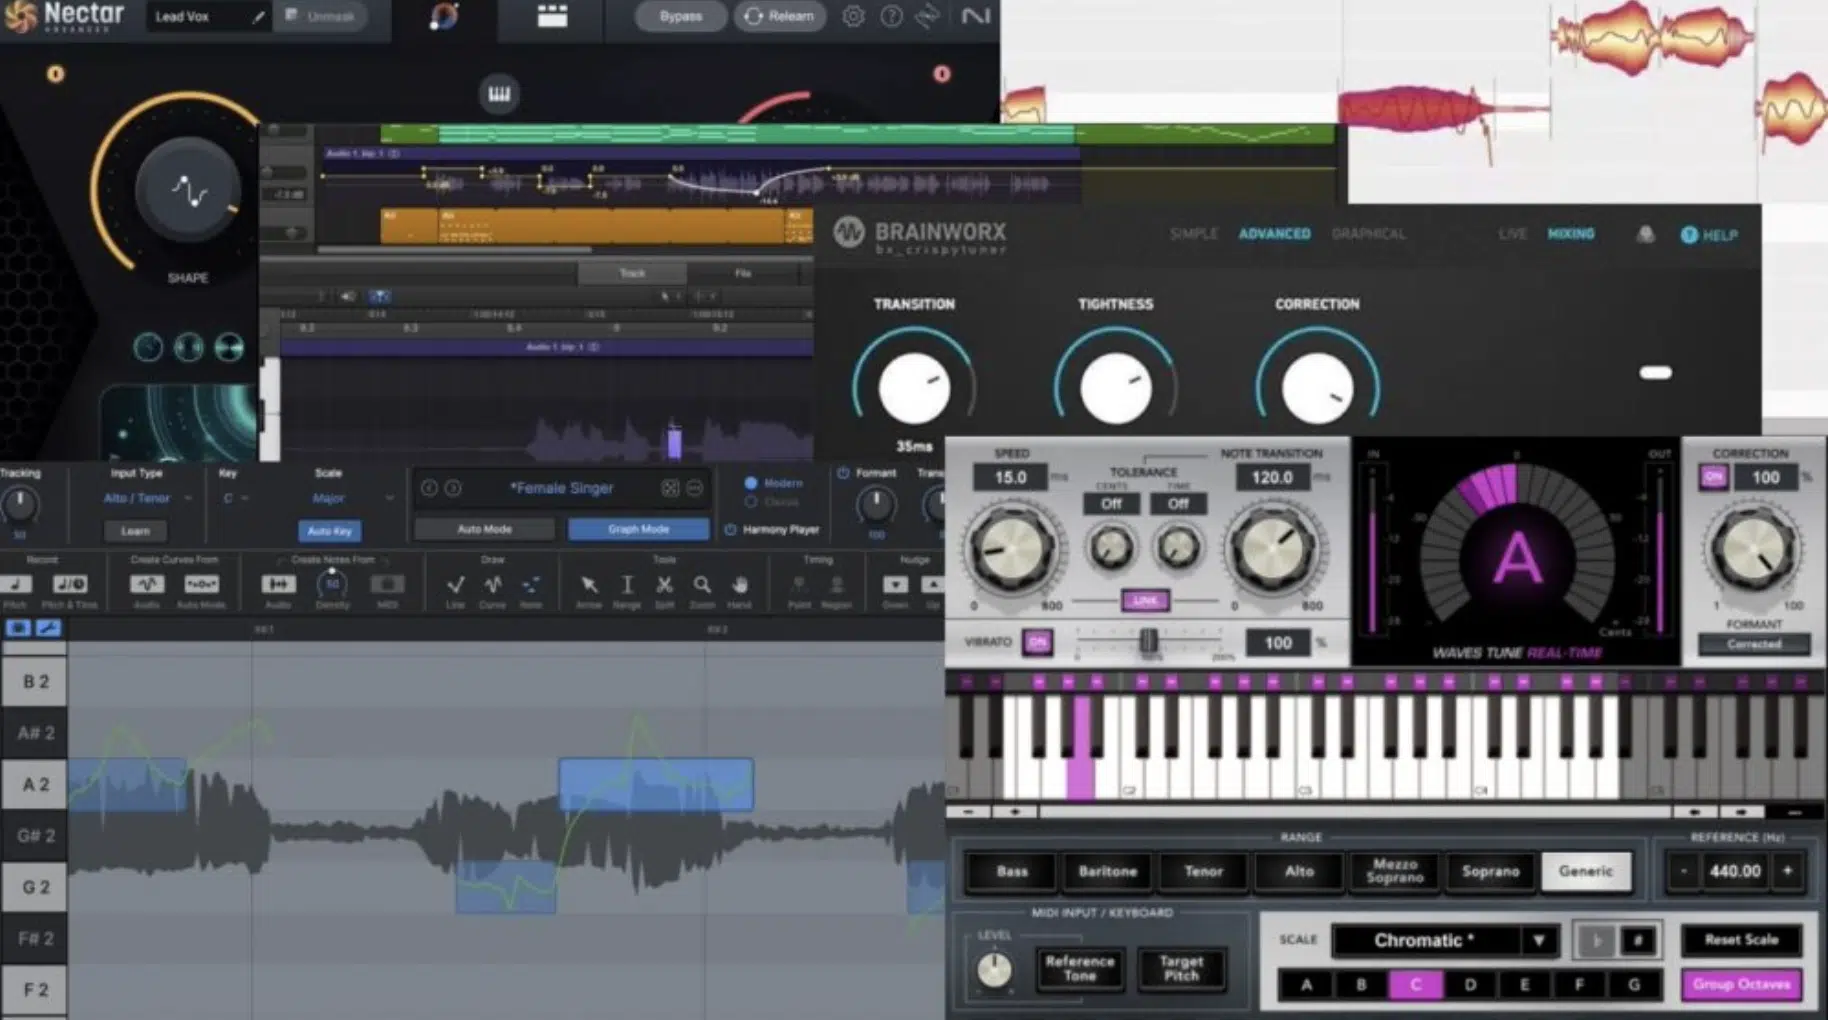
Sometimes, the most iconic vocal harmonies come from pushing the boundaries of pitch correction instead of hiding it, so here’s how you can push things to the limit.
For clean vocal arrangements, start by tuning each harmony line separately in Melodyne 一 keep the pitch modulation around 60–70%, with pitch drift at 0% to stay tight.
Perfect for when blending three-part harmonies built from your MIDI controller input.
Now for a little bit of a textural twist, thanks to yours truly…
Use Auto-Tune Pro with a Retune Speed of 10 and Humanize around 15 to retain slight imperfections while still locking each voice to certain notes in your key.
This works wonders on airy background vocals when your vocal melody is already busy and you need clean support underneath.
And if you’re like me and want that more extreme vibe, lean into the Cher-effect or T-Pain style by setting the Retune Speed to 0 and turning Humanize all the way down.
This will hard-lock your vocal harmonies into a robotic tone that sounds wild over dissonant harmonies, especially if the melody plays against the scale.
Just make sure it matches the emotional impact of the song because less is more in a lot of circumstances, and sometimes that just doesn’t match the feel you’re aiming for.
PRO TIP: Create contrast by tuning only the harmony part while leaving the lead vocal raw or lightly processed.
That subtle difference in tuning texture will help the vocal harmonies sit behind the main vocal without competing with it, while still adding depth/polish to the overall sound.
8. EQ & Tonal Shaping
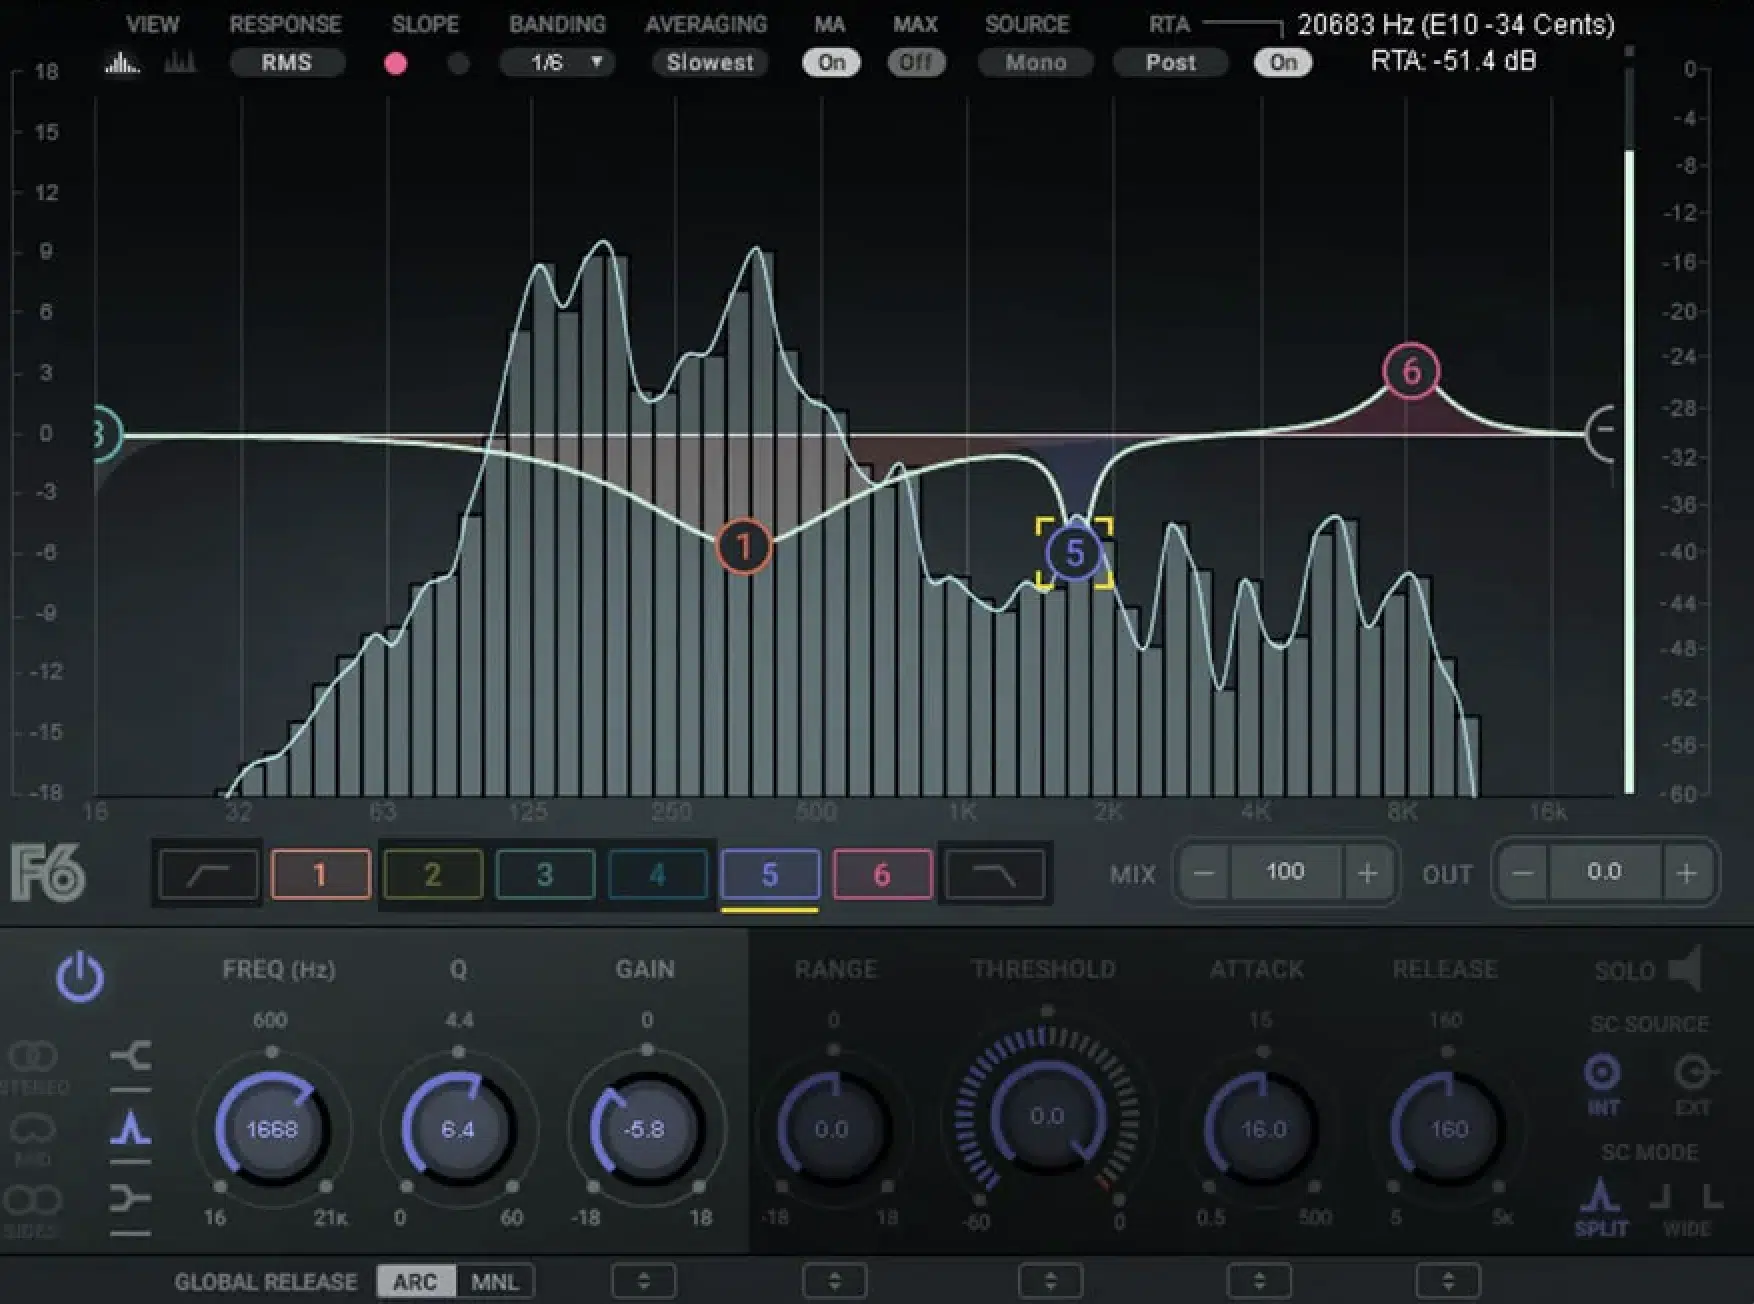
Perfecting the tone of your vocal harmonies starts with EQ, and knowing what to cut or boost can make or break your mix (no two ways about it).
Start by carving out the low mids 一 cut 2–3 dB around 250 Hz using a Q of 1.5 to reduce muddiness in the vocal stack, especially when layering three or more voices.
This gives your main vocal more room and stops phase buildup across the chord tones.
From there, use frequency-specific layering to emphasize the emotional role of each harmony, making sure they all still balance each other out well.
For example, boost 2–3 dB at 4kHz with a wide Q on your highest harmony line to add sparkle, then attenuate 6–8kHz on the lower ones to make them feel darker and more supportive.
This technique is ideal for dense arrangements with multiple vocal lines.
Just don’t forget to notch out clashing frequencies 一 if your vocal melody is bright, roll off highs on the background vocals starting at 9kHz using a gentle shelf.
This helps your vocal harmonies tuck behind the main vocal while still sounding clear.
Also, use dynamic EQ or multiband compression if needed to tame harsh notes that spike when your voices stack.
PRO TIP: Try isolating each vocal harmony into its own bus, then EQing them individually before applying group processing.
This gives you precision over the tone of each harmony part when creating harmony with layered textures or blending dissonant voices against a bright main melody.
9. Dynamic Processing & Levels
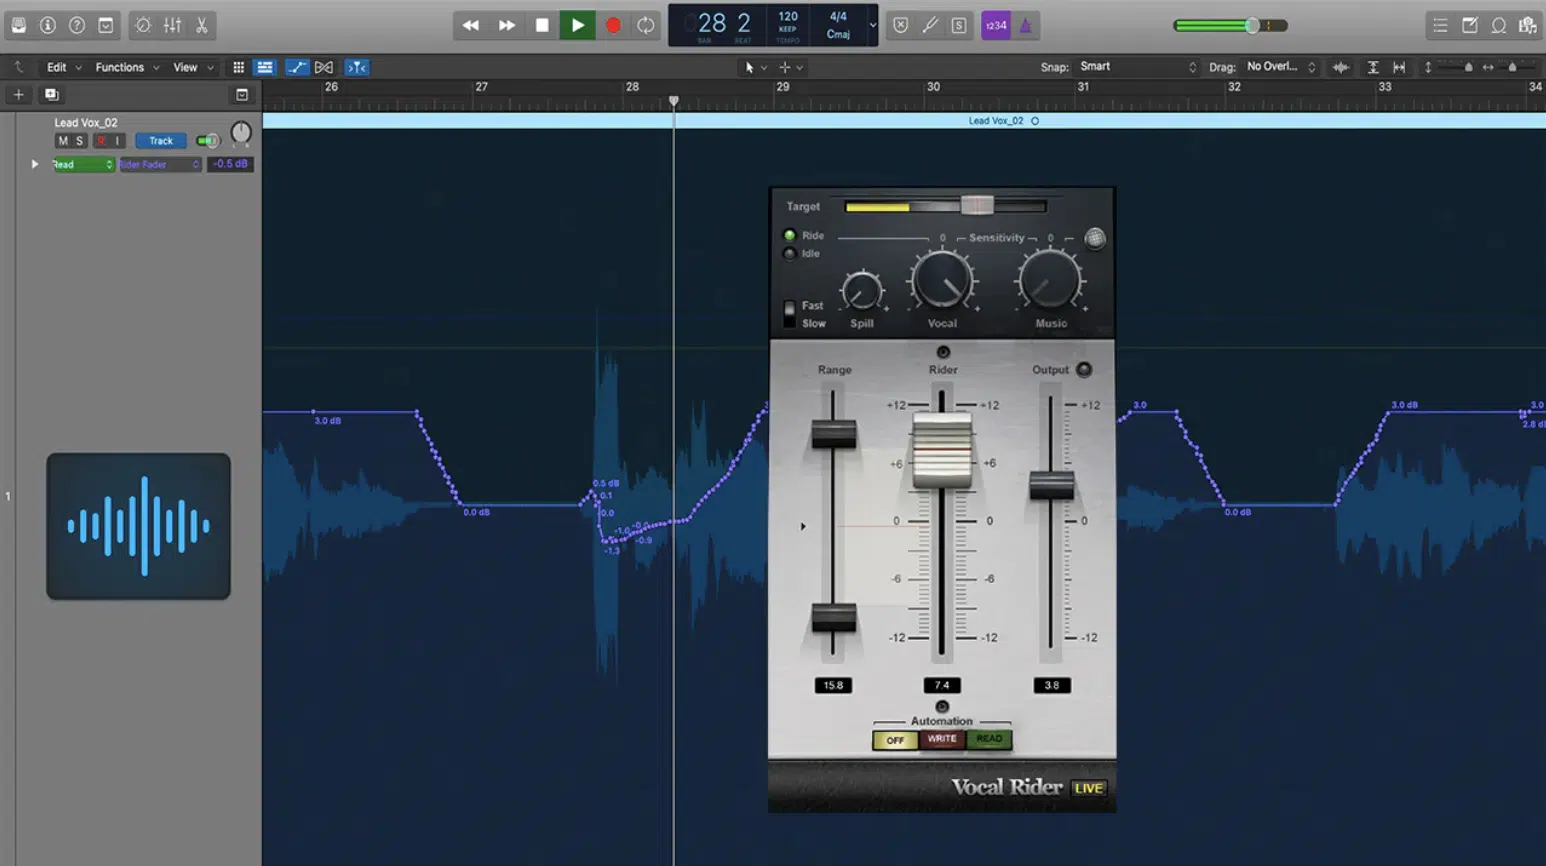
When you’re dealing with stacked vocal harmonies, controlling dynamics is key to making sure your mix stays clear and punchy.
So, you’ll want to start by comparing auto-leveling tools like Vocal Rider or Waves CLA Vocals against manual compression.
For example, Vocal Rider can keep background vocals steady without coloring the sound (set the target range around -12dB and the sensitivity at medium).
But if you want more tonal control, traditional compression works better.
Remember, for vocal harmonies, a ratio of 3:1 with a slow attack (around 20ms) and medium release (60–80ms) can smooth out peaks while keeping the voices breathing naturally alongside the main vocal.
Try using separate compressors per harmony group, especially when you’re layering low, mid, and high vocal stacks to blend across a chord progression.
And don’t forget about de-essing, either…
Use a narrow band around 5kHz–8kHz and set the threshold so only the harshest consonants trigger gain reduction.
Around -25dB usually works well for most harmony lines, especially when they’re sung closer to the mic.
This keeps your vocal harmonies from clashing with cymbals or other high-frequency elements in the instrumental accompaniment.
PRO TIP: Send your vocal harmonies to a dedicated bus and apply group compression at a 2:1 ratio with about 2dB of gain reduction.
This glues the entire vocal arrangement together without squashing the natural dynamics, which makes it much easier to blend behind the main melody while keeping everything tight, right, and on point.
10. Spatial Positioning & Stereo Field

If you’re not aware, getting your vocal harmonies to sit properly in the stereo field is all about spatial planning.
A classic approach that I’m still all about is panning the main harmony lines to -30 and +30, with the main vocal dead center.
For denser vocal stacks, try staggering panning:
- -60 (low harmony)
- -20 (mid)
- +20 (mid-high)
- +60 (high harmony)
This spreads out the sound and avoids frequency overlap between voices.
When it comes to reverb, you’ll want to use a short plate reverb (0.7 to 1.2s decay) on lower background vocals to keep them tucked back, and a longer hall reverb (1.5 to 2.2s) on higher harmonies to lift them into the air.
Blend using pre-delay settings between 30–50 ms to prevent reverb masking the main vocal, especially in tight pop or trap tracks.
Delay can also help with separation. A 1/16th-note slapback delay (40–60ms) on the far-panned harmony parts gives width and groove without cluttering the melody.
NOTE: Use feedback settings around 10–15% for short tails, especially when you’re working in the C major chord or similar brighter tonal centers.
Also, make sure to keep high-pitched vocal harmonies slightly wider and wetter, and low-pitched harmonies drier and more mono.
This is for clarity across your chords and lets the main vocalist shine through.
Just be sure to listen in mono often to make sure you’re not losing certain notes from phase issues because nobody has time for that.
11. Mixing Workflow & Bus Routing
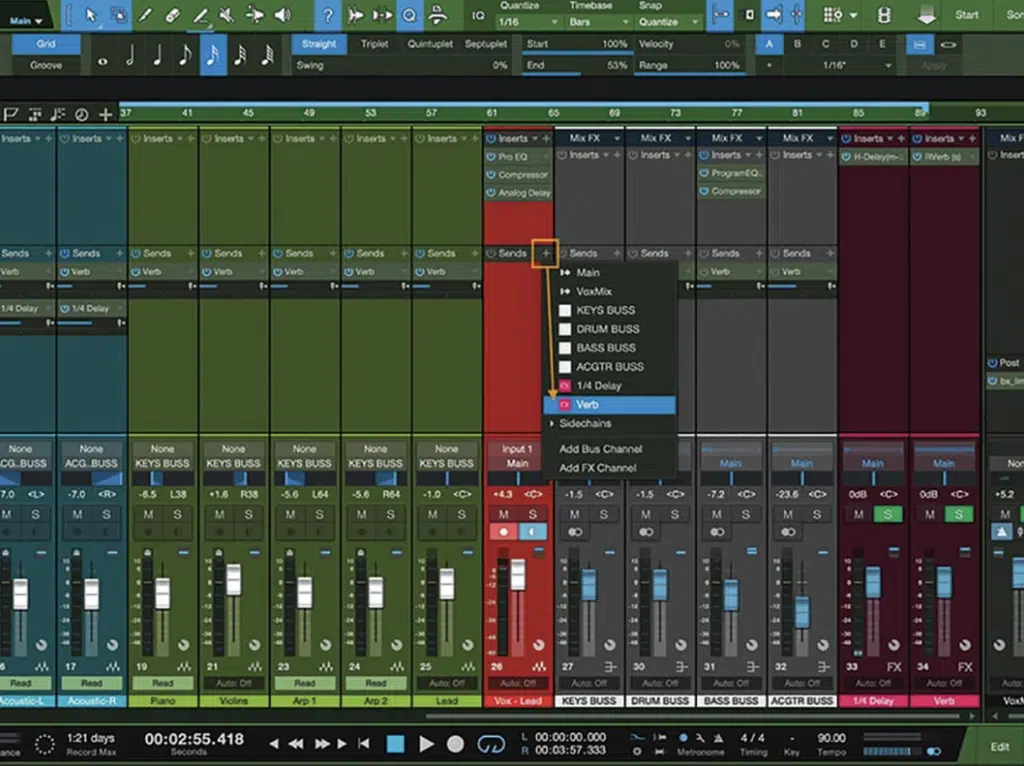
To keep your vocal harmonies consistent across the board, setting up proper bus routing is essential.
Start by sending all your harmony lines to a group bus labeled something like “BGV Bus” or “Harmony Stack.”
From there, apply group EQ, compression, saturation, and reverb to make sure all background vocals blend with the same sound signature.
Yes, even if they were recorded with different voices or mics.
Within your project, divide vocal harmonies based on song section (verse, chorus, and bridge) and assign separate sub-buses if needed.
This makes it easier to automate volume changes or EQ differently per section 一 especially when your melody evolves across multiple chord progressions.
For compression on the bus, use something subtle: 2:1 ratio, -2dB threshold, fast attack (10ms), and release around 80ms.
Then apply a touch of saturation (0.5–1.5%) using something like Decapitator or FabFilter Saturn 2 to glue the harmonies together and add depth without making them too aggressive.
PRO TIP: Use pre-fader sends to send your vocal harmonies to time-based FX like delay and reverb, keeping dry/wet balance independent.
This way, when you automate volume rides on the main harmony part, the effects trail still stays consistent, helping music producers like yourself highlight those irresistible emotional transitions across the song.
Side note, if you want the best techniques for improving your music production workflow, I got you covered.
12. Genre‑Specific Harmony Tricks

Different genres treat vocal harmonies in unique ways, and knowing how to manipulate your vocal arrangements is a big part of building your harmonizing skills.
In pop, three-part stacked harmonies are common (root, third, and fifth) often recorded by the main vocalist and layered with formant tweaks to hype up different voices.
Think Ariana Grande or Dua Lipa: bright, clean, tight stacks built around major or minor chords.
In R&B or soul, you’ll often hear vocal harmonies that play with:
- Dissonant harmonies
- Seventh chords
- Even complex harmonies built on chord extensions
Try creating a harmony part that lands on a 9th or 11th, and sing it slightly behind the beat with softened dynamics.
This creates tension that feels emotional and lush, especially under slow melodies.
For house or electronic music, parallel harmonies that don’t necessarily follow the chord tones are common.
You might have a vocal melody that loops, while a static vocal stack underneath holds one sustained note across multiple underlying chords.
This way, you’ll get that hypnotic, trance-like effect that’s super fire (think: dope ambient layering that serves more as a texture than a melodic lead).
PRO TIP: If you’re producing hip-hop or trap, try layering a pitched-down harmony an octave below the main vocal and compressing it hard (5:1 ratio, 6dB gain reduction) for a thick, gritty foundation.
Then, create contrast by layering a falsetto vocal harmony an octave above with heavy Auto-Tune (Retune Speed 5) to nail that popular music vocal effect.
It’ll give you that moody, modern bounce that people are super into right now.
13. Stem Separation & Vocal Extraction
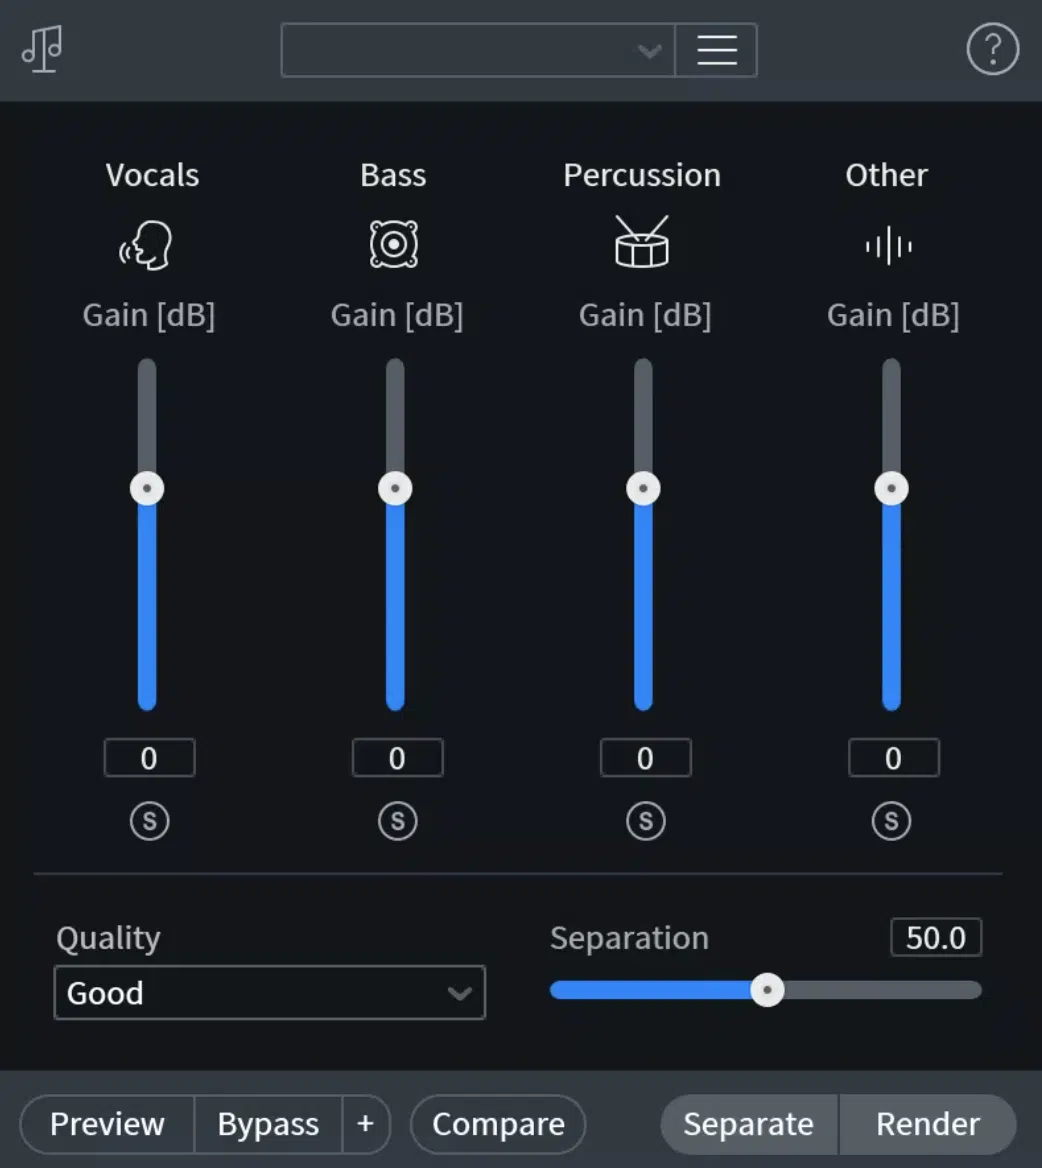
Sometimes, the best vocal harmonies aren’t recorded, they’re extracted.
With super innovative AI tools like iZotope RX, Lalal.ai, or Splitter.ai, you can isolate vocals from a stereo track, even if you don’t have access to the raw multitrack session.
This makes it possible to unmix existing vocals via AI for harmony recreation, then build new parts around them.
For example, once you isolate a main vocal using RX’s Music Rebalance tool, you can drop it into Melodyne, identify the melody, and then shift the extracted audio to build your own harmony line.
Try pitching the duplicate vocal up a third and applying a -2 semitone formant shift — this helps the voice sound like a different singer, not just a duplicate.
After that, you can re-harmonize extracted stems by aligning them with the current chord progression of your track.
If the original song is in C major, but your remake is in A minor, transpose the vocal harmonies down three semitones and double-check that all chord tones still sit correctly under the main melody.
PRO TIP: Always solo the mid and side channels to check for phase smearing after extraction.
If needed, use a linear phase EQ to carve out 1–2dB in the 400–700 Hz range to keep the harmony part sitting clean under the main vocal without making the sound feel hollow or processed.
14. Advanced Editing & Comping Techniques
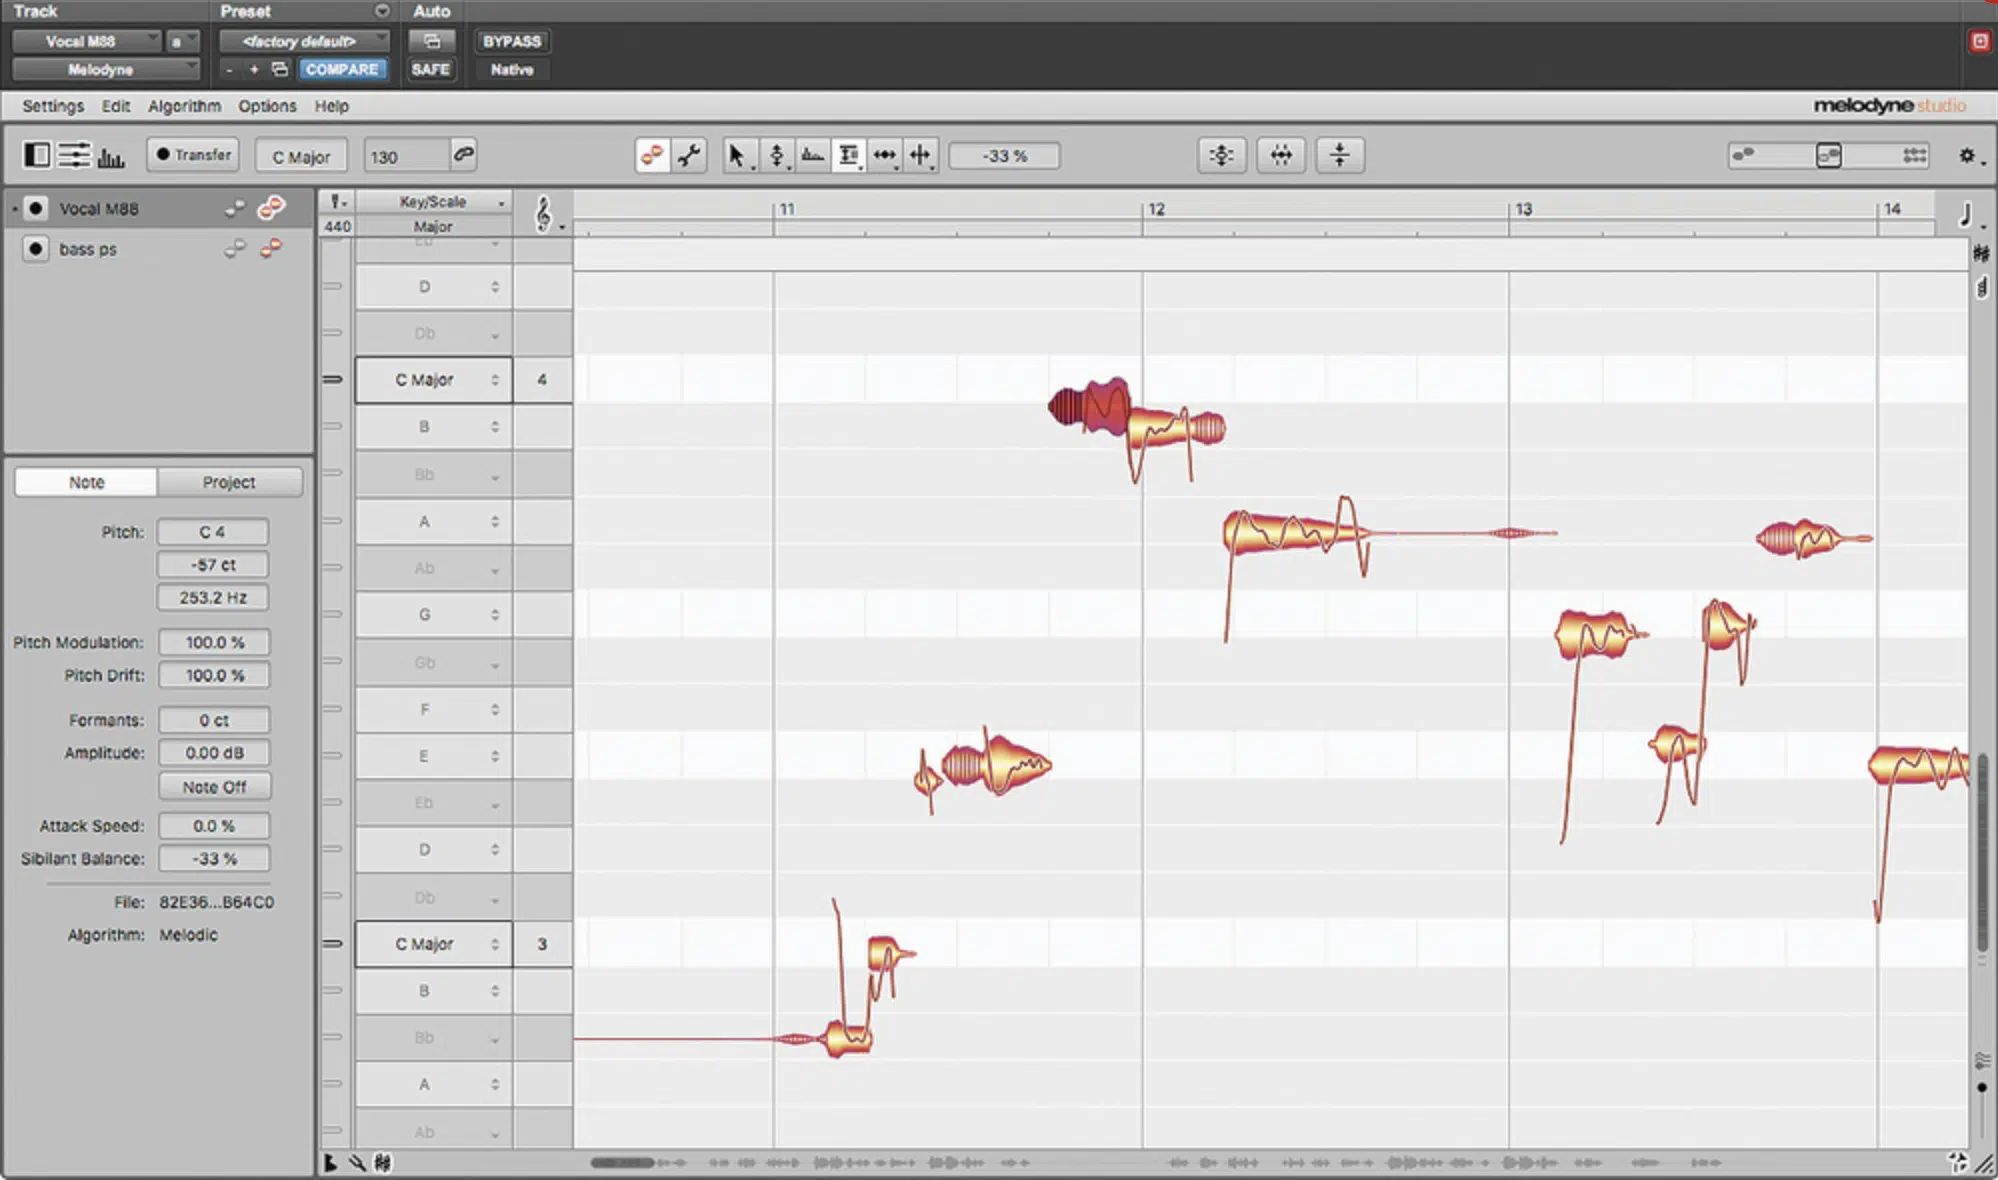
Getting tight, emotional vocal harmonies isn’t just about the singing, it’s about how you edit them after the fact.
Using Melodyne, comp across multiple takes of the same harmony line by choosing sections where pitch, timing, and tone feel fluid as hell.
Keep transitions smooth by editing in descending order:
- Tackle pitch
- Then timing
- Then gain
When splicing together the best vocal performances for harmony depth, watch for sibilant consonants (like “s,” “t,” and “sh”) that don’t align between layers.
Fade those in manually or apply gentle de-essing to make them sit naturally.
A fast attack (1–3ms), high ratio (6:1), and threshold around -18dB usually keeps them in check on background vocals.
To keep phase tight across a vocal stack, line up your notes down to the sample level in your digital audio workstation.
Zoom in and snap transients to the grid if needed 一 even a 5ms misalignment between two voices singing the same melody can sound smeared.
When done right, you get perfect harmony with no weird comb filtering or loss of definition.
PRO TIP: Use region gain or clip-based automation to level out phrases before sending vocal harmonies to the bus compressor.
This avoids over-compressing one loud take and helps you create a balanced, professional-sounding blend, especially when stacking 4 or 5 voices in a full vocal arrangement.
15. Creative Effects & Texture Design
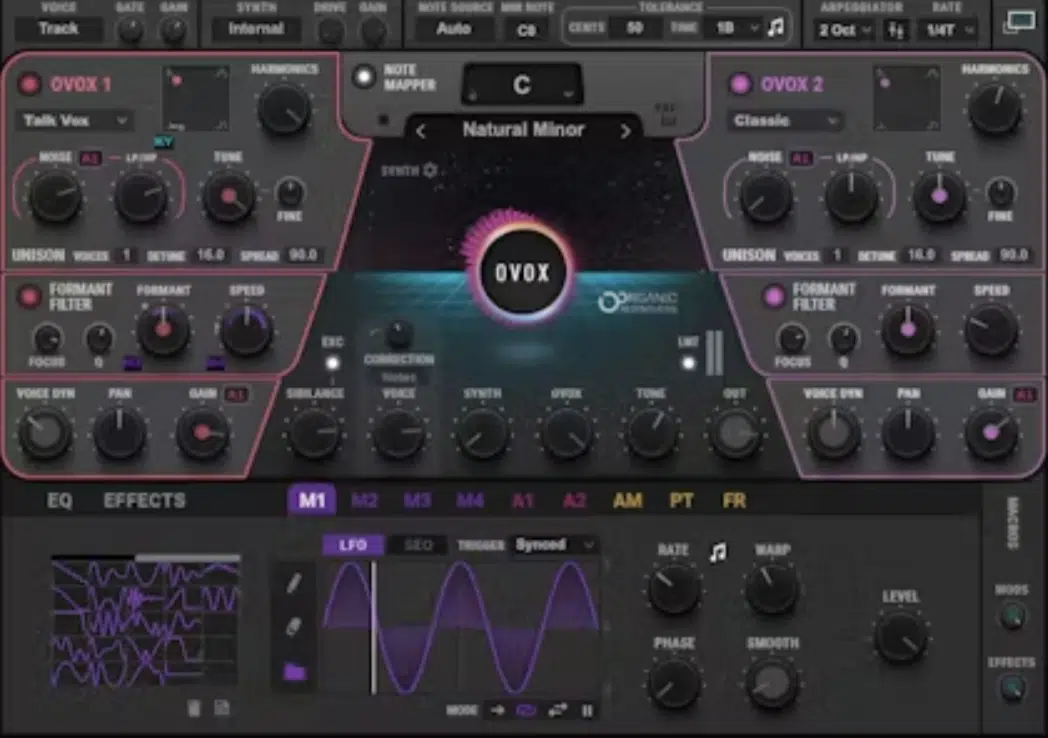
Once your vocal harmonies are clean and balanced, it’s time to have some fun.
Start with modulation effects 一 adding chorus, flanger, or phaser layering to select harmony parts creates movement and stereo interest.
For example, try applying a flanger with a 0.25Hz rate and 60% feedback to the mid harmony, which adds just enough swirl without overpowering the main vocal.
For texture, layer in additive synthesis overlays using soft sine or triangle waves that subtly follow the vocal melody.
Use a MIDI pitch tracker like Waves OVox or Kilohearts Pitch Shifter to convert your vocal line into MIDI, then route that to a simple synth with a 200 Hz–1 kHz range to reinforce certain intervals or notes within your chords.
Another trick I like is using reverse reverb tails…
Simply bounce out a vocal harmony stem, reverse it, apply a long plate reverb (3.5–5s), then reverse that audio again to create a swelling lead-in into the main melody.
This is especially dope for pop drops or moody R&B transitions where you want to add depth without adding more voices.
PRO TIP: Parallel process your vocal harmonies with a saturated effects chain (try Decapitator > EchoBoy > Valhalla Shimmer) and blend it in at 10–15% wet using a send.
This will keep the melody intelligible while letting you introduce movement, grit, and tonal flavor, all without muddying up the track or losing clarity in your chord tones.
16. Stereo & Width Maximization

To make your vocal harmonies sound MASSIVE without muddying the track, use doubling echo and micro‑delays to widen them beyond the main vocal.
For a tight, modern sound, duplicate your harmony part, delay the copy by 15ms left and 25ms right, and lower each by 3dB.
This creates a pseudo-doubled vocal stack that feels wide but stays in sync with the rhythm.
Use the Haas effect for separation by panning one harmony hard left with a 10–20ms delay, and another hard right with zero delay.
This basically gives you instant stereo width without reverb.
To kick it up a notch, add a 5–10% stereo chorus on the mid harmonies to soften transitions between certain intervals, especially when using dissonant harmonies or singing against more adventurous chord tones.
Just make sure that you’re checking phase constantly 一 flip one voice polarity and collapse to mono to ensure you don’t lose any sing notes in playback.
PRO TIP: If you’re working in any given key, identify which voices can be widened without disrupting the main melody or underlying chords.
So, when producing for dense genres like pop, where every inch of stereo space matters, this one is absolutely perfect.
17. Harmonies as Pads and Textures
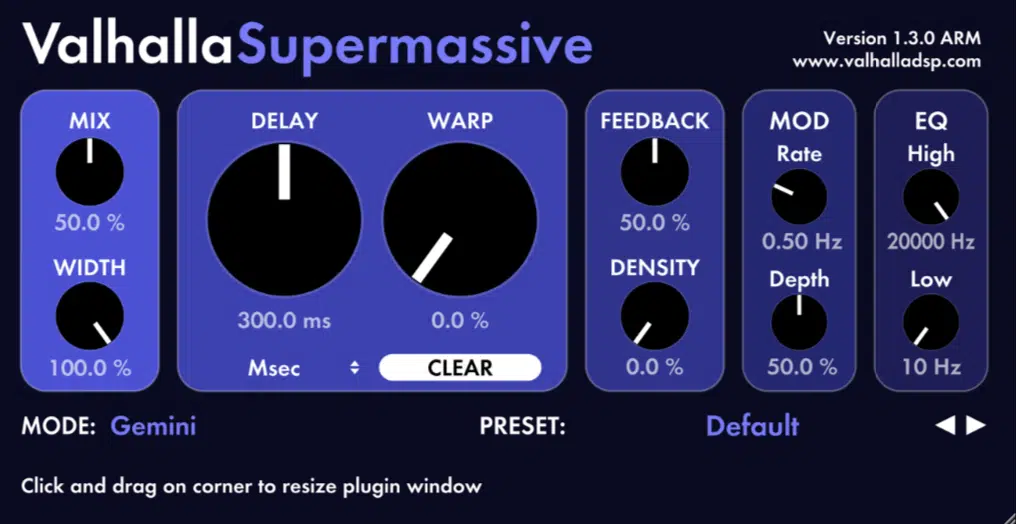
Sometimes the best vocal harmonies don’t sound like vocals at all because they actually act more like textures.
So, what you’ll want to do is start by using harmonies to build ambient pads:
- Take a sustained harmony line
- Time-stretch it 300%
- Add reverb with a 7-second tail
- Filter the top end down to 7kHz with a soft low-pass curve
This transforms your voices into an airy sound bed that blends perfectly behind your main vocalist during intros, breakdowns, or bridge sections (dealer’s choice).
You can also try layer blending voices as atmospheric layers by stacking 2–3 different singers, detuning each by 10 cents, and panning them wide.
Then make sure to apply granular reverb like Valhalla Super Massive.
If your melody is built around a major scale, try layering sustained 3rds and 6ths from the C major chord to keep things consonant while still adding movement underneath.
PRO TIP: And the last pro tip I’ll leave you with is to bounce the full vocal harmony pad into audio and reverse it. Then, align the tail so it swells right into the next chord progression or melodic phrase.
It’s one of the fastest ways to add depth and emotion using your own voice as a tool for both music theory and sound design (big perk).
Final Thoughts
When it comes to leveling up your music, knowing how to shape, place, and fine-tune your vocal harmonies gives you a serious edge.
That’s because the difference between a decent vocal and a killer immersive experience is all about how those harmonies support, enhance, and interact with the main vocal.
And once you’ve got the right tools, techniques, and tricks under your belt, you’re no longer just guessing — you’re creating super emotional moments people will remember.
From stacking takes to blending AI-powered textures, every move you make adds depth and dimension that connects with your listeners.
And whether you’re producing pop, trap, or even ambient soul, mastering your vocal harmonies will kick things up a notch every single time.
At the end of the day, the more you refine your skills, trust your ear, and keep experimenting, the closer you’ll get to creating the kind of music that freakin’ rocks.
So just make sure to always experiment/play around, learn new techniques, think outside the box, and always stay true to your signature sound.
Until next time…


Leave a Reply
You must belogged in to post a comment.