Vocals are the crown jewels in the realm of music production.
That’s why knowing how to EQ vocals correctly is vital 一 it can truly make or break your track.
EQing vocals is an art, with its canvas being the frequency spectrum.
It involves highlighting the vocal’s strengths while reducing any harsh or overbearing elements, ultimately striving for a sound that fits perfectly into your mix.
This process requires knowledge, intuition, and a deep understanding of sound and frequency.
Luckily, we’ll be breaking it all down for you today.
In this comprehensive guide, we’ll delve deep into the subject, sharing expertise and insights gained from years of experience in the industry.
We’ll cover:
- Understanding the basics of Vocal EQ ✓
- The essential steps of EQing vocals ✓
- The vocal recording process, frequency range, and bass frequencies ✓
- Vocal EQ settings ✓
- Detailed analysis of male & female vocals ✓
- How to tackle common vocal EQ challenges ✓
- Expert tips & tricks for EQing vocals ✓
By the end of this guide, you’ll be equipped with the knowledge and techniques about how EQ vocals like an absolute pro.
You’ll understand how to work with different vocal types, deal with common challenges, and make informed decisions during the EQ process.
So, let’s dive in…
Table of Contents
- How to EQ Vocals: Understanding the Basics
- Parametric EQ & Dynamic EQ
- EQing Vocals: The Essential Steps
- The Art of EQing Vocals
- An In-depth Analysis of Male and Female Vocals
- Overcoming Muddiness & Harshness in Vocals
- Dealing with Vocals that Sound Unnatural or Sound Thin
- The Proximity Effect
- Cutting Problematic Frequencies
- Boosting Frequencies to Enhance Vocal Sound
- EQing Vocals in the Mixing Stage
- Bonus: 2 Pro Tips
- How To EQ Vocals: Final Thoughts
How to EQ Vocals: Understanding the Basics
Let’s get started by covering what vocal EQ is, the frequency spectrum, high-pass filters, low-pass filters, and more.
-
What is Vocal EQ?
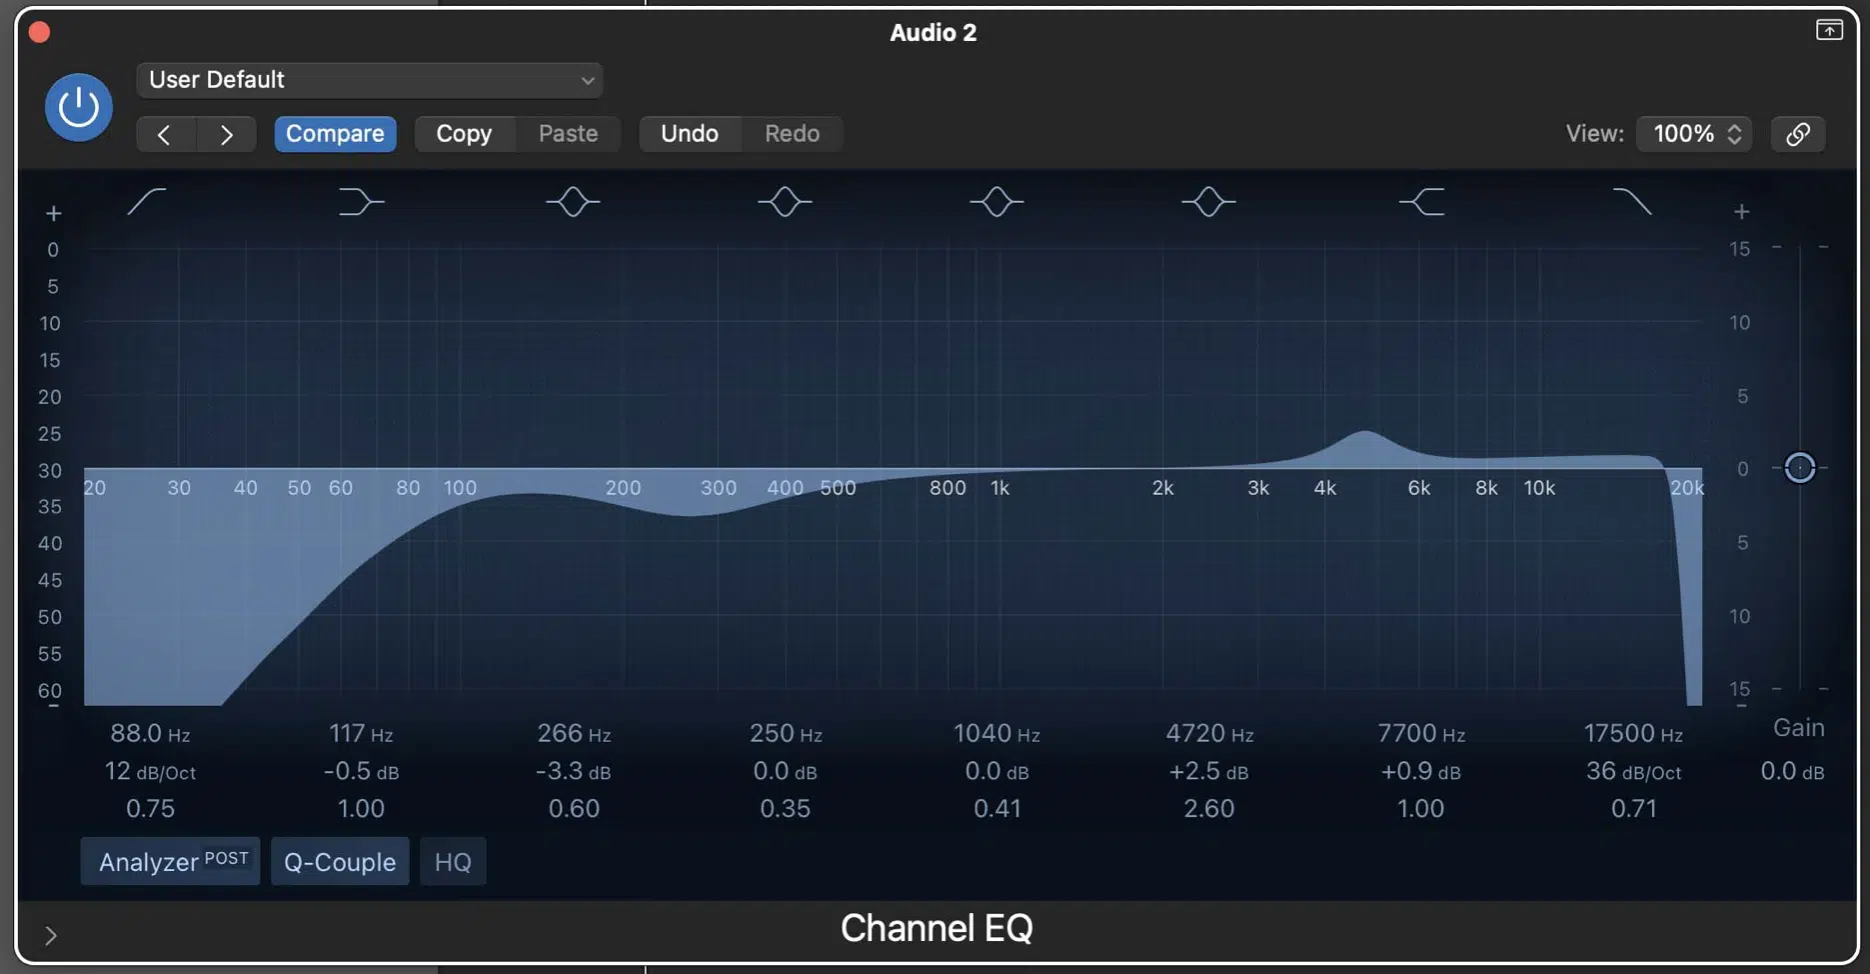
Vocal EQ is a crucial aspect of music production that involves the manipulation of specific frequency ranges in vocal recordings.
It’s the key to achieving a clear, balanced vocal sound that cuts through the mix without clashing with other elements.
Your musical journey isn’t complete without mastering how to EQ vocals effectively.
Diving a bit into the technical side, the process of EQing vocals involves:
- Boosting certain frequencies
- Cutting certain frequencies
- Attenuating certain frequencies
The primary goal is to enhance the desirable aspects of the vocal sound and suppress those parts that are not needed or are interfering with the overall mix.
Remember, there’s no one-size-fits-all setting when it comes to Vocal EQ…
The right EQ settings vary based on the nature of the vocals and the genre of music.
Remember to always trust your ears, have patient, and always be open to experimentation.
-
Frequency Spectrum & The Human Voice
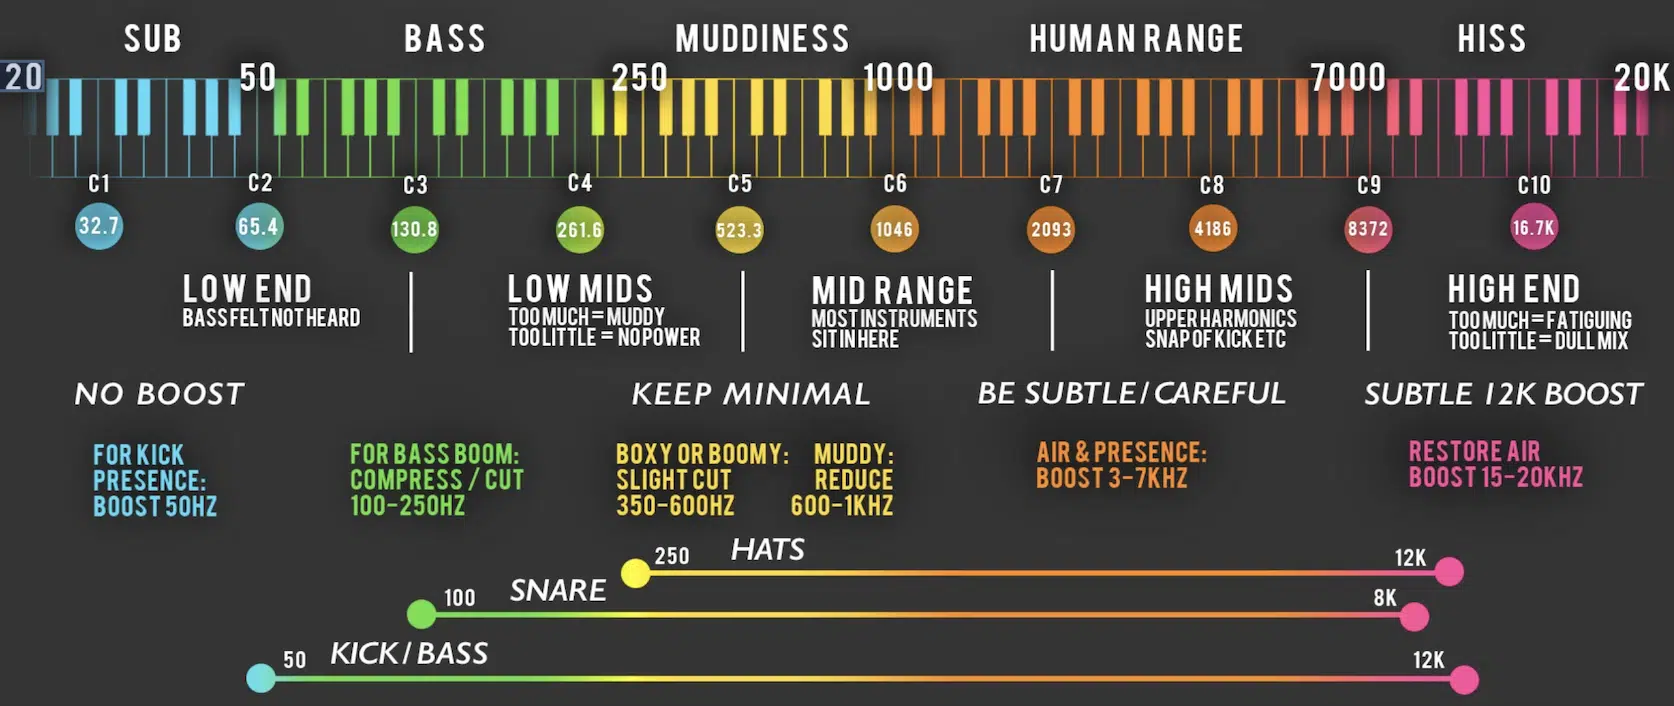
The human voice falls within a broad frequency spectrum, and it’s essential to comprehend this to EQ vocals effectively (and when recording vocals).
Each voice is a complex mix of fundamental frequencies and harmonics that create unique characteristics.
These frequencies are key to understanding the vocal sound and how to manipulate it using EQ.
For a deeper grasp, consider using a spectrum analyzer tool.
This tool displays the frequency content of your audio signal and helps you visually identify which frequencies are most prominent in your vocal track.
The fundamental frequency of the human voice usually falls between 100 Hz and 12 kHz.
- Male vocals tend to be lower (100 Hz to 6 kHz)
- Female vocals tend to be higher (350 Hz to 17 kHz)
But remember, these are rough estimates.
Every voice is unique, and you should always listen carefully to determine the frequency range of the specific vocals you’re working with.
-
High-pass Filters & Low-pass Filters
Understanding how to use high-pass and low-pass filters is crucial to shaping your entire vocal sound.
These are the two most basic types of EQ filters and serve as powerful tools in your EQ toolkit.
A high-pass filter (HPF) 一 Allows frequencies above a certain point to pass through while attenuating (reducing) the frequencies below that point.
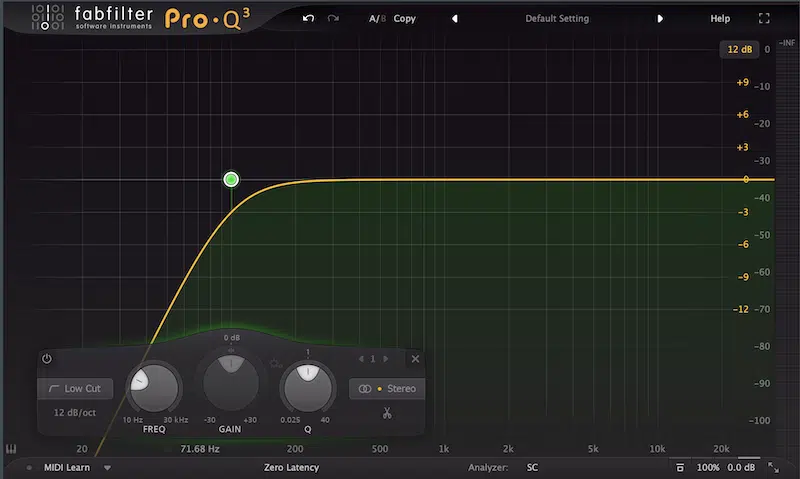
For example, applying a high-pass filter at 100 Hz on a vocal track would reduce the impact of any frequencies below 100 Hz.
This cleans up any low-frequency rumble that might muddy the vocal sound.
A low-pass filter (LPF) 一 Allows frequencies below a certain point to pass through, attenuating frequencies above that threshold.
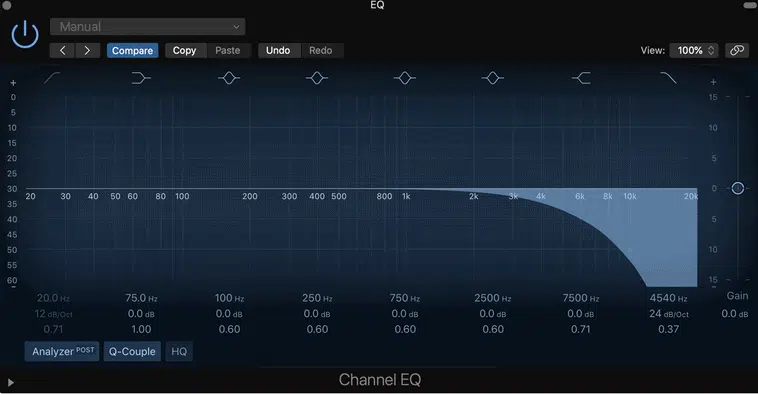
A low-pass filter is less commonly used on vocals, but it can be handy for taming excessively bright or harsh vocals.
-
The Vocal EQ Chart & Vocal EQ Settings
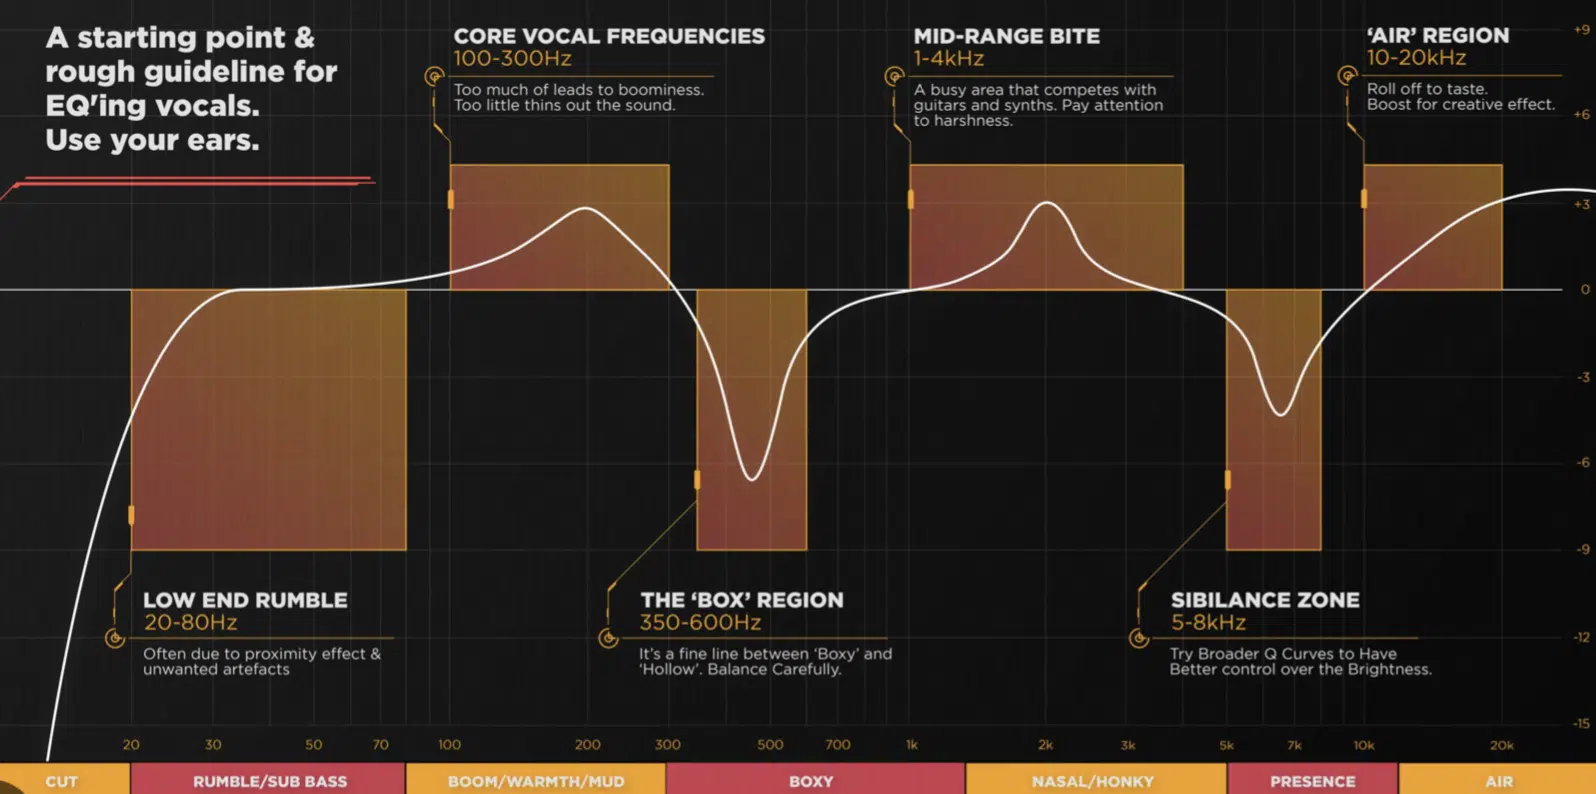
Visual aids like a vocal EQ chart can help demystify the process of EQing vocals and vocal EQ settings.
These charts provide a generalized frequency range for different characteristics of the human voice; guiding where you might want to boost or cut to achieve certain tonal effects.
It’s not a vocal EQ cheat sheet, but more of a starting point for your EQ decisions.
For example, the fundamental frequencies of vocals usually lie in the 100 Hz – 1 kHz range.
Boosting in this area can add fullness, but be careful: too much boost might result in a muddy sound.
- The 1 kHz – 2 kHz range 一 Often adds presence and clarity.
- The 2 kHz – 6 kHz range 一 Can increase definition and intelligibility.
Frequencies above 6 kHz add airiness and can brighten up the vocals.
However, too much boost might lead to sibilance or a harsh sound.
Remember, your EQ settings for vocals will depend on multiple factors, like the key of the song, the genre, the singer’s vocal style, and the arrangement of other instruments in the mix.
Always use a vocal EQ chart as a general guide, not a strict rulebook.
Your primary aim when setting your EQ should be to shape the vocals in a way that they blend well with the overall mix.
If you’re just starting out as a music producer, simple cuts and boosts can make a world of difference, but remember to EQ carefully.
Over-EQing can make the vocal’s sound unnatural.
Parametric EQ & Dynamic EQ
Two types of equalizers you’ll frequently use are parametric EQ and dynamic EQ.
Understanding the functionality of these EQ types can significantly enhance your vocal mixing skills.
- Parametric equalization (EQ) is the most common type of EQ used in music production.
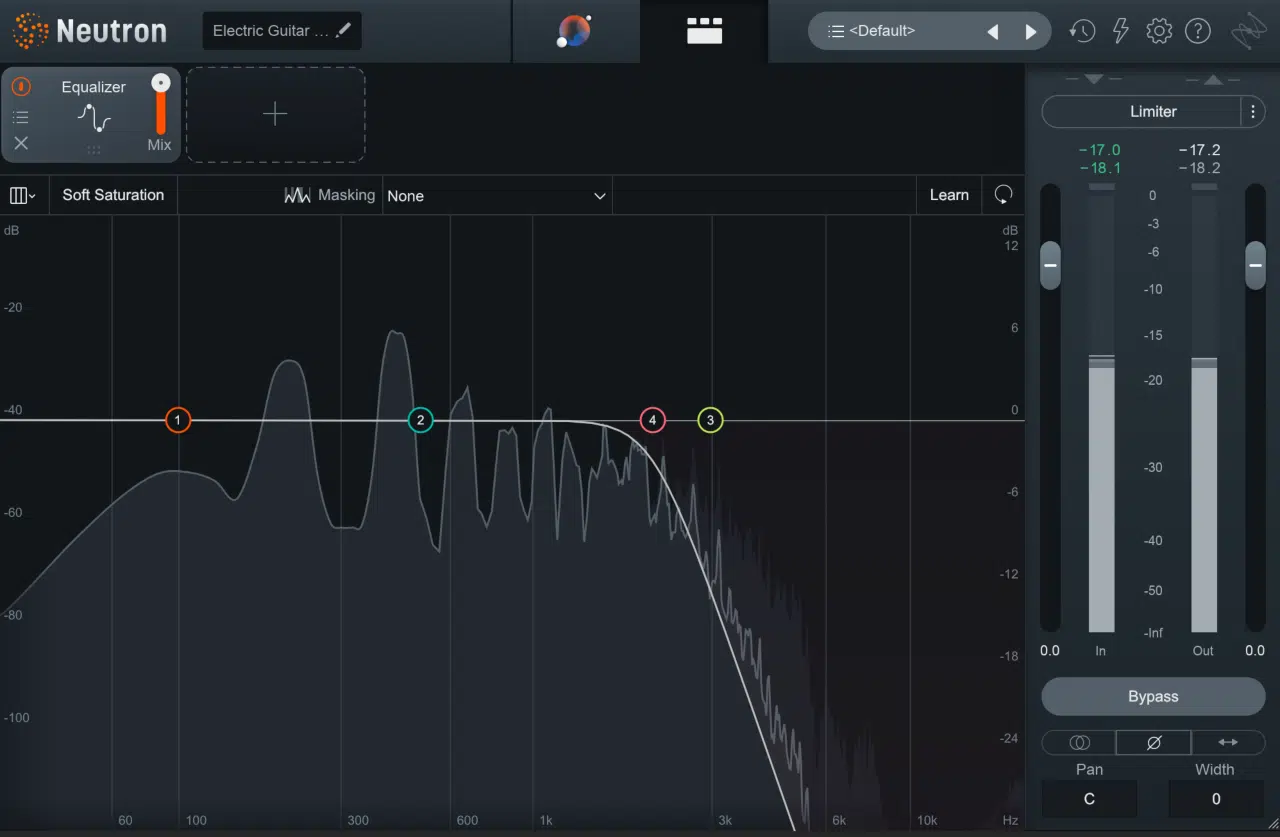
Parametric EQ gives you control over the center frequency and Q (quality factor that determines the bandwidth or range of frequencies affected).
As well as the amount of boost or cut applied.
This fine level of control is perfect for carving out a space for your vocals in the mix.
- Dynamic EQ, on the other hand, is a more recent advancement.
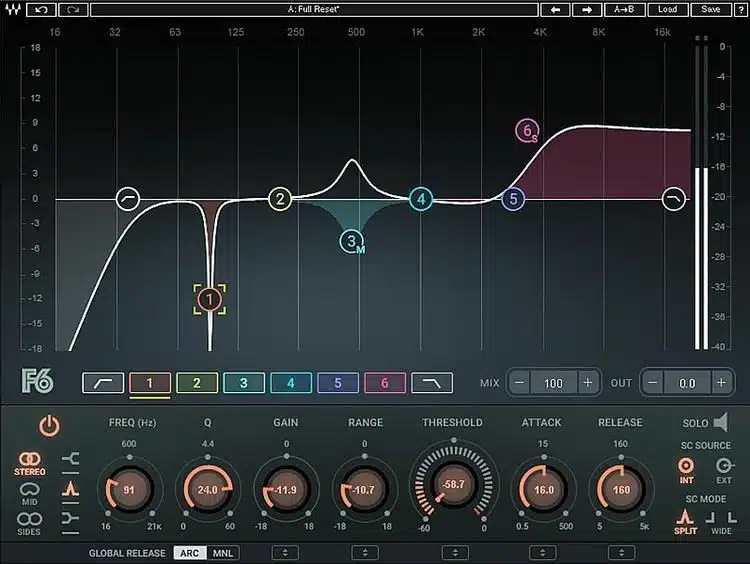
It’s like a combination of an EQ and a compressor.
Dynamic EQ allows you to dynamically adjust the gain of a specific frequency band depending on the level of the input signal.
It’s a versatile tool that can handle tasks such as:
- De-essing (removing harsh ‘s’ sounds).
- Controlling the proximity effect (the increase in low frequencies when a vocalist gets very close to the microphone).
This is the beginning of our journey to mastering vocal EQ.
EQing Vocals: The Essential Steps
The art of EQing vocals isn’t just about twisting knobs and adjusting sliders.
It requires a strategic approach to achieve a polished and professional sound, as you’ll soon see.
So, let’s dive into the best EQ settings.
-
Adjusting the High & Low Frequencies
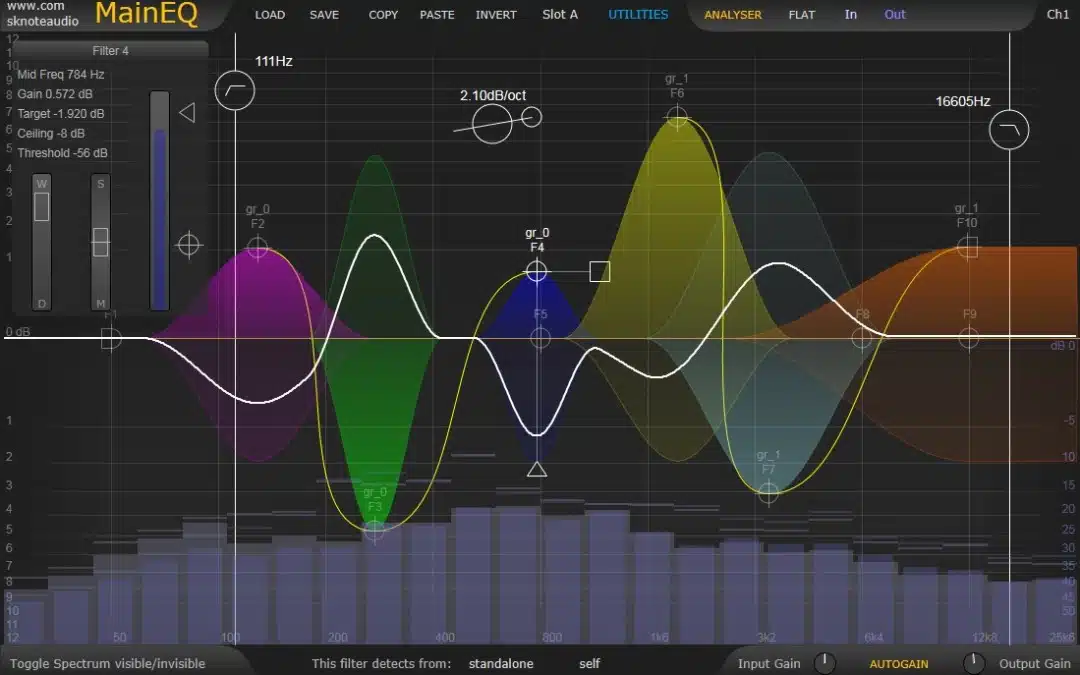
After identifying the vocal frequency range, the next step is adjusting the high and low frequencies.
This process often involves using a high-pass filter to remove low frequencies that aren’t contributing to the vocal sound.
These frequencies often come from:
- Background noise
- Mic pops
- Even the singer’s breath
On the other end of the spectrum, tweaking the high frequencies can help your vocals shine.
A gentle boost with a high-shelf filter above 6 kHz can add an airy quality to your vocals.
NOTE: Be careful not to overdo it, as too much high-frequency boost can lead to a harsh, sibilant vocal sound.
Remember to adjust these frequencies in the context of the mix…
Soloing the vocal track while EQing can lead to decisions that sound good on their own, but not when the track is played with the rest of the mix.
Striking the right balance is key.
-
Understanding When to Boost or Cut Frequencies
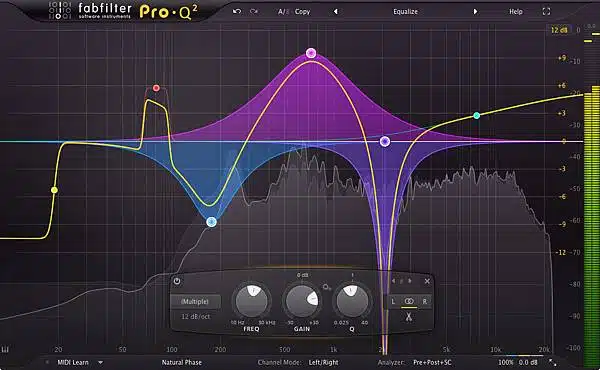
Understanding when to boost or cut frequencies in your vocals can make a significant difference in your mix.
- Boosting 一 Involves increasing specific frequencies to highlight desirable aspects of the vocal.
- Cutting 一 Involves reducing specific frequencies to minimize problem frequencies/unwanted frequencies.
Boosting can be used to add presence or airiness to vocals, enhance clarity, or even bring out the character of a particular voice.
For example, a gentle boost around 5 kHz can add presence to your vocals, making them stand out in the mix.
On the other hand, cutting is often used to:
- Reduce muddiness
- Remove room resonances
- Control harsh frequencies in the vocal track
A common technique is to cut in the lower frequency range (200 Hz and below) to reduce muddiness.
Cutting around 3 kHz can help tame harshness.
While there’s a place for both boosting and cutting in the EQ process, one common piece of advice is to cut more than you boost.
This approach (known as subtractive EQ) is based on the idea that removing problematic frequencies often leads to a more natural-sounding result than adding more of what’s missing.
-
Using a High-Shelf Filter
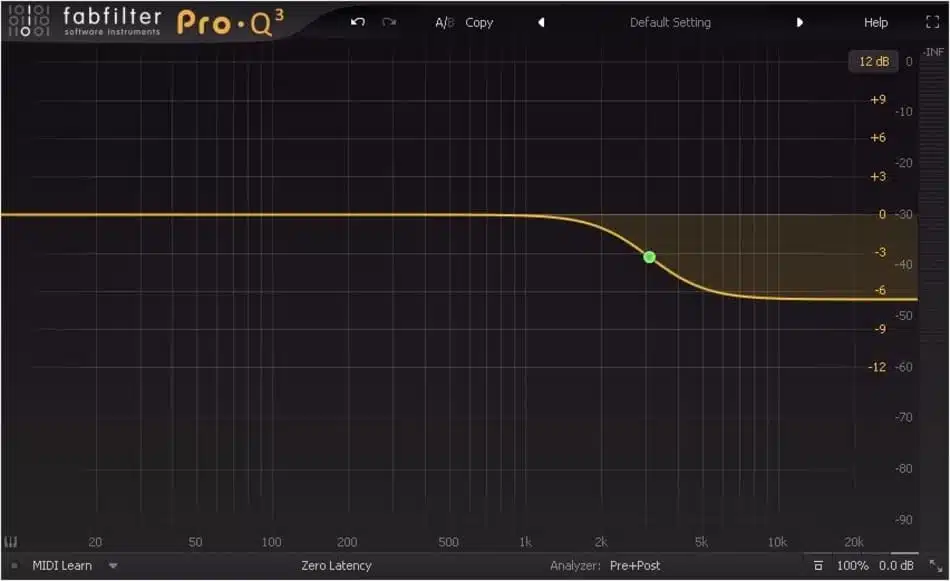
A high-shelf filter is another valuable tool for EQing vocals.
This type of filter allows you to boost or cut all frequencies above a specified frequency point, like the shelf in a bookcase.
It’s great for adding brightness and airiness to vocals or taming overly bright vocal tracks.
For example, if your vocals sound dull or lack presence, you can use a high-shelf filter to boost frequencies above 6 kHz.
This can add an airy, breathy quality to the vocals 一 helping them shine in the mix.
But remember, subtlety is key…
A little goes a long way, and overdoing it can make your vocals sound harsh and unnatural.
On the flip side, if your vocals are too bright or harsh, a high-shelf filter can be used to attenuate the high frequencies.
This can help to soften the vocals and blend them better into the mix.
Always adjust in context with the rest of the mix, and remember that what sounds good soloed may not work well in the mix.
The Art of EQing Vocals
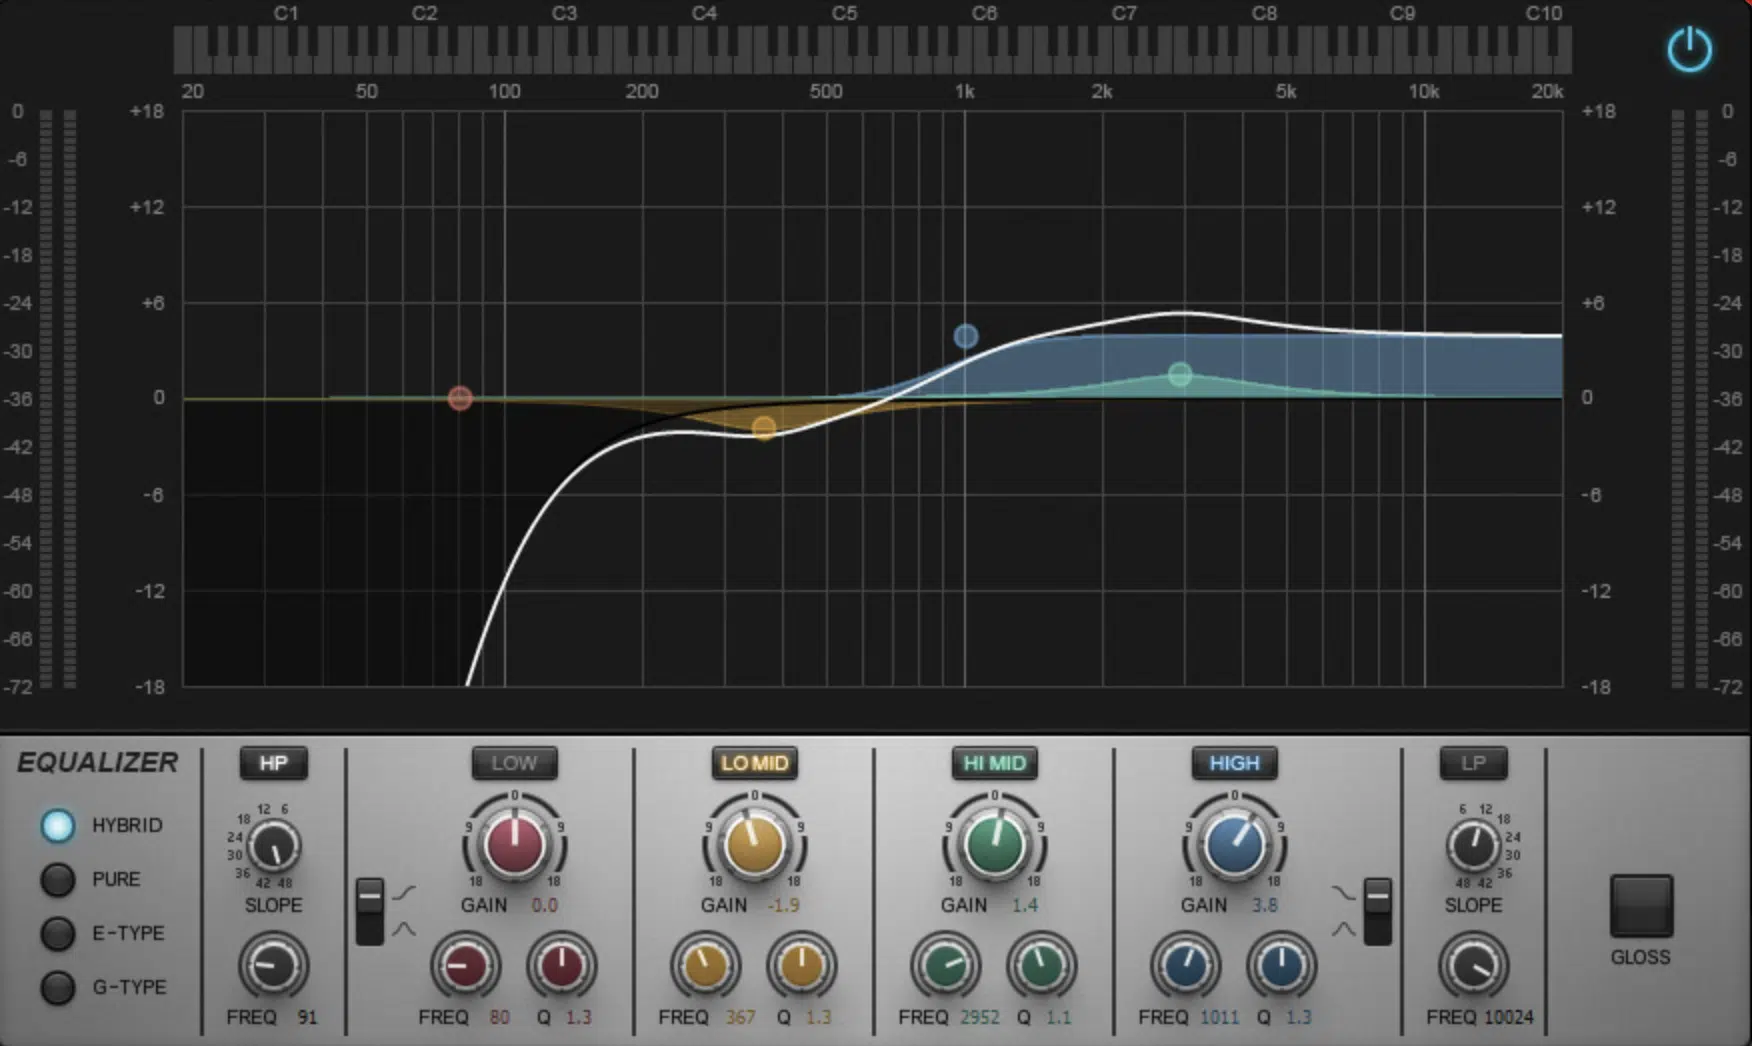
The art of EQing vocals is about more than just adjusting frequencies; it’s about achieving a balance where the vocals shine without overwhelming the rest of the mix.
This balance is achieved through a process of careful listening, subtle adjustments, and constant refinement.
Step #1 一 It’s important to EQ vocals in the context of your entire mix.
This allows you to make decisions based on how the vocals interact with other elements in the mix, rather than how they sound in isolation.
For example, you might need to cut certain frequencies in your vocals to avoid clashing with other instruments.
Yes, even if those frequencies sound good on their own.
Step #2 一 Refine your EQ decisions.
This might involve adjusting the Q value on your parametric equalizer to narrow or widen the bandwidth of your boosts or cuts.
It might also involve adjusting the gain of your boosts or cuts or even adding or removing EQ points.
Step #3 一 Always remember to take regular breaks to rest your ears.
Our ears can quickly get accustomed to certain sounds, a phenomenon known as ‘ear fatigue.’
Taking regular breaks helps reset your ears, allowing you to make more accurate and precise EQ decisions.
An In-depth Analysis of Male and Female Vocals
The human voice is an incredibly diverse instrument, and male and female voices each have their unique characteristics.
Understanding these differences is crucial when it comes to EQing vocals effectively.
-
The Male Vocal: How To EQ Vocals

When EQing male vocals, there are a few general tips that can help you shape a more balanced and polished sound.
Firstly, to add depth and warmth to male vocals, you might consider a subtle boost in the low-mid frequencies (around 100-300 Hz).
However, boosting too much in this range can lead to a muddied or boomy sound, so it’s important to use this technique sparingly.
Male vocals can sometimes lack presence or definition in a busy mix.
To address this, a gentle boost in the presence range (around 3-6 kHz) can help the vocals cut through more effectively.
NOTE: Be cautious, though, as boosting too much in this area can lead to a harsh or brittle sound.
Finally, to add some air or brightness to male vocals, you could consider a high-shelf boost above 10 kHz.
However, not every male vocal needs this, and it’s crucial to make decisions based on the specific vocal track you’re working with.
Always listen in context with the mix, and remember that subtle adjustments often yield the best results.
-
The Female Vocal: How To EQ Vocals

EQing female vocals require a somewhat different approach to male vocals due to the higher fundamental frequency range.
One common issue with female vocals is harshness or sibilance in the upper-mid to high frequencies (around 3-7 kHz).
A careful cut in this area can help manage these issues 一 creating a smoother, more pleasing vocal sound.
Despite their natural brightness, female vocals can sometimes benefit from a boost in the high frequencies.
A high-shelf boost above 10 kHz can add air and sparkle to the vocals, enhancing their presence in the mix.
Similar to male vocals, it’s important to be subtle with these boosts to avoid introducing harshness or imbalance to the mix.
In the lower frequencies, a high-pass filter can be used to remove unnecessary low-end information that could seriously muddy up the mix.
NOTE: Female vocals generally don’t carry much useful information below 200 Hz.
Therefore, setting a high-pass filter in this area can help clean up the vocal track without sacrificing any key characteristics.
Overcoming Muddiness & Harshness in Vocals
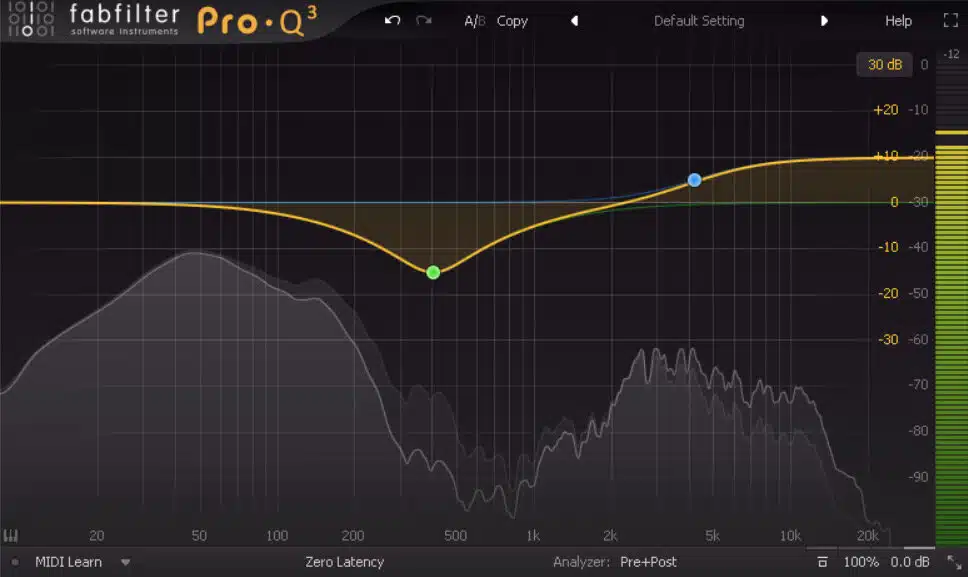
Muddiness in vocals refers to a lack of clarity often resulting from excessive energy in the low-mid frequencies (around 200-500 Hz).
To reduce muddiness, you can apply a cut in this area.
It’s essential to use a narrow Q (bandwidth) to minimize the impact on adjacent frequencies.
Harshness is another common problem in vocal tracks 一 often resulting from an excess of energy in the upper-mid frequencies (roughly 2-5 kHz).
Using a parametric EQ to cut these frequencies can help reduce harshness.
NOTE: Caution is required because too much cutting can cause vocals to lose their presence in the mix.
In both cases, the key is to make gradual, subtle adjustments and always consider the vocal’s context within the overall mix.
This way, your music will be unique and professional.
Using high-quality headphones or monitors can also help, as these provide a more accurate representation of frequency balance.
Dealing with Vocals that Sound Unnatural or Sound Thin
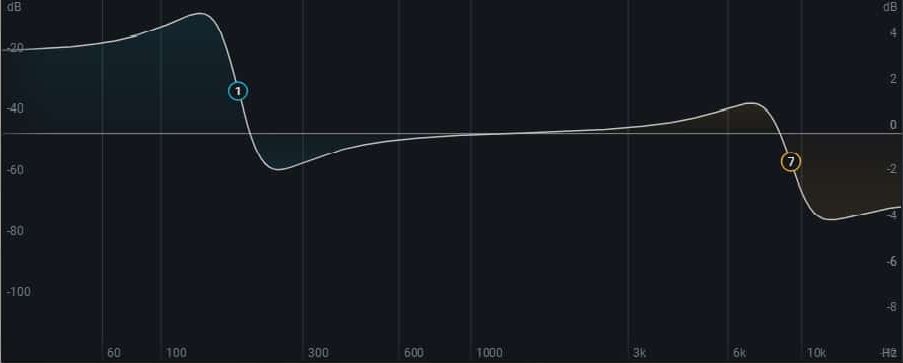
Vocals that sound thin or unnatural are often lacking in mid-range frequencies.
To resolve this, consider boosting frequencies in the mid-range area 一 typically between 500 Hz and 2 kHz.
A subtle boost can add body and richness to the vocals.
Alternatively, the thinness may be a result of excessive cutting during the EQ process.
If you find this to be the case, try easing back on your cuts or even bypassing your EQ altogether to reassess the natural sound of the vocal.
Remember, EQ should enhance the vocal’s natural qualities, not detract from them.
If the vocals sound unnatural, it could be because of too much boosting or overly narrow bandwidths in your EQ settings.
- Excessive boosting 一 Can make vocals sound artificial.
- Narrow bandwidths 一 Can create a ‘peaky’ and uneven frequency response.
In this case, consider using broader bandwidths and less boosting for a more natural vocal sound.
The Proximity Effect
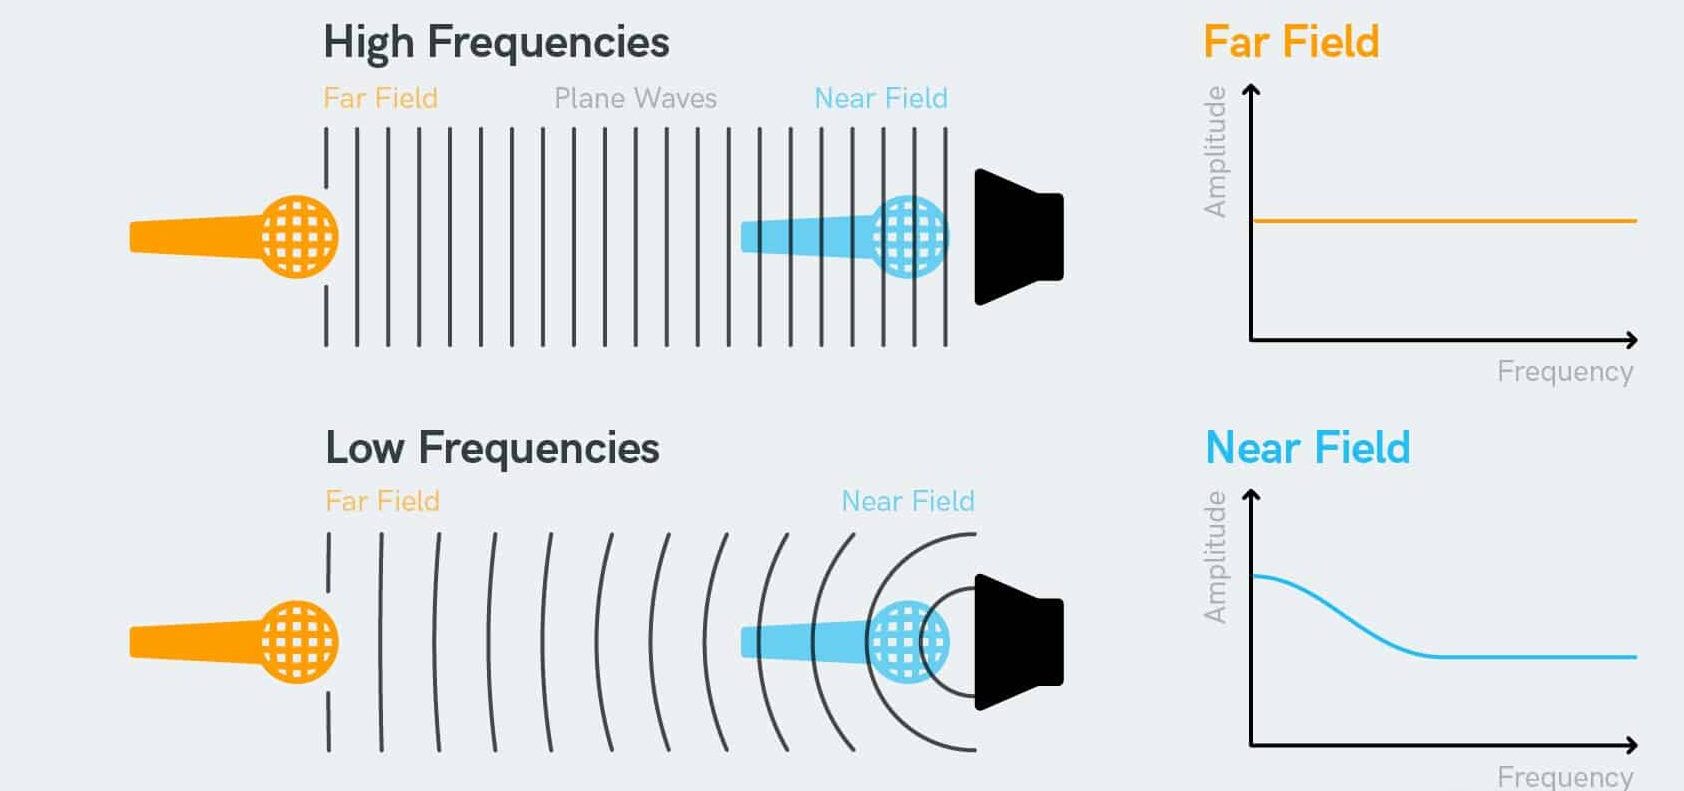
The proximity effect refers to the increase in low-frequency response as a sound source gets closer to a microphone.
This effect can cause vocals recorded close to the mic to sound boomy or overly saturated with bass frequencies.
To manage the proximity effect without changing your recording environment, you can use a high-pass filter to roll off the low frequencies.
Start with a low cutoff frequency (around 80 Hz) and slowly move up until the vocals start to sound more balanced.
Be careful not to remove too much low end, as this can make the vocals sound thin or weak.
It’s also worth noting that the proximity effect is dependent on the microphone type.
- Cardioid microphones 一 Tend to have a strong proximity effect.
- Omnidirectional microphones 一 Do not.
If you’re having ongoing issues with the proximity effect, it might be worth considering a different mic type or vocal recording technique.
Cutting Problematic Frequencies
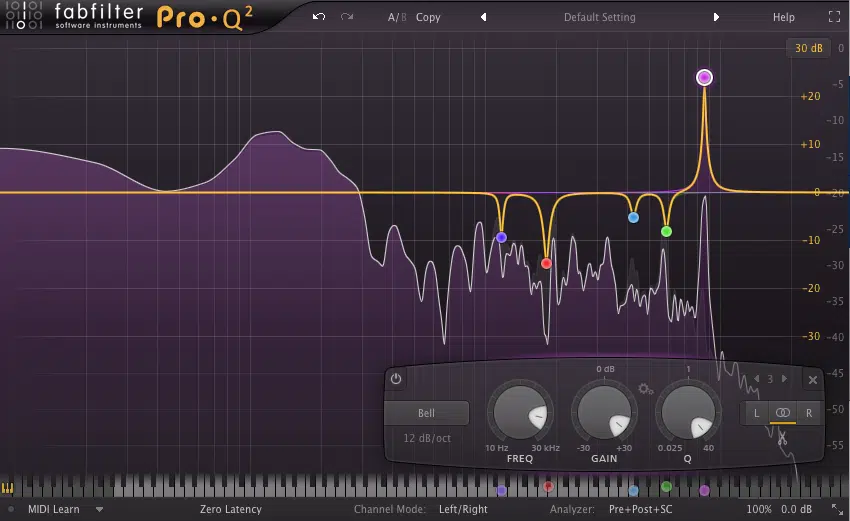
Problematic frequencies can create various issues in your vocal mix; from muddiness and harshness to resonance and boxiness.
These frequencies can often be tamed with careful use of a parametric EQ.
Identifying problematic frequencies can sometimes be a challenge.
A common technique is to use a ‘sweeping’ method, where you boost a narrow bandwidth on your EQ and slowly sweep across the frequency spectrum.
When you hit a frequency that sounds particularly bad, you’ve likely found a problematic frequency.
Once you’ve identified a problem frequency, the next step is to reduce it using a cut on your EQ.
It’s important to be subtle with your cuts to maintain a natural sound.
Start with a small cut and gradually increase it until the problem is resolved.
Remember, the goal is to minimize the issue without negatively impacting the overall sound of the vocal.
Boosting Frequencies to Enhance Vocal Sound
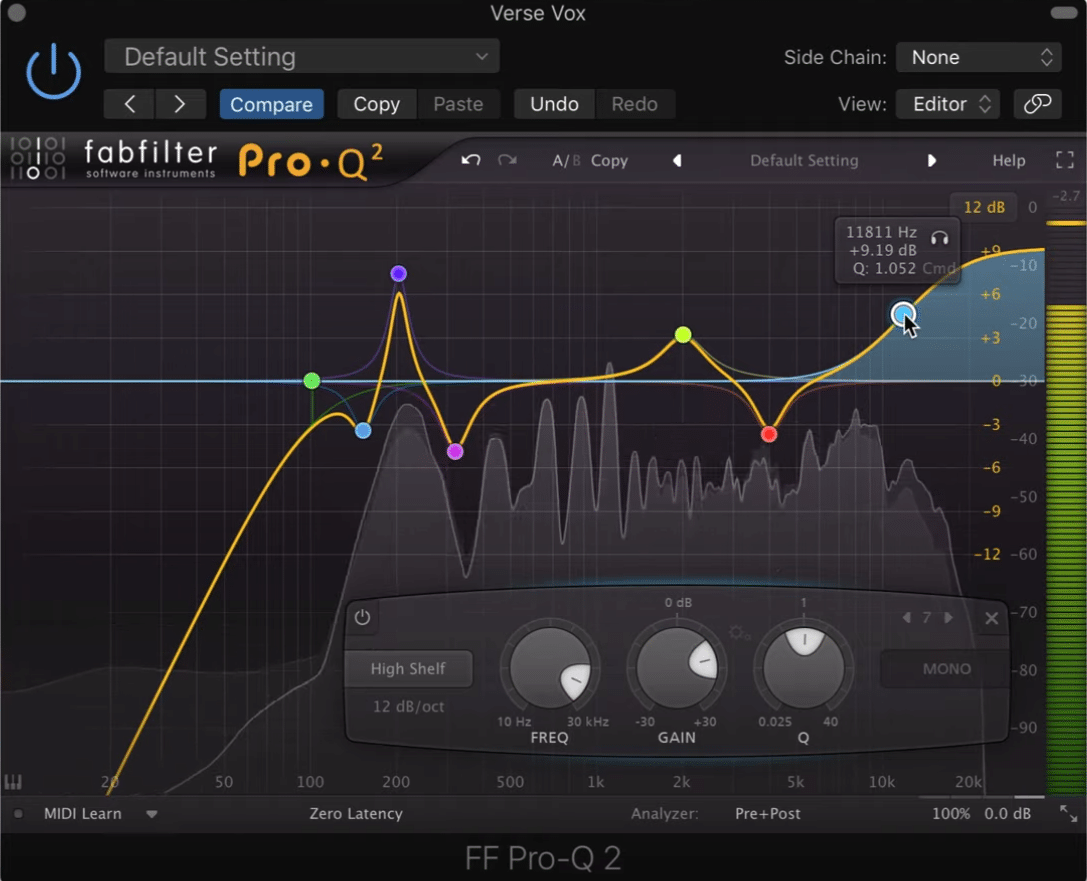
While much of EQing involves cutting problematic frequencies, boosting can also be used effectively to enhance the vocal sound.
However, boosting should be done sparingly and with caution, as excessive boosting can lead to an unnatural-sounding mix.
If your vocal lacks presence, consider a mild boost in the 3-6 kHz range.
- For adding warmth and body to the vocal 一 Boost slightly in the 200-500 Hz range.
- For some airiness or brightness 一 A high-shelf boost above 10 kHz could be effective.
Remember, the key to effective boosting is subtlety.
Rather than making drastic changes, aim for smaller, incremental boosts.
EQing Vocals in the Mixing Stage
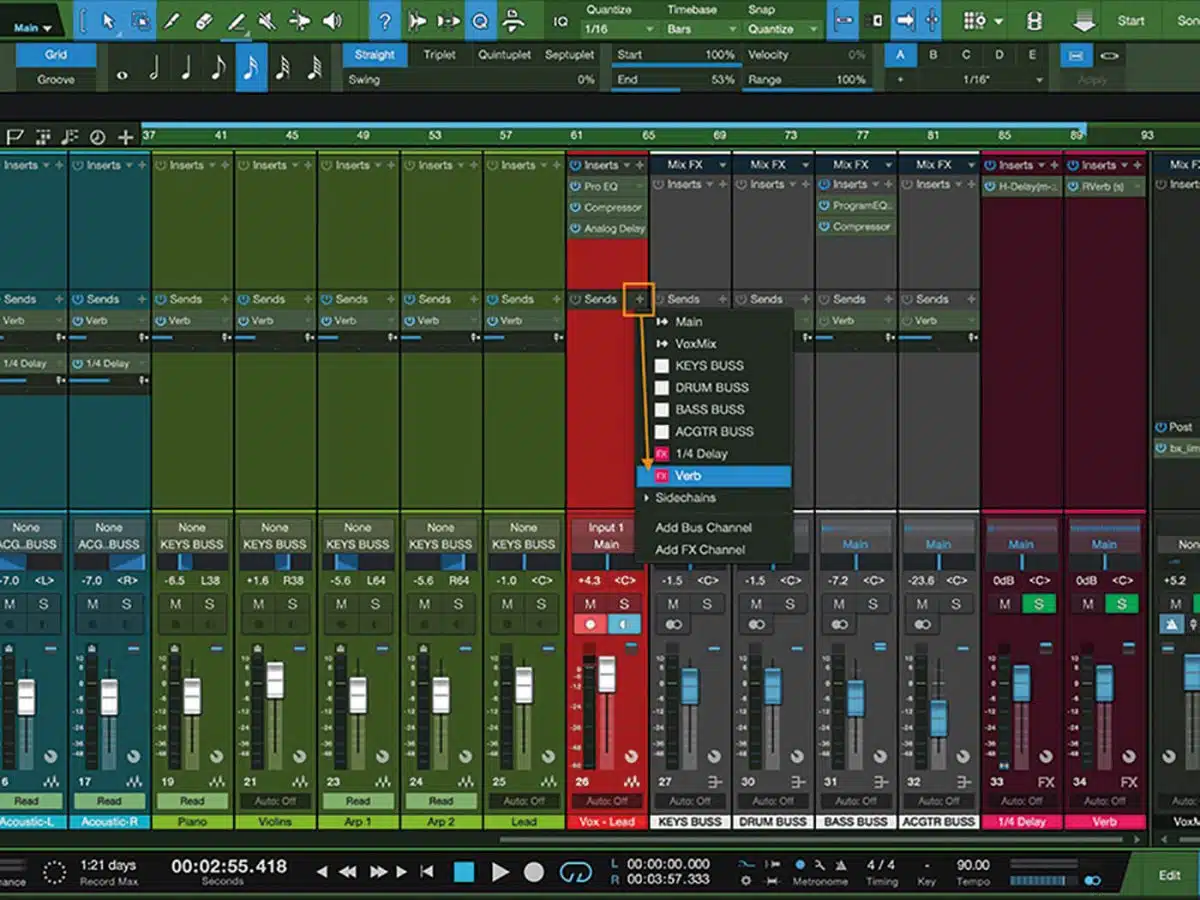
During the mixing process, EQing vocals involve more than just shaping the tone of the voice.
It also involves carving out a space for the vocals in the overall mix.
This often means using EQ on other instruments to ensure they don’t clash with the vocals.
One common technique is to identify the key frequency ranges where the vocals shine, and then use EQ to reduce these frequencies in other mix elements.
For example, if your vocals have a lot of energy in the 2-4 kHz range 一 you might cut this range slightly in the guitars or keyboards to give the vocals their own ‘space’ in the mix.
Another important aspect of EQing vocals in the mix is dealing with sibilance (the harsh ‘s’ and ‘t’ sounds) which can sometimes become exaggerated during the recording process.
This can be addressed with a type of dynamic EQ called a de-esser, which reduces the level of these frequencies only when they exceed a certain threshold.
As always, it’s important to make EQ decisions while listening to the mix as a whole, rather than EQing each track in isolation.
What sounds good on its own may not work in the context of the mix, so always check your EQ moves in the mix context.
Bonus: 2 Pro Tips
To wrap up this article, here are 2 final tips when learning how to EQ vocals.
#1. Using An EQ Plugin
An EQ plugin can offer greater flexibility and control than the basic EQ controls on your mixing console or DAW.
They often provide a visual representation of the frequency spectrum, which can be helpful for identifying problem areas and making precise adjustments.
Some EQ plugins also offer advanced features like dynamic EQ, which allows you to adjust the EQ of a track dynamically based on the input level.
This can be especially useful for managing inconsistent frequencies in vocal tracks, such as a singer who varies widely in pitch or volume.
#2. Maintaining Balance with Other Instruments
Balancing the vocals with the other instruments in a mix is a critical aspect of EQing vocals (lead vocals, background vocals, etc.).
The goal is to make the vocals sit well in the mix 一 neither overpowering the other elements nor being overshadowed by them.
To maintain balance, it’s often useful to start with the vocals and build the rest of the mix around them.
It allows you to carve out a space in the frequency spectrum for the vocals, and then fit the other elements around this.
This approach is particularly effective for tracks where the vocals are the main focus.
How To EQ Vocals: Final Thoughts
Now, you are familiar with the ins and outs of how to EQ vocals like a true professional.
We’ve walked the path from the fundamental understanding of vocal EQ, analyzed different vocal types, and tackled common challenges.
Now, it’s your turn to take this knowledge and apply it in your studio, your productions, your music.
As you grow your skills, remember that the journey of learning never truly ends.
Keep exploring, keep experimenting, and most importantly, keep listening.
To further your skills, you should seriously download these renowned, Free Beatmaker Template Essentials.
It’s the ultimate tool to get a sense of perfectly EQ’d vocals 一 providing you with two popular, accurately structured hit tracks that are EQ’d and mixed to perfection.
It’s a practical way to see everything we’ve discussed in action and understand how to apply these principles to your own tracks.
You are now armed with the knowledge to make your vocals sound better than ever.
Therefore, you’ll never have to ask yourself how to EQ vocals again!
Remember, every vocal is unique, so use these techniques as a starting point and adjust based on what you hear.
Until next time…


Leave a Reply
You must belogged in to post a comment.