De-essers are all about taming harsh sibilance in vocals so that your mix stays smooth, clear, and professional.
They can reduce piercing “s” and “sh” sounds, balance high frequencies, and prevent any unwanted harshness from ruining your vocal mix altogether.
Plus, they help you retain brightness in a vocal without making it sound dull or muffled.
As producers, knowing all the answers to what is a de-esser can completely change the game for you 一 that’s why I’m breaking down everything you need to know, like:
- What is a de-esser and how to use a de-esser ✓
- How sibilance can make or break a vocal mix ✓
- The difference between a wideband and split-band de-esser ✓
- Where to place a de-esser in your signal chain for the best results ✓
- Key settings like threshold, frequency range, and attack/release ✓
- Mixing de-essing with EQ, compression & multiband processing ✓
- Advanced techniques, tricks, and tips ✓
- The biggest de-essing mistakes that ruin vocal clarity ✓
- The best de-esser plugins in the game ✓
- Manual de-essing basics and other de-essing techniques ✓
- Much more to help you answer, ‘what is a de-esser’ ✓
By knowing all about de-essers and how to use them like a boss, you’ll be able to control sibilance without completely killing the life in your vocals.
As well as successfully keep high frequencies balanced, retain vocal clarity without over-processing, and make sure your vocals always sit perfectly in the mix.
This way, your tracks will always sound polished, professional, and ready for release without annoying harshness ever getting in the way.
Table of Contents
De-Essing: Breaking it Down
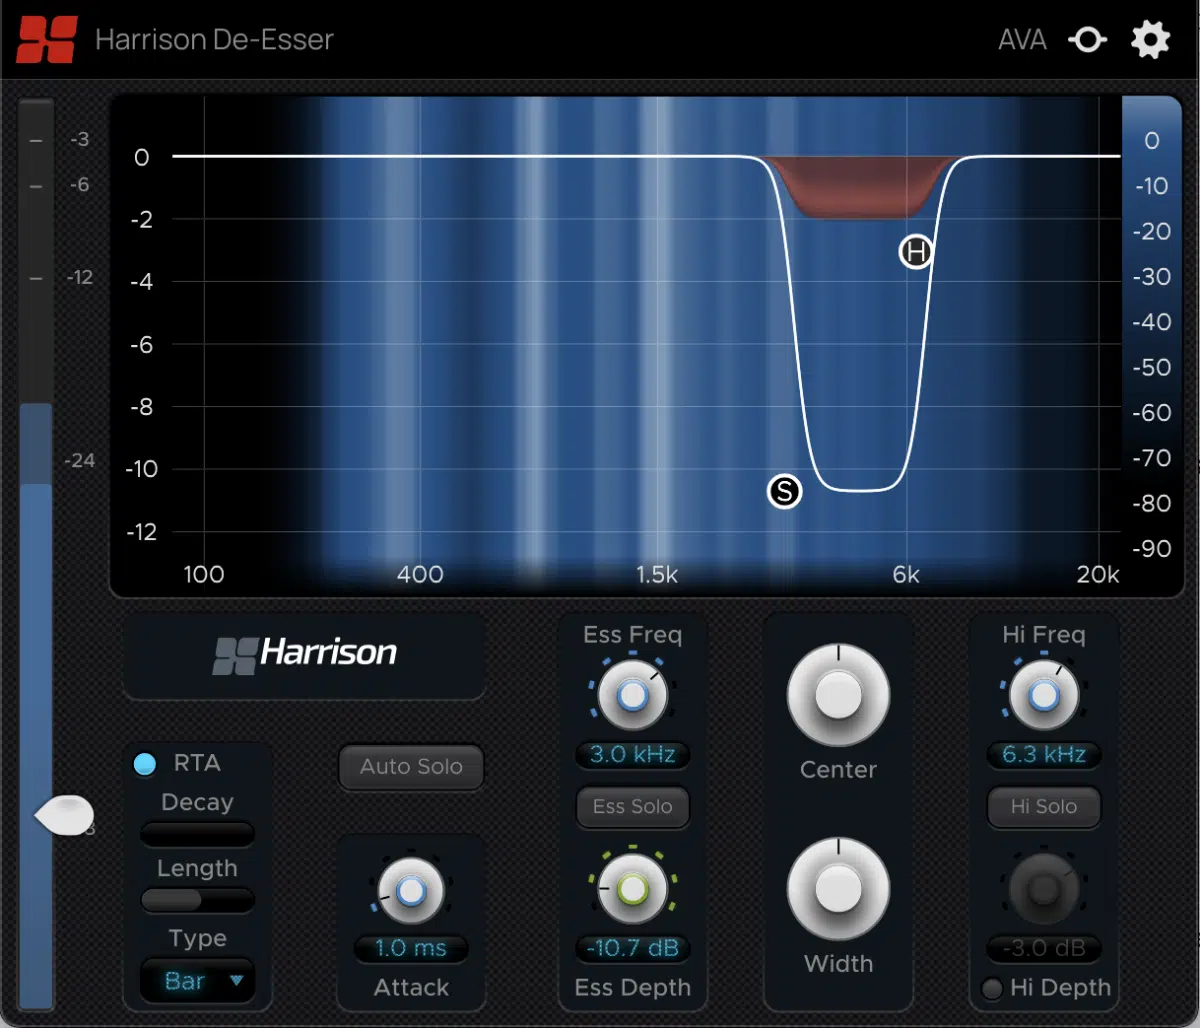
Sibilance is the sharp “s,” “sh,” “ch,” and “t” sounds that naturally occur in vocal recordings.
They can become harsh/distracting when amplified through compression and EQ.
This is super problematic in audio production, where clarity and balance in vocals are key to a polished mix.
The de-essing process successfully reduces these unwanted frequencies without dulling the overall vocal tone and vibe.
A de-esser is essentially a frequency-specific compressor that reacts to sibilant peaks and attenuates them when they exceed a set threshold.
Instead of applying broadband compression (which can make vocals sound lifeless), a de-esser precisely targets and smooths out the problem areas.
All while preserving the energy of the performance to perfection.
Knowing how to de-ess properly ensures that your vocals sit cleanly in the mix without introducing artificial dullness or distortion.
Don’t worry, we’ll be breaking down everything you need to know to answer the question, ‘what is a de-esser’ so you get a super solid understanding.
What is a De-Esser? Different Types
A de-esser is designed to reduce excessive sibilance in vocal recordings, preventing harsh, piercing sounds from cutting through a mix in an unpleasant way like we talked about. While all de-essers work toward the same goal, there are multiple types, each with unique methods of controlling sibilance, so let’s break it down.
-
Wideband De-Esser
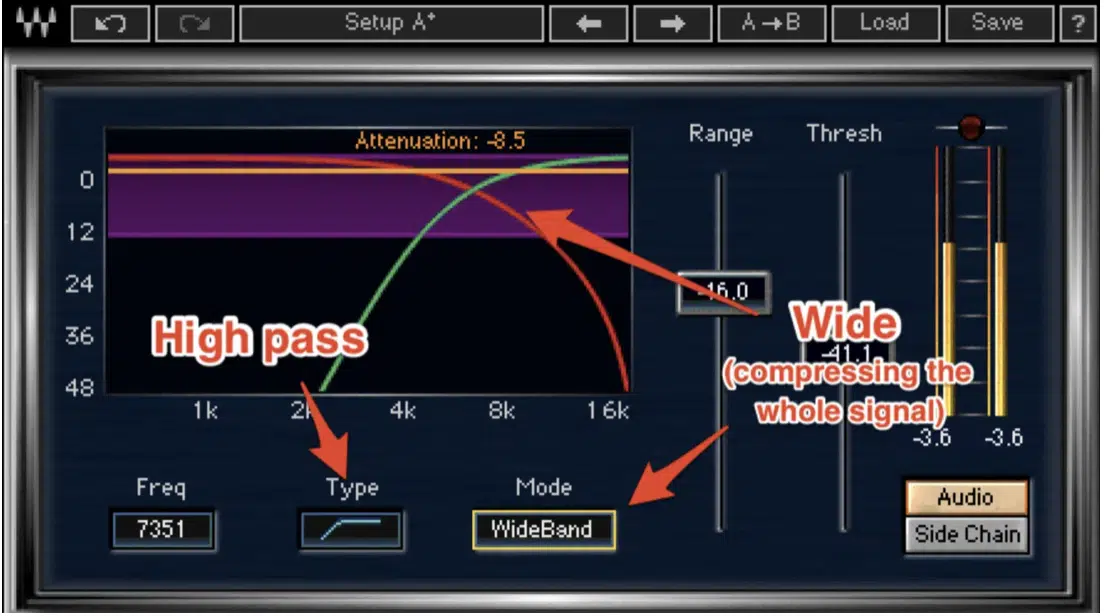
Wideband de-essers reduce the entire frequency range of a signal whenever sibilance exceeds a set threshold.
This means that instead of only targeting the harsh frequencies, the entire vocal track is momentarily ducked when sibilance is detected.
It can be very noticeable when working with highly compressed vocals, where sudden volume dips stand out even more.
For example, if you’re mixing a pop or hip-hop vocal that has been heavily processed with an 8:1 compression ratio, a wideband de-esser with an aggressive threshold of -30 dB could cause unnatural vocal inconsistencies and make things choppy.
Just keep in mind that while this method can be great for extreme sibilance issues, it can also result in an unnatural dip in the vocal’s volume.
If the attack time is set too fast (below 5 ms), the de-esser might clamp down too harshly and make the vocal feel lifeless.
If the attack time is set too slow (10-15 ms), it allows the vocal to maintain some natural movement before attenuation kicks in 一 leading to a smoother result.
For example, if a singer’s sibilance is prominent around 6 kHz and the threshold is set too aggressively, a wideband de-esser may cause the whole vocal to briefly lower in volume whenever an “s” sound appears.
This can make the vocal sound inconsistent, and nobody has time for that.
If you notice that words feel unnaturally “dipped” in volume, it might be time to either raise the threshold slightly or lower the reduction amount to around 3-5 dB instead of 6-8 dB.
To use a wideband de-esser properly, make sure to keep the threshold slightly above the average vocal level and adjust the release time.
A gradual release setting of 40-60 ms works better for singers with longer sibilance tails (like airy falsettos).
On the flip side, a 20-30 ms release is ideal for snappier, rhythmic vocalists who need to maintain clarity in faster phrases.
This way, you can make sure the vocal bounces back quickly after attenuation without making it sound robotic or over-processed.
-
Split-Band De-Esser
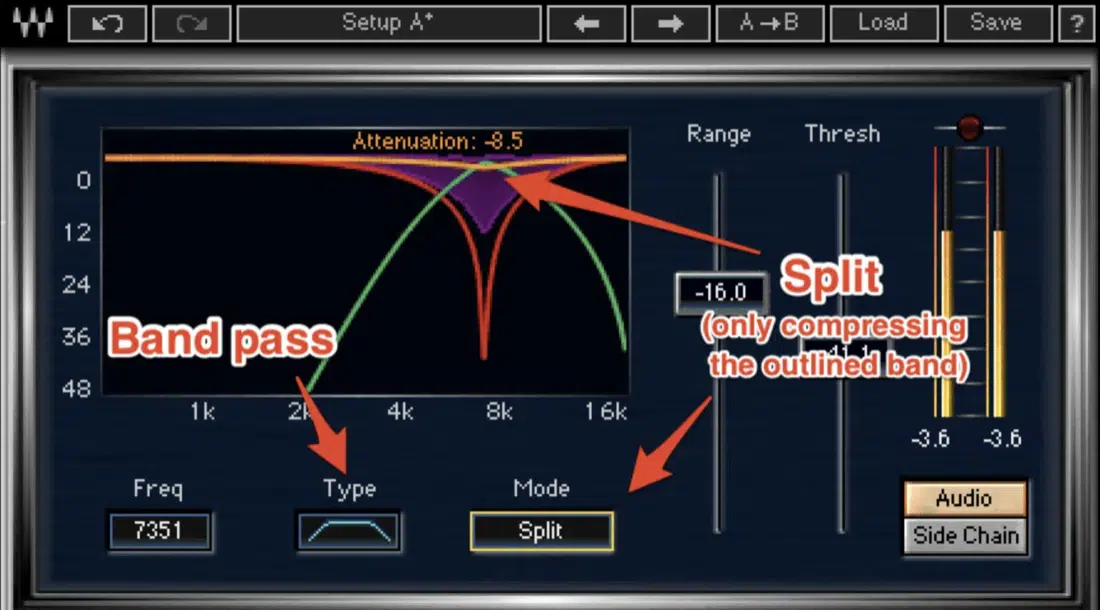
A split-band de-esser works more precisely than wideband de-essers by only attenuating the sibilant frequencies instead of the entire vocal.
This means that rather than ducking the whole signal, it selectively reduces only the harshest peaks to preserve the vocal’s overall presence and dynamic range.
When it comes to densely produced tracks, where vocals need to cut through without becoming too harsh or brittle, it’s perfect.
They’re a much more transparent solution which lets vocals retain their full presence while still reducing harshness.
Let’s say you’re mixing a modern pop or R&B vocal, where clarity is key but excessive brightness can be a problem…
A split-band de-esser targeting 6 kHz to 7.5 kHz can subtly tame harshness without sacrificing the vocal’s energy.
On the flip side, for a rock vocal with a naturally darker tone, setting the de-esser around 4.5 kHz to 6 kHz can smooth out sibilance while keeping the grit and character intact.
A typical frequency range for split-band de-essing is between 4 kHz and 8 kHz, but this can vary depending on the vocalist.
Some female vocals naturally have more pronounced sibilance around 7-9 kHz, while male vocals often exhibit harshness closer to 4-6 kHz.
If a vocal has excessive brightness, setting the frequency range closer to 5 kHz will tame the harshness without dulling the articulation.
However, if the de-esser is set too high (above 9 kHz) it may start affecting the air and breathiness of a performance 一 making the vocal sound less natural.
Unlike wideband de-essers, which affect the overall volume, split-band de-essing only pulls down the specific problematic range.
Many modern de-essers allow you to solo the affected frequency range before applying processing, which makes it easier to pinpoint exactly where the harshness is occurring.
If you’re working on a bright lead vocal that needs a touch of control, a 2-4 dB reduction is usually enough.
However, for aggressively compressed vocals, where sibilance is hyped up big time, you may need to increase reduction to 5-7 dB while compensating with a slightly wider bandwidth to avoid unnatural dips.
It ensures that the rest of the vocal remains untouched for natural articulation and clarity even after processing.
The best thing is to adjust the reduction amount so that sibilance is controlled but still feels natural because too much de-essing can make a vocal sound unnatural and lispy.
NOTE: A gentle attack setting of 5-10 ms ensures that the de-esser catches fast sibilance without flattening the vocal’s transient energy.
Also, a release time of 40-60 ms helps maintain a smooth and natural recovery between sibilant peaks.
If the vocal still sounds overly processed, try reducing the range control slightly or adjusting the Q factor to fine-tune how much of the specific range is affected.
-
Pro Tip: Using Dynamic EQs as De-Essers
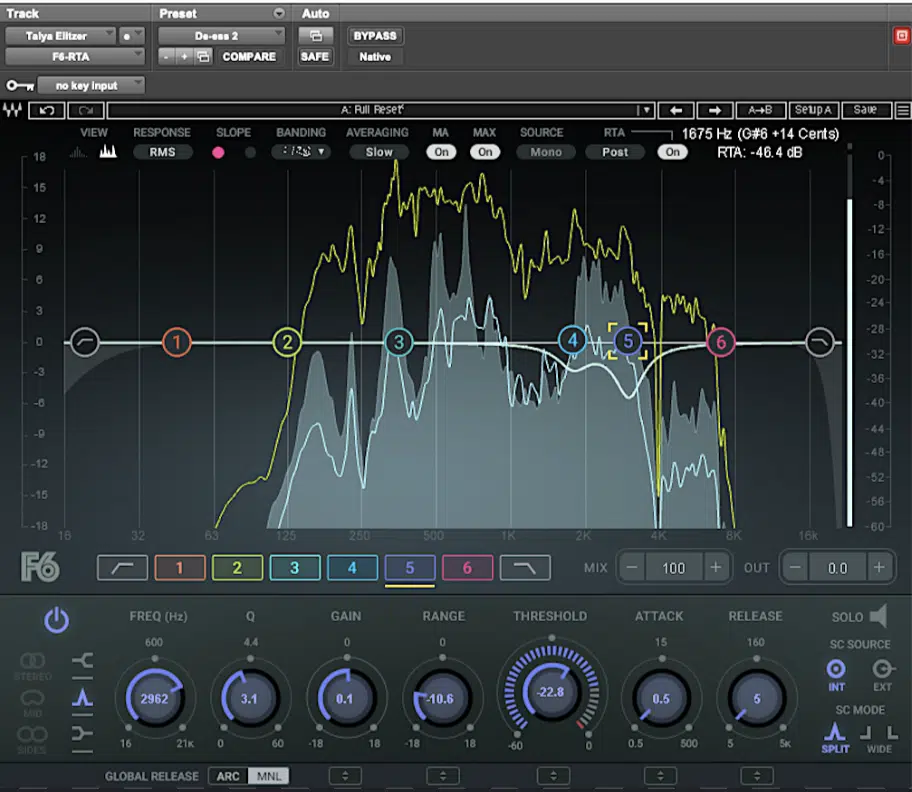
Dynamic EQs can function as de-essers by applying gain reduction to a specific frequency range only when sibilance occurs.
Unlike traditional de-essers, which rely on compression-style attenuation, dynamic EQs allow for more precise control over how sibilance is handled.
It’s great when working with vocals that have varying levels of sibilance, where a standard de-esser might either miss some peaks.
Or, overprocess sections that don’t need reduction, things like that.
For example, if a vocalist has harsh “s” sounds around 7 kHz, a dynamic EQ can be set to dip that frequency only when sibilant frequencies appear, rather than constantly reducing it.
This means that softer consonants remain untouched 一 preserving the articulation and clarity of the performance.
If the vocal has multiple harsh areas, you can even set additional bands, like one around 5 kHz for lower-range harshness and another at 8 kHz for brighter, sharper sibilance.
It gives you much finer control than a single-band de-esser.
A common setting might involve a threshold of -20 dB with a Q-factor of 3-5 to avoid affecting too wide of a frequency range.
If the sibilance is especially aggressive, narrowing the Q-factor to 4 or 5 helps focus the reduction on just the problem area.
On the other hand, for lighter de-essing, a Q of 2-3 can allow for a more natural-sounding cut that blends flawlessly into the vocal.
This method is great for transparent de-essing in genres where vocal clarity is paramount, such as pop and R&B.
Bottom line, the benefit of using a dynamic EQ as a de-esser is that it allows you to make subtle frequency adjustments in real time to prevent over-processing.
You can even adjust the attack and release settings…
A fast attack (5-10 ms) and a release of 40-60 ms will help catch quick sibilant peaks without flattening the vocal’s natural movement.
It avoids the robotic or over-processed effect that some de-essers can introduce.
Key Parameters of De-Essers
When you’re learning what is a de-esser, you need to dial in the right settings. The key parameters control how aggressively the de-esser targets sibilance and how smoothly it applies gain reduction. Understanding how each setting works helps you avoid over-processing and keeps your vocals sounding natural, so let’s break it down.
-
Threshold (Sensitivity) Settings
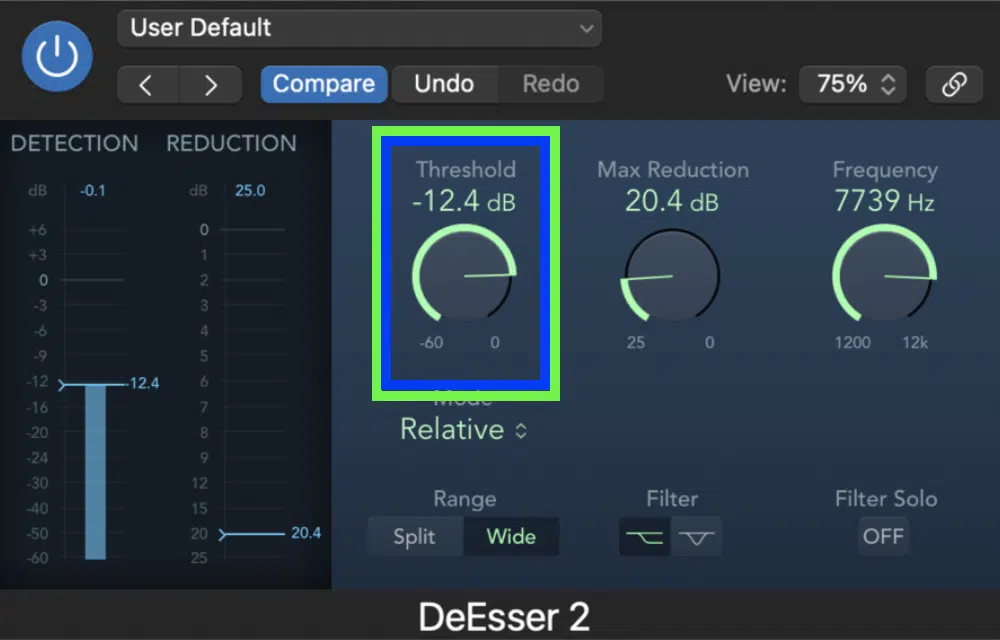
The threshold setting determines when exactly the de-esser starts reducing sibilance.
If the threshold is set too high, sibilant sounds won’t be controlled correctly.
If it’s too low, the de-esser will overwork and make the vocal sound dull or choppy (a good starting point is around -25 dB to -30 dB, but this varies depending on the vocal performance).
If you find that some “s” sounds are still slipping through, lower the threshold slightly, and if the vocal starts to sound muffled, simply ease up on the setting.
The key is to balance reduction without making the singer sound like they have a full-blown lisp.
-
Frequency Selection
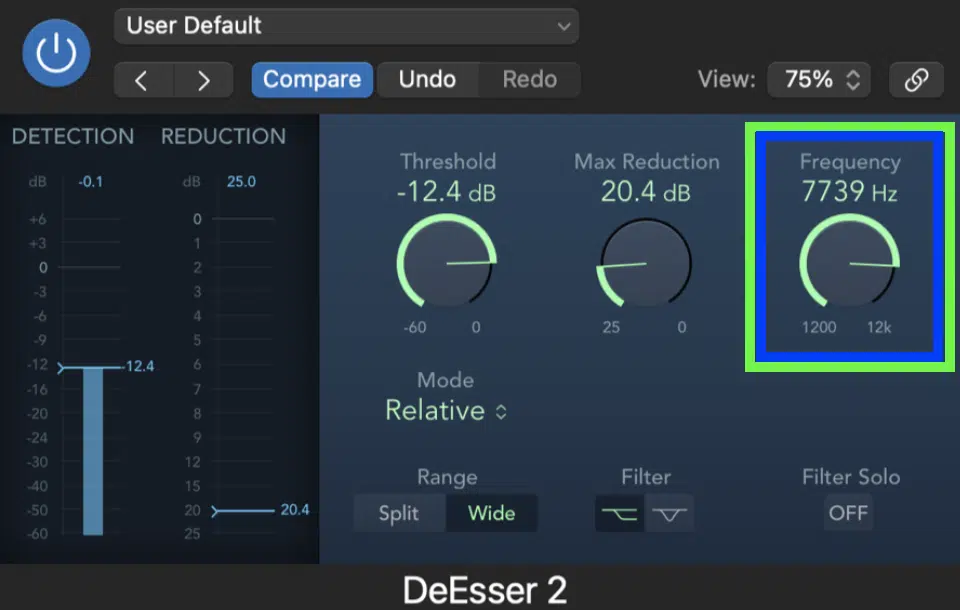
Choosing the right frequency range (e.g., lower frequency range, harsh higher frequency range, center frequency, etc.) is what separates a great de-esser from one that completely wrecks your mix.
Most sibilance lies between 4 kHz and 10 kHz, but it varies depending on the vocalist, of course, because everyone is different (you need to know that as a producer).
For a female singer with sharp “s” sounds, targeting around 7 kHz to 9 kHz works well.
For a male vocalist with a deeper tone, setting the frequency range closer to 4 kHz to 6 kHz can smooth things out without killing clarity.
If you’re unsure, solo the vocal and sweep the frequency selector until you find the exact spot where the harshness is strongest.
Once you do finally lock it in, make sure to fine-tune the reduction so it sounds natural.
Many de-essers also provide range control settings so you can easily refine the specific range being affected instead of applying broad cuts.
If you don’t really know which way to go, simply solo the vocal and sweep the frequency selector until you find the exact spot where the harshness is strongest.
Some de-essers even let you adjust the center frequency dynamically so that only the desired range is reduced without affecting the overall vocal tone.
If you need more control over lower sibilant tones, focusing on the lower band (closer to 4-5 kHz) can keep the vocal warm while still taming harshness.
Side note, in some cases, manual clip gain adjustments on overly harsh sibilant peaks can work alongside a de-esser for a more transparent result, so keep that in mind too.
-
Reduction Amount / Range Control
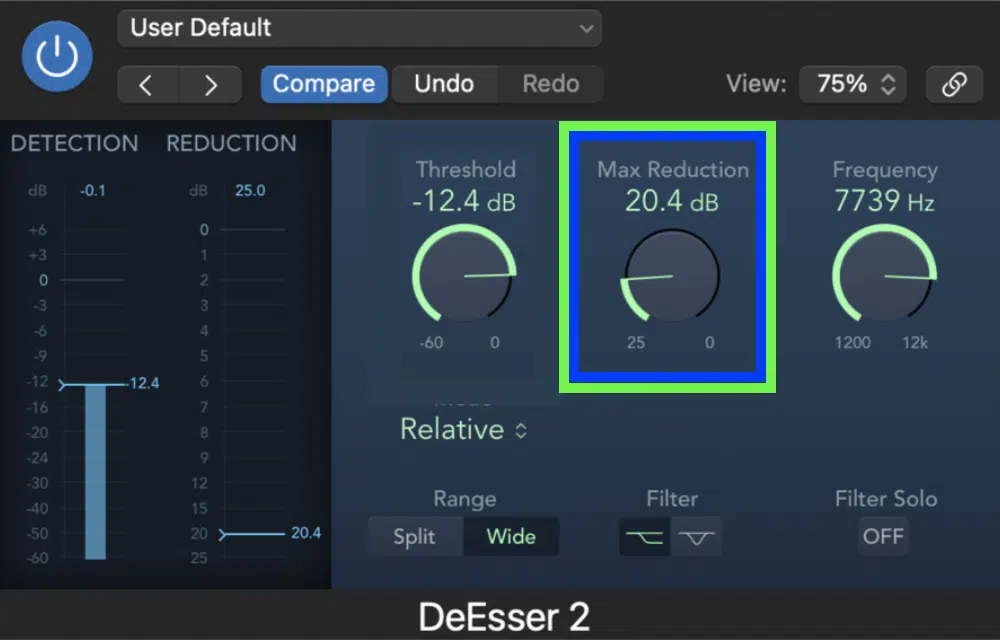
The reduction amount or range control determines how much sibilance is being removed 一 helping to keep the vocal sounding natural instead of over-processed.
Many de-essers allow you to set a maximum reduction value (typically ranging between 2 dB and 10 dB) to ensure that only the harshest peaks are affected.
- A lighter reduction (2-4 dB) is often enough for subtle sibilance control
- More aggressive settings (6-8 dB) might be needed for brighter, heavily compressed vocals
If the reduction is set too high, the vocal can start to sound lispy or unnatural, so it’s best to adjust this setting while listening in the full mix to maintain vocal clarity.
Some de-essers also include a soft-knee function, which makes the reduction smoother and more gradual rather than sudden and noticeable.
-
Split-Band vs. Wideband Mode
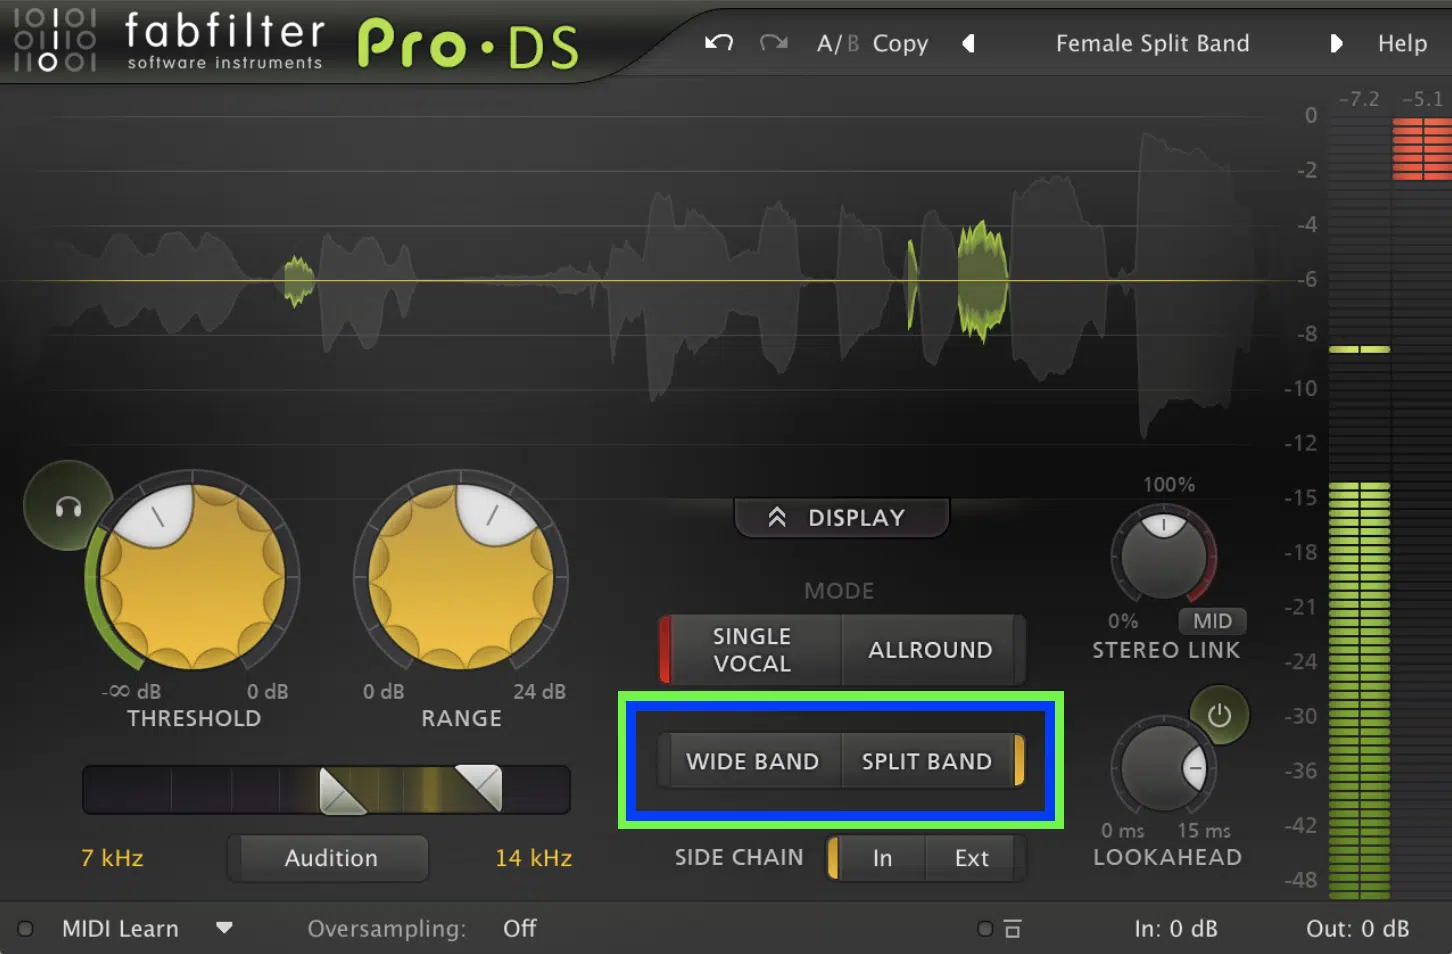
Choosing between split-band and wideband de-essing can impact how natural the final vocal sounds in a major way.
Split-band mode only reduces the selected sibilant frequencies, typically between 4 kHz and 10 kHz, while leaving the rest of the vocal intact.
This is the most transparent option and is ideal for genres like pop and R&B, where you want to retain brightness without harshness.
Wideband mode, on the other hand, lowers the entire vocal signal whenever sibilance is detected, which can make the vocal sound less natural if overused.
Keep in mind that if a vocal feels overly compressed or inconsistent, switching to split-band mode can often fix the issue and allow for more precise de-essing.
-
Lookahead
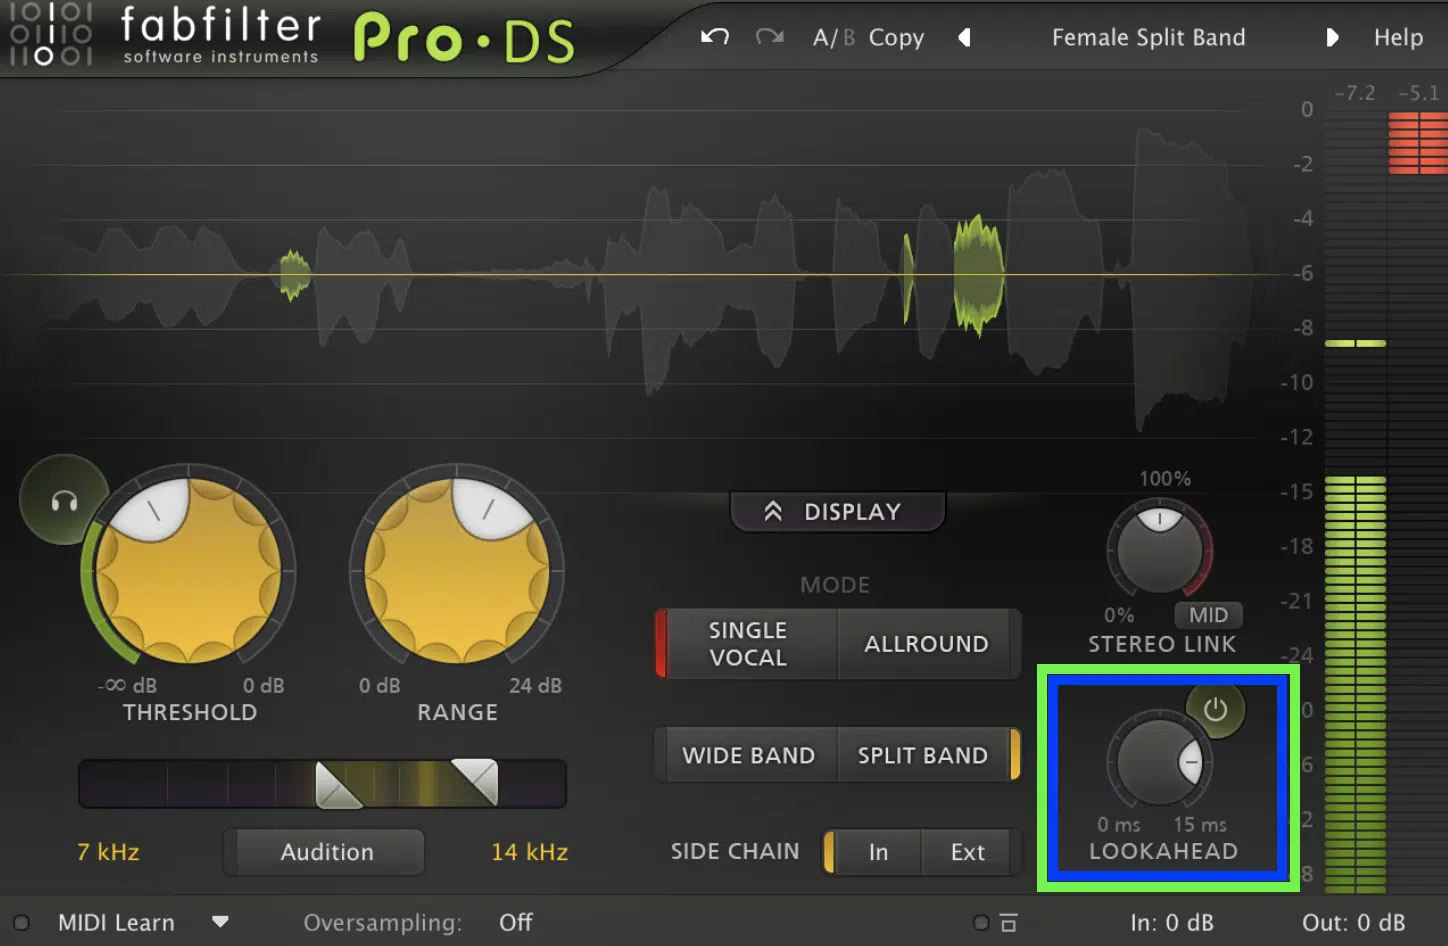
The lookahead feature in de-essers is a powerful tool that allows the processor to analyze the incoming audio before the sibilance occurs, ensuring smooth and accurate attenuation.
Instead of reacting after sibilance has already passed through, lookahead makes it possible to anticipate peaks in real time, reducing the risk of unwanted artifacts like unnatural dips or sudden volume drops.
A typical lookahead setting of 3-10 ms is enough to ensure that the de-esser catches fast transients while maintaining a natural vocal tone.
If lookahead is set too high (above 15 ms), it can cause unwanted latency, making the vocal feel sluggish in real-time monitoring situations.
On the other hand, disabling lookahead completely might result in the de-esser reacting slightly too late, allowing brief sibilant peaks to sneak through before being attenuated.
Many modern de-essers feature adjustable lookahead settings, allowing you to fine-tune the processing based on the vocal performance.
For fast-paced rap or spoken word, a shorter lookahead (3-5 ms) ensures quick response times without introducing too much delay.
For soft, airy vocals in ballads or acoustic tracks, increasing the lookahead to 7-10 ms can smooth out sibilance more gently, making it feel more natural.
-
Listen / Audition / Solo Mode
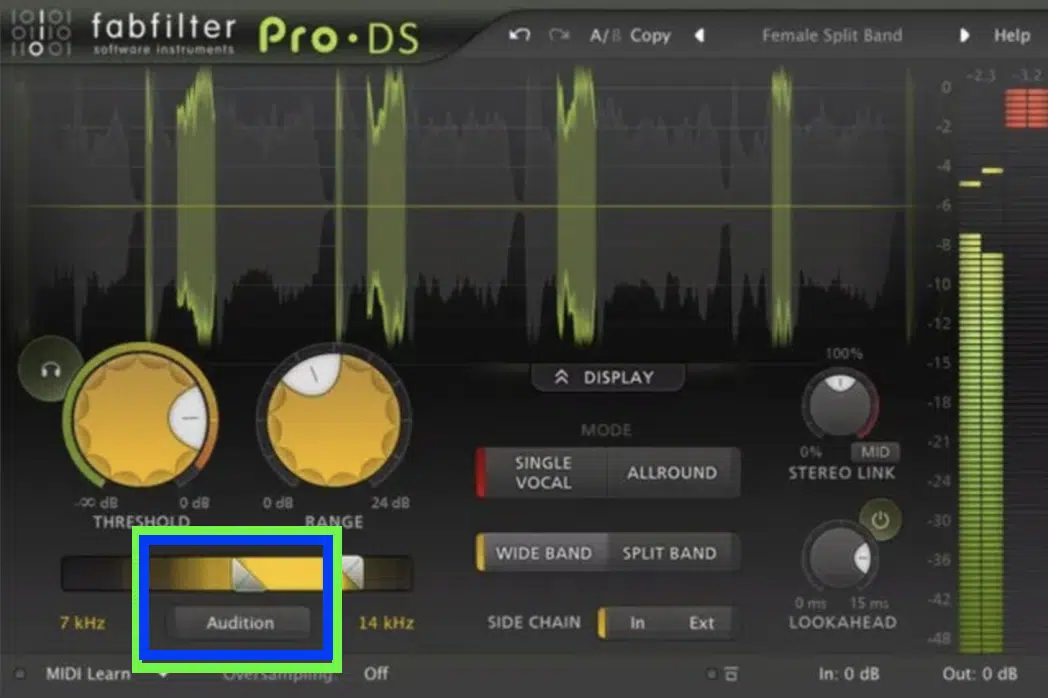
Many modern de-essers include a listen or solo mode, which lets you isolate only the affected frequencies before applying reduction.
This is important for locking down exactly where the harshness is occurring, rather than guessing or using broad frequency ranges.
By enabling solo mode, you can sweep through the frequency spectrum to identify whether the problem frequencies are closer to 4-6 kHz (lower sibilance) or 7-10 kHz (higher sibilance) and adjust to taste.
Some de-essers also feature a real-time visual display.
It shows you exactly which frequencies are being attenuated, which makes the process even more intuitive (big plus).
Using listen mode makes sure that you’re not over-processing the vocal to preserve the original tone while still keeping sibilance in check.
Using De-Essers in Your Mix
A de-esser should never be a one-size-fits-all tool. Where and how you use it in your vocal chain makes a huge difference. Sometimes, placing a de-esser early in the chain before heavy compression can tame sibilance before it gets exaggerated. Other times, putting it later in the chain can help fine-tune a vocal after most of the processing has already been done. Messing around with placement and combining different de-essing techniques will give you the most natural and polished results.
-
Placement in the Signal Chain
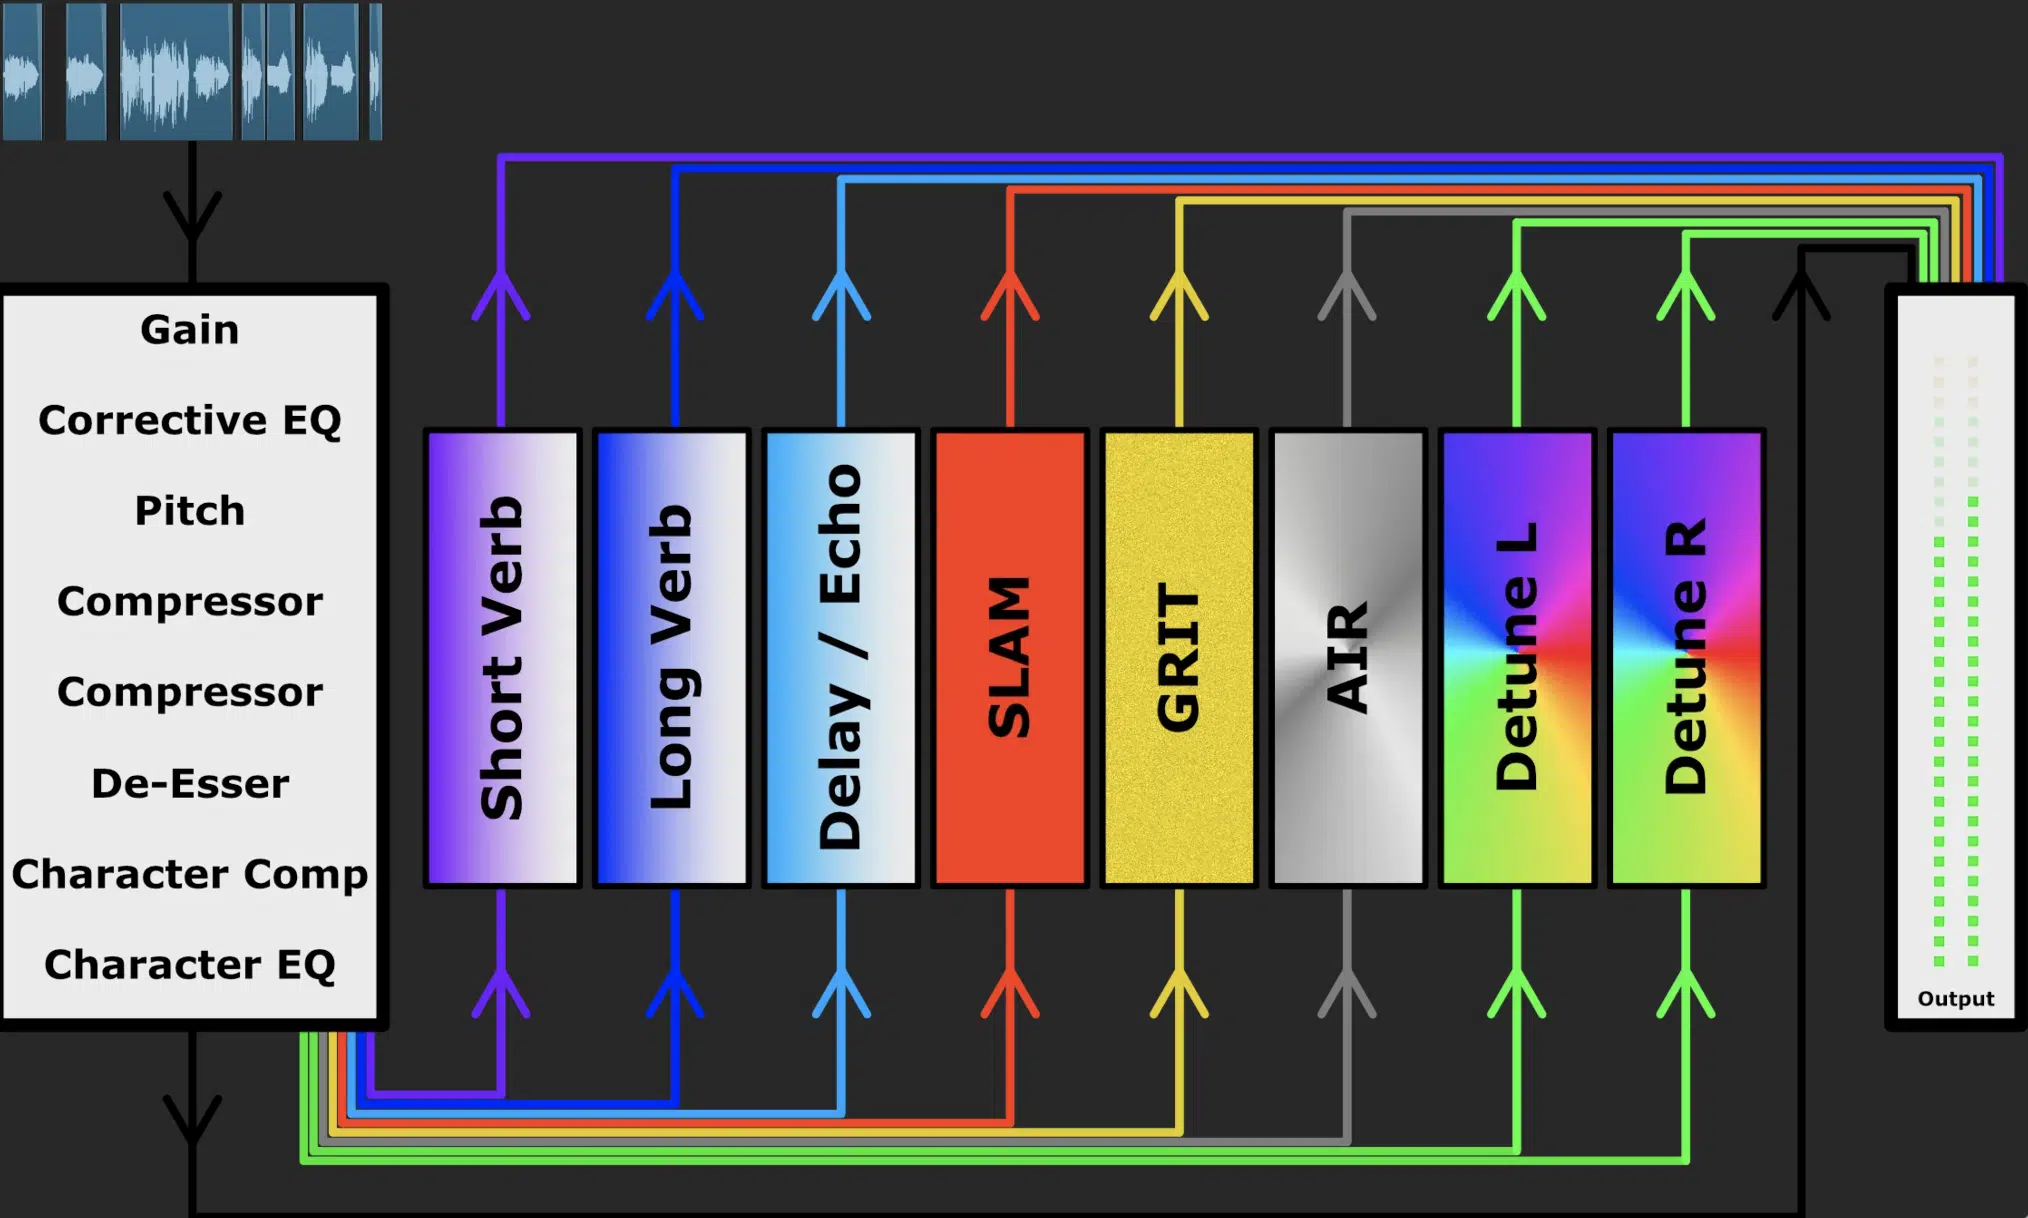
Where you place a de-esser in your vocal chain completely changes how it affects the sound, so you really need to know the differences.
Placing it before compression helps tame sibilance early on 一 preventing the compressor from exaggerating harsh frequencies.
This is super useful if a vocalist naturally has sharp “s” sounds around 7 kHz to 9 kHz.
Placing a de-esser after EQ and compression lets you smooth out any boosted high frequencies that might have become too sharp.
If you’re dealing with an already heavily processed vocal, try using two de-essers.
One pre-compression with a light threshold around -25 dB and a second one post-compression with a higher threshold around -15 dB for subtle final adjustments.
Again, playing around with different attack and release settings at each stage ensures a natural-sounding vocal without overprocessing.
Side note, since talking about chains, if you want to learn all about mastering chains, I got you covered.
-
Balancing De-Essing with Other Processing
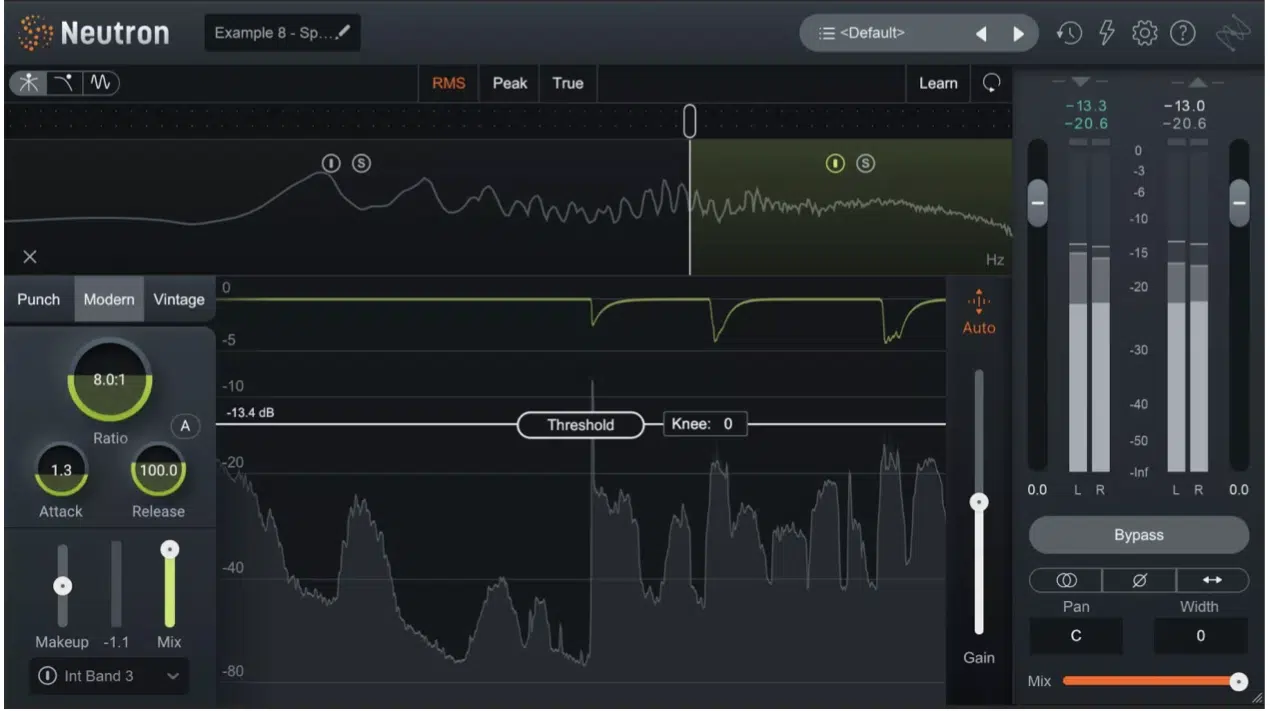
De-essing is just one part of getting a smooth and professional vocal sound, and it works best when balanced with EQ and multiband compression.
For example, if a vocal still sounds harsh after de-essing, it’s worth checking if there’s an excessive high-shelf boost at 10 kHz or above…
Dialing this back slightly can reduce sibilance before it even hits the de-esser.
Using multiband compression in the 4 kHz to 8 kHz range with a gentle ratio of 2:1 to 3:1 can also provide extra control 一 smoothing out peaks before a de-esser is needed.
A soft high-frequency limiter, such as 10-15 ms attack and 40-60 ms release, can also help prevent sibilance spikes from becoming too sharp while keeping the top end airy.
-
Pro Tip: Common Mistakes and How to Avoid Them
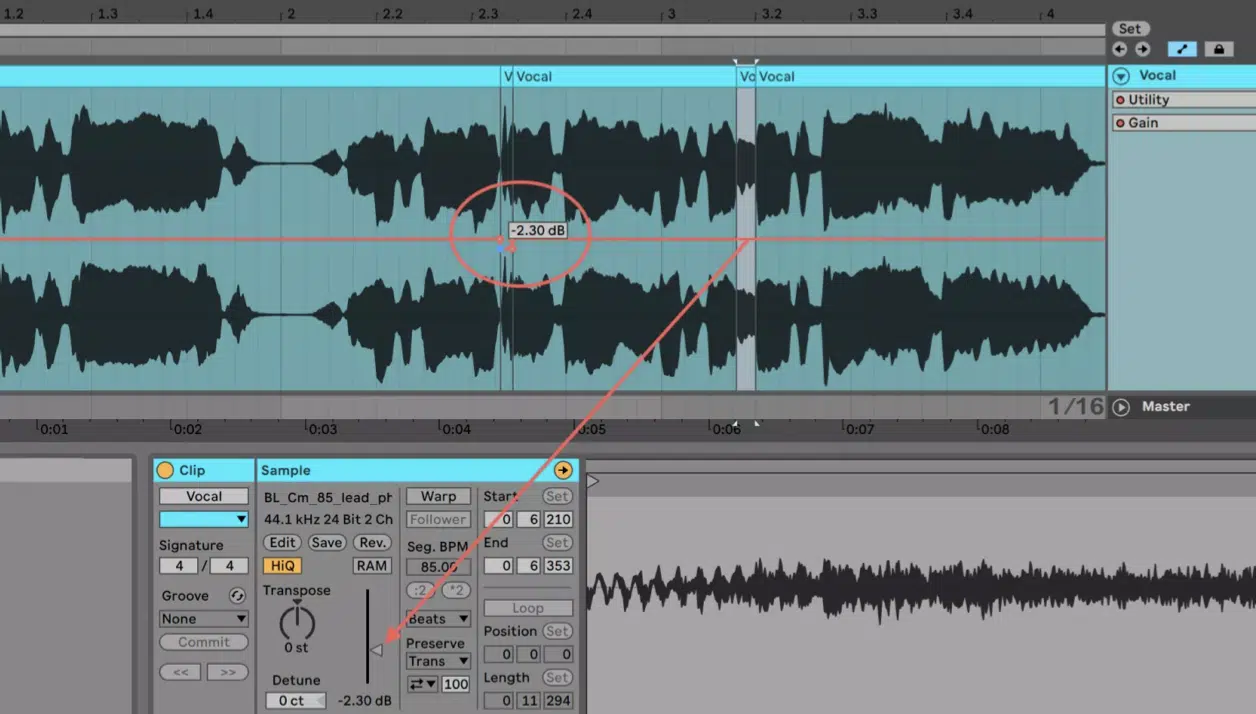
One of the biggest mistakes is applying too much de-essing, which can make a vocal sound dull, unnatural, or give the singer a lisp.
If you notice that the vocal sounds lifeless, reduce the amount of gain reduction 一 2 to 4 dB is usually enough for most vocals.
A common rule of thumb is to solo the de-esser and listen only to what it’s removing; if it sounds too aggressive or starts affecting non-sibilant parts of the vocal, dial it back.
Also, not all sibilance needs to be removed…
Sometimes a bit of high-end bite adds to a song’s energy, especially in genres like pop and EDM where bright vocals cut through dense instrumentals.
A vocal in a soft acoustic song may need more de-essing than one in an aggressive trap track.
Always listen in the full mix, not just in solo, because what sounds harsh in isolation might sit perfectly once all the elements are playing together.
Bonus: The Best De-Esser Plugins of 2025
Learning what is a de-esser is only half of it… knowing the actual best de-esser plugins can completely change the game. The right de-esser plugins make a huge difference in how easily and transparently you can smooth out sibilance. So, for this last section, let’s talk about some of my favs.
-
FabFilter Pro-DS
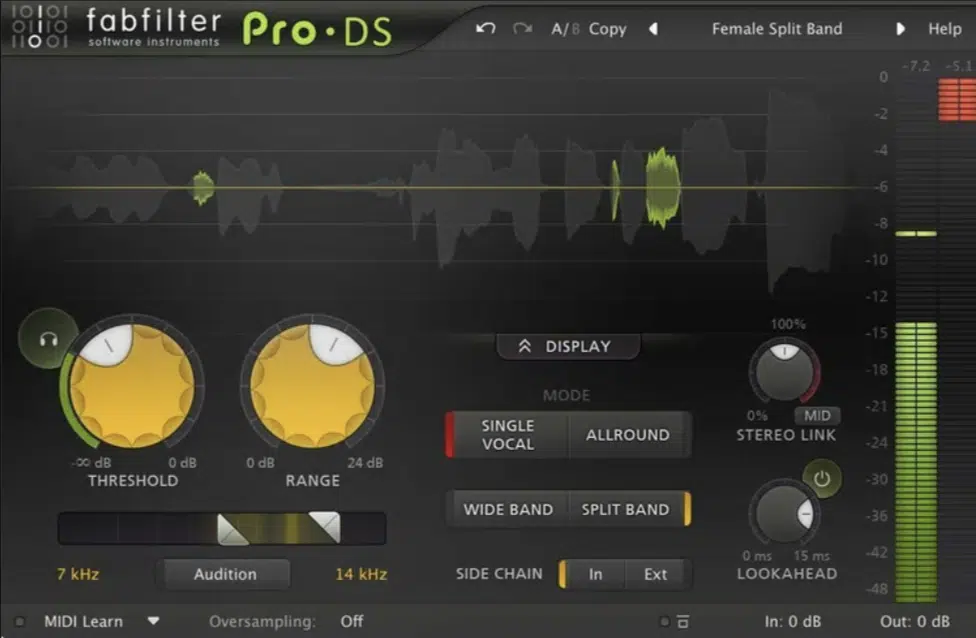
FabFilter Pro-DS is hands down one of the most advanced and transparent de-essers in the game, hands down.
Unlike other de-esser plugins, it doesn’t just react to harsh “s” sounds 一 it intelligently detects actual sibilance so only unwanted frequencies get tamed.
The Wideband and Split-Band modes let you control how much of the vocal gets affected, so whether you need subtle de-essing or heavy reduction, you got it.
You can also use the real-time waveform display to visually see exactly where sibilance is hitting, and the lookahead function (set between 5-10 ms) is another winner.
It makes sure the processing happens smoothly before sibilance even becomes noticeable at all.
If you’re working on bright pop vocals, compressed rap verses, or even human voice overs, Pro-DS keeps things controlled without ever sounding unnatural.
Bottom line, it’s better than most de-esser plugins around, so definitely don’t overlook it.
-
Waves Sibilance
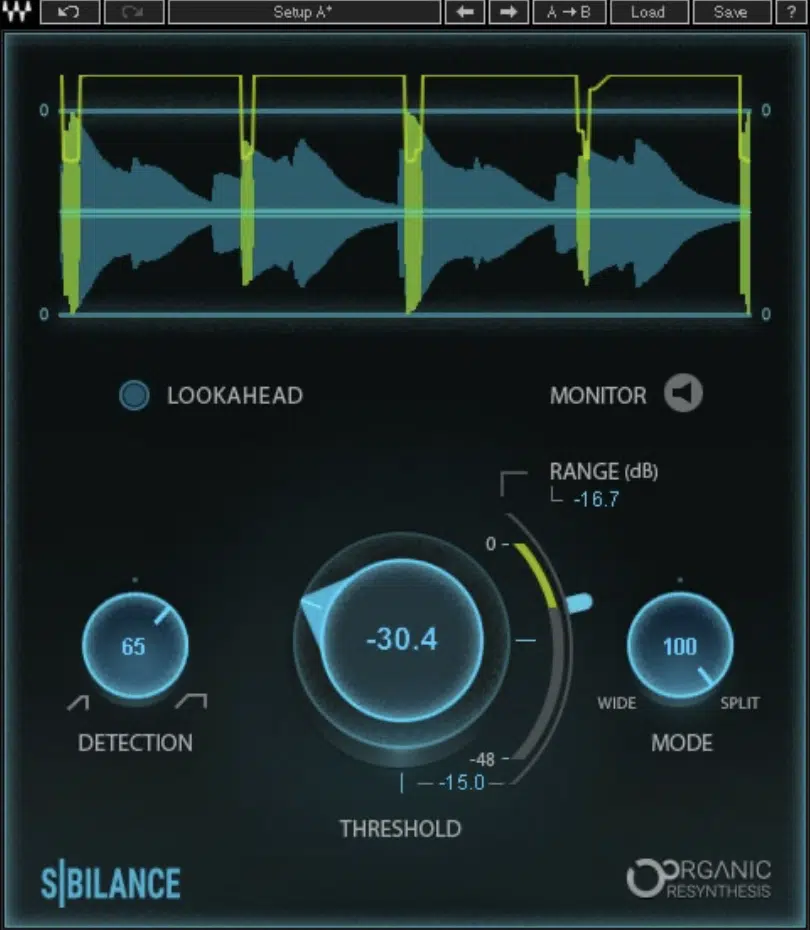
If you want to use a vocal de-esser that’s fast, easy, and insanely transparent, Waves Sibilance is a go-to.
It doesn’t just cut frequencies, it uses Organic Resynthesis technology to separate sibilance from the vocal itself.
Meaning, you don’t lose any clarity or air in the process.
The automatic frequency detection takes the guesswork out of setting it up and locks onto problem areas immediately (super time-saving).
Side note, you can choose between Sharp and Soft modes, depending on whether you want a surgical cut or a more natural de-essing effect, of course.
Bottom line, unlike some other de-esser plugins, it’s perfect if you’re working with vocals that need to stay bright but not harsh.
-
Sonnox Oxford SuprEsser V3
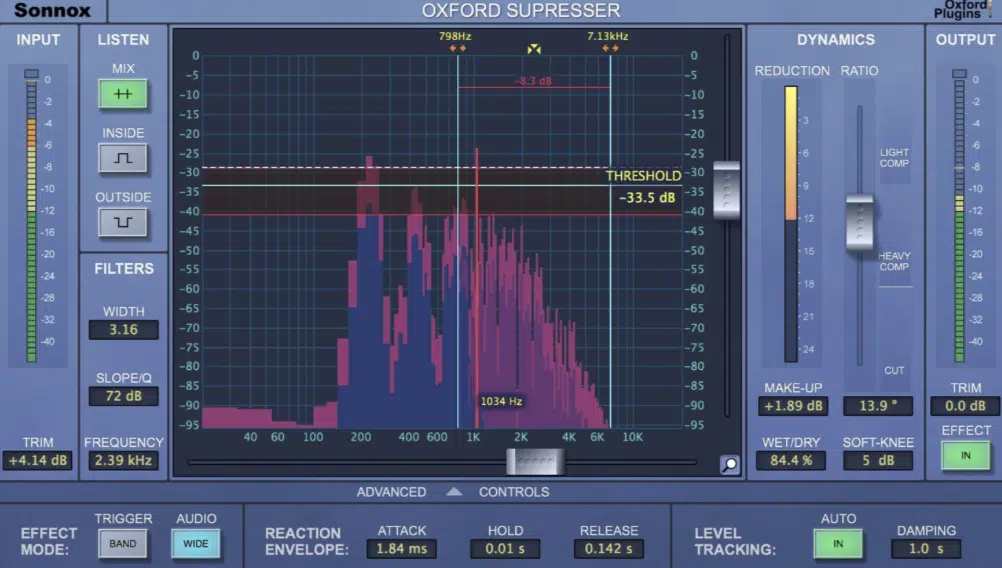
If you need surgical precision when de-essing, Sonnox Oxford SuprEsser V3 gives you the kind of control you won’t find in most de-essers.
Unlike other de-esser plugins, it works more like a dynamic EQ, so you can isolate and control specific sibilant frequencies instead of affecting the entire vocal.
The real-time spectral analysis shows you exactly where sibilance is spiking, and you can dial in custom frequency bands to target only what you need.
Whether you’re working with delicate acoustic vocals or heavy modern mixes, the wet/dry mix control makes sure you don’t overdo it and mess everything up.
All-in-all, if you want total control over de-essing, this is an absolute must-have.
-
HOFA IQ-Series DeEsser
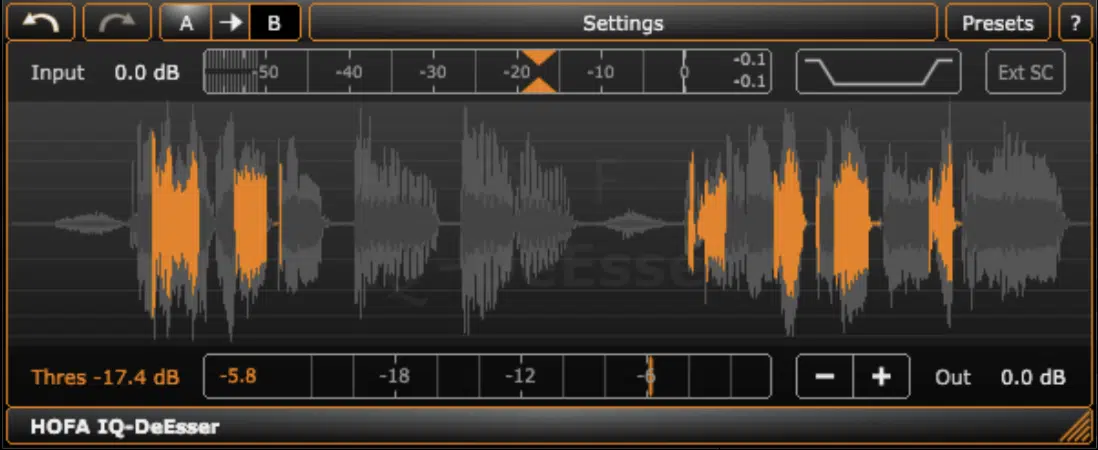
If you want a next-level intelligent de-esser, HOFA IQ-Series DeEsser gives you automatic detection combined with deep manual de-essing tweaking options.
It doesn’t just squash sibilance, it analyzes the incoming vocal and adapts to its dynamics, so you don’t have to constantly tweak settings.
Also there’s dual-band processing which lets you tame different sibilant areas separately, which is super useful when working with vocals that have both sharp “s” and piercing “sh” sounds.
The detection sensitivity controls give you even more flexibility 一 letting you dial in how aggressively or subtly the de-essing is applied.
If you’re dealing with harsh high-frequency buildup in modern trap vocals or need transparent reduction in a soft R&B mix, this de-essing plugin keeps things smooth.
-
SPL De-Esser by Brainworx
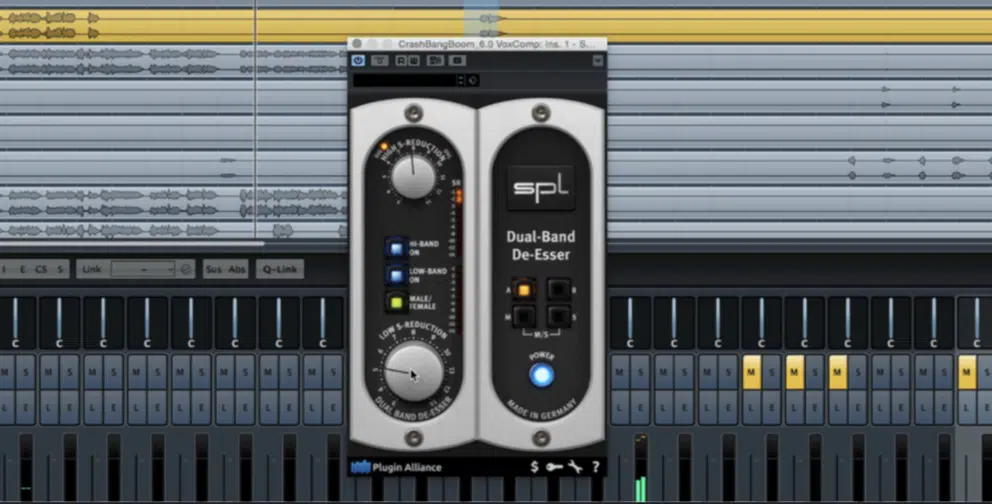
When you want to use a de-esser that mixes analog-style de-essing with modern precision, SPL De-Esser by Brainworx is the one for you.
It delivers some of the most musical sibilance reduction you can get.
This one takes a simplified yet powerful approach that lets you Auto-Threshold technology that reacts dynamically to changes in the vocal performance.
This means you don’t have to constantly ride the threshold because it adjusts in real time to keep everything balanced.
Also, the Stereo mode is a game-changer for de-essing background vocals and doubled tracks so they sit in the mix without sounding over-processed.
If you’re a fan of classic analog gear but need digital flexibility, this one blends both worlds perfectly.
-
Accusonus ERA De-Esser Pro
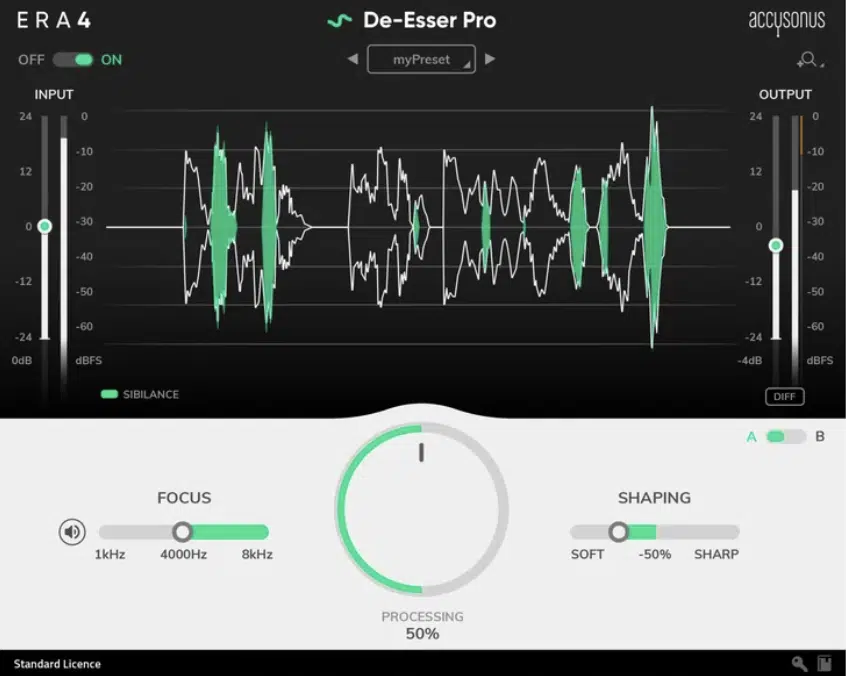
If you need quick, no-fuss de-essing, Accusonus ERA De-Esser Pro is one of the easiest and most efficient tools out there.
Unlike other de-esser plugins, it’s built for speed and simplicity, using a one-knob control that intelligently detects and reduces sibilance.
All without you needing to adjust multiple parameters.
That doesn’t mean it’s lacking in power though, don’t worry, you still get adaptive frequency targeting.
It lets this awesome de-essing plugin to automatically focus on problem areas without dulling the rest of the vocal.
If you’re on a tight deadline or need instant de-essing on human voice overs, interviews, string noise, or quick vocal edits, this is the fastest way to clean up sibilance.
All while keeping everything natural and on point, of course.
Final Thoughts
And there you have it: everything you need to know to answer the question, “what is a de-esser?”
Now, with all the information, tips, and techniques we talked about, you’re ready to use them like a true professional.
Just remember to set the right frequency range, fine-tune the threshold to avoid over-processing, and experiment with different types of de-essing methods to find what works best for your mix.
Plus, make sure that you’re always listening in context, balancing de-essing with EQ and compression, and avoiding the common mistake of making vocals sound dull/lispy.
And, as a special bonus, you’ve got to check out the absolute best Free Vocal Samples in the game.
In this pack, you’ll get 20 free vocal samples that are the best way for you to make your tracks catchy and add the missing piece to your beats every single time.
They’re all proper, polished, perfectly processed vocal samples that were created by expert vocalists and producers.
You’ll be getting the best vocals in the game for absolutely nothing (yes, all 100% royalty-free) 一 trust me, you do NOT want to miss out on these.
Bottom line, when it comes to learning what is a de-esser, it’s really all about controlling sibilance without sacrificing vocal clarity and choosing the right settings for each track.
Plus, understanding when to use wideband vs. split-band de-essing for the best results.
Make sure to avoid over-processing, combine de-essing with other processing techniques, and never rely on a single method for every vocal.
This way, your tracks will always be on point, clean, professional, and industry-ready.
Just don’t forget to always practice, enhance your skills, try out new things, and never be afraid to think outside the box because that’s where the real magic happens.
Until next time…


Leave a Reply
You must belogged in to post a comment.