Psychoacoustics in music production are all about tricking the listener’s brain — and doing it on purpose.
They can help you shape how sounds are perceived, even if the actual frequency content or volume doesn’t change.
Plus, they give you full control over width, clarity, loudness, and space like never before.
As producers, knowing all the best psychoacoustic techniques can seriously enhance your skills and bring your mixes, beats, and sound design to the next level.
That’s exactly why I’m breaking down everything you need to know, like:
- Stereo widening without phase problems ✓
- Creating low-end presence without using subs ✓
- Boosting perceived loudness without limiting ✓
- Shaping transients for clarity and punch ✓
- Creating emotional depth with subtle modulation ✓
- Using masking to clean up muddy elements ✓
- Controlling dynamics with harmonic compression ✓
- Enhancing center focus through mid/side tricks ✓
- Simulating 3D space with binaural panning ✓
- Saturating with purpose, not just loudness ✓
- Many, many more psychoacoustic techniques ✓
By knowing all the best psychoacoustic techniques, you’ll never have to worry about sloppy/cluttered mixes or super weak-sounding tracks ever again.
They’ll hit harder than you ever imagined and feel way more immersive (plus they’ll translate on every speaker setup you could think of).
You’ll be able to knock out emotional, professional-level mixes like an absolute boss.
And side note, I’ll be including pro tips all throughout the article, so you’ll be able to take things to the next level without second-guessing yourself!
Table of Contents
- What Are Psychoacoustics?
- Top 11 Psychoacoustic Techniques to SERIOUSLY Enhance Your Skills
- #1. Haas Effect (Stereo Widening Without Phase Issues)
- #2. Phantom Transient Anchoring
- #3. Binaural Panning (Creating Virtual 3D Movement)
- #4. Phantom Signal Sculpting with Residual Hints
- #5. Virtual Bass (Low-End Without Low Frequencies)
- #6. Mix Translation Through Equal-Loudness Contouring
- #7. Psychoacoustic Compression (Perceptual Control of Dynamics)
- #8. Mid-Side Expectation Skewing
- #9. Implied Motion Through Spectral Incongruence
- #10. Micro-Modulation (Keeping Static Sounds Alive)
- #11. Layer-Splitting (Fundamental Mono + Wide Harmonics)
- Bonus: What You Should Remember When Using Psychoacoustics
- Final Thoughts
What Are Psychoacoustics?

Before we get into the techniques themselves, let’s first break down what psychoacoustics are actually about and how they can skyrocket your skills.
Psychoacoustics is the science of how we perceive sound, not just how it’s measured 一 it digs into how your brain and ears interpret:
- Volume
- Pitch
- Space
- Depth
- Dynamics
Yes, even when two signals might technically be the same.
In the music production game, knowing how to manipulate and leverage psychoacoustic techniques lets you shape a listener’s experience.
It does this by tweaking what seems loud, wide, clean, or powerful, instead of what actually is, if that makes sense.
That means you can make a track feel bass-heavy (even on speakers unable to reproduce the lower end of the spectrum) without overloading the low end.
Or, sound huge in headphones without touching the reverb.
These psychoacoustic techniques will be crazy beneficial when you want your mixes to translate across cheap earbuds, club systems, car stereos, or phone speakers.
They also give you an edge in emotional impact, which makes elements stand out, or blend in, depending on what your unique song needs, of course.
Plus, understanding psychoacoustics makes every sound decision more intentional instead of just guessing with plugins.
So, whether you’re designing 808s, mixing vocals, or layering synths, psychoacoustic techniques are the secret weapon that let you work smarter, not harder!
And by the way, once you master it, you’ll instantly be taken seriously because this is some truly advanced stuff right here.
Don’t worry if it sounds confusing right now, I’ll be breaking everything down for you so you have a super solid understanding by the end.
Top 11 Psychoacoustic Techniques to SERIOUSLY Enhance Your Skills
Now that you know what psychoacoustics are, why they matter, and how you’re going to be taking advantage of it, let’s break down the real-world psychoacoustic techniques that can elevate your productions instantly. These are the exact tricks that professionals use in advanced sound design, mixing, and mastering to get that polished, immersive sound that stands out from the rest (big time).
#1. Haas Effect (Stereo Widening Without Phase Issues)
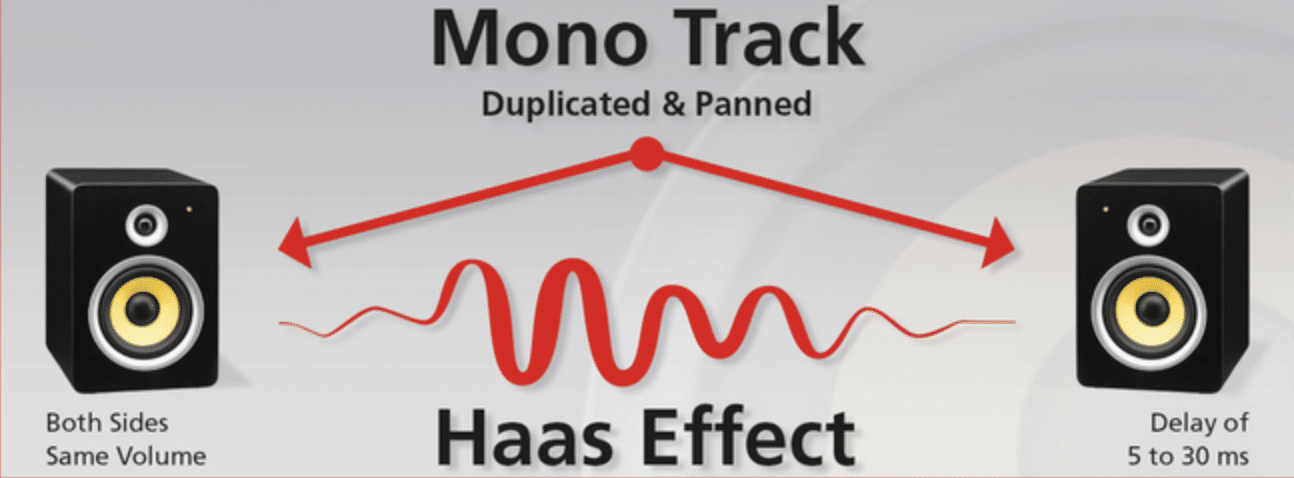
Let’s kick things off by talking about the Haas Effect, which is a legendary psychoacoustic widening trick that you’re going to need to know.
It makes a mono sound feel stereo by delaying one side just enough to fool your brain, without actually doubling or chorusing the signal.
What you can do is take a mono signal (like a dry lead vocal, snare, or synth) and duplicate it 一 then delay the right channel by somewhere between 10–35ms.
This is the sweet spot for stereo width without noticeable echo.
What you’re going to do is start with 20ms and adjust up or down while soloing the track in mono, and if the sound thins out or comb filters, make sure to bring the delay down slightly or collapse it tighter.
You can either do this:
- A) Manually in your DAW with sample-accurate delays
- B) Use plugins like Waves Doubler, Voxengo Sound Delay, or even Utility + Delay in Ableton to get surgical with it
On top of that, you should lower the volume of the delayed side by about -3 to -5dB, depending on how dominant you want the original center signal to remain.
If you want to take it further, simply toss a high-pass filter on the delayed channel at around 150Hz–200Hz to keep your stereo field clean and avoid pulling low-end out of the center, because you definitely don’t want that.
And, just make sure to always mono-check your mix after using the Haas Effect.
If it sounds hollow, you’ve gone too far, and the best fix is usually adjusting the delay back toward 15ms and pulling down the delayed side’s level until it feels “glued.”
#2. Phantom Transient Anchoring
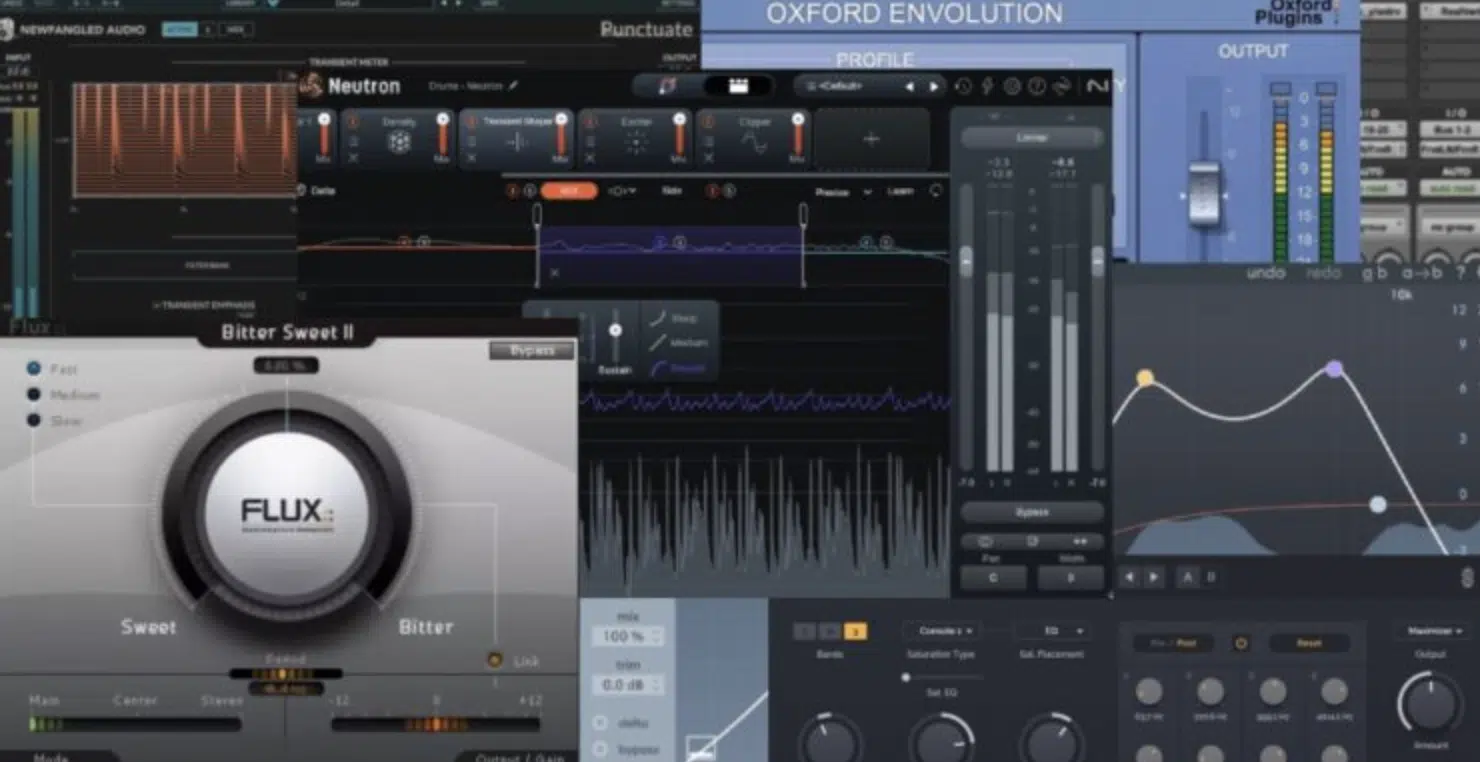
Phantom transient anchoring is a psychoacoustic technique that makes slow-attack or static sounds (like pads, texture beds, or reverb tails) feel more locked-in/professional.
The best part is, it does so without raising the volume or adding extra layers.
What you can do is layer a very short, clean transient, like a:
- Rim click with no tail
- Hi-hat with everything below 300 Hz and above 6kHz filtered out
- Even a tight snare tick EQ’d to emphasize the 2kHz–5kHz range
Then you’re going to place it precisely at the starting point of your ambient or sustained sound.
Just make sure to keep the transient super quiet (around -18dB to -24dB FS) and make sure it doesn’t draw attention to itself.
The ultimate goal is to let the brain fuse it with the sustained element using the ear’s temporal binding window, which usually lasts about 30–50 milliseconds.
When timed right, your listener’s ear will perceive the transient and the slow-attack sound as one unified object.
It gives the static sound a false but convincing sense of impact, clarity, or groove placement… Pretty cool, right?
You’re not changing the tone of the pad or ambient wash 一 you’re giving it a rhythmic anchor point that feels like an attack, even though it technically doesn’t have one.
This trick is insanely dope on ambient vocal layers, riser beds, or reverb tails that need to “arrive,” or sustained 808s that you don’t want to over-compress.
PRO TIP: To keep the illusion fresh and successfully avoid ear fatigue, automate the transient’s pitch by ±1–2 semitones or its pan position by ±10–15% every 8 or 16 bars.
This subtle (yet pretty epic) modulation reinforces presence while keeping the listener unconsciously engaged, which is always what you want with psychoacoustic techniques.
#3. Binaural Panning (Creating Virtual 3D Movement)
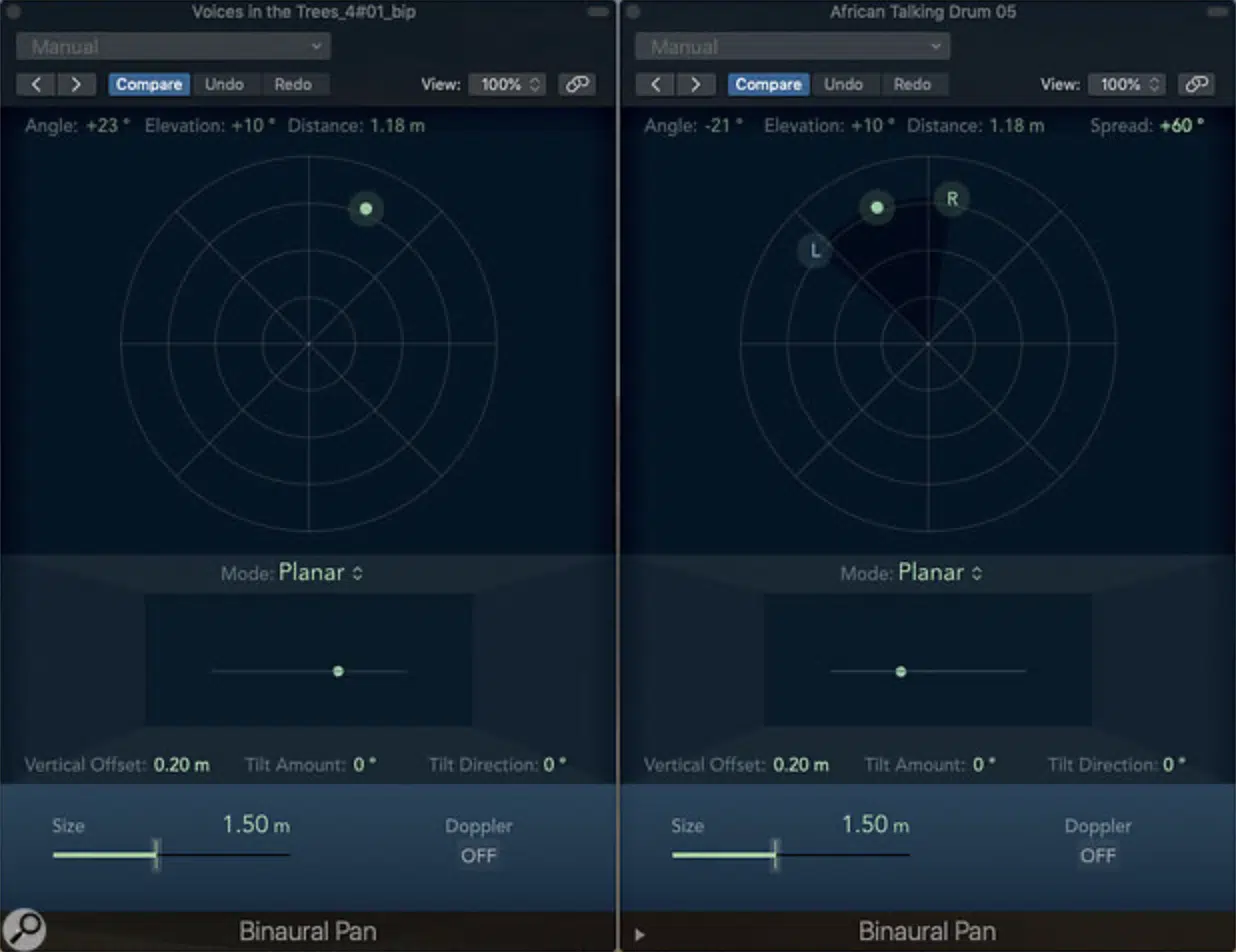
Binaural panning is another super interesting psychoacoustic technique that lets you place sounds in full 3D space.
Not just left to right like standard stereo panning, but above, below, behind, or directly in front of the listener.
This works by simulating how your ears and brain localize sound using interaural time differences (ITD) and interaural level differences (ILD).
I know that’s a little confusing, so in plain english, these are the tiny shifts in timing and loudness between what your left and right ear hear.
What you can do is grab a plugin like Logic Pro’s Binaural Panner, DearVR Micro, or SPARTA Binaural Renderer, and start adjusting the sound’s:
- Azimuth (horizontal angle, typically ±30° to ±75°)
- Elevation (from -30° below to +60° above)
- Distance (usually 0.5m to 2.5m)
This will help you create the illusion of sound orbiting or hovering in 3D space.
For example, automate the azimuth of a reversed riser from -90° to +90° over 8 bars while slowly raising its elevation from 0° to +30° to make it feel like it’s lifting off and flying over the listener’s head.
Keep in mind that it shines brightest on high-frequency, transient-rich elements, like percussive FX, ear candy, ambient sparkles, or even hi-hats.
I seriously urge you to try this with sounds like reversed vocal FX, synth swells, or whispered phrases, but it’s dealer’s choice.
This is because the brain relies more on phase and timing to locate higher frequencies in space.
Just remember that this effect only works correctly on headphones, so it’s perfect for modern platforms like Spotify, Apple Music, TikTok, or YouTube Shorts.
Anywhere where most listeners are on earbuds or cans, really.
NOTE: To keep it extra musical, don’t automate movement too quickly. Instead, use slow sweeps over 4–16 bars and modulate distance values from 0.7m–1.5m to maintain depth without disorienting the listener.
My tip here would be to bounce the binaurally-panned version of your FX or vocal ad-libs and layer it quietly underneath the dry version at around -20dB to -25dB, panned center.
It creates a psychoacoustic “spatial halo” that enhances depth and width without crowding the mix or losing focus in mono.
This technique also future-proofs your workflow because immersive audio formats (like Dolby Atmos, VR audio, or head-tracked playback) aren’t going anywhere.
So, honestly, using it now puts you way ahead of the competition.
#4. Phantom Signal Sculpting with Residual Hints
Phantom signal sculpting lets you create the illusion of a sound continuing to exist (even after you’ve removed it) by shaping what’s left behind in a very specific way.
What you can do is take a complex sound, like a layered vocal pad, a granular texture, or even a tonal noise burst, and design it with a strong transient front or tone center.
This is the going to be followed by a decaying harmonic tail, subtle noise, or ambient FX.
Then, right at the transition point or drop, strip out the core of the sound (either the fundamental tone, main midrange body, or dominant frequency).
Just make sure to leave only the residuals, like upper harmonics, spectral smears, or a long reverb trail filtered above 2.5kHz.
You’ll want to do this because the brain relies on temporal continuity and spectral cues (especially in the 2–8kHz range) to keep track of sonic “objects.”
Basically, your listener will still feel like the sound is present even though the core of it is completely gone.
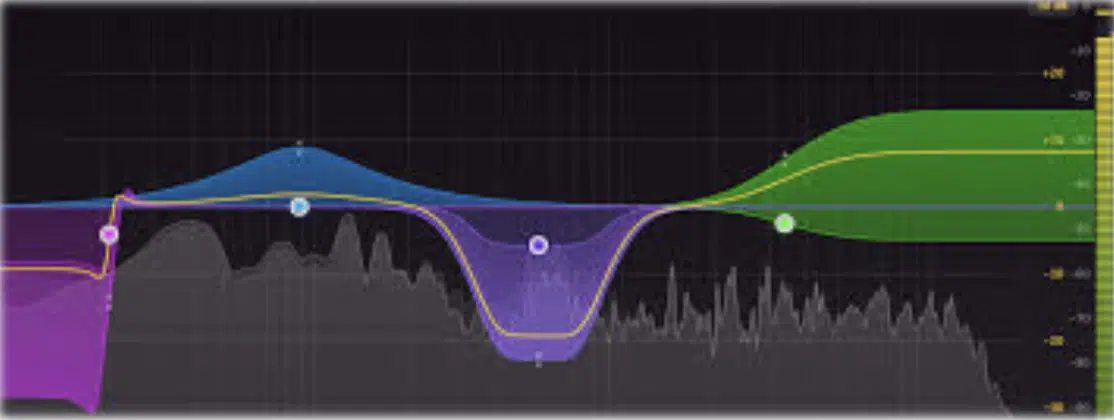
You can hype up this awesome illusion by boosting specific overtone clusters using tools like Pro-Q 4 in dynamic EQ mode.
Or, by enhancing the formants with spectral shapers like Oeksound Soothe2 or SplitEQ, even just +1.5–2dB can lock it in.
Also, try using subtle pitch modulation (±10 cents) or widening automation on the remnants, and you’ll get a lingering ghost-image of the sound that feels emotionally active, even though it’s technically disappeared.
PRO TIP: Use this trick during ambient breakdowns, post-drop transitions, or melodic decays, and combine it with a quick high-pass sweep (ending around 300Hz).
This lets the phantom element float while leaving room for the next section to hit clean 一 it’s presence without presence, and it works like freakin’ magic.
#5. Virtual Bass (Low-End Without Low Frequencies)
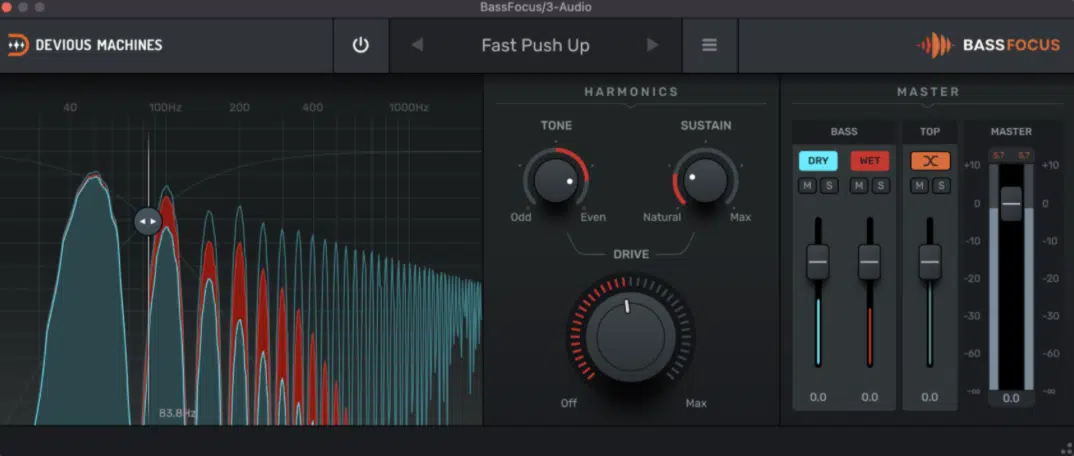
Virtual bass is one of my personal favorite psychoacoustic techniques in the game.
It lets you fake deep low-end even when the playback system physically can’t reproduce sub frequencies (like phone speakers, laptops, or cheap earbuds).
The trick is to layer in harmonics between 120Hz and 250Hz, which the brain uses to “fill in” the missing fundamental frequencies based on:
- Pattern recognition
- Overtone relationships
What you can do is take your sub or 808 and run it through a harmonic generator like Waves MaxxBass, RBass, or whatever your go-to one is.
Just make sure to set the crossover frequency around 75–90Hz, and boost the synthetic harmonics so they peak about +2.5 to +3dB above the original sub content.
And for more manual control, duplicate your bass, high-pass the copy at 150Hz, and run it through a distortion plugin like Decapitator, Trash 2, or FabFilter Saturn with the drive pushed to 25–40%.
In my experience, you’ll want to use a tape or warm tube mode to keep the tone round, not harsh, so keep that in mind as well.
Blend that layer back in at around -12dB to -9dB, depending on how much edge you want 一 you’re not going for loudness, just harmonic presence.
The goal is to add texture and overtones in the upper bass range so even when the sub can’t be heard directly, the listener still feels it right in the chest.
You’ll also want to monitor using a spectrum analyzer like SPAN, Pro-Q 3/4, or Youlean Loudness Meter, and check that your 2nd and 3rd harmonic peaks (e.g., for a 50Hz sub, that’s 100Hz and 150Hz) are clearly visible and smoothly tapering.
PRO TIP: When mastering for digital-first platforms, keep your real sub mono and tight (cut below 30Hz if needed), but let your harmonics spread slightly.
You can do this with M/S EQ or stereo widening from 150Hz upward because it gives you that big, wide bass feel without sacrificing club or car playback clarity.
#6. Mix Translation Through Equal-Loudness Contouring
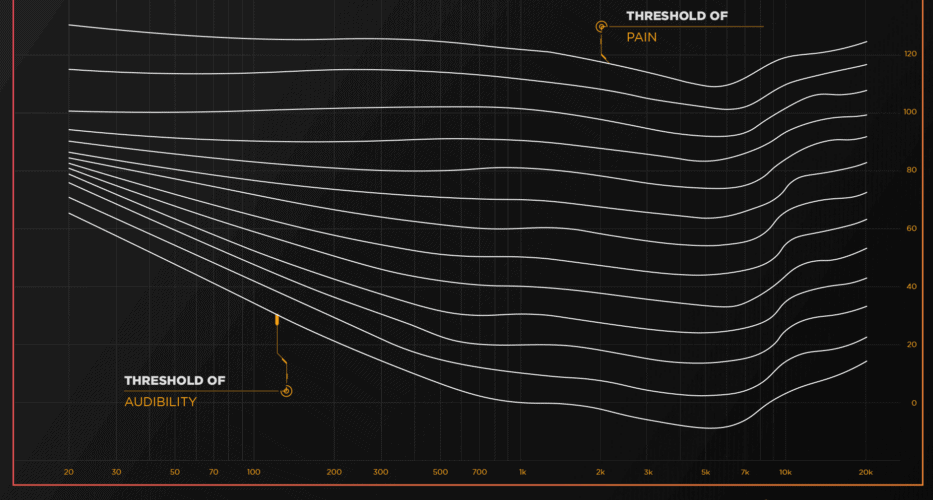
Equal-loudness contouring is one of the vital psychoacoustic techniques that are based on how the human ear hears frequencies differently depending on volume.
Understanding this one is a MASSIVE cheat code for making mixes that actually translate, so you definitely don’t want to overlook it.
The concept comes from the Fletcher-Munson curve.
If you’re not familiar, it shows that our ears are most sensitive to 2–5kHz, and far less sensitive to deep lows and airy highs, especially at lower playback volumes.
What you can do is periodically switch your monitoring level while mixing…
For example, reference at 65 dB SPL for clarity and balance, then check at 80–85 dB SPL to gauge punch, body, and impact.
Make sure to take mental notes on which frequencies suddenly feel too sharp or too weak, because that’s the key here.
If your snare pops at low volume but disappears when cranked, or your bass feels clean at 85 dB but vanishes at 60 dB, that’s a big red flag.
It’s basically telling you that your mix is reacting to psychoacoustic bias, not reality.
One way to fix this is by lightly dipping 2–4kHz by 1 to 1.5dB using a wide bell curve, and boosting subs (40–60Hz) or air (10–12kHz) by 0.5–1dB.
This way, those regions remain present across volume shifts.
Now, this doesn’t mean you “fix” your mix at one loudness 一 it simply means you balance it across a range, training your ear to think like a listener, not an analyzer.
PRO TIP: If you’re working late and monitoring quietly, try temporarily applying a “Fletcher-Munson offset” EQ to your master.
To do this, use a high-shelf lift above 9kHz (+1dB), a low-shelf bump around 60Hz (+1.5dB), and a midrange dip around 3kHz (-1dB).
It’ll successfully simulate a louder response curve and keep your mixing decisions on point and in check until you can monitor at full level again.
#7. Psychoacoustic Compression (Perceptual Control of Dynamics)
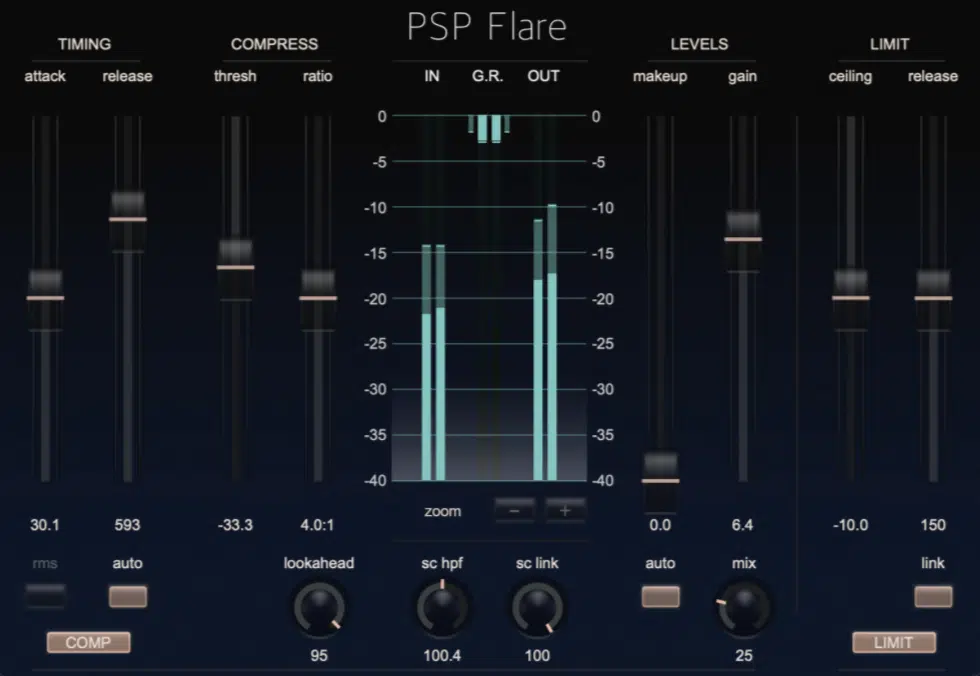
Now, you might hear “psychoacoustic compression” and think that it has to be all about squashing your dynamics… Well, not in this case.
For this unique technique, it’s all about shaping how your listener perceives punch, energy, and flow, without necessarily changing the peak values on your meter.
What you can do is use classics like saturation, transient shaping, and even manual clip-gain rides to shift the feel of the entire performance.
This is instead of just throwing a compressor on everything.
For drums, you’re going to grab a transient shaper like SPL Transient Designer or Oxford Envolution and boost the attack to +5.0 and reduce sustain by -2.0.
This will give you tighter, snappier transients that feel louder but don’t actually peak higher.
And on vocals, you can lightly saturate using your favorite tape plugin (like Waves Kramer Tape, in my case) and push the input to +4.5dB.
Then, simply fine-tune the flux or bias until the top-end smooths out and the midrange feels forward without losing emotion or tone.
For even more controlled shaping, stack two compressors in series:
- The first with a 2:1 ratio, 30ms attack, and 100ms release for leveling overall body.
- The second with 4:1, 5ms attack, and 50ms release to add grip and snap to the front-end of the signal.
This layered approach brilliantly controls macro and micro-dynamics separately, so your mix breathes naturally but still hits hard and feels glued.
Just remember, you’re not compressing to tame…
You’re compressing to enhance perception, which is what separates clean but flat mixes from polished, professional-sounding ones all day.
Also, my advice would be to use a VU meter or an RMS loudness analyzer while dialing this in.
This is because the ear hears closer to RMS and average energy than peak spikes, especially when it comes to perceived consistency across playback systems.
#8. Mid-Side Expectation Skewing
Mid/side manipulation isn’t just about pushing your sides wider, believer it or not.
It’s about creating controlled perceptual tension by subtly breaking the brain’s built-in assumptions about where sound “should” exist in a mix.
Your auditory system naturally expects vocals, bass, and leads to be centered, and reverbs, ambient noise, and shimmer to live in the sides.
What you can do is use M/S EQ to bend those rules just enough to create a phantom expansion effect…
For example, take a vocal or lead synth and boost 2.5–4.5kHz by +1.5–2dB in the side channel only, while dipping the same band by -0.5dB in the mid.
This way, you’re going to get intelligibility or texture (like breath, string pick, or crisp consonants) that feels like it’s radiating outward even though the sound technically remains centered.
This psychoacoustic trick works because the brain uses lateralization bias.
It localizes high frequencies and transient-heavy detail in the stereo field way faster than low or sustained elements ever could.
Basically, you’re hijacking that system to make the sound feel wider, deeper, and more alive without making it float off-center.
This is killer on vocals, electric guitars, drum bus ambience, stereo reverb returns, and even synth leads that need to cut without sounding sharp.
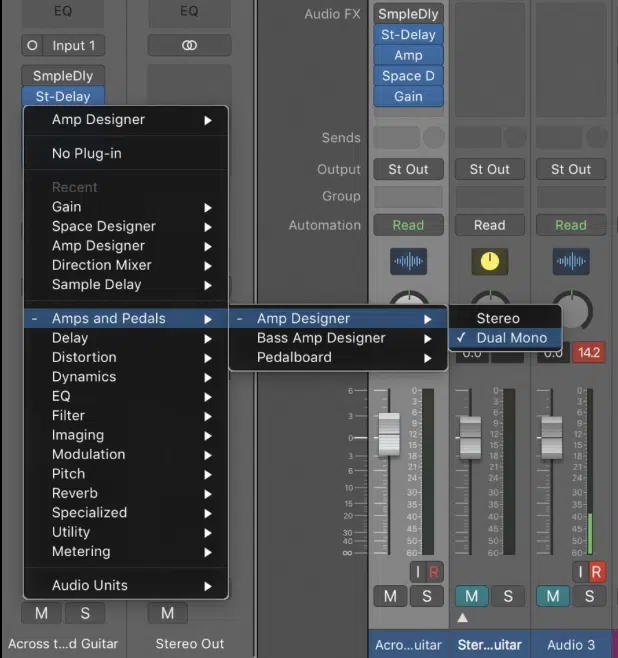
PRO TIP: If your plugin doesn’t support mid/side natively, load it in Dual Mono mode (Logic Pro, for instance) and apply effects only to the right or left channel.
This essentially functions as “side-only” processing and lets you use non-M/S effects like granular manglers, like Output Portal, or delays on the side image only.
It’ll add movement and ear-catching textures that only live in the stereo field.
Just make sure to keep your side energy in check (especially above 5kHz) or your mono compatibility might take a hit, so always A/B your track in mono after dialing in the effect.
#9. Implied Motion Through Spectral Incongruence
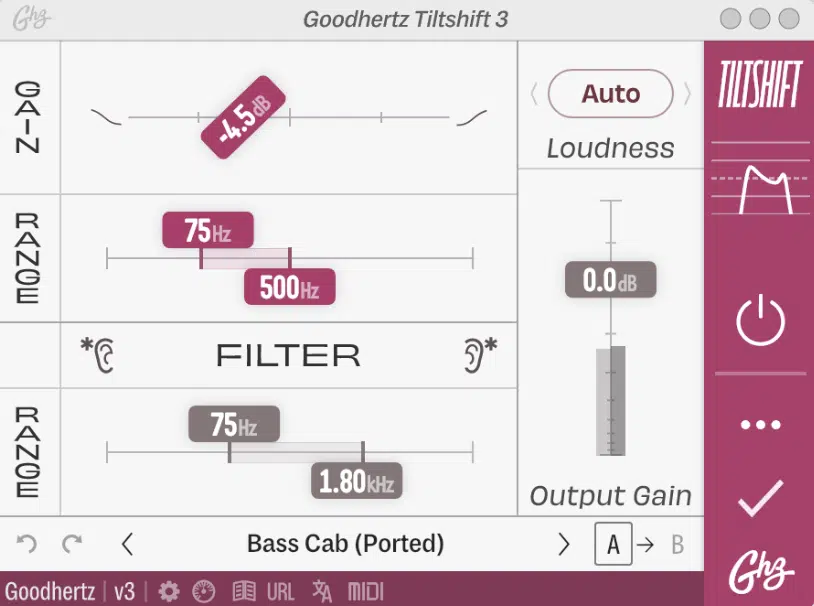
Implied motion is another one of those psychoacoustic techniques that help you create the feeling (illusion, really) that a sound is constantly moving/morphing.
And not by automating volume or panning, but by modulating only the spectral content while leaving everything else completely still.
What you can do is take a static sound, like drone, pad, or riser, and apply slow, subtle modulation to its:
- Formant shape
- Harmonic centroid
- Spectral tilt
You’re going to do this by using plugins like Vital’s vowel morph, NI Form’s spectral shifter, or a tilt EQ like Goodhertz TiltShift 3 or Pro-Q 4 with dynamic bell curves.
Simply set the modulation speed to something slow (1 to 4 bars per cycle) and keep the movement narrow.
Tweak formants by no more than ±200Hz, or tilt the spectrum by ±1.5dB from low to high.
Meanwhile, keep amplitude, stereo image, and spatial effects completely untouched 一 no LFOs on volume, no reverb automation, no stereo modulation, no nothing.
The brain naturally expects changes in brightness or tone to correlate with shifts in reverb tail, stereo position, or envelope.
And when that expectation is shattered, your auditory system perceives it as “movement from within” every single time.
Therefore, your listeners will think that the sound is morphing internally while staying fixed in time and space, which is super cool in my opinion.
This will create a fluid, shape-shifting sensation that feels alive but never disrupts groove or dynamic balance.
And if you’re wondering, it’s absolutely perfect for vocal atmospheres, reverb beds, or tonal FX layers that need to sit underneath busy mixes without clashing.
PRO TIP: Stack this with micro-pitch modulation (±5–10 cents) or narrow band width modulation around 2–4kHz to create the illusion of spectral blooming.
Bottom line, it’ll feel like your sound is evolving over time, even though it’s not “moving” in any traditional way.
#10. Micro-Modulation (Keeping Static Sounds Alive)

Piggy-backing off of #9, micro-modulation adds just enough movement to prevent elements from feeling stale or robotic, especially in loops that repeat for several bars.
And what you’re going to do with this unique technique is apply super subtle modulation (subtle being the keyword here) to:
- Pitch
- Filter cutoff
- Stereo width
For example, try loading up Soundtoys MicroShift or Valhalla Space Modulator and automate just a 5–10% wet/dry mix over 4–8 bars to add evolving texture to a synth pad or ambient sound.
Another option is to add a slow, randomized LFO to the stereo pan of hi-hats using something like ShaperBox or the LFO tool in Serum FX.
To do that, you’re going to set the rate between 1/2 and 2 bars, with modulation depth around 5–8%, so the movement stays subtle and musical.
You can also apply micro-delay modulation using chorus-style plugins by setting the delay time between 15–25 ms with a modulation depth of 1–2ms and a slow rate (around 0.1–0.2Hz).
This will make the source feel wider and more alive without sounding “chorus-y” if you feel what I’m saying.
This works great on background vocals, guitar layers, FX returns, and even synth leads when you want them to feel animated.
And if your pads or textures are sounding flat, automate the filter cutoff by ±200Hz every few bars using a triangle or sine wave shape.
That way, you’ll create the illusion that the sound is literally breathing or evolving (yes, even if it’s a super static chord).
PRO TIP: Stack two subtle modulation types (e.g., pitch and filter) on one sound, each with slightly different LFO speeds…
These cycles drift apart over time and your ear naturally stays more engaged without consciously noticing why!
#11. Layer-Splitting (Fundamental Mono + Wide Harmonics)
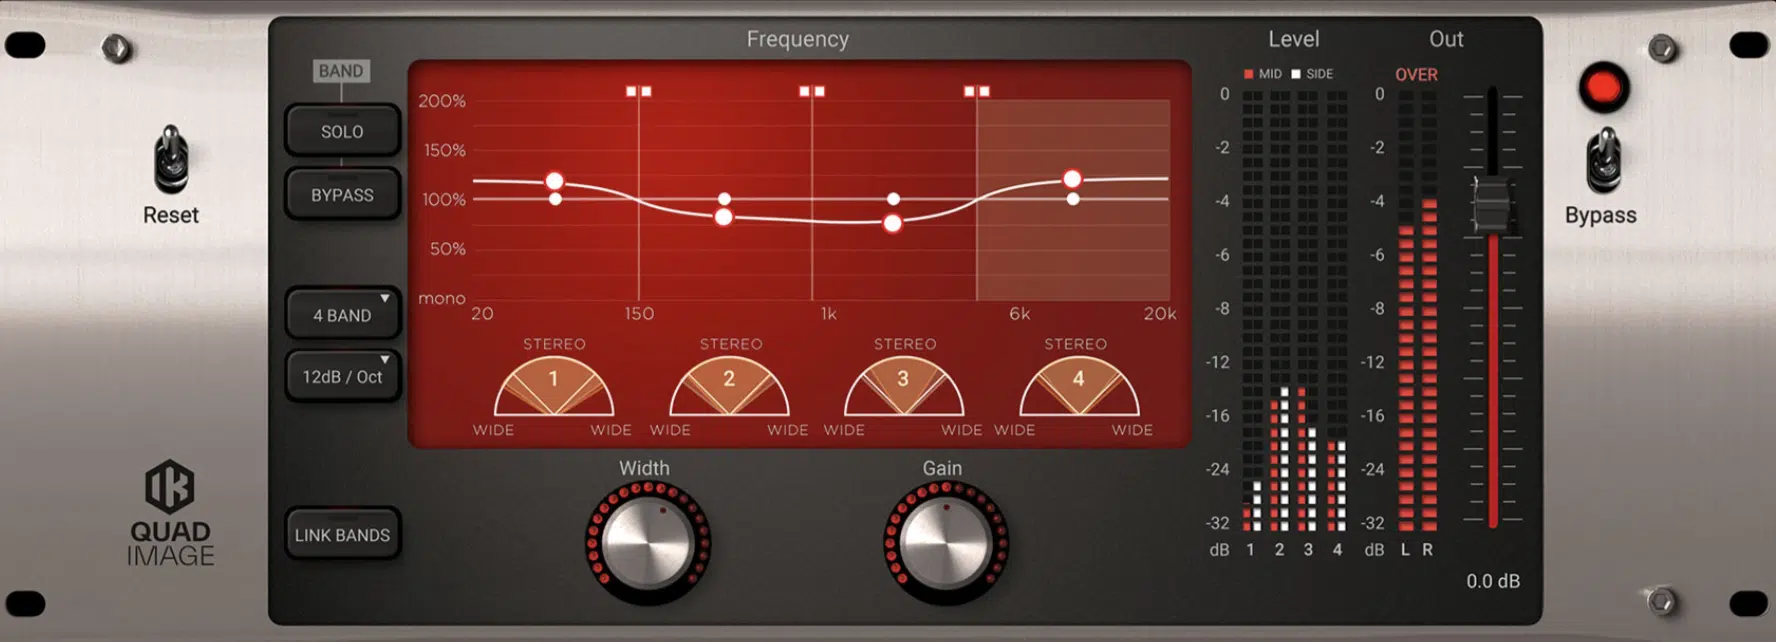
For this one, you’re going to tap into how the brain separates low-frequency localization from stereo perception to give you wide, immersive bass that still knocks hard in mono.
What you can do is split your bass into two distinct layers:
- The sub/fundamental, which stays mono and dead-center under ~150 Hz
- A harmonic layer, which holds everything above that and gets the stereo treatment
For the sub layer, use a sine or triangle wave, or LPF a saw down to ~120Hz, then sum it mono using a Utility or goniometer.
Just make sure your phase correlation is 100% center and apply distortion before mono’ing if you want to bring some extra grit to the table.
For the upper harmonic layer, you can use a richer waveform (like a saw or formant-based wavetable) and high-pass it at around 120–150Hz.
Then, use Unison with 4–7 voices, detune between 0.05–0.25, and enable random phase start (Serum: Global > Phase = Random, Memory OFF) for natural stereo movement.
The sub anchors the pitch in the listener’s brain while the wide harmonics give it the illusion of width, basically.
This tricks the ear into hearing a massive stereo bass without compromising mono compatibility or transient focus, which is epic.
You can even enhance the effect by applying subtle stereo modulation or Haas delay (7–20ms) to the upper layer only.
This keeps it HPF’d at 400 Hz so it never muddies the low-end.
PRO TIP: To take it one step further, use a multiband stereo imager (shown above) and set your stereo spread to 0% under 150Hz, 40% from 150–800Hz, and up to 100% above 1kHz.
That way, your bass is locked in and wide exactly where it needs to be.
Bonus: What You Should Remember When Using Psychoacoustics

Now that you’ve seen how deep these psychoacoustic techniques really go, it’s just as important to know when and where to use them. Whether you’re building drums, mixing vocals, or dialing in atmosphere during advanced sound design, using these techniques will totally transform how your tracks hit, feel, and connect with your audience in the best ways. So, let’s get into it.
When & Where to Apply These Techniques
The best time to use psychoacoustic techniques is when your track technically sounds “good” but still feels like it’s missing depth, energy, or clarity.
Or of course, when you’re dealing with a mixing situation that has some issues and you just don’t really want to take the easy way out.
This could be like “faking the bass” instead of simply adding more saturation just to give the listener a clue that the bass is present.
Maybe your sub is already stacked with saturation and EQ, but it still disappears in phone speakers…
Well, that’s the moment where virtual bass layering or midrange harmonic enhancement gives you what simple volume changes never could in its wildest dreams.
And when you’re messing around with sound design, you can lean into things like micro-modulation and harmonic excitement.
This will give your synths or textures more life and movement right off rip instead of having to fix them later (talk about time-saving).
You can also use binaural panning or implied motion to create depth and engagement without adding more layers, which not only sounds cleaner but saves CPU too.
When it comes to the mixing stage, transient shaping, virtual bass, and mid/side EQ are key for when your elements are clashing or just not sitting right, even if levels look fine.
Sometimes it’s not about gain staging or frequency overlap 一 it’s about getting your listener to feel something is locked in, even if technically nothing changed on the meter.
And for mastering, perceived loudness enhancement and EQ contouring can help your final bounce hit harder without blowing past -14 LUFS or killing the dynamics.
Even subtle harmonic lifts or psychoacoustic compression in the right range can shift the entire energy of a track, without you having to push it into a limiter and pray.
Just remember, these aren’t things you slap on for no reason… They work best when you’re solving a problem or chasing a specific feeling in the mix.
And once you get comfortable using them with purpose, they start becoming second nature, which will give you that extra layer of control other producers miss entirely!
Layering & Sound Design with Psychoacoustics in Mind
When you’re layering sounds, using psychoacoustic techniques can help keep things from turning into a big muddy mess.
For example, if you’re stacking three different synth layers for a chorus lead, you can:
- Apply harmonic excitement to just the top layer for extra sparkle
- Carve out a 2–4kHz notch in the mid layer
- Use subtle mid/side widening on the bottom layer to spread the weight across the stereo field
You could also boost the 10kHz+ range by +1dB on just the side signal of the top layer to push air outward.
Just make sure to add a tight mono sub below 150 Hz under the lowest layer for stability, which creates a layered sound that feels HUGE but stays glued.
This way, each layer holds a specific job (one provides shimmer, one brings body, and one supports the width), but none of them will be fighting each other.
You’re basically assigning roles to every element in the stack, and reinforcing those roles through perceptual tricks rather than just stacking frequencies blindly.
When done right, this kind of layering not only sounds bigger, it feels more emotional, more intentional, and most importantly way more professional.
Just remember that it’s less about stacking for the sake of stacking, more about using psychoacoustics to make each element play its unique role in the overall arrangement.
And once you start thinking this way, you’ll notice your mixdowns need less EQ correction, less compression, and they tend to translate better on every system.
The main goal: design the perception of space 一 not just the sound itself.
Avoiding Overuse and Listening Fatigue
Even though these psychoacoustic techniques are powerful, going too far with them can actually hurt your mix more than help it, and you certainly don’t want that.
If you overdo things like stereo widening or harmonic distortion, your track might sound cool at first, but after 30 seconds, it can start to feel tiring, unstable, or even annoying.
For example, if you’re boosting 10kHz or higher across five different elements just to add “air,” you’re not creating clarity.
You’re just stacking harshness, and the listener’s ear is gonna check out quick, especially on earbuds or bright headphones.
Same goes for excessive modulation.
If everything in the track is constantly shifting, swirling, or moving across the stereo field, the mix will start to lose focus and nothing will feel locked down in place.
What you can do here is assign motion strategically.
This will let certain elements (like a riser or background pad) carry movement, while your drums, vocals, and bass stay solid to hold down the groove.
One trick is to A/B your mix after every psychoacoustic move and ask yourself 一 “Is this actually improving the vibe, or just making it sound different?”
If the mix sounds cooler but loses impact, or starts feeling less fluid/on point, it’s a sign you’ve pushed the psychoacoustic effect too far my friend.
Keeping that mindset helps you use these tools like a pro (not like a kid going crazy with plugins and widening everything just because it sounds exciting in the moment).
PRO TIP: After every session, bounce a quick rough mix, throw it in your phone or car, and ask yourself where your ears naturally go…
If everything’s screaming for attention at once, it’s time to scale back and rethink what actually needs the spotlight.
Final Thoughts
And there you have it: the absolute best psychoacoustic techniques you could ever dream of.
With all of them, you’ll be able to shape space, control energy, and bend perception like an absolute boss (talk about dominating the competition!).
Just remember that it’s all about strategic, intentional decisions as opposed to simply stacking plugins just because they sound cool in solo.
If you don’t keep that in mind, you’ll just end up with a bloated, unfocused mix, or worse, something that only sounds good for the first 10 seconds.
And, let’s be honest, that’s the last thing you’ll want.
Bottom line, psychoacoustic techniques are all about using the science of hearing to boost the feel of your track.
If you follow this outline though, you’ll never have to worry about your mixes feeling flat, crowded, or lifeless again.
This way, not only will your skills be through the roof, but your tracks will move people like never before.
Just try not to get overwhelmed by the complexity of these techniques at first, because practice makes perfect, and you’ll nail it with time, no worries.
And also, never be afraid to think outside the box, because that’s where the real magic happens.
Until next time…


Leave a Reply
You must belogged in to post a comment.