Sidechain compression is a super beneficial technique that uses a compressor’s sidechain input signal in order to trigger the device, as opposed to the compressor’s (default) input signal.
It can be used subtly or more aggressively, depending on your intended outcome.
Sidechain compression can provide clarity in different elements throughout your track, and can even create notably intriguing pumping effects.
Within this article, you’ll get an extensive look into some of the most unique ways you can incorporate sidechain compression into your mixes.
The following sidechain compression techniques will allow you to:
- Mix your low-end more efficiently.
- Incorporate rhythmic pumping effects to your instruments.
- Avoid phase issues by eliminating clashing.
- Target specific frequencies directly through multi-band sidechain compression.
- Allow vocals to sit properly in a mix.
- Create ultimate stereo separation and imaging by adding mid/side processing (M/S) to your sidechain compression.
- Capture the attention of your audience.
- Produce a more professional mix.
- Plus so much more.
However, before we jump into sidechain compression, it’s important that you understand compression itself, so let’s dive in.
Table of Contents
- Back To Basics: Compression
- What Is Sidechain Compression?
- Sidechain Compression: Broken Down
- Compressor Parameters
- #1. Ducking/Pumping: Sidechaining Your Kick & Bass
- #2. Stereo-Imaging & Mid/Side-Processing Through Sidechain Compression
- #3. Multi-band Sidechain Compression
- #4. Vocal Ducking With Multiband Sidechain Compression
- #5. Using MIDI as the External Sidechain Input (For Rhythmic Flavor)
- OUTRO
Back To Basics: Compression
Compression, in its simplest form, is a dynamic (not static) process that reduces the dynamic range of a given signal over time.
It is an indispensable tool found across individual tracks, Mix Buses, and mastering chains.
The dynamic range of a sound is technically the difference between the loudest (peak) and softest/lowest level of the given audio signal.
By using compression, you’re able to control the overall level of the signal; evening it out by making the loudest and lowest parts closer together.
In turn, this lowers the dynamic range and enables you to push a signal harder without a large degree of signal variance.
In its simplest form, it’s used as a general technique to level a signal so it’s relatively consistent and easier to mix.
If you’ve previously drawn in automation curves for a track’s MIX level, you’ve most likely implemented some manual compression.
For instance, bringing down the excessively loud sections (downward compression), and bringing up the particularly softer sections (upward compression).
With the use of a compressor on the other hand, you’ll be able to automate this process entirely.
This will save you a lot of time and hassle, as well as introduce sonic characteristics that are unique to compression.
You’ll be able to boost the overall (perception of) loudness, confidently compete in the ‘Loudness Wars,’ and sound professional on a whole new level.
Basically, compression always was, and always will be the ultimate dynamic processor.
The most popular effects and purposes for which compression is used are as follows:
- Taming Dynamics
- Manipulating Amplitude Envelopes
- Peak Limiting
- Sidechaining
- Parallel Processing
- Etc.
NOTE: If you’re looking for some advanced compression tricks and tips, check out our comprehensive compression article, found here.
What Is Sidechain Compression?
Sidechain compression is when the level of one instrument or sound triggers a compressor, in order to control the level of another sound.
In other words, a compressor is placed on the bass so that when a kick drum hits, the bass level will drop.
Sidechain compression allows you to create sufficient room for the kick itself, so it doesn’t clash with the like-frequencies of your bass.
Otherwise, you’ll run into serious issues, mainly phase cancellation, and you’ll end up losing those desirable low-end frequencies.
This will, in turn, negatively affect the rest of your mix as well.
One super common genre in which sidechain compression is often used is EDM.
Sidechain Compression: Broken Down
Sidechain compression is extremely similar to standard compression, in that you’ll be dealing with the same parameters.
This includes, but is not limited to:
- Threshold
- Ratio
- Attack
- Release
These parameters are further explained in the following section.
However, as the name indicates, the external sidechain is the main difference.
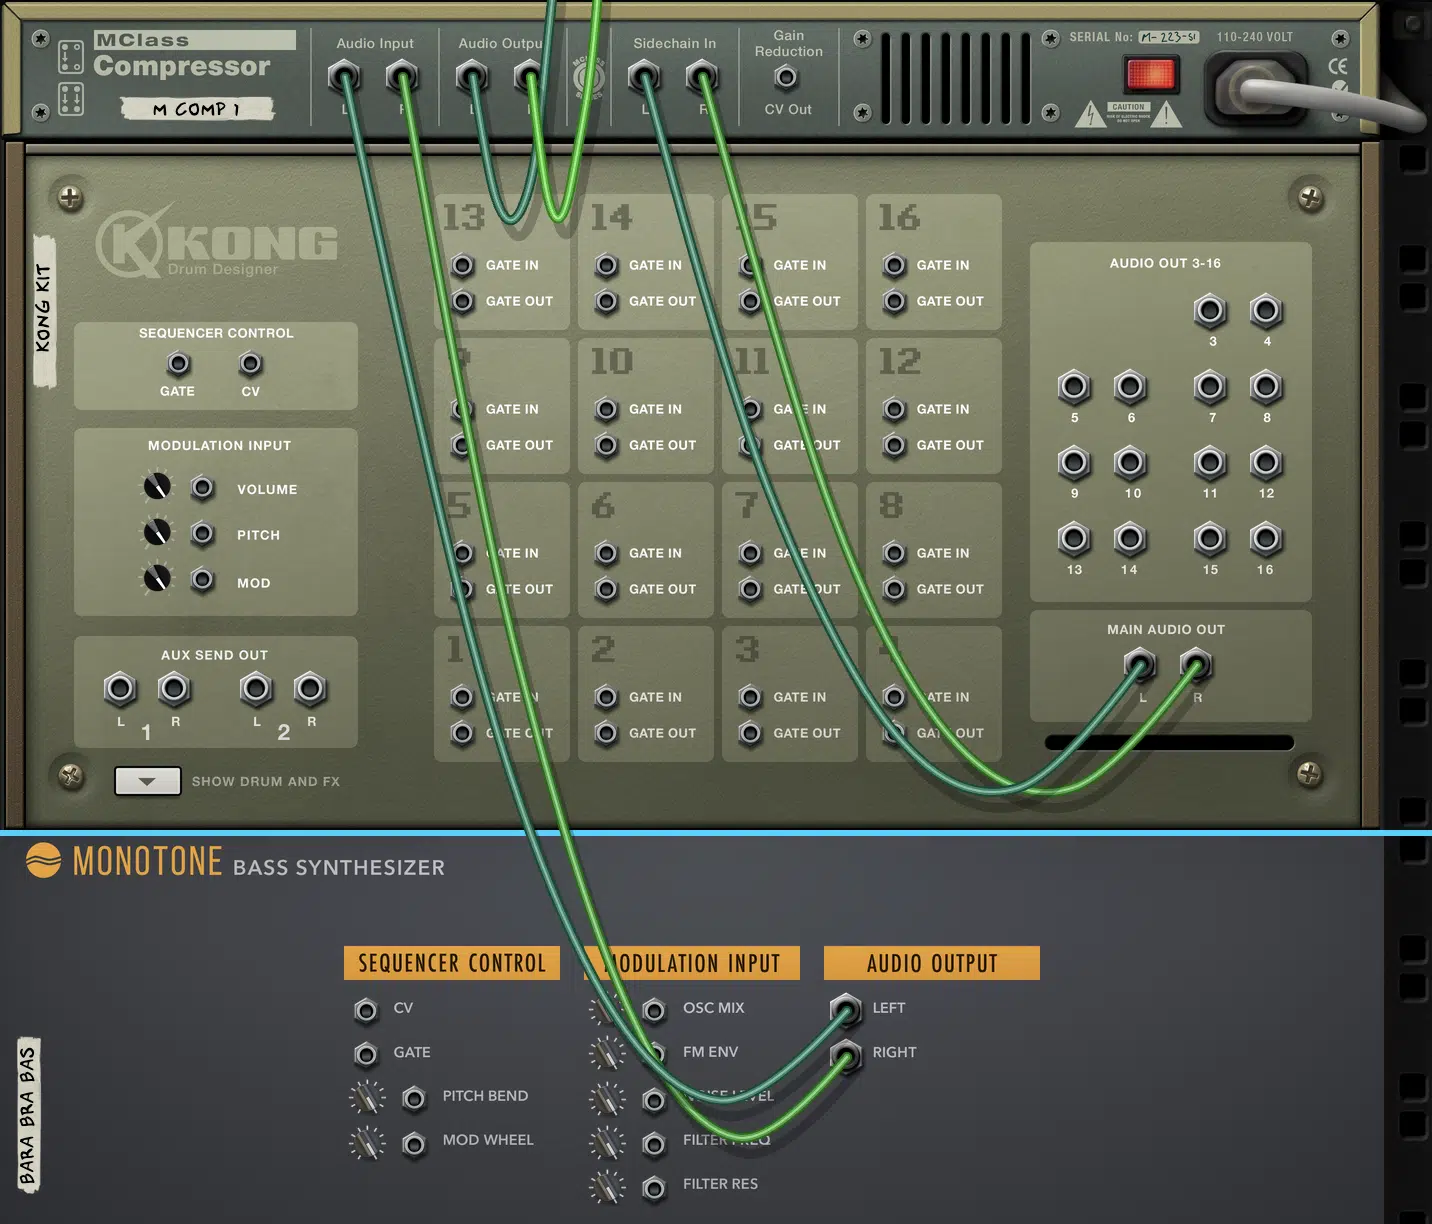
It’s what separates this sidechain compression process from a compressor’s (standard) intelligent volume control.
With a regular compressor plugin, you’re able to control the signal on the track/mix channel where your plugin is inserted.
However, it’s different when you engage the compressor’s sidechain input parameter.
It will start monitoring and responding to a different sound source altogether.
Let’s say you were to place a compressor onto an 808 track and set the sidechain to your kick drum.
The signal of that 808 track would then control the compressor.
It will enable the 808 to clamp down and ‘duck’ every time the kick is triggered.
You may be wondering why you’d want that to happen…
Well, the low-end is extremely finicky when it comes to certain things.
You can’t have 2 of the same, or similar frequencies competing at once, otherwise, you’ll have some serious phase issues.
Also, the overall effect of both your kick and the 808/bass will be severely diminished.
It will typically end up (negatively) affecting the surrounding elements as well.
Plus, will most likely cause the rest of your mix to suffer greatly in the process.
That’s where sidechain compression comes in.
Before we jump into the most astonishing sidechain compression tricks, tips, and techniques, let’s first quickly go over its parameters.
Compressor Parameters
Aside from the sidechain input, the following (general) parameters found on a sidechain compressor are shared with a standard compressor.
Meaning, you’ve probably dealt with them before.
However, if you haven’t or you’d like to brush up on them, let’s dive in:
-
Threshold
The threshold determines the level at which the compressor begins compressing.
It’s traditionally expressed in decibels (dBs),
The threshold is set to target specific moments, or sections of your audio strategically.
Let’s say a drum groove’s snare seems too loud to you…
By strategically setting the threshold, you’ll have a lot of benefits.
You’ll be able to ensure it’s low enough so the snare exceeds it, yet high enough that the rest of the kick is bypassed.
Meaning, it will only allow the snare to trigger and, if desired, be compressed as well, while staying clear of the kick altogether.
The best way to accomplish this is by slowly raising, then lowering the threshold until the meter reacts solely to the snare.
-
Ratio
When the input signal exceeds the threshold, the compressor will detect that and immediately begin attenuating the signal.
The amount in which the level is reduced is determined by the ratio.
In other words, the ratio sets the amount of compression that will take place once the signal crosses the threshold.
This amount is usually expressed in decibels.
For example, let’s say you were using a ratio of 3:1.
That simply means for every 3dB that the signal crosses the threshold, the compressor will apply 1dB of gain reduction.
Note: A limiter is essentially a compressor, just with a high (≥ 10:1) to infinite ratio.
While a compressor typically tames peaks in a gentle manner, a Limiter on the other hand aggressively puts a stop to any level exceeding the threshold (aka, the ‘ceiling’).
This will allow you to drive the signal even harder if desired or preferred.
For everything you need to know in regard to Limiters vs. Compressors, click here.
-
Attack and Release
A compressor’s Attack 一 typically measured in milliseconds (ms) 一 determines just how quickly the compressor reacts.
The input signal gets pulled down when it exceeds the threshold.
The Release does it opposite.
It represents how long it will take for the compressor to let go once the signal is no longer crossing the threshold.
Meaning, it determines the total time required for the signal to return to a fully uncompressed state.
-
Makeup Gain
This is beneficial because compression, by definition, reduces the level of a track.
Even though it’s oftentimes associated with making a track louder.
You should always compensate for the level that is lost when using this parameter.
It’s customary to start by adding back the level of gain reduction the compression is applying.
This is oftentimes accomplished the most successfully when done by ear.
Now that you’re familiar with all the definitions and parameters, let’s dive into 6 unique and super catchy sidechain techniques…
#1. Ducking/Pumping: Sidechaining Your Kick & Bass
Your kick and bass occupy the same frequency range, for the most part.
So, sidechaining the kick to the bass can help you to avoid phase cancellation and clashing.
STEP 1 一 Apply a sidechain compressor to your bass track.
STEP 2 一 Route your kick into the compressor’s external sidechain input.
At this point, you’ll want to mess around with the threshold if need be.
You should start to see some sort of movement within your compressor.
Not when your bass crosses the threshold, but rather every time the kick is triggered.
STEP 3 一 Play around with the Ratio and Threshold parameters to ensure that the bass is sufficiently lowered (aka ‘ducked’).
This is done to:
- Prevent clashing/phase issues.
- Ensure you can hear (or feel) the ‘pumping’ the sidechain compression produces.
STEP 4 一 Manipulate the Attack and Release settings in order to really zone into, and perfect the pumping time.
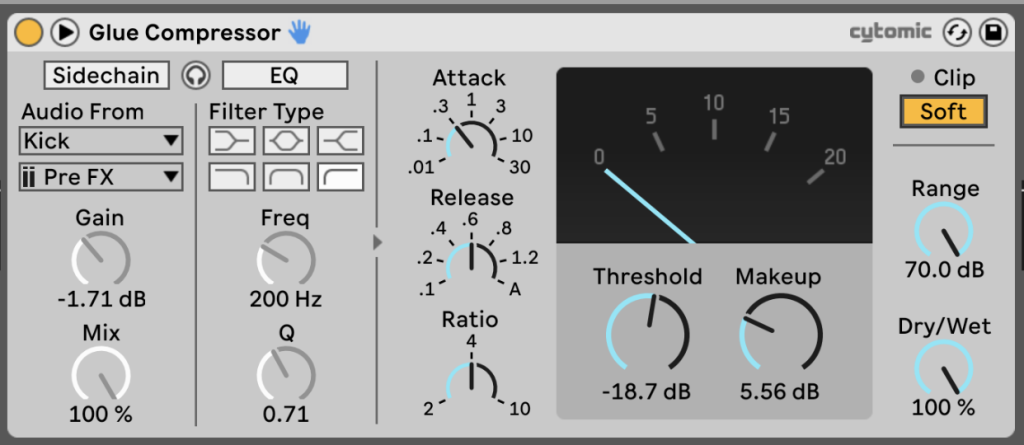
- Attack 一 Make sure it’s set fairly low.
This way, it will react quickly enough to ensure there isn’t any clashing when it comes to the attack portion of the kick.
- Release 一 Make sure the release is not too fast.
Otherwise, the compressor will release its grip before the kick’s delay/release is properly finished.
However, you want it long enough for the pumping to be exaggerated to the point that it’s both heard and felt (if desired).
STEP 5 一 Adjust the Makeup Gain if needed.
You want to make sure the bass is set to the same level it was pre-compression.
STEP 6 (optional) 一 If you want you could even take it a step further at this point, by muting the kick on the main mixer.
This will make it so you can include the rhythmic-pumping effect on the bass, without hearing the kick.
You’ll still hear its familiar pumping action, minus the kick for some variation.
You can also apply it to a pad.
This is ideal for an intro, bridge, or any other part when you’re struggling with breaking free from ‘loop mode.’
#2. Stereo-Imaging & Mid/Side-Processing Through Sidechain Compression
This technique has a wide range of applications.
Ranging from subtle to extreme stereo imaging, correction, enhancement, and manipulation.
The most notable and intriguing is when a sidechain compressor, with mid/side-processing capabilities, is creatively applied to vocals.
When you apply sidechain compression that’s triggered by the vocal, and solely compress the MONO portion of the signal, the conflicting MONO information is ducked.
Leaving the stereo information intact.
This gives the appearance of the vocals being present right down the middle.
Making it coast right along with the surrounding instruments.
What’s happening in this instance is simple:
The MONO portion of the instrumental is moved out of the (main) vocals way when needed.
It will still appear as if the entire signal is unaffected because the stereo information will still remain intact.
This works so well because the stereo/side content doesn’t end up clashing with the mid-signal.
It is a well-known (modern) go-to when attempting to get the vocals to sit correctly.
If you were to apply this same technique using a process that doesn’t offer mid/side capabilities, it won’t have the same effect.
The instrumental that’s ducked by the vocal will usually appear way too obvious.
This ultimately results in the bad sort of pumping that you need to avoid, so keep that in mind.
If you’re a little confused, think of it like this:
A stereo signal is traditionally seen as a left/right channel…
But with the incorporation of mid-side processors, you’ll be able to separate the content.
This is accomplished by isolating the MONO (mid) and STEREO (side) signals.
Just like you would separate the left/right channels of a stereo signal.
It’s also used as a tool to ensure proper translation across various playback systems.
You’ll be able to make certain elements appear present when listened back in stereo, but virtually nonexistent when played back in MONO.
Needless to say, this is essential for guaranteeing a proper MONO playback translation.
This may not necessarily sound like a good thing.
But, whenever this is able to be done in a premeditated fashion, it’s always beneficial.
NOTE: Unless you’re using a form of creative effect processing, or applying sidechain compression for its effect, its ultimate purpose is to make room for conflicting signals to co-exist.
STEP 1 一 Open up a compressor that offers external sidechain input and mid-side (M/S) processing capabilities.
For simplicities sake, you’re going to be applying this process to an entire instrumental.
You’re doing this in order to make sufficient room and to ensure the MONO signal gets ducked when the vocal requires some space (or gets overpowered).
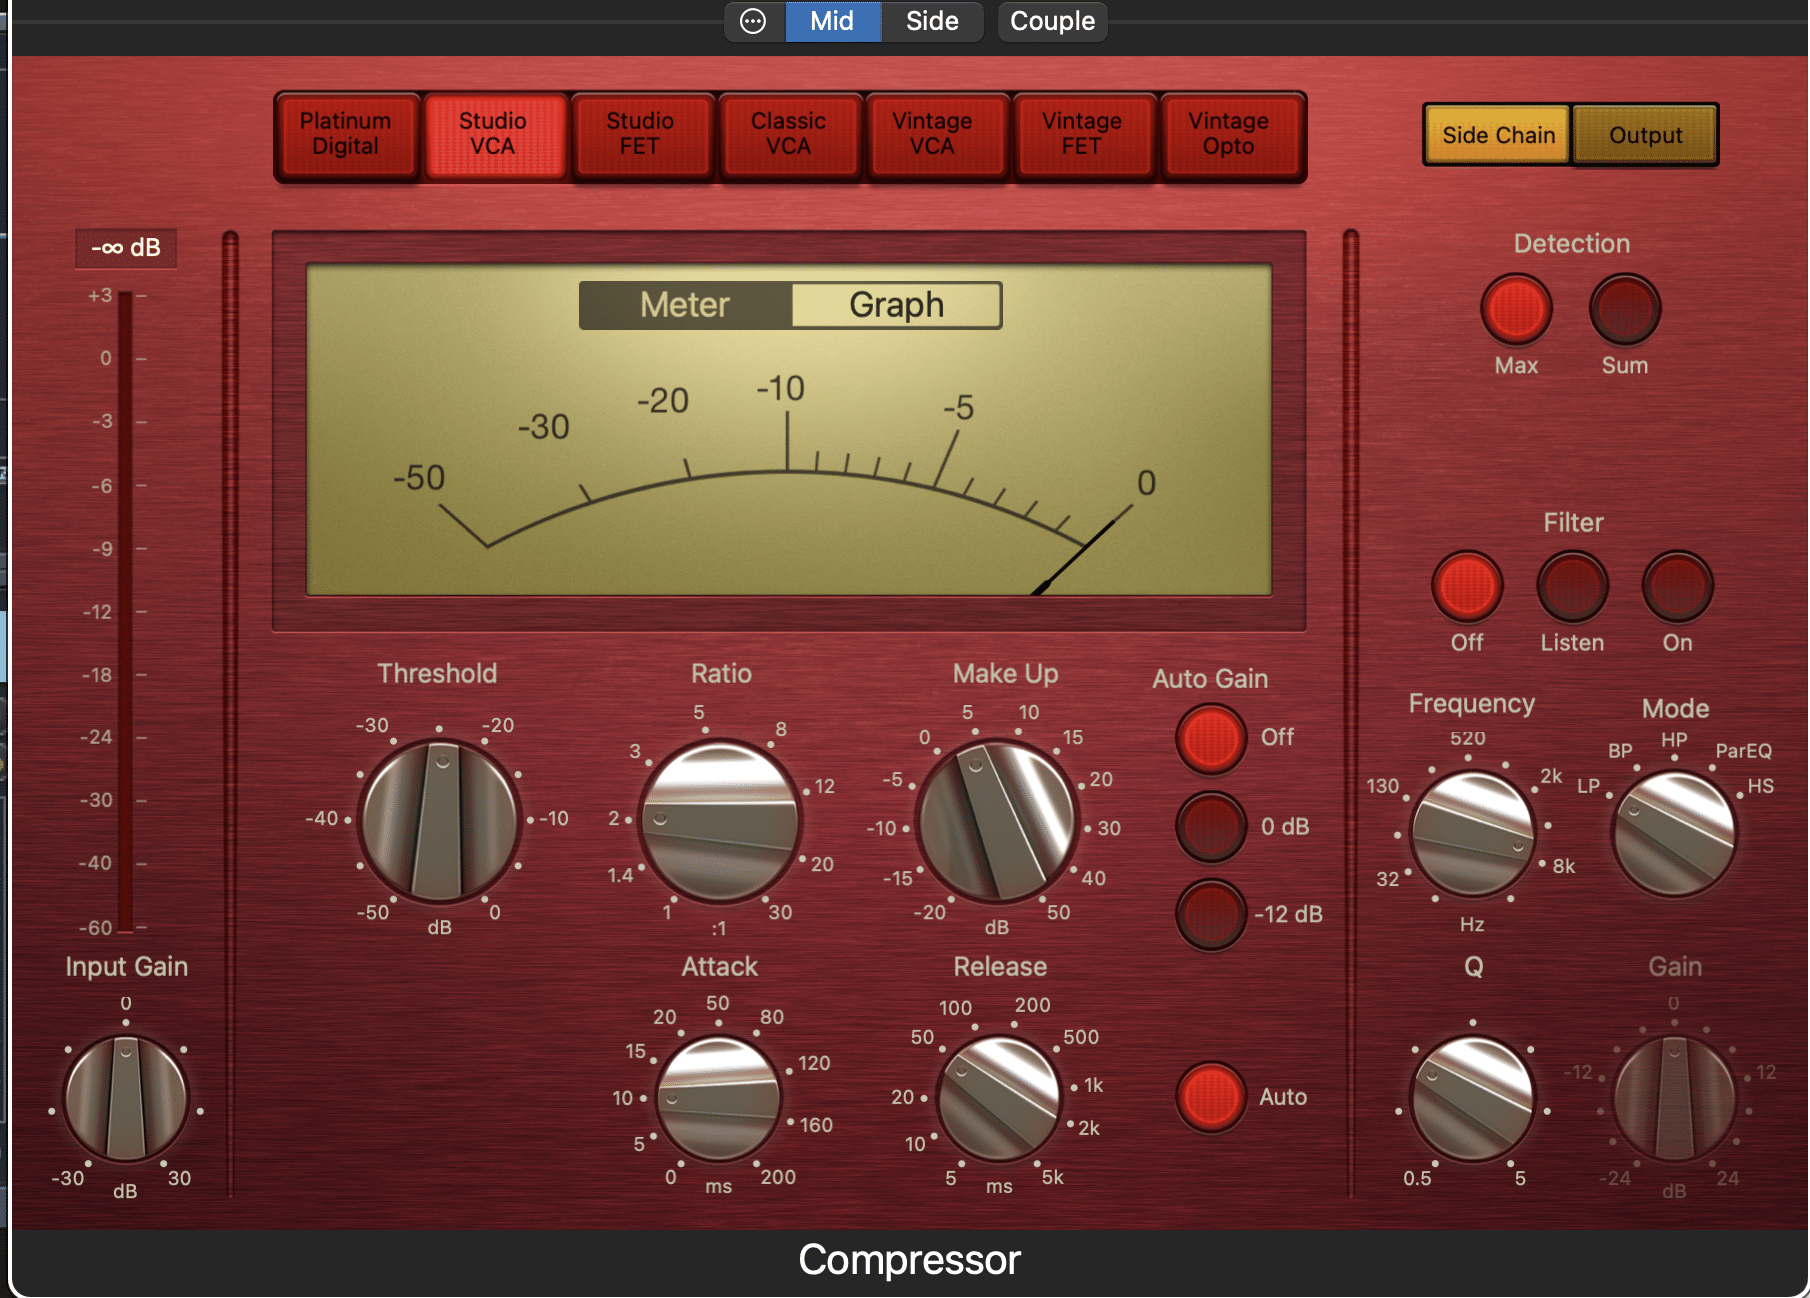
STEP 2 一 Take the acapella’s signal/output and route it into the compressor’s external sidechain input.
This should be located on the instrumental itself.
STEP 3 一 Set your threshold and determine whether or not it needs to be automated (based on the specific section of your song).
Try testing out a lower threshold.
This way it will basically always be compressing the mid-signal.
Simply listen to what it sounds like when attenuated, and take it from there.
When you have the mid-signal ducking and the stereo intact, it may open up a world of new possibilities and completely revolutionize your mixes altogether.
At this point, it’s all about finding that perfect balance.
So do a little experimentation, and you’ll be good to go.
Sidechain Compression: Pro Tip
If you have the stems at your disposal, it’s best to group certain key stereo elements and duck them.
As opposed to the instrumental as a whole.
This helps you target and duck only the signals that you think should get ducked with the vocal.
#3. Multi-band Sidechain Compression
While this technique certainly deserves its own section, there’s little to say that hasn’t previously been mentioned.
Just keep in mind that everything is the same as standard sidechain compression, except for one crucial detail:
You can trigger the compressor in an isolated, frequency-specific fashion.
This comes into play when you have, for example, a kick and a super saturated bass triggering at the same time, but don’t want to duck the upper-harmonic content of the bass.
More often than not they are continuously clashing and fighting for dominance.
Plus, as you may know, phase cancellation is no friend of the low-end (even on a seemingly undetectable level).
This can be fixed by taking a sidechain compressor and having the bass duck every time the kick is triggered.
If you were to use a standard sidechain compressor to perform this task, the entire bass signal would be reduced when the kick is triggered instead.
This is a consequence of the compressor compressing the signal as a whole.
It may be acceptable in certain situations.
However, what happens when your track already has enough movement, or when you incorporate your own pumping?
Well, it most likely won’t align properly with the intended rhythmic pumping and ends up turning into a complete disaster.
The solution isn’t to skip this process, deal with the low-end clash, or simply accept the unrhythmic pumping.
You solve it by grabbing a multiband sidechain compressor instead!
NOTE: The main goal of this trick is purely for mixing purposes, as opposed to the overall effect.
STEP 1 一 Route the kick into the external sidechain input.
STEP 2 一 Determine the frequency range that occupies both the kick and the bass since that’s where the clashing is occurring.
STEP 3 一 Try to isolate the range as accurately as possible, and create a band that occupies that specific range.
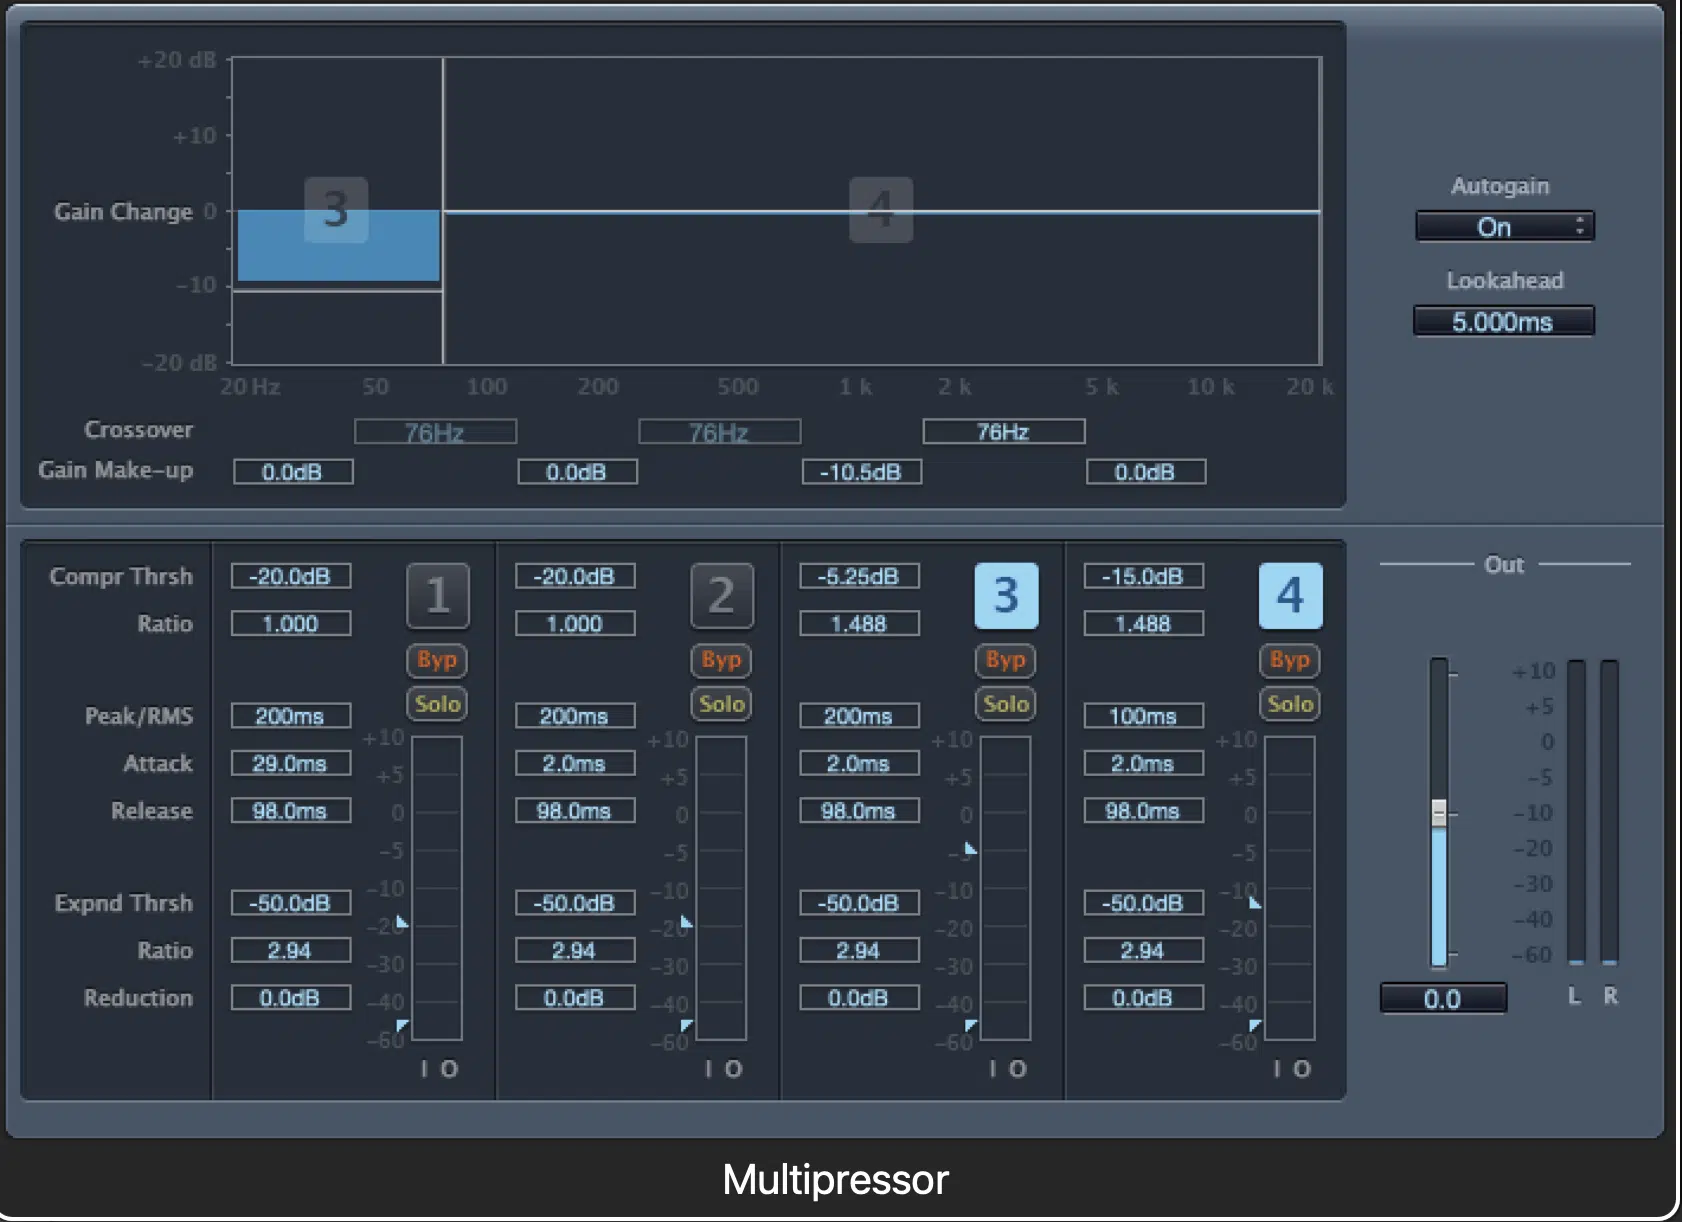
Sometimes it helps to zero in and listen to that specific range in isolation.
STEP 4一 If needed, enable the band to ‘listen’ to the external sidechain signal.
This is sometimes referred to as Enabling/Inputting the sidechain key.
STEP 5 一 Assign & adjust the settings as you normally would (Threshold, Ratio, Attack, Release) and fine-tune any sidechain filters if desired.
You’ll be pleasantly surprised to hear that the clashing has completely disappeared, and the bass signal remained (seemingly) intact.
The benefits of frequency-selective dynamic processing should never be overlooked.
Once you understand the basic theory, being able to apply it in more advanced variations will be super easy (not to mention awesome!).
#4. Vocal Ducking With Multiband Sidechain Compression
In order to achieve vocal ducking with multiband sidechain compression, the same steps (as above) apply.
However, there is one major difference 一 the settings are much more difficult to zero in on.
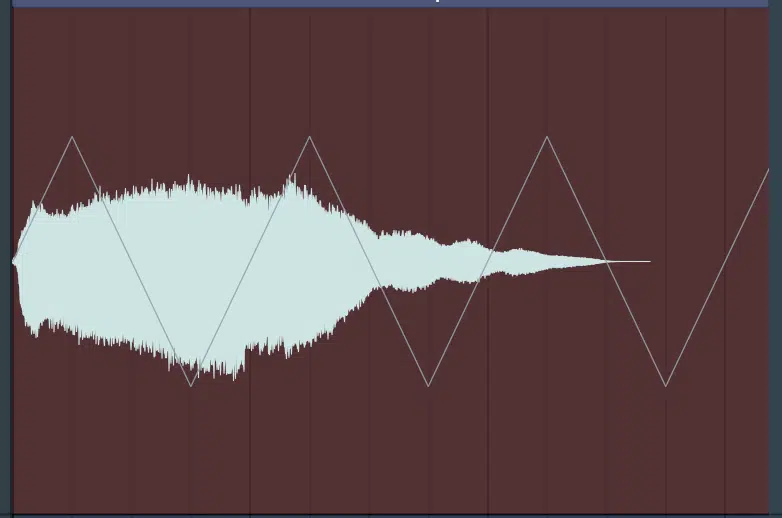
This is due to the ever-changing nature of your elements, like Travis Scott-like vocals for example.
That’s why pairing these sidechain compression techniques with automation are typically the next piece of the puzzle.
Regardless of experience or skill, you can accomplish this like a pro as long as you’re patient & precise, even without involving automation.
When making room for a vocal, it all depends on:
- The mix itself.
- What exactly you’re applying the compression to.
Sometimes it will just be a pad or single element that’s clashing with the vocal frequencies in the mid-range.
Other times it may be an entire group, sub-mix, bus, or entire instrumental.
You’ll first need to determine if a standard sidechain compressor is needed, or if one of the multi-band varieties is required.
Regardless, the same concepts will apply in order to achieve fluidity.
PRO TIP: When it comes to vocals, make sure to ensure the threshold doesn’t clamp down on the entire signal, but rather the peaks only.
#5. Using MIDI as the External Sidechain Input (For Rhythmic Flavor)
Over the last decade, MIDI has been used to trigger the threshold of an external sidechain processor.
Due to its particular functionality, it works as a simple Gate (On/Off trigger).
It’s less about the level it crosses 一 which is irrelevant since MIDI contains no actual audio-data 一 and more about triggering the compressor at the right time.
Without leaving any amplitude variables that can potentially skew your results, of course.
If you’ve ever seen someone add a kick-track & sample in order to trigger the sidechain compressor throughout the track without being heard, MIDI was used as the trigger.
This is usually referred to as a ‘dummy kick.’
It helps you to eliminate the unnecessary audio that had no business being included in your session in the first place.
NOTE: Your compressor must be equipped with the compatibility to be triggered by MIDI. From there it’s easy and straightforward.
This way, when triggering a compressor, you won’t have to worry about the input signal’s level or the current level of the compressor’s threshold.
OUTRO
Sidechain compression is an amazing tool that was originally introduced into the audio world for corrective mixing purposes.
Nowadays it’s just as beneficial, and can be used just as efficiently for creative effects.
After reading this article, you now have the sidechain compression tools to be a professional at either one.
As long as you know the basic theory, there’s no wrong way to incorporate sidechain compression.
Feel free to go absolutely wild and, when the kick hits, be sure to duck down.
Also, be sure to grab the Unison Essential Drum Loops as well as the Unison Essential Bass loops to instantly start your sidechaining journey.
This way, you get a leg up on the competition, as you’ll be incorporating the hottest sounds around from the jump.
Until next time…


Leave a Reply
You must belogged in to post a comment.