Mixing vocals is a key aspect of music production that involves balancing, enhancing, and refining the vocal track to ensure it stands out in the mix.
Plus, you have to make sure the vocal performance is in tune and the vocal sound is clear and present.
So, as a music producer, knowing exactly how to mix vocals is super important because it can make or break a track.
And that’s exactly what we’re breaking down today, like:
- How to mix vocals, step-by-step ✓
- Preparing your vocal tracks ✓
- Cleaning vocal recordings ✓
- Vocal comping and editing ✓
- Setting up your vocal chain ✓
- Applying high-pass filtering ✓
- Using pitch correction ✓
- EQ techniques for vocals ✓
- Compression techniques ✓
- Adding reverb and delay ✓
- Creative vocal effects ✓
- Fine-tuning the vocal mix ✓
- Advanced vocal mixing techniques ✓
- Much more about mixing vocals ✓
After this article, you’ll be able to mix vocals that are clear, professional, and polished.
Plus, you’ll be able to apply advanced techniques to your mixed vocals and creative effects like a true professional.
Your vocals will never sound cleaner or more polished.
So, let’s dive in so you can learn how to mix vocals like a boss…
Table of Contents
- How to Mix Vocals 101: The Importance
- Preparing Your Vocal Tracks
- Setting Up Your Vocal Chain
- Subtractive EQ vs Additive EQ
- Vocal Effects and Processing
- Other Creative Vocal Effects
- Fine-Tuning Your Vocal Mix
- Using Reference Tracks
- Common Mistakes & Solutions When Mixing Vocals
- How to Mix Vocals: Final Thoughts
How to Mix Vocals 101: The Importance

Getting the vocals right in a mix is essential for a professional sound.
Vocals are often the focal point of a song, carrying the melody and the emotional weight of the performance.
When vocals are mixed well, they enhance the entire track and ensure that the listener connects with the song.
When vocals are not mixed well, your tracks will sound amateurish and unprofessional (which nobody wants; you or the listeners).
Effective vocal mixing requires attention to the tiny little details, as well as a solid understanding of various techniques.
This includes everything from cleaning up vocal recordings manually to applying pitch correction and using EQ and compression.
Mastering these skills allows you to create mixes where the vocals shine and sound professional 一 making your music stand out in a competitive industry.
Don’t worry, we’ll break down everything (in way more detail) throughout the article.
Preparing Your Vocal Tracks
Preparing your vocal tracks is the foundation for a great mix. Super clean recordings and precise edits set the stage for professional vocals. And will help you learn how to mix vocals properly in no time.
-
Vocal Comping and Editing
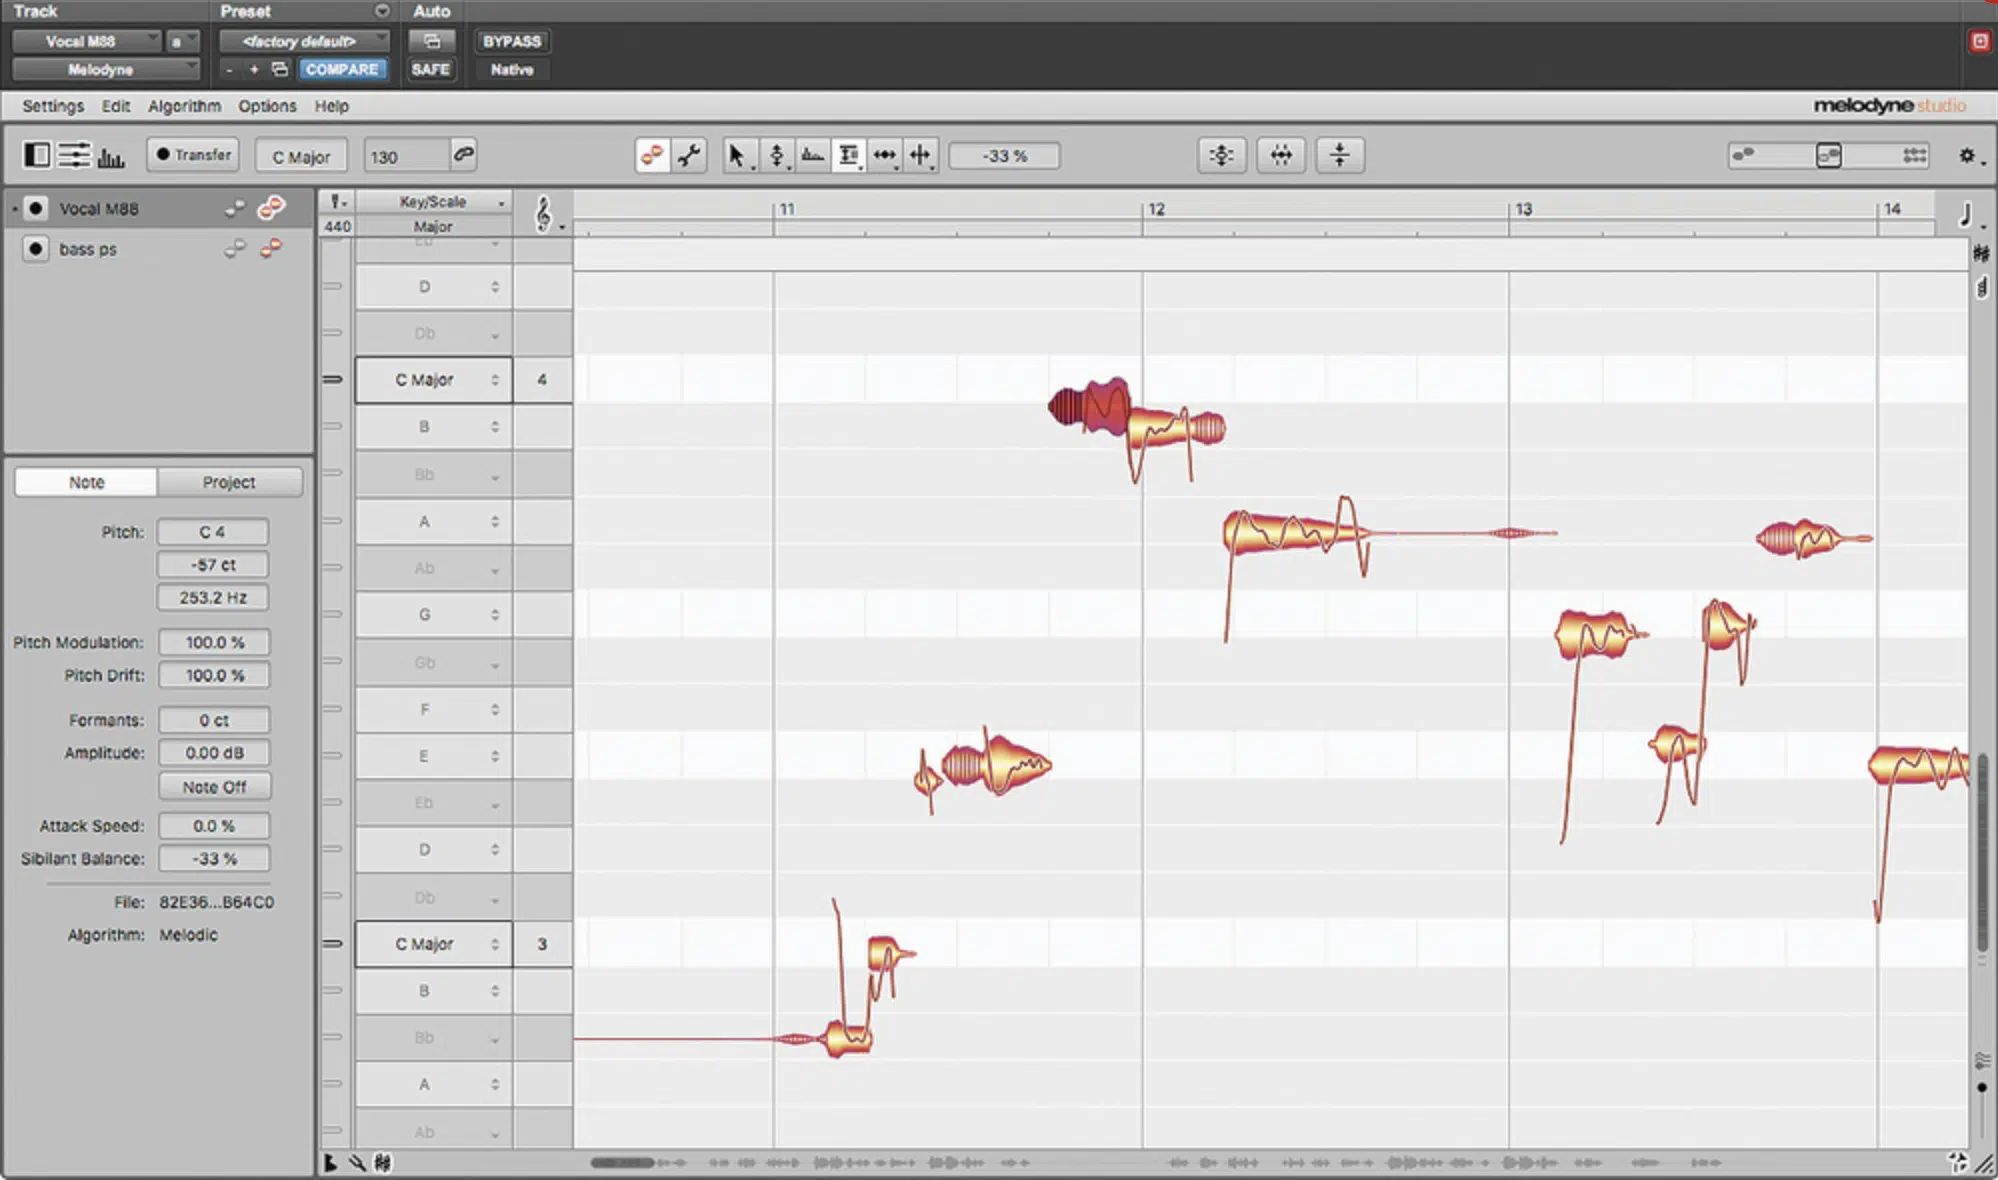
Vocal comping involves selecting the best parts from multiple vocal takes, ensuring that you have the strongest performance for your final mix.
Pay attention to timing issues and fix them during the editing stage to make your vocal performance really shine.
Using popular DAWs like Ableton or Pro Tools makes this process easier because their comping features are on point.
Make sure that each phrase flows naturally into the next for a more cohesive sound.
When it comes to editing, you’ll also have to remove unwanted noise and breaths between phrases 一 this is very important.
Use fades and crossfades to smooth out edit points and make transitions between vocal takes inaudible.
This way, your vocal performance will be as polished as possible.
NOTE: Melodyne can help with finer pitch adjustments to maintain a natural vocal sound.
Pro Tip: “Cleaning” Your Vocal Recordings
The following tip can hurt your vocal tracks more than help if you do it incorrectly or in the right spot, so be sure to do this in crucial instances only…
For example, if there’s some super obnoxious fan blasting in the background or if your girlfriend is screaming for you to pay attention to her instead of your music.
Start by removing any unwanted background noise from your vocal recordings.
Use a noise reduction plugin, such as RX7, to clean up the vocal track 一 ensuring a high-quality vocal recording free from any distractions.
This can help you achieve a professional sound (again, remember to focus on areas where background noise is super loud).
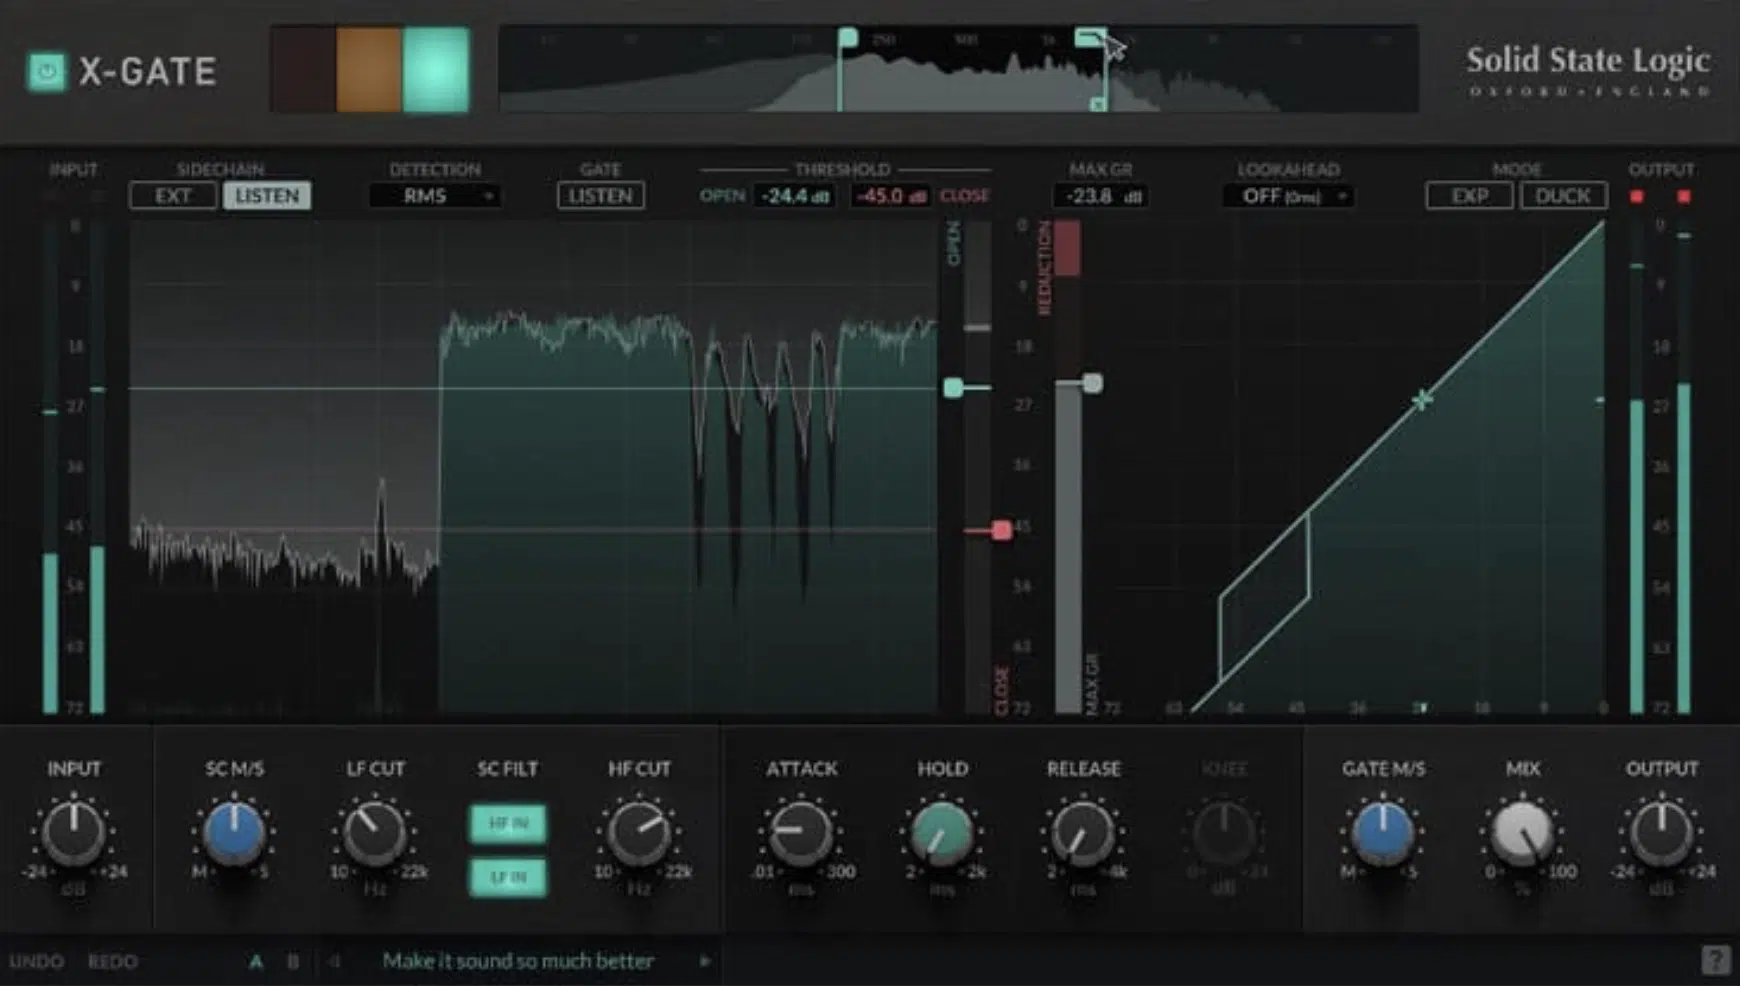
Then you’re going to want to apply a noise gate to further address any unwanted noises.
A noise gate helps eliminate low-level sounds that can muddy the mix, such as background hum or air conditioner noise.
Lastly, set the threshold so that the gate opens only when the vocal is present to maintain a clean, clear vocal sound.
Setting Up Your Vocal Chain
Setting up your vocal chain correctly is essential for a great vocal mix and mastering how to mix vocals like a professional. The order of processing can significantly impact the final sound. For instance, a compressor placed before the EQ will give you a much different effect than if it was placed after the EQ.
-
High-Pass Filtering
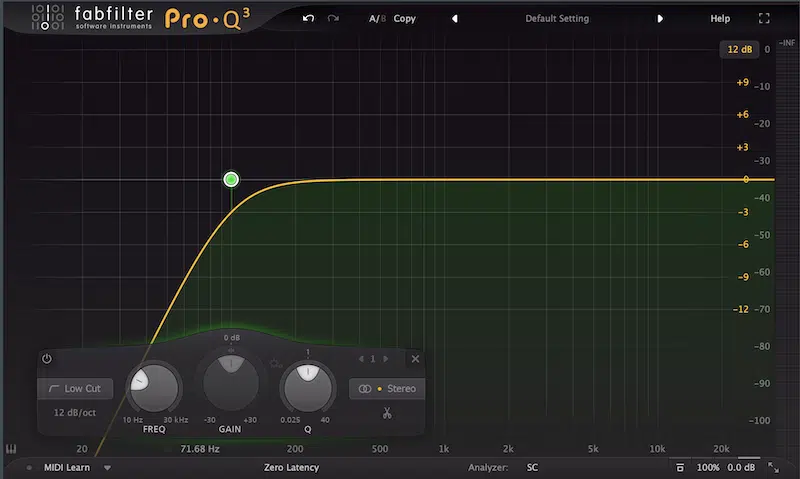
Start your vocal chain with a high-pass filter to remove low frequencies that aren’t needed in the vocal track.
This clears out rumble and low-end noise and helps your vocal sit better in the mix.
Set the filter around 60-90 Hz, depending on the vocal’s range and the mix’s overall sound; remember, it’s all about that particular track.
Removing these frequencies can help focus the vocal sound without muddying the mix.
A high-pass filter is key for maintaining clarity and ensuring that the vocal stands out… but even so, many music producers overlook it when vocal mixing.
Do not be one of those producers!
Make sure to listen carefully and adjust the filter’s cutoff point to find the sweet spot for your vocal track.
This way, your vocals will be clear, professional-sounding, and next level.
Pro Tip
Be sure to listen when adjusting the cutoff, as it can play a bigger role than it may seem visually. Sometimes, removing a range that isn’t noticeable on the spectrum analyzer can still have a significant impact.
-
Applying Pitch Correction

Pitch correction is the way you’re going to make sure your vocal performance is in tune.
Tools like Auto-Tune or Melodyne are a favorite amongst talented music producers and can correct pitch issues without making the vocal sound unnatural.
Start with subtle settings to maintain the natural quality of the vocal performance.
For instance, set a slow retune speed to avoid the robotic sound often associated with aggressive pitch correction (which, let’s face it, is not cool).
Applying pitch correction should enhance the vocal without drawing too much attention 一 maintaining the integrity and balance of the vocal recording.
When applying manual pitch correction, focus on the notes that are slightly off-pitch.
Use your DAW’s visual interface to identify and correct these notes.
NOTE: Avoid over-correcting, which can lead to an unnatural, robotic sound. This is true for any genre you’re working with (pop, trap, hip-hop, or electronic music).
For example, if a singer’s vibrato is being smoothed out too much, reduce the effect to preserve the vocal’s character.
If you want to learn how to mix vocals that sound polished on all levels, and make sure your vocal performance will shine, this is key.
Just remember to always, always, always listen critically to ensure the vocal sound remains authentic, uncluttered, and clean.
-
EQ Techniques for Vocals
EQ (Equalization) is a super powerful tool for shaping your vocal sound.
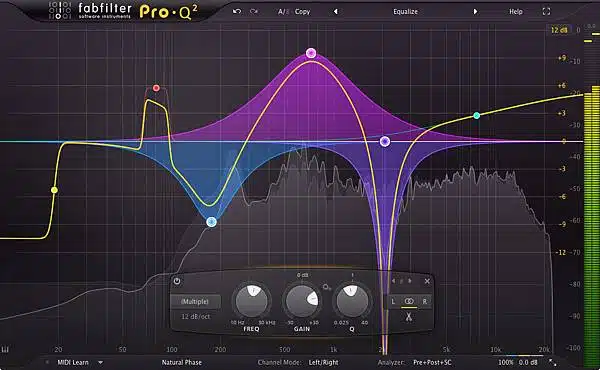
Start by cutting problematic frequencies, such as low-mids that can make the vocal sound muddy.
Use a parametric EQ to identify and reduce these destructive frequencies 一 typically around 200-400 Hz.
For example, if the vocal has a boxy quality, a gentle cut around 300 Hz can clear it up.
This technique helps to clean up the vocal and make it more present in the mix so your vocal stands out without clashing with other instruments.
Next, boost frequencies that enhance the vocal’s presence and clarity.
Frequencies around 2-5 kHz can add brightness and make the vocal cut through the mix exactly like it’s supposed to.
NOTE: Be careful not to overdo it, as too much boosting (particularly around 3K) can lead to a harsh sound.
Use a high-shelf filter to add air and openness to the vocal, typically around 10 kHz and above.
For instance, a slight boost at 12 kHz can give the vocal a more airy and open feel.
Proper vocal EQing can make a significant difference in achieving professional-sounding vocals or not; believe me when I tell you that.
Subtractive EQ vs Additive EQ
When you’re learning how to mix vocals, it’s super beneficial to understand the differences between subtractive and additive EQ.
-
Subtractive EQ
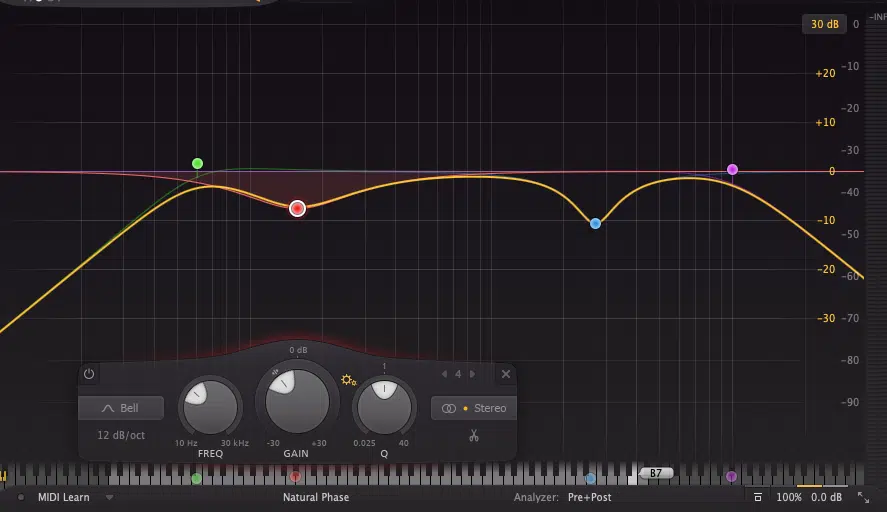
Subtractive EQ involves removing unwanted frequencies to clean up the sound.
This technique can be more effective than additive EQ because it avoids adding gain 一 which can lead to unwanted distortion.
Start with subtractive EQ to address problem areas before boosting frequencies.
-
Additive EQ
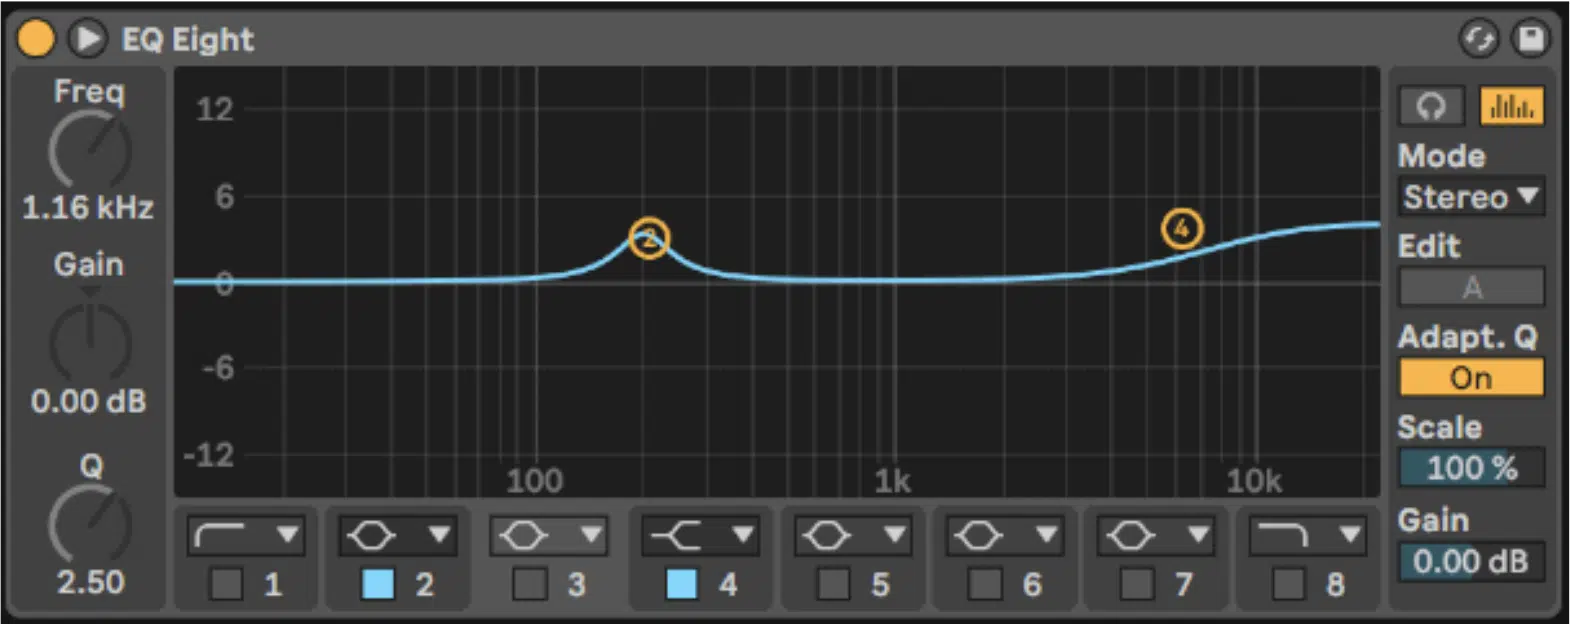
Additive EQ, on the other hand, is used to enhance certain aspects of the vocal.
After cleaning up the vocal with subtractive EQ, use additive EQ to bring out the best qualities of the vocal sound.
Combining both techniques can result in a more balanced and polished vocal mix, so make sure to play around with them when you’re learning how to mix vocals.
NOTE: Placing a compressor between the subtractive and additive EQ (subtracting first) can result in a cleaner sound.
This is because you’re removing the unwanted frequencies before compression and boosting the compressed signal only.
-
Pro Tip: Dynamic EQ
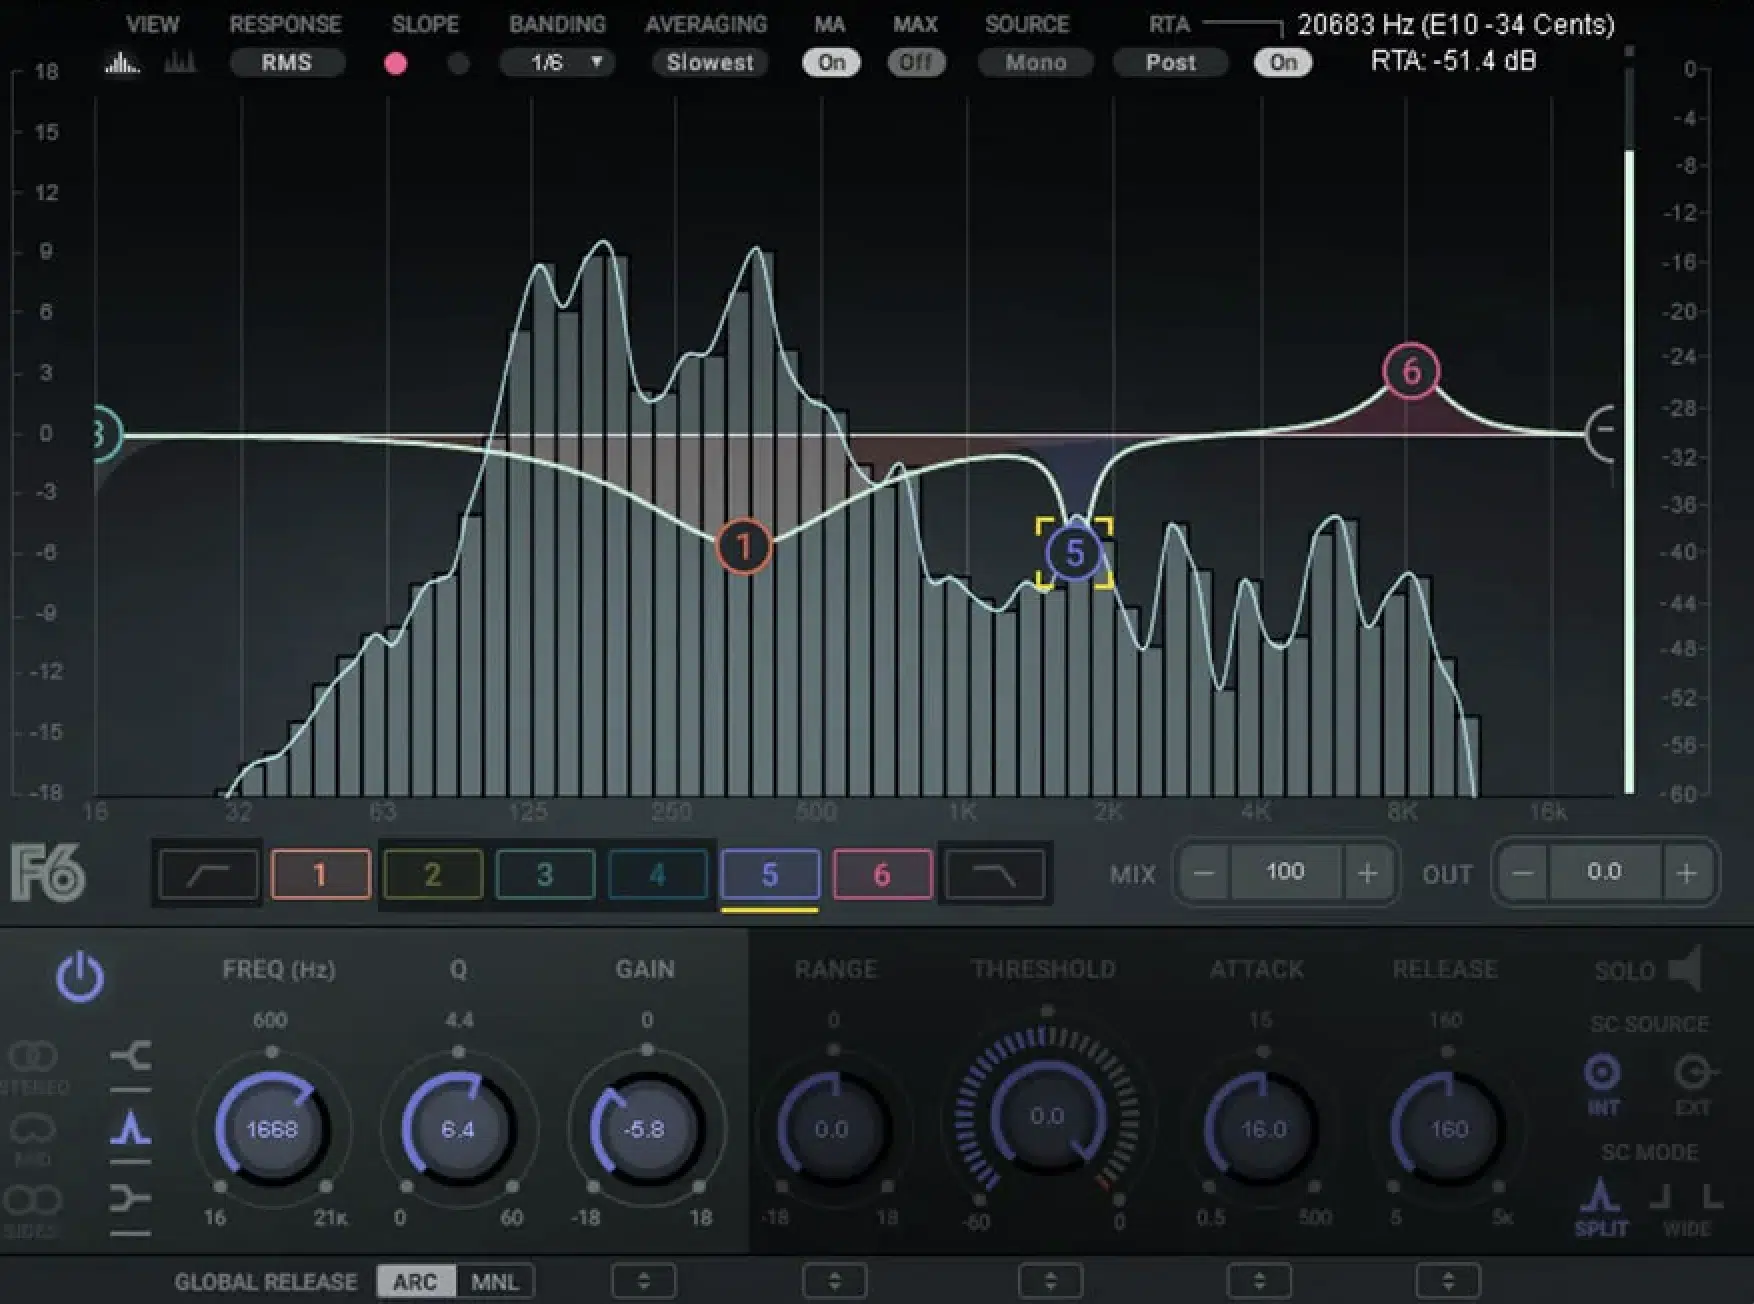
Dynamic EQ allows you to apply EQ changes only when certain frequencies become problematic.
This technique is useful for controlling dynamic range and addressing issues that occur only at certain points in the vocal performance.
For example, use dynamic EQ to tame harsh sibilance without affecting the rest of the vocal sound.
-
Compression Techniques
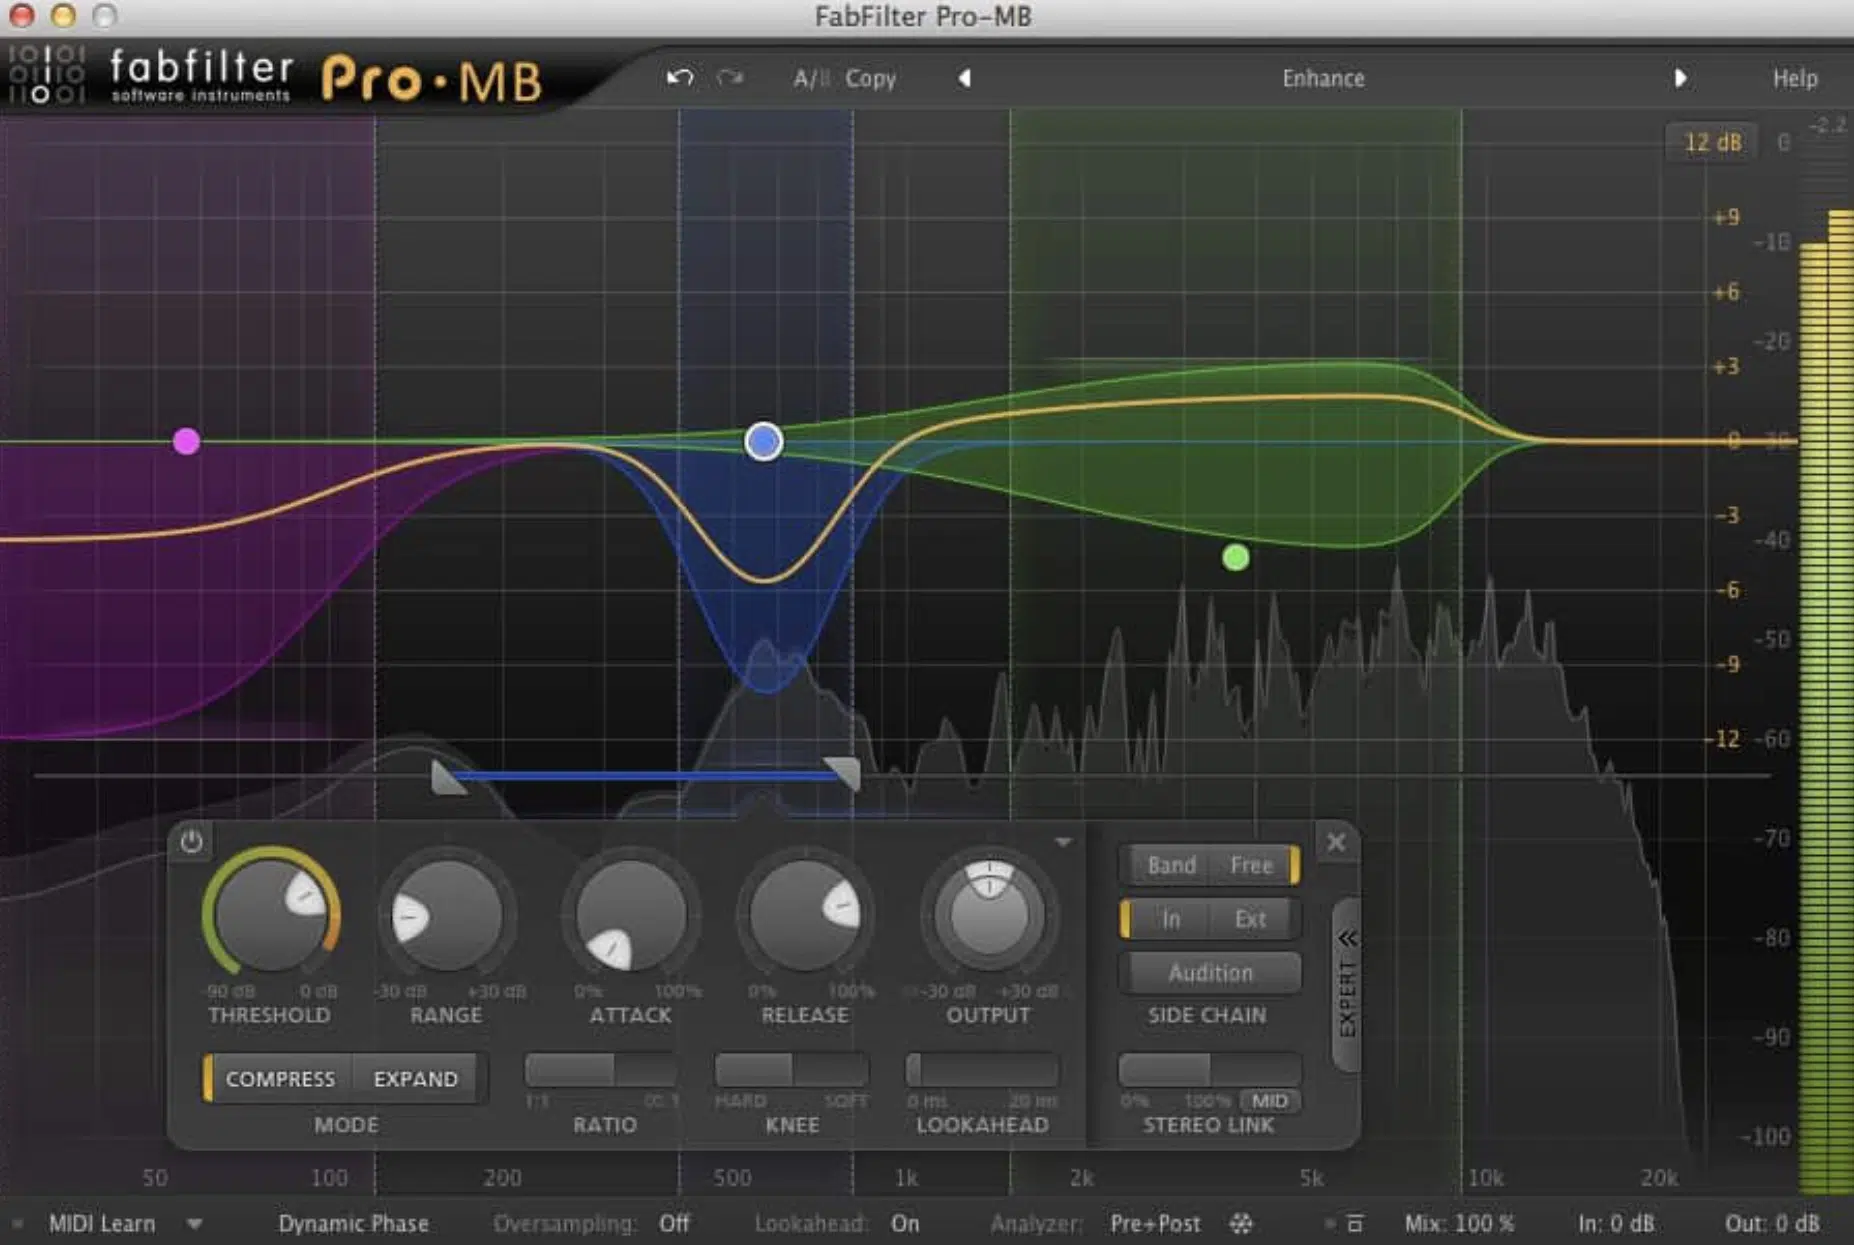
Compression is essential for controlling the dynamic range of the vocal performance you’re working with.
Use a compressor to even out the volume levels and ensure a consistent level throughout the track.
Simply:
- Start with a gentle ratio (like 2:1)
- Adjust the threshold (until you get the desired amount of gain reduction).
For example, aim for a few dB (about 3-5 dB) of gain reduction to smooth out the vocal takes without squashing them.
Make sure to keep an eye on the attack and release settings so your vocals sound natural and authentic.
A slow attack allows the initial transients to pass through 一 preserving the vocal’s punch and overall presence.
Side note, if you’d like to know all the differences between compression and limiting so you don’t get confused when you’re learning how to mix vocals, we got you.
-
What’s the Thing Called Serial Compression?
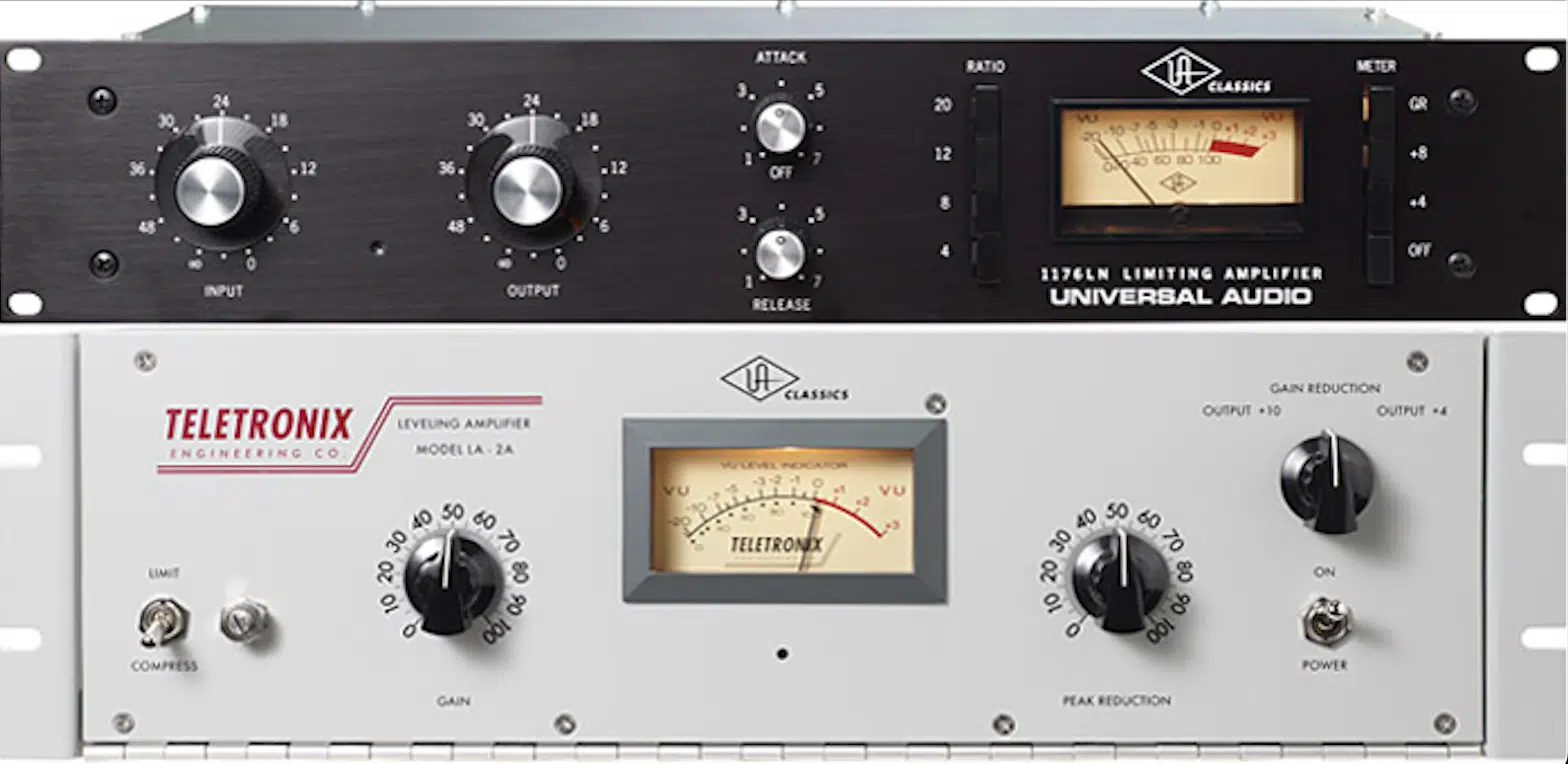
Serial compression involves using multiple compressors to manage the vocal’s dynamic range.
Start with a compressor set to catch the loudest peaks with a fast attack and release so those sudden volume spikes don’t overwhelm your mix.
Follow up with a second compressor set to a lower ratio and slower attack and release.
This helps to smooth out the overall dynamic range for a more controlled and consistent vocal sound.
Serial compression can add volume automation to your mix 一 making the vocals sound more polished, which is always what you want when learning how to mix vocals.
Parallel compression (aka NY Compression), on the other hand, is for when you need to add some real “heavy-handed” compression.
When you really need to enhance your tracks, let the parallel compression do all the heavy lifting.
-
Adding Reverb and Delay
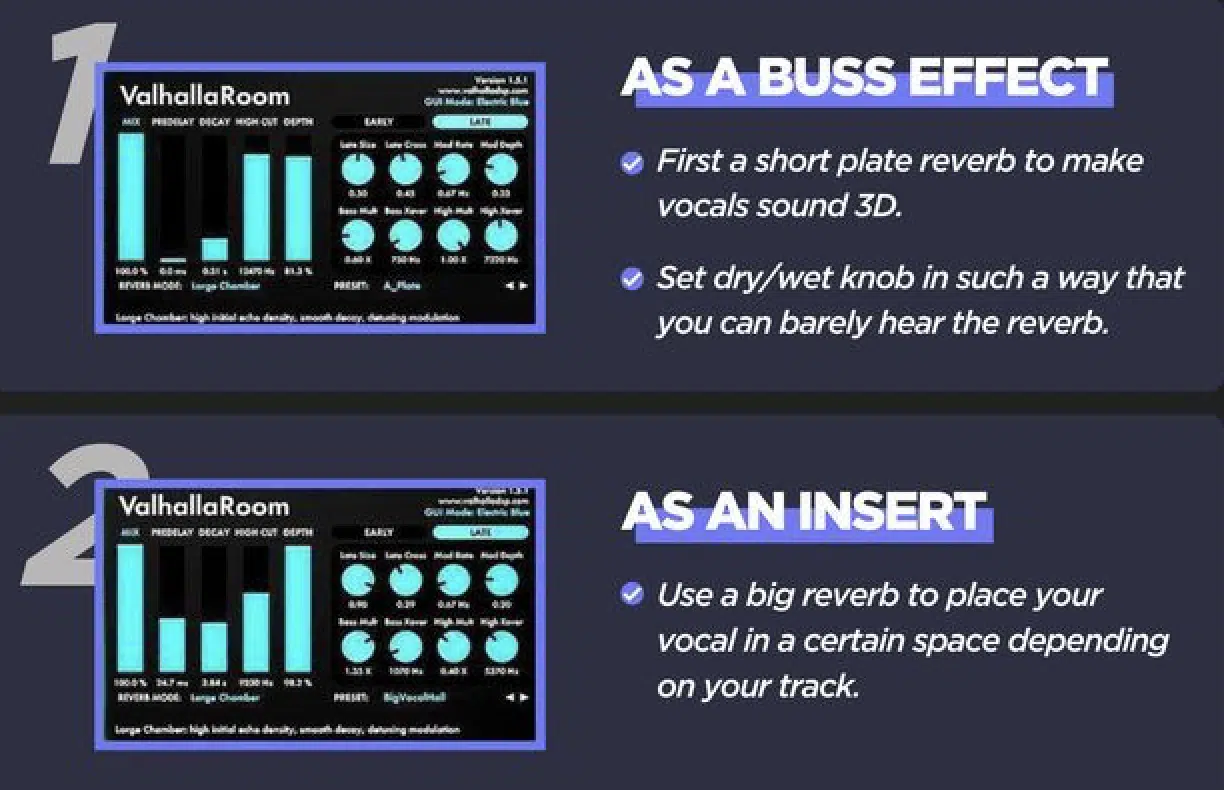
Reverb and delay will help you add extra depth and space to your vocals.
Reverb creates a sense of space, whether it’s a small room or a large hall, so start with a subtle reverb setting to avoid washing out the vocal.
Adjust the decay and pre-delay times to fit the tempo and style of the track.
For instance, a short pre-delay can help maintain clarity while adding a sense of space.
Just remember that the reverb settings should always complement the vocal performance without overwhelming it.
Delay can add a sense of width and rhythm to your vocals.
Use a slapback delay for a subtle effect or a longer delay time for a more pronounced echo and experiment with panning the delay to create a stereo effect.
This will make the vocal sound more expansive and immersive.
For example, a stereo ping-pong delay can create an engaging effect that enhances the vocal’s presence.
Combining reverb and delay can enhance the vocal mix 一 giving it a professional polish that makes the vocal sound richer and more immersive.
Vocal Effects and Processing
Beyond basic mixing techniques, creative vocal effects can add character and interest to your vocal tracks. Plus, make sure they sound professional and pristine. If you’re just learning how to mix vocals, keep in mind that experimenting with different vocal effects can make your vocal mix stand out.
-
Vocal Doubling/Vocal Layering
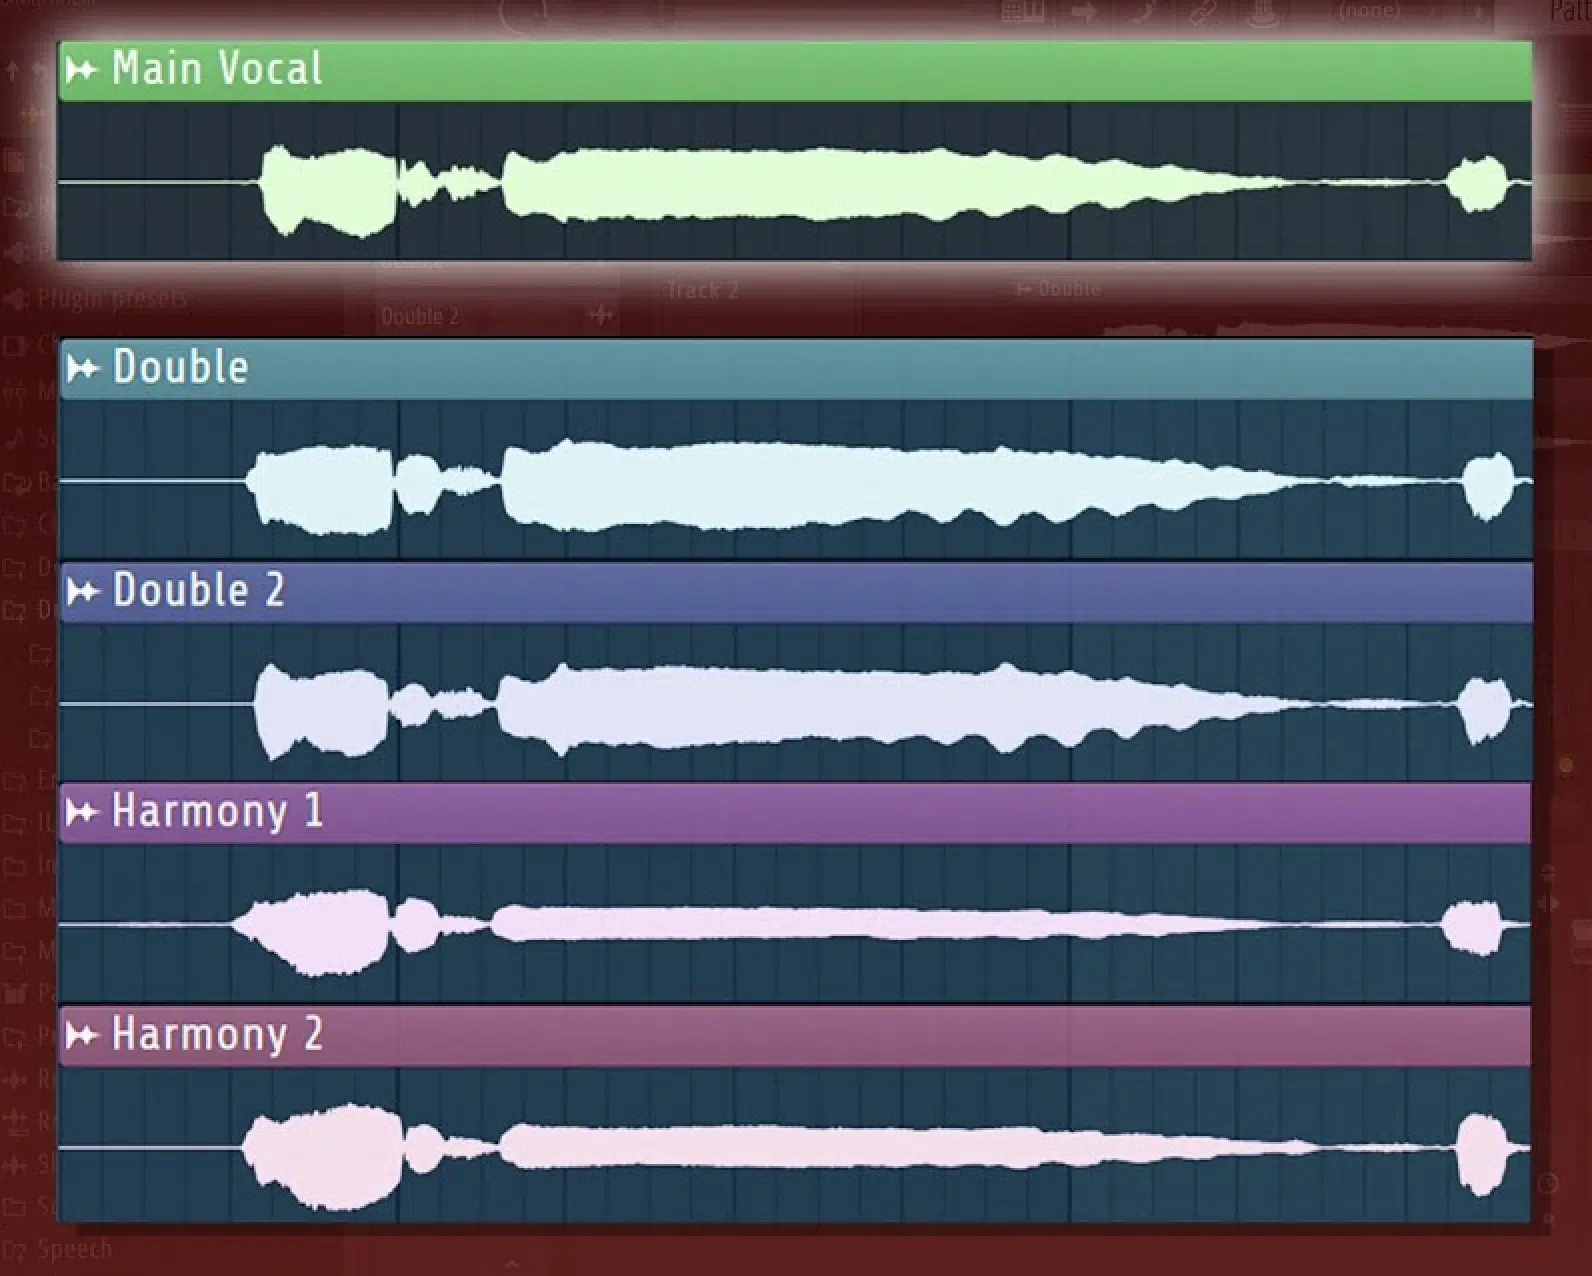
Vocal doubling involves recording multiple takes of the same vocal line and layering them together, and can help you learn how to mix vocals like a pro.
It can add thickness and depth to the vocal sound, and is a favorite of a lot of top mix engineers in the game.
For a more natural effect, vary the timing and pitch slightly between takes.
Also, make sure to use a stereo spreader to pan the doubled vocals to the left and right side for a wider, more professional sound.
Vocal layering can also involve adding harmonies and background vocals for a fuller, richer vocal sound that enhances the lead vocal.
Use subtle EQ and compression to blend the layers flawlessly with the main vocal.
Bottom line, vocal doubling and layering are very effective ways to achieve a professional vocal mix and learn how to mix vocals properly.
Pro Tip
Using a vocal doubler plugin can achieve similar results without multiple takes 一 adding depth and dimension to your vocals.
Experiment with the doubler settings to find the right balance and width for your mix, ensuring the doubled vocals enhance rather than overpower the lead vocal.
Other Creative Vocal Effects
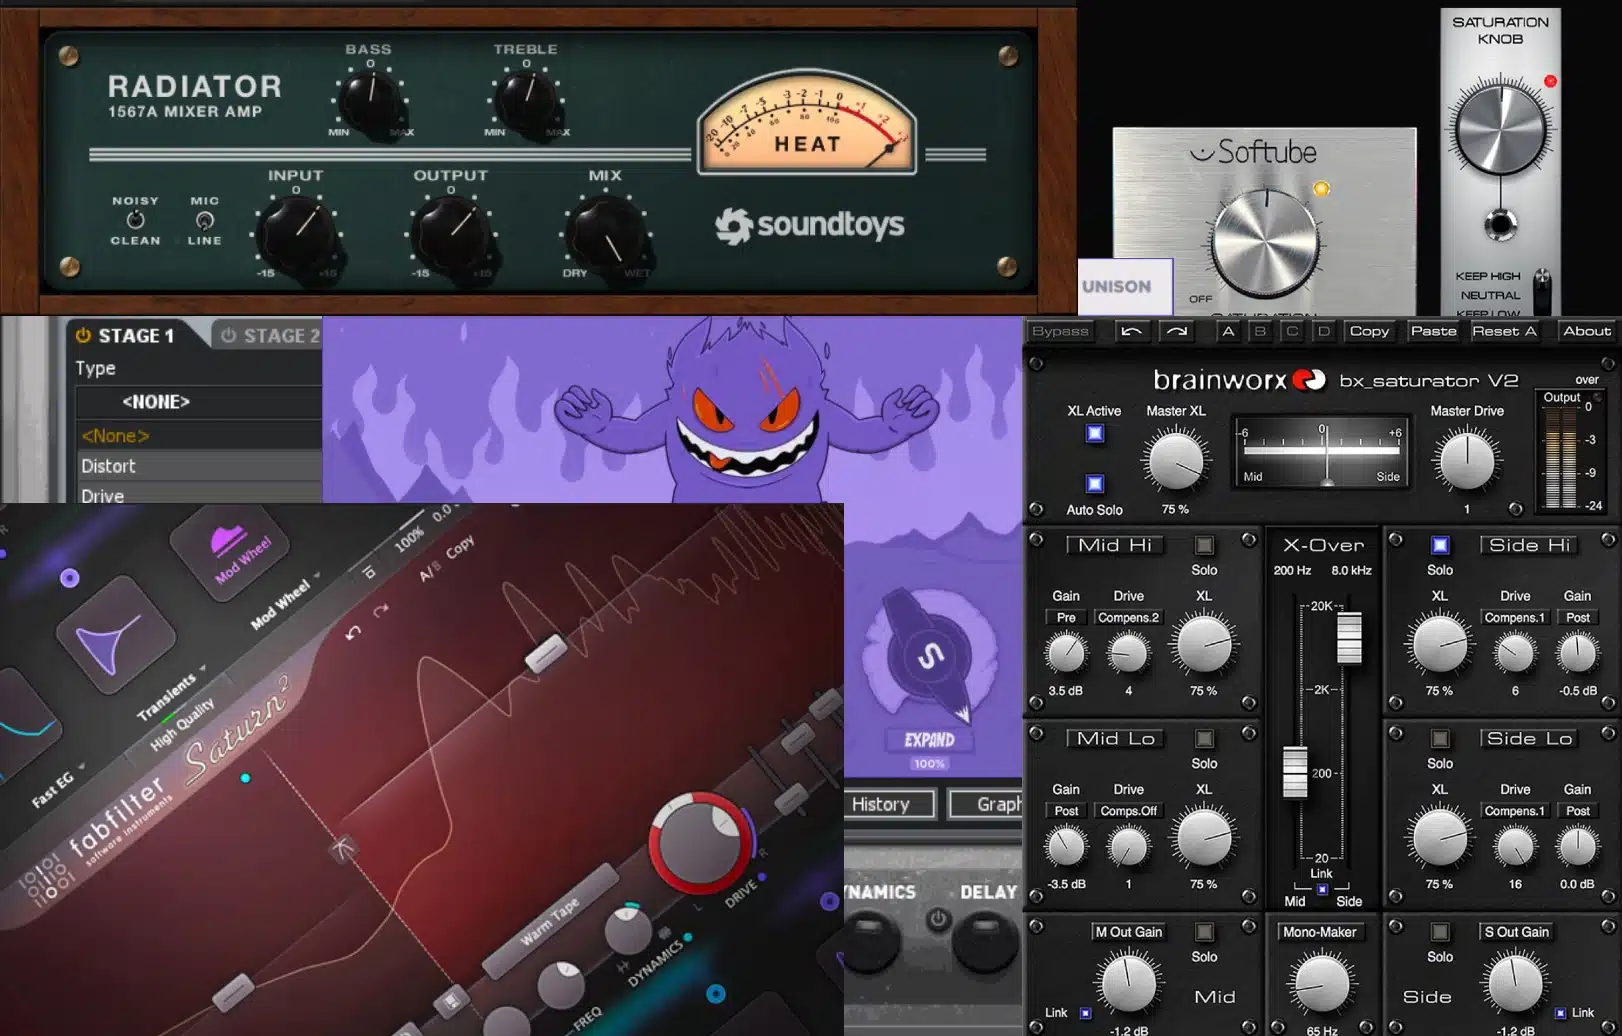
Subtle saturation can add warmth and character to the vocal sound, so try using a saturation plugin with gentle settings.
This will enhance the harmonic content of your vocals.
This effect can make the vocal sound more polished and professional, but just be careful not to overdo it, as too much saturation causes distortion.
Pitch-shifting can create interesting effects and add a unique texture to the vocal.
NOTE: Use pitch shifting sparingly to avoid making the vocal sound unnatural.
Experiment with different settings to find the right balance for your mix because vocal effects can add a distinctive touch to your vocal tracks and make them stand out.
Fine-Tuning Your Vocal Mix
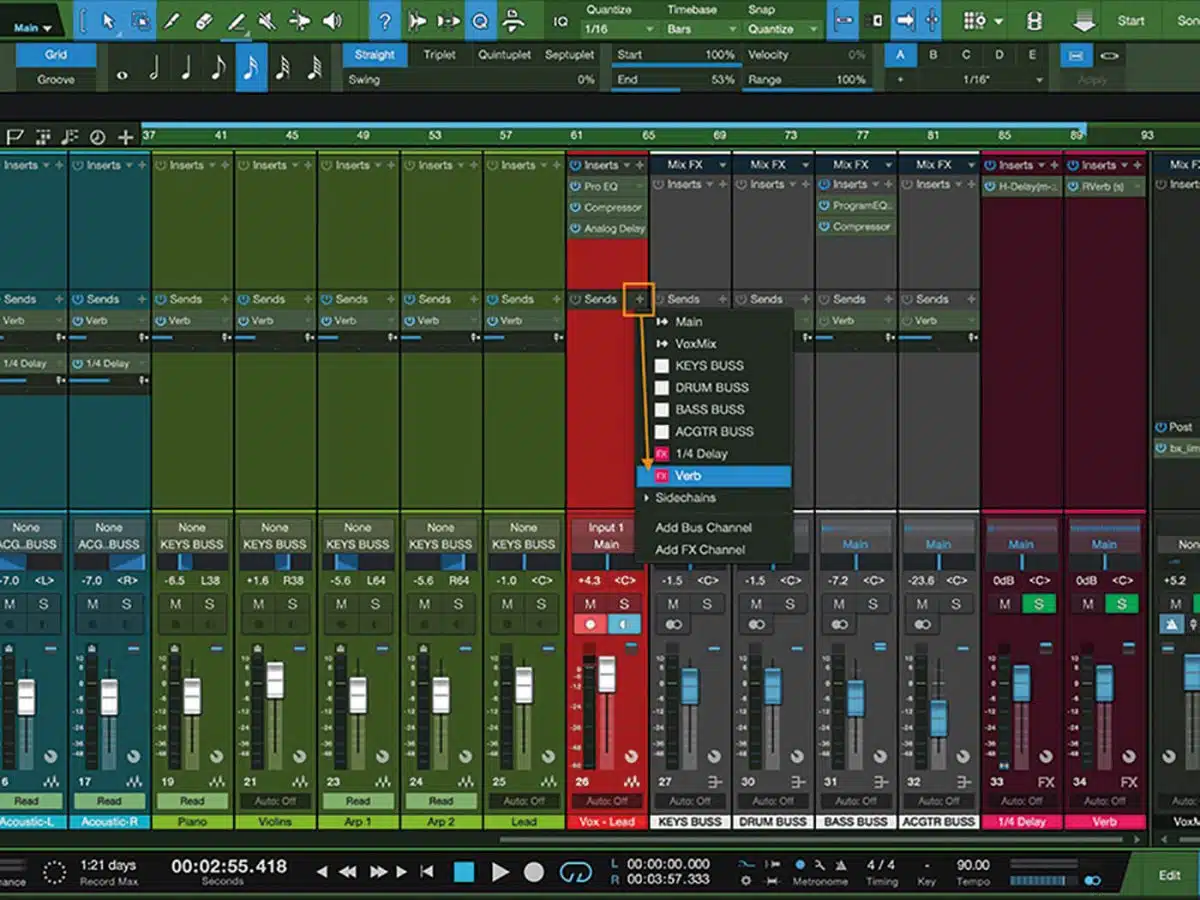
Fine-tuning your vocal mix involves making precise adjustments to ensure the vocal sits perfectly within the track.
Start by adding volume automation to control the dynamic range and ensure a consistent level throughout the song.
For example, if a vocal line gets too loud in the chorus, simply use volume automation to tame it.
Additionally, apply gain automation/gain reduction to adjust the vocal’s volume in different sections of your song 一 making sure it remains clear and present.
Another essential aspect of fine-tuning is addressing problematic frequencies.
Use a dynamic EQ to tame harsh sibilance or resonant frequencies that can cause issues in the mix.
For instance, if the vocal sounds harsh around 3-5 kHz, use a dynamic EQ to control these frequencies only when they become too prominent.
This approach helps maintain the vocal’s natural character and clarity.
-
Pro Tip
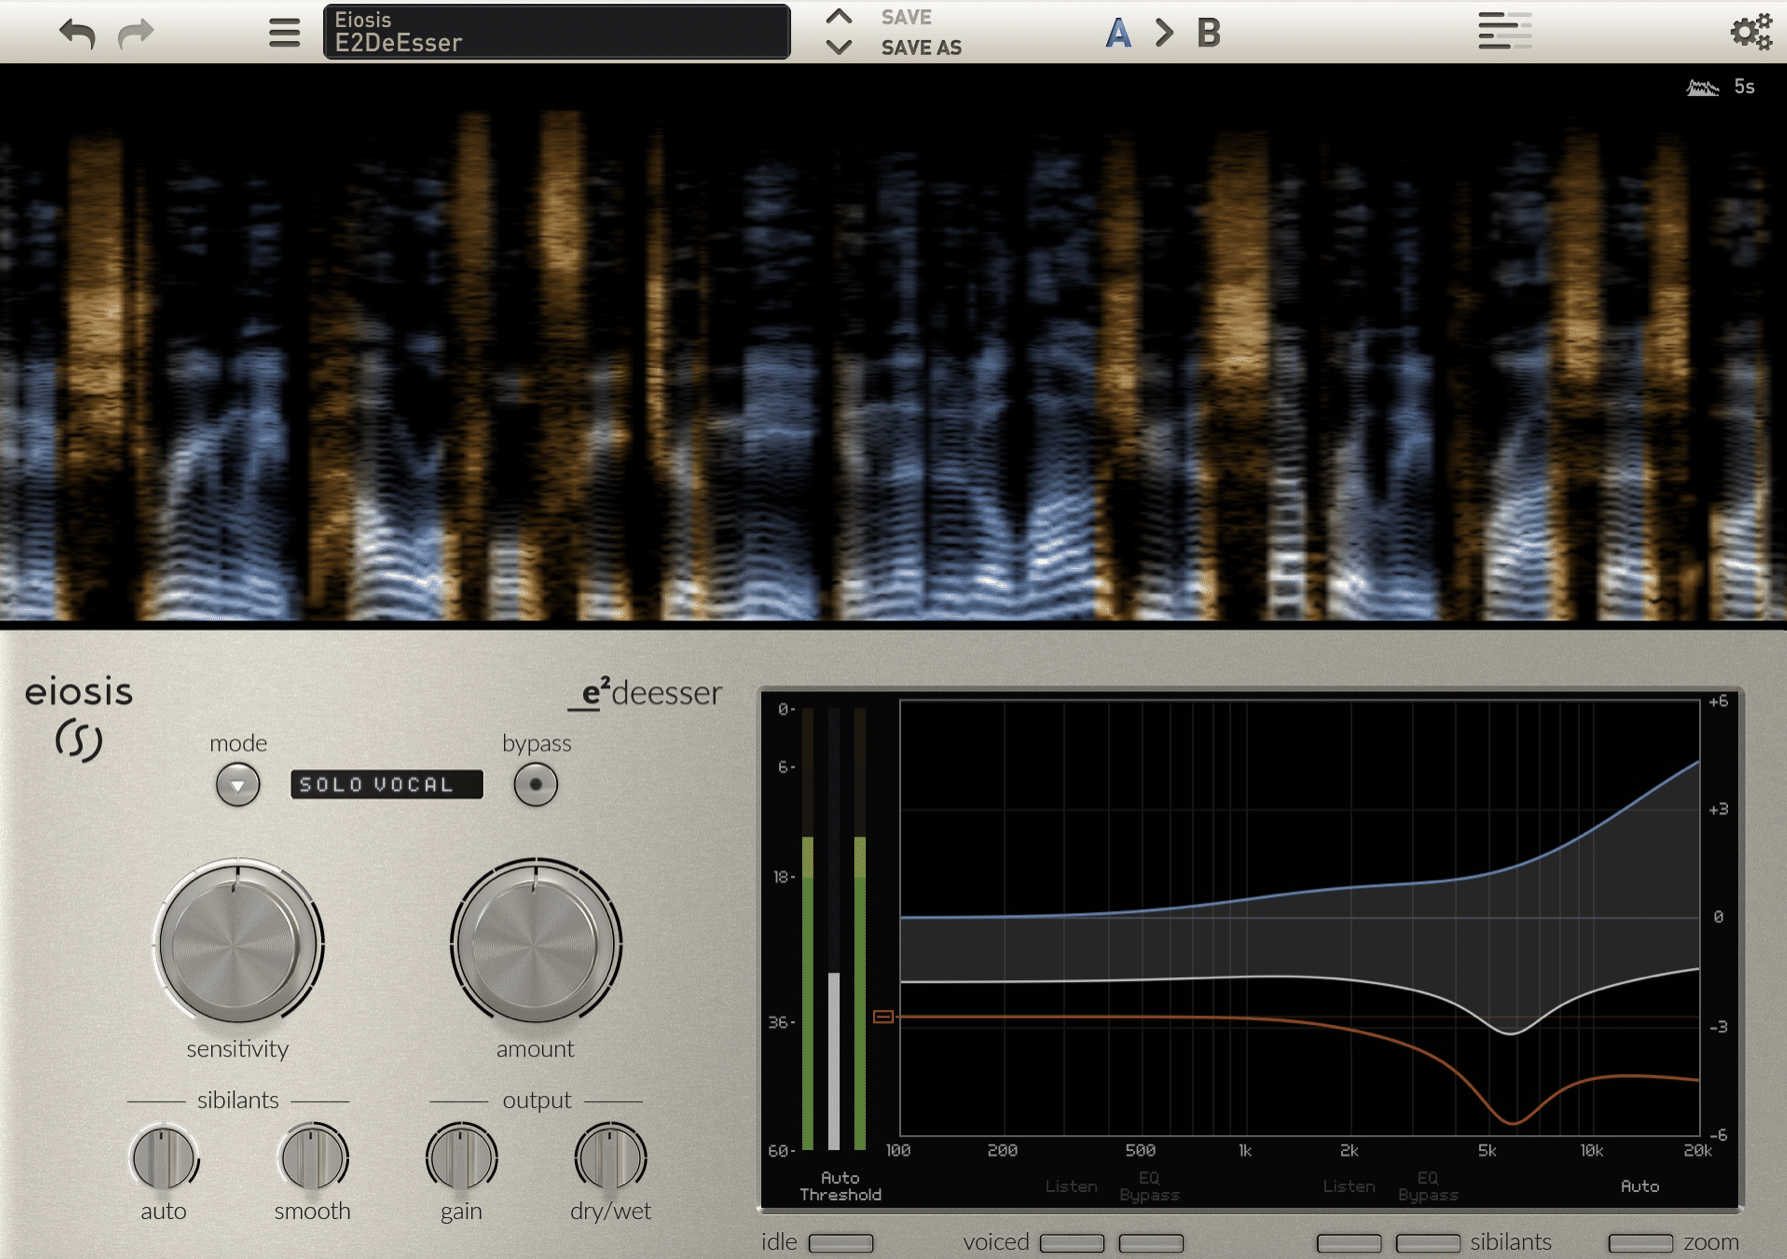
Polishing the mix involves adding the final touches to ensure the vocal sounds professional and polished, as we just talked about.
Use a de-esser to control sibilance so that harsh “s” sounds do not distract from the vocal performance.
Set the de-esser to target the specific frequency range in the frequency spectrum where sibilance occurs 一 typically around 5-8 kHz.
This step is key for achieving a smooth, professional vocal sound.
Additionally, consider using subtle saturation to add warmth and color to the vocal.
Plugins like FabFilter Saturn or Soundtoys Decapitator can enhance the vocal’s harmonic content and give it a more polished sound.
Remember to apply these effects subtly to avoid making the vocal sound unnatural because final adjustments are everything.
Using Reference Tracks
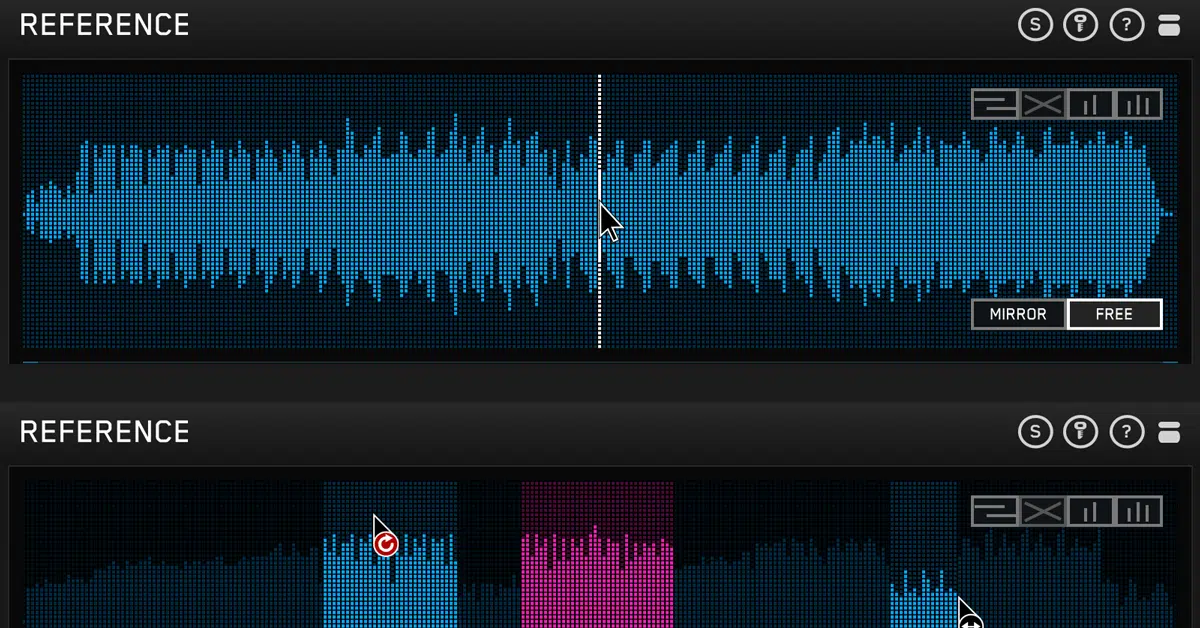
Using a reference track can help you achieve a professional mix by providing a benchmark for your vocal sound.
Choose a track that has a vocal mix you admire and compare it to your own mix.
When you’re learning how to mix with a reference track, pay attention to the:
- Overall balance
- EQ
- Other effects
It will help you make the right decisions and help you achieve a similar level of professionalism.
For example, if you notice that the reference track has a brighter vocal sound, adjust your EQ settings to enhance the high frequencies.
If the reference track uses a certain type of reverb, experiment with similar settings in your mix.
Sound super easy, right?
Using reference tracks is an invaluable way to improve your vocal mixing skills and achieve a more professional sound.
NOTE: Be sure to also use a reference not just for the sound of the vocal but also for how it relates to and interacts with all the other elements of a track.
Common Mistakes & Solutions When Mixing Vocals

One common mistake in vocal mixing is over-compression, which can make the vocal sound unnatural and lifeless.
To avoid this when learning how to mix vocals, use gentle compression settings and multiple stages of compression (if necessary).
Another mistake is not dealing with timing issues, which can result in a disjointed vocal performance and sloppy overall production value.
Always make sure that the vocal timing is tight and aligned with the rest of the track.
Additionally, failing to remove unwanted background noise can lead to a cluttered mix.
Always clean up your vocal recording before starting the mixing process.
Finally, be cautious with reverb and delay settings 一 too much can wash out the vocal and make it sound distant.
Always use these effects appropriately to enhance the vocal without overwhelming it.
-
Pro Tip For Perfectly Mixed Vocals
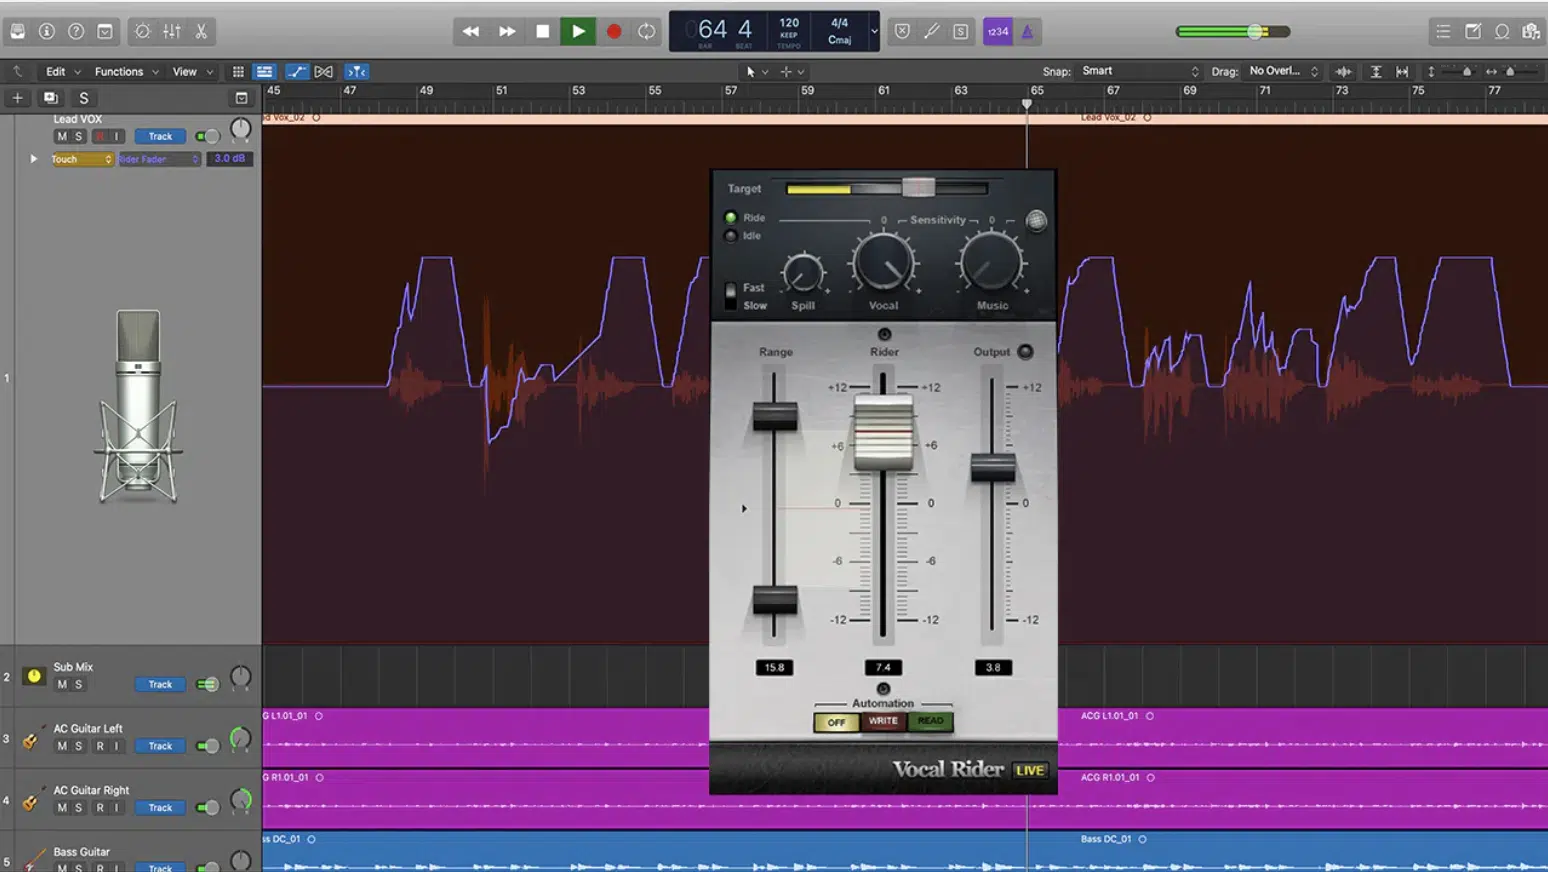
For advanced vocal mixing, try using techniques like vocal riding to automate volume changes dynamically.
Vocal riding involves manually adjusting the vocal’s volume to ensure it remains consistent throughout the track.
Popular plugins like Waves Vocal Rider can simplify this process and help maintain a steady vocal level throughout.
Vocal riding can be very useful in dynamic vocal performances where the volume varies significantly.
For instance, gently riding the vocal volume during quieter verses and louder choruses can maintain a balanced mix.
Another advanced technique is parallel compression, which involves blending a heavily compressed vocal signal with the original, as we briefly talked about earlier.
This method can add power and presence to the vocal without losing its dynamic range.
Set up a parallel track with aggressive settings (compression) and mix it in with the original vocal to taste.
This technique can add more body and impact to the vocal mix 一 making it stand out even more and help you learn exactly how to mix vocals like a boss.
Don’t forget to play around with different creative effects like subtle saturation and pitch shifting to add unique textures to the vocal.
This will enhance its character and make the mix way more interesting.
How to Mix Vocals: Final Thoughts
Mixing vocals is a super important skill that can transform a good track into a great one.
It can make the difference between a polished, professional-sounding track and one that seriously falls flat and lacks professionalism.
You always have to make sure your vocals are clear, balanced, and blend properly with the rest of the mix.
By using the techniques we broke down today, you’ll be able to learn how to mix vocals like a professional in no time.
To help you get started, check out the legendary Free Vocal Samples pack, which contains 20 free vocal loops, chops, and one-shots.
They’re all high-quality, created by professionals, and ready to use in your projects.
Plus, they’re mixed to perfection, of course and can give you an epic competitive edge and enhance your tracks every single time.
So, take these tips and techniques, experiment, and make sure your vocals stand out, without overpowering anything, of course.
Until next time…


Leave a Reply
You must belogged in to post a comment.