Drum bus compression is about locking your entire drum kit together, mastering dynamics, and boosting punch where your tracks really need it.
It can help make your drum mix sound tighter, on point/consistent, and way more energetic (without killing the vibe you’re aiming for).
Plus, when you do it correctly, it can glue your kick drum, snare drum, and percussion into one powerful, flowy sound like the pros.
As producers, knowing everything about drum bus compression can completely change the way your mixing process goes and help you shape your very own drum sound.
That’s exactly why I’m breaking down everything you need to know, like:
- How drum bus compression actually works ✓
- Key differences from individual drum track compression ✓
- The best compression settings for punch, glue & weight ✓
- Dialing in the perfect attack and release ✓
- When to use parallel drum bus compression ✓
- Combining multiband compression with traditional compression ✓
- Pro-level automation moves and timing tricks ✓
- Using saturation alongside compression ✓
- How to stack compressors without mud ✓
- Advanced tips, tricks, and techniques ✓
- Much more about drum bus compression ✓
By knowing all the secrets and tricks to drum bus compression, you can easily shape tone, lock in your groove, and add punch like an absolute boss.
Plus, you’ll never have to worry about lifeless, whack transients or heavily compressed drum buses ever again.
This way your tracks will move, hit hard, and sound clean every single time.
Table of Contents
- What Is Drum Bus Compression & Why Should You Care As Producers?
- Drum Bus Compression vs. Individual Track Compression
- Setting Up Your Drum Bus Properly (Any DAW)
- The 5 Key Compressor Controls You NEED to Understand
- Picking the Right Compressor for Your Drum Bus
- How to Dial In Punchy, Tight, or Smooth Compression
- Parallel Compression on Your Drum Bus (Advanced Control)
- Using Multiband Compression When You Actually Need It
- Compression vs Saturation on the Drum Bus
- Shaping Groove Through Compression Timing
- Layered Compression: Stacking Compressors Without Overdoing It
- Mid/Side Compression on the Drum Bus
- Killer Automation Moves with Drum Bus Compression
- Advanced Techniques That Take It to the Next Level
- Final Thoughts
What Is Drum Bus Compression & Why Should You Care As Producers?

Drum bus compression is when we take all of our core drum tracks (kick, snare, hats, toms, percussion) and run them through one dedicated drum bus to apply compression to the entire kit at once.
Instead of compressing individual hits in isolation, you’re shaping the entire drum sound as one solid unit.
Basically the goal is to bring cohesion and dynamic control without killing the transients or feel, because that would be super amateurish.
When done right, it enhances the pocket and gives your drum mix that polished, glued-together sound you hear in top records.
This can help tighten up sloppy grooves, tame inconsistent hits, and help the drums sit properly in your entire mix.
For glue compression, it’s super useful 一 that subtle type of compression that doesn’t sound obvious but keeps everything locked in.
Whether you’re working on punchy boom-bap, clean pop, or distorted trap beats, drum bus compression helps you lock down a controlled sound that still moves/breathes.
Once you get comfortable using the right drum bus compressor with the right settings, your drums start to feel like one instrument instead of a bunch of disconnected hits.
That’s when you know you’re really leveling up.
Drum Bus Compression vs. Individual Track Compression
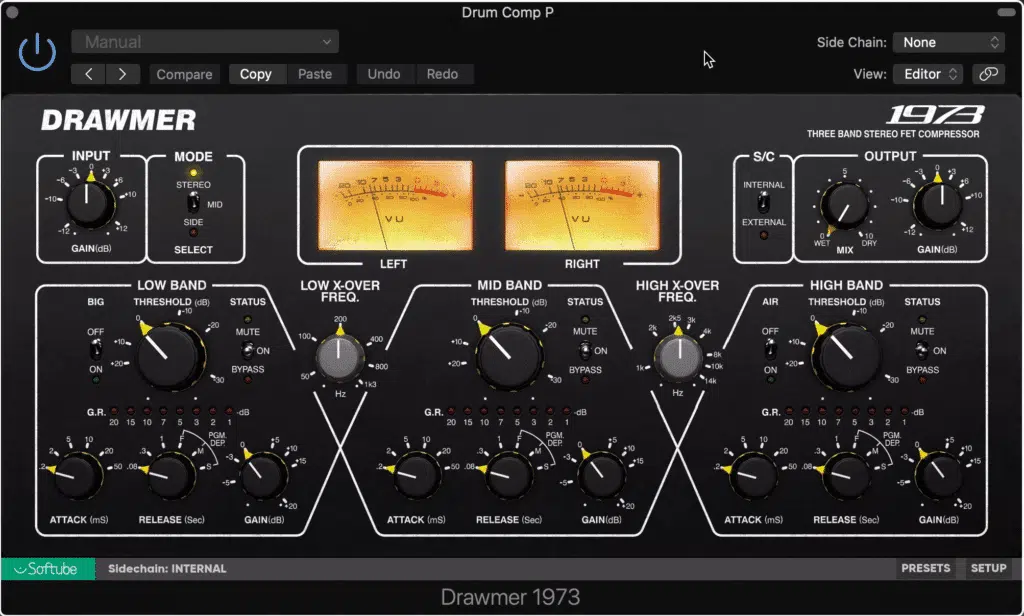
While individual track compression is great for shaping single elements like a kick drum or snare drum, drum bus compression is all about what happens when those sounds interact together in the same space.
For example, you might compress your snare with a fast attack (around 5ms) and medium release (around 80ms) to tighten it up on its own.
But once it’s sent into the drum bus, the relationship between the snare and kick becomes way more important my friends.
In a drum bus, you’re not just controlling transients 一 you’re managing how the entire drum kit breathes together.
For example, you can keep punch intact while still gluing the elements together with about 2–3 dB of gain reduction using a:
- 4:1 ratio
- Slow attack (25–30ms)
- Medium release time (90–120ms)
That balance wouldn’t even be possible if you were only compressing individual drum tracks, which is very interesting, right?
And another thing that’s pretty dope is how the two types of compression can actually complement each other…
You can tame the kick drum individually with a FET compressor, get your snare hits sitting right with a soft knee setting.
Then, use drum bus compression to lock everything into the groove.
It’s super useful when layering in parallel drum processing underneath, so make sure to keep that in mind.
PRO TIP: Start light on individual elements (1–2 dB of compression), then add a dedicated drum bus compressor like the SSL G-Master or API 2500 and apply an additional 2–3 dB at the bus level.
This combo will give you natural-sounding compression that still hits hard without killing your dynamic range.
Side note, if you want to learn all about natural-sounding compression in full, I got you.
Setting Up Your Drum Bus Properly (Any DAW)
Before you even think about touching any compression settings, you’ve gotta make sure your drum bus is set up the right way. The way you group, route, and stage your drum tracks sets the tone for how your drum bus compression will actually behave. So, let’s break it down so you get a super solid understanding.
Grouping, Routing, and Gain Staging
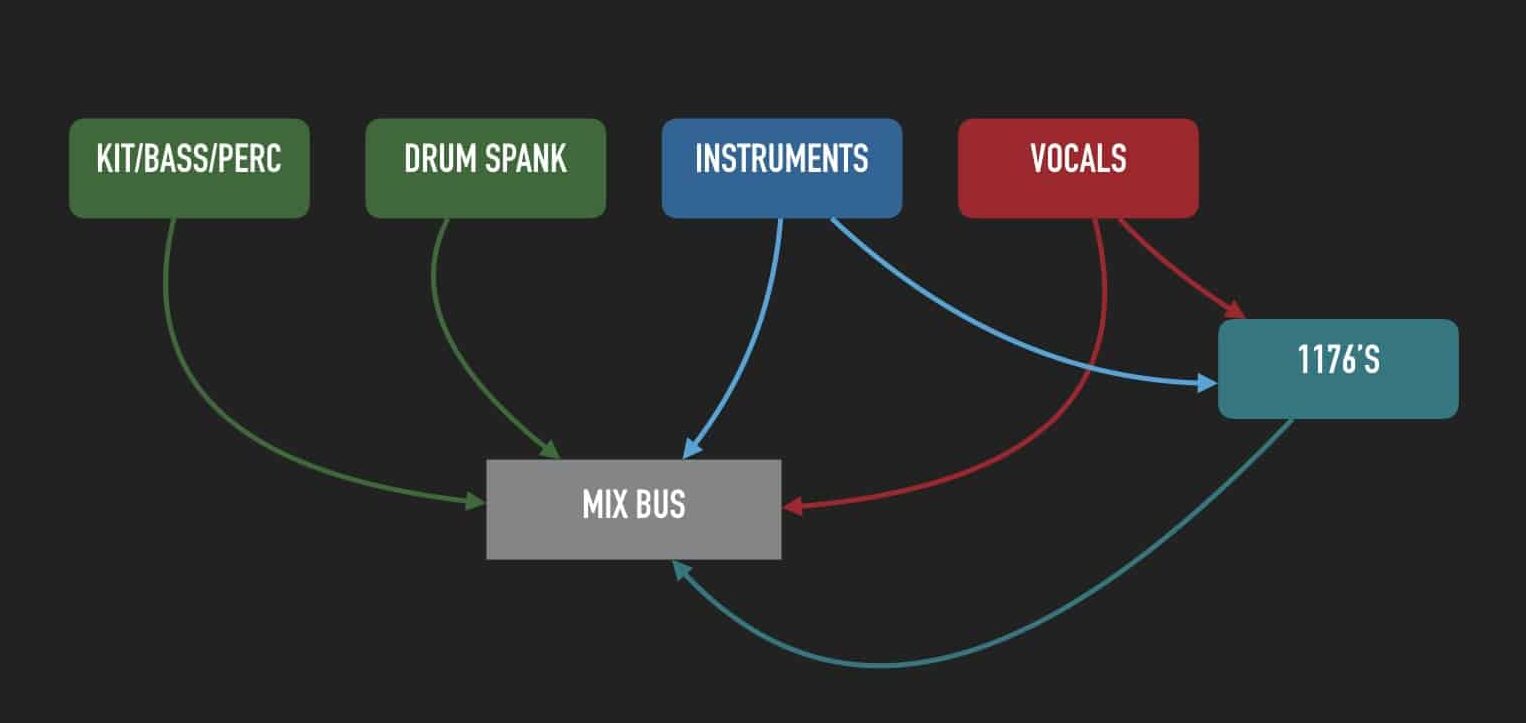
You’re going to start by sending all of your core drum tracks (kick drum, snare drum, hats, toms, percs, room mics, and overheads) into a single auxiliary track or group bus.
In FL Studio, for example, you can use a dedicated mixer insert, while in Ableton you’d group them using Ctrl+G and route to a return track.
Just make sure each individual track hits the drum bus at a consistent level, which means gain staging each channel to peak around -12 dBFS.
This will help no one element dominate before compression even begins.
From there, aim to keep your drum bus peaking around -6 dBFS, giving yourself headroom for any make-up gain, parallel compression, or bus FX you’re stacking on top.
If your snare hits are peaking much louder than everything else, that’s going to skew or mess up how your drum bus compressor reacts…
So remember to fix that balance before inserting any plugins.
PRO TIP: Use a VU meter plugin like Klanghelm VUMT to get a more analog-style visual of your levels 一 it’s a great way to spot when your drum sound is pushing too hard, especially if you plan to hit the comp with some analog-style glue compression.
Why Signal Flow Matters for Compression
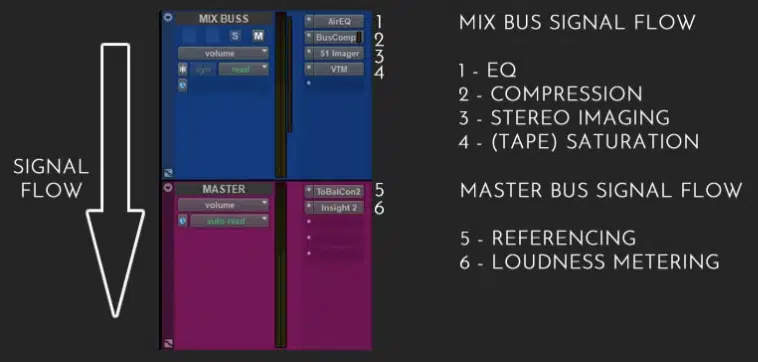
Your signal flow determines what actually gets compressed.
And if something is hitting the drum bus after the compressor, it’s not being shaped by the compression at all.
For example, if your overhead mics are sent directly to the master instead of the drum bus, you’ll get that weird disconnected feel where the cymbals float above everything.
There won’t be any kind of cohesive sound, and nobody has time for that.
You want everything hitting the bus pre-compressor, including parallel drum layers and even subtle FX returns like claps or rimshots, especially if they’re driving the groove.
If you’re stacking reverb or stereo widening tools (like Ozone Imager or MicroShift), keep those after the comp to avoid shaping dynamics that don’t need compression.
PRO TIP: Treat your drum bus like a funnel…
If it’s not going into the top of that funnel, it’s not being compressed, and your drum mix will never feel glued no matter what ratio, threshold, or attack setting you’re using.
Insert Position: Pre or Post Effects
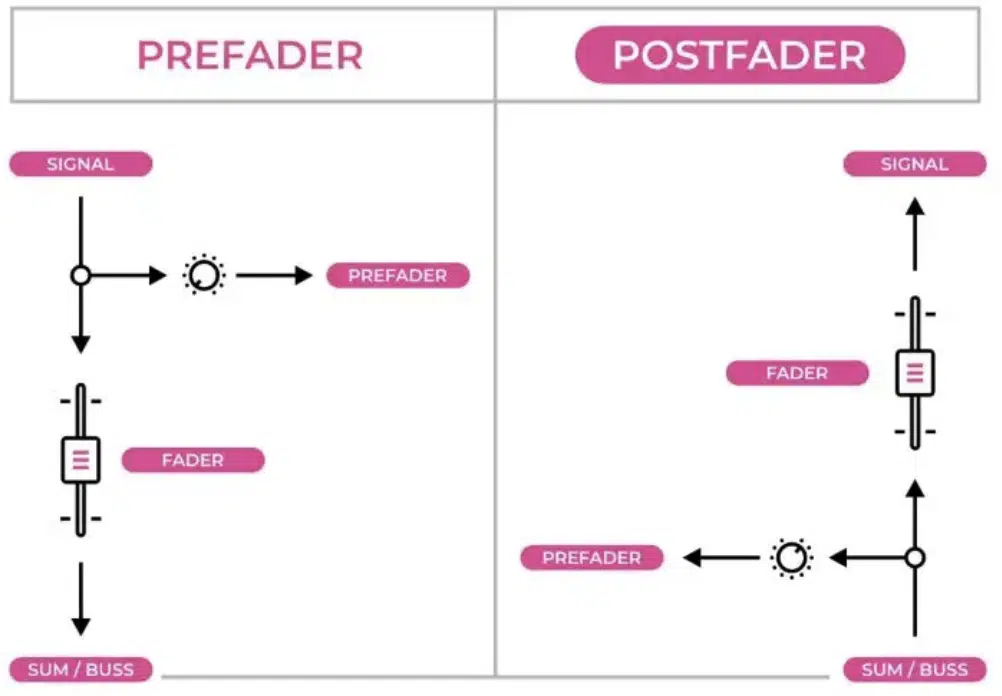
Where you put your drum bus compressor in your FX chain massively affects tone:
- Inserting it before EQ or saturation keeps the compression clean and focused on raw transients.
- Placing it after adds tone coloration and harmonic behavior into the compression reaction.
If you’re going clean and punchy, insert the compressor right after routing, then follow with saturation like Softube Tape or Kramer Master Tape, and EQ (like a high-shelf boost at 8 kHz, +2.5 dB) at the end to sweeten the top.
If you’re going for a thicker sound, saturate first, then compress with a 4:1 ratio, 25ms attack, 100ms release, and apply around 3 dB of gain reduction.
This pulls the extra harmonics back under control and gives you a controlled sound.
Oh, and remember that using multiband compression after saturation can also help tame the mids without killing the highs, especially in the snare drum/overhead region.
PRO TIP: Whatever you do, avoid stacking stereo imaging or reverb sends before your comp; it’ll either smother your punch or result in a heavily compressed, overly wide mess.
The 5 Key Compressor Controls You NEED to Understand
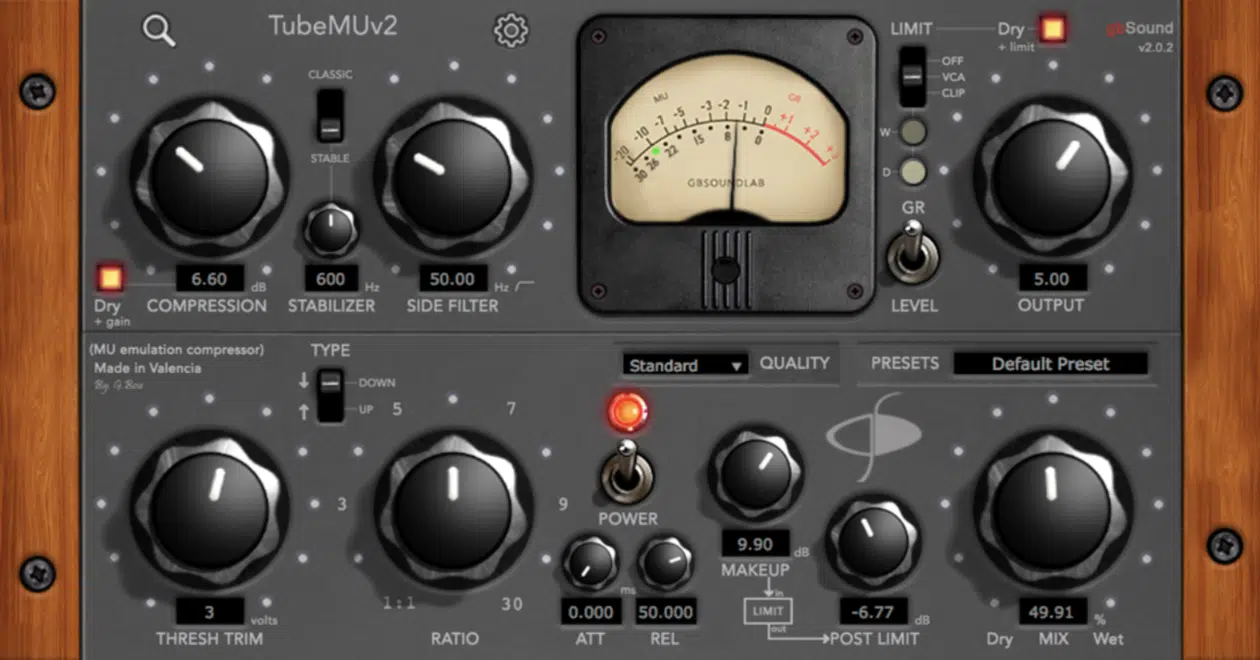
Once your drum bus is routed clean, staged right, and flowing properly, it’s time to start dialing in the compressor itself. These five parameters (threshold, ratio, attack, release, and make-up gain) are what shape your drum sound from raw to pro-level. You really can’t become a drum bus compression master without knowing them like the back of your hand, so let’s get into it.
Threshold & Ratio
The threshold sets the point where your drum bus compression kicks in, and it should be directly tied to how hot your drum tracks are hitting the input.
If your drums peak around -10 dBFS, a threshold set to -18 dBFS will start pulling down signal consistently.
For glue, you want about 2–3 dB of gain reduction, which usually happens when the threshold sits 6–10 dB below peak level, depending on your comp’s internal detection circuit.
The ratio determines how much compression is applied.
For transparent glue, a 2:1 to 4:1 ratio works best 一 if you’re going for a harder, punchier feel, step it up to 6:1 or even 8:1.
This is especially true in parallel drum bus compression chains.
For example, on a dry boom-bap loop, an SSL G-Master set at 4:1, with a threshold at -16 dB, will give you just enough glue without choking your snare hits or rolling off the transients of your kick drum.
And make sure to always monitor the gain reduction meter…
If you’re seeing 5–6 dB of consistent reduction on a drum bus, you’re compressing too much unless you’re doing it for character or running it in parallel.
My best advice would be to start small, then push harder only if the song calls for it.
Attack & Release
Next up let’s talk about the 2 key players here 一 attack and release settings.
The attack setting controls how quickly the compressor grabs onto a signal.
Fast attack times like 1–10ms will clamp down on the transient and flatten the punch, and slower attack settings, like 20–40ms let those transients snap through before compressing the tail.
For punchy drums, a slow attack at 30 ms lets your kick drum hit clean while the body gets tamed, and the snare drum retains that sharp crack before being gently controlled.
Release affects how long it takes the compressor to stop compressing after the signal dips below the threshold.
Faster release settings like 50–80ms give you more movement, while slower ones like 120–200ms smooth things out but can make the bus feel heavy or smeary.
On a trap beat, you might run a FET compressor with attack at 25ms, release at 100ms, and a 4:1 ratio, which lets the transients snap while keeping hats and midrange content in check/on point.
Just make sure to set your release to “breathe” with the tempo…
If your track is at 100 BPM, try a release between 100–120 ms and tweak by ear until the drum mix feels like it’s moving naturally in rhythm without pumping too hard.
Makeup Gain
Once you’ve applied compression, the output signal is almost always quieter.
That’s where makeup gain comes in to bring the level back up without adding unnecessary noise.
If your drum bus compressor is knocking the signal down by 3 dB, then a starting point would be setting the makeup gain to +3 dB.
But always trust your ears and not just the number because that’s key.
Match the compressed output to the dry signal in perceived loudness, not just peak meter readings.
You can do this by toggling the compressor bypass and adjusting makeup until both versions sound equally loud.
Some plugins even have auto-gain features, but they’re often inconsistent, so it’s better to go manual (especially if you’re stacking multiple tracks into the bus and want total control).
For example, on the API 2500, set your gain reduction around 2–3 dB.
Then, bring up the output gain knob until your drum sound fills out the same space in the entire mix as before, only tighter.
PRO TIP: If your post-comp signal sounds better just because it’s louder, dial back your makeup gain and reevaluate the compression itself.
Loudness bias can trick you into thinking a heavily compressed signal sounds “better,” when all it’s really doing is sounding louder, and you definitely don’t want that.
Picking the Right Compressor for Your Drum Bus
Not every compressor is built to handle drum bus compression, and which one you choose seriously impacts the feel, tone, and punch of your drum sound. Whether you want transparency, saturation, smack, or glue, it all comes down to knowing what each compressor type actually does, and what your track really needs. So, let’s talk about it.
VCA, FET, Optical & Digital Compressors: Explained
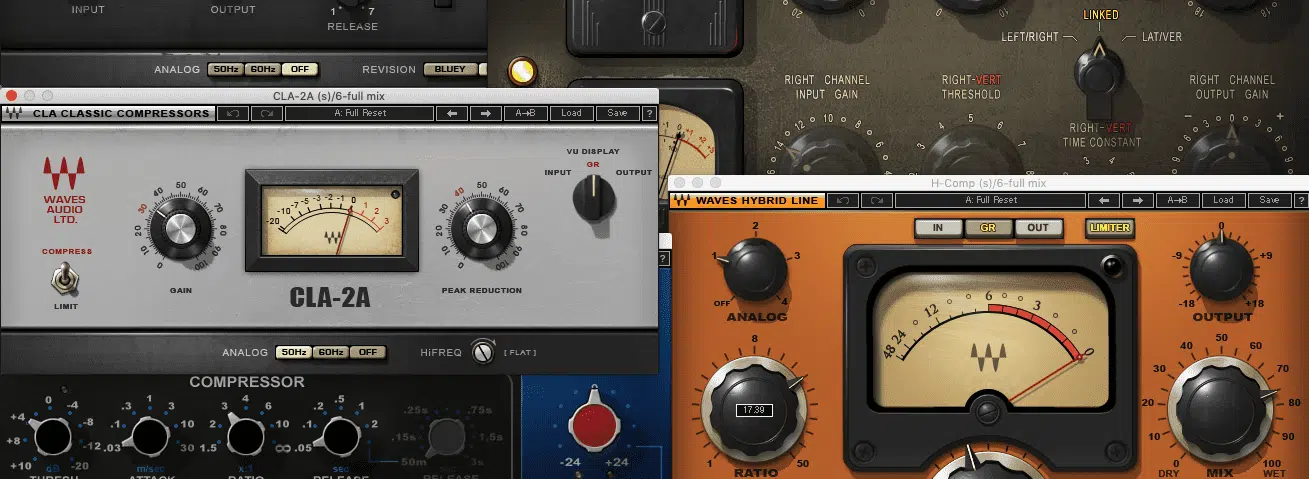
VCA compressors use a voltage-controlled amplifier to apply clean, controlled compression with lightning-fast response.
This makes them absolutely perfect for glue-style drum bus compression.
For example, the SSL G-Master Bus Compressor is a classic VCA, and using a 4:1 ratio, 30ms attack, and 100ms release, you can lock your drum kit together while still letting the transients breathe.
FET compressors like the UA 1176 are ultra-fast and aggressive, ideal for smacking a kick drum or snare drum when you want grit and attitude.
Quick tip: Run it at 8:1, attack at 2, release at 6, and aim for 5–7 dB of gain reduction in a parallel drum setup.
Then you’ve got optical compressors, which react slower and more musically, thanks to their light-based detection circuits.
They’re really not ideal for fast transients but work well when you want smooth, natural-sounding compression that rounds off harshness with a touch of color…
Think LA-2A, 3:1 ratio, slow attack and release, and 1–2 dB of compression.
And last but not least, digital compressors, which are ultra-clean, flexible, and usually feature-packed.
Take FabFilter Pro-C 2, for example, where you can adjust knee shape, lookahead, sidechain EQ, and even M/S processing for surgical drum bus control.
PRO TIP: If you’re unsure where to start, go VCA for glue, FET for punch, optical for warmth, and digital when you need to dial in very specific movement and tonal shaping without any pesky artifacts.
When to Use Each One for Glue, Snap, or Color
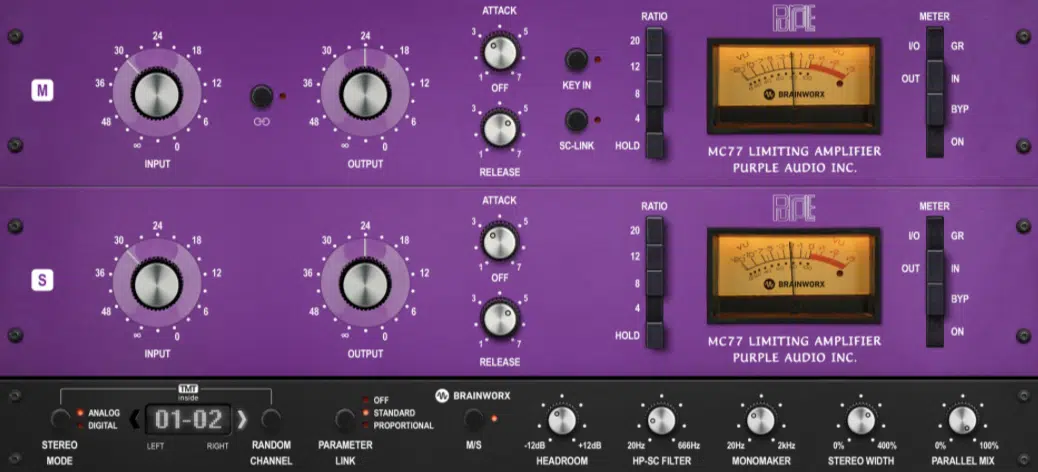
If your drum mix feels disconnected or loose, a VCA compressor is usually the move.
I suggest you try 2:1 ratio, 25ms attack, and 100ms release, with around 2–3 dB of gain reduction to feel the kit start to breathe as one without sounding heavily compressed.
For raw transient snap and explosive energy, grab a FET compressor like the Purple Audio MC77 or UAD 1176 Rev A, and slam it with:
- 10:1 ratio
- Fast attack at 2
- Release at 7
Then, blend it back in with a mix knob at 25–35% for aggressive parallel compression that doesn’t flatten the front end.
And when you’re after a thicker, rounder tone that tames sharp hats or poky snares, an optical comp like the LA-3A with 2:1 ratio, auto attack/release, and 2 dB of gain reduction helps smooth the mids.
While keeping a natural sound that sits perfectly under a vocal bus, I might add.
Use digital compressors like Pro-C 2 or DMG TrackComp 2 when you’re working with multiple tracks on the drum bus and need precision.
For example, compressing only the mid-channel or adding a dynamic high-shelf with a moderate ratio on top-end content like overheads.
Think of it like seasoning, if that’s easier for you…
VCA for control, FET for impact, optical for softness, digital for customization, and pick what flavors you actually need instead of just reaching for the usual.
Recommended Plugins That Actually Deliver
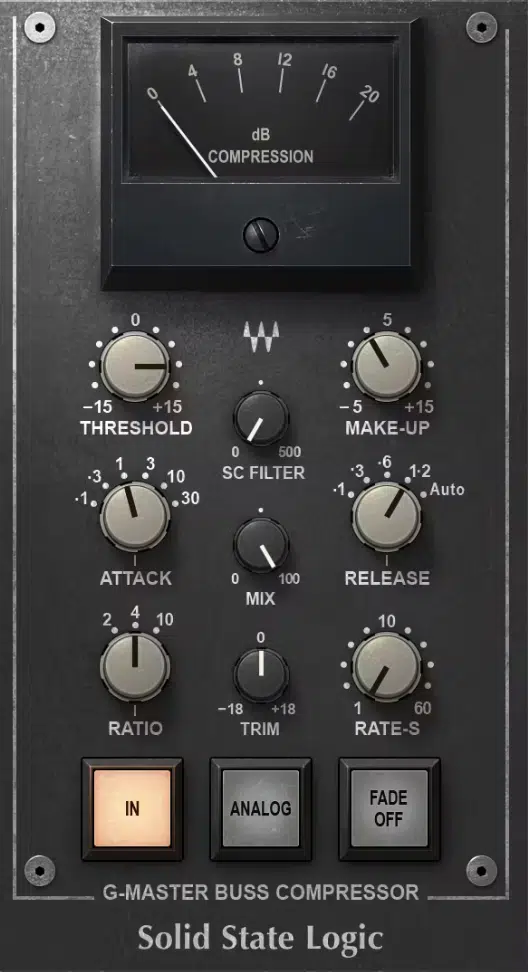
If you’re after that tried-and-true glue compression, the Waves SSL G-Master Bus Compressor is still one of the most reliable, hands down.
Set it to 4:1, attack at 30 ms, release at 100ms, and pull around 2–3 dB of gain reduction for a tight but open feel.
For FET-style snap, UAD 1176 Rev E, Slate FG-116, or Arturia Comp FET-76 are killer.
Just don’t be afraid to slam the input for character and back it off with output gain for maximum balance.
And if you want total control, FabFilter Pro-C 2 gives you:
- Advanced metering
- Sidechain filtering
- Stereo linking
- Soft knee settings
You can easily shape everything to match your exact groove 一 start with a 3:1 ratio, attack at 25ms, release at 80ms, and tweak visually from there.
PRO TIP: When A/Bing compressors, match output gain within 0.2 dB and listen for movement, tone, and pocket (not just loudness).
How to Dial In Punchy, Tight, or Smooth Compression
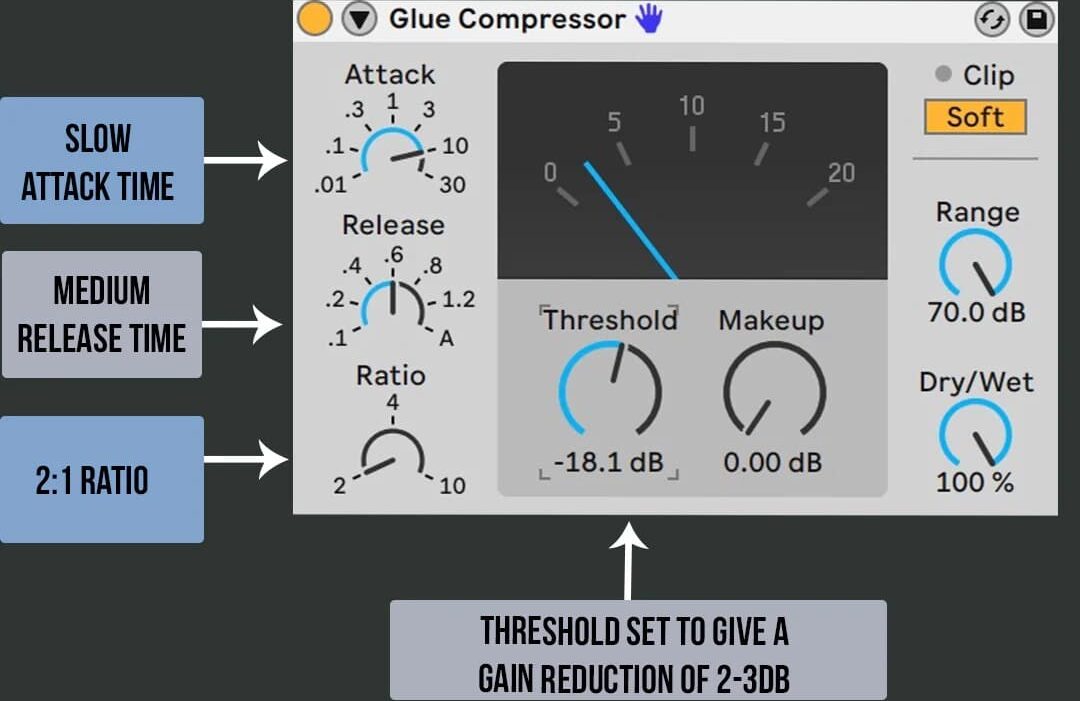
To get punch without killing your transients, go with a slow attack around 30–40ms, release time between 80–100ms, a 4:1 ratio, and aim for about 2 dB of gain reduction.
This lets your kick drum and snare hits snap through while still gluing the drum bus.
For a tighter, more controlled sound that still breathes, bring your attack slightly faster (15–25ms), lower your threshold to grab about 3 dB, and shorten your release to around 60–75ms.
It’s perfect for fast-paced genres like pop or tight EDM grooves.
If you’re after that smooth, big-boy glue that adds low-end weight, try a VCA compressor with 2:1 ratio, attack at 25ms, release at 120ms.
Just make sure to feather the threshold until you’re compressing just 1–2 dB 一 it won’t jump out, but you’ll feel it locking the kit in place.
For extra density, pair that with parallel drum bus compression and blend the compressed chain back in at 30–40% wet for punch and thickness that doesn’t sound heavily compressed.
PRO TIP: Always compress with the entire mix playing.
Your drums might sound tight solo’d, but you’ll only know if they’re really working when they’re up against bass, vocals, and everything else.
Parallel Compression on Your Drum Bus (Advanced Control)
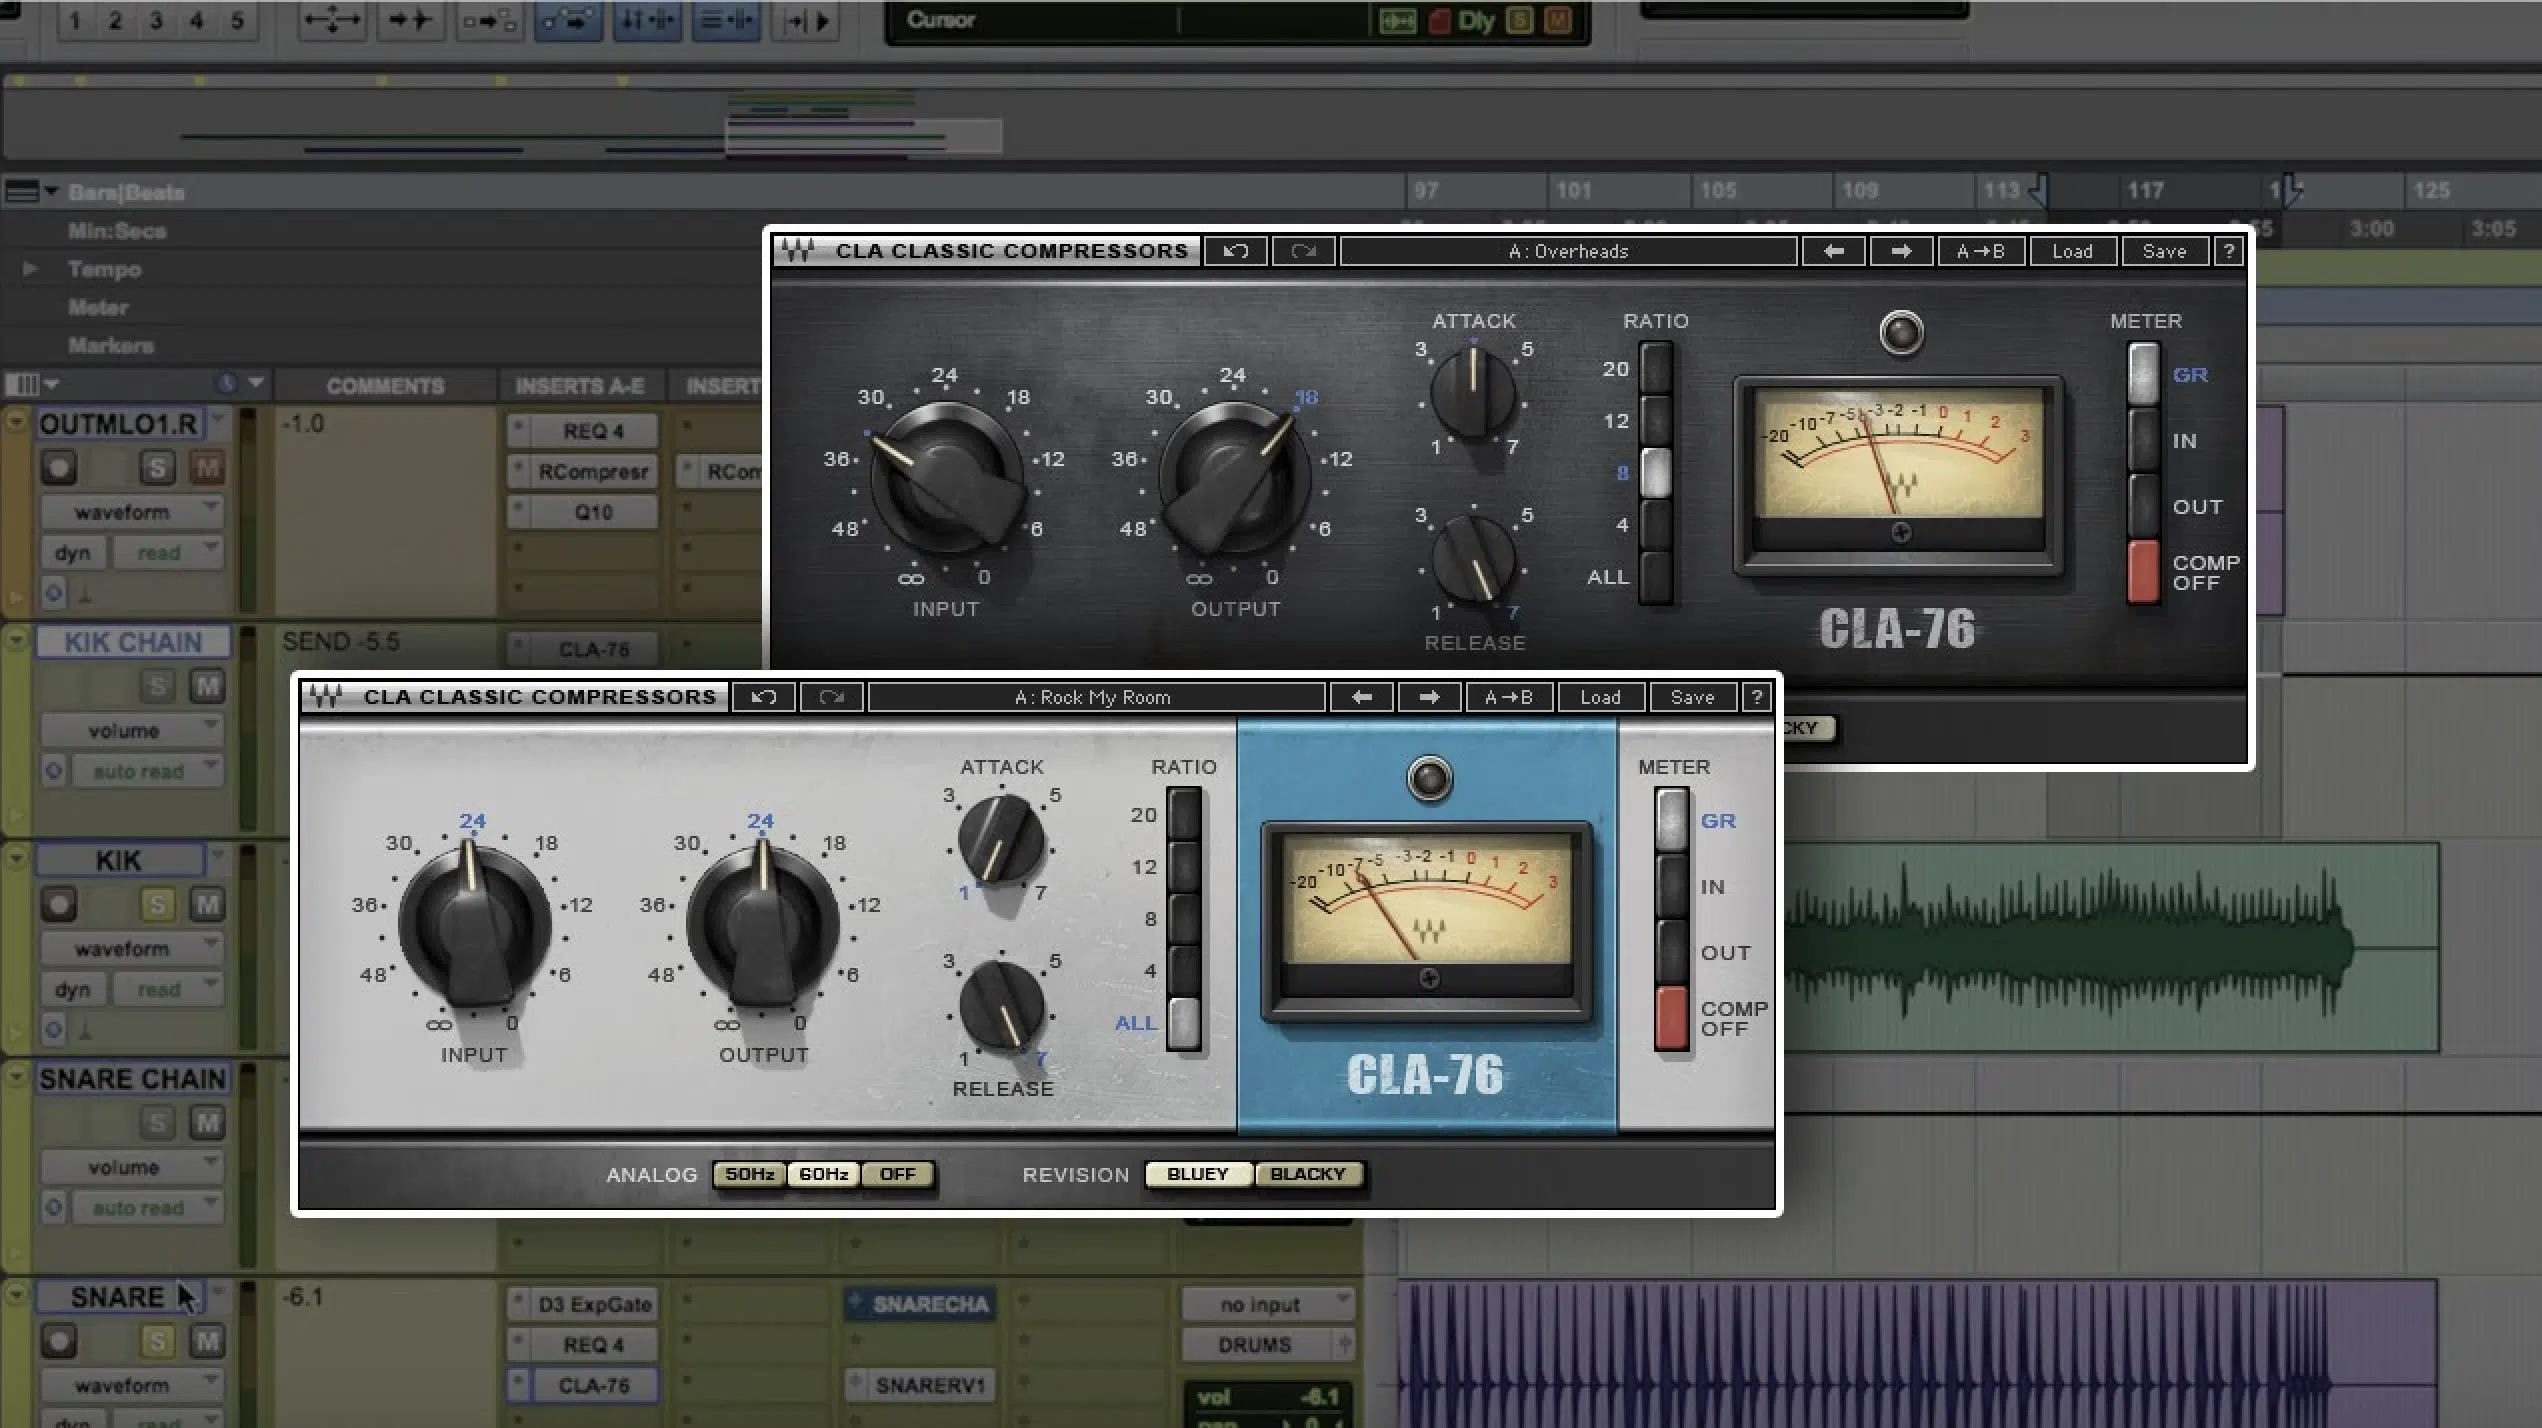
To properly set up parallel drum bus compression, you’ll want to:
- Duplicate your full drum bus or send it to an auxiliary track
- Slap on a compressor like the 1176 Rev A
- Go heavy
I suggest that you try a 20:1 ratio, attack at 3, release at 7, and smash it with 8–12 dB of gain reduction until it sounds borderline broken.
Now, blend it back in underneath your dry drums using the mix knob or aux fader, starting at 20% wet and adjusting until your drum mix feels thicker without flattening the groove 一 usually around 25–35% is the sweet spot.
The trick is to compress the hell out of it, then sneak that compressed signal under the original to reinforce body and punch without losing natural dynamics.
Before hitting the comp, insert an EQ to roll off the lows below 50 Hz and dip harsh mids around 2.5 kHz, especially if your snare drum or cymbals feel harsh once blended.
For extra vibe, add saturation after the comp; Decapitator set to Mode E, Drive at 3, and Tone pulled slightly left will give you grit without mud.
PRO TIP: Use a high-pass filter on the sidechain input (around 100 Hz) so the kick drum doesn’t trigger too much gain reduction.
This will keep your bottom end solid and prevent your compressor from overreacting.
Using Multiband Compression When You Actually Need It
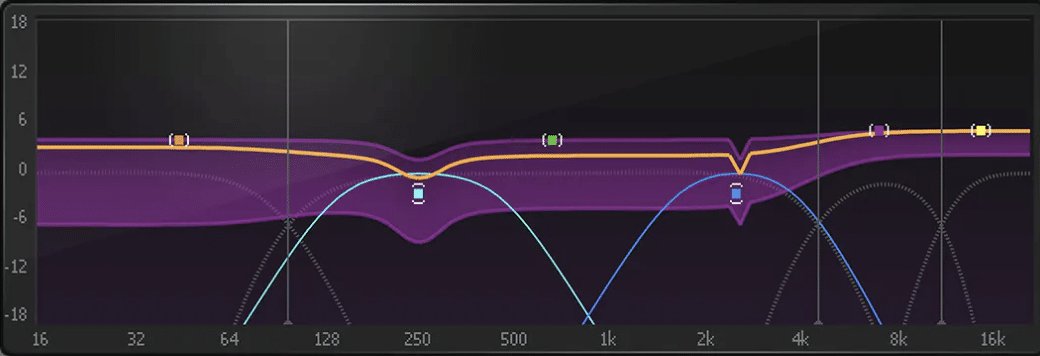
Multiband compression is perfect when your drum bus has frequency-specific issues (like sub boom, harsh highs, or boxy mids) that full-band compression would overcorrect.
Let’s say your kick drum is sitting right, but the low-mids around 250–400 Hz are getting out of control…
In this case, use FabFilter Pro-MB with a band focused on 180 Hz to 500 Hz, apply a 3:1 ratio, and go for 2–3 dB of reduction with a medium attack (25ms) and release (120ms).
To tame bright hi-hats or brittle cymbals, compress only the top band from 6 kHz and up, using a soft knee setting, 2:1 ratio, attack at 10ms, and release around 80ms.
This smooths the top without dulling it, which is what you want.
Multiband is also ideal in parallel drum setups where your lows are overpowering.
What you’ll want to do is isolate the low band (0–100 Hz), compress it harder, and leave the mids/highs uncompressed to maintain punch and space.
PRO TIP: If you’re layering your drum bus under a vocal bus, tame the 1–3 kHz range dynamically on the drums.
This makes sufficient room for the lead vocal to breathe while keeping your drum sound upfront.
Compression vs Saturation on the Drum Bus
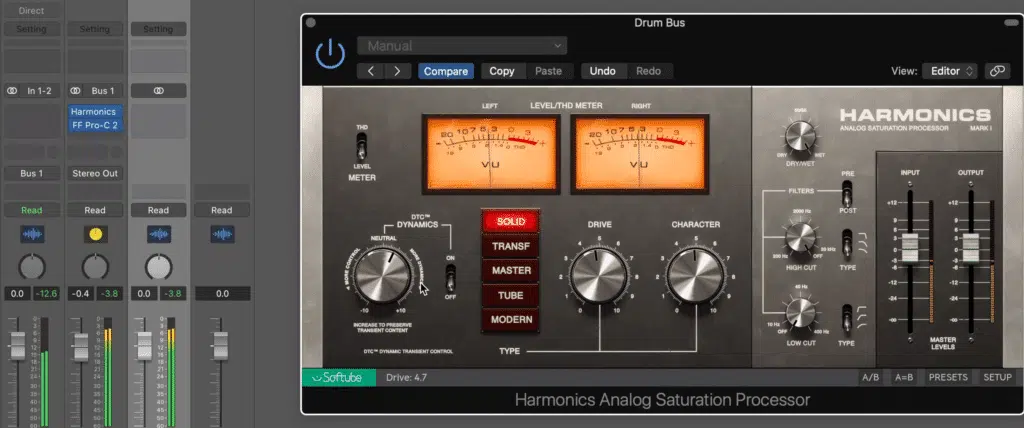
Another things you’ll have to understand is the different between compression and saturation, and where you’re going to apply each.
Compression reduces dynamic range and glues your drum tracks together.
Saturation on the other hand adds harmonic content that makes your drums feel bigger, warmer, and more “analog” (which is super popular now and forever).
A VCA compressor like the SSL G-Master with 3:1 ratio, attack at 25ms, and release at 100ms will keep your transients intact and provide that tight glue compression we all love…
But sometimes it’s not enough to get that bold, full tone.
So what you want to do is drop in a tape or tube saturator after compression (like Softube Tape or Soundtoys Radiator) and push Drive until the output peaks around -6 dBFS, then back off the mix to around 30–40% wet.
This thickens the mids and adds harmonics that compression can’t.
You can also flip the order and saturate before compression to control that added energy more tightly.
It’s super great on parallel drum returns where you’re pushing things hard.
PRO TIP: Use saturation when your drums sound too clean or sterile, and use compression when the performance feels inconsistent.
This sick combo of both gives you a crazy polished sound with attitude/control.
Shaping Groove Through Compression Timing
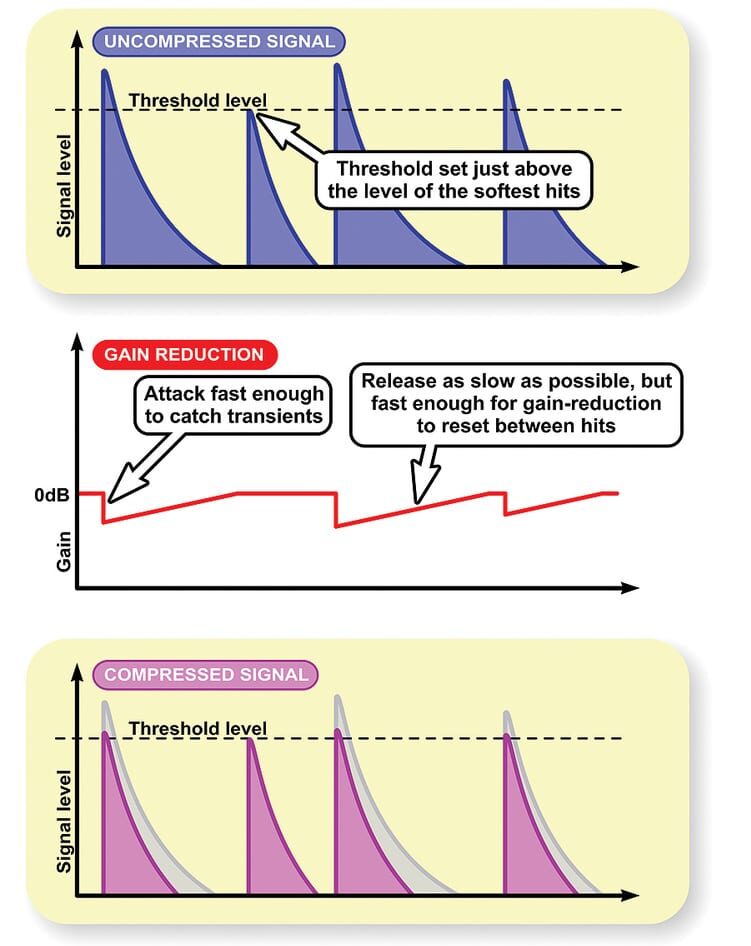
Groove lives in the space between transients, and the attack and release settings on your drum bus compressor are what shape that space.
Use a slow attack (30–40ms) to let the transients snap through and maintain punch, especially on kick snare patterns that need to feel live and upfront.
Then shape the groove with release times…
For a laid-back feel, use 120–150ms, while faster-paced beats (like 120–140 BPM) usually feel better with 60–90ms releases that reset before the next drum hit.
If the release is too slow, your drum bus will feel glued in a bad way 一 compressed between hits with no bounce; too fast, and it’ll jitter and pump unnaturally.
PRO TIP: Match your release timing to the tempo.
For example, a 100 BPM track has a 1/16th note around 150ms, so start there and fine-tune until your drum mix feels like it’s dancing in time with the beat instead of working against it.
Layered Compression: Stacking Compressors Without Overdoing It
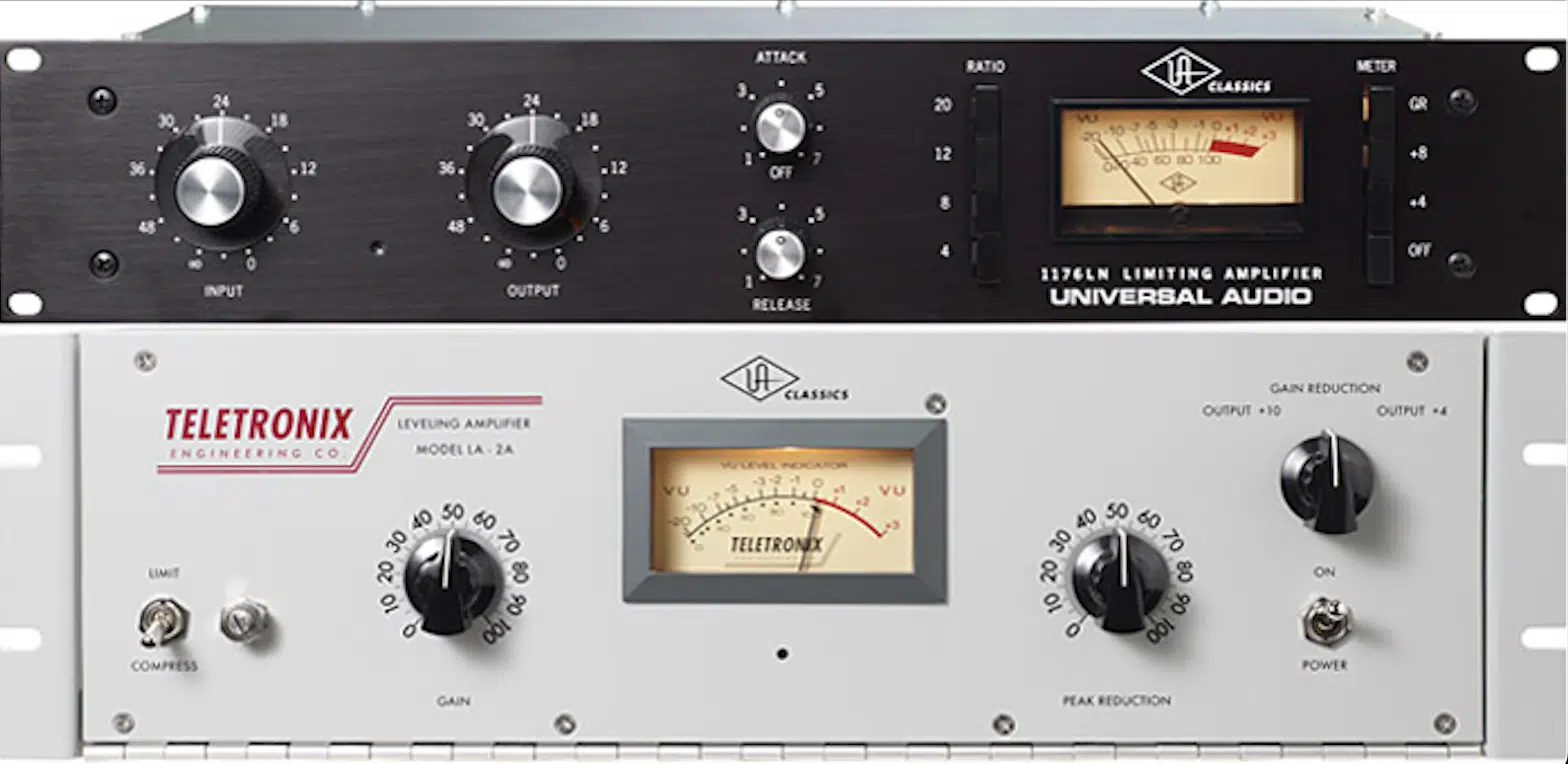
Stacking compressors (aka serial compression) is all about letting each stage do one job well, and it’s definitely a perk to know about.
For example, start with a VCA compressor like the SSL G-Master (4:1 ratio, 25ms attack, 100ms release, and aim for 2 dB of gain reduction) for glue.
Then, follow it with a FET compressor like the 1176 Rev A (8:1 ratio, fastest attack/release settings, 3–4 dB of gain reduction) to smack the transients back into shape.
This gives you a tight, punchy drum bus that still has weight, but without having one compressor work too hard or smear the transients.
To keep things from sounding heavily compressed, limit each stage to no more than 2–4 dB of reduction, and EQ between stages if necessary.
For instance, dip 300 Hz slightly between comps if your drum kit starts sounding muddy.
PRO TIP: Try adding a third layer (a digital compressor like FabFilter Pro-C 2 set to M/S mode with a 2:1 ratio, compressing only the mids) to lock the kick snare to the center without touching the stereo field 一 giving you punch and width at the same time.
Mid/Side Compression on the Drum Bus
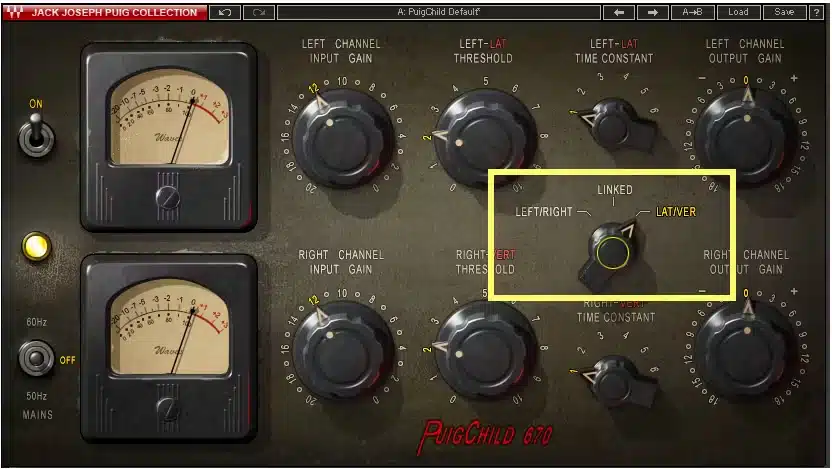
Mid/Side compression gives you the ability to treat the center (kick, snare) and sides (rooms, overheads, reverb tails) of your drum bus differently.
So, if your stereo field feels too wide or too messy, it’s key.
In FabFilter Pro-C 2, enable M/S mode, then compress the mid channel with a 3:1 ratio, 20ms attack, release at 100ms, and aim for 2–3 dB of gain reduction to keep your core drum sound focused.
For the side channel, either don’t compress it at all, or go super subtle — maybe 1.5:1 ratio, 30ms attack, 150ms release, and less than 1 dB of gain reduction.
Just enough to calm excessive cymbal movement without killing the width.
NOTE: If your overhead mics or room signals are washing out your punch, compress only the mids and let the sides breathe.
This will help your drum mix hit hard in mono while keeping that clean, wide stereo image up top, so keep that in mind.
Pro Tip: How to Know When It’s Too Much
If your drums start sounding smaller, flatter, or like they’ve lost their groove, you’re probably over-compressing, and that’s a big no-no.
Check your gain reduction meter, and if you’re pushing past 6 dB of reduction on your drum bus compressor, it’s time to back off.
One way to tell fast: toggle the bypass button and match your makeup gain so that the loudness is identical, then A/B.
If the compressed version only sounds better because it’s louder, it’s not actually helping (which is where a lot of producers slip, and you don’t want to be one of them).
Over-compression tends to suck the life out of your snare hits, tame your kick drum too much, and make the entire drum mix feel buried instead of upfront.
So, make sure to always solo your drum bus while looking at the gain reduction meter, but make final decisions in context with the entire mix.
If your drums don’t pop under the vocal, they’re not working, regardless of what the meters say.
Killer Automation Moves with Drum Bus Compression
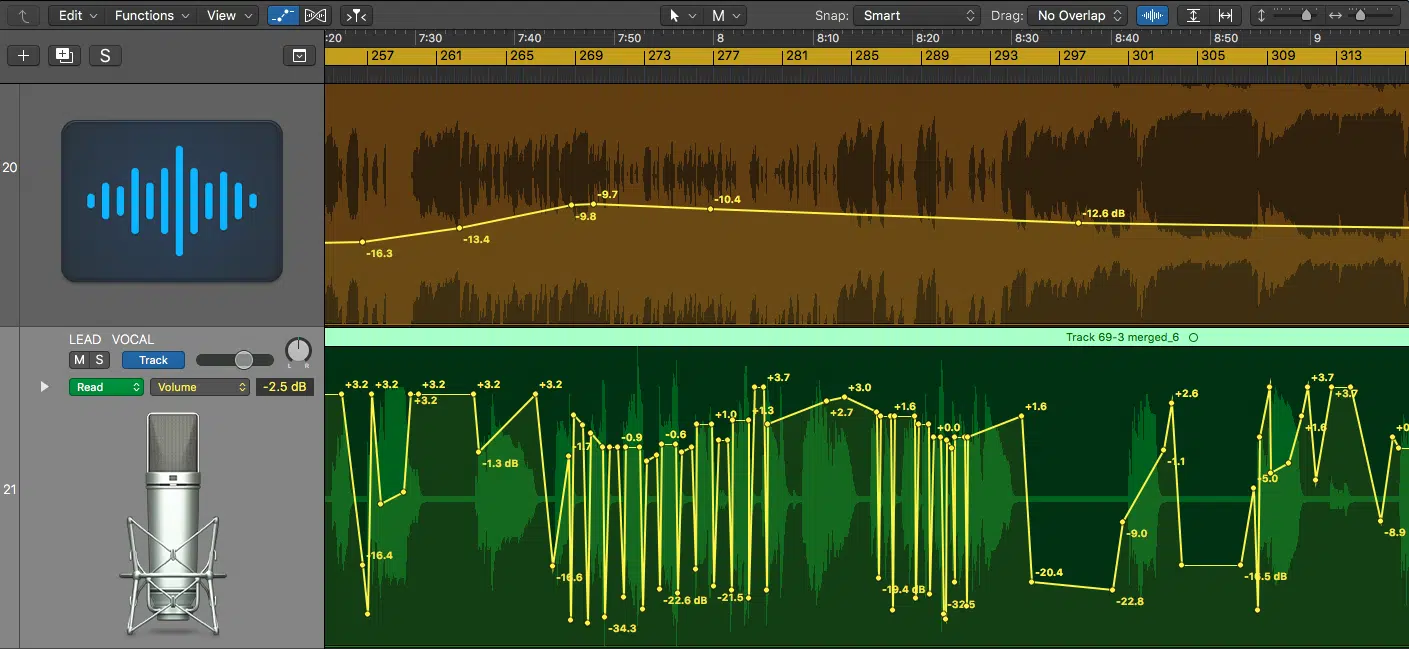
Once your main compression settings are locked in, automation is how you breathe life into your drum bus without reaching for another plugin. These tricks can add real movement and intentional dynamic shifts (not just volume) while keeping your drums locked to the groove. So, make sure to really pay attention here.
Automating Threshold or Mix Knob for Impact
Automating the threshold of your drum bus compressor lets you control just how aggressively the drums get compressed throughout different sections.
For example, start your intro or verse at -14 dBFS, then drop it to -18 dBFS as the chorus or drop hits to create a denser, punchier feel with 3–4 dB of gain reduction.
On a parallel drum bus, automate the mix knob from 20% in the verse to 35–40% in the chorus, letting that compressed signal hit harder without smashing the dry transients.
If you’re using FabFilter Pro-C 2, you can automate both threshold and dry/wet mix directly from within the plugin.
It will give you precision control over tone and energy at every transition.
PRO TIP: Use volume automation on the drum bus fader in conjunction with threshold automation to avoid jumping too far in perceived loudness.
This will help you keep everything feeling intentional, not reactive.
Dynamic Drum Bus Movement Throughout a Track
I also want you guys to know that automation isn’t just for effects only…
Using it to subtly shift attack, release, or even ratio settings across the timeline can breathe serious life into your drum mix.
For example, in a chill verse, use attack at 30 ms, release at 130ms, and a 2:1 ratio, then ramp it up to attack at 20ms, release at 80ms, and 4:1 ratio for high-energy choruses.
This gives you increased punch and control when it counts without changing your overall gain structure.
In plugins like UAD API 2500, you can automate knee shape, switch between “old” and “new” styles, or flip to a faster release for breakdowns that need more bounce.
And don’t overlook automating gain reduction depth, either.
Automate the compressor to clamp harder (up to 5–6 dB) during breakdowns and dial it back (2 dB or less) in the bridge to create a sense of release.
Enhancing Drops, Transitions, and Climaxes Like a Boss
To supercharge your drops, you can automate your parallel drum bus compression to go from dry to fully wet over 1–2 bars.
Start with a mix knob at 10%, ramp it up to 50% by the drop, then instantly snap it back to 25% post-impact to maintain punch while maximizing intensity.
During risers or pre-drop builds, automate your attack setting to get faster (for instance, go from 30ms down to 10ms).
This creates tension by softening transients and reducing forward momentum.
You can also sidechain your drum bus compressor from a muted sweep or reverse crash during a build-up and kill the sidechain just as the drop hits.
This way, you’ll get that signature “slam-back” effect where the drums feel like they freakin’ explode into the space (it’s super cool, you’ll love it).
PRO TIP: If you’re using a FET compressor like the 1176 on your parallel chain, automate both input gainand output level to push saturation during peaks 一 driving the input to +6 and compensating with -6 on output makes things hit way harder without clipping.
Advanced Techniques That Take It to the Next Level
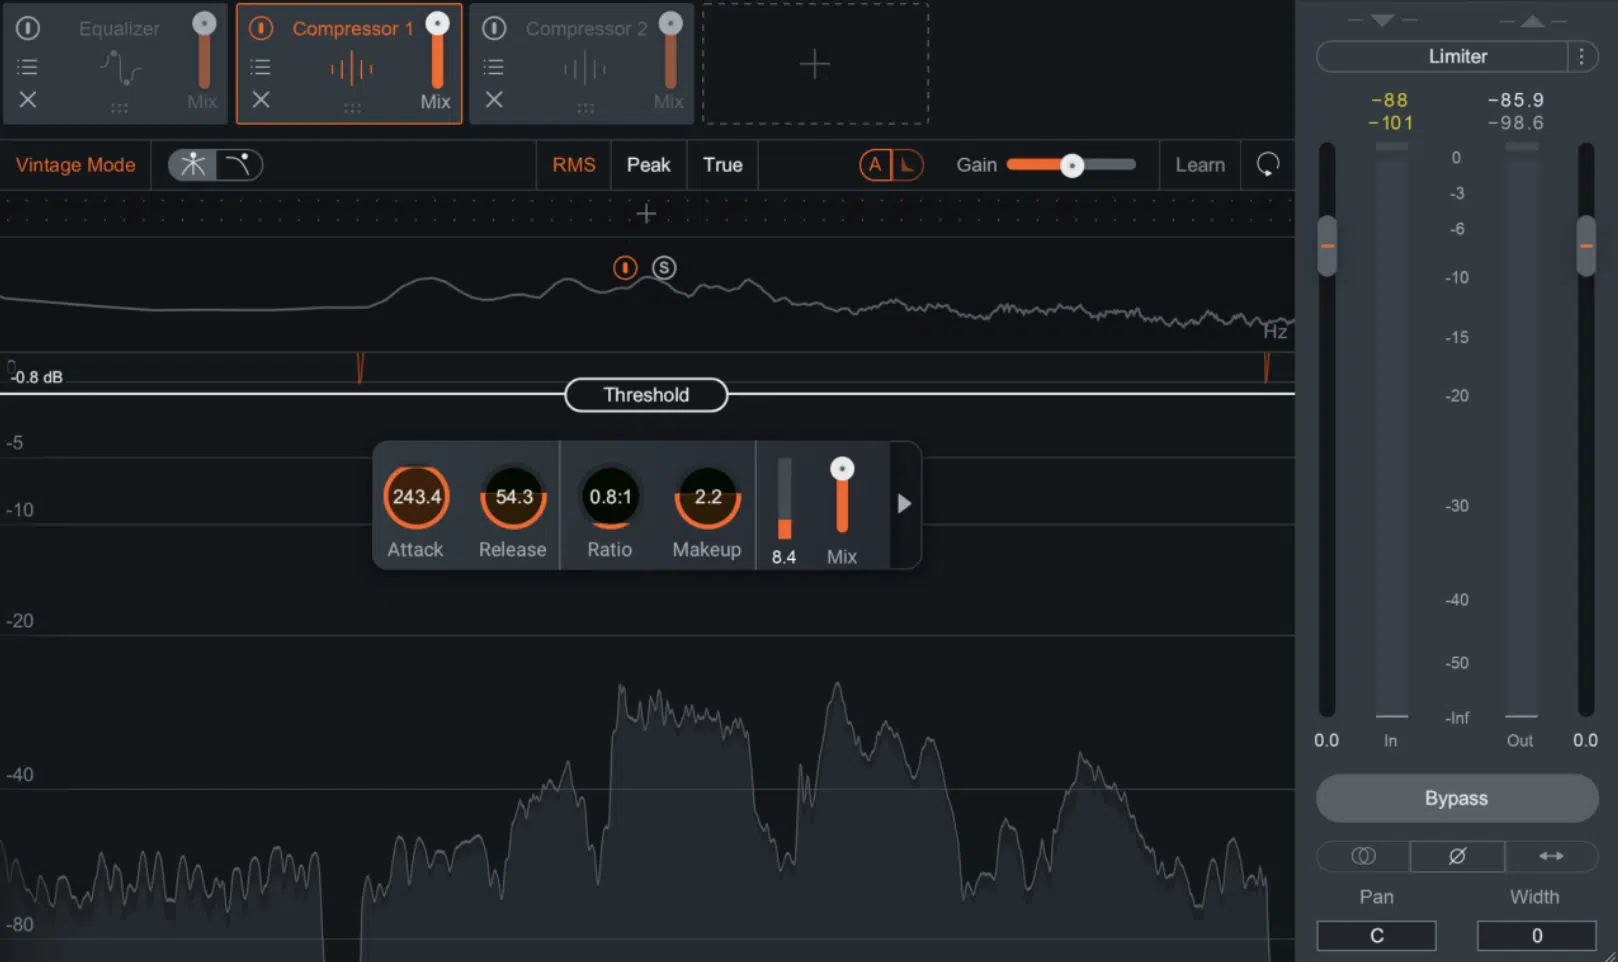
And to round things off, I’m going to leave you with some of my favorite advanced techniques that I myself use all the time. These next-level tricks give your drum bus compression that pro edge most producers never think to use, and they’re easier to implement than you might think. So, let’s get it.
Upward Compression for More Energy
Upward compression increases the volume of quieter details without smashing your transients, and unlike traditional compression, it expands the body of your drum sound instead of just taming peaks.
One of the easiest ways to do this is with Waves MV2:
- Start with the low-level compression slider around +30
- Leave the high-level at 0
- Adjust the output gain until your drums are peaking around -6 dBFS
By doing this, you’ll immediately notice the ghost notes, room tails, and soft hats pop without sounding overprocessed.
On parallel drum buses, upward compression is super powerful as well..
So, smash your normal comp (1176, 20:1, 10ms attack, 60ms release), then run the return through MV2 or Kush Novatron with upward emphasis to restore lost depth underneath.
My biggest advice would be to use upward compression after your initial glue comp but before saturation.
That way you’re expanding the quiet layers and then blessing them with harmonic content 一 giving your drum mix serious energy without mud or over-compression.
Pumping the Room Mic Bus into the Drum Bus Chain
To make your drum kit feel alive and open, compress your room mics independently, then blend them into the drum bus.
This lets you easily control space without overwhelming the punch.
Try an aggressive 1176 or API 2500 on the room bus: 8:1 ratio, attack at 10ms, release at 120ms, and pull about 5–6 dB of gain reduction to tame the tail.
All without choking the ambience, of course.
After compression, high-pass filter below 120 Hz to clean out low-end wash, and send that room signal into your main drum bus at around -10 dB (or about 20% lower than your close mics) for glue that includes space and tone.
If the room tone feels too wide or diffuse, use a stereo imager (like Ozone Imager) to narrow the sides down to about 75% width.
Then, compress the mono signal with a soft knee to keep your ambiance focused and punchy without clouding the center of your stereo image.
Ghost Sidechaining from Percussion for Groove Enhancement
Ghost sidechaining uses a muted rhythmic element to trigger subtle compression, which lets you shape the groove of your drum bus without touching the audible audio.
You can think of it like invisible groove control.
What you can try out real quick:
- Load a muted tambourine or offbeat shaker into an auxiliary track
- Route it into the sidechain input of your drum bus compressor (like Pro-C 2)
- Set your threshold around -28 dBFS, ratio at 2:1, attack at 10ms, release at 60ms
- Apply a gentle 1–2 dB of gain reduction every time the ghost hit lands
This creates micro-ducks that push and pull your real drums into the rhythm, especially in swing-heavy or syncopated beats where you want bounce without losing weight.
Don’t use your main kick drum or snare hits as the ghost trigger…
Use something off-grid (like a 16th-note conga or percussion loop) so the groove enhances the natural feel without interfering with the main hits.
I’m telling you, that’s where the real magic happens, so keep that in mind.
Final Thoughts

And there you have it: everything you need to know about drum bus compression and how to control, shape, and enhance your drum mix like a freakin’ boss.
By using these epic tips, tricks, and techniques, you’ll be able to successfully glue your drum tracks together and add punch without squashing the feel.
You’ll be able to easily create a drum sound that hits hard, breathes naturally, and sits right in the entire mix.
Plus, you’ll never have to worry about washed-out snares, lifeless grooves, or over-compressed kits ever again.
And, as a special bonus, since we talked about drum kits so much, you’ve gotta check out this legendary Free Hip Hop Drum Kit pack.
Inside, you’re getting access to 50+ free drum samples 一 including loops with matching audio and MIDI stems to take your beats to the next level.
These proper, polished, perfectly processed drum samples and loops (created by expert beatmakers and sound designers) will seriously blow your mind.
They’re modeled off the styles of the biggest hit beats in modern music, so you’re getting pure magic right here.
And yes, every single file is 100% royalty-free, so you can use them however you want, without restriction; trust me, you won’t be disappointed.
Bottom line, when it comes to drum bus compression, just remember you always have to respect your dynamics and trust your ears.
This way, you can shape your drum bus with intention, lock in the groove, and add punch without losing the musicality of it all.
Your tracks will always hit like an expert and be super clean, punchy, and professional.
And don’t forget to always experiment, automate, and think outside the box because that’s where the most unforgettable drum sounds are born.
Until next time…


Leave a Reply
You must belogged in to post a comment.