Sidechaining in Ableton is an essential technique for any music producer looking to create space and clarity in their mix.
It can help you make your kick drum punch through the mix and ensure your bass track doesn’t overpower other elements.
Plus, make sure your synths and pads sit well in the mix without clashing with the vocals.
As a music producer, knowing how to sidechain in Ableton the proper way can save you countless hours of frustration and ensure your tracks sound super polished.
In this article, you’ll learn:
- Preparing your project the quick and easy way ✓
- Configuring the external input ✓
- Selecting the sound source ✓
- Adding a compressor to the target track ✓
- Setting up the compressor ✓
- Optimizing compressor settings ✓
- Monitoring and adjusting gain ✓
- Applying sidechain to additional tracks ✓
- Advanced sidechaining techniques ✓
- Using processors other than compressors ✓
- Automating sidechain parameters ✓
- Troubleshooting and routing optimization ✓
- Much more to help you learn how to sidechain in Ableton ✓
After reading this article, you’ll know how to sidechain in Ableton step-by-step, so you can create dynamic and professional-sounding mixes.
Plus, you’ll be able to troubleshoot common issues, optimize your settings, and experiment with advanced techniques like a true professional.
Whether you’re working on electronic music, hip-hop, or any other genre, mastering sidechaining in Ableton will take your production skills to the next level.
So, let’s jump in…
Table of Contents
How to Sidechain in Ableton: Preparing Your Project
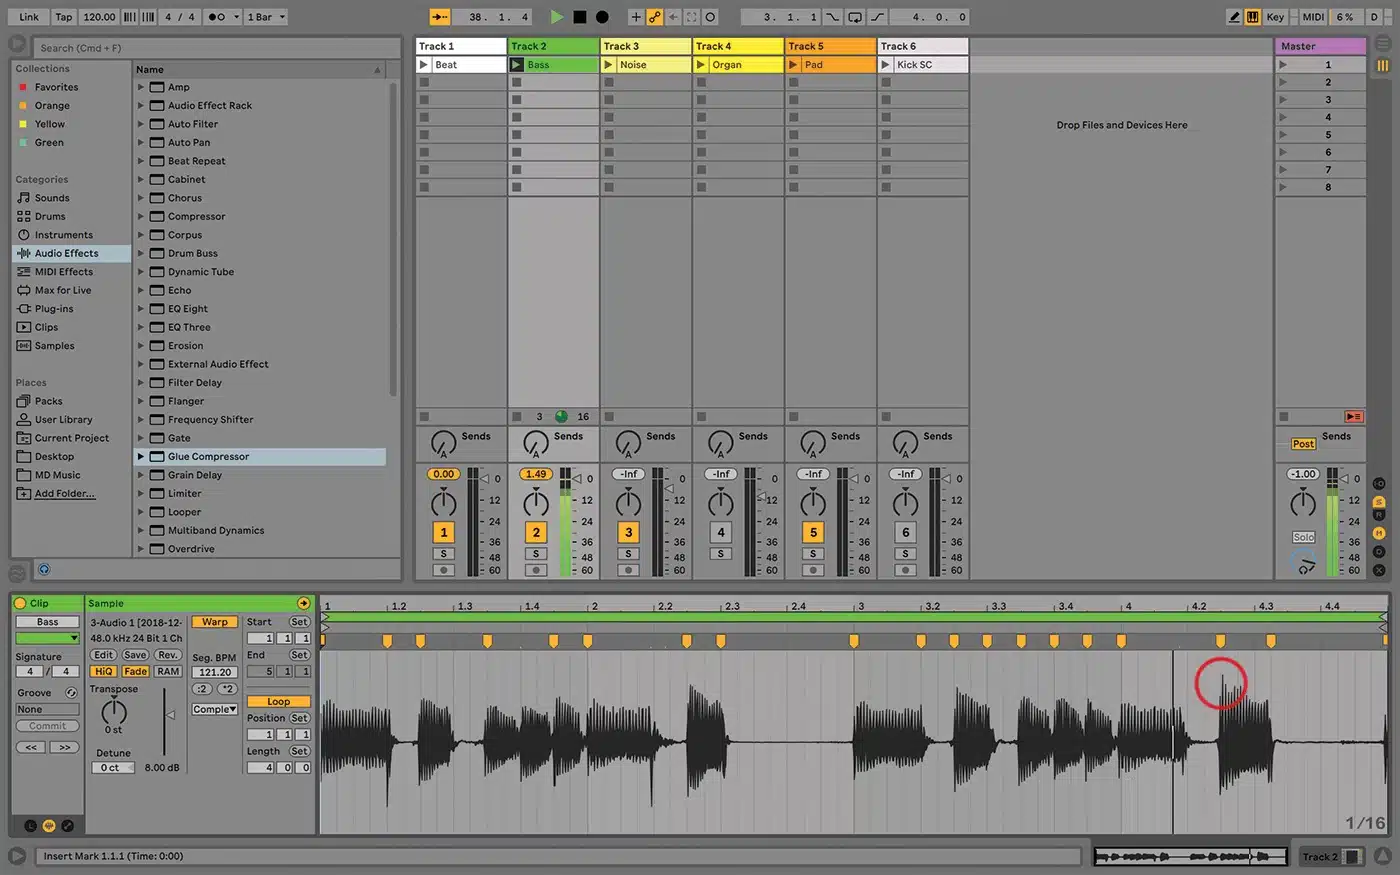
Before diving into sidechain routing, you need to set up your project correctly, so start by creating a new project in Ableton and importing your audio tracks.
Make sure you have a kick drum track, a bass track, and other elements you want to sidechain and remember proper organization is key to a smooth workflow.
Label your tracks and group similar sounds to keep everything neat.
Next, adjust the levels of your audio tracks to avoid clipping 一 a well-balanced mix is key for effective sidechaining.
Now that your project is set up, let’s move on to configuring the external input for sidechaining.
This way, you’ll be able to sidechain in Ableton like a true boss.
Configuring the External Input for Sidechaining
After your project is ready and you’re satisfied, you can now configure the external input for sidechaining. Let’s break down exactly how to do that.
-
Step 1: Selecting the Sidechain Source

First, you’re going to choose your sidechain source; typically this is a kick drum, but you can use any track.
For this example, I am indeed using a kick drum as the sidechain trigger signal.
To select the sidechain source, simply navigate to the audio track with your kick drum and make sure your kick drum hits consistently throughout your track.
Click on the “I/O” button to reveal the sidechain routing options 一 here, set the audio signal output to send to a return channel.
This will be your sidechain trigger track (easy, right?).
NOTE: The sidechain functionality depends on how you set up your drum rack and configure the sidechain routing within Ableton.
-
Step 2: Adding a Compressor to the Target Track
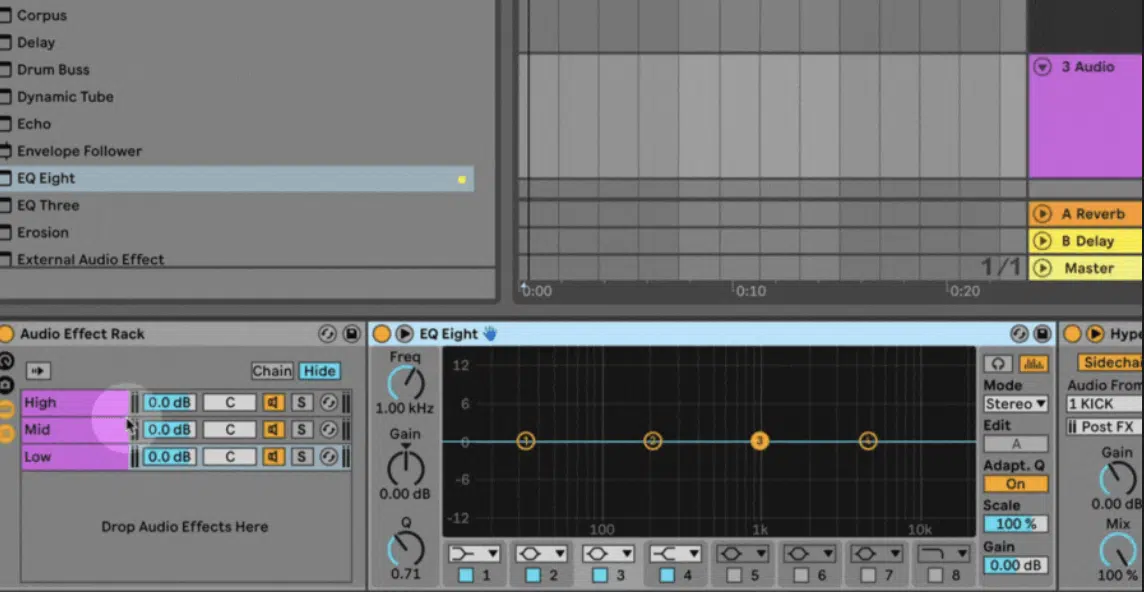
Now, add a compressor to the one track you want to sidechain, which could be:
- The bass track
- A synth
- Any other element you want to duck
In Ableton, the compressor is most commonly used for sidechain compression, but you can also use other sidechain-capable VST favorites or an Ableton stock device.
Now, simply drag and drop the compressor onto your target track.
Ableton’s stock glue compressor supports external sidechaining 一 making it a great choice and one of my personal favorites.
NOTE: If you’re unaware, a glue compressor simply helps to “glue” different elements of a mix together by applying gentle, cohesive compression that enhances the overall balance and warmth of your tracks.
If you want to check out other Ableton stock plugins, we’ve got you covered.
-
Step 3: Setting Up the Compressor for Sidechaining
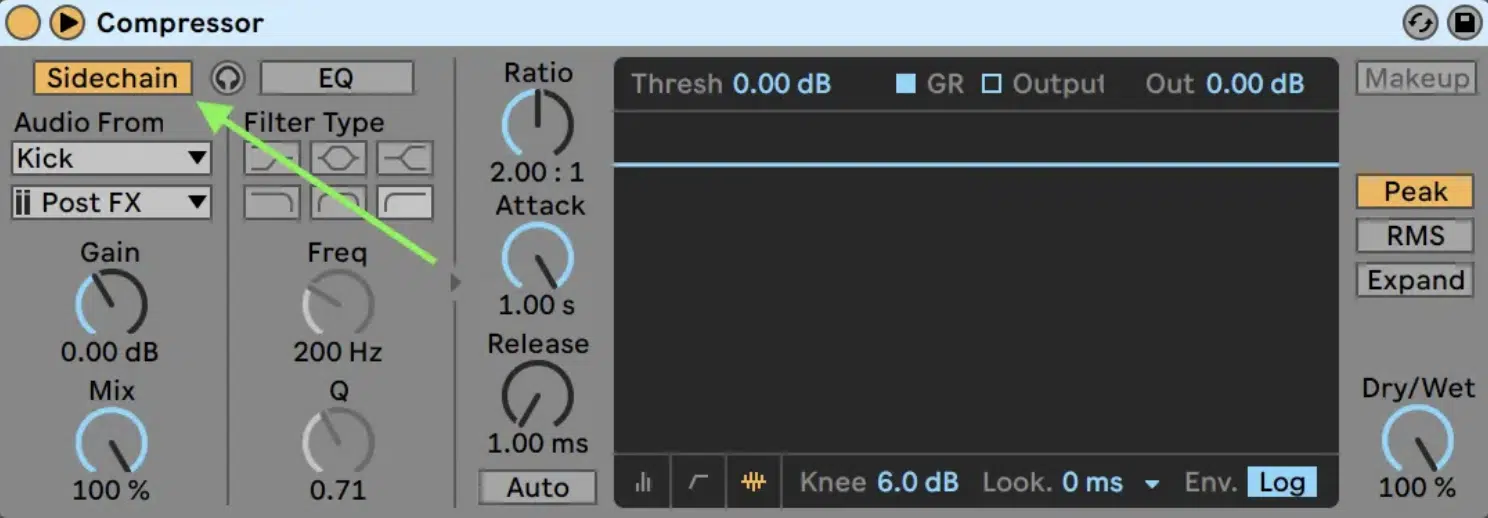
With the compressor in place, it’s time to set it up for sidechaining.
So, open the compressor on your target track, and click on the sidechain toggle button to enable sidechain functionality.
This allows the compressor to listen to an external sidechain input.
Next, select the sidechain input source…
In the sidechain panel of the compressor, choose your return channel (where the kick drum is routed) as the sidechain trigger source.
This will, of course, set the kick drum as the sidechain signal trigger.
Now, adjust the threshold to determine at what point the compressor will start to apply sidechain compression.
For example, if your kick drum plays around -6 dB, set the threshold slightly above this level (~ 10 dB & adjust from there) to ensure it triggers the compression correctly.
Next, set the ratio to control the amount of compression.
A higher ratio, like 4:1, is a good starting point for noticeable sidechain compression, resulting in more pronounced ducking of the bass track when the kick drum hits.
If you need more aggressive ducking, increase the ratio control to 6:1 or higher.
Finally, fine-tune the attack and release controls to shape the sidechain effect.
- A fast attack (e.g., 1 ms) ensures the compressor reacts quickly to the kick.
- A moderate release (e.g., 200 ms) helps maintain a smooth reduction of the audio signal/input signal.
Remember to adjust the release time to control how quickly the compression fades.
For example, a release time of 200 ms allows the bass to swell back in smoothly after the kick drum hits.
Pro Tip

In Ableton, many stock processors support external sidechain inputs.
For example, you can use EQ Eight to create a dynamic EQ effect by sidechaining specific frequency bands to your kick drum.
This versatility lets you get creative with different sound design techniques and have precise control over your mix.
-
Step 4: Monitoring and Adjusting Gain
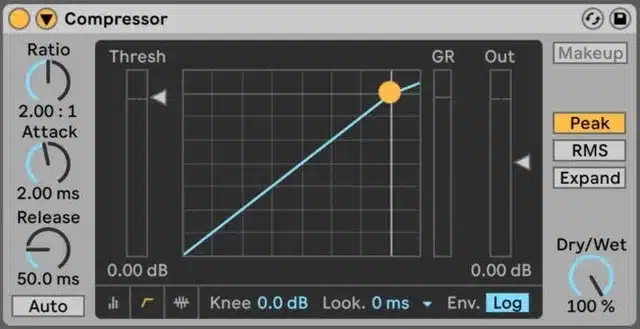
Monitoring and adjusting gain is essential to maintain a balanced mix.
Use the gain reduction meter on the compressor to see how much compression is applied.
If the output signal level drops too much, use the makeup gain control to compensate.
This ensures that your track remains at the desired volume.
Remember to listen carefully to how the sidechain effect impacts your mix, and adjust the settings until you achieve the desired result and perfect volume.
-
Step 5: Applying External Sidechain to Additional Tracks
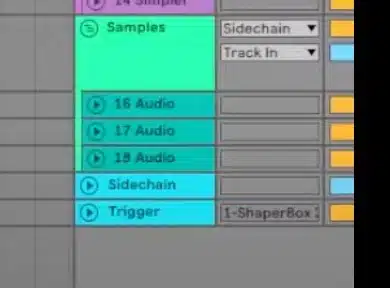
You can apply external sidechaining to multiple tracks in your project to create a more dynamic mix.
Repeat the steps of adding a compressor and simply select the sidechain input for each track you want to sidechain.
This technique is super effective for managing busy mixes with lots of overlapping sounds.
For example, if you have a synth pad and a vocal track that both need to duck when the kick drum plays, add a compressor to each of these tracks.
Enable sidechain functionality, and select the same return channel (the sidechain trigger track) as the sidechain input.
Then, just adjust the compressor settings for each track to ensure the kick drum cuts through the mix effectively without overwhelming other elements.
Pro Tip
Using sidechain compression on multiple tracks can prevent clutter and ensure clarity. It helps to keep the kick drum and bass prominent while allowing other instruments to breathe. Make sure to experiment with different sidechain settings for each track to find the perfect balance.
Advanced Techniques
Now that you know exactly how to sidechain in Ableton, let’s break down some more advanced sidechaining techniques so your tracks can really pop.
-
Sidechaining Processors Other Than Compressors
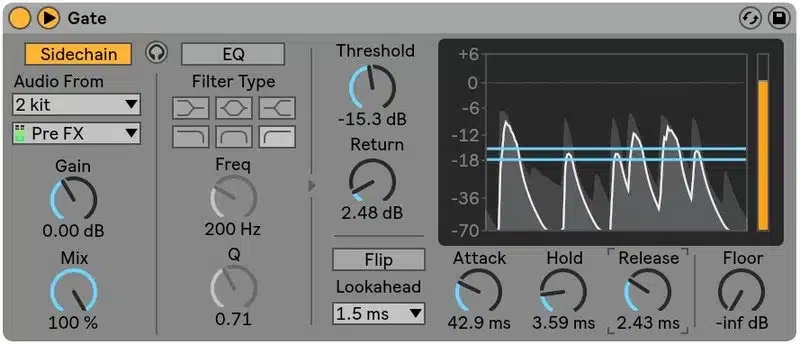
While sidechain compression is a common technique, Ableton allows you to sidechain with other processors as well.
For example, you can use EQ Eight to create a dynamic sidechain EQ effect, simply:
- EQ Eight to your track
- Enable the sidechain toggle button
- Select the sidechain input source
You can then sidechain specific frequency bands to your kick drum 一 cutting out unwanted frequencies whenever the kick drum hits.
Another example is using the Auto Filter.
By sidechaining the filter’s cutoff frequency to the kick drum, you can create rhythmic filter sweeps that add movement and interest to your track.
This technique is particularly effective for electronic music genres.
Pro Tip
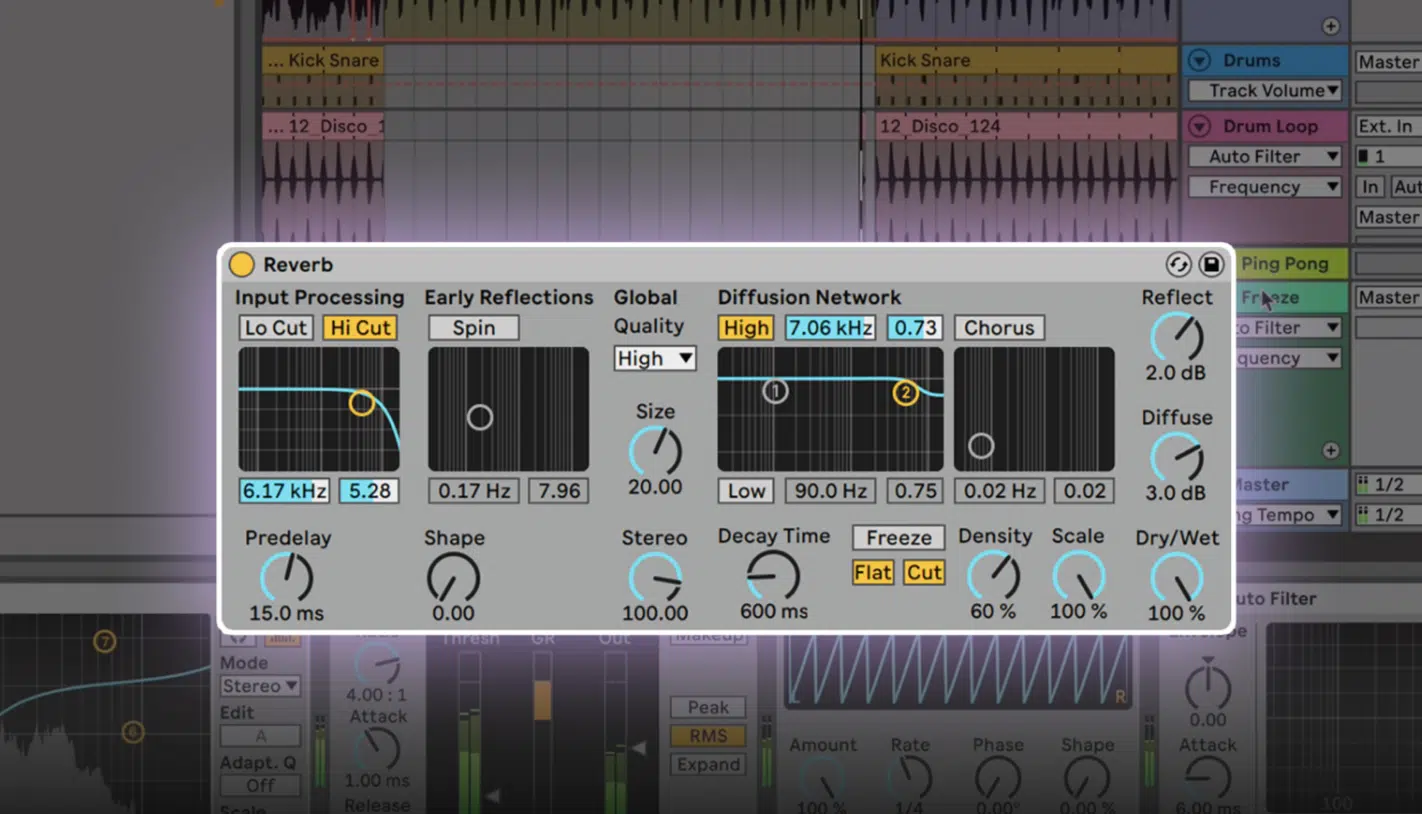
You can also use reverb and delay effects with sidechain inputs.
Sidechain reverb can help maintain clarity by ducking the reverb tail whenever the kick drum plays.
This way, when you’re mixing, everything will remain clean/punchy (which is the goal).
Experiment with different sidechain-capable VSTs and stock audio effects in Ableton to discover unique and creative ways to enhance your tracks.
-
Automating Sidechain Parameters
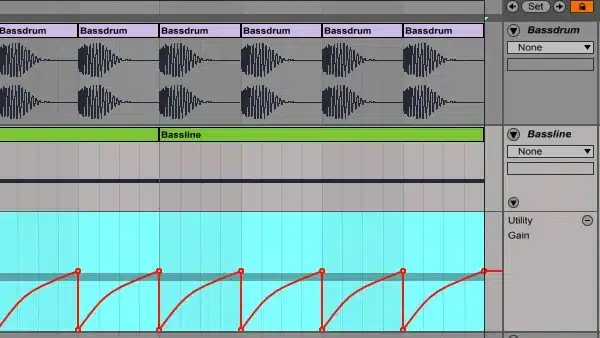
Automating sidechain parameters adds dynamic variation to your mix.
In Ableton, you can automate the threshold, ratio, attack, and release settings of your compressor to change the sidechain effect over time.
This technique is useful for building intensity in a song or creating rhythmic edge.
For example, automate the threshold to gradually lower it during the build-up of a track 一 increasing the amount of sidechain compression applied.
This creates a sense of anticipation and energy.
Similarly, you can automate the ratio to make the compression more aggressive during certain sections, such as the drop in an EDM track.
Pro Tip
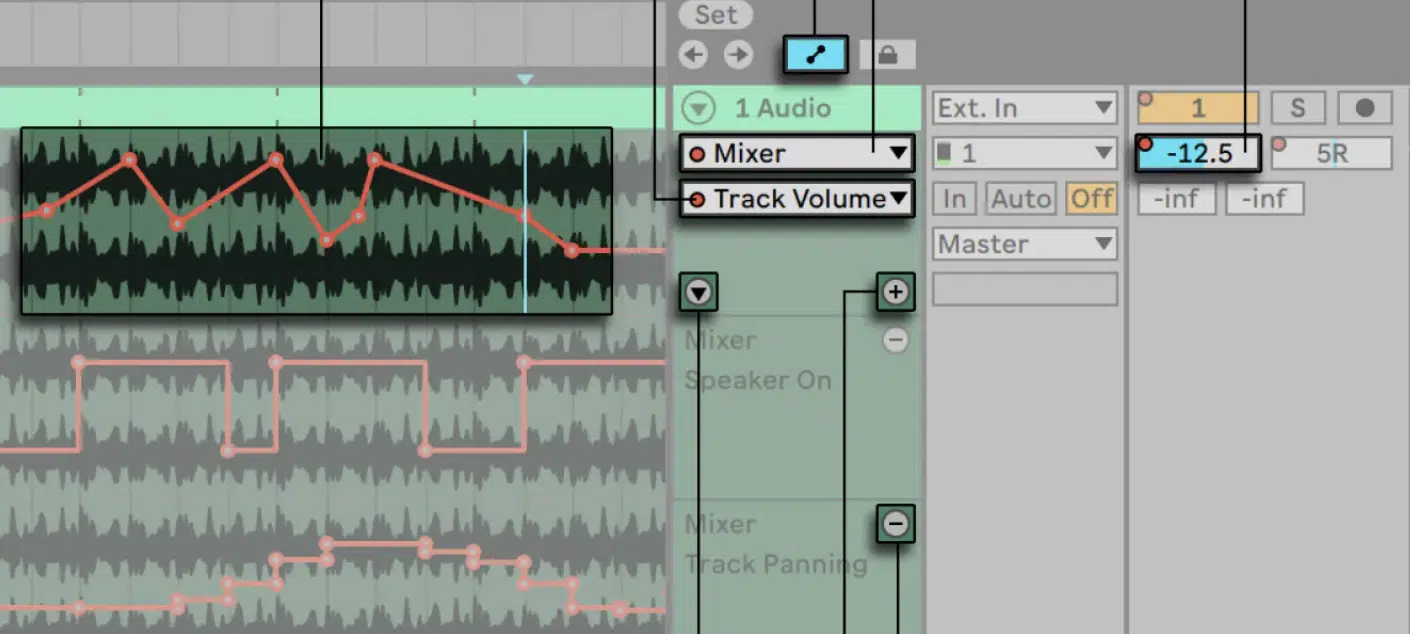
Use Ableton’s automation lanes to draw in these changes. Select the parameter you want to automate, and create automation points to adjust the settings over time. This allows you to add movement and excitement to your mix so it’s more engaging.
Bonus: Troubleshooting and Optimization
When you’re learning how to sidechain in Ableton, you’re most likely going to run into some common challenge. As a bonus, here are some tips for troubleshooting and optimizing your setup.
-
Fixing Common Issues
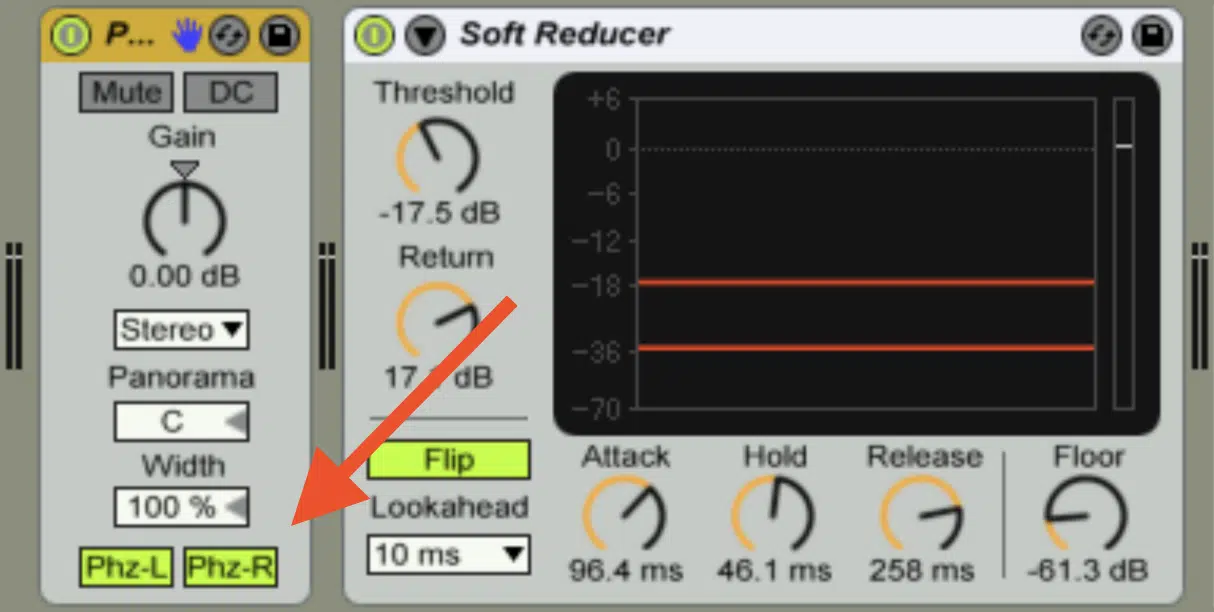
Common sidechain issues include phase problems and unwanted artifacts.
To deal with phase issues, try adjusting the attack and release times on the compressor.
If you hear any artifacts, check your compressor settings and ensure you’re not over-compressing.
Make sure your kick drum hits are consistent to provide a reliable sidechain trigger signal.
If you want to know the exact instructions for how to apply sidechaining or get the proper compression settings, we’ve got you covered.
-
Enhancing Performance
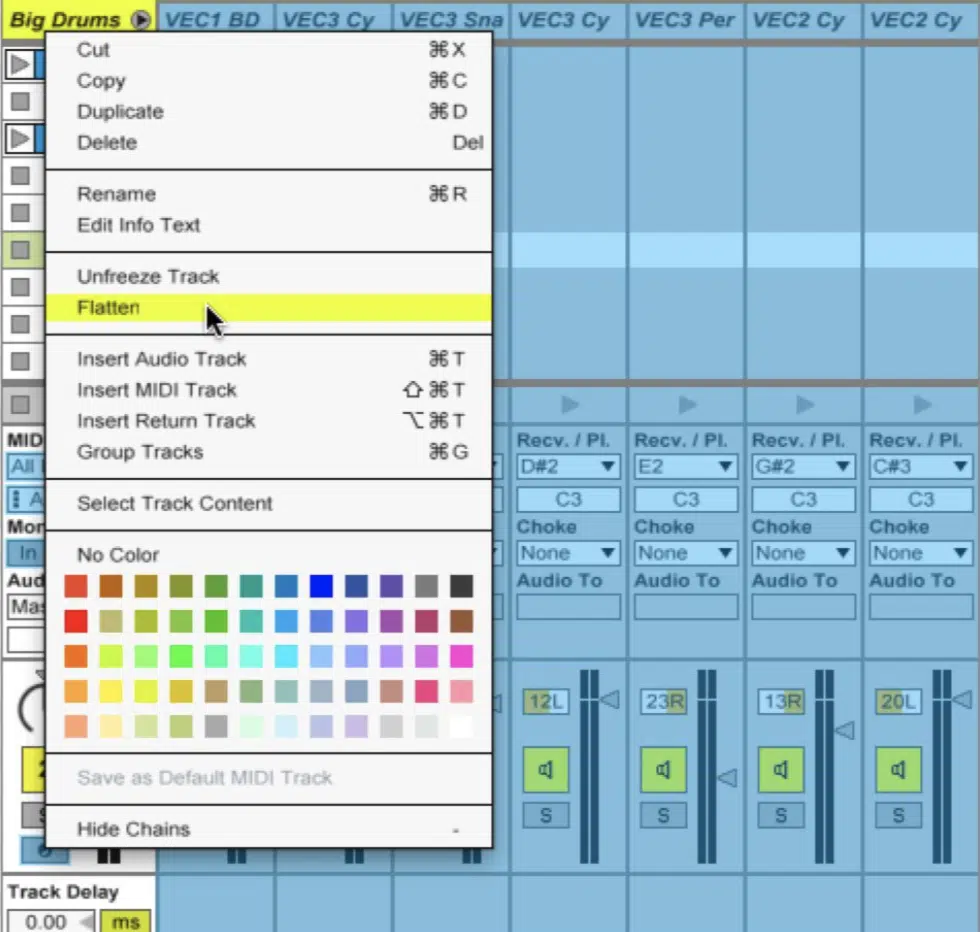
Enhancing performance involves optimizing your project’s CPU usage.
Anything that will support external sidechaining can be CPU-intensive, especially with multiple sidechain tracks.
Use Ableton’s freeze and flatten features to reduce CPU load and try using a lighter sidechaining-capable VST/plug-ins for sidechaining where possible.
This ensures smooth playback and prevents performance issues during your sessions.
How to Sidechain in Ableton: Final Thoughts
Learning how to sidechain in Ableton is an invaluable technique for creating polished mixes that blow the competition away.
By understanding and applying the steps we broke down today, you’ll be able to make your kick drum punch through the mix and balance your bass track.
And add dynamic movement to your synths and pads.
Plus, you’ll also be able to set up and fine-tune sidechain compression like an expert 一 ensuring your tracks always sound their best.
To take your production skills to the next level and see, firsthand, how to sidechain in Ableton, you’ve got to check out the highly-renowned Free Project Files.
It includes 3 project files that break down exactly how to make professional tracks in Ableton Live.
It covers everything from start to finish (yes, including sidechaining) so your beats will be super epic.
Created by top producers and sound designers, you can trust you’re getting top-quality content.
Plus, everything is 100% copyright- and royalty-free, so you don’t have to worry about a thing and can use them however you’d like.
Now, go use your new knowledge about how to sidechain in Ableton to create dynamic, professional-sounding tracks.
Remember, to become the next big name in production, you’ve got to constantly learn new techniques like how to sidechain in Ableton, grow, and evolve; so never stop!
Until next time…


Leave a Reply
You must belogged in to post a comment.