Vocals are the lifeblood of any track.
They have the power to convey emotions, tell a story, and ultimately captivate your listeners.
However, getting vocals right is a complex task.
When mixed properly, they can elevate your music to unprecedented heights.
But, if you apply the incorrect vocal compression settings, they can end up sounding unprofessional, sloppy, or even downright terrible.
The good news is that understanding and mastering vocal compression doesn’t need to be a mystery or a daunting task.
With the right knowledge, tools, and techniques, you can harness the power of vocal compression to make your vocals sound punchy, clear, and perfectly placed in your mix.
And that’s what we’ll be breaking down for you today.
In this guide, you will learn about:
- The importance and fundamentals of vocal compression ✓
- Essential aspects of dynamic control and dynamic range ✓
- Techniques to compress vocals like a pro ✓
- Tonal, parallel & multiband compression ✓
- The advantages of using multiple compressors ✓
- The importance of attack & release settings ✓
- Achieving the perfect lead vocal compression ✓
- Common mistakes to avoid when compressing vocals ✓
- Tips to remember when applying vocal compressor settings ✓
By the end of this article, you’ll have a solid understanding of vocal compression settings.
Therefore, you’ll be able to produce vocals that sound pristine, professional, and super compelling.
So, let’s dive in…
Table of Contents
- Understanding Vocal Compression: Why It’s Essential
- Understanding the Fundamentals of Vocal Compressor Settings
- Techniques to Compress Vocals Like a Pro
- How Multiple Compressors Can Enhance Your Vocal Tracks
- Nailing the Attack and Release Settings for Your Vocal Compressor
- Achieving Perfect Lead Vocal Compression
- Mistakes to Avoid When Compressing Vocals
- Vocal Compressor Settings: Final Thoughts
Understanding Vocal Compression: Why It’s Essential
Now that we’ve set the stage for our journey into vocal compression, let’s delve into the nitty-gritty.
Starting with the main subject of the matter, we’ll explore the importance of vocal compression and why it’s a crucial part of the music production process.
-
Importance of Vocal Compression

Understanding vocal compression is absolutely vital for any music producer.
This process forms the backbone of getting that polished and professional sound we all strive for.
Whether your vocal recordings are rap verses or soulful ballads, vocal compression settings can make or break your mix.
In essence, vocal compression helps to control the dynamic range of the vocals.
It brings down the volume of loud parts 一 helping the softer aspects of your track shine through.
This ensures that every word, every note, and every breath your artist takes is heard clearly, making for a balanced and smooth vocal performance.
The key here is not to eliminate dynamics but to manage them.
Dynamics are what give life to music, and a skilled producer knows how to compress vocals without sucking the life out of the track.
Also, the correct vocal compression can help the vocals sit well in the mix.
Without it, your vocals can either get lost behind the instruments or be left with super aggressive vocals.
It’s all about achieving a balance where vocals and instruments live harmoniously, each complementing the other without any aspect of the mix feeling overwhelmed.
That way, you’ll have legendary vocal hits to share with the world.
-
Basics of Dynamic Compression
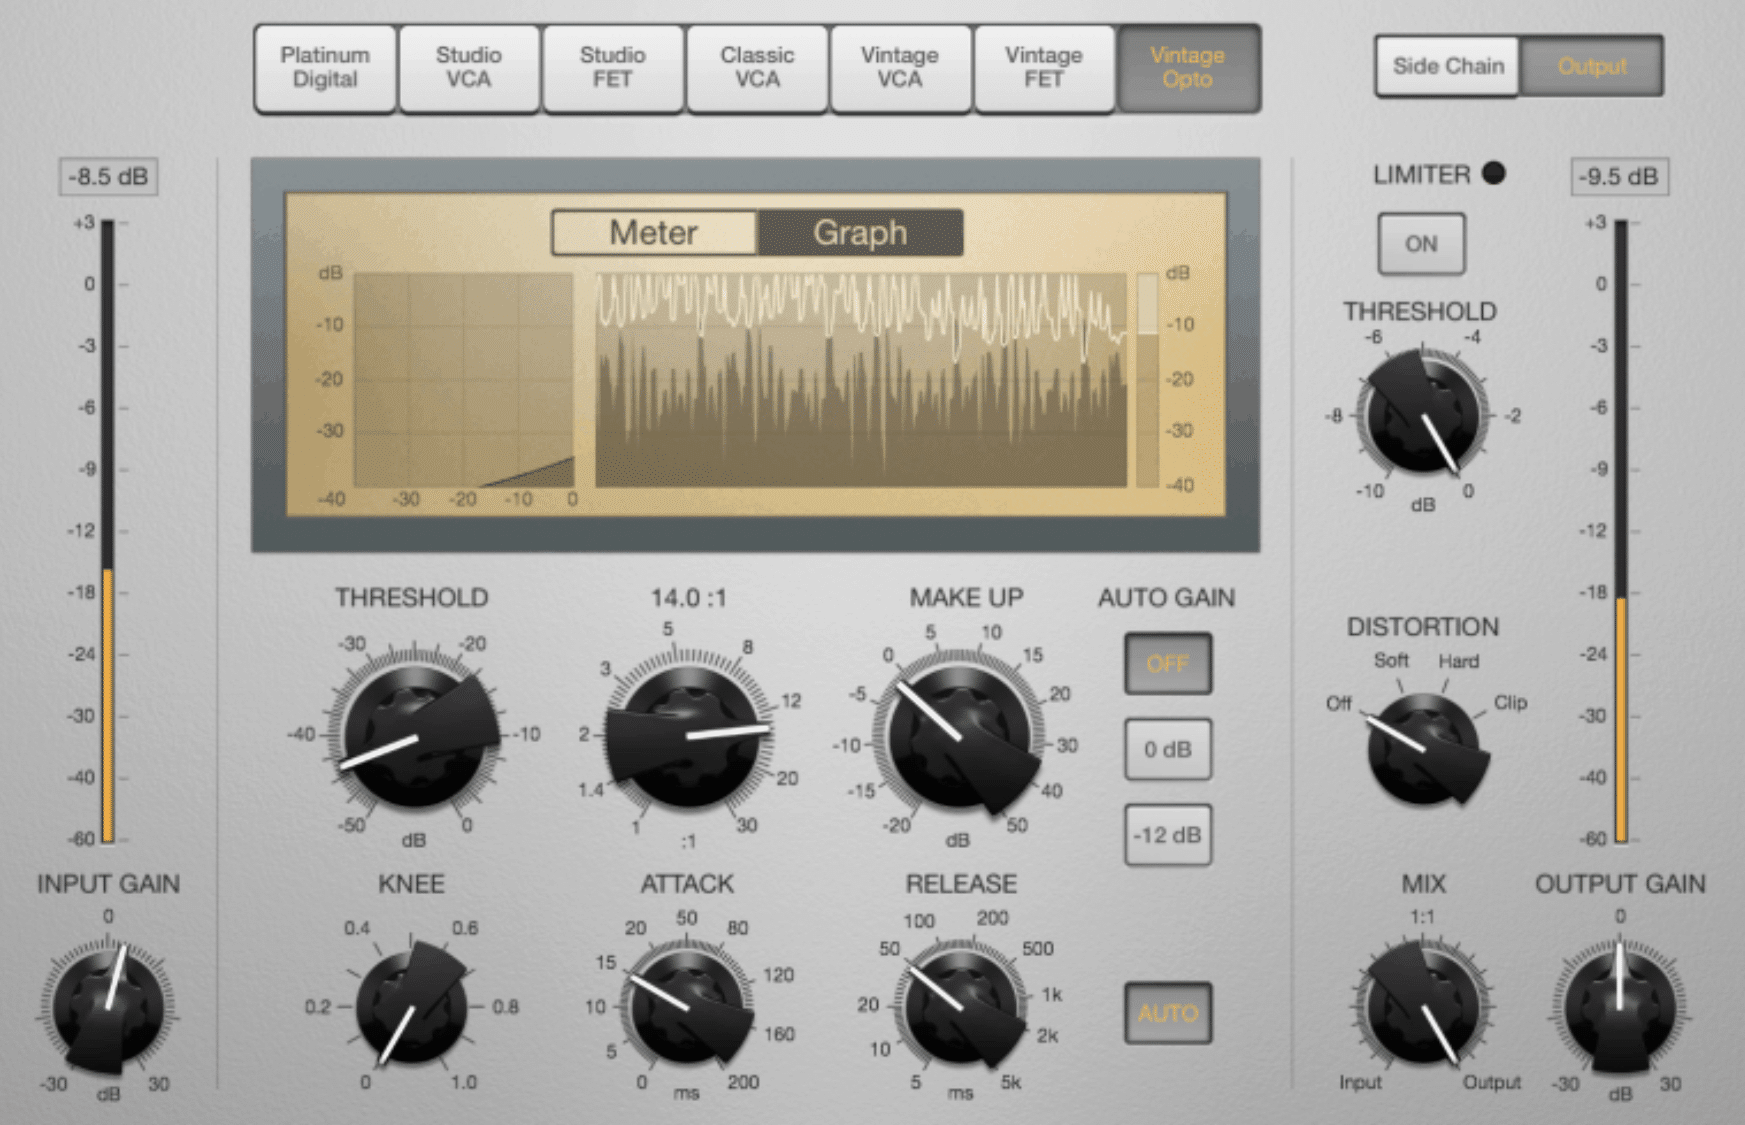
Dynamic compression is a fundamental tool in any producer’s toolkit.
But to wield it effectively, you need to understand its core components and how they interact with the audio signal.
First off, dynamic compression reduces the dynamic range of an audio signal.
This dynamic range is the difference between the loudest and the softest part of a signal.
In essence, compression reduces the volume of loud sounds or amplifies quiet sounds by narrowing (or “compressing”) an audio signal’s dynamic range.
Attack and release are two of the most critical parameters in dynamic compression.
The attack time determines how quickly the compressor will start reducing the gain after the input signal exceeds the threshold.
- Fast attack times 一 Can make the vocals sound tight.
- Slow attack times 一 Let some of the transients through for a more natural sound.
The release time, on the other hand, is how long it takes for the compressor to stop compressing after the input signal falls below the threshold.
- A fast release 一 Can make the compression less noticeable, but if it’s too fast, it can distort the audio.
- A slow release 一 Results in smoother and more natural-sounding compression.
It’s important to remember that there are no one-size-fits-all settings for compression.
The attack & release settings will depend on the needs of your vocal track.
What matters most is that you know how to manipulate these basic settings/parameters to achieve the sound you desire.
Understanding the Fundamentals of Vocal Compressor Settings
Having grasped why vocal compression is such a key component, let’s step further into the realm of compressor settings.
First up, we’ll delve into the intricacies of dynamic control and discover why it holds such importance when you apply compression.
-
Dynamic Control & Why It Matters When You Apply Compression
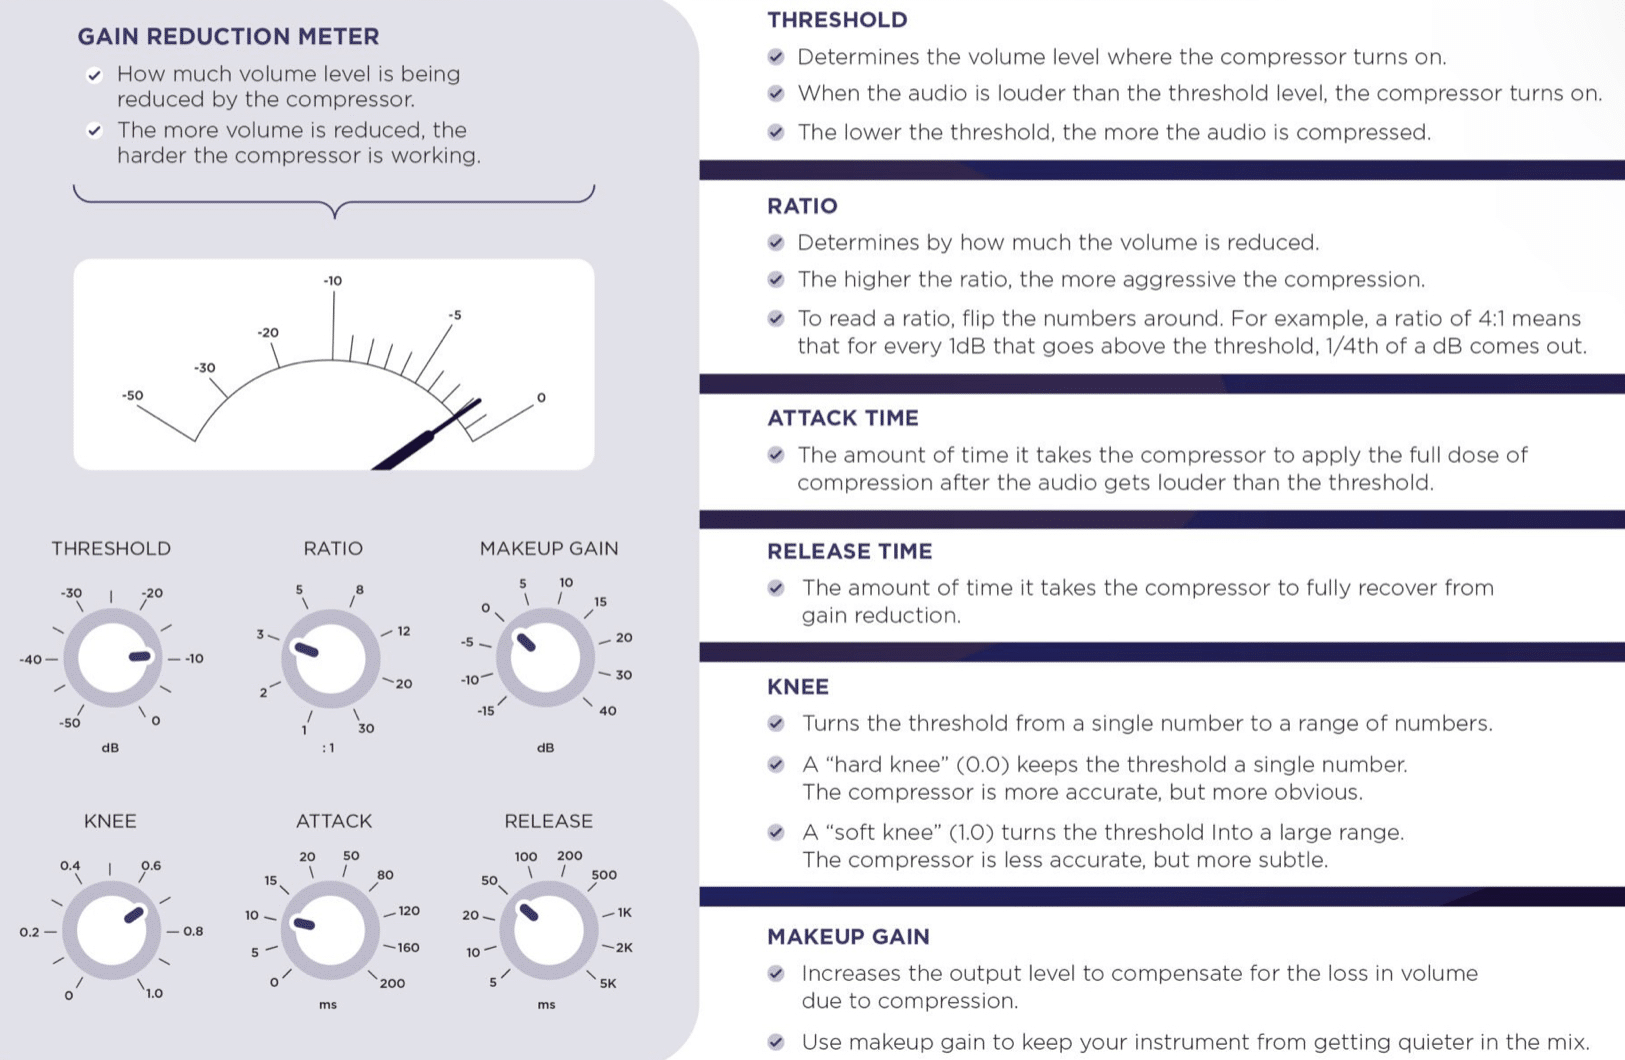
Dynamic control is at the heart of vocal compression.
As a music producer, you strive to achieve a balance where every word in the vocals is heard clearly without the overall track being too loud or too soft.
This requires a comprehensive understanding of dynamic control.
At its core, dynamic control is all about managing the relationship between the loudest and softest parts of your vocal track.
It’s about ensuring the quiet parts don’t get lost in the mix and the louder parts don’t overpower the rest of the elements in your audio track (aka subtle compression).
You don’t want to make your vocals sound loud and obnoxious.
Without proper dynamic control, the vocals can feel inconsistent 一 with certain words or phrases sticking out awkwardly.
This can be particularly problematic in hip-hop, where a tight, consistent vocal performance is often key to the delivery.
The primary tool for dynamic control is, of course, your compressor.
With it, you can manipulate the dynamic range of the vocals, making the loud parts quieter and the quiet parts louder.
- Overcompressing 一 Leads to vocals that sound flat and lifeless.
- Undercompressing 一 Leaves your vocals sounding inconsistent & unpolished.
Understanding this delicate balance will help you achieve that sweet spot like a pro.
-
Dynamic Range & Its Significance in Compression
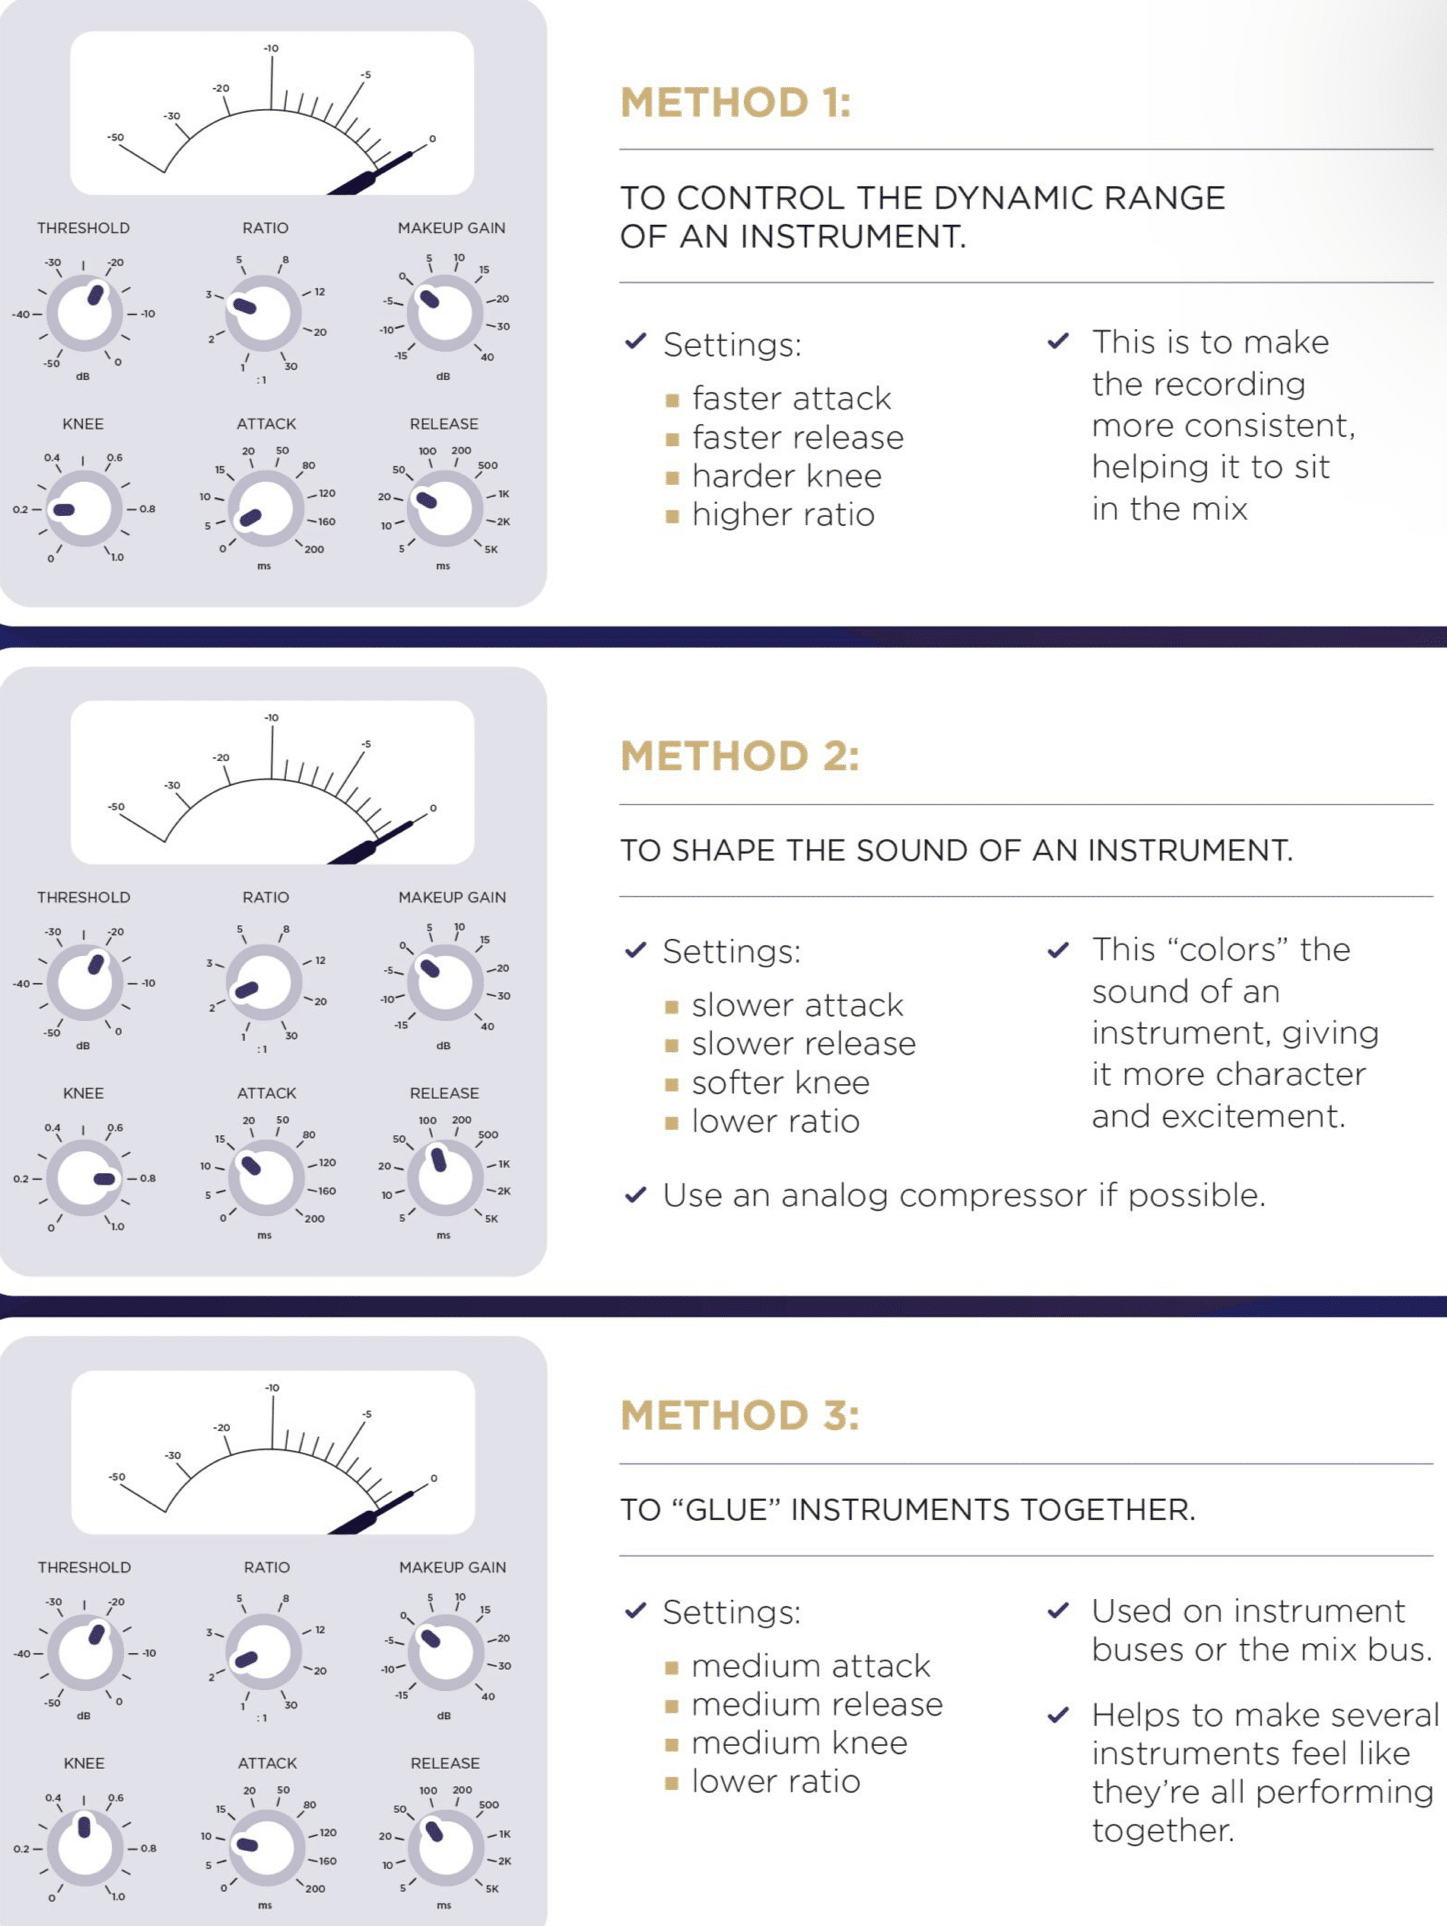
The dynamic range refers to the difference in volume between the quietest and the loudest part of an audio signal.
The broader the dynamic range, the greater the difference between the quietest and loudest part.
In the context of vocal compression, understanding this is crucial.
- If the dynamic range is too broad 一 The quieter parts of your vocal track might get lost in the mix.
- If the dynamic range is too narrow 一 Your vocals can end up sounding lifeless and flat.
So, what’s the ideal range?…
Well, it depends on the genre (lo-fi, pop, rock, trap, etc.) and the vibe you’re going for.
For example, in hip-hop music, you might want a relatively narrow dynamic range to ensure the vocals punch through the mix and hold their own against the beats.
This way, your tracks will sound pristine, clean, and desirable.
-
Gain Reduction
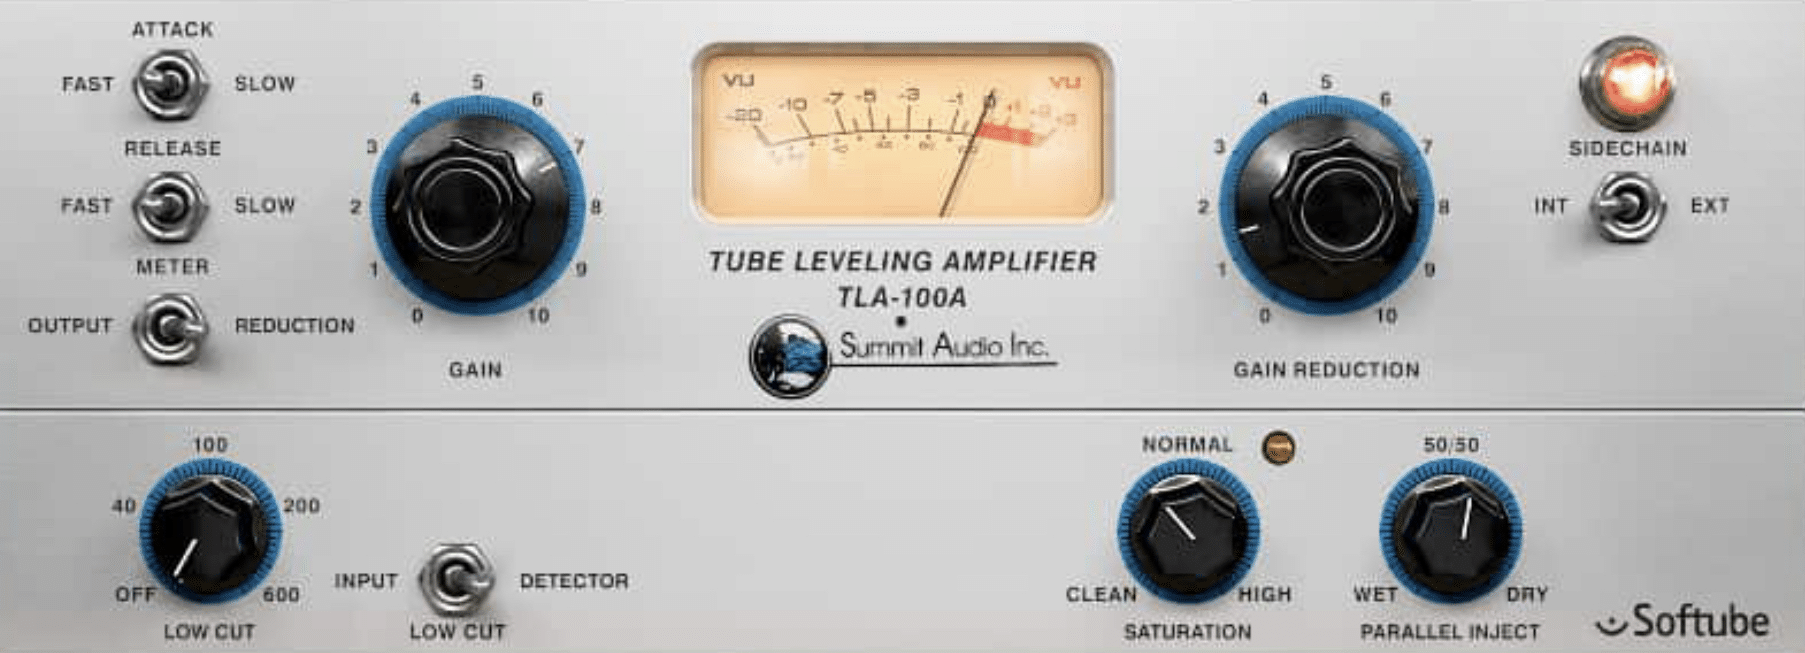
Gain reduction is the heart and soul of vocal compression.
Simply put, it’s the process of reducing the gain when the signal exceeds a certain threshold.
It’s the primary way a compressor affects your audio.
When you compress vocals, you set a predetermined threshold level.
When the signal surpasses this threshold, the compressor kicks in 一 reducing the gain and thus the volume.
The amount by which the compressor reduces the gain is shown in the gain reduction meter.
So how much gain reduction should you apply?…
Again, it depends on the audio source and what you’re trying to achieve.
If the vocals are recorded well and already have good dynamic control, a gain reduction of 3 to 6 dB might be enough.
If the vocals are more dynamic, you might need to apply heavier compression.
It’s crucial to use your ears when setting the gain reduction.
NOTE: Watch the gain reduction meter, but don’t be guided by it exclusively.
It’s not about how much you’re reducing the gain, but how it sounds.
Lastly, remember that gain reduction is just one part of the puzzle.
To properly compress vocals, you also need to consider other parameters like:
- Attack time
- Release time
- Ratio
- Knee settings
Each of these contributes to the overall sound and feel of your compressed vocals.
Techniques to Compress Vocals Like a Pro
Now that we’ve built a solid foundation on the fundamentals of vocal compression, it’s time to get our hands dirty with some practical compression techniques.
Let’s kick things off by exploring the fascinating world of tonal compression.
-
Exploring the Tonal Compression Technique
When it comes to compressing vocals, there’s an array of techniques you can use.
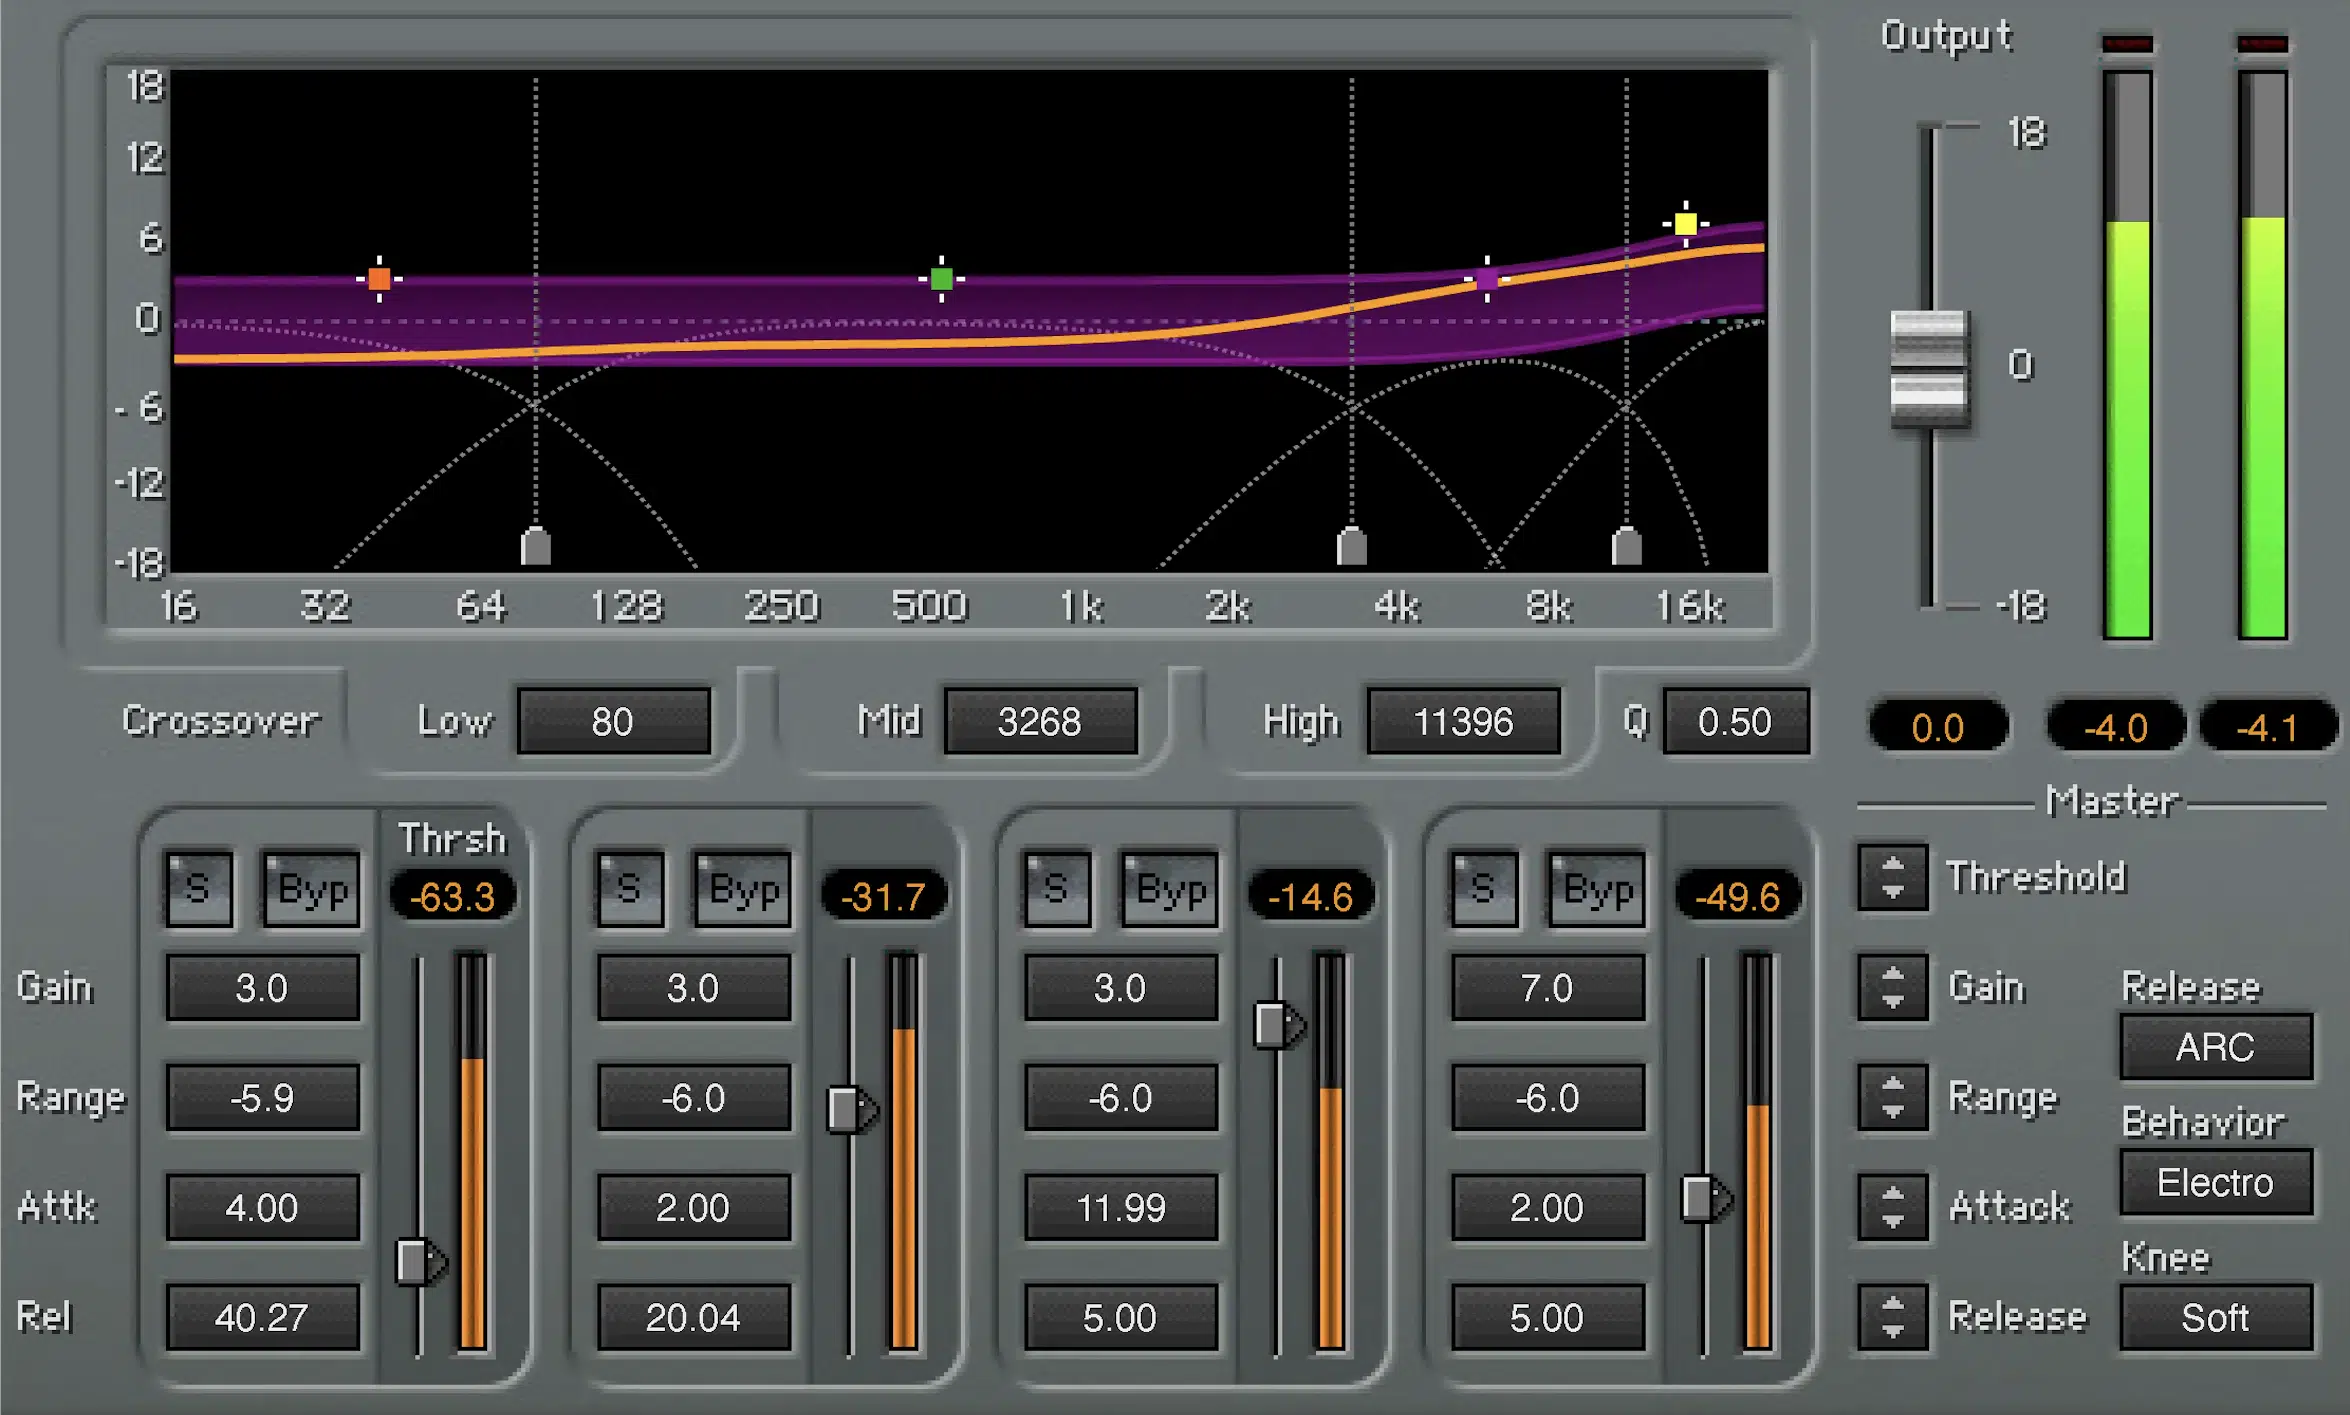
One such technique is tonal compression 一 which is all about shaping the tone of the vocals and achieving that ideal tonal quality.
Tonal compression focuses on specific frequencies.
For instance, you can compress only the high frequencies to prevent sibilance, or you might want to compress the mids to control how the vocal sits in the mix.
This selective compression can be achieved using a multiband compressor, where you set different compression settings for different frequency bands.
A common use of tonal compression is to control harsh frequencies.
For instance, if a vocalist’s certain notes are resonating too much in the 2-4 kHz range, you can set your multiband compressor to compress this range.
This makes the vocals sound smoother and less harsh.
This technique requires a keen ear and a deep understanding of frequencies.
When used effectively, it can bring a new level of polish and finesse to your vocal tracks.
-
The Power of Parallel Compression

Parallel compression, often referred to as “New York compression,” is a powerful technique for adding punch and energy to your vocals without overcompressing them.
The process involves duplicating the vocal track and heavily compressing the duplicate while leaving the original track uncompressed.
The compressed and uncompressed versions are then blended together to taste.
This results in a vocal track that maintains its dynamic range but also benefits from the added weight and consistency of the compressed signal.
It’s a wonderful technique for vocals where you want to preserve the original dynamics and still provide a consistent level.
Parallel compression can be particularly effective when working with rock vocals or pop tracks, where the vocals need to cut through dense instrumentation.
-
Multiband Compression
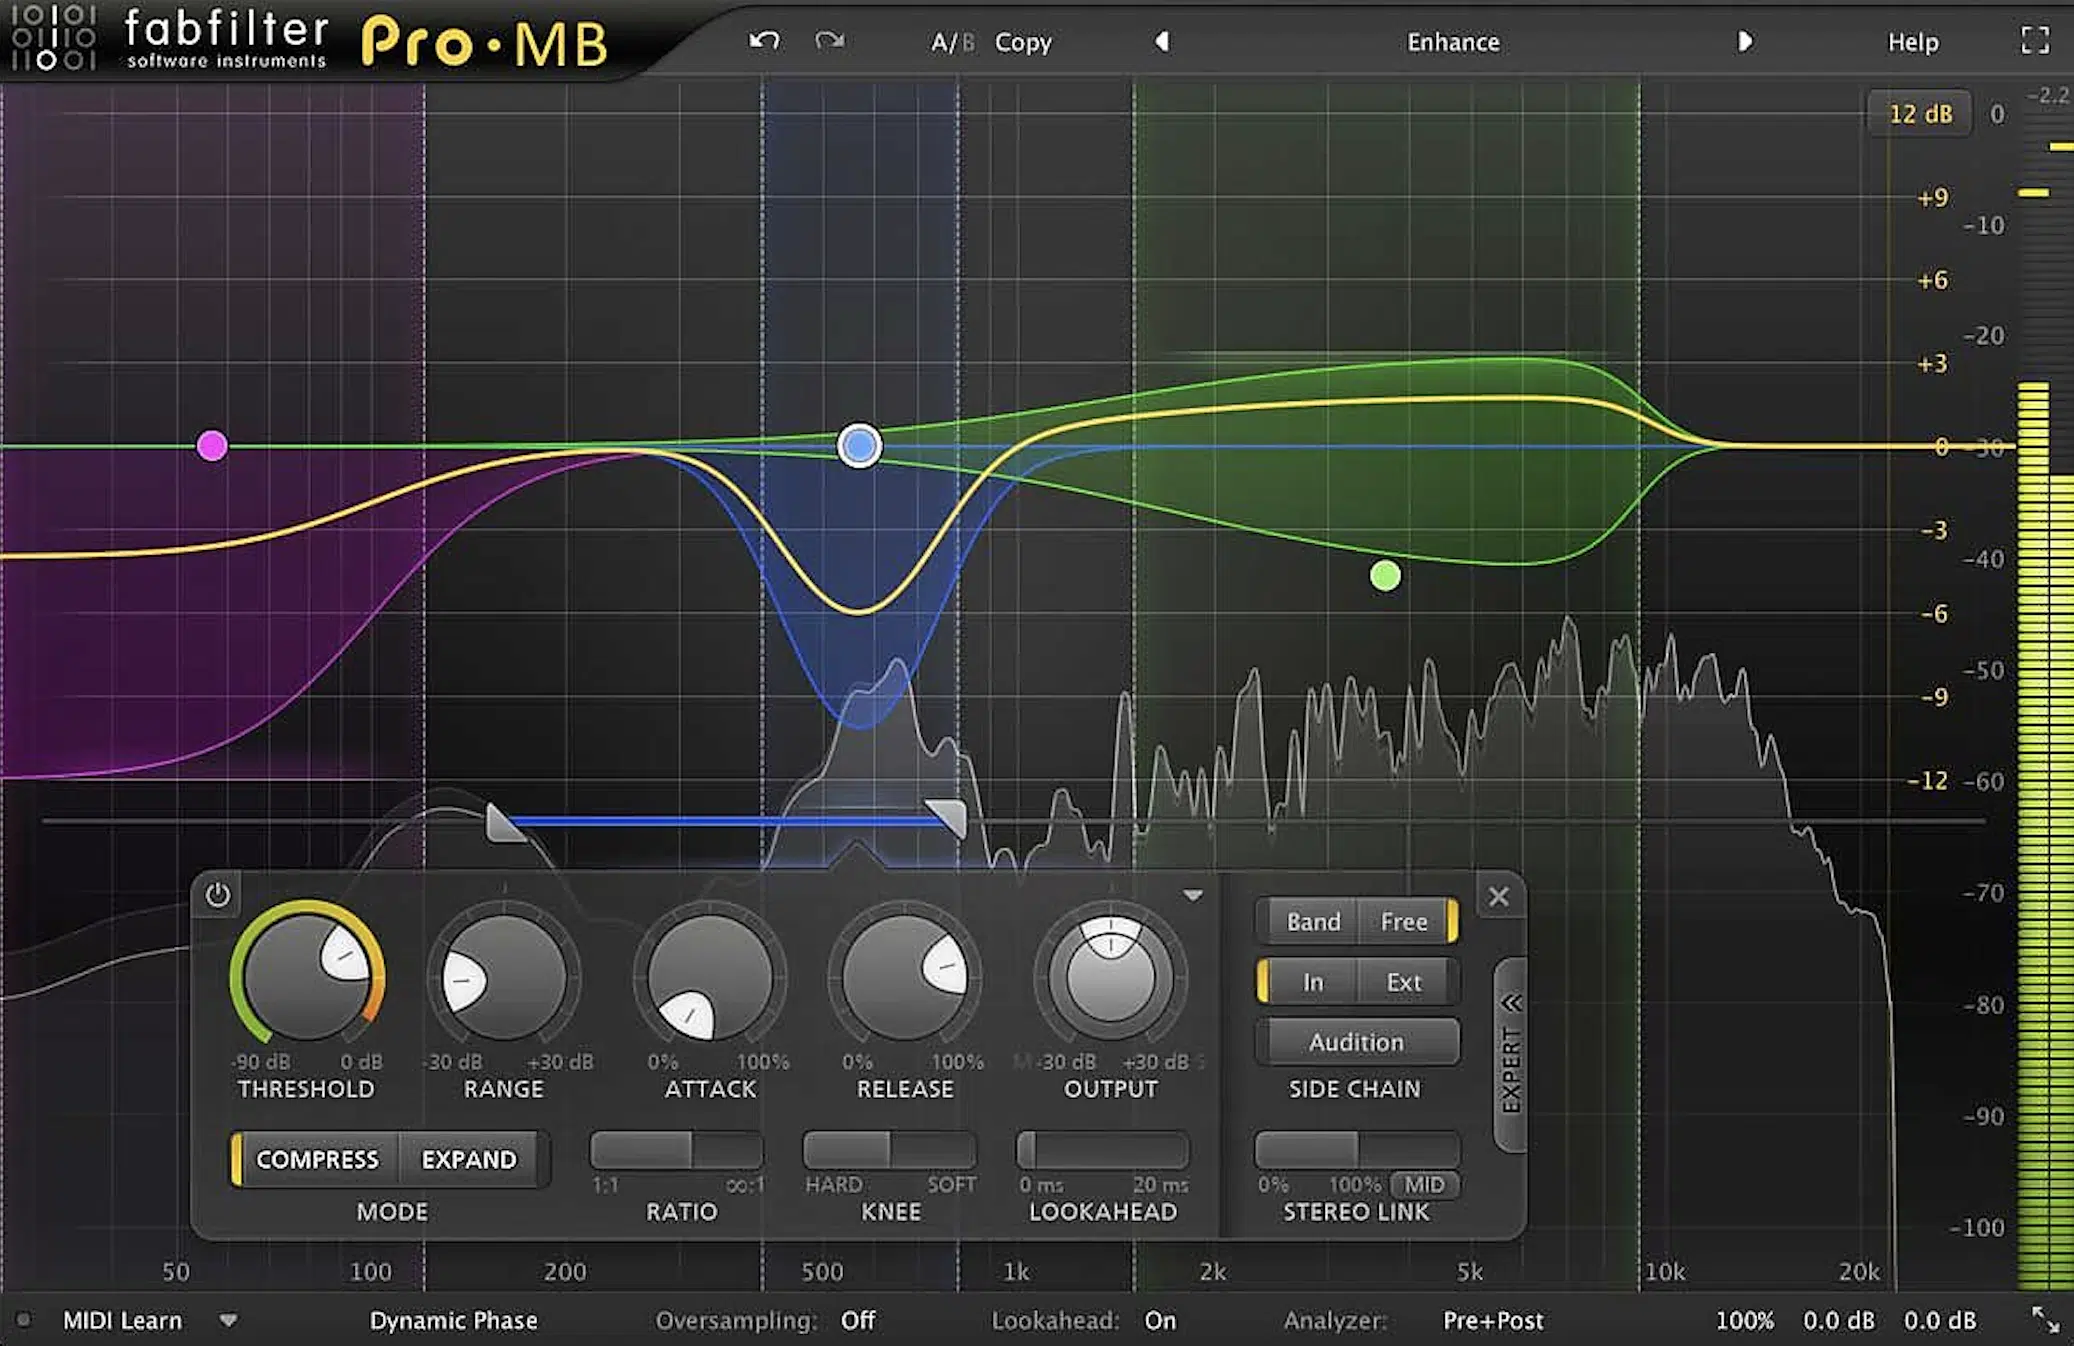
Multiband compression is a unique and highly effective approach to vocal compression.
Unlike a regular compressor (which affects the entire frequency spectrum of the audio signal), a multiband compressor divides the spectrum into several bands.
Each band can be compressed independently 一 giving you a lot more control over how you shape the sound.
This technique is especially useful when dealing with problematic frequencies.
For instance, if the vocalist’s ‘s’ sounds are too harsh, you can use multiband compression to reduce the volume of those frequencies.
Using multiband compression requires a good understanding of audio frequencies and how they affect the perception of sound.
It’s not a tool for beginners, but once you master it, it can be a game-changer in your mixing process.
Remember, though, multiband compression is a surgical tool.
It’s easy to overdo it and end up with an unnatural sounding vocal.
As with any tool, it’s best used in moderation and always in service of the song.
NOTE: Multiband compression is not a replacement for EQ.
They serve different purposes and should be used in conjunction with each other.
While EQ adjusts the level of specific frequencies, multiband compression controls the dynamics of specific frequency ranges.
How Multiple Compressors Can Enhance Your Vocal Tracks
When it comes to the compression process, utilizing multiple compressors can seriously enhance your tracks, if applied correctly, of course.
So, let’s dive into the art of layering compressors, when to incorporate multiple compressors, and sidechain compression.
-
Layering Compressors for an Exceptional Vocal Track
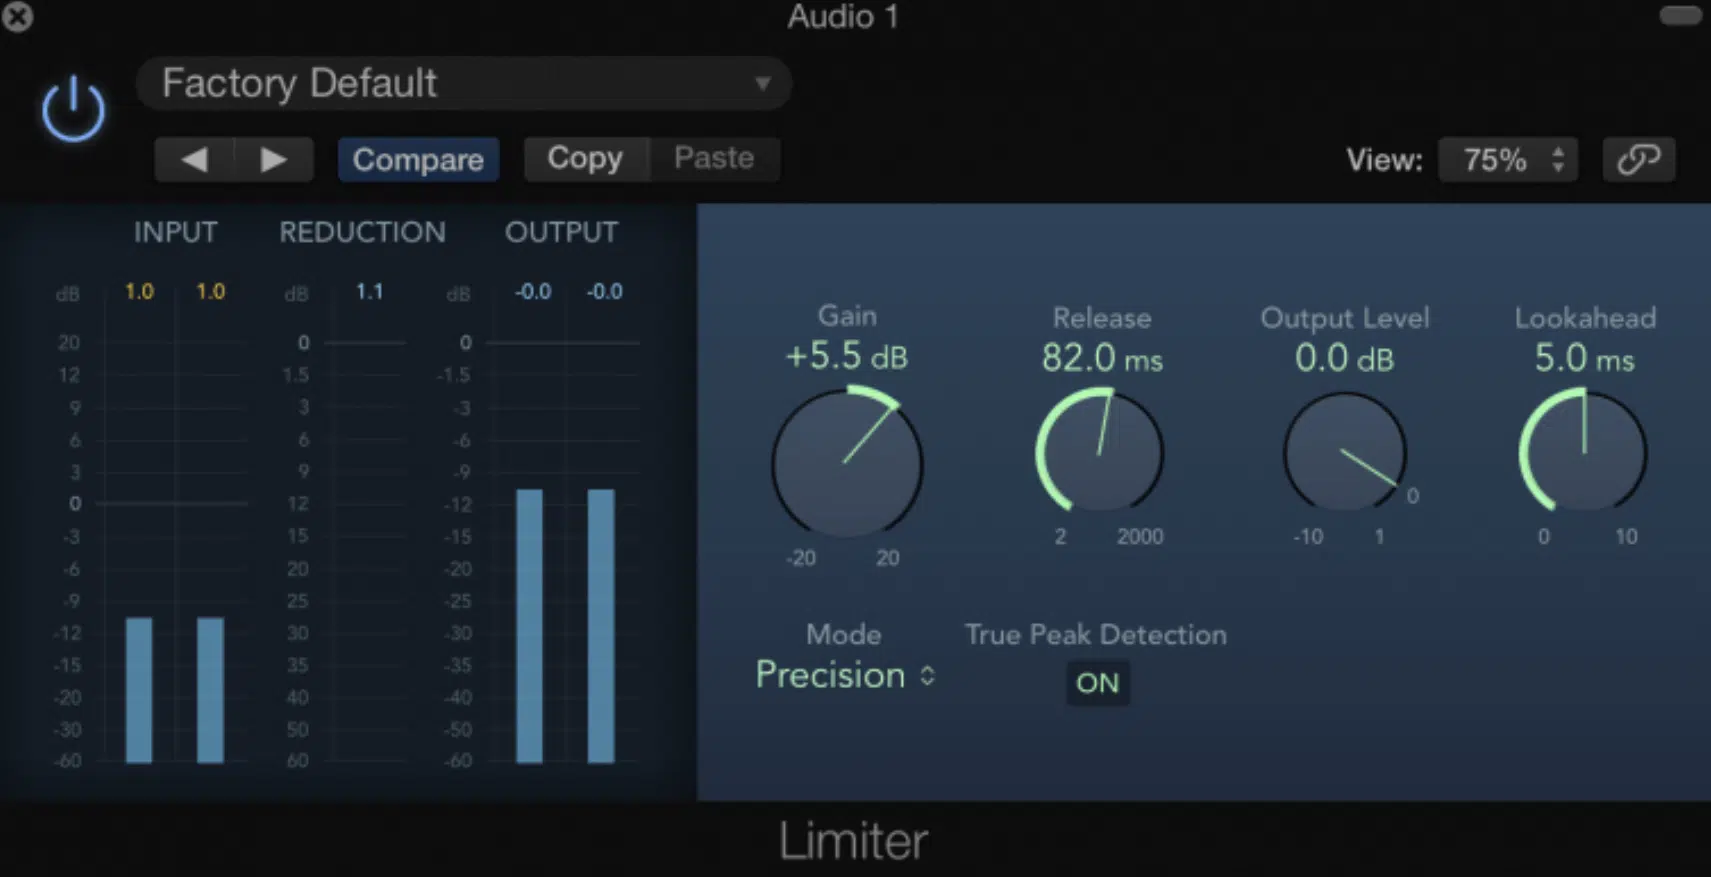
Using multiple compressors in a series (also known as serial compression) can provide a higher degree of control over your vocal dynamics.
The idea is to share the compression task among two or more compressors; each one dealing with a different aspect of the sound.
- The first compressor in the chain 一 Can be used for general leveling, applying mild compression to tame the vocal’s dynamic range.
- The second compressor 一 Could be used to add character or color to the sound, with a higher ratio and slower attack/release times to enhance the vocal’s sustain and body.
This approach can give you more nuanced control over your vocals and can help achieve a more natural sound.
However, it requires a deep understanding of compression and a careful touch.
Overdoing it can squash your vocals and rob them of their natural dynamics.
-
Sidechain Compression
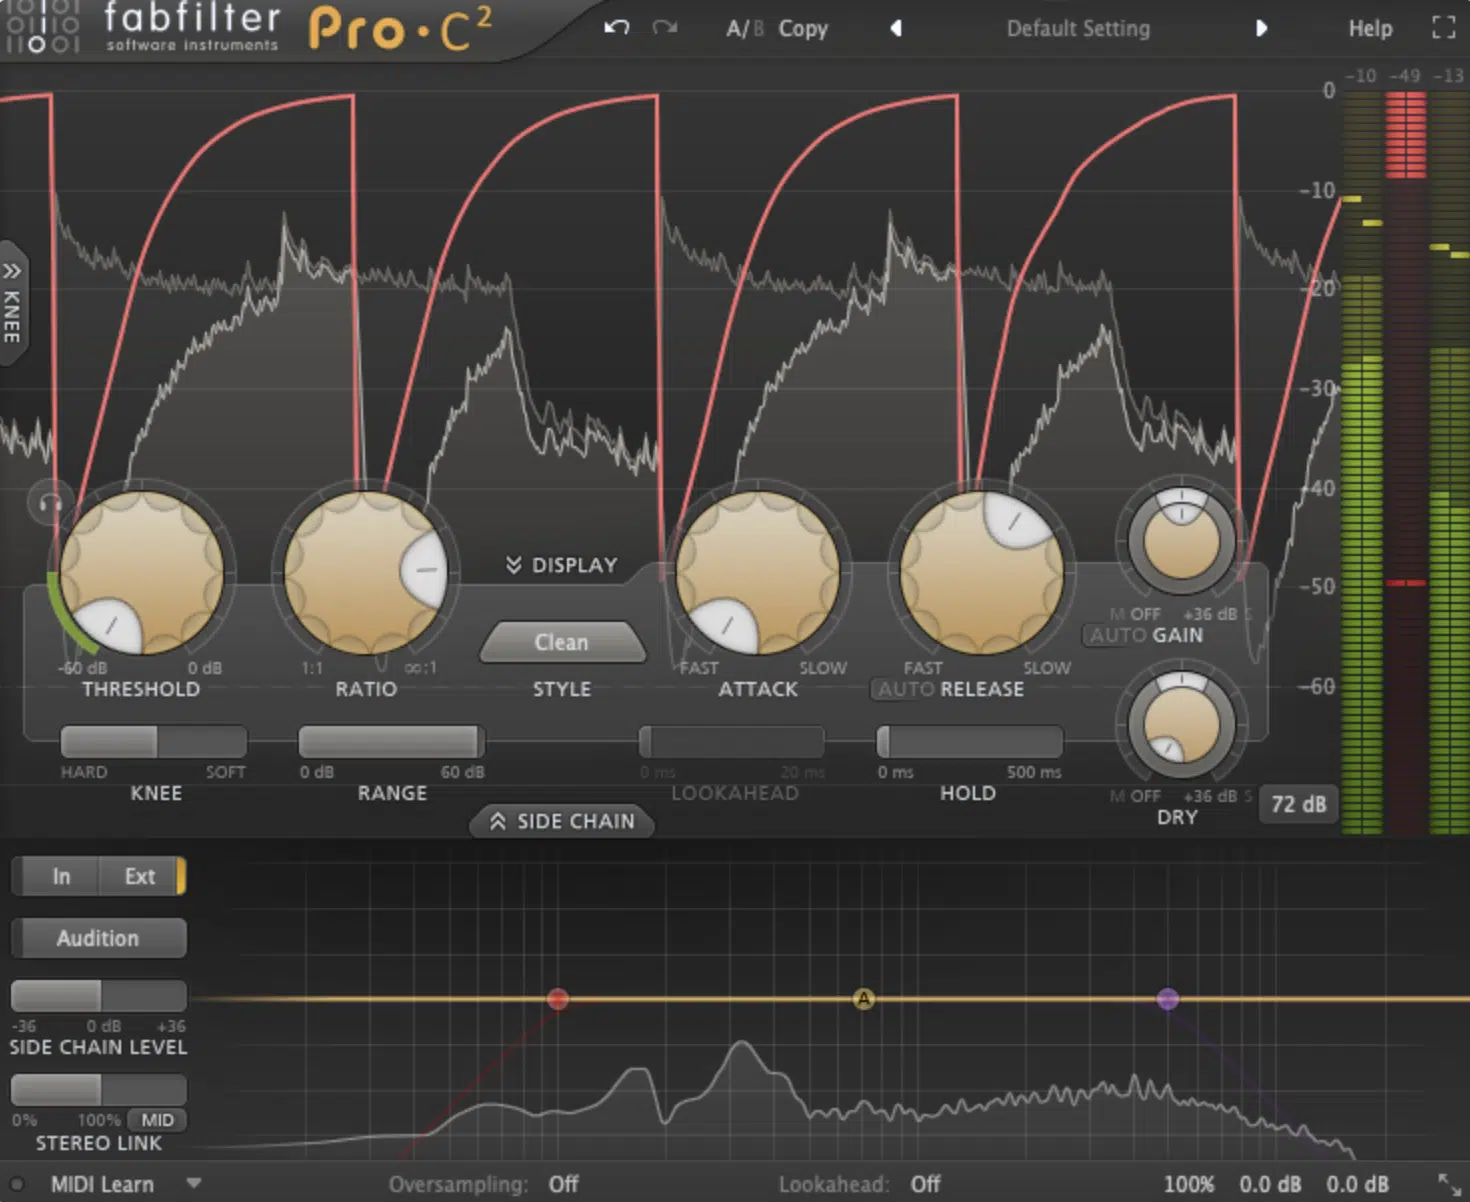
Sidechain compression is a powerful tool in a producer’s arsenal.
It’s often used in electronic music to create that “pumping” effect, but it can be equally effective in other genres for achieving a clear and balanced mix.
In essence, sidechain compression is about using the audio signal from one track to control the compressor on another.
A typical use is to have the kick drum trigger the compressor on the bass track.
Every time the kick hits, the bass gets momentarily quieter, which allows the kick to cut through the mix.
However, in the context of vocals, sidechain compression can help your vocals sit better in the mix.
By applying sidechain compression to other elements in your track (such as guitars or keys), you can make them quieter every time the vocals come in.
This gives the vocals more space in the mix 一 ensuring they’re heard clearly without having to increase their volume.
Keep in mind, though, that like any other tool, sidechain compression should be used judiciously.
Overdoing it can result in an unnatural-sounding mix.
So, always trust your ears and aim for a balance that serves the song.
-
When & Why to Use Multiple Compressors

Using multiple compressors can seem daunting at first, but it’s a unique technique that can yield excellent results when used correctly.
The main advantage of using multiple compressors is that it allows you to shape and control the vocals more precisely.
For example, you can:
- Use one compressor to tame the peaks.
- Use another compressor to add some character or color to the vocals.
Or you could use one for broad-stroke compression and another for more surgical, detailed work.
The possibilities are vast, and it’s all about finding the right combination that works for your specific needs.
That said, it’s important to know when to use multiple compressors.
If the vocals are already well recorded and have a relatively consistent level, you might not need more than one compressor.
Multiple compressors are best used when:
- Dealing with a challenging vocal track with a wide dynamic range.
- You’re trying to achieve a specific sound.
Furthermore, each compressor you add to your signal chain can introduce noise and coloration.
While this can sometimes be desirable, it can also degrade the sound quality if not managed properly.
So why use multiple compressors when you apply vocal compression?…
Because it gives you a higher degree of control and can help you achieve a more polished, professional sound.
Nailing the Attack and Release Settings for Your Vocal Compressor
Nailing the attack and release setting is super important if you’re looking to achieve pristine, balanced, professional vocals.
So, let’s jump in…
-
Understanding the Importance of Attack Time
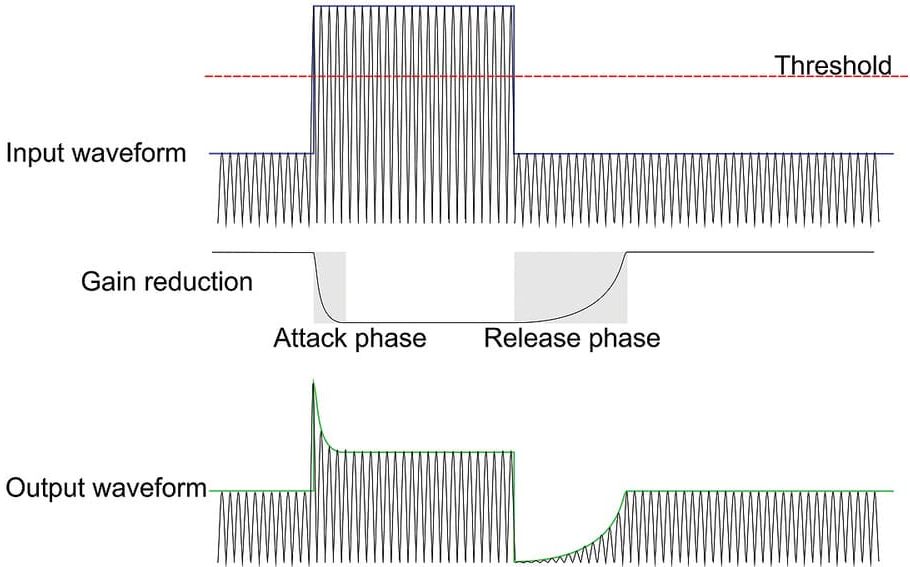
The attack time on a compressor is crucial, and understanding how it works can significantly enhance your vocal mixes and make sure your compression sounds legit.
- The attack time 一 Controls how quickly the compressor responds once the input signal exceeds the threshold.
If you set a fast attack time, the compressor will quickly clamp down on the signal; reducing the gain almost immediately.
This can be useful for taming loud transients or when you want a tight, controlled sound.
However, too fast an attack time can also make the vocals sound unnatural, lifeless, and dull as it squashes the natural dynamics of the performance.
Conversely, a slow attack time allows more of the initial transient to pass through before the compressor starts reducing the gain.
This can result in a more natural, dynamic sound.
It can also add punch and presence to the vocals, as the initial transients are often where the character of the voice lies.
Knowing how to manipulate the attack time can give you a lot of control over the shape and tone of your vocals.
- Too fast 一 You risk killing the dynamics.
- Too slow 一 You might not provide enough control over the loud peaks.
So, again, remember that it’s ultimately a balancing act.
-
Getting the Release Time Right
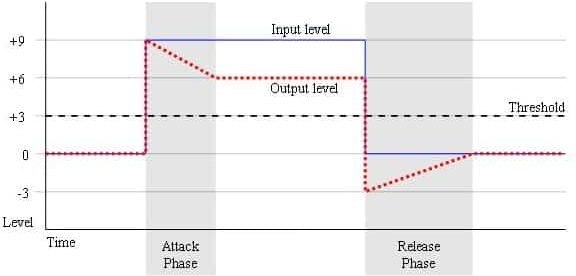
Just as important as the attack time is the release time.
While the attack controls how quickly the compressor starts working, the release time controls how quickly it stops compressing after the signal falls below the threshold.
- If the release time is set too fast 一 The compressor will stop compressing quickly, which can cause the volume to jump back up and create a pumping effect.
While this can be a desired effect in some electronic music genres, in vocals it can make the performance feel unsettled and inconsistent.
- A slow release time 一 Means the compressor takes longer to stop compressing. This can help maintain a consistent level and smooth out the vocal performance.
But, set too slow, the compressor might not fully release before the next loud section comes in.
Which, in turn, can lead to over-compression and a loss of natural dynamics.
Getting the release time right can be a bit tricky as it depends heavily on the tempo and rhythm of the song, as well as the dynamics of the vocal performance.
A good starting point is to set the release time so that the gain reduction meter returns to zero just before the next beat or vocal phrase.
Understanding and mastering the interplay between attack and release times can truly take your vocal mixes to the next level.
Achieving Perfect Lead Vocal Compression
Having explored various compression techniques, it’s now time to apply your knowledge to the centerpiece of any track: the lead vocal.
We’ll start by examining how to use clip gain to achieve a greater level of dynamic control.
-
Using Clip Gain for More Dynamic Control
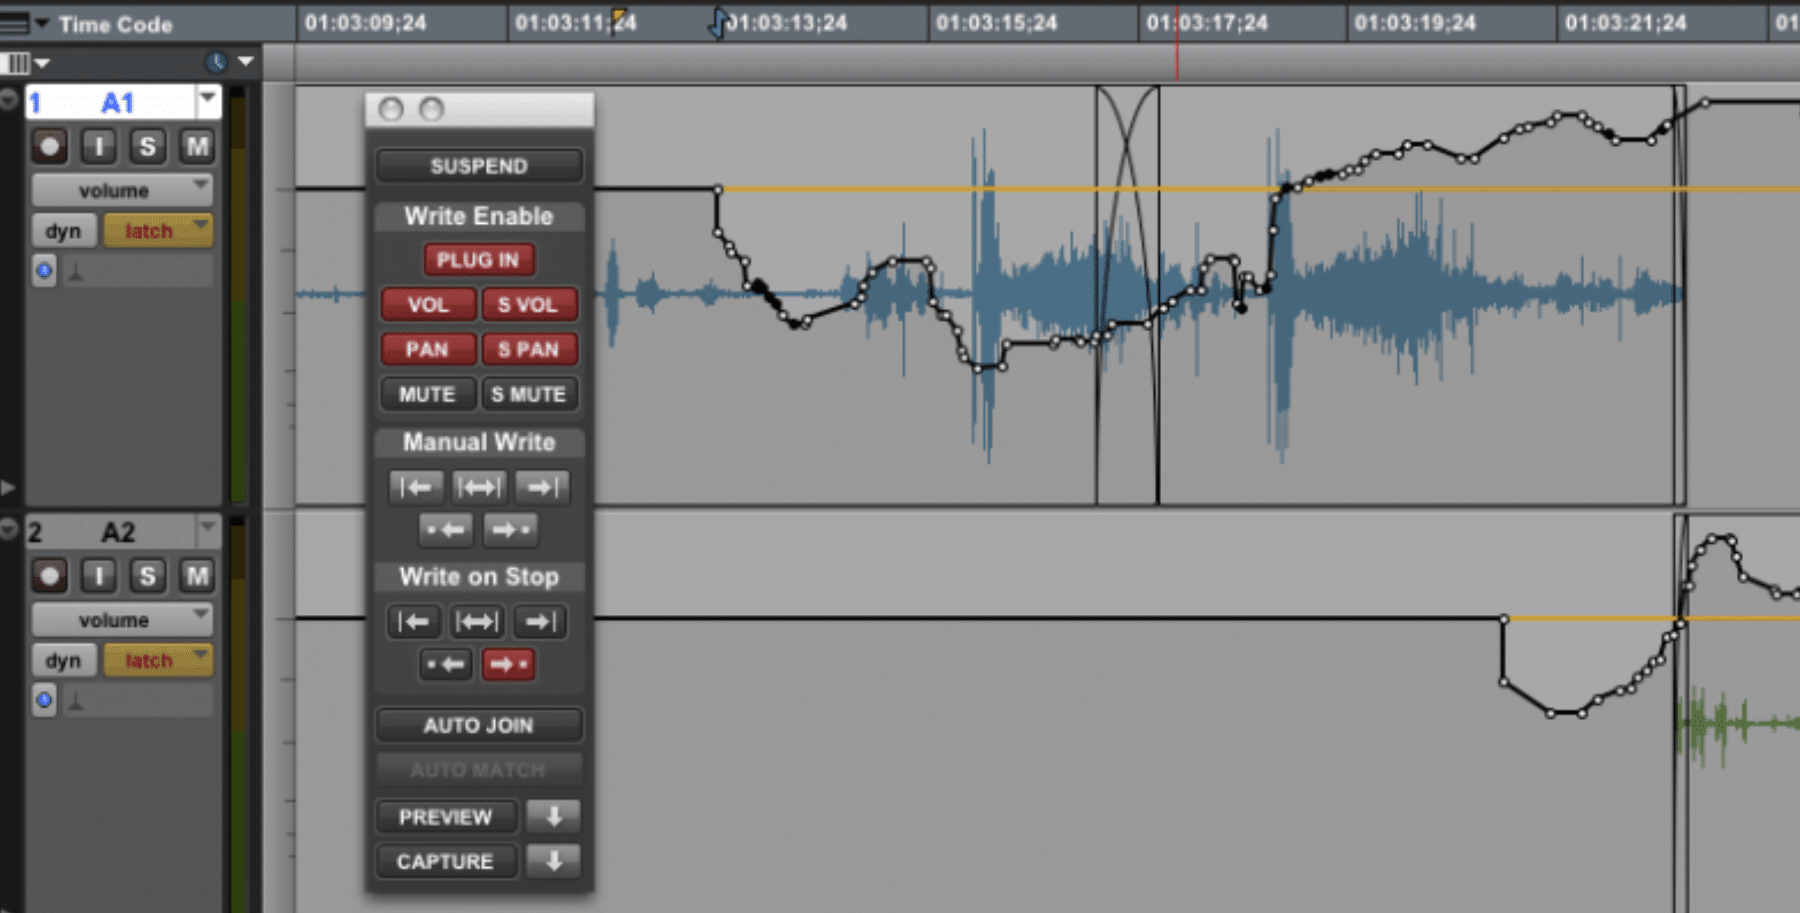
Clip gain is a powerful tool that allows you to control the dynamics of a vocal performance before it reaches the compressor.
By adjusting the clip gain, you can ensure that the compressor receives a more consistent signal, which can result in smoother compression.
For instance, if a vocalist sings one phrase quietly and then the next one loudly, you could increase the clip gain for the quiet phrase and decrease it for the loud one.
Rather than relying solely on the compressor to even out these levels, that is.
This way, the compressor doesn’t have to work as hard and is less likely to introduce artifacts or over-compress the vocals.
To effectively use clip gain, it’s essential to carefully listen to the vocal performance and identify any sections where the volume dramatically changes.
Adjust the clip gain accordingly, and always aim for a more consistent level.
Remember, the goal is not to eliminate dynamics but rather to control them in a way that benefits the mix.
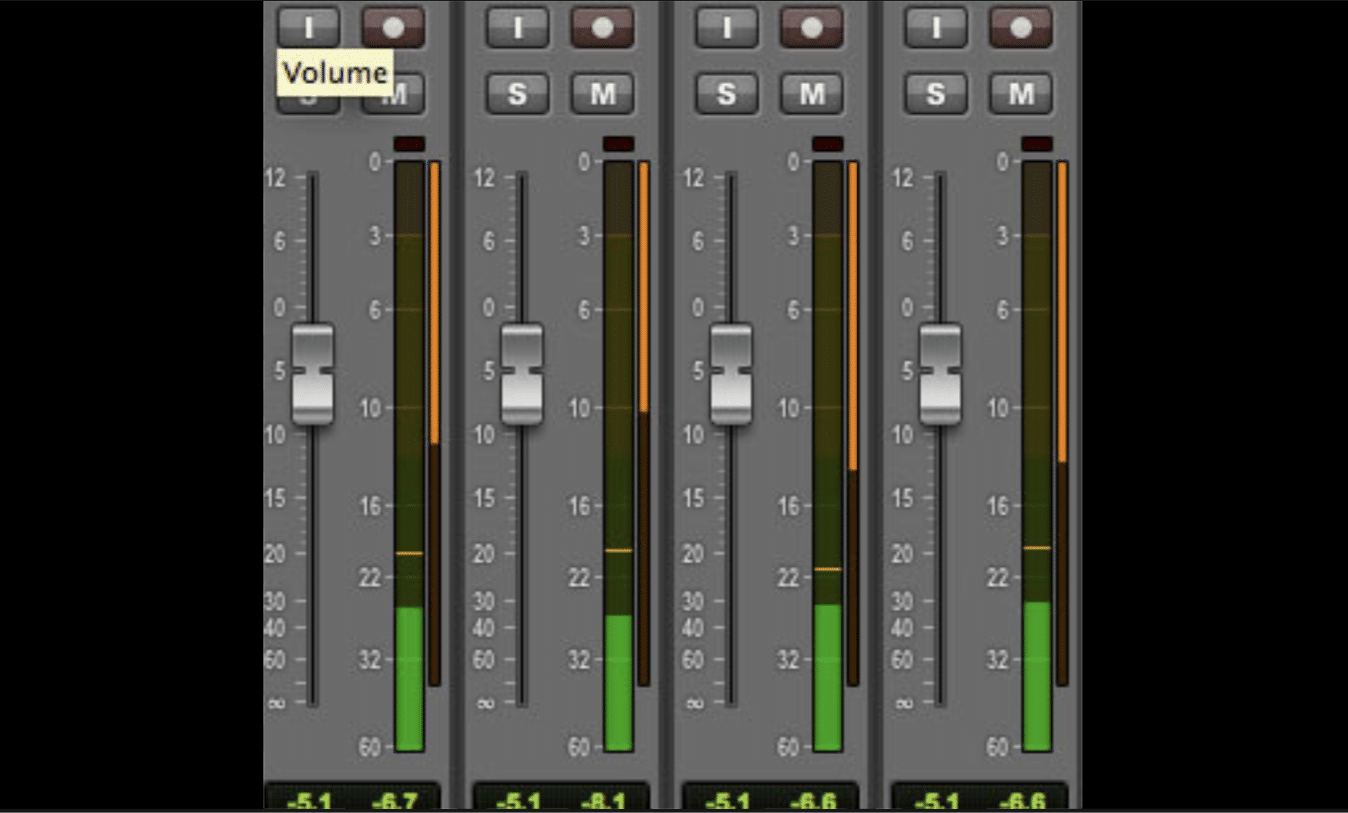
The gain reduction meter is an invaluable tool when compressing vocals.
It provides visual feedback on how much the compressor is reducing the gain of the signal in real-time.
Understanding how to read and interpret this meter can greatly improve your compression results.
The more the gain reduction meter moves towards the negative, the more the compressor is reducing the gain.
If you see the meter constantly in the negative, it means your compressor is working hard and potentially over-compressing the signal.
NOTE: A good rule of thumb is to aim for about 3 to 6 dB of gain reduction on peak sections for a natural sound.
Of course, this can vary depending on the style of music and the dynamics of the vocal performance.
Remember to use the gain reduction meter as a guide, not a rule.
It’s there to help you visualize what’s happening 一 but your ears should always have the final say.
If it sounds good but the meter is showing a high amount of gain reduction, trust your ears.
-
Harnessing the Power of Makeup Gain for Your Lead Vocal
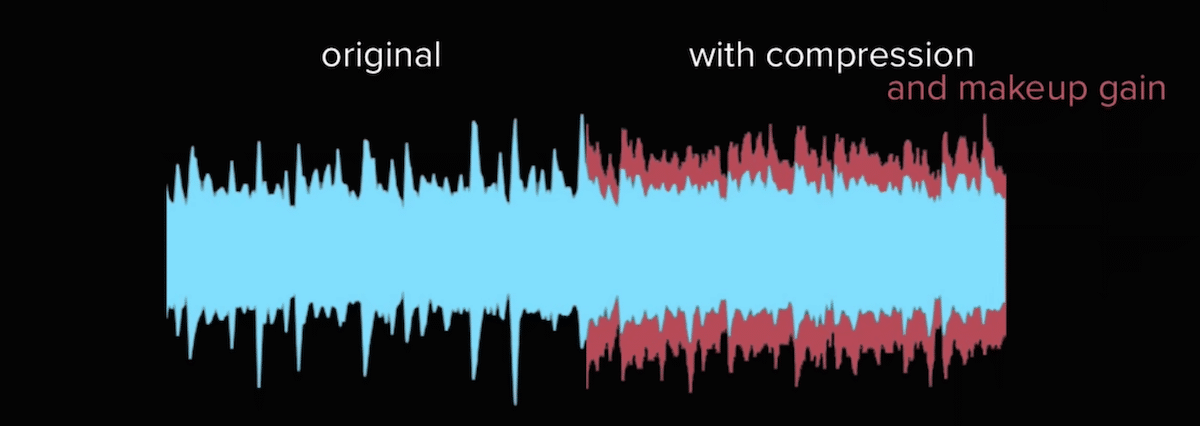
After compressing a vocal, the overall volume is often reduced due to gain reduction…
This is where makeup gain comes in.
It allows you to increase the output level of the compressor to compensate for the gain reduction 一 ensuring the vocal maintains its place in the mix.
When setting the makeup gain, it’s crucial to level-match with the uncompressed signal to accurately judge the effect of the compression.
A common mistake is to set the makeup gain too high, which makes the compressed signal louder than the original.
Because our ears perceive louder as better, this can lead to over-compression as it might seem like the louder, compressed signal sounds better.
A good approach is to switch the compressor in and out of the bypass while adjusting the make up gain.
The goal is to match the perceived loudness of the compressed and uncompressed signals.
This way, you can focus on the effect of the compression, not the change in volume.
Remember, the purpose of makeup gain is not to make the vocals louder in the mix but to restore the level that’s been reduced by the compression.
When you mix vocals, the balance should be determined by your fader levels, not your make up gain.
Ultimately, makeup gain is an essential tool for ensuring your vocal compressor settings maintain their impact and presence in the mix.
Mistakes to Avoid When Compressing Vocals
As we continue our journey in mastering vocal compression, it’s crucial to understand the pitfalls that can trip up even the most experienced producers.
First, we’ll discuss a common misstep: creating an unnatural sound with overzealous vocal compression.
-
Avoiding Unnatural Vocal Compression
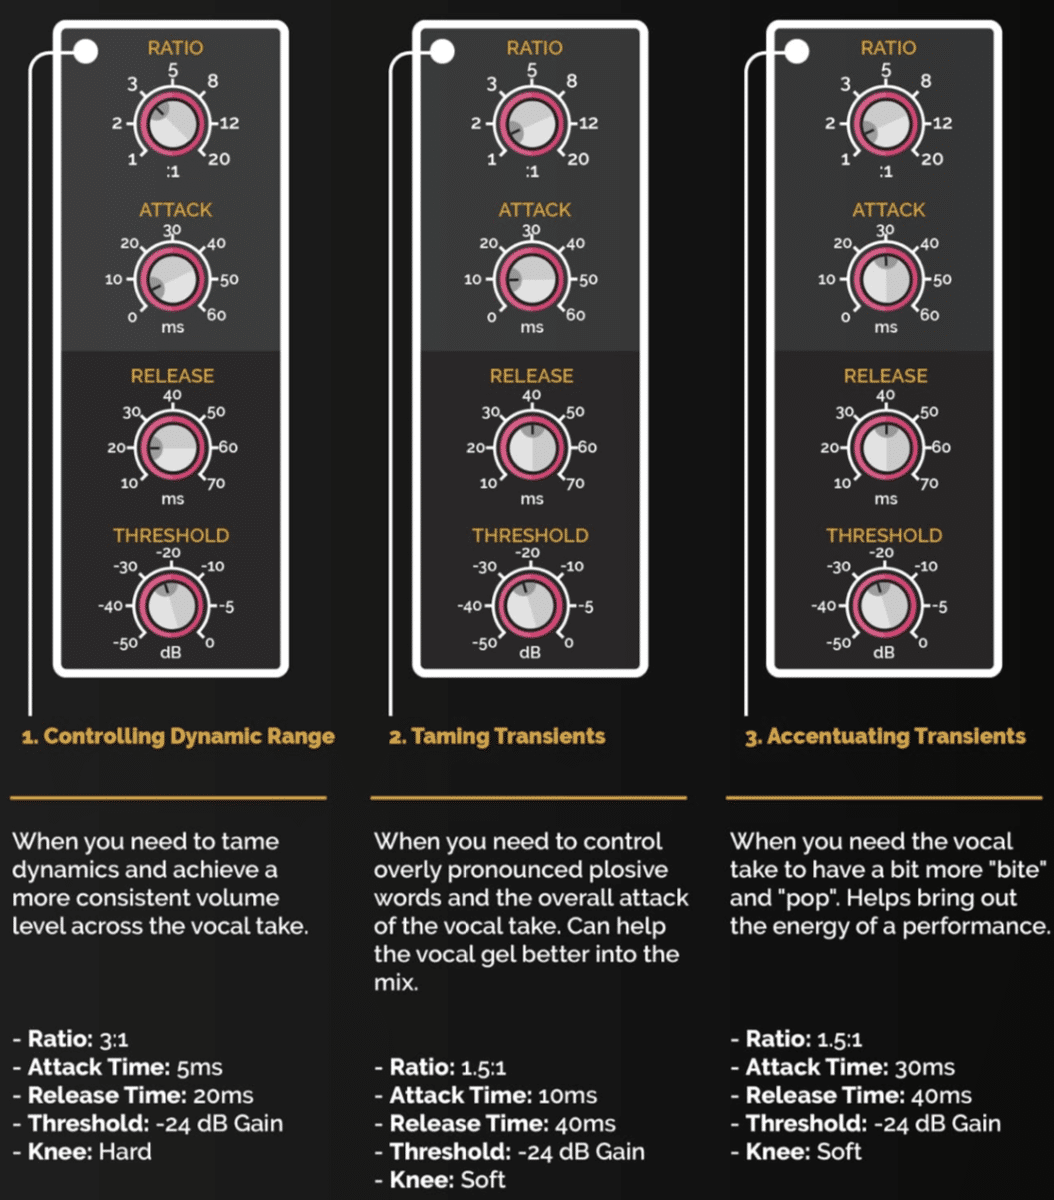
One of the biggest mistakes to avoid when compressing vocals is to overdo it, resulting in an unnatural sound.
This often happens when the compressor is set with:
- A fast attack time
- High ratio
- Heavy gain reduction
The result is a super squashed and lifeless vocal that seriously lacks dynamic variation.
The key to avoiding this is to use compression subtly and intentionally.
Remember, the goal of compression is to enhance and shape the performance, not to squash it.
Always listen carefully to the effect of the compression and adjust your settings accordingly.
Another good practice is to frequently bypass the compressor to compare the compressed and uncompressed signals.
This can help you avoid over-compression and keep a check on whether you’re enhancing or detracting from the performance.
-
Vocal Compressor Settings: How Much Compression is Too Much?
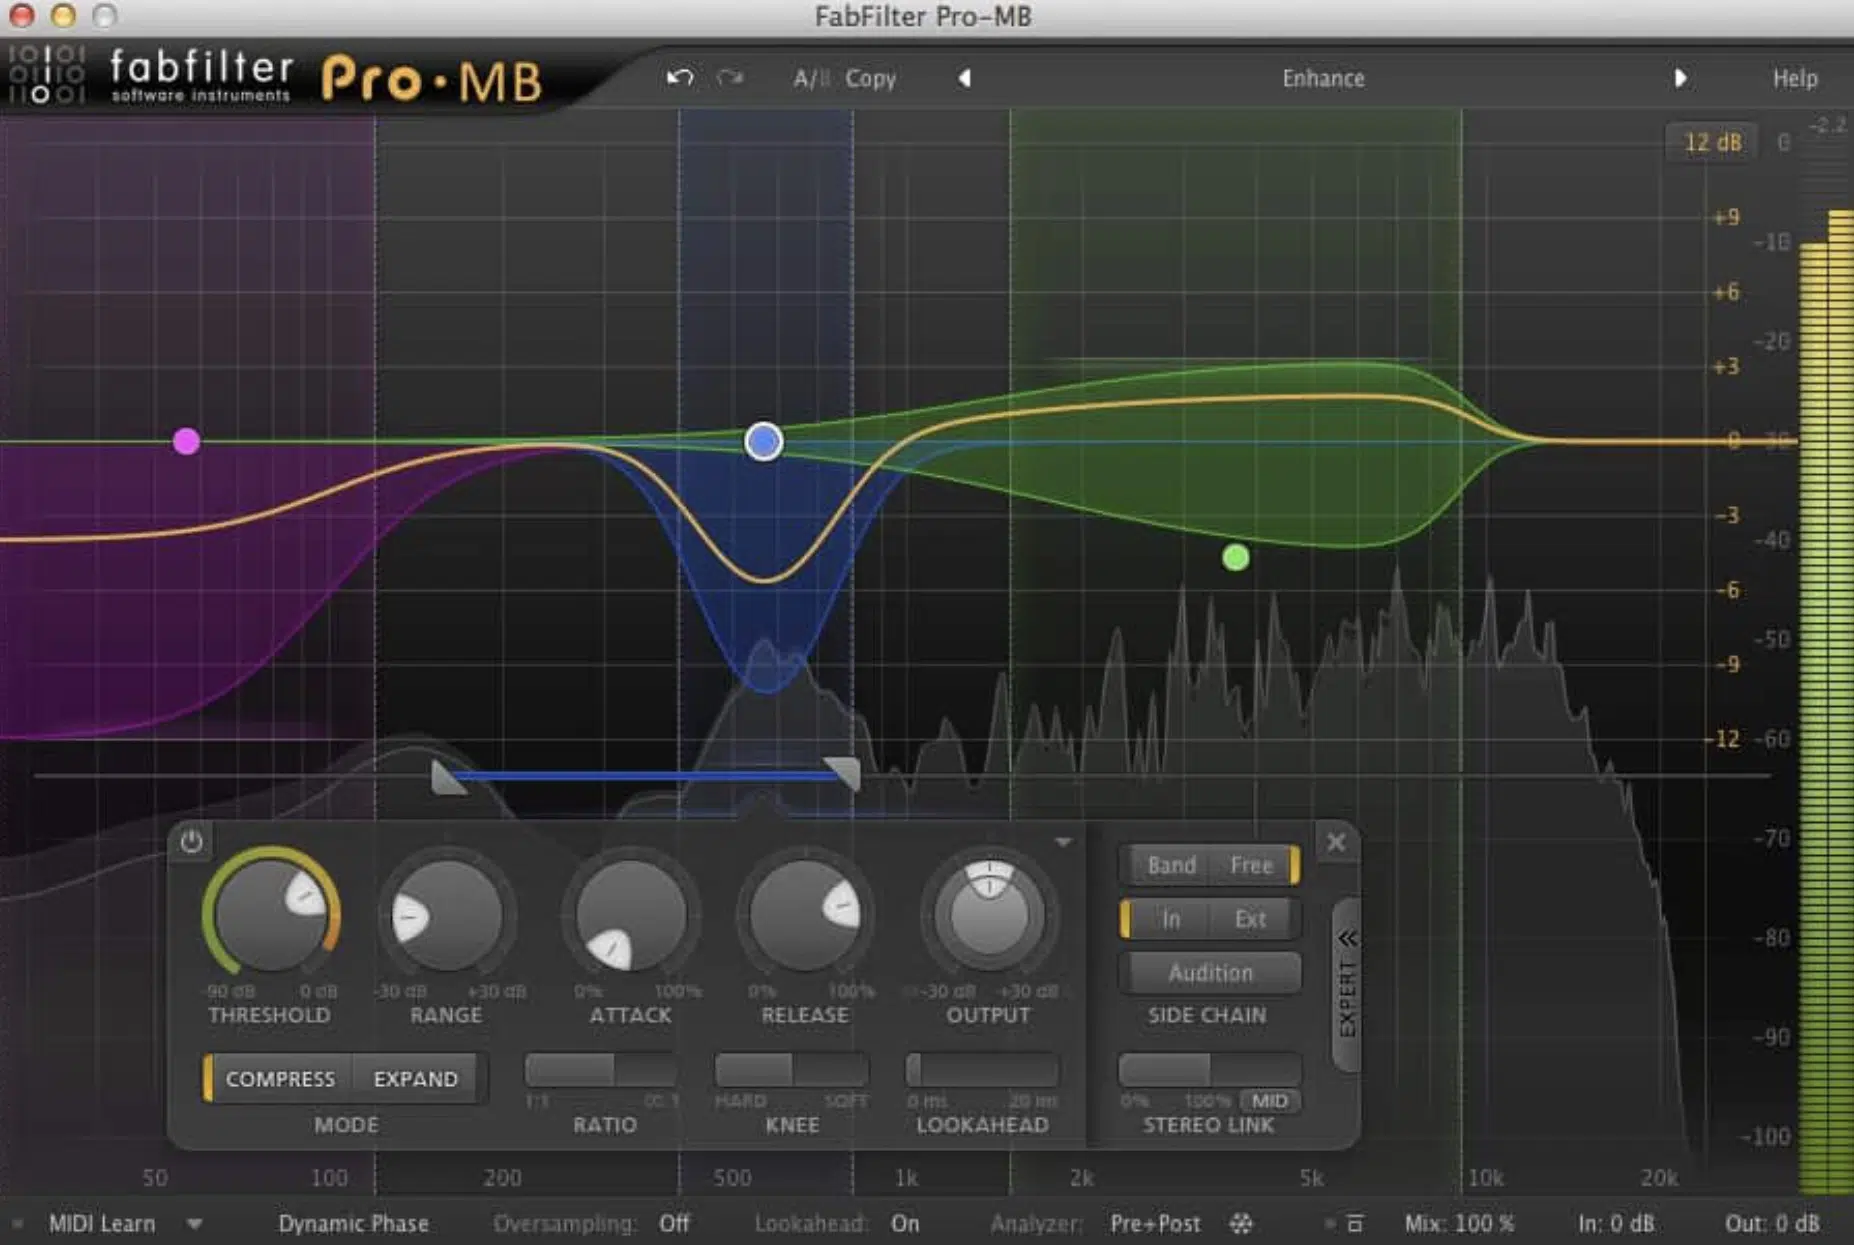
Determining how much compression is too much can be tricky, and it largely depends on the style/vibe of your beat and the dynamics of the vocal performance.
However, a good general rule is that if the compression is noticeable and the vocals sound over-processed, it’s probably too much.
A common mistake is to rely on the gain reduction meter to decide how much compression to apply.
While the meter can be a helpful guide, it’s essential to trust your ears, as we discussed earlier.
The final judgment should always be based on how the vocals sound in the context of the mix.
Keep in mind that more compression doesn’t necessarily mean better.
Too much compression can lead to a loss of dynamic range 一 making the vocals sound lifeless and flat.
Instead of applying heavy compression, consider using techniques like parallel or serial compression to achieve more dynamic control without sacrificing naturalness.
Remember to use compression as a tool to enhance the performance, not overpower it.
-
The Risk of Overcompressing & How to Avoid It
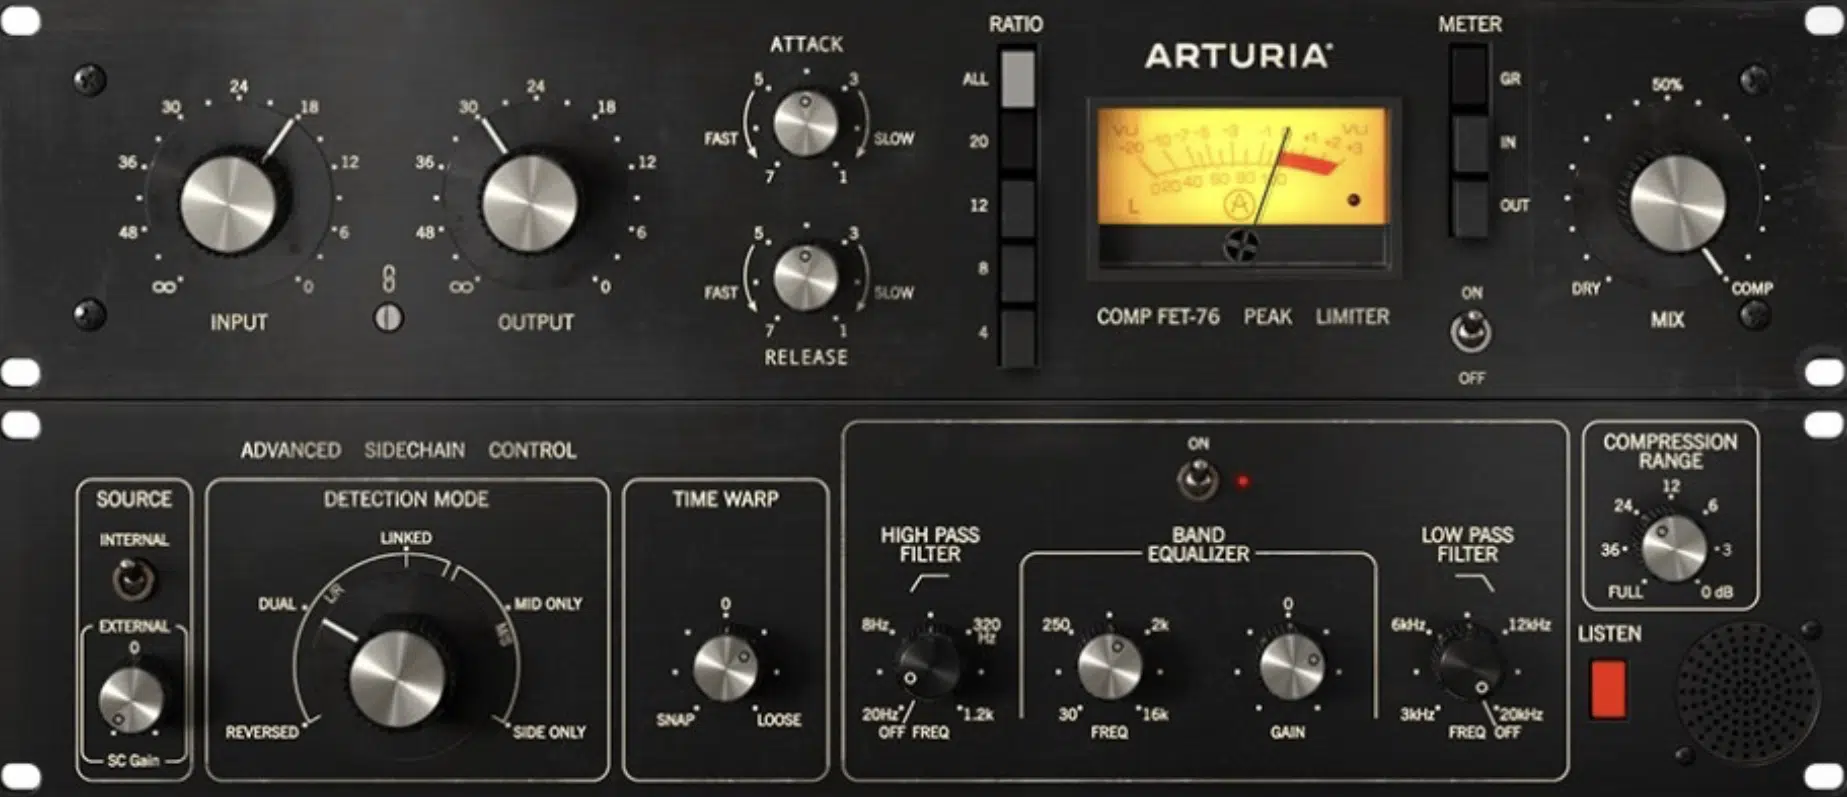
Overcompression (super aggressive compression) is a common pitfall when mixing vocals.
It can make the vocals sound squashed, lifeless, and devoid of emotional impact.
This is particularly detrimental in genres where the entire vocal dynamics and expression play a pivotal role.
To avoid overcompressing:
- Start with mild settings (light compression).
- Then, gradually increase the compression while continuously assessing its impact on the sound.
- Plus, regularly bypass the compressor to ensure that you’re enhancing and not detracting from the vocal performance.
You can also use techniques like serial or parallel compression to achieve more dynamic consistency without applying excessive compression.
This can result in a more natural and open sound while still maintaining a consistent vocal level (lead vocals, backing vocals, etc.) in the mix.
Always keep in mind the purpose of compression 一 to control dynamics and enhance your vocal track.
If the compression starts taking away from the natural expression and emotional impact of the vocals, it’s time to dial it back.
Vocal Compressor Settings: Final Thoughts
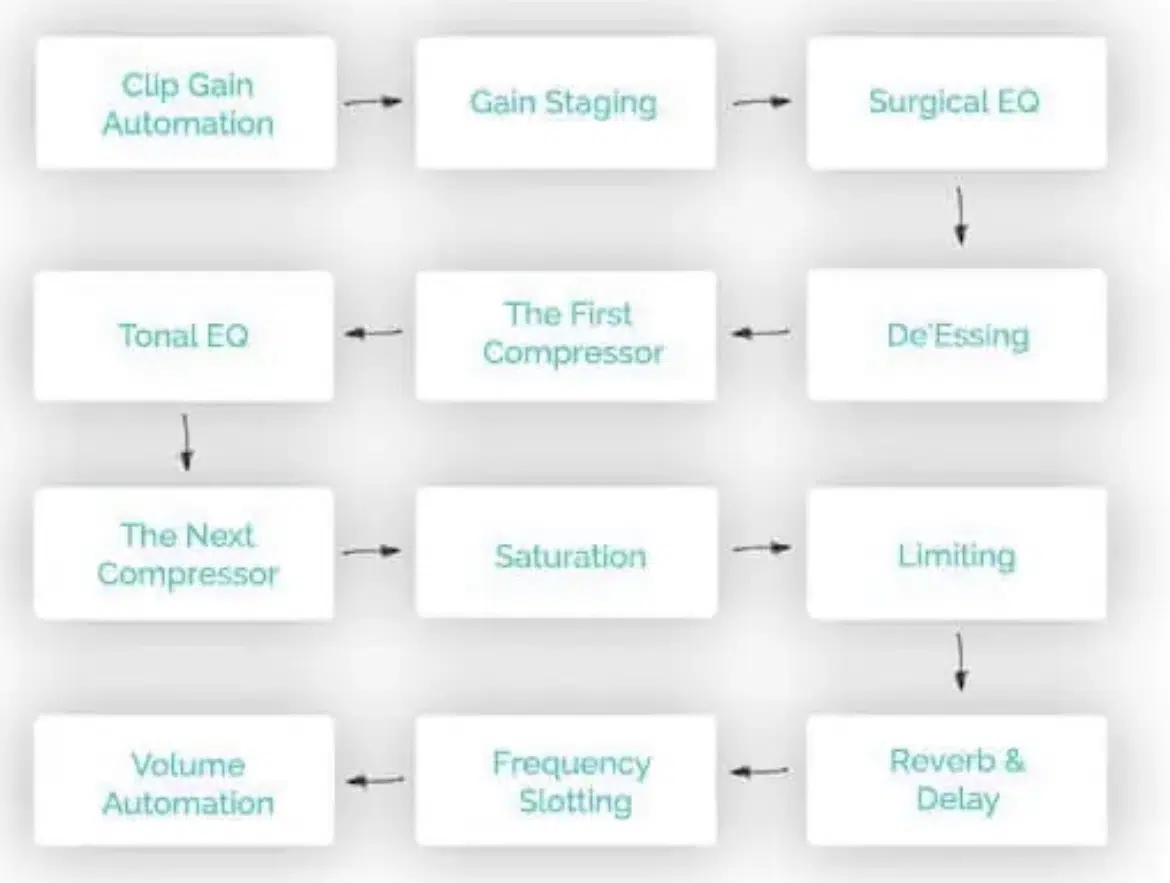
With this in-depth exploration of vocal compressor settings, you’re now armed with the knowledge to truly elevate your mixes.
We’ve explored dynamic control, uncovered common pitfalls to avoid when compressing vocals, and everything in between.
But remember, like any art form, mastering vocal compression requires practice, patience, and a lot of experimentation.
If you’re keen to delve deeper and analyze how perfectly compressed vocals should sound, I highly recommend checking out these Famous Beatmaker Templates.
These professionally crafted templates provide an incredible learning resource and a tangible reference to aid your comprehension.
Studying these epic templates will allow you to see and hear how expertly compressed vocals look and sound in a finished mix.
Don’t forget, the journey to perfection is never-ending.
Even the most experienced producers are continually learning and adapting their skills.
Use the knowledge you’ve gained here as your springboard, then dive into the endless ocean of possibilities.
Every track is a new opportunity to refine your skills and further your understanding of this vital aspect of music production.
Keep pushing your boundaries, and soon, your vocals will take on a life of their own and impress anyone who hears them.
Until next time…


Leave a Reply
You must belogged in to post a comment.