VST plugins offer an unparalleled range of sounds, effects, and instruments to elevate your tracks and enhance your skills.
They can transform your digital audio workstation (DAW) into a limitless musical playground where you can experiment all night long.
It allows for the exploration of new sonic territories and the refinement of your sound.
However, once you want to get rid of them either for organizational purposes, to free up system resources, or to troubleshoot issues, it’s important to know the proper process.
This is because improperly uninstalled plugins can leave behind residual files that clutter your system or cause conflicts with other software.
And that’s exactly why we’re breaking down the process in 4 easy steps today.
In this article, you’ll learn:
- How to uninstall VST plugins ✓
- Locate your plugins on Windows and Mac ✓
- Use the Control Panel for Windows uninstallation ✓
- Navigate Mac’s Library Audio for plugin removal ✓
- Clean up remaining DLL and common files on Windows ✓
- Remove extra Mac Library Audio files ✓
- Verify the complete uninstallation ✓
- Additional tips for a smoother process ✓
- Much more about how to uninstall VST plugins & enhance your workflow ✓
By the end, you’ll have a solid understanding of how to uninstall VST plugins efficiently.
This way, you’ll be able to maintain a clean, organized, and conflict-free digital audio workspace (which, as you know, can be a game-changer).
You’ll be equipped with the knowledge to manage your audio plug ins effectively 一 ensuring that your production environment remains optimized for creativity.
You can streamline your setup, enhance system performance, and get back to what you do best: making music.
So, let’s dive in…
Table of Contents
VST Plugins: A Quick Breakdown

Before worrying about how to uninstall VST plugins, you’ve got to know what they actually are first, as they’re the key to making your music sound captivating and unique.
These audio plug ins can range from virtual instruments, such as synthesizers and samplers, to effects units like reverb, compression, and EQ modules.
They seamlessly integrate into digital audio workstations (DAWs), which allows you to incorporate as many audio processing and creation tools as you’d like.
One of the trademark aspects of VST plugins is their ability to emulate the sound and functionality of traditional hardware equipment.
But, VST plugins are not limited to just replicating analog gear…
They also give you a solid pathway to innovative sound design and audio manipulation techniques that are only possible in the digital domain.
The Importance of Knowing How To Uninstall VST Plugins

The abundance of VST plugins available can sometimes lead to an overloaded system or a cluttered DAW session.
This can potentially slow down the performance of your computer and production workflow.
This means the occasional removal of unused or redundant audio plug ins from your system.
Properly uninstalling VST plugins ensures that they do not leave behind any residual file that could slow down your system or conflict with other beat-making software.
The process of uninstalling VST plugins varies slightly between Windows and Mac OS, but the principle remains the same:
- Locate the plugin files on your hard drive
- Remove them
- If necessary, perform additional cleanup to erase any leftover data
This not only keeps your digital workspace organized but also optimizes your system for a smoother workflow.
So, let’s break it down step-by-step you never have to wonder how to uninstall VST plug ins again.
Step 1: Locate Your Plugins
Before we break down the nitty-gritty of uninstallation, locating where your VST plugins are installed is the first order of business. I know it’s a pretty self-explanatory step, but, for the newbies, we’ve got you.
-
Finding VST Plugins on Windows (For Windows Users)
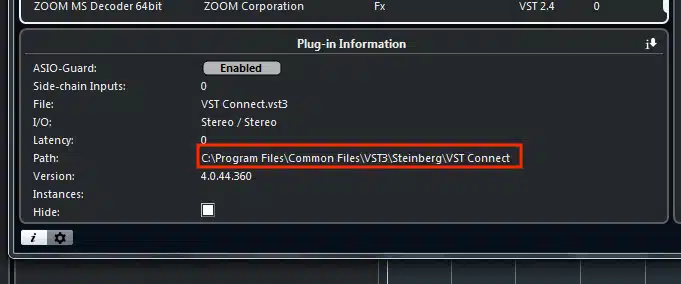
On Windows, VST plugins are commonly found within the “Program Files” directory.
Look for folders named:
- “VSTplugins” or “Steinberg/VstPlugins” 一 For VST2 formats.
- “Common Files/VST3″ 一 For VST3 formats.
These locations under Program Files are standard.
However, some applications may store plugins in custom folders, so checking your DAW’s preferences for VST paths is a good practice.
Remember, if you’re going to be deleting any plug in, you’ll need to be familiar with that Program Files tab.
-
Locating VST Plugins on Mac (For Mac Users)
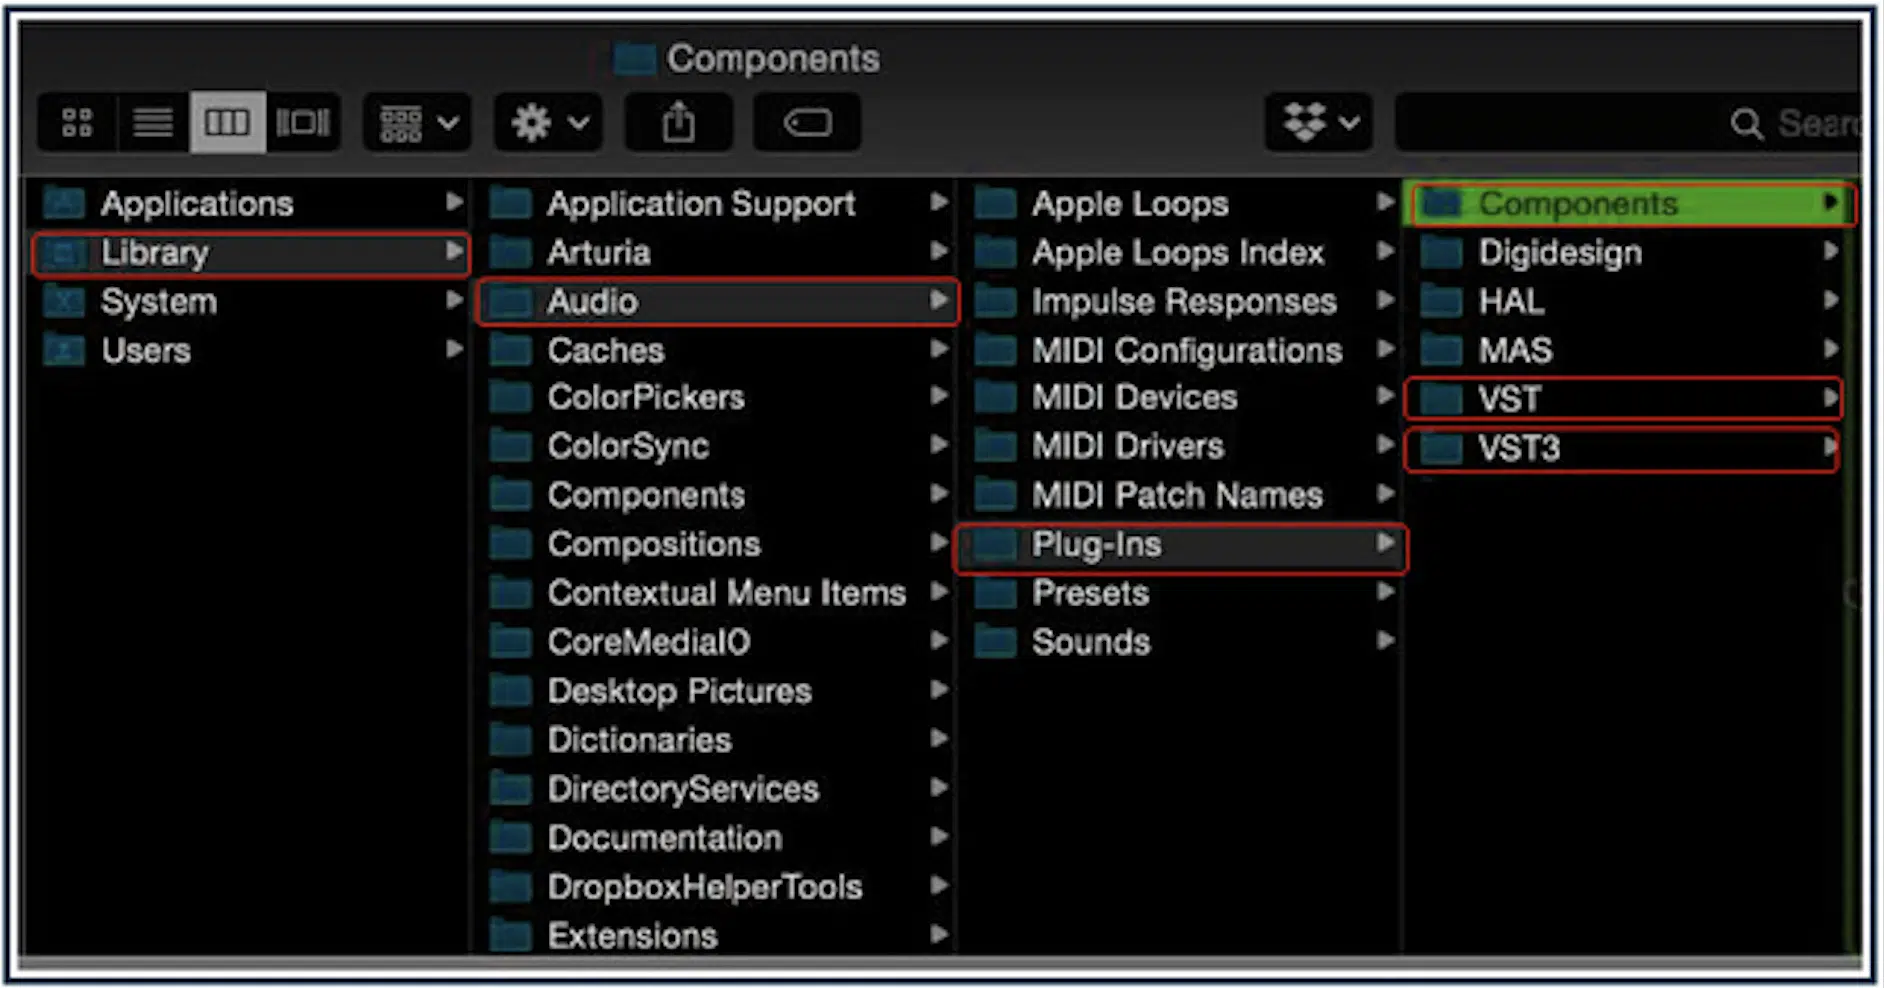
Mac users will find their VST and AU plugins in the “Library/Audio/Plug-Ins” directory.
This is divided into:
- “VST”
- “VST3”
- “Components” (for AU plugins)
Like Windows, these are the default paths, but some DAWs might utilize different locations 一 which can be adjusted in the software’s settings.
Step 2: The Uninstallation Process
With the plug in locations in mind, we can now move on to the actual uninstallation process so you can remove them from your system completely.
-
Using the Control Panel for Windows
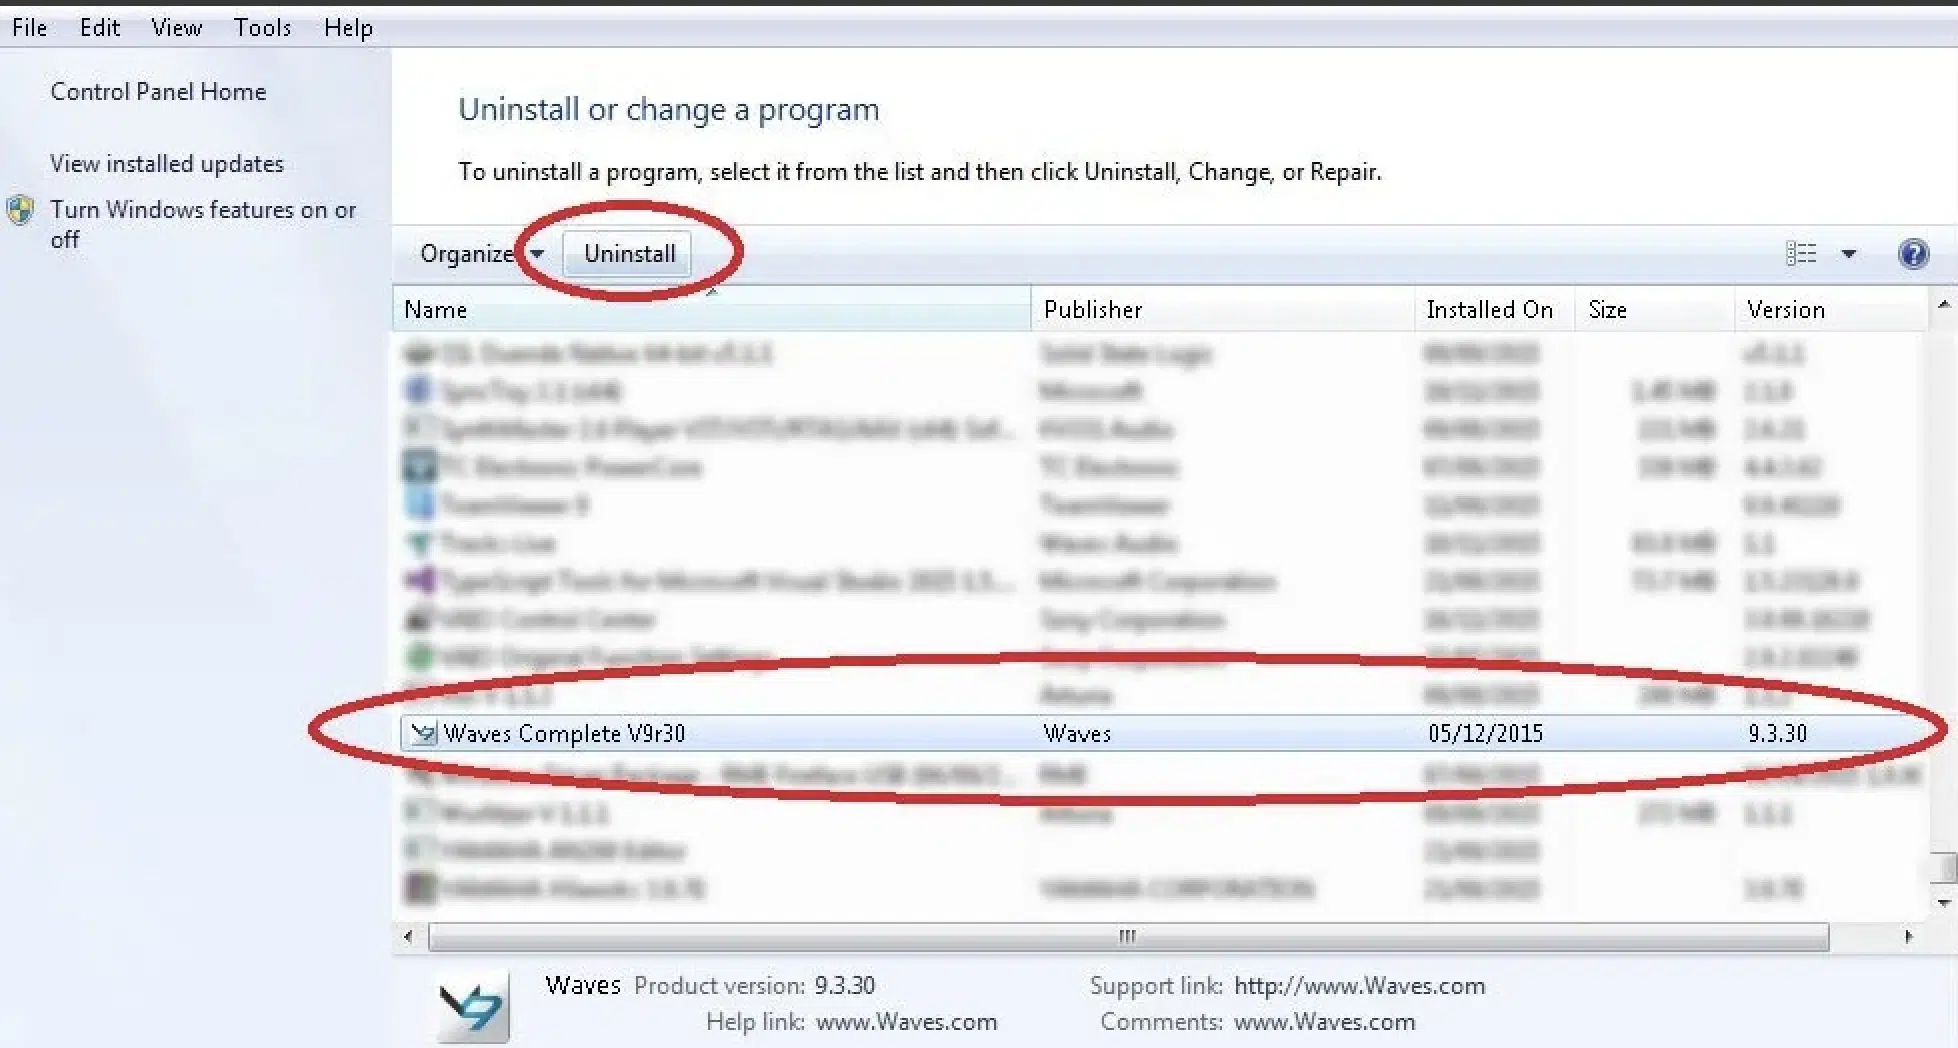
Uninstalling an old plugin
The Control Panel on Windows is a straightforward tool for uninstalling software, including VST plugins.
To completely uninstall VST plugins on Windows, the Control Panel is your go-to tool.
#1. Open the Control Panel and select “Programs and Features,” where you’ll find a list of all installed software on your system.
#2. Scrolling through, locate the VST plugins or related audio software you wish to remove.
#3. Selecting the program and clicking “Uninstall.”
Then, Windows initiates the removal process 一 deleting the program files, associated DLL files, and registry entries.
NOTE: This method removes the program files and associated data, it’s smart to manually check the installation folders afterward for any leftovers.
You can check by checking out the “Program Files,” “VSTPlugins,” and “Common Files” directories for any remnants to ensure a thorough cleanup.
As a music producer, sound designer, or audio engineer, having a clean, organized workspace is key; remember that.
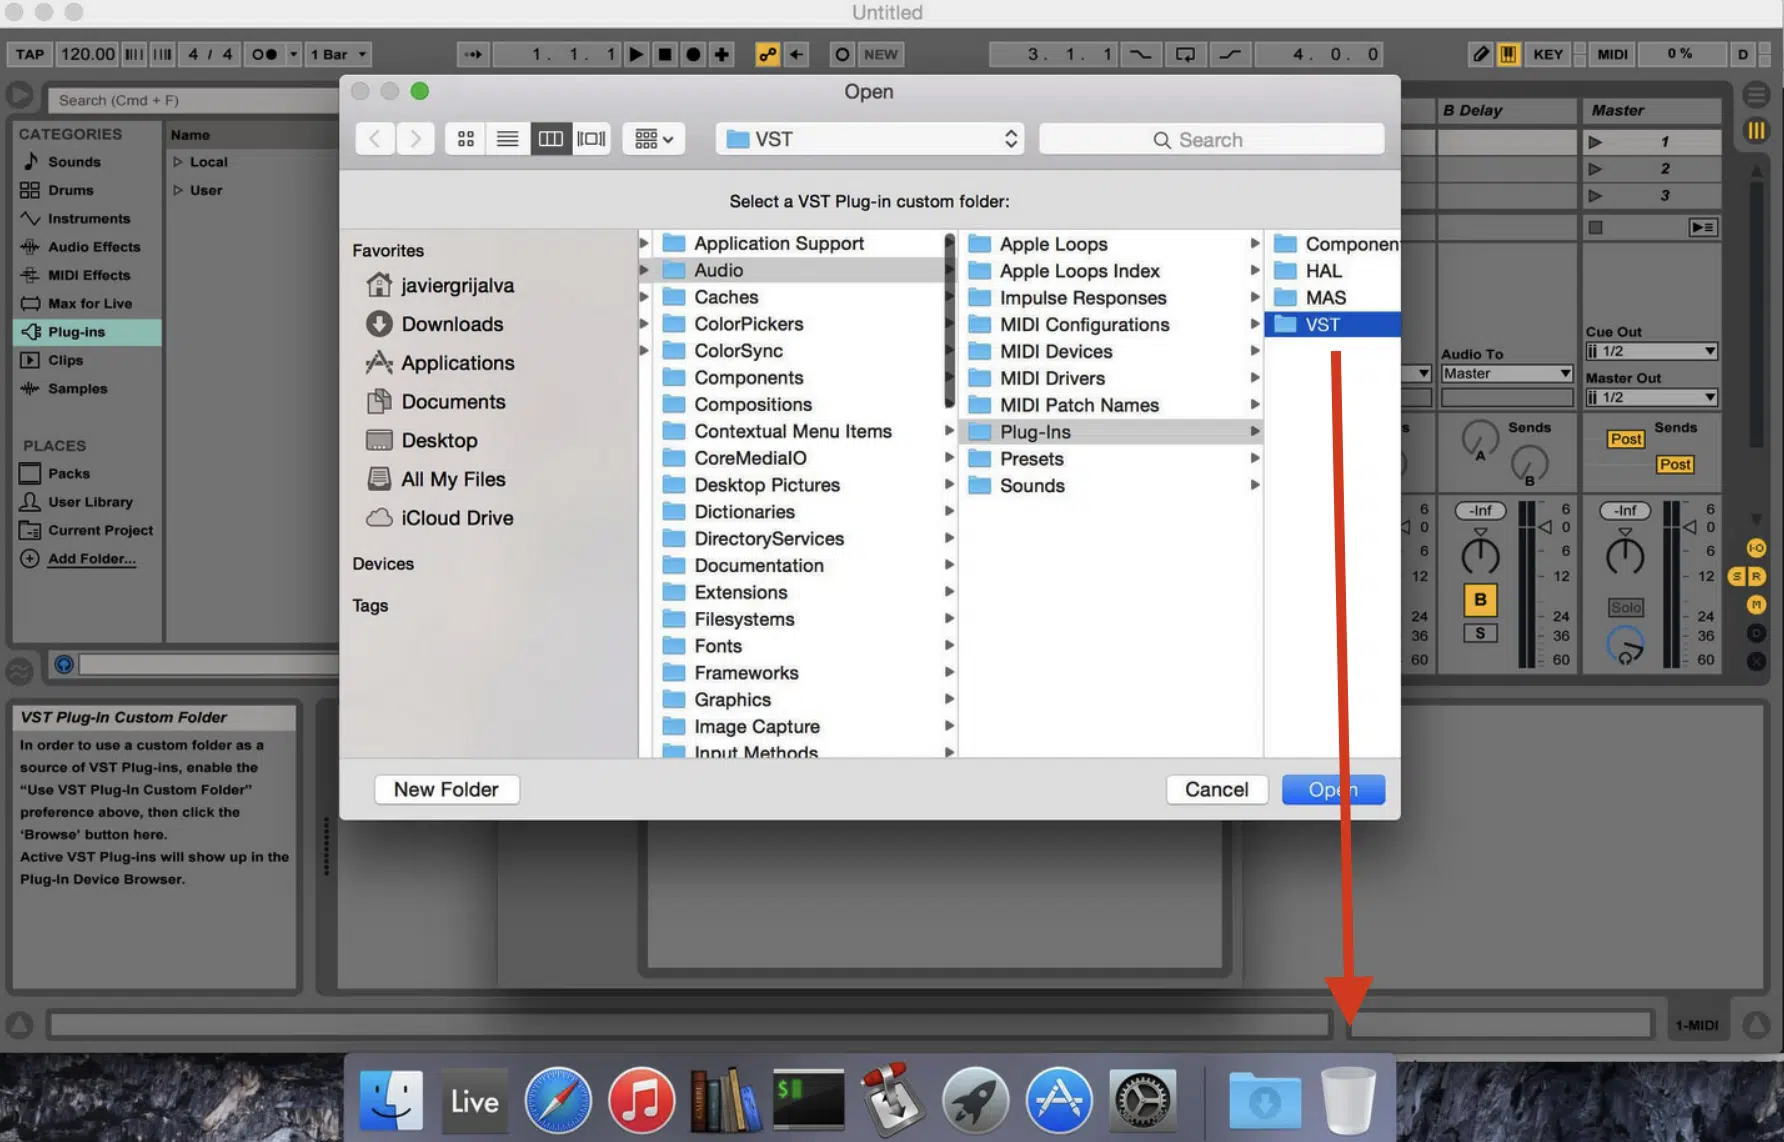
On Mac, uninstalling VST plugins requires a manual approach 一 not involving a centralized utility like the Control Panel.
#1. Open Finder and navigate to the “Library/Audio/Plug-Ins” folder, where VST and AU plugins reside.
#2. Within this directory, VST plugins are stored in the “VST” and “VST3” folders, while AU plugins are found under “Components,” as we just covered.
#3. From here, you can drag the unwanted plug in files to the Trash.
It’s important to empty the Trash to finalize the uninstallation 一 you always want to check that your audio plugins, like effects, instruments, synths, etc., and their data are completely removed from your system.
To fully complete the process, emptying the Trash is necessary to free up the space and ensure the plug ins are permanently removed.
Step 3: Cleaning Up Remaining Files
Uninstallation might leave behind some residual files that need clearing out. So, let’s dive into how to permanently delete DLL files, common files, and other extra audio files. Side note, if you’d like to learn all about audio file formats, we’ve got you covered.
-
Deleting DLL Files and Common Files on Windows
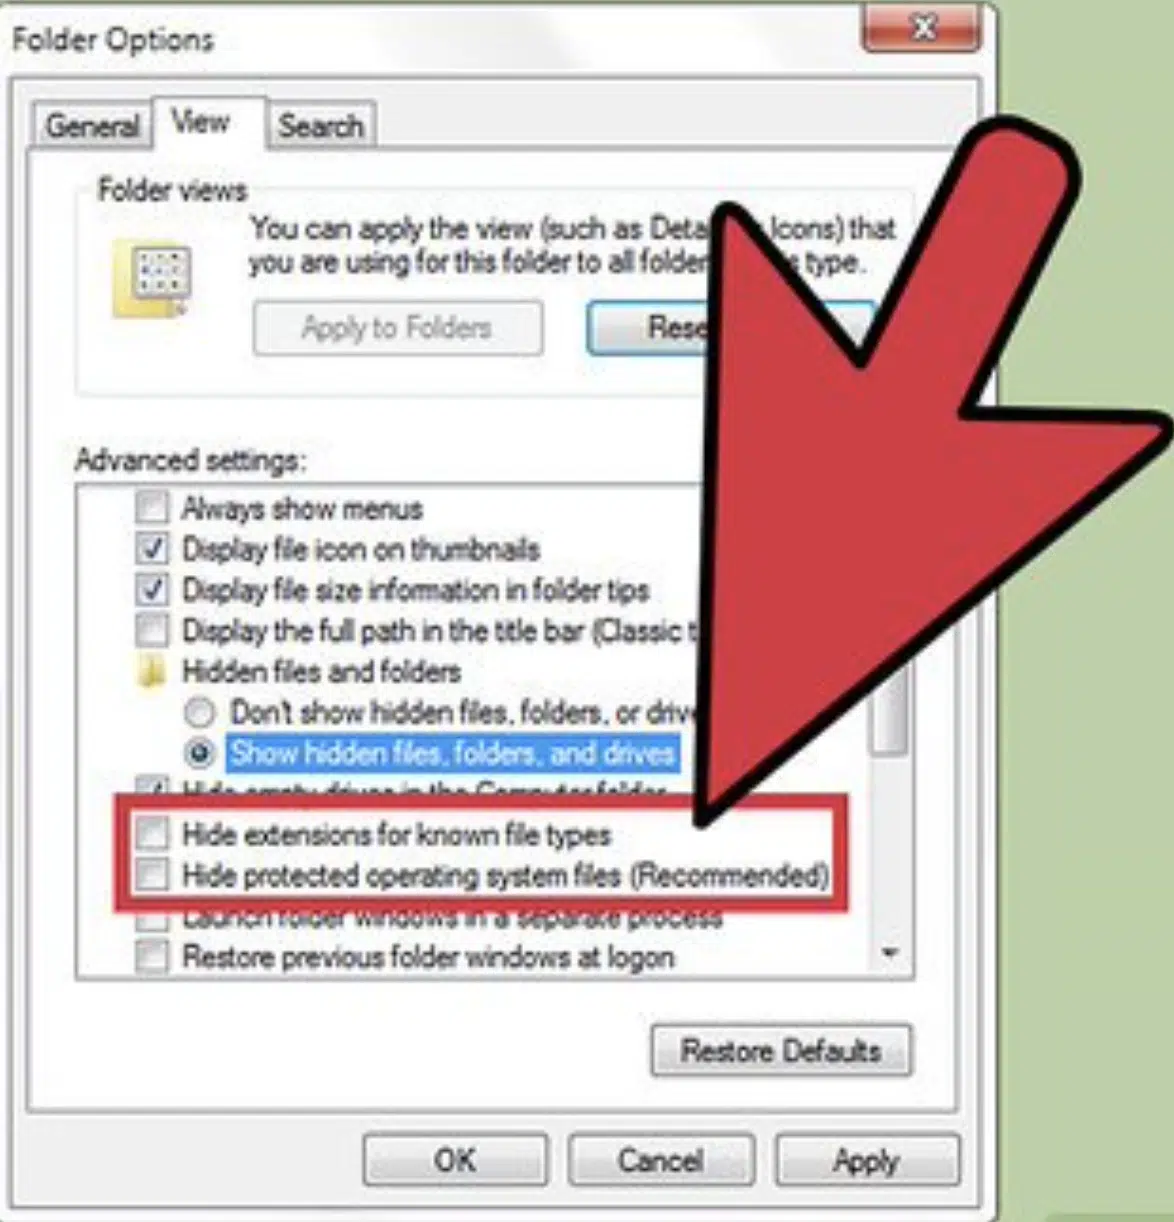
After using the Control Panel to uninstall VST plugins on Windows, it’s super important to perform additional cleanup in the Program Files and Common Files directories.
These folders might still contain DLL files, presets, and configuration data related to the uninstalled plugins.
Manually deleting each file from the “VSTPlugins” folder and any subdirectories under “Common Files” ensures no leftover files can:
- Cause conflicts.
- Take up unnecessary space on your laptop/computer.
This step is crucial to prevent conflicts or unnecessary clutter on your hard drive.
There’s nothing worse than having an unorganized, unoptimized setup; it just wastes time and leads to frustration.
It’s similar to producing a beat and, right in the middle, you lose it because you didn’t constantly save your work.
-
Removing Extra Files from Mac’s Library Audio
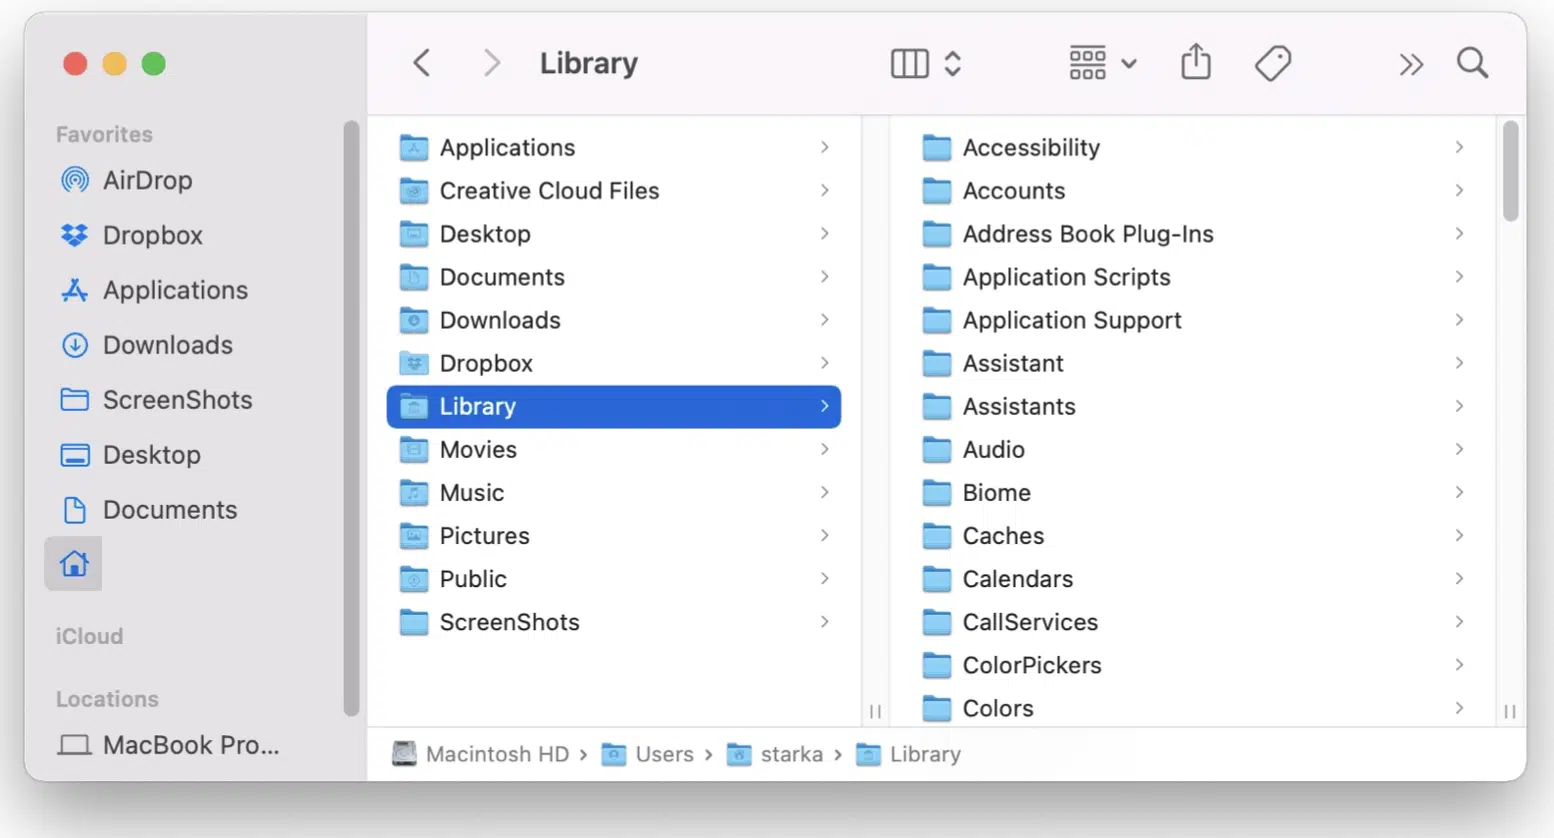
Similar to Windows, Mac systems may also have leftover files after the main plugin files are deleted.
Check the “Library” folder under both the system and user directories for any remaining audio plugin-related file or documents, such as presets or settings, in the “Preferences” or “Application Support” folders.
Removing these files completes the cleanup process on Mac 一 freeing up space and ensuring your system runs smoothly.
Step 4: Verify the Uninstallation

A final check ensures that the uninstallation process was successful so, when you’re learning how to uninstall VST plugins, do not overlook this final step.
For Windows users, Revisit the “Program Files” and “Common Files” directories to make sure no traces of the uninstalled plug ins are left.
This verification step is vital to confirm the complete removal of your audio plugins.
If you find any remaining files or folders related to the plugin, simply delete them to finalize the cleanup (yes, they’ll really be gone after that).
For Mac users, a thorough search in the “Library/Audio/Plug-Ins” and associated directories is necessary to confirm that all components of the audio plugin have been removed.
Checking the system-wide “Library” folder as well as the user-specific “Library” ensures that no leftover files compromise your system’s performance.
For bother Windows users and Mac users, double-checking after uninstalling your plugins is always key 一 it’s a small step that has a big impact.
Pro Tip: Many plugins come with an installer that also includes an uninstall option. Running the installer can provide a straightforward way to remove your plug in.
This ensures that all components are correctly deleted before a new install is attempted.
How to Uninstall VST Plugins: Final Thoughts
Uninstalling VST plugins isn’t always the most enjoyable part of a music producer’s workflow, but it has to be done to ensure DAW remains efficient and clutter-free.
So, knowing how to uninstall VST plugins efficiently can help you maintain an optimized production environment, reducing system load and enhancing your creative process.
That way, you can focus more on what truly matters (producing show-stopping sounds) without being bogged down by unnecessary software.
On the flip side, if you’re searching for a free VST plugin you’ll NEVER delete, you’ve got to check out Zen Master.
Zen Master is a new, highly-renowned free plugin that instantly adds unique lo-fi vibes to your sounds.
It can transform any sample or track into something warm, vintage, and irresistible in less than 3 seconds.
With its simple and easy-to-use interface featuring only 5 knobs, Zen Master delivers pristine sound quality while offering the perfect combination of analog/digital modeled effects for a truly hybrid experience.
It’s truly legendary and already crowned one of the best free VST plugins of 2024.
So, now that you know how to optimize your setup and get rid of all those plugins you no longer want, go make some chart-topping music with the VST you’ll never delete.
Until next time…


Leave a Reply
You must belogged in to post a comment.