Linear phase EQ is all about phase accuracy, super smooth adjustments, and clean frequency sculpting without messing up your stereo image.
And when it’s used right, it can help you seriously tighten up your mix and avoid the phase issues that regular EQs can sneak in.
It can also help you clean up overlapping elements, tame certain frequencies with precision, and avoid harsh artifacts.
All without shifting phase or introducing unwanted coloration, I might add.
Compared to regular EQ, the main difference is it’s much more surgical, transparent, and trustworthy when you’re dealing with parallel processing or stacked frequency content.
As producers, knowing all about linear phase EQ can help enhance your skills (and your tracks) all day.
And that’s exactly why I’m breaking down everything you need to know, like:
- Linear phase vs. minimum phase ✓
- Phase distortion, phase response & phase shift ✓
- Key use cases (parallel processing, mastering, etc.) ✓
- What pre-ring really is ✓
- Latency and CPU usage breakdown ✓
- Advanced linear phase EQ techniques ✓
- Mid/Side applications ✓
- How to adjust/tweak things properly ✓
- EQ curve control and Q values ✓
- Pro tips and workflow tricks ✓
- Advanced techniques to kick things up a notch ✓
- Much more about linear phase EQ ✓
By knowing all about linear phase EQ, you’ll always be able to EQ cleanly, keep phase relationships on point, and help make sure your stereo image is locked in.
This way, your tracks will really shine in the mastering stage 一 and you’ll never have to worry about smearing transients or messing up multiple recordings ever again.
And, side note, unlike other articles, I’m covering absolutely everything you need to know, not just basic stuff, so stay tuned.
Table of Contents
- What Is Linear Phase EQ?
- When to Use Linear Phase EQ & When To Avoid It Entirely
- Pre-Ringing, Latency & CPU Load: The Real Trade-Offs
- Common Misconceptions About Dynamic EQ and Multiband Compression: Debunked
- Technical Breakdown (For the Curious Producer)
- Mid/Side Techniques for Perfect Balance
- Advanced Linear Phase EQ Techniques
- Bonus: Quick Pro Tips & Workflow Tricks
- Final Thoughts
What Is Linear Phase EQ?
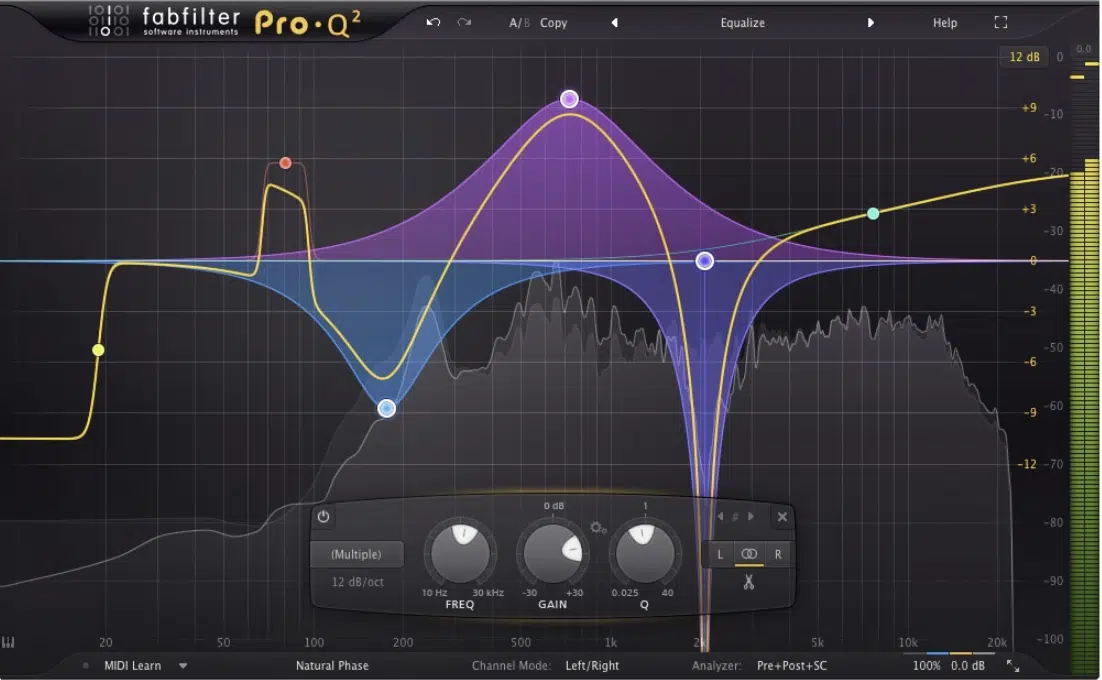
Linear phase EQ is a type of equalizer that maintains perfect phase alignment across all frequencies by using a special kind of filter called an FIR (Finite Impulse Response) filter.
Instead of letting different frequencies arrive at different times like minimum phase EQs do, a linear phase equalizer delays all frequencies equally.
Basically, it preserves the natural phase relationships between sounds.
This type of linear phase processing avoids phase shift entirely 一 this means your signal stays tight and your stereo image remains untouched.
No matter how aggressive your EQ curve looks.
So whether you’re cutting low-end rumble or boosting air on a vocal, you can shape your frequencies without affecting the original tone or introducing audible phase distortion.
When to Use Linear Phase EQ & When To Avoid It Entirely
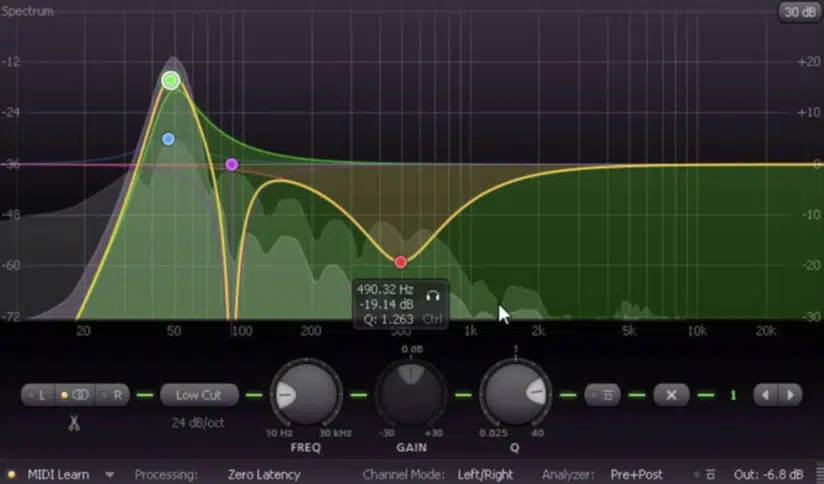
One of the best times to reach for linear phase EQ is when you’re dealing with multi-mic or stereo recordings.
This could be like overheads on a drum kit or a guitar amp captured with two microphones, that kind of thing.
Because these recordings rely heavily on natural phase relationships, using regular EQ can cause subtle phase shift and unwanted coloration problems.
Whereas a linear phase EQ keeps things aligned while letting you clean up low-end buildup or tame harsh highs.
It’s also a go-to in parallel processing chains (like a heavy drum crush buss) where EQing either the wet or dry signal with a minimum phase EQ would cause comb filtering due to phase distortion.
Mastering engineers also rely on linear phase equalizers during final EQ adjustments to avoid altering the stereo spread of the full mix.
Especially when applying gentle shelving boosts at 10kHz or subtractive cuts around 300Hz.
But there are definitely times to avoid using a linear phase EQ, like when tracking live vocals or playing MIDI instruments in real-time…
The higher latency introduced by linear phase processing can make it feel laggy, whack, and completely unnatural.
You’ll also want to steer clear of it when EQing transient-heavy sounds like snares or kicks, since the pre-ring can smear the transients.
And it can make things sound less punchy than they should.
NOTE: If you’re working with short samples or sharp attacks, it’s freakin’ perfect.
Pre-Ringing, Latency & CPU Load: The Real Trade-Offs

When you use linear phase EQ, there’s no doubt it can make your mixes cleaner. But, it comes with some unavoidable trade-offs that you need to be aware of, for sure. So before you throw it on every channel, it’s important to understand what pre-ring, latency, and CPU load actually mean in the context of linear phase processing, so you’re using it intentionally 一 not accidentally killing your workflow.
What Is Pre-Ringing and Why It Happens
Pre-ringing happens when a linear phase EQ introduces a short “ghost” version of the signal before the actual transient hits.
This sounds super unnatural, especially on sharp sounds like snares or hi-hats.
It occurs because FIR filters used in linear phase equalizers apply symmetrical delay around the center of the impulse response.
Therefore, it causes the ringing to start before the transient (unlike minimum phase EQs, which keep all delay after the sound).
You’ll notice this the most when applying a narrow high-Q boost around 7kHz on a transient-heavy clap.
This is because the pre-ring smears the attack and adds a weird artificial tail before the peak 一 especially with Q values above 5.0 and gain boosts over +3dB.
If you’re using FabFilter Pro-Q 4 in linear phase mode, you can actually control this by setting the slope of the EQ band to 12dB/octave and widening the Q slightly (around 2.5–3.5).
This reduces the amplitude of the pre-ring, even though it doesn’t remove it entirely.
If you have to use linear phase EQ on drums, try only applying it in multiband form (i.e. low-mids only) and bounce to audio after.
This way, you’ll successfully keep your transients intact and avoid smearing your attacks like a true boss.
Latency in Linear Phase Equalizer Plugins
Latency in a linear phase EQ is introduced because whatever plugin you’re using has to delay your entire signal to line up all frequencies equally.
And that delay gets longer depending on how precise the filter is.
For example, in T-RackS 6 Linear Phase EQ, switching to the “High Precision” mode adds up to 4096 samples of latency.
This equals about 92.9 ms at 44.1kHz sample rate, which makes real-time monitoring pretty much unusable.
Even Pro-Q 4 at its “Maximum” linear phase setting introduces around 5,000 samples (or over 110 ms) of delay, which is fine for mastering…
But it will no doubt kill any live input or MIDI session in real-time.
Just keep in mind that you should only activate linear phase mode once you’re in the late mixing or mastering stage.
And if you’re bouncing stems, make sure to always freeze the track afterward to lock in the EQ without keeping the delay active.
CPU Usage & Buffer Settings (Minimum Phase Issues)
Because of the long impulse responses required for linear phase processing, these plugins can burn through your CPU resources fast.
Especially on older machines or large sessions with multiple tracks using them at once.
For example, TDR Nova GE’s linear phase mode uses roughly twice the CPU compared to its minimum phase mode at the same resolution.
And when stacked across 5+ tracks, that can introduce audible dropouts unless you raise your buffer size above 512 samples.
To keep things smooth, set your DAW to a 1024-sample buffer size during mix or mastering, and avoid using linear phase EQs on every buss.
Instead, commit to one or two key busses that need it most (like the mix buss or vocal stem).
PRO TIP: On lower-spec machines, use low CPU usage plugins like DDMF’s LP10.
It’s a solid linear phase equalizer that doesn’t hog your processor, and works great for simple EQ adjustments on vocals or final stereo shaping, so keep that in mind.
Common Misconceptions About Dynamic EQ and Multiband Compression: Debunked
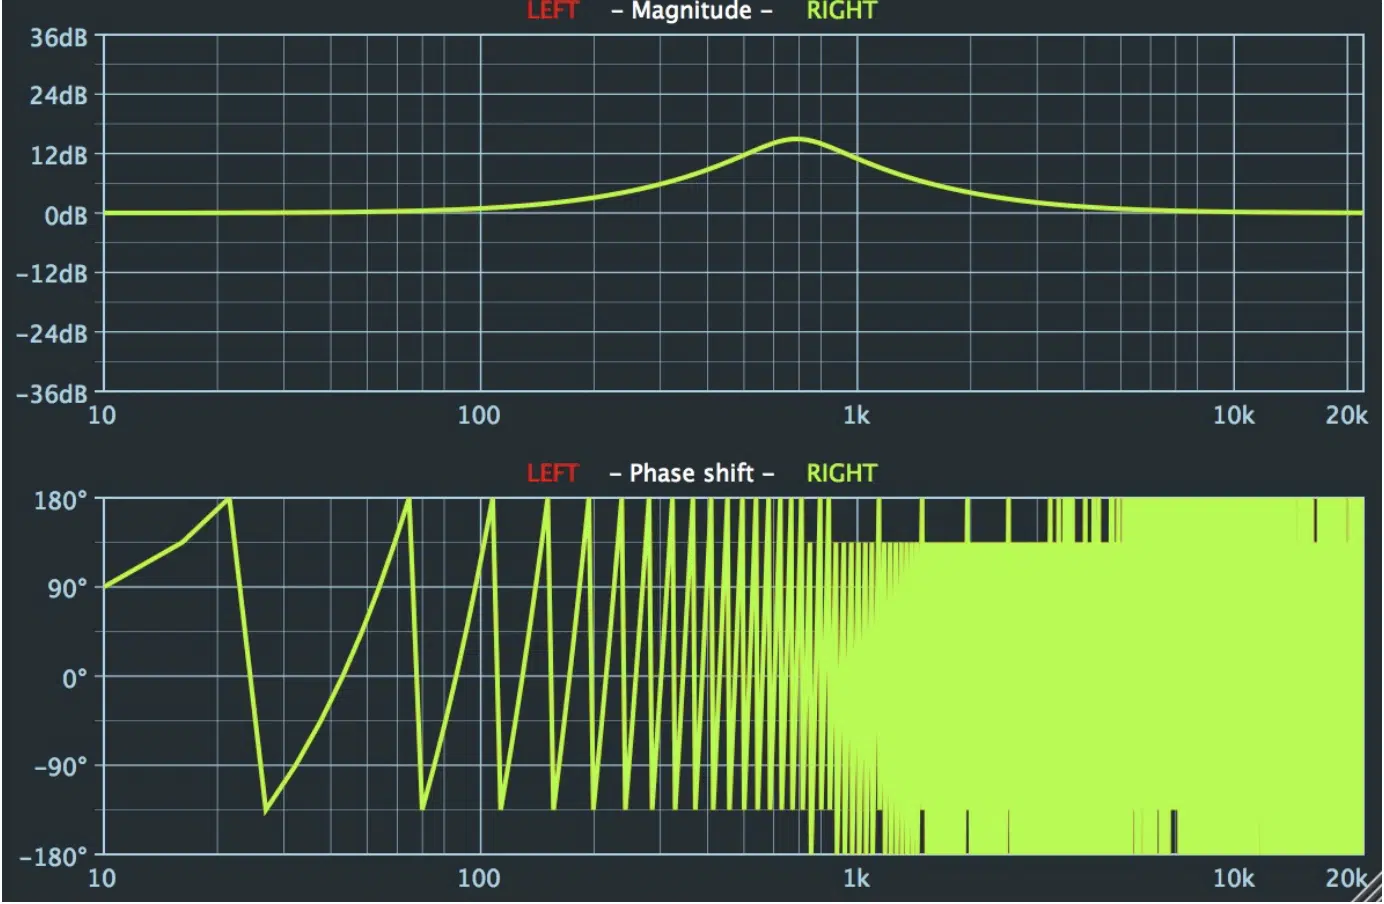
There’s a lot of hype (and confusion) around when, where, and why to use linear phase EQ. So before we go any further, let’s shut down the biggest myths that tend to cloud this tool’s real purpose in your mix and mastering workflow. Let’s dive right in.
“Linear Phase is Always Cleaner”
While linear phase EQ can technically preserve phase relationships, it doesn’t automatically make the sound cleaner.
And if you’re boosting narrow bands on transient-heavy material, that’s where the trouble really comes into play.
For example, if you boost 4dB at 5.2kHz with a Q of 6.0 using the linear phase mode in Pro-Q 4, the result might sound sharper on vocals…
But that pre-ring can create a smear just before consonant peaks like “T” and “S” sounds, which makes it feel much less natural, and you definitely don’t want that.
On top of that, if you’re applying multiple EQ bands in close proximity (like three high-shelf boosts above 8kHz on a full mix) the cumulative phase response might remain linear 一 but the overall tone can start to feel brittle or overly sterile.
My greatest advice would be to use linear phase EQ when you want transparency in your EQ curve, not when you want warmth or punch.
For that, a good analog-style minimum phase EQ is usually the better call.
“It Fixes All Phase Issues”
A lot of producers I’ve taught assume linear phase EQ solves any and all phase issues.
But, that’s only true if the issue stems from EQ-induced phase distortion… not from other factors like mic placement, polarity, or stereo alignment.
If you have two snare mics (one top and one bottom) that are 1.2ms out of alignment due to mic distance, throwing on a linear phase equalizer won’t magically fix that delay.
You’ll still need to manually nudge or time-align the tracks in your DAW.
Even on a stereo piano recording, if the left mic was 6 inches farther from the sound source than the right mic, you’re looking at roughly 0.58ms of natural delay.
And linear phase EQ won’t compensate for that unless you’re EQing identical content on both channels.
Plus, phase shift from analog gear, stereo widening plugins, or chorus effects needs to be handled with not just EQ alone, but also tools like:
- Phase rotation
- Mid/side utilities
- Manual correction
A linear-phase EQ band might preserve phase coherence within its own process, but it won’t clean up phase problems created earlier in your chain.
And if you’re dealing with phase issues between multiple tracks, I highly recommend that you solve the alignment first and foremost.
Then you can use linear phase EQ to make subtle EQ adjustments without introducing new problems (it works much more efficiently that way, no doubt).
“More Linear = More Professional”
Just because something uses linear phase processing doesn’t mean it’s automatically more professional because it really all comes down to when and how you’re using it.
A pro mix engineer like myself might only use linear phase EQ on the stereo master and maybe a vocal buss 一 applying a high-shelf cut at 10kHz with a Q of 0.7.
As well as a subtle 1.5dB dip just to reduce harshness (and nothing more).
On the other hand, loading linear EQs across 16 individual drum tracks with zero purpose/intention can introduce higher latency and eat up CPU resources.
Plus, completely destroy your real-time workflow without any noticeable sonic improvement, and nobody has time for that, am I right?
PRO TIP: Focus on intentional signal flow, not defaulting to “linear = better.”
And make sure to always A/B your EQ curve in both linear and minimum phase modes to actually hear the difference.
Technical Breakdown (For the Curious Producer)
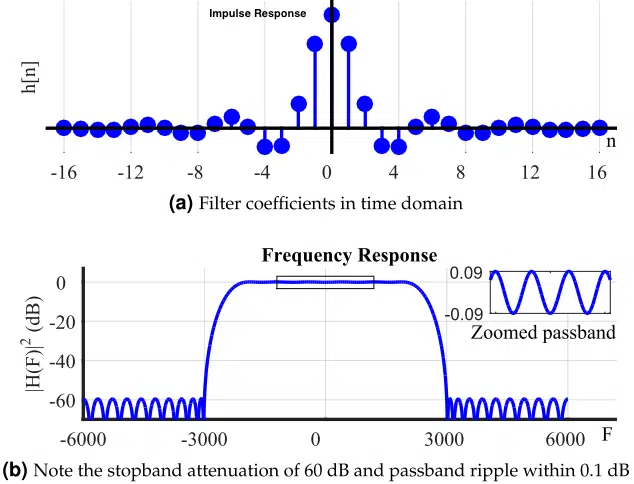
If you’re like me, you’re always wanting to know the technical stuff, so let’s just cover that real quick (if you’re not interested, simply go to the next section, no hard feelings).
At the core of every linear phase EQ is an FIR filter, which is short for Finite Impulse Response like we talked about earlier.
This works by analyzing a fixed-length window of the signal and processing it symmetrically to avoid any phase shift.
Meaning, all frequencies arrive at the output perfectly aligned in time.
Instead of letting the low end lag behind or the high end get ahead (which is what happens with minimum phase filters), FIR keeps everything dead center by delaying all frequencies equally.
This symmetry is what gives linear phase equalizers their precise linear phase response.
And it’s really why they’re so key when it comes to preserving the natural interaction between multiple tracks or stereo pairs.
But, it also introduces that infamous pre-ring, especially when using steep EQ bands with low Q values around 1.0–1.5; the sharper the slope, the more noticeable the effect.
For example, if you’re doing a steep bell cut at 400 Hz with a Q of 1.2 and a gain of -6dB in linear phase mode, you might hear a weird, soft “blur” right before the transient hits.
That’s the ring showing it’s face before the actual signal even arrives.
Many high-end EQs like T-RackS 6 Linear Phase EQ and FabFilter Pro-Q 4 include different quality modes (from “Low” to “Maximum”) with higher modes increasing FIR resolution.
These modes control how long the impulse response is.
Just keep in mind that a longer impulse gives you cleaner, more accurate filtering but introduces more delay and eats more CPU resources.
This reduces ripple artifacts in the frequency band, and increases latency as a trade-off.
So, if you’re working on the master buss, you can use “Maximum,” but if you’re mid-mix, “Medium” is probably your sweet spot.
Oversampling is another major factor, so definitely don’t forget about that either because it’s often hidden in the settings, but it makes a difference fast.
And when activated at 4x or 8x, you get cleaner top-end performance on aggressive boosts (like +6dB @ 16kHz) but at the cost of CPU resources and minimal latency increases across your project 一 dealer’s choice.
You’ll definitely hear the difference on:
- Hi-hats
- Cymbals
- Breathy vocals
The sound becomes silkier and less grainy, but you’ll feel it on your processor if your buffer size is sitting low.
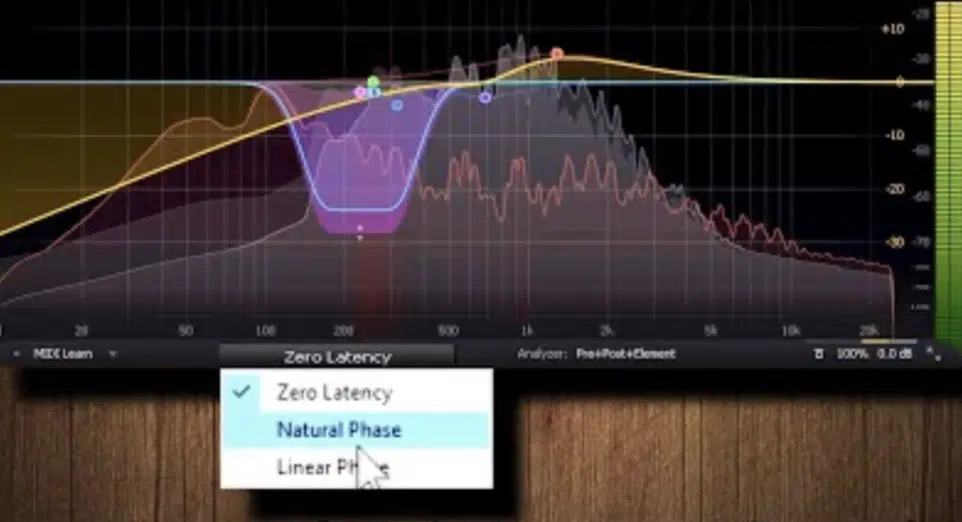
Also, I suggest you try FabFilter’s “Natural Phase” mode as a middle ground.
It introduces only mild phase shift, keeps most of the EQ curve clean, and avoids pre-ring on transient-heavy material like snares or claps.
It’s basically the “best of both worlds” option.
NOTE: If you’re ever A/B’ing it with the full linear phase mode, make sure to match levels because natural phase can sometimes feel a little brighter in the top end due to the way it handles subtle phase response differences.
Mid/Side Techniques for Perfect Balance
When it comes to stereo clarity and controlled phase response, linear phase EQ can be a real game-changer, for real. This is even more true when applied in mid/side mode. So let’s break down how it can help you lock in the center, widen the sides, and make your full mix sound polished and phase-tight without affecting your spatial signal structure.
Bass Tightness in the Mid
When you’re working with a dense mix that has a layered low-end, like an 808 overlapping with a kick and a sub-bass pad, using linear phase EQ on the mid channel only can help you isolate and clean up the center without even touching the stereo field.
For example, using FabFilter Pro-Q 4 in Mid mode, you can apply a:
- Tight low-shelf cut at 40Hz
- Q of 1.0
- Gain reduction of -2.5dB just in the mid channel
This lets your central bass content tighten up without messing with the width of reverb tails or stereo synths, which is awesome.
This technique avoids phase shift that would normally spread into the sides when using a regular EQ.
This is especially true when it comes to overlapping frequency bands like 30Hz–70Hz that sit across multiple elements.
My tip to you would be, on final masters, try using TDR Nova GE in dynamic linear phase mode with a threshold of -24dB and a soft ratio of 1.5:1 on the mid lows.
This way, you’ll get dynamic control of the signal only when the low-end stacks too hard, keeping your bass super tight without killing vibe.
Air and Width on the Sides
When adding sparkle or “air” to your mix, you’ll usually want to target the side channel 一 not the mid.
Luckily, linear phase EQ helps you do that without introducing any stereo imbalance or unwanted comb filtering.
For example, using the side mode in Pro-Q 4, a gentle high-shelf boost starting at 12kHz with a Q of 0.5 and +1.8dB gain can widen your sound without touching centered elements like lead vocals or kick drums.
If you tried the same thing with a minimum phase EQ, the phase distortion could cause unpredictable interactions with other stereo elements like delay tails.
PRO TIP: Always double-check your side boost in mono using a utility plugin…
If the signal collapses or loses presence, dial back the gain or try a broader shelf with low Q values (around 0.3–0.6) to reduce the impact of pre-ring artifacts.
Prevent Imaging Collapse During EQing
When you apply aggressive EQ moves in stereo (especially notched cuts or tight boosts), the natural phase shift from minimum phase EQs can actually skew your stereo image.
This makes it feel like one sound is leaning left or right.
And, it actually gets worse if you’re cutting something like -6dB at 2.4kHz with a Q of 8.0 across both channels because the side information may cancel unevenly.
When it overlaps with two tracks occupying similar frequencies, that’s even worse.
With a linear phase EQ, the EQ adjustment stays phase-neutral, maintaining perfect phase coherence and keeping your imaging stable.
Even if you’re applying identical cuts on stereo piano, vocal doubles, or wide synth layers.
PRO TIP: Before printing a master, solo your side channel and sweep a bell cut across 1–3kHz in linear phase mode.
This will help you reveal if any buildup is creeping in and lets you adjust with surgical precision without killing the stereo width.
Advanced Linear Phase EQ Techniques
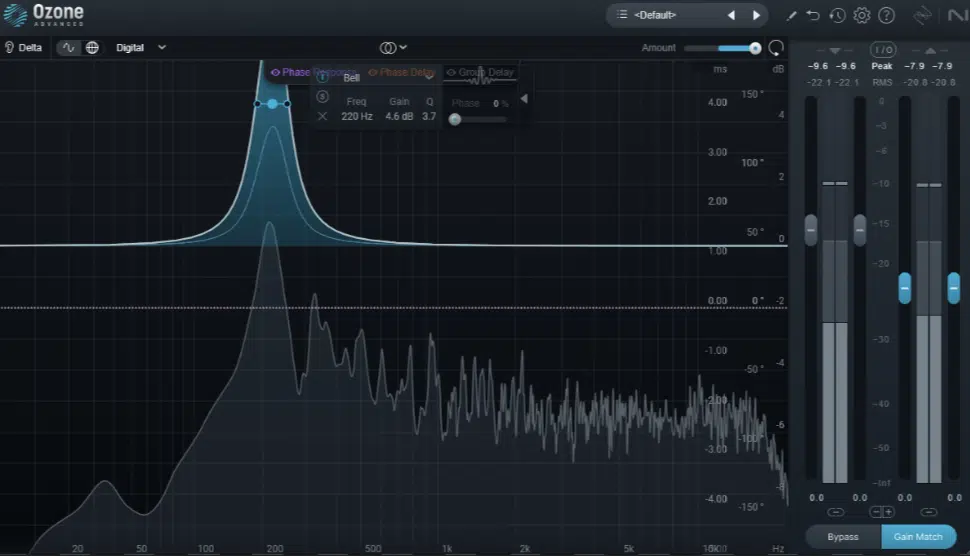
Now that we’ve locked down the core uses, it’s time to get into some more advanced stuff. The real surgical tricks that most producers don’t even realize they can do with linear phase EQ. These aren’t just nice-to-have workflows. They’re how you gain maximum control while maintaining clean phase alignment 一 no matter how dense or layered your signal chain gets.
Linear EQ on Mid Channel Only
Using a linear phase EQ exclusively on the mid channel lets you surgically process mono elements like:
- Basslines
- Vocals
- Centered claps
All without messing with the stereo width of your mix.
Let’s say your vocal is feeling a bit nasally…
You can simply cut around 750 Hz with a Q of 3.0 and a -2.8dB dip in the mid using Pro-Q 4 in linear phase mode.
This way, you’ll preserve all the stereo reverb and harmony layers around it untouched, which is super helpful when mastering stems.
For example, if the bass is too muddy but the stereo synth pad sounds perfect, you can apply a linear low-shelf cut in mid-only mode at 60Hz with -2dB and avoid affecting the richness of the stereo field.
NOTE: This technique works insanely well in multiband setups.
Use DMG Equilibrium or T-RackS 6 Linear Phase EQ with a 48dB/oct crossover to isolate the mid-lows and clean them surgically without altering phase on any other band.
Multi-Band Linear Phase with Automation
Using multi-band linear phase EQ with automation gives you extreme control over different frequency ranges across time.
It lets you react to changes in energy, layering, or transitions without shifting phase or breaking that fluidness across your mix.
For example, in Pro-Q 4, set a linear phase EQ band from 200Hz to 600 Hz with a Q of 2.2 and automate a -3dB gain cut during verses to clean up muddy male vocals.
Then, automate it back to neutral during choruses to let the full mix breathe.
This type of automation keeps your vocal from clashing with stacked mid-range instruments like electric pianos or low strings.
Especially when those frequencies start piling up in dense sections.
It’s also crazy effective on background vocals, so definitely give that a try as well…
To do so, automate a high-shelf boost around 10.5kHz (Q: 0.8) using linear phase processing to gradually open up the top end during pre-choruses.
This will get it done without messing up the main vocal’s stereo reverb.
Even subtle dynamic changes across frequency bands can feel more natural when done this way.
And the consistent linear phase response keeps your phase relationships locked in, even across multiple automation passes.
PRO TIP: When automating in multiband setups, always double-check for ring artifacts when working with steep filters (24dB/octave or sharper) and consider backing the slope down to 12dB/octave in transition zones to reduce audible pre-ring buildup.
Linear Tilt Filtering in Master Chains
Tilt filtering is one of the most overlooked techniques in mastering, and it has to be one of my personal favorites.
When done using linear phase EQ, it can rebalance your tone across the spectrum without causing phase distortion or stereo shifts.
Let’s say your full mix feels a little dark, you can use T-RackS 6 Linear Phase EQ to apply a gentle tilt starting around 800Hz with a slope of +1.2dB/octave toward the high end.
Just make sure to keep it linear to maintain transparency and preserve phase coherence across multiple recordings.
This gives you a super smooth, natural-feeling boost in the highs and a subtle dip in the low-end, all in one move.
And because it’s linear, the phase shift is nonexistent 一 making it perfect for mastering engineers working on tight stereo balances.
It’s also great in reverse, meaning if a mix is too sharp or brittle, you can apply a negative tilt of -1.5dB/octave starting at 1.2kHz.
Then, pull back the highs just enough to tame harshness without touching transient positioning or stereo imaging.
You can also automate tilt filtering in breakdowns (for example, a +2dB/octave tilt over 16 bars can slowly introduce air, which makes the final drop feel bigger by contrast).
Just make sure to not overdo it because anything above ±2.5dB/octave starts to sound artificial fast.
Use your ears and always hear your tilts in context of the whole chain, especially if analog saturation follows your EQ.
Bonus: Quick Pro Tips & Workflow Tricks
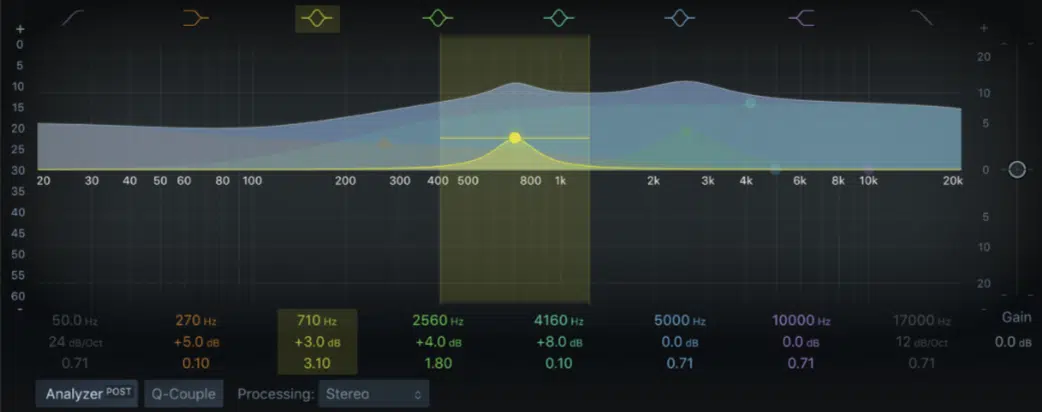
If you’re working with dynamic EQ and want total control without tonal smearing, always pair it with linear phase EQfor the static bands…
Cut 250Hz dynamically with TDR Nova and then add a clean linear shelf at 12kHz to add shine without affecting the signal’s movement.
Just remember to never apply linear phase EQ globally.
Instead, reserve it for use on parallel processing busses, your master chain, or elements that rely on clean phase relationships, like doubled vocals or stereo percussion layers.
Another sick technique is using a linear phase equalizer only on intro sections where stereo clarity is most obvious.
Then, bypass it once the mix gets busier to reduce latency and avoid wasting CPU resources unnecessarily.
And if you want yet another underrated move, it’s automating the mode itself…
In Pro-Q 4, you can automate between “Natural Phase,” “Minimum Phase,” and “Linear Phase mode” to shift tonal weight during transitions without touching your gain or frequency values.
Also, if you’re doing EQ adjustments in the 60–80 Hz range on stacked kicks and 808s, apply a narrow linear cut (-2.4dB, Q: 3.5) to just the mid channel.
That keeps the low-end mono and tight while keeping stereo wideners or reverbs completely untouched as they should be.
NOTE: If you’re low on power, go with low-overhead options like Crave EQ or LP10, which are optimized for low CPU usage and let you load multiple instances without dropouts (super helpful on two tracks or more).
Just don’t forget to match loudness when A/B testing.
Boosting certain frequencies even slightly can trick your ears, especially in the 3kHz–6kHz range where the ear is most sensitive.
Keep your reference track nearby and always use your headphones for subtle detail!
Final Thoughts
And there you have it: absolutely everything you need to know about linear phase EQ and everything it’s truly capable of.
By using these techniques, you’ll seriously elevate your mixes, clean up your phase relationships, and make your tonal adjustments hit harder.
All without compromising stereo width, which is a huge plus.
And you’ll be able to eliminate smearing, control pre-ring, and sculpt your frequencies with surgical precision in no time.
Just remember that it’s all about using linear phase EQ where it makes sense, and understanding the trade-offs like latency, CPU usage, and phase behavior.
Otherwise, you’ll end up working against your own mix, creating artifacts you can’t even hear until it’s too late, and nobody wants that.
And, as a special bonus, since we talked about drums so much, I thought I’d give you access to the absolute sickest Free Drum Loops in the entire industry.
It includes 12 pro-quality drum loops designed by industry-standard sound designers 一 each one is tempo-labeled, royalty-free, and ready to drop straight into your DAW.
They cover a range of styles, from 90–174 BPM, giving you maximum flexibility whether you’re working on boom bap, trap, EDM, cinematic, or experimental beats.
These loops are a perfect match for working with linear phase EQ, especially when you’re layering multiple drum busses or tightening up stereo top loops.
It lets you preserve phase integrity across your whole rhythm section.
Bottom line, when it comes to linear phase EQ, just don’t forget to use it where it matters most, and always keep an ear on how it’s affecting your transients, stereo field, and tonal balance.
This way, you can preserve your imaging, control frequency buildup, and make EQ moves that feel intentional, clean, and unforgettable.
Your tracks will always sound wide, balanced, and phase-aligned, and you’ll know how to sculpt your mix like a true boss.
And never forget to think outside of the box, because that’s where the magic happens.
Until next time…


Leave a Reply
You must belogged in to post a comment.