As producers, using reference tracks is an absolute must.
It can help you instantly spot issues with your tonal balance and get your stereo width tweaked properly.
Plus, lock in the kind of sound quality that separates solid tracks from release-ready records.
I mean, successfully using reference track matching can help you match your favorite mastered track, get that balanced mix, and bring your tracks up to industry standards.
And who doesn’t want that?
Well, that’s exactly why I’m breaking down everything you need to know about reference track matching, like:
- Tonal balance vs frequency balance ✓
- Level matching without like a boss ✓
- EQ match tools & tricks ✓
- Stereo imaging & stereo width ✓
- Loudness differences & LUFS matching ✓
- Pink noise calibration ✓
- Best automatic matching EQ tools ✓
- How to use reference tracks effectively ✓
- Mixing decisions backed by real data ✓
- Advanced tips, tricks, and techniques ✓
- Much more to help you with successful reference track matching ✓
By being able to use reference tracks the right way, you’ll never have to worry about inconsistent results or muddy, sloppy, unbalanced mixes anymore.
This way, your mixes and masters will always be on point (as they should be).
Plus, you’ll be able to make confident decisions, finish faster, and lock in release-ready sound all day.
Table of Contents
- Why Reference Tracks Matter in Modern Production
- How to Properly Level Match Without Bias
- What to Listen for When Matching a Reference
- Reference Matching in the Mixing Stage
- Reference Matching During Mastering
- Advanced Techniques for Ultra-Precise Reference Track Matching
- Bonus: 5 Quick Tips You Need to Know When Reference Track Matching
- Final Thoughts
Why Reference Tracks Matter in Modern Production
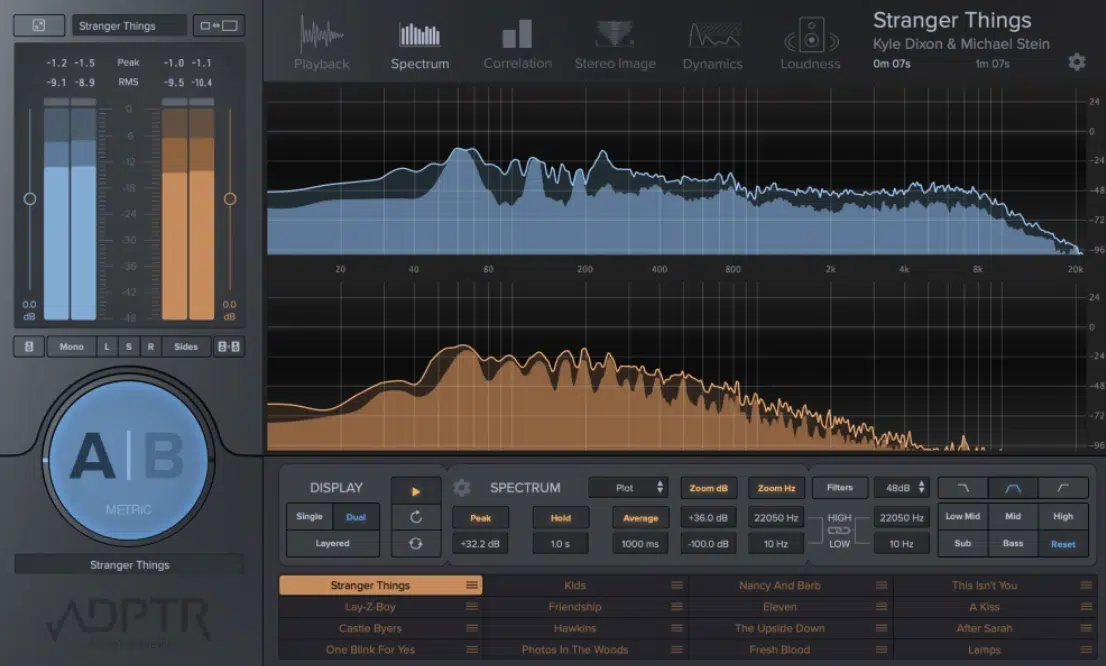
Reference track matching is the closest thing we’ve got to a cheat code in modern music production.
When you bring in a professionally mastered track to compare against our own, you’ll instantly see any issues in:
- Tonal balance
- Dynamic range
- Frequency distribution
- Etc.
Anything at all that might’ve flown under the radar, so you can get it fixed and keep it moving.
For example, let’s say your bass is hitting at -7 dB but your highs are tucked below -20 dB…
You wouldn’t notice how dull that sounds until you match it against a reference track with proper frequency balance and stereo imaging.
By referencing something already dialed in, you can adjust your own mix with intention and professionalism 一 not just guessing or hoping it’s all good.
That’s why you should always choose reference tracks that sound amazing in the real world, whether that’s in a club, a car, or straight out of a phone speaker.
The key is finding tracks that reflect your own production goals (for example, if you’re mixing punchy trap drums, use a track like Travis Scott’s Sicko Mode).
Or, if you’re doing soulful house, grab something off Disclosure’s Settle.
Whatever makes sense and you feel like really checks all the boxes, that’s the one you want to compare yours to.
The goal is simple: match your vibe (not just the genre) and focus on the specific elements that make that track pop.
How to Properly Level Match Without Bias
Before we dive into tonal tweaks or EQ match techniques, we’ve got to talk loudness. If the volume of your reference track is way off from your own, reference track matching becomes totally unreliable, and that’s where your ears start playing tricks on you. So, let’s break it down.
Matching Loudness (LUFS vs Perceived Volume)
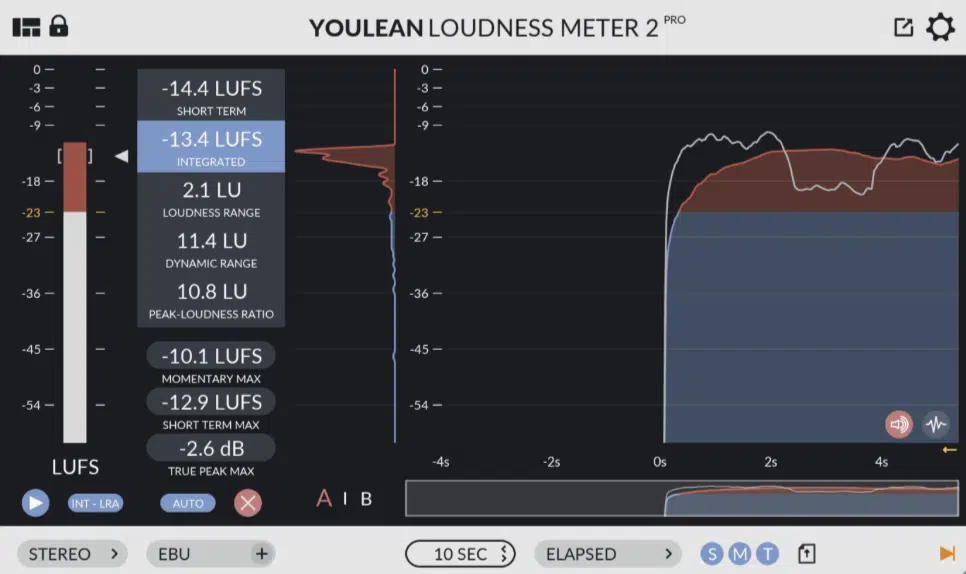
When it comes to reference track matching, if your loudness levels aren’t dialed in from the jump, everything else gets skewed, and that’s exactly what you don’t want.
Most mastered tracks these days sit between -8 and -9 LUFS integrated, especially in modern genres like hip-hop, EDM, and pop.
So, if your mix is hanging around -14 LUFS, it’s going to sound noticeably quieter no matter how good your frequency balance is.
That’s why you could use Youlean Loudness Meter or iZotope Insight 2 to check both LUFS integrated and LUFS short-term on the chorus section of your reference track and compare that directly to yours.
For example, if your reference peaks at -8.7 LUFS and your mix is coming in at -13.9, you’ll want to reduce the reference track by exactly 5.2 dB using a utility plugin before comparing.
And you’re not compressing 一 just attenuating the gain so you’re comparing tone and transients at equal loudness.
One thing you should always remember is to keep an eye on short-term LUFS too.
This is because, even if your integrated loudness matches, the punch of your hook might still get buried if your reference spikes at -7.5 LUFS short-term and your mix doesn’t exceed -10 LUFS during the same section.
Matching LUFS this precisely will help you make sure your reference track matching is based on sound quality, not psychological loudness bias.
And that’s exactly how you make better mixing decisions every single time.
Using Gain Staging or VU Tools to Normalize
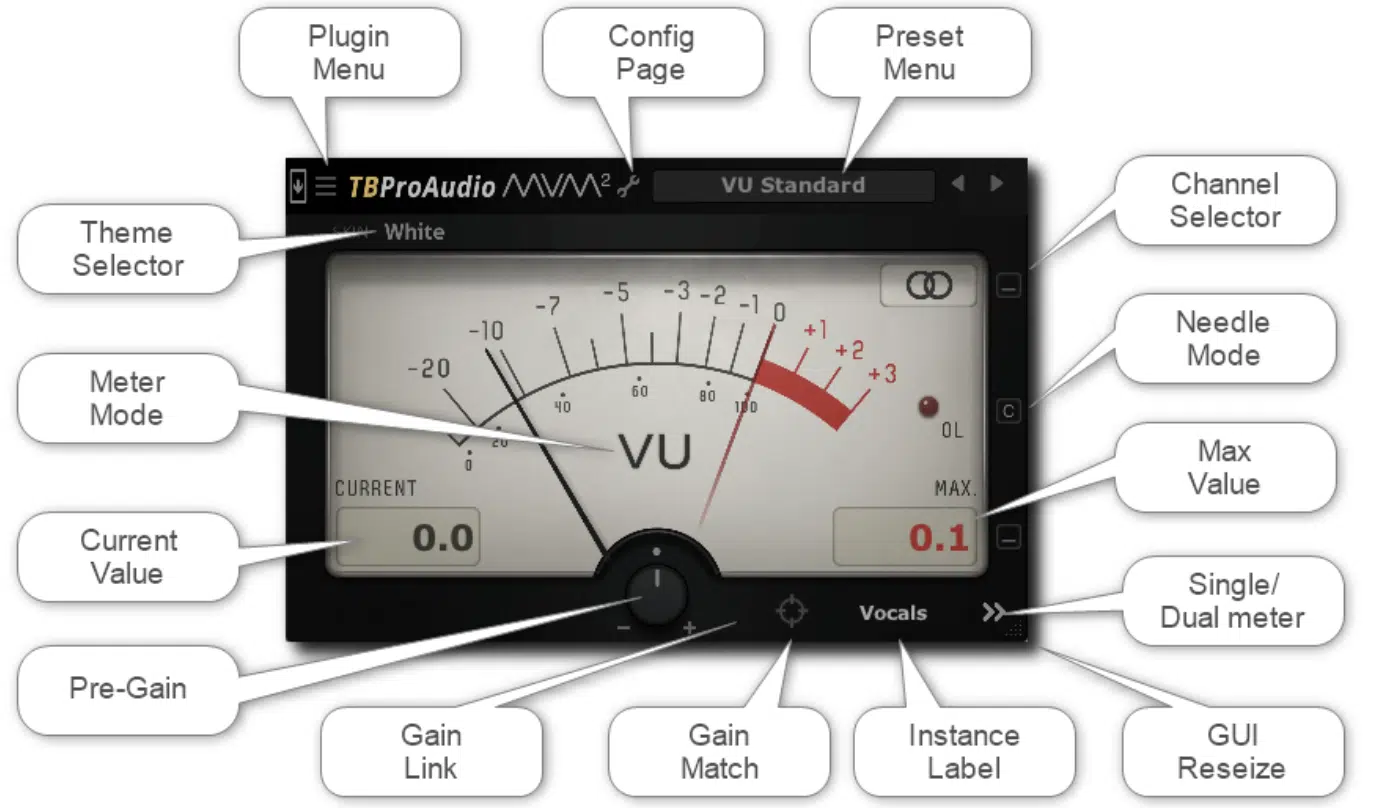
Once your LUFS levels are matched, the next step in reference track matching is setting up clean gain staging.
Luckily, VU meters make this way easier to control than your eyes alone.
You’ll want to start by using something like mvMeter2, which lets you calibrate to -18 dBFS = 0 VU very easily.
This gives you a great visual average of where your mix or reference track sits dynamically.
For example, if your reference is hovering at +1 VU and your mix is down at -3 VU 一 that’s roughly a 4 dB RMS difference you’ll want to make up using a gain plugin.
Not a limiter or compressor, believe it or not.
In Ableton, you could throw a Utility on the reference track and lower it by exactly the number of dB needed to line it up visually and sonically.
In Logic, simply use the Gain plugin right before your metering tools, and make sure your faders aren’t doing any hidden boosting or cutting.
Another smart trick is to insert a gain plugin before any bus processing or limiting, so you’re not messing up what you’re hearing post-processing.
And remember, keeping your signal chain transparent like this is key…
You’re not trying to make it louder, just get everything sitting at the same volume level so you can actually judge frequency response, stereo imaging, and dynamic range.
Bottom line, proper gain staging keeps your ears honest and your reference track matching workflow reliable from top to bottom.
Preventing the ‘Louder Sounds Better’ Trap
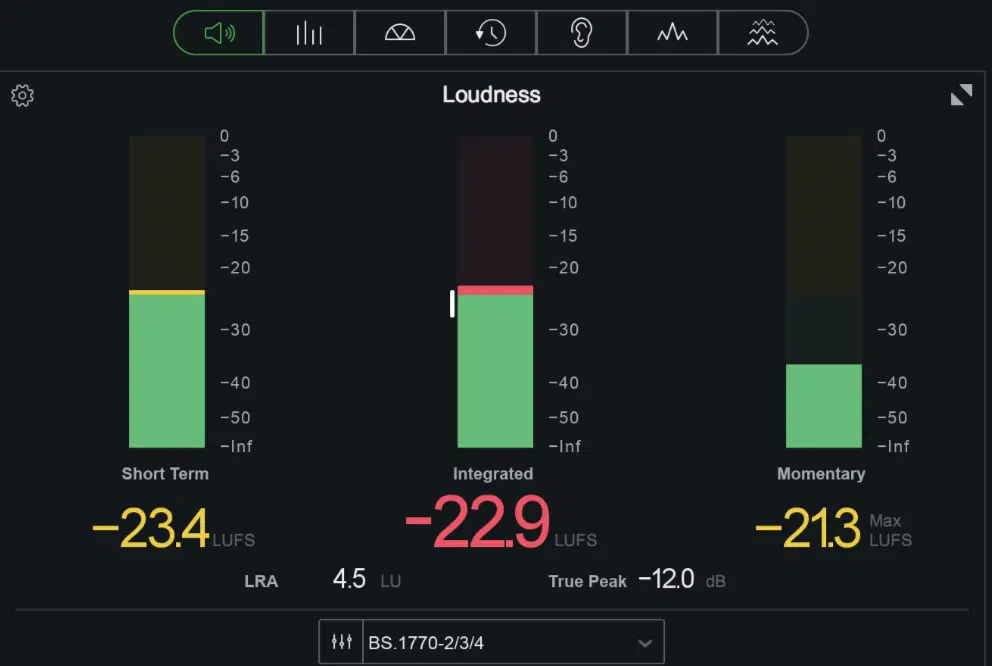
Preventing the ‘louder sounds better’ trap is probably the most common mistake we’ve all made at some point…
But assuming the louder reference track sounds “better,” when really, it’s just louder is the absolute worst thing you can do.
For example, if your reference track is hitting -0.5 dB on the true peak meter and your mix is chilling at -8 dB, your brain will favor the reference even if your frequency balance and stereo imaging are on point.
That’s why it’s super important to gain-match to within ±0.5 dB of your mix’s perceived loudness using LUFS-I and short-term LUFS meters.
Otherwise, your reference track matching becomes totally skewed/blurred.
A great technique is to match to -14 LUFS integrated for streaming targets and double-check short-term LUFS during chorus sections to keep loudness under control.
PRO TIP: Use a level-matched switcher like ADPTR Metric AB with the auto gain feature on 一 it removes the guesswork and lets you focus purely on sound, not volume.
What to Listen for When Matching a Reference
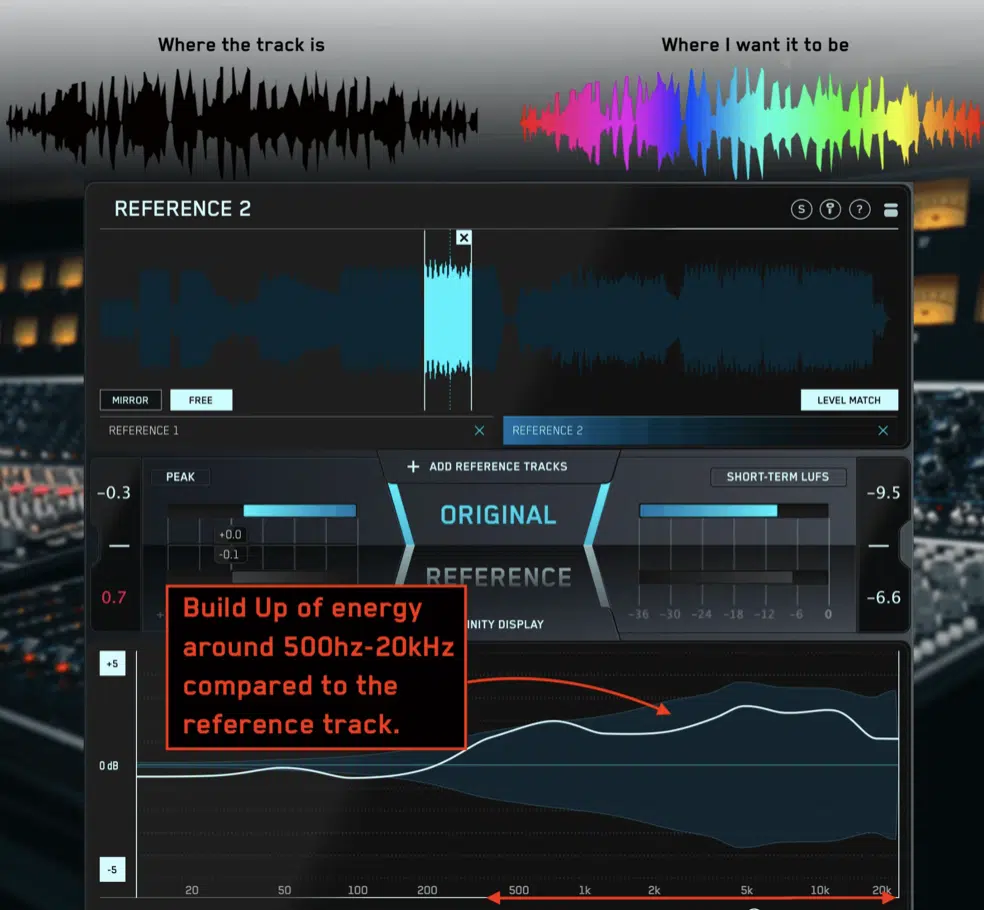
Now that you’ve locked in the plugins and leveled the playing field (pun intended), let’s shift focus to what you’re actually listening for when doing reference track matching. This is where your ears, meters, and instinct all come together. And it’s where things start to get really detailed, so you definitely want to stay tuned right here.
Tonal Balance Across the Frequency Spectrum
When it comes to tonal shaping during reference track matching, your first checkpoint is always tonal balance.
That means looking at how the low-end, mids, and high frequencies are distributed in your reference track, then comparing it to your own using a tool like Tonal Balance Control 2.
For example, if your mix has a 5 dB dip at 400 Hz while your favorite reference track holds flat from 200 Hz to 1kHz, you’re missing vital midrange energy that supports vocals or synths.
So, keep in mind that you want your:
- Subs (20–60Hz) to sit around -30 dBFS RMS
- Bass range (60–120Hz) closer to -25 dBFS
- Highs (10kHz–16kHz) no more than -35 dBFS to avoid harshness
Frequency distribution matters big time 一 I really cannot emphasize this enough.
So, make sure to use a surgical EQ like FabFilter Pro-Q 4 with a narrow Q (around 2.0) to boost or cut specific elements without affecting surrounding tones.
And if you’re aiming to match multiple reference tracks effectively, average out their EQ curves and use pink noise as a sanity check, so to speak.
It’ll give you a solid baseline to compare against when your ears get fatigued.
Stereo Width & Imaging Placement
When we’re talking about stereo width, we’re really talking about how spread out the elements in your mix feel across the left-to-right field.
And this is a huge part of what makes a reference track sound “expensive.”
For example, if your reference track has hi-hats spread to ±60% on the stereo field and your mix has them dead center, you have to tighten up.
You’ll instantly hear a narrower image that lacks that commercial spaciousness.
One of the best plugins for analyzing stereo imaging is Ozone Imager 2 or the free SPAN Plus like I mentioned, which lets you break things down into 4 frequency bands.
That way, you can see if your bass is mono while your highs are wide, just like in most professionally mastered tracks.
A great starting point is this: keep kick, bass, and lead vocals 100% mono (dead center), then push your ambient pads and FX to ±80–100% width.
You can easily do this using something like Utility in Ableton or S1 Imager by Waves.
And if your reference track feels wider, use a mid/side EQ like Pro-Q 4 to cut mid highs (say, 3–6kHz at -2 dB) while boosting the sides slightly.
Just don’t push it over +3 dB or it starts to smear your frequency balance.
And remember, reference track matching isn’t about copying 一 it’s about understanding the spatial layout and recreating that balance with your own unique sounds.
Dynamic Range & Transient Response
Now let’s talk dynamic range (the difference between the loudest and quietest parts of your track, and it plays a huge role in how clean and punchy everything feels).
When you’re doing reference track matching, check how your kicks and snares are hitting compared to the reference track, and you’ll want to ask yourself:
- Are they snapping through the mix?
- Or, are they getting buried by compression?
For example, if your snare is peaking at -6 dB but has no punch, compare it to the reference’s snare, which might be peaking the same but only compressed at a 2:1 ratio with a 10 ms attack 一 letting the transients breathe before clamping down.
So, you’ll want to use a transient shaper like Smack Attack or Transient Master to boost attack on individual drums by +2 to +3 dB.
From there, see how close you can match that transient response and you’ll be good.
On the flip side, if your reference track has a tight, controlled feel, it might have way less dynamic range…
Maybe it’s mastered at -8 LUFS with minimal peaks, while your track sits at -12 LUFS with too much fluctuation.
So, bottom line, it’s not just about “loud vs. soft,” it’s all about how you’re controlling individual elements to lock in that tight, unmatched sound quality.
PRO TIP: And to really nail it, throw a meter like Dynameter tool on both your track and the reference, this is very important.
If your crest factor, which is peak minus RMS, is hovering around 6–8 dB, you’re likely in the pocket for a punchy, modern mix.
That’s the level of detail that makes your reference track matching actually translate (and not just in your room, but on every system it touches!).
Reference Matching in the Mixing Stage
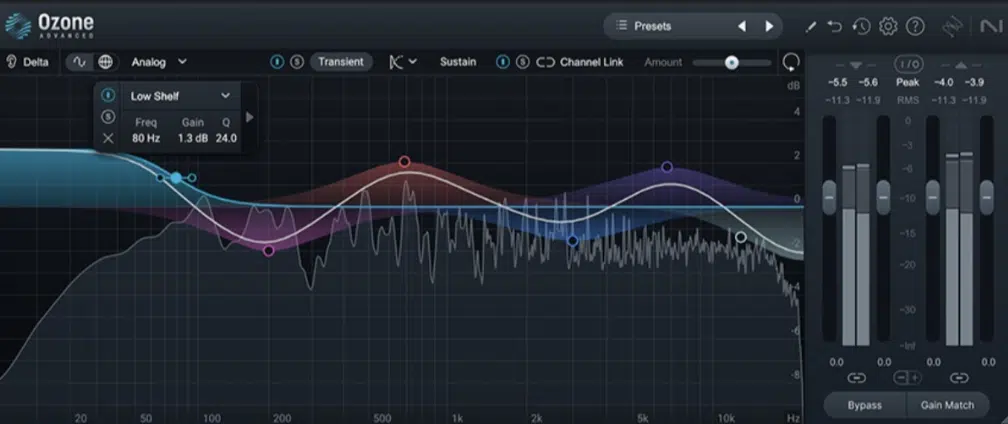
When you’re mixing, there’s a sweet spot where your reference track matching really starts to shine. It’s all about comparing specific elements in your mix, like the EQ curve on your vocal or the transient shape of your snare, against your reference track to make sharper, more professional mixing decisions. So, let’s break it down real quick.
EQ Curve Shaping Against the Reference
EQ curve shaping again your reference track is where the real sculpting happens.
So, load up a plugin like Match EQ in Logic, Ozone’s EQ Match, or Melda MEqualizer, and use it to grab a frequency snapshot of your reference track.
For example, you might see that your mix is dipping around 250Hz and peaking around 5kHz compared to your reference, which holds a flatter curve.
Well, that means you might need a bell boost at +2.5 dB with a Q of 1.5 at 250Hz to fill in that mudhole, and a gentle cut at -1.5 dB at 5kHz to tame brightness.
The best automatic matching EQ plugins will let you smooth the curve (start around 50%) and set the matching amount (try 60–70%) so it doesn’t overdo it.
Just remember that subtle moves go further all day.
Meaning, you always want to A/B with the EQ on and off to make sure you’re not dulling or hyping the frequency response unnaturally.
And if your mix has too much low-end, try a shelf cut starting at 80Hz by -2 dB 一 just match the reference’s shape, not the exact numbers.
That’s what makes reference track matching so powerful in the mixing process because it shows you exactly where to adjust and gives you a target, not a total mystery.
Compression & Transients Matching
When you’re comparing compression between your mix and a reference track, you’re not just listening for volume.
You’re listening for how tight, punchy, or squashed transients feel in each section.
For example, let’s say your reference track has a snappy snare that cuts at 90ms of attack with a 2.5:1 ratio and your snare feels dull…
You’ll want to try matching that by setting a compressor like FabFilter Pro-C 2 to 30ms attack, 100ms release, and a 2:1 ratio.
This successfully brings those transients forward without killing their snap.
For kick drums, I usually start with 10–15 ms attack and a slightly higher ratio, around 3:1, and tweak the release to match the groove:
- Fast release (50ms) for trap.
- Slower release (120ms) for house or funkier tracks.
And just make sure to watch out for how the reference’s envelope shapes sit in the mix because a fast compressor might be muting your attack or dulling your dynamic range.
This makes your drums feel totally lifeless, and nobody has time for that.
And if you’re noticing that the reference track has more punch even at a similar loudness level, it’s most likely the result of precise transient control.
So, try layering in Smack Attack or Transient Designer just to boost attack by +3 dB while keeping sustain neutral if it makes sense for your track.
This way, you’re not just copying loudness 一 you’re matching how specific elements react dynamically, which is a huge part of realistic reference track matching.
Reverb Tail Length & Spatial Energy
If your reference track feels more “open,” “bigger,” or more 3D, chances are the reverb tail length and decay curve are better tuned.
This is one of the most overlooked areas in reference track matching.
For example, a pop vocal might use a reverb tail of 1.8 seconds with a pre-delay of 60 ms and high-pass filter at 180 Hz to keep it from muddying the low-end.
While your own vocal is sitting on a 0.7s reverb with no filtering and a short pre-delay, I might add 一 and that contrast alone can collapse your entire stereo field.
Try matching by using a plugin like ValhallaRoom or Seventh Heaven, then start with:
- A 1.5s tail
- Set pre-delay between 50–80ms (depending on tempo)
- EQ out anything below 150 Hz and above 12kHz
A good trick is to use a stereo reverb on FX returns with widening enabled, while mono sources (like vocals or claps) get just a touch of centered ambience.
Listen closely to your reference track and ask yourself: does the snare bloom into a wide hall, or is it tight and snappy?
What you’re going to do after you figure that out is set your decay time and diffusion parameters to match that feel.
For snares, I often go with a 0.9s plate with low diffusion, while pads can stretch up to 2.8s with high diffusion and late reflections pushed wide.
Matching spatial energy like this is what gives your mix depth and balance, and it’s a game-changer for hitting the same sound quality as your mastered track.
PRO TIP: Don’t forget to check the stereo return’s width using something like Imager 一 if your reverb return hits ±80% on the sides like your reference track, but yours is stuck around ±40%, it’s not just a timing issue, it’s a spatial one.
Dialing that in gives your mix the same immersive vibe, and that’s what makes reference track matching feel flawless and easy instead of overwhelmingly hit-or-miss.
Reference Matching During Mastering
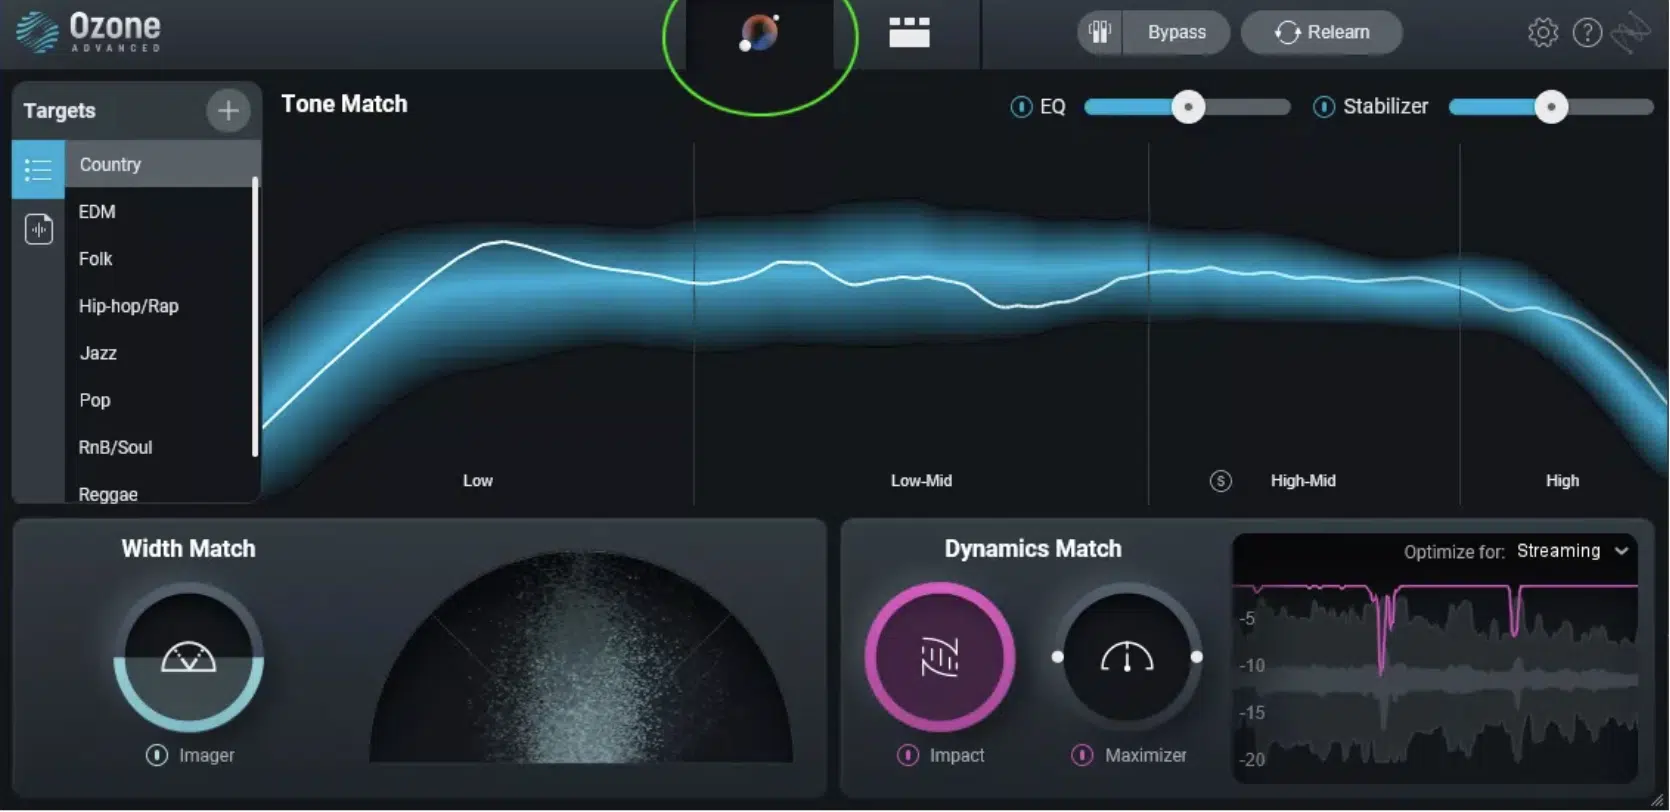
Once you’re happy with your mix, mastering is where your reference track matching really needs to hit hard. This is your last chance to line up tonal shape, perceived loudness, and frequency balance, so it’s key. It’s all about locking in final polish so your track doesn’t fall flat next to a professional mastered track. Let’s get it…
Achieving Consistent Loudness & Clarity
In mastering, loudness consistency isn’t just about numbers 一 it’s about matching your track’s punch, headroom, and frequency distribution to that of your reference track.
So, you’ll want to start by measuring the LUFS of your reference, then set your limiter (like FabFilter Pro-L 2) so that your track lands within 0.3 LUFS of that.
Remember, like I said before, most streaming-ready masters land between -8 to -10 LUFS integrated.
For example, if your reference reads -9 LUFS, try setting your:
- Ceiling at -1 dBTP
- Threshold at -3.5 dB
- And, tweak the lookahead to 1 ms with release at 250 ms
This is to properly match loudness differences without killing your transients.
Use Ozone’s Maximizer in IRC IV mode for transparent limiting, and double-check clarity by toggling your EQ and limiter on/off.
If clarity drops when it’s on, your dynamic range is too crushed, so make sure to always compare how the high frequencies sparkle on the reference track.
If your master feels dull, add a high-shelf EQ at 10kHz with +1.5 dB boost (Q around 0.7) and listen again.
PRO TIP: Mid/side processing on the master bus can help.
A +0.5 dB boost at 4.5kHz on the side channel adds sparkle and stereo width without touching your center vocal or kick.
Done right, reference track matching during mastering gives you commercial-grade sound quality that translates everywhere (from phone speakers to big-room monitors).
Mid/Side & Width Adjustments to Match
Mid/Side EQ lets you surgically shape the stereo width of your track so it lines up with your reference track, which is key for nailing that commercial 3D feel.
For example, if your reference track has wider synths and airier highs, check your sides using a plugin like FabFilter Pro-Q 4 in M/S mode…
Maybe the reference has +2 dB at 8.5kHz on the sides, while yours is flat or even dull.
Match that by applying a high-shelf boost of +1.5 to +2 dB from 7kHz upward, Q around 0.5, on just the side channel 一 and keep the mids clean and centered.
Another trick is to check your kick and bass in mono (the mid channel) and use Pro-Q 4 to carve space on the sides below 150 Hz with a steep low-cut on the side band.
You can also enhance stereo imaging by boosting a touch of 3–5kHz on the side and pulling back the same range in the mid.
This creates perceived depth and separation, just like your reference track.
Remember, the overall goal with reference track matching isn’t to copy width, but to balance spatial energy across your mix the same way your reference does.
Matching Tonal Curve Using EQ Match Tools
When you need to lock in the same overall tonal balance as your reference track, using an EQ match plugin is the fastest and cleanest route.
A solid plugin for this is Ozone 11 EQ Match because all you have to do is:
- Import your reference track
- Play a full chorus section
- Then do the same with your track, and let the plugin draw the curve
For example, if the reference shows a mid scoop at 500 Hz and a high boost at 10kHz, you’ll need to apply a gentle -1.5 dB bell cut (Q 1.0) at 500 Hz and a +2 dB shelf starting around 9.5kHz to match the feel.
Always smooth the matching curve around 50% to avoid harsh EQ moves and keep the frequency balance musical.
My advice here would be to apply the EQ match only to the stereo bus or a pre-limiter stage on your master bus.
This is because doing it post-limiter can completely kill your transients and collapse your dynamic range, and you certainly don’t want that.
Use this to get closer to your reference track, but don’t overdo it.
And remember people, always trust your ears and use spectrum analyzers like SPAN or Tonal Balance Control to make sure everything looks and sounds locked in!
Pro Tip: Using Multiple References
Sometimes one reference track just isn’t enough (especially when you’re pulling inspiration from different songs with different strengths).
So, try loading up three reference tracks:
- One for bass and low-end power
- One for stereo width
- One for vocal or high-end clarity
In REFERENCE by Mastering The Mix, label each track for its purpose and toggle between them while focusing on specific elements.
For example, AB the kick and sub region (20–100Hz) from one track while comparing the top end sparkle (10kHz+) from another.
This kind of layered reference track matching gives you a composite target that fits your vision 一 it’s about building your own sonic blueprint, not copying someone else’s mix.
Advanced Techniques for Ultra-Precise Reference Track Matching
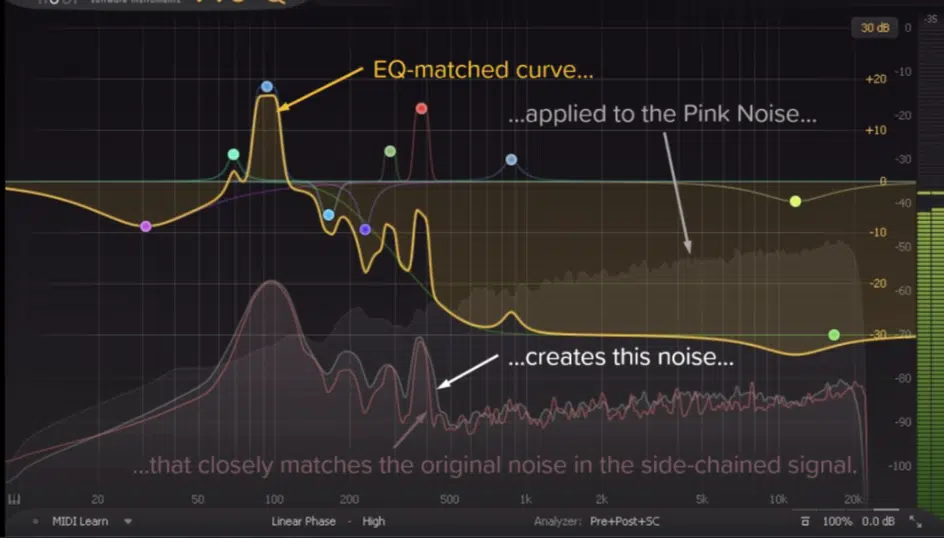
If you’ve already locked down the basic EQ, loudness, and width settings like a boss, it’s time to take reference track matching to a surgical level. So, these next few techniques are where you start dialing in micro-details that separate amateur mixes from serious, competitive music production (these are my personal favorite, and you know I got you).
Using a Pink Noise Reference & EQ Curve Matching
Using pink noise is one of the cleanest (not to mention, coolest) ways to spot tonal issues when your ears are tired, especially when paired with reference track matching.
To play around with this, you can load pink noise into a separate audio track, loop it, and adjust your mix volume until it disappears into the noise.
When it’s masked evenly across the spectrum, your frequency balance is likely on point.
For example, if your lead vocal sits 3–4 dB above the pink noise in the 2.5kHz–4kHz range but your reference track remains balanced there, that tells you the vocal presence is overhyped and needs taming with a bell cut of -2.5 dB, Q 1.8.
So to get even more surgical, use SPAN Plus and overlay the EQ curve of your reference track with the pink noise slope (tilted around -3 dB per octave).
Also, you’ll want to use a plugin like TDR Nova or Ozone 11 EQ and shape your track to fall roughly along that slope.
This is very, very important in the 120Hz–12kHz range, where most tonal inconsistencies show up.
If you’ve got multiple reference tracks, run an EQ match on each, export the curves, and average them manually by smoothing at 60% and applying at 50% strength.
This technique is pure gold for building a custom EQ target curve that works across devices and gives you a consistently balanced mix, I’m telling you.
Dynamic EQ Automation Based on Reference Shifts
The secret weapon most producers sleep on during reference track matching is automating EQ dynamically across sections.
This could be like adjusting the curve of your mixing process to match how your reference track evolves.
For example, let’s say your reference opens up with a brighter chorus by boosting 6kHz–10kHz +2 dB, you’ll want to mimic this by using Pro-Q 4 in dynamic mode with:
- Threshold of -22 dB
- Attack at 25ms
- Release at 175ms
Then, automate that band’s gain up 1.5–2 dB only during your chorus section (only being the key word here).
And if your verse feels muddy but the reference stays leaner, use a dynamic low-mid cut at 280Hz, threshold -28 dB, range -3 dB, and automate the threshold slightly tighter during dense vocal moments.
Another great move is to follow the tonal balance of your reference track in real time using Oeksound Soothe2 or TDR Nova.
These let you compress problematic bands reactively, not statically, and gives your mix elasticity, especially when instruments swell and compete for space.
This level of reference track matching lets your frequency response flex naturally instead of staying stuck in a flat EQ curve 一 and that’s what brings your mix to life!
Reference Matching in Specific Frequency Bands Only
You don’t always need full-spectrum adjustments, my friends, often, it’s more accurate to match your reference track in just one or two trouble zones.
For example, if your reference has a punchier bass response at 60–90Hz, throw Ozone Dynamic EQ on your master and create a:
- Narrow band centered at 75Hz
- Range of +3 dB
- Threshold -30 dB
- Attack/release at 10ms/120ms
This will help you successfully boost that low-end only when it’s weak.
For boxiness in the 200–400 Hz range, compare the spectrum against your reference track using SPAN, then notch problematic areas with a Q of 2.5 and cut by -2.5 to -3 dB.
Sometimes your reference track has brighter, wider tops…
So, to mimic that, try a shelf boost at 10.5kHz on the side channel only (M/S EQ), gain +1.8 dB, Q 0.7, and automate the gain upward during the chorus for extra lift.
Or maybe the reference has tighter transient control in the 1–2kHz region.
In that case, slap on SplitEQ by Eventide, isolate the transient component, and reduce by -2 dB using attack time of 20ms and release of 200ms.
Doing reference track matching by zone helps you make targeted, impactful changes without nuking your entire tonal shape.
It’s all about specific elements, not global fixes 一 always remember that.
Bonus: 5 Quick Tips You Need to Know When Reference Track Matching
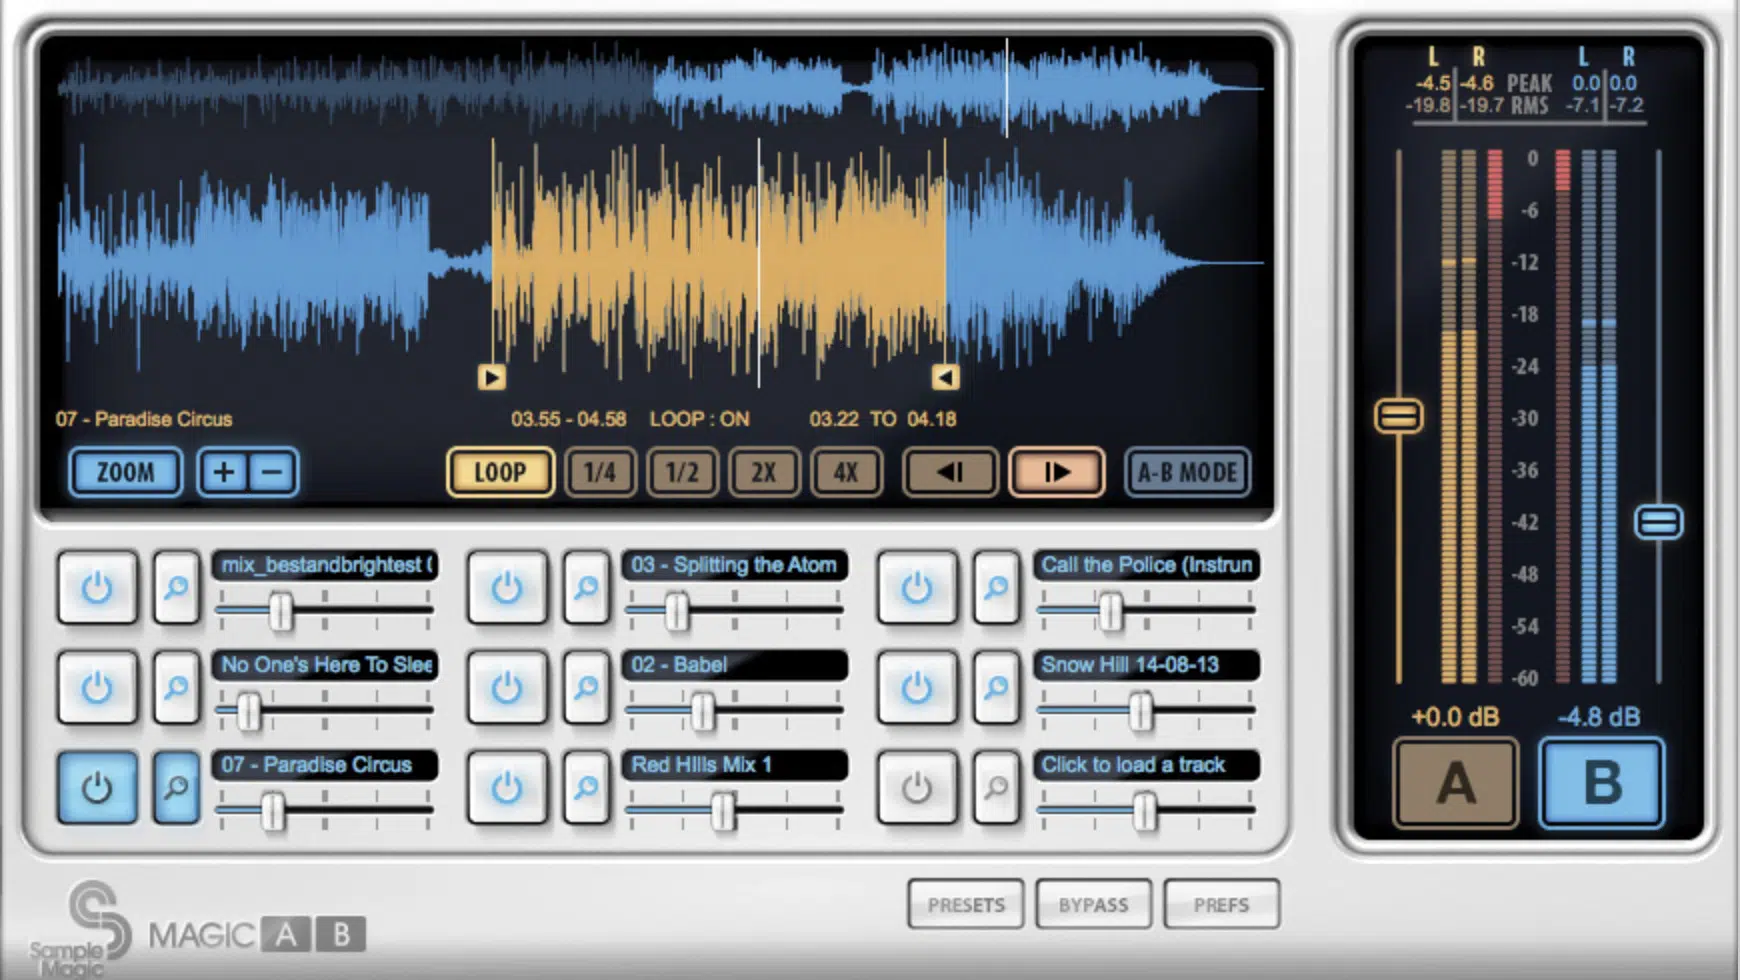
Now that you’ve done all the heavy lifting, let’s run through a few quick studio-hardened tricks that’ll take your reference track matching to that extra edge. These are fast, surgical moves that help avoid mix fatigue, save time, and push your creative ceiling a little higher.
#1. Don’t Overcompensate: Match with Intention, Not Ego
One of the biggest mistakes during reference track matching is over-EQing or over-compressing just to force your mix to look like a reference track.
Yes, even when it already sounds right.
For example, if your low-end is hitting -24 LUFS RMS and your reference is only -22 LUFS RMS in the same range, that 2 dB gap might not need a +2 dB shelf boost at 60Hz.
It might just be the result of different elements in the song’s arrangement.
Instead of chasing curves, use a spectrum analyzer to cross-check loudness, but trust your ears above the graph 一 and make EQ moves of ±1.5 dB max unless something truly sounds off.
#2. Use Mono Check-ins to Validate Against Reference
When doing reference track matching, toggling to mono at key moments can expose frequency balance issues and phase cancellation that stereo referencing might hide.
So, use a plugin like Ozone Imager or even a DAW utility to mono-check your chorus section every single time.
For example, if your reference track keeps its kick, bass, and vocal clean and upfront while your version collapses or gets muddy, that means something (often pads or reverbs) is too wide or too out of phase.
NOTE: Keep bass elements below 120Hz fully mono, and collapse your mix bus to mono for 10–20 seconds every 3–4 minutes of work.
This simple quick move sharpens your mixing decisions like crazy, so you definitely don’t want to overlook it.
#3. Reference with Fresh Ears at Different Volumes
Always take breaks before final reference track matching sessions, and make sure to check at multiple volume levels.
Your perception of sound quality shifts dramatically depending on loudness.
For example, when referencing at 70 dB SPL (around TV volume), you may hear midrange more clearly, while listening at 85 dB SPL (a little louder) exaggerates bass and low-end 一 possibly fooling you into pulling it back too far.
A great technique is to use a calibrated SPL meter or plugin like Youlean Loudness Meter, and check both your mix and reference track at 70, 80, and 90 dB SPL.
This will undoubtedly reveal where adjustments are truly needed, and you can get to fixing from there.
#4. Use Visualizers With Caution, Not as a Crutch
Plugins like Tonal Balance Control, SPAN, and Insight 2 are powerful, but they’re just that: tools.
And if you’re constantly comparing slope lines instead of listening to specific elements like snare brightness or high frequencies in your reference track, you’re relying on visual cues instead of trusting the creative process.
So make sure to use visualizers as verification, not direction…
If the curve shows a dip at 500Hz, but your reference sounds just as scooped there, then it’s not a problem that needs fixing.
NOTE: The better move is to sweep that 500Hz band with a narrow Q and actually A/B it against your reference track.
If cutting it by -2 dB tightens the mix without losing warmth, keep it; if not, leave it alone, and remember, your ears decide what works 一 the graph just helps confirm it after.
#5. Automate AB Switches for Live Comparison During Playback
AB comparisons work best when they’re fluid — not clunky.
So you’ll want to load your reference track into REFERENCE, ADPTR Metric AB, or set up a manual chain using your DAW’s return tracks, and map a MIDI key or macro to toggle between your mix and reference instantly.
For example, with Metric AB, you can sync both waveforms and loop sections.
Then, assign a hotkey to compare your chorus drop against your favorite reference track in real time to keep the transitions clean.
And it’ll help you focus on individual elements, not on stopping and restarting playback.
Also, make sure to automate gain adjustments for each and every section so you’re matching LUFS consistently (for example, automate the reference chorus down -2.3 dB to match your mix’s LUFS during that same part).
These moves let you stay deep in the zone while keeping your reference track matching super sharp, on point, intentional, and professional.
Final Thoughts
At the end of the day, reference track matching isn’t just a “nice to have…”
It’s one of the most powerful things you have to help make your tracks hit way harder, feel cleaner, and translate properly all day.
And whether you’re dialing in your EQ curve, shaping transients, or controlling stereo width, a reference track is absolutely invaluable.
With it, every single decision you make becomes way more professional.
And as a special bonus, if you really want to see how the real pros make these decisions in real-time, you’ve got to grab this epic Free Project Files Pack.
It shows you every move, every automation, and every plugin setting used in actual chart-ready tracks.
Basically, you’ll have all the cheat codes you ever need right at your fingertips.
Bottom line, when it comes to reference track matching, just remember to match with purpose and always trust your ears before your eyes.
This way, you’ll never have to second guess your mixes again 一 your tracks will sound fire and perfectly leveled no matter where they’re played.
Until next time…


Leave a Reply
You must belogged in to post a comment.