As a producer, you’re no doubt aware of how vital the low-end, bass, and sub-bass elements are in each and every track.
They get your listeners engaged and excited about your music; in their souls and down to their bones.
Yes, even though they can only feel and not hear it.
The low end is, by nature, typically processed as 1 single entity.
However, to achieve optimum results, you shouldn’t approach it that way.
Otherwise, you’ll end up with a seemingly epic low-end bass, but devoid of the true bottom end (the sub-bass frequencies).
It may appear to be hitting hard on your iPad or iPhone.
When it’s played through an actual system, like a subwoofer, on the other hand, the results may be baffling.
Therefore, they should always be split into different sections and processed in their respective zones.
This way, the sub-bass won’t get lost in the process.
Today, we’re going to focus on optimizing one specific section of the low-end: the sub-bass.
Even if you’re not aware of its impact at this point in the article, you most certainly will be by the end.
Why? Because that much-desired ‘ground-shaking’ component actually stems from the sub-bass itself.
You may be thinking… but I don’t have all that fancy equipment, so how am I going to produce a banger without it?
The answer is simple: you can efficiently work around it!
Just a few simple unfamiliar processes, using familiar processors will show just how powerful the sub-bass can be.
We’ll show you 6 interesting and unique sub-bass techniques that will get your sub-bass to knock harder than you ever imagined.
The best part is, no fancy equipment is needed.
Let’s jump in…
Table of Contents
- What Exactly Is Sub-Bass?
- Sub-Bass: 5 Things To Remember
- 1. The sub-bass does not require much processing (like compression, for instance).
- 2. When dealing with lower frequencies, a pure sine tone, generated with a synth oftentimes serves as the most powerful tool.
- 3. Make sure to test out your mixes across any, and all available playback systems.
- 4. Have your sub-bass’ main frequency hit between the 40-60Hz range (roughly).
- 5. You’ll want your kick to hit an octave higher than that (approx.); around 120Hz.
- Sub-Bass: 5 Things To Remember
- 6 Mind-Blowing Ways To Mix Your Sub-Bass With No Subwoofer
- OUTRO
What Exactly Is Sub-Bass?
The bass, for the sake of mixing, is broken down into multiple zones based on frequency.
The sub-bass, in the simplest of terms, is just the very low end.
It begins at around 60Hz and encompasses everything below it.
This includes the frequencies in which humans are not capable of hearing as well.
NOTE: Humans are not capable of hearing anything below 20Hz.
These frequencies are known as ‘infrasonic frequencies.’
Sub-bass frequencies tend to be so low that you oftentimes only feel them, as opposed to actually hearing them.
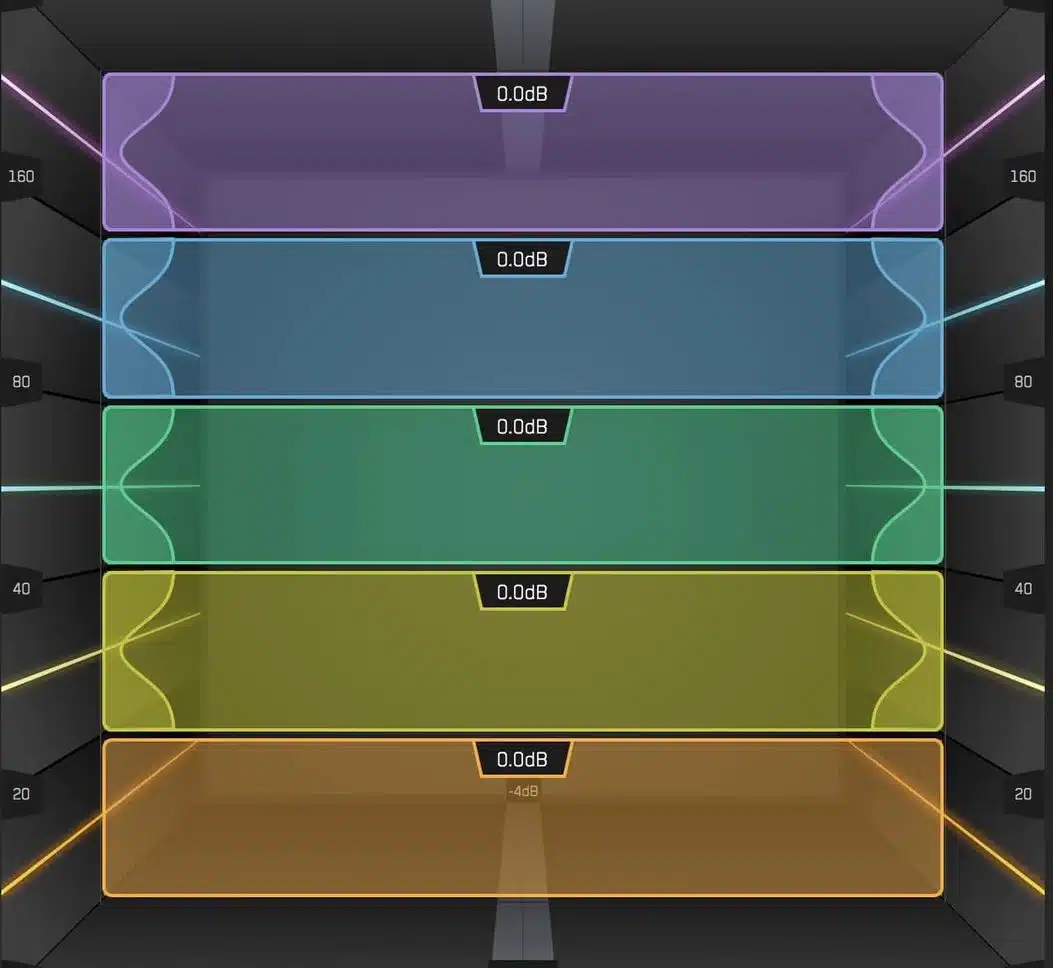
Hence why you can seemingly feel the sub-bass vibrating in your bones.
You may think a subwoofer is required to accurately mix the sub-bass, but a good pair of headphones can do the trick as well.
As long as you know how to leverage the tools available at your disposal, of course.
You don’t need fancy, expensive equipment to compete with the best.
All you’ll need is the following sub-bass tips, tricks, and techniques to really shine and exceed.
Don’t worry, we’ll cover everything in detail below.
Sub-Bass: 5 Things To Remember
When it comes to the sub-bass frequencies, there are a few things you should keep in mind:
-
1. The sub-bass does not require much processing (like compression, for instance).
A little can go a long way, as these specific frequencies are too low for most processors to handle properly anyway.
-
2. When dealing with lower frequencies, a pure sine tone, generated with a synth oftentimes serves as the most powerful tool.
Make sure your sine tone is completely unprocessed.
-
3. Make sure to test out your mixes across any, and all available playback systems.
You’ll want to do this so you become familiar with the subtle differences.
You should constantly be learning how the low-end translates across various mediums.
Sure, you’ll never truly experience the low-end on an iPhone, but that doesn’t mean you shouldn’t superimpose it.
-
4. Have your sub-bass’ main frequency hit between the 40-60Hz range (roughly).
The ‘main frequency’ is simply referring to the frequency in which your sound is defined, or includes the most energy/hype.
It’s not necessarily the fundamental frequency, so don’t get those confused.
By no means, however, should the frequencies be restricted to that area alone.
The surrounding frequencies should venture far below that range.
-
5. You’ll want your kick to hit an octave higher than that (approx.); around 120Hz.
This way, it won’t interfere with your epic bass too much.
Therefore, your track won’t sound obnoxiously muddy or ‘boomy.’
6 Mind-Blowing Ways To Mix Your Sub-Bass With No Subwoofer
1. Use a Spectrum Analyzer
The ‘Analyzer’ category in your DAW probably contains your most underutilized, seemingly unimportant plugins.
However, when it comes to getting your sub-bass to cut through the mix and knock like a champion successfully, that’s certainly not the case.
It’s different than working with, let’s say, drums or one-shots.
It’s actually your only true measuring tool in your mix when it comes to bringing life to elements that can’t be heard.
This is especially true when it comes to your sub-bass.
You won’t be able to hear what’s happening below the 20Hz range regardless of your system.
Your Spectrum Analyzers, on the other hand, surely can.
For 4 foolproof ways to analyze your music and enhance your sound, click here.
That’s why you should take the ‘never mix with your eyes’ sentiment and throw it out the window.
Especially when dealing with the low-end.
Instead, try to mix with an even amount of both elements 一 eyes and ears 一 for the perfect balance.
From here on out, when mixing your sub-bass, remember to constantly cross-reference with your favorite Spectrum Analyzer.
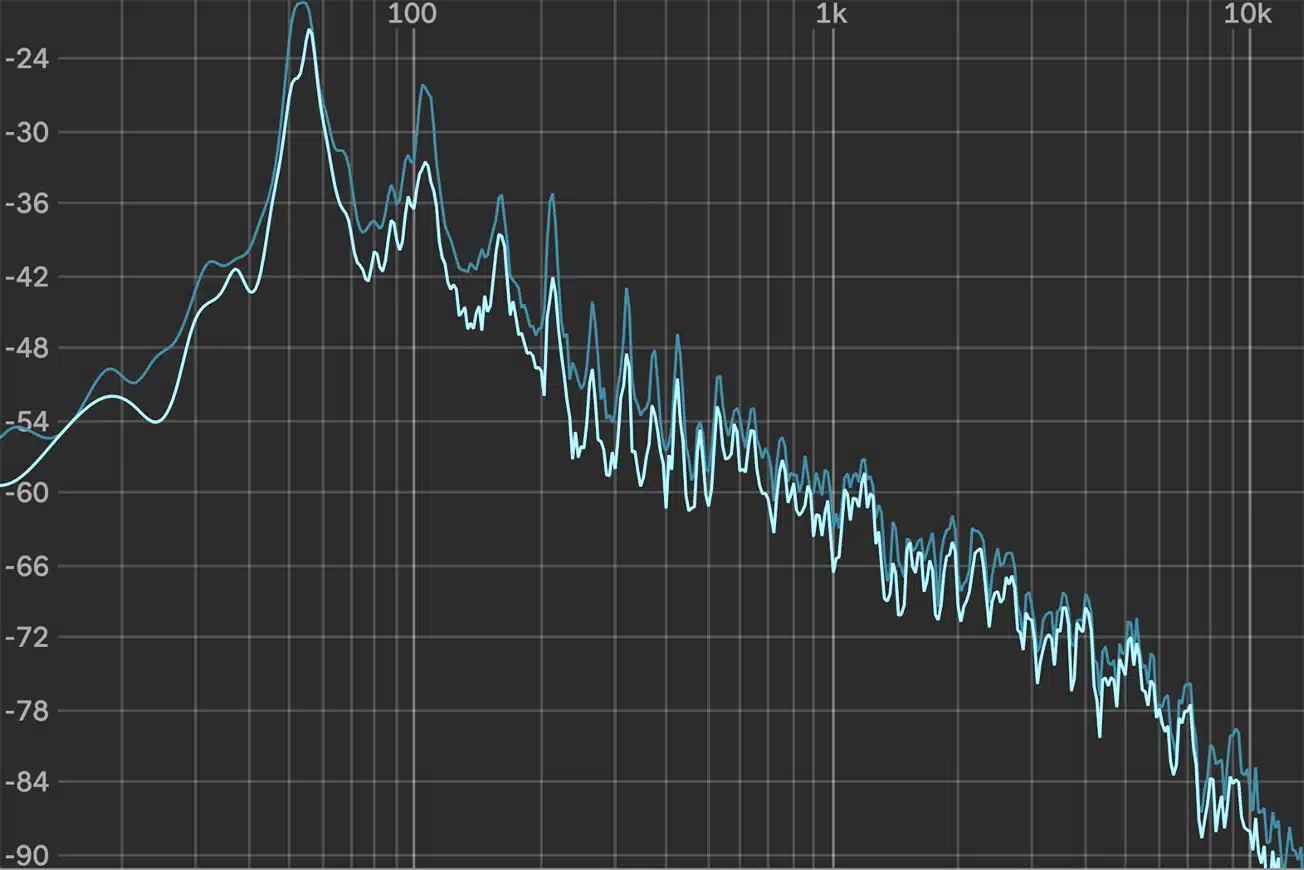
Think of it as the eyes to your ears.
NOTE: If you haven’t worked with spectrum analyzers before, be sure to find your best match.
With that said, they all do the same thing, so it’s all about personal preference and comfortability.
Now, let’s get started…
STEP 1 一 Open up a bass-heavy 808, along with a spectrum analyzer.
Make sure that there’s a significant amount of sub-bass activity occurring.
STEP 2 一 Open up an EQ.
Cut only the frequencies below (around) 50Hz, with a relatively steep filter.
STEP 3 一 Enable and disable the EQ-band.
Listen carefully to the differences you can hear.
At this point, there won’t be much.
STEP 4 一 Now enable and disable the EQ again.
Only this time, do it while simultaneously looking at your spectrum analyzer as well.
You’ll be able to see just how big of an impact it truly possesses.
Alow the processors that can hear better than you to become an extension of your own ears, respectively.
Your sub-bass will indeed thank you.
2. Use a Reference Track
Using a reference track was once a frowned-upon process amongst professional producers.
That’s no longer the case.
In fact, nowadays, you’ll be left behind if you don’t use them.
So if you have any ill feelings about using a reference track, I highly suggest you change your train of thinking now.
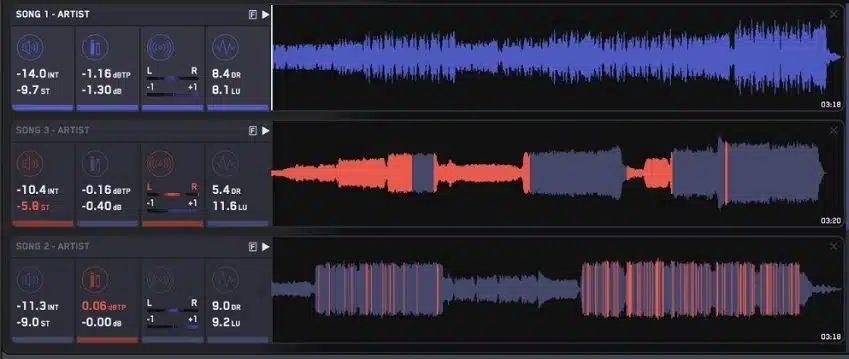
While you should certainly use one for every mix, we’re going to be focusing solely on the sub-bass today.
NOTE: Your spectrum analyzer is key when it comes to this particular tip.
It will teach you how to properly analyze and dissect any, and all of your favorite mixes.
So, again, make sure to get acclimated with them for supreme efficiency.
STEP 1 一 Take your favorite sub-bass-heavy track, and bring it into your favorite DAW.
STEP 2 一 Open up your preferred spectrum analyzer and EQ plugin.
STEP 3 一 Analyze the low-end section as a whole; including the mid-range frequencies as well.
To do this, take your EQ band and apply a steep low-pass filter (LPF) at 1k.
STEP 4 一 Bring the band down to 500Hz.
You’re going to do this for the sake of hearing all the low-end content at this level.
STEP 5 一 Take a low-cut filter and place it around 60Hz.
At this point, you’ll be analyzing all the low-end content minus the sub-bass.
If you were to remove the band at 500Hz, you’d then be able to hear/see the entire mix, devoid of the sub-bass frequencies.
You’ll be surprised to find that some, if not most processing techniques may actually be hindering your sub-bass.
This technique won’t only help you to accurately perfect your sub-bass, but become more fluid with your mixing process as a whole.
You’ll learn about the entire frequency spectrum, plus get a (real-time) reality check when comparing your mix to a professional.
Before finishing your project, ask yourself:
- How does it sound across different playback systems, like speakers, headphones, etc.?
- Should I add some additional processors? Do they help or hurt?
- Am I satisfied with the results?
- Is there anything I want to be changed or enhanced?
- Does the spectrum analyzer agree with my train of thought?
3. Use the Right Type of Headphones
As you know, the proper playback systems are crucial when mixing, at any frequency.
It can either set you further back or help you advance forward.
However, a professional, ‘proper’ system usually costs a ridiculous amount.
No worries though, because you really don’t need one.
A good engineer knows that the ‘ideal’ mixing setup is very different from the ideal mix.
They certainly don’t go hand-in-hand.
That’s why learning, and truly understanding the intricacies of your specific playback-monitoring environment is key.
This will take a little time to perfect, but the payoff is well worth the trouble.
Conversely, when it comes to mixing bass, particularly sub-bass, a decent pair of (over-the-ear) headphones are crucial.
Ideally, ones of the ‘closed-back’ variety.
Semi- or open-back headphones tend to leak out low-end frequencies.
Their design alone helps enhance any tiny sub-bass, and low-end frequencies generated.
Thus, giving you the appearance of a much fuller low-end.
So, when it comes to headphones and analyzing sub-bass frequencies, make sure you have your main pair.
Especially when testing, experimenting, and refining.
Once you bounce your mix, however, it’s important to switch between different playback systems.
As well as production environments.
It’s also helpful to have a go-to ‘bad device.’
The best one to reference is a phone, as it’s the most commonly used apparatus.
It won’t just help the immediate mix, but all future mixes as well.
You’ll become more confident, and ultimately become a better producer/engineer altogether.
3A. Separate, Isolate and Process the Sub-Bass
When it comes to processing your sub-bass, there are a seemingly infinite amount of tricks to take advantage of.
The most effective one when you don’t have the best equipment at your disposal is bass/sub-bass isolation and processing.
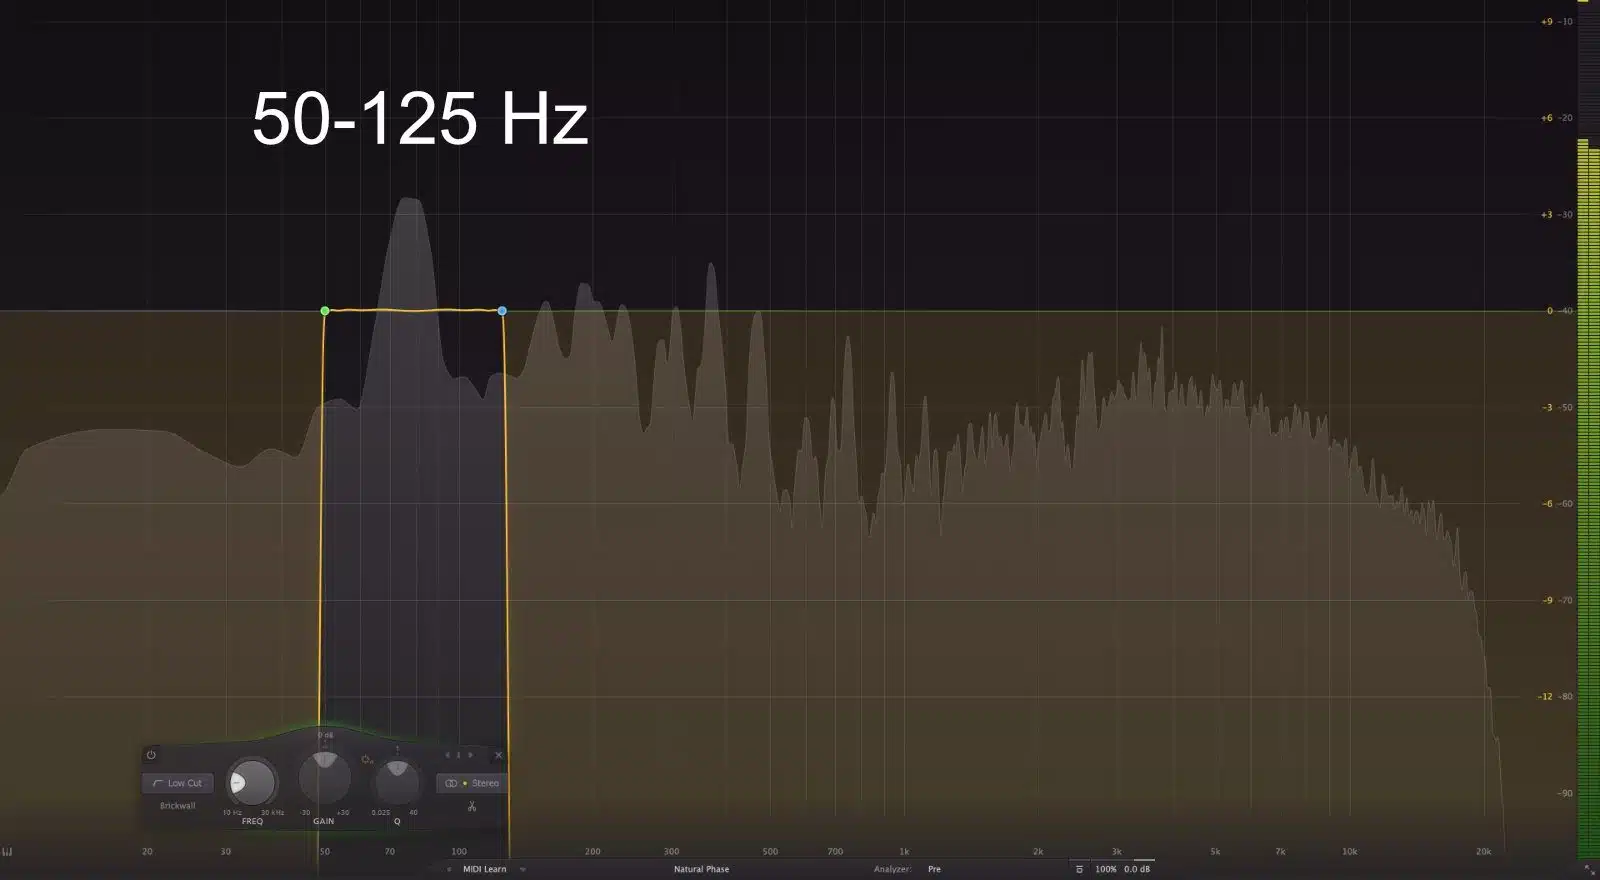
The low end is largely considered to be just 1 element…
However, the results you can obtain from treating the sub-bass and the rest of your low-end as different entities are remarkable.
- It’s sonically superior.
- It can eliminate most of the confusion (mixing-wise).
- It can help put a stop to potential issues (like phase cancellation).
- It will make you sound much more professional and pristine.
- It opens up many creative opportunities (production- & mixing-wise).
NOTE: Other than the following tip (#4), the remaining tips will treat these 2 sections separately.
4. Compression With Internal Sidechain Hi-Pass (HP) Filtering
Compression is an amazing tool, there’s no doubt about it.
It can take a low-end element from lackluster energy to super high energy, and enhance it in mindblowing ways.
However, compressors are just as imprecise and unreliable as humans.
Especially when it comes to detecting, analyzing, and managing the lower part of the low-end frequencies as well.
They are highly sensitive to the lower end of the spectrum.
Plus, they tend to model the human perception of sound in a super inaccurate fashion.
Meaning, the compressor could actually end up triggering based on the ‘felt’ frequencies, as opposed to the ‘heard’ frequencies.
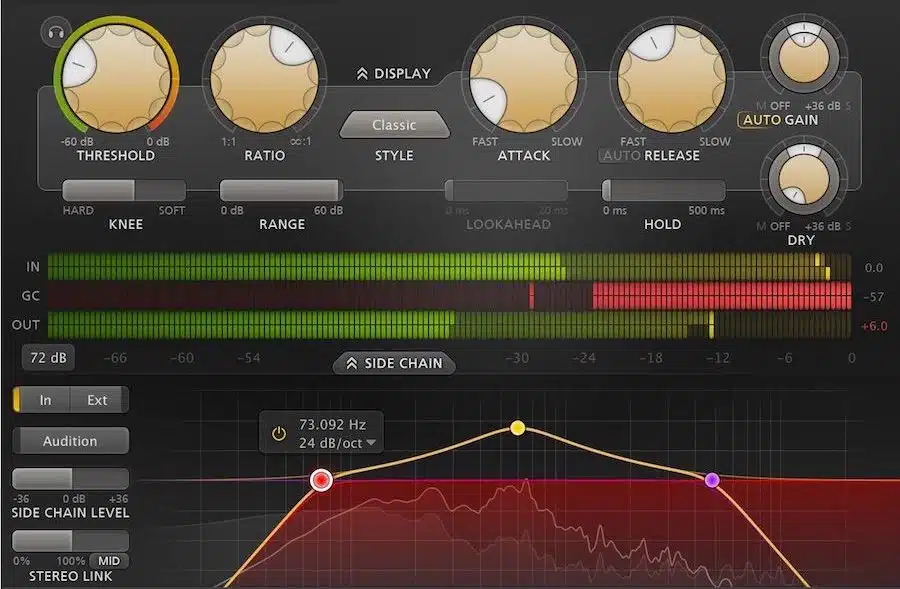
The frequencies that actually need compressing are overlooked, as the compressor’s actions are based upon unheard frequencies.
If you’re confused about the differences between a Limiter and a Compressor, click here.
This is why applying one to an 808, versus a typical bass guitar, is much harder to manage.
The reason is, that you intentionally want to make an 808 sub-bass heavy.
While the bass guitar naturally produces those frequencies in subtle amounts.
Luckily, there’s a brilliantly simple solution:
the internal sidechain detection filter.
What this does is allow you to EQ frequencies within the signal being processed (internally).
This way, the compressor will totally ignore them altogether.
The magic lies in the fact that the EQ’d frequencies won’t be EQ’d when it reaches the output stage either, which is great.
This makes it so the low-end frequencies that notoriously trigger the compressor are essentially non-existent to them.
Incredible, right?
Upon output they will still exist.
Allowing you to sufficiently compress your signal without those low frequencies driving the boat.
For example, if you applied a cutoff at around 60Hz, the compressor will ignore all the sub-bass frequencies.
Thus, allowing it to trigger upon the heard frequencies, not felt.
Otherwise, it will end up being a complete disaster.
Additionally, it creates an extremely hard, unadulterated low-end compression otherwise unattainable without this technique.
Here is how to do it:
STEP 1 一 Open up a compressor that contains an internal sidechain EQ circuit.
STEP 2 一 Apply compression as you normally would.
Remember, now that you have a better understanding of the sub-bass, make sure you’re looking at your spectrum analyzer.
You’ll most likely see the sub-bass frequencies trigger the compressor.
This will cause very erratic, inaccurate compression, which of course you want to stay far away from.
STEP 3 一 Use the internal sidechain EQ to cut the sub-bass frequencies.
You’ll instantly hear a much bigger sub-bass that can now be controlled based on the frequency you hear.
Amazing and simple. Can’t get any better than that.
NOTE: This may cause a noticeable increase in the overall level/volume.
Be sure to adjust the compressor’s Makeup Gain parameter accordingly.
5. EQ Carving: What Not To Cut
It is common practice to simply go into each channel and apply a cut to every track in your mix, right?
Well, when it comes to the sub-bass, this technique is slightly modified.
It’s not intended to reduce the perceived low-end, but rather increase it.
I’m sure you’ve experienced or seen low-end elements that had this very cut applied, with a resonant boost (as shown below).
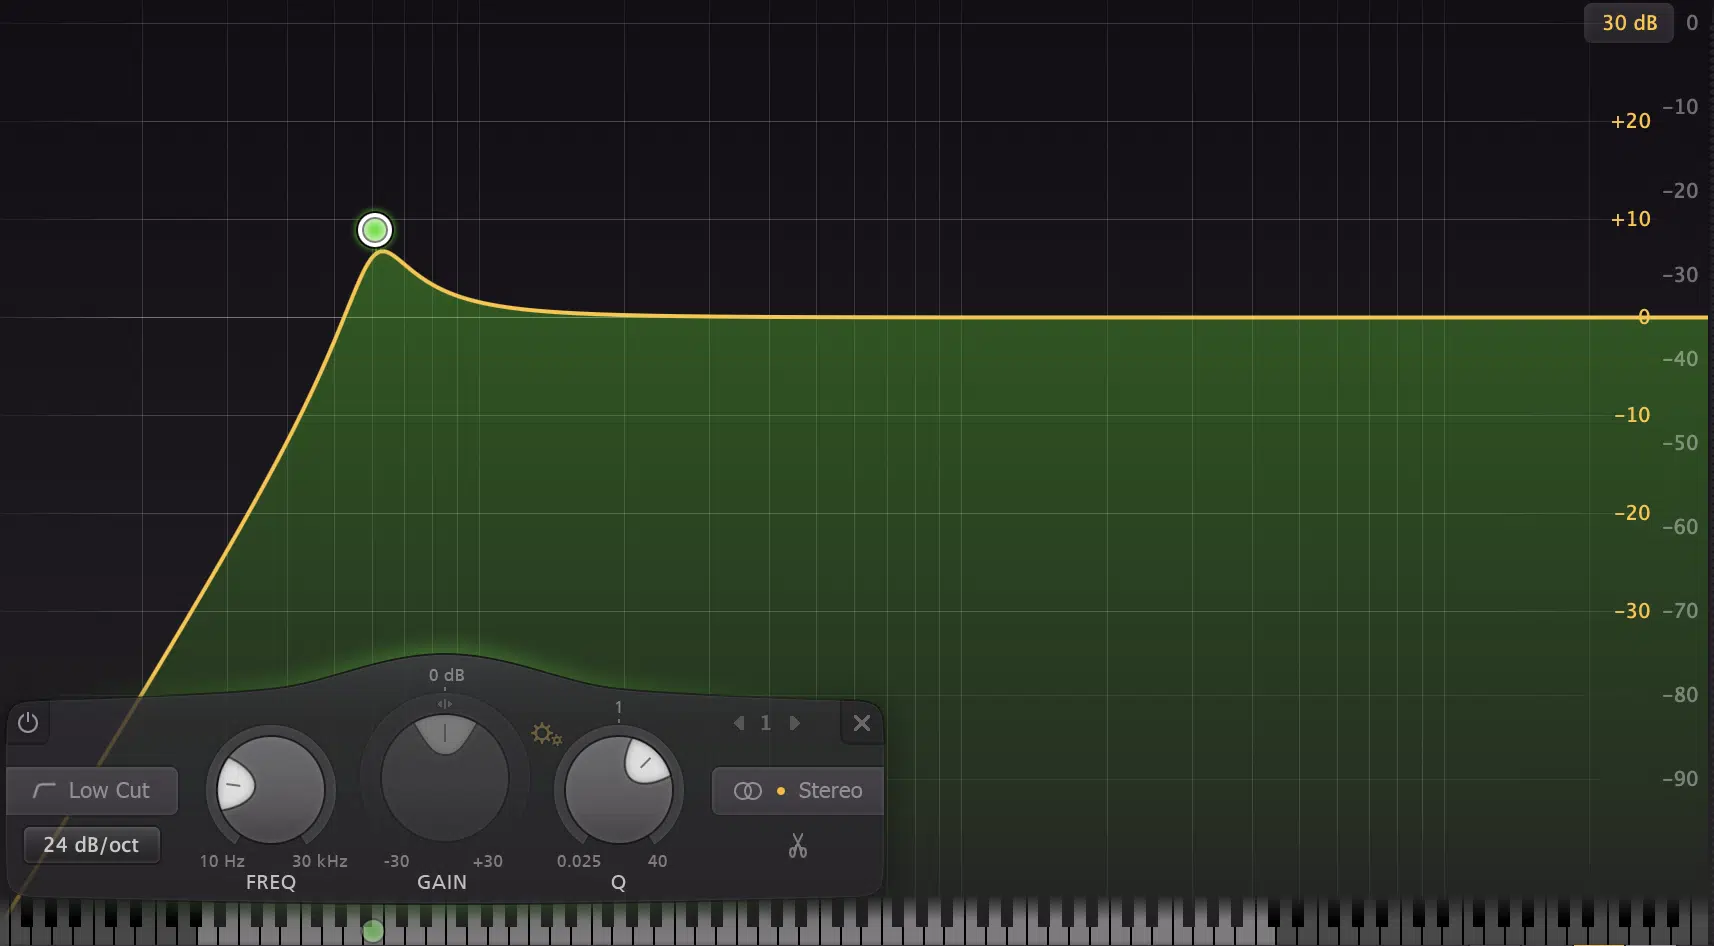
When it comes to removing those crucial sub-bass frequencies and replacing them with frequencies that are more easily manageable, it certainly has its advantages.
However, that’s the easy way out.
It may sound good on your boombox, but just wait until you play it back on a good system… can you say cringe?
Plus, in actuality, all you’re doing is increasing the illusion of bass and eliminating the real thing.
Instead, what you’re going to want to do is modify this technique slightly, as mentioned above.
STEP 1 一 Locate your low-end element, preferably already with the EQ cut and resonant boost applied.
Then, take the steep EQ cut and dial down the resonant boost to 0 (a standard cut).
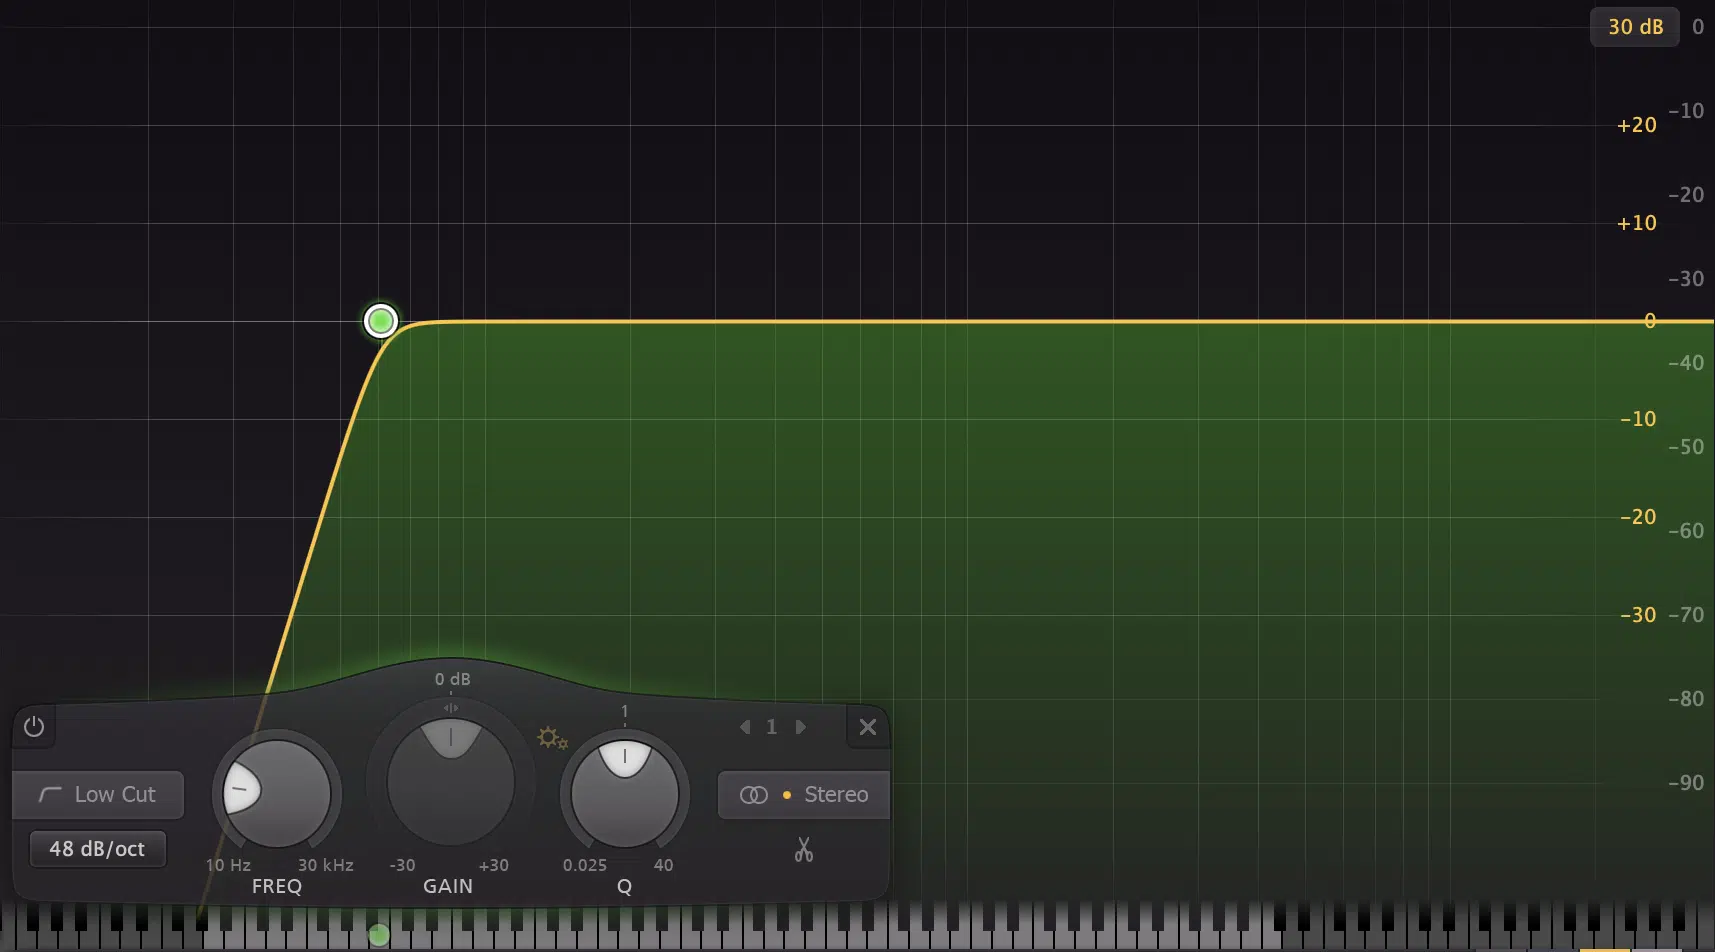
STEP 2 一 Duplicate the track.
STEP 3 一 Take the duplicate track and put that cut in reverse.
In other words, cut everything at, and above the 60Hz range (approx.).
You’ve now successfully isolated and split the sub-bass elements from the rest of the signal.
This will give you ultimate creative freedom.
You’ll be able to implement everything you normally would.
Except now, you’ll be able to incorporate sub-bass frequencies however you’d like as well.
This can serve as a real game-changer in the future, so make sure to write it down in your Producers’ toolkit.
6. The Lack of Saturation
Saturation is the definition of a double-edged sword, especially when it comes to the sub-bass.
As you incorporate saturation, you’re actually taking away from those lower-end frequencies.
This consists of taking the lower harmonic content and exciting it in order to be heard in the upper-frequency range.
Meaning, it increases the perception of the low-end harmonics, whilst actually reducing those very same frequencies.
The best way to look at is, in a sense, these processors take your sub-bass harmonics and transpose them upwards.
For example, the more saturation/distortion you add to the bass to make it hit harder, the more you’re taking away from the actual low end.
If you add too much harmonic excitement, those lower-end frequencies will cease to exist in the mix entirely.
Yes, even with the best sub-woofer in the world at your disposal.
The solution, aside from parallel sub-bass processing?
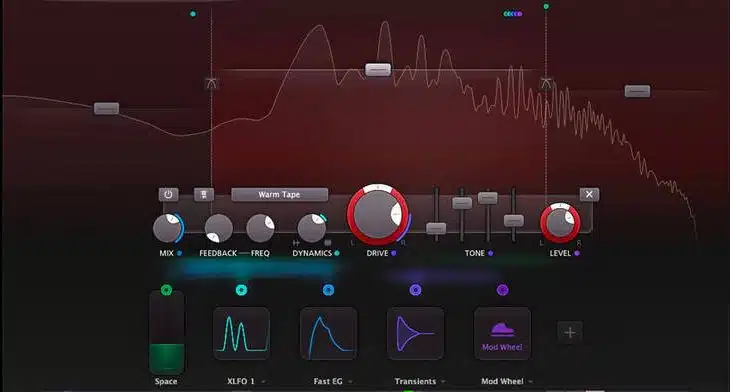
Don’t add saturation to the very bottom.
STEP 1 一 Take your bass and apply saturation.
As a test, you’re going to watch the sub-bass and low-end frequencies with your spectrum analyzer.
You’ll notice them disappear as you push the saturation harder.
STEP 2 一 Duplicate and isolate the sub-bass frequencies (explained above).
STEP 3 一 At this point, it’s not likely you’ll hear a difference until you remove the saturation from the isolated sub-bass track.
Remember to watch the analyzer so you’ll be able to see the difference, as opposed to hearing it.
STEP 4 一 For additional effect, push the saturation even harder on the main bass track.
Don’t worry about the loss of the low-end, as you know the final product will reflect differently.
STEP 5 一 Take the EQ band, which is now at around 60Hz, and gradually push it up until it reaches 90Hz.
You’ll now have a mix of the sub-bass and lower-end spectrum, which can be heard when unsaturated.
This will provide you with pure low-end bass mixed with processed bass.
Now you’ll have a super saturated, bassy outcome, regardless of the playback system on which it’s heard.
OUTRO
The sub-bass is no doubt a tricky beast.
While these tricks alone are just the tip of the iceberg, they can help impact your final product in a major way.
You most likely won’t master them at first, as practice makes perfect, but the more you experiment, the more you’ll grow.
You’ll be able to uncover things you didn’t even know existed within your mix, even when you can’t hear them.
Incredible, right?
Just make sure to remember, when it comes to the bass and sub-bass, balance is key.
Especially when you consider all the different playback systems available (especially phones & tablets).
To help you get into the swing of things, make sure to practice not only your own samples/music but professional sounds as well.
It really makes the process smoother and more fluid.
For the hottest, ready-to-go samples imaginable, make sure to download the free Unison Essential Bass Loops.
They include some of the most fire, professional basslines in the game.
Plus, they will make your tracks undeniably unforgettable, even when used as is.
If you’d like to check out a list of the hottest FREE samples of 2023, click here.
Until next time…


Leave a Reply
You must belogged in to post a comment.