Ableton’s piano roll is pretty impressive, especially when it comes to programming beats, laying down melodies, or building epic chord progressions.
If you know what you’re doing, you’ll be able to create fire tracks, tweak your MIDI clips to sound perfect, and speed up your workflow (big time).
Plus, successfully using features like velocity control, quantization, and scale mode will help your music sound polished and dynamic.
If you’re an Ableton Live user, or just want to learn all about it, then you’re in luck because I’m breaking it all down today, like:
- Mastering the piano roll layout ✓
- The Arrangement View and Session View ✓
- Working with MIDI clips/MIDI tracks/MIDI data ✓
- Editing MIDI notes with precision (+ MIDI editor tricks) ✓
- Adjusting velocity for realistic expression ✓
- Timing tweaks with quantization settings ✓
- Staying in key with scale mode ✓
- Using MIDI effects and modulation ✓
- Tips for working with MIDI controllers ✓
- How it differs from other DAWs ✓
- Much more about the Ableton piano roll ✓
By knowing all of this invaluable information, you’ll produce legendary tracks and enhance your skills to a whole new level.
It’s all about having control, staying creative, and improving your workflow.
As Ableton producers, knowing how to use the piano roll effectively and take advantage of all its features/functions is a game-changer.
This way, your tracks will sound polished and professional 一 giving you the confidence to take your music to the next level and blow the competition away.
Table of Contents
- Ableton Piano Roll: Quick Rundown
- The Piano Roll Interface
- Basic MIDI Note Functions (MIDI Editor Must-Knows)
- Grid and Quantization Settings (Breaking it Down)
- Advanced Editing Techniques
- MIDI Effects and Modulation
- Integration with an External MIDI Keyboard/Controller
- Using the Chance and Velocity Range Features
- Time-Warping and Strumming Effects
- Bonus: Don’t Forget to Utilize Keyboard Shortcuts
- Final Thoughts
Ableton Piano Roll: Quick Rundown
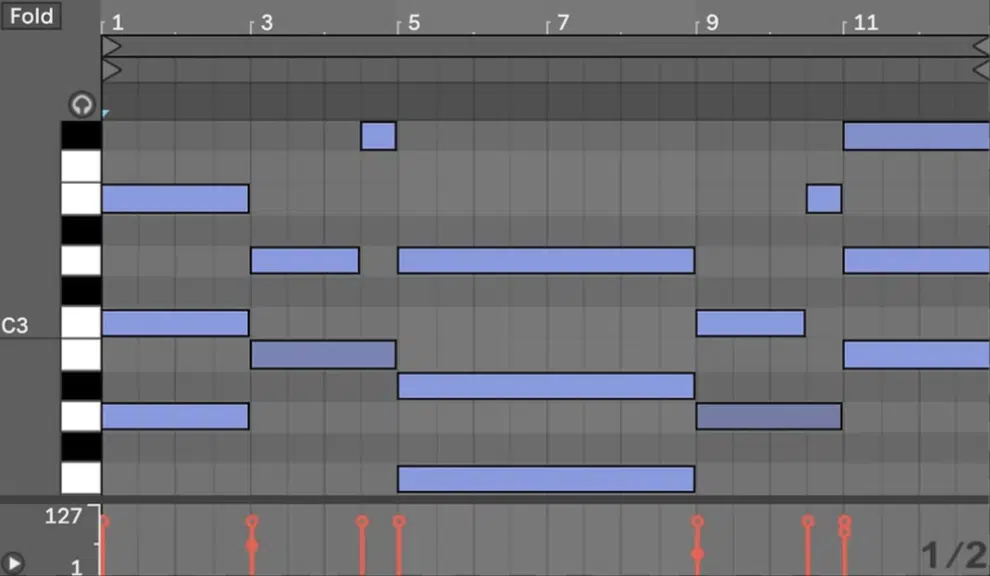
The Ableton piano roll is one of the most versatile tools in Ableton Live because it’s where you’re going to be editing and arranging MIDI notes in it all day.
As well as spend endless hours:
- Fine-tuning melodies
- Creating intricate rhythms
- Developing harmonies
- Etc.
By double-clicking on a MIDI clip in either Arrangement View or Session View, you can open this intuitive MIDI editor and begin knocking out beats.
Its standout features include precise note placement, adjustable grid sizes, and seamless integration with MIDI keyboards and controllers.
Whether you’re working with an instrument rack, a single melody, or layering multiple clips, the piano roll in Ableton Live gives you the creative flexibility to bring your ideas to life.
And that’s exactly what we’re going to be breaking down today, so let’s get to it.
-
Pro Tip: Accessing the Piano Roll in Ableton Live
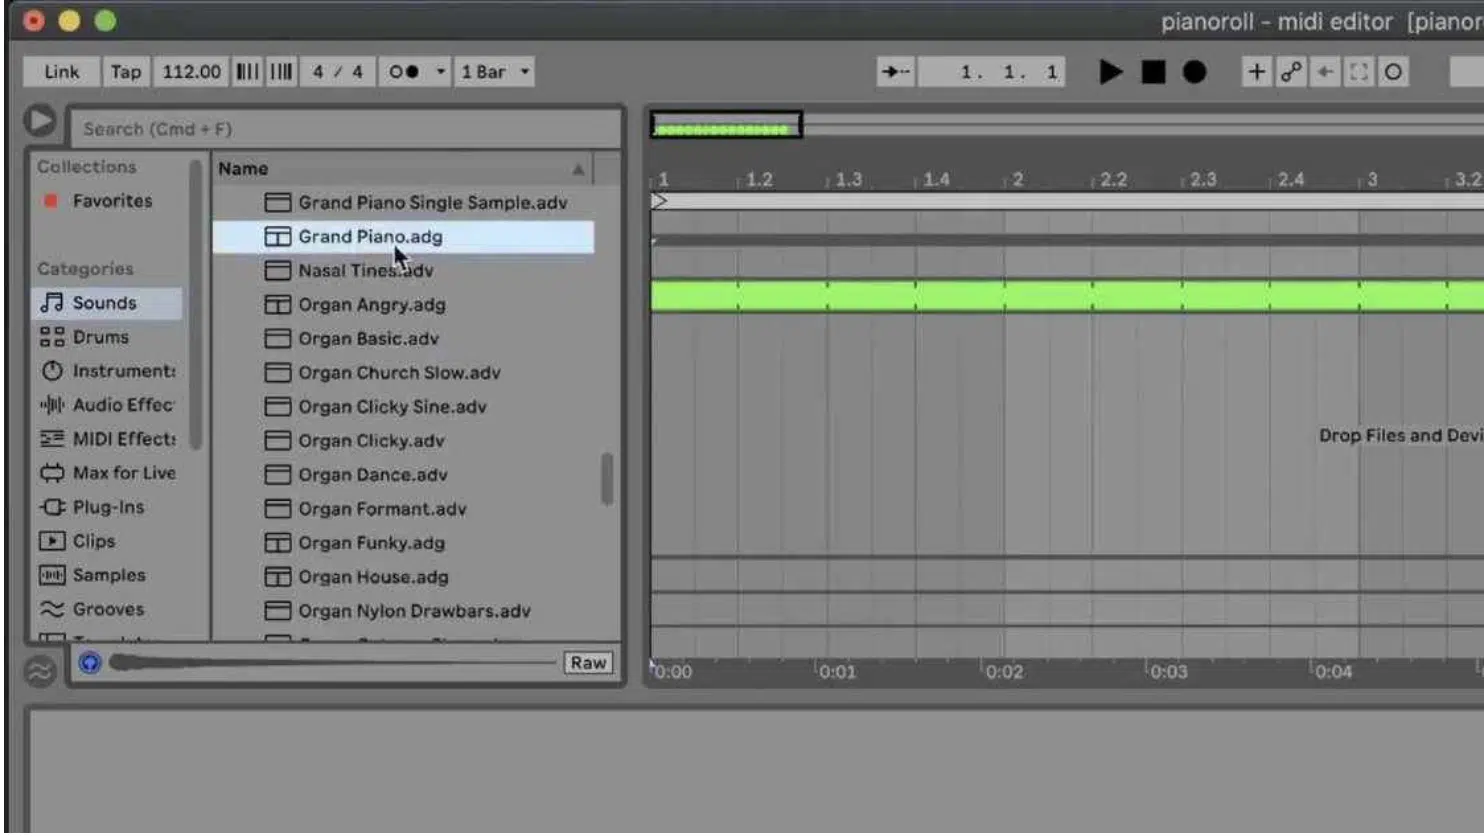
I know it sounds like a simple step, but learning how to access Ableton’s piano roll is super important for a smooth workflow, and it’s the first step.
To open the piano roll in Ableton Live, start by creating a new MIDI track and double-clicking an empty clip slot in Session View.
Or, simply double-click within the timeline in Arrangement View.
Head over to the ‘Create’ menu at the top of the interface and select ‘Insert MIDI Track,’ or use the shortcut [Command + Shift + T] on Mac or [Ctrl + Shift + T] on Windows.
Once the MIDI track is in place, double-click on an empty clip slot within the track to easily create a new MIDI clip.
This action will open the piano roll editor at the bottom of the screen so you can start inputting and editing MIDI notes right away.
Remember, double-clicking is key to accessing the piano roll efficiently.
PRO TIP: Use the Blue Headphones Icon in the Clip View to preview notes as you click them 一 making sure they sound exactly how you want without needing to hit play.
The Piano Roll Interface
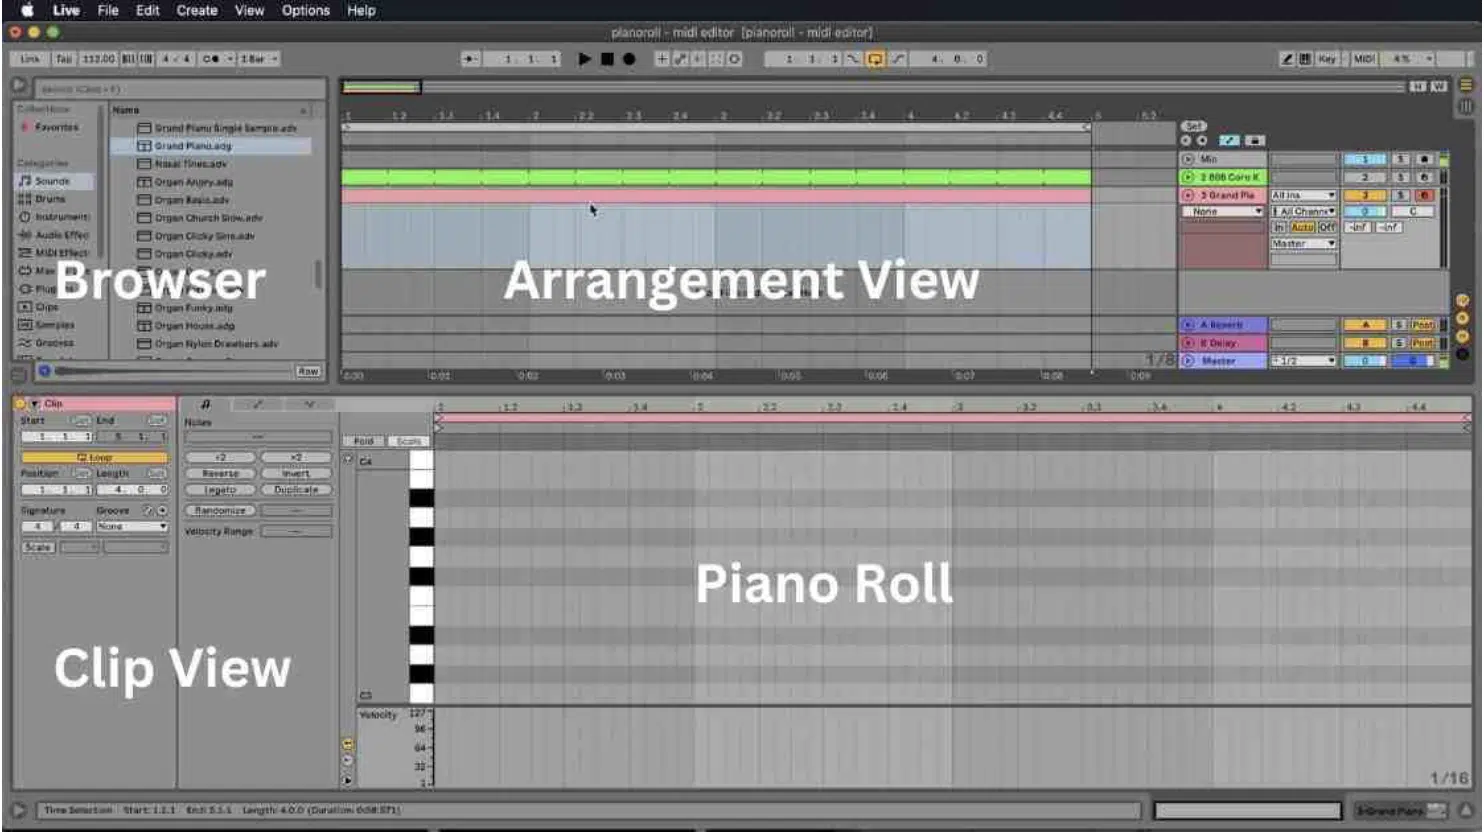
The piano roll in Ableton Live is where creativity meets precision, and the interface is split into a:
- Vertical axis (pitch)
- Horizontal axis (time)
The notes are arranged like a piano keyboard, with white and black keys helping you visually align MIDI notes.
You’ll see the grid overlaying the piano roll, which is key for manipulating your MIDI notes to your desired timing and rhythm.
For example, setting the grid size to 1/16 allows you to program fast hi-hat rolls, while larger sizes like 1/4 are great for slower, groove-driven basslines.
Above the piano roll is the Clip View, which provides an overview of your MIDI clip and its parameters, such as loop points and start/stop positions, that kind of thing.
And remember, the Blue Headphones Icon in the top-left corner of the Clip View is a hidden gem as I mentioned right above.
It lets you preview notes by clicking on the piano keys or individual MIDI notes in the roll.
Let’s say you were designing melodies, this feature makes it easy to hear your notes without pressing Play repeatedly, so it’s pretty beneficial.
Lastly, don’t forget about the zoom function…
PRO TIP: Dragging with your mouse or using shortcuts like [Command + Scroll] on Mac helps you fine-tune your edits in dense arrangements, which I’m sure you’ll work with.
Basic MIDI Note Functions (MIDI Editor Must-Knows)
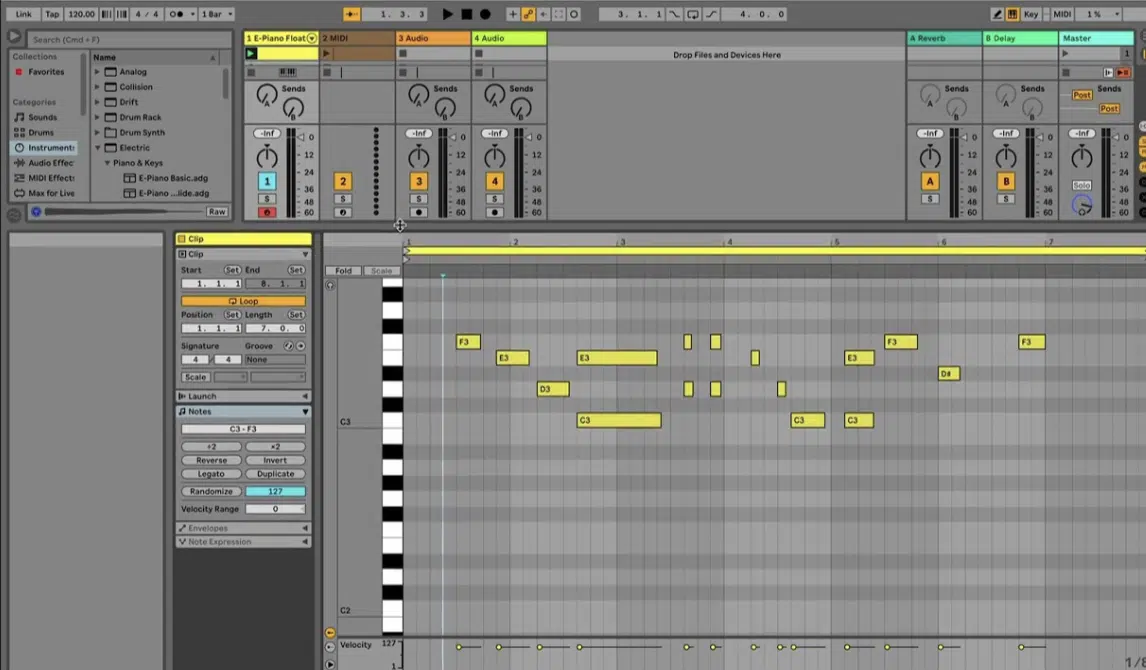
Mastering MIDI note functions in Ableton’s piano roll is super important when it comes to creating intricate and professional tracks.
Adding notes is as simple as double-clicking on the grid where you want a note to be placed 一 super straightforward.
For example, if you’re creating a four-on-the-floor kick pattern, double-click on the first beat of each measure.
To adjust the note’s length, drag its edge either left or right:
- Shorter notes (Perfect for staccato melodies)
- Longer notes (Add legato-style sustain)
Also, editing MIDI notes is just as simple 一 by right-clicking on a note, you’ll access options like quantization, which aligns your notes to the grid.
Quantize settings let you control how tightly notes snap, so you can preserve human-like imperfections or go for tight robotic precision, dealer’s choice.
Velocity adjustment is also a must-know: Select a note and drag the velocity marker up or down in the Velocity Editor at the bottom of the screen.
PRO TIP: Lower velocities can soften drum hits or make your chords sound more dynamic, while higher values add punch and intensity.
Always remember, all the notes you edit contribute to the overall feel of your track, so take your time fine-tuning each one so it matches your vibe perfectly.
Grid and Quantization Settings (Breaking it Down)
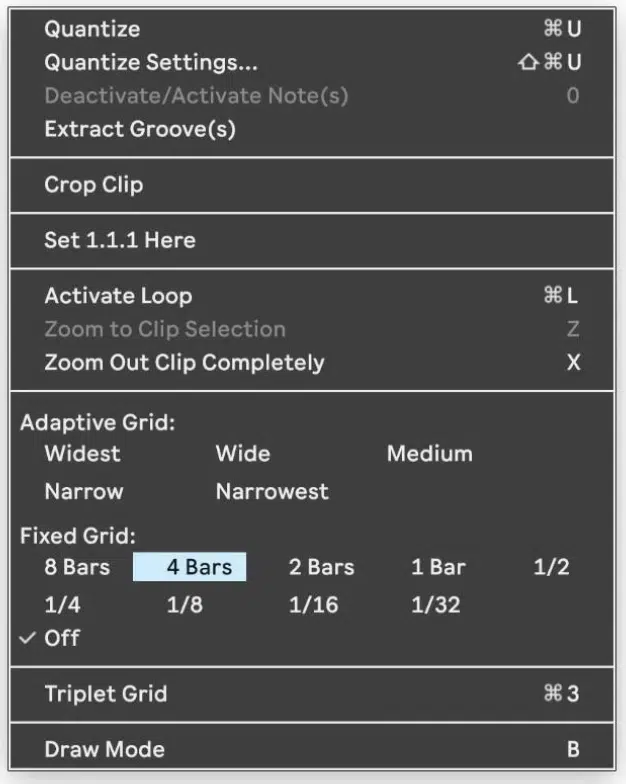
The grid and quantization settings in Ableton Live aren’t just about keeping your notes put together… they can completely transform your rhythms.
The grid determines where notes fall in time, but it also offers unmatched flexibility.
For example, by selecting “Fixed Grid” or “Adaptive Grid” (right-click in the piano roll), you can adjust the grid resolution to fit your project.
But, rather than focusing only on rhythmic precision, think of the grid as a way to structure your patterns while leaving room for experimentation.
Here’s where the grid shines creatively… Instead of simply aligning notes to a rigid pattern, use it to design show-stopping grooves.
For example, you can program kick drums on a 1/4 grid for structure, then switch to a 1/32 grid to add quick rolls or give your hi-hats an edge.
This lets you build complexity without losing the foundation of your rhythm.
Also, what I like to do sometimes is disable the grid entirely (Ctrl + 4 on Windows or Command + 4 on Mac) because it’s perfect for nudging specific notes 一 giving them a more laid back, humanized feel.
Quantization kicks things up a notch by locking your patterns into place when needed, but remember it’s not just about snapping notes to the nearest beat…
In Ableton, the Quantize Settings menu allows you to dial in exactly how much adjustment is applied to each note.
For example, applying 50% quantization to a groove will tighten it while preserving its natural swing, which is always great.
Use this technique to enhance the interplay between drums and melodic elements, creating a track that feels both polished and organic.
Remember, it’s not just about programming, it’s about shaping rhythm that breath new life into your music.
Advanced Editing Techniques
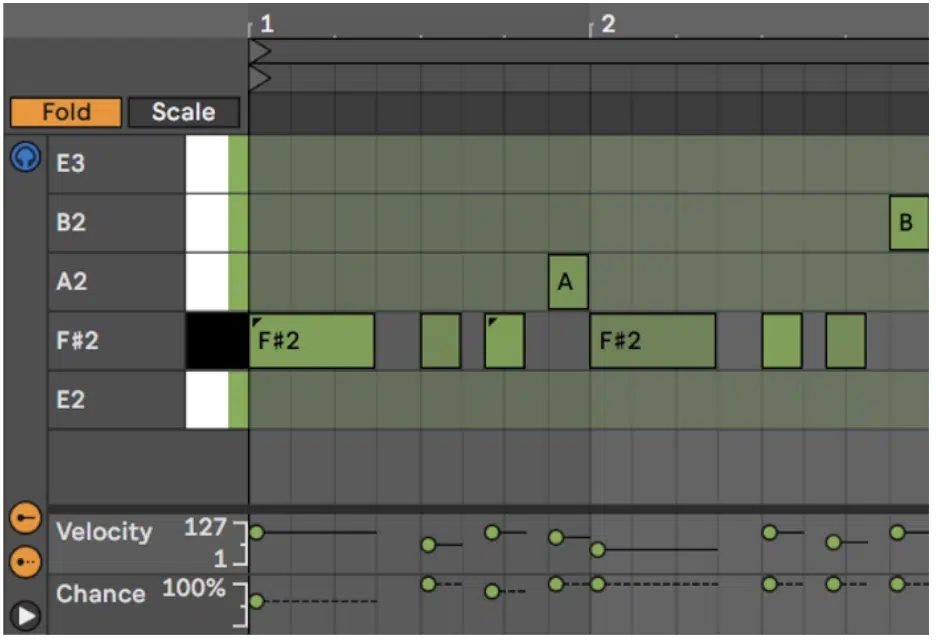
When working in the Ableton Live piano roll, advanced editing techniques will help you fine-tune your MIDI clips for unique/polished results, which I hope you do every time.
#1. One of the standout features is the Fold button, located in the top-left corner of the piano roll, which hides any unused notes and focuses only on the ones you’ve played.
It seriously can streamline your workflow and make things easier to manage.
For example, if you’re working on a chord progression in C minor, activating Fold will show only the notes in your chords, keeping the interface clutter-free.

What I like to do is combine the Fold function with Scale Mode so I only see the notes that fit my selected scale, which is pretty cool.
#2. Another great tool is the Force Legato function which is ideal for connecting notes and eliminating any gaps.
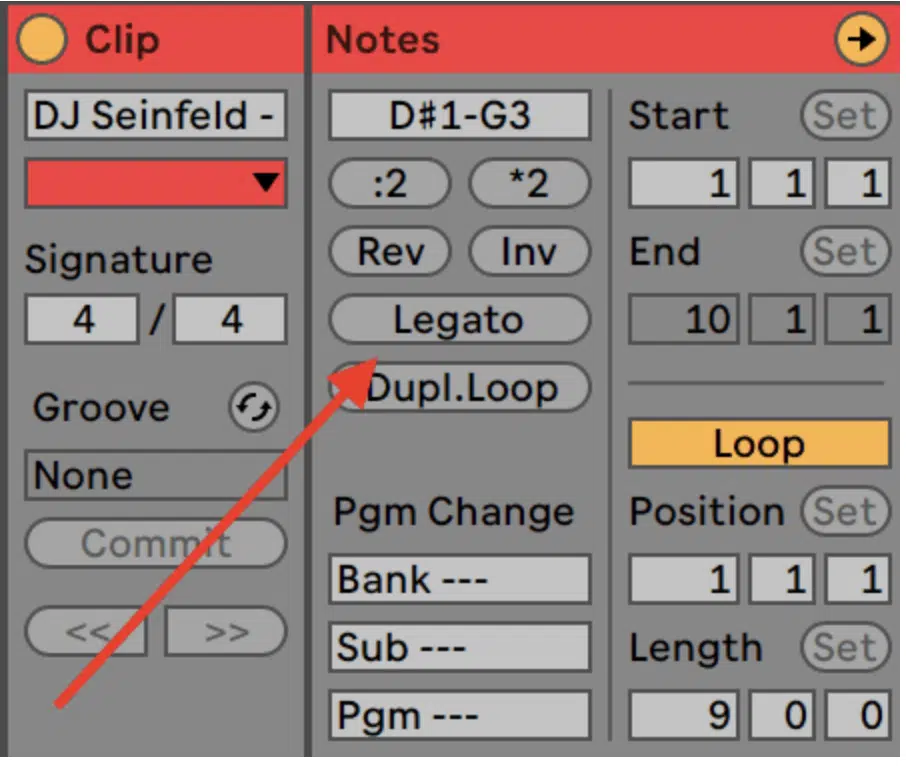
To use it, simply highlight your MIDI notes, right-click, and select “Legato” to extend each note to the beginning of the next one, creating smoother transitions.
This is perfect for string or pad instruments where note transitions are key (and yes, you can manually tweak things afterwards).
For example, when working on ambient tracks, slightly overlapping legato notes can create lush, flowing textures which have a super immersive vibe.
On the flip side, EDM genres benefit from tighter, controlled transitions.
#3. Use Reverse and Invert commands, found in the right-click menu, for creative reimagining of melodies.
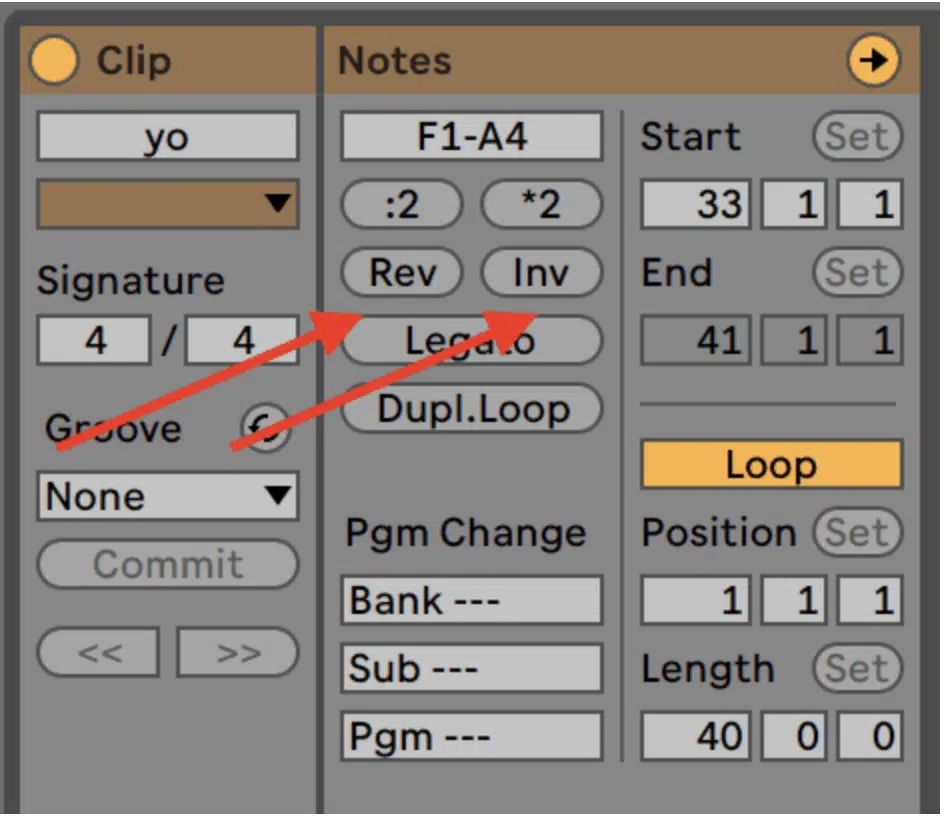
Reversing flips the note sequence backward, while inverting flips the pitches around a central axis 一 both are great for remixing or generating new ideas from old patterns.
My advice is to copy your MIDI clip first so you can compare the original with the modified version.
#4. Don’t overlook the Duplicate Loop button, which instantly doubles the length of your MIDI clip and keeps all edits in place for easy extensions.

After duplicating, make subtle changes to the second half, such as altering velocities, shifting a few notes, or adding new elements.
For example, if you’re working on a bassline, you could add slight variations in timing or pitch to keep the track dynamic and engaging.
Side note, you can use the Randomize Velocity feature in the right-click menu to humanize the duplicated section, which prevents it from sounding repetitive/basic.
MIDI Effects and Modulation
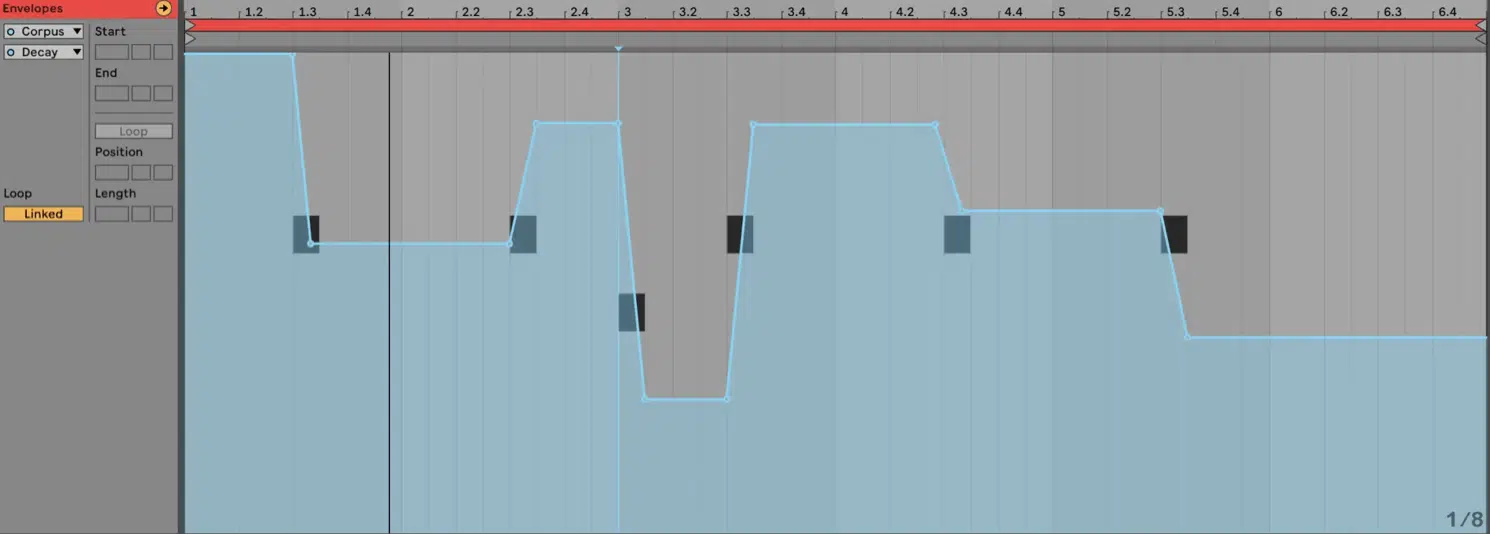
MIDI effects in Ableton Live let you add depth and complexity to your MIDI clips with basically no effort, so you can bang out dynamic tracks all day.
For example, the Arpeggiator effect automatically breaks down chords into rhythmic sequences, making it perfect for creating intricate patterns for electronic genres.
Mix that with the Chord effect to instantly add harmonies to single notes 一 creating enchanting progressions without manually programming every note.
Stack effects like Velocity and Random to humanize your repetitive sequences if you want to add subtle variations in note intensity and timing.
Modulation in the piano roll takes things further, and you can use the Envelope Editor to:
- Automate pitch bends
- Modulate instrument parameters
- Even control external gear
For example, by automating the cutoff frequency of a synth, you can create sweeping filter effects that change/evolve throughout the track.
Ableton Live’s MIDI mapping capabilities also let you assign modulation parameters to knobs or sliders on your MIDI controller for real-time tweaking.
This is something that I myself personally love.
Whether you’re adding movement to pads or creating rhythmic variations in percussion, combining MIDI effects and modulation is your key to unlocking expressive sounds.
Ones that will really help your tracks stand out above the competition, and enhance your skills in the process, which is what it’s all about.
Integration with an External MIDI Keyboard/Controller
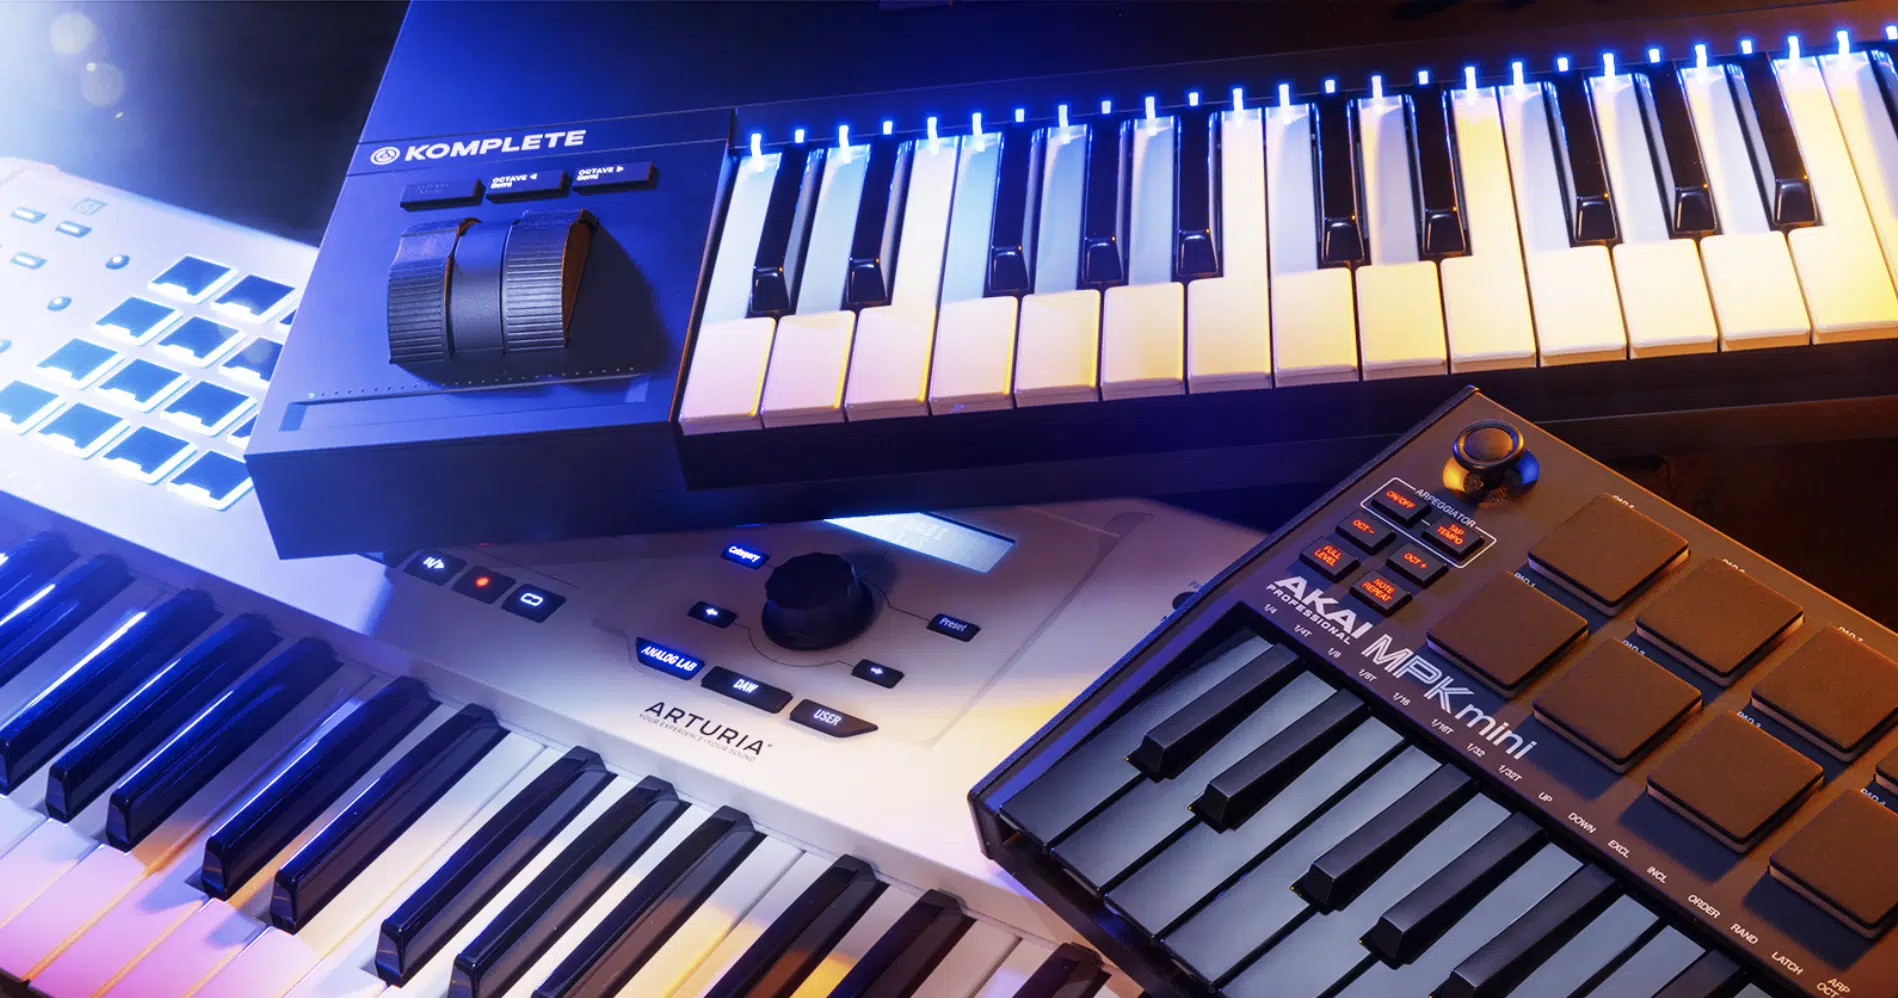
Integrating an external MIDI keyboard or controller with Ableton Live enhances both creativity and workflow efficiency.
Start by connecting your MIDI device and ensuring it’s detected in Ableton’s Preferences > Link/Tempo/MIDI tab.
Once connected, you can enable the Track and Remote options for your device to unlock both MIDI note input and MIDI mapping functionality.
Make sure to double-check your MIDI channel settings on both the device and Ableton to avoid conflicts, especially when using multiple controllers.
Once everything is set up, recording MIDI notes directly into the piano roll is straightforward and super fun to mess around with.
Simply hit Record and play your keyboard to capture notes in real-time (perfect for capturing those subtle nuances that come with playing live).
And then there’s MIDI mapping, which can up your integration game even more.
By entering MIDI Map Mode (Command + M on Mac or Ctrl + M on Windows), you can assign keys, pads, or knobs on your controller to specific functions in the software.
This could be like starting and stopping clips or adjusting instrument parameters.
If possible, use a controller with velocity-sensitive pads for dynamic drum programming or assign the modulation wheel to control filter sweeps in real-time.
Try mapping multiple parameters to a single knob for creative effects, like simultaneously controlling reverb size and filter frequency.
And, if you’re using a MIDI keyboard, try experimenting with octaves shifts to explore higher or lower registers without needing to edit in the piano roll.
It makes composing faster, more intuitive, and way more enjoyable (I hope), and you can find out all about octaves right here.
Using the Chance and Velocity Range Features
The Chance and Velocity Range features in Ableton Live are powerful ways to include some unpredictability and realism into each MIDI clip.
The Chance Editor, located in the piano roll, lets you set the probability of each note being triggered during playback.

For example, if you’re creating a drum pattern, you can assign lower chance values to ghost notes or subtle hi-hats.
This makes them play sporadically for a more dynamic rhythm, and you can even combine this with longer clips to ensure the variations feel organic/less repetitive.
The Velocity Range feature lets you define a range of velocity values for each note, rather than a single static number.
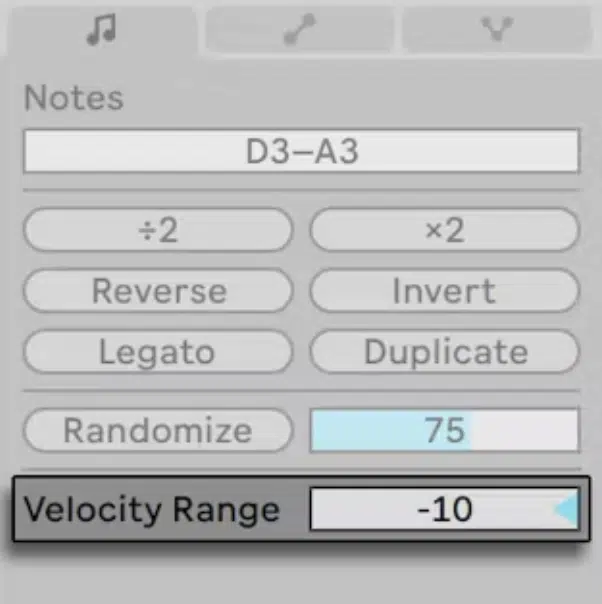
This is super useful for mimicking the dynamics of live instruments.
For example, if you’re programming a piano melody, setting a range of velocities for each note creates a natural ebb and flow, as if it were played by a real pianist.
To access this, click on the Velocity Editor in the piano roll and drag the range markers up and down.
NOTE: Use both Chance and Velocity Range together to humanize loops 一 giving your tracks that “played live” feel, even if they’re 100% programmed in MIDI.
Time-Warping and Strumming Effects
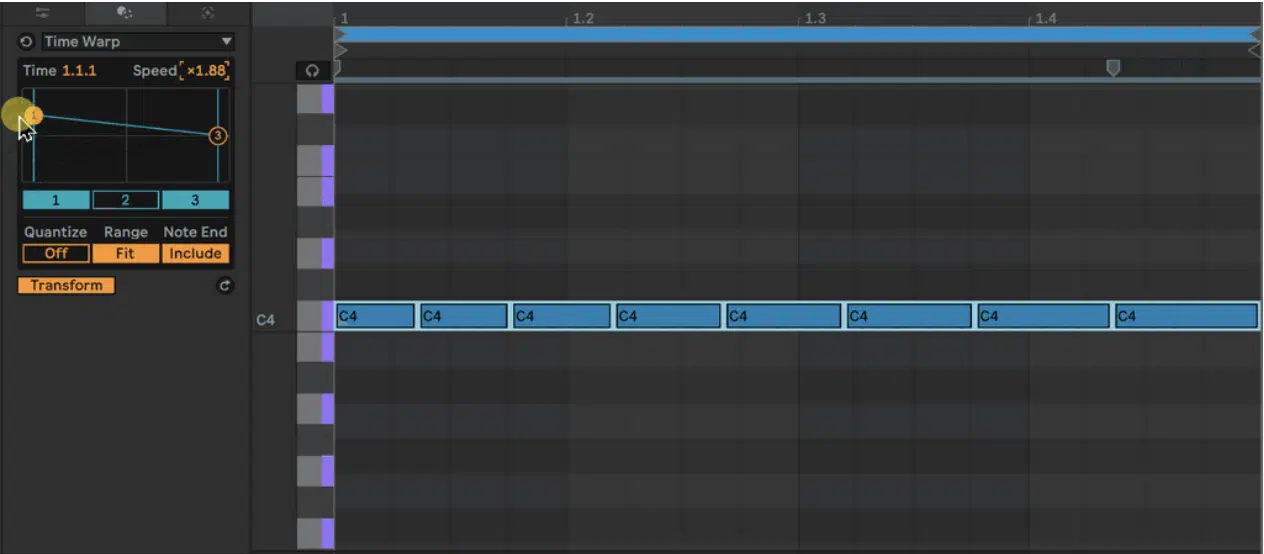
Time-warping and strumming effects in the Ableton piano roll lets you push the boundaries of timing and texture in your MIDI compositions.
Time-warping allows you to manipulate the timing of notes, either by dragging them individually off-grid.
Or, by using the Warp Markers feature to stretch and compress certain sections of your MIDI clip to make things a little more interesting.
Whether you want to slow down or speed up the timing of individual notes, you’ll be able to do so easily.
Strumming effects are yet another creative tool that Ableton has to offer, especially if you’re looking to emulate guitar-like chords.
To create a strumming effect, just stagger the timing of chord notes slightly by dragging them horizontally in the piano roll.
It’s best when combined with the Velocity Range feature to vary the intensity of each note in the chord, so definitely play around with that as well.
Apply strumming to synth patches for arpeggiated textures, or use it on pads for a subtle rhythmic pulse (sick stuff).
If you want to push things a little further, layer strummed chords with percussive sounds to add unique textures to your track.
Bottom line, these techniques make sure that each and every MIDI clip is not only rhythmically on point, but also has a ton of expression and character.
Bonus: Don’t Forget to Utilize Keyboard Shortcuts

Shortcuts in Ableton Live’s piano roll isn’t just a time-saver, it’s a game-changer for workflow efficiency, no doubt about it.
One key shortcut is [Command + Shift + T] on Mac or [Ctrl + Shift + T] on Windows to instantly create a new MIDI track.
This allows you to quickly add new instruments without interrupting your creative flow whenever inspiration strikes (which I know can be super random).
Another must-know shortcut is [B] to toggle Draw Mode 一 letting you input notes with a simple click.
To zoom in on intricate MIDI details, hold [Option + Scroll] on Mac or [Alt + Scroll] on Windows, making it easy to fine-tune note placement.
When editing velocity, use [Shift + Drag] to adjust multiple notes at the same time.
PRO TIP: You should memorize shortcuts for Duplicate ([Command + D] or [Ctrl + D]) and Quantize ([Command + U] or [Ctrl + U]) to fast-track repetitive tasks that suck.
The more you incorporate these shortcuts into your workflow, the faster and more fluid your production process will become.
Don’t forget to click the ‘shortcuts’ link up above to find out all of them.
Final Thoughts

The Ableton piano roll might not be as feature-rich as, let’s say, FL Studio’s piano roll, but it’s still a pretty powerful tool.
If you’re an Ableton piano roll user, you’ll need to master every part of it to produce tracks like a professional, so you have to at least know the basics like the back of your hand.
Now, after everything we’ve discussed today, you’ll be able to master the interface with confidence and edit MIDI notes with razor-sharp precision.
Plus, you’ll adjust velocity, utilize quantization, and apply advanced techniques like a boss after your practice a little bit.
Now, to take your skills to the next level when it comes to the Ableton piano roll, you’ve got to check out these invaluable Free Project Files.
It includes 3 professional-quality project files compatible with Ableton Live, FL Studio, and Logic Pro, showing you how the pros produce beats, from start to finish.
By studying these projects, you basically get the cheat codes about how pro-quality tracks are structured, layered, and processed.
Plus, these files are 100% royalty-free 一 letting you use them in your own music without any legal concerns, because nobody has time for that.
So, now that you know how to properly use the Ableton piano roll and have access to professional project files, it’s time to get to work.
Just remember to always practice, experiment, and stay creative so you never stop growing as a producer.
Until next time…


Leave a Reply
You must belogged in to post a comment.