Limiting is all about controlling peaks and shaping the audio signal to create a polished, professional sound.
It can prevent clipping, enhance perceived volume, and bring balance to your dynamic range, which will set you apart from all the amateurs out there.
Plus, it makes sure that your tracks are always on point for streaming platforms and ready for distribution without any worry.
As producers, knowing how to use limiters will seriously enhance your skills 一 helping you achieve cleaner mixes, louder masters, and more show-stopping results.
That’s exactly why I’m breaking down everything you need to know about how to use limiters, like:
- How limiters work in music production ✓
- Different types of limiters, like brickwall limiters ✓
- Understanding the threshold and output ceiling ✓
- Adjusting attack and release times ✓
- Preventing unwanted distortion ✓
- Key differences between compression & limiting ✓
- Using limiters for MAX dynamic control ✓
- Limiter placement in the mastering chain ✓
- Enhancing dynamic range & avoiding artifacts ✓
- Advanced techniques, tips, and tricks ✓
- Much more about how to use limiters ✓
Bottom line, by knowing all about how to use limiters like a professional, you’ll be able to knock out mixes that sound clean, balanced, and ready to upload.
Plus, your tracks will hit the perfect volume level without sacrificing dynamics or clarity (which you never want).
And, bonus, you’ll learn some advanced tips, tricks, and techniques along the way to really kick things up a notch like a true mastering engineer.
Table of Contents
What Exactly Does a Limiter Do?
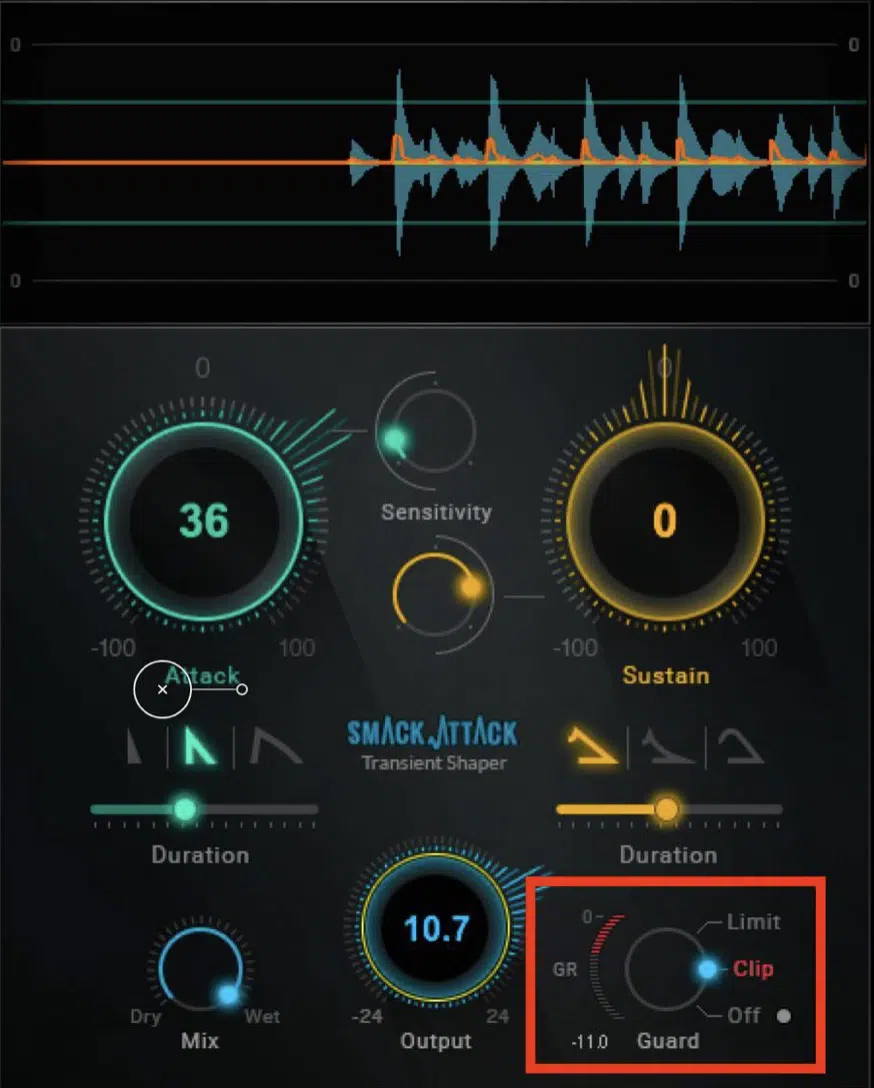
You can think of your limiter like your track’s safety net because it makes sure the audio signal never exceeds a certain level.
It’s a specialized form of compression with an infinite ratio, stopping any peaks from going beyond the set threshold.
For example, if your input signal gets too loud, the limiter kicks in to reduce its level, protecting against unwanted distortion.
When it comes to the mastering stage, this is key because it’s where audio limiters are used to ensure consistent loudness across all streaming platforms (like Apple Music).
When setting a limiter, it’s important to adjust the threshold carefully to avoid introducing unwanted distortion while still maintaining punch and clarity.
One of the biggest mistakes producers make is slamming the limiter’s threshold too low, which can seriously squash the dynamics and kill the energy of your mix.
And trust me, you definitely don’t want that to happen.
Instead, you should find the sweet spot where the limiter reduces peaks but preserves the natural feel of the sound.
Limiters are also great for boosting the perceived volume of a mix, making it sound louder without causing the track to distort.
For example, on a kick drum, you can use a limiter to bring out its presence while keeping it tight and controlled.
Just make sure to always monitor the output level to ensure you’re hitting the desired commercial loudness without killing the dynamic range.
Don’t worry if it sounds a little overwhelming, because I’ll be breaking down everything in detail so you’ll have a solid understanding of how to use limiters like a boss.
-
Pro Tip: Compression vs Limiting
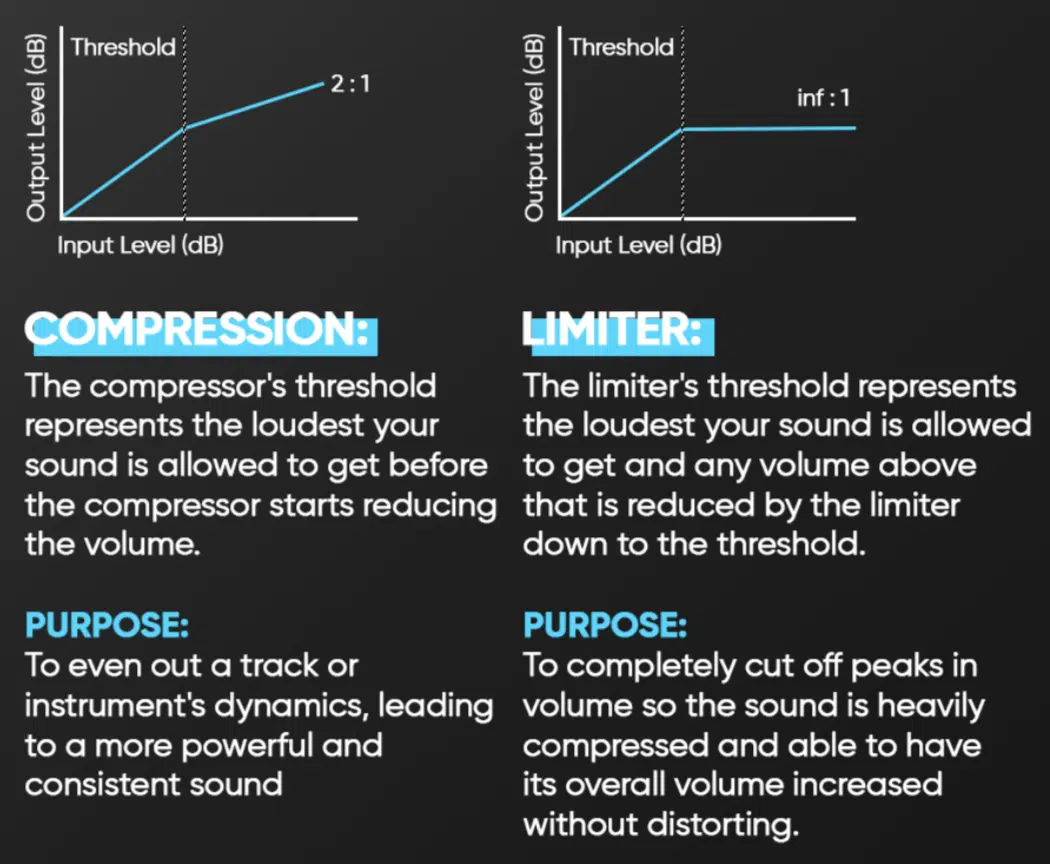
Compression and limiting both control dynamics, but they work differently.
Compression smooths out your audio signal by gradually lowering levels above the threshold control, making it great for shaping the overall feel of a mix for a more powerful, consistent sound.
Limiting, on the other hand, makes sure nothing goes past the set limit in the first place (perfect for cutting down peaks when you’re mastering).
If you know how to use limiters the right way, you’ll get loud, polished tracks without sacrificing clarity or introducing distortion.
Side note, if you want to learn absolutely everything about the differences between compression and limiting, I got you covered.
Types of Limiters: Breaking it Down
Limiters come in many types, each designed for specific tasks in music production. When you’re learning how to use limiters, you have to know all the key differences. So, let’s kick things off by breaking down the most common ones: Peak Limiters, Brickwall Limiters, and Multiband Limiters (plus their unique roles when shaping your sound).
-
Peak Limiters
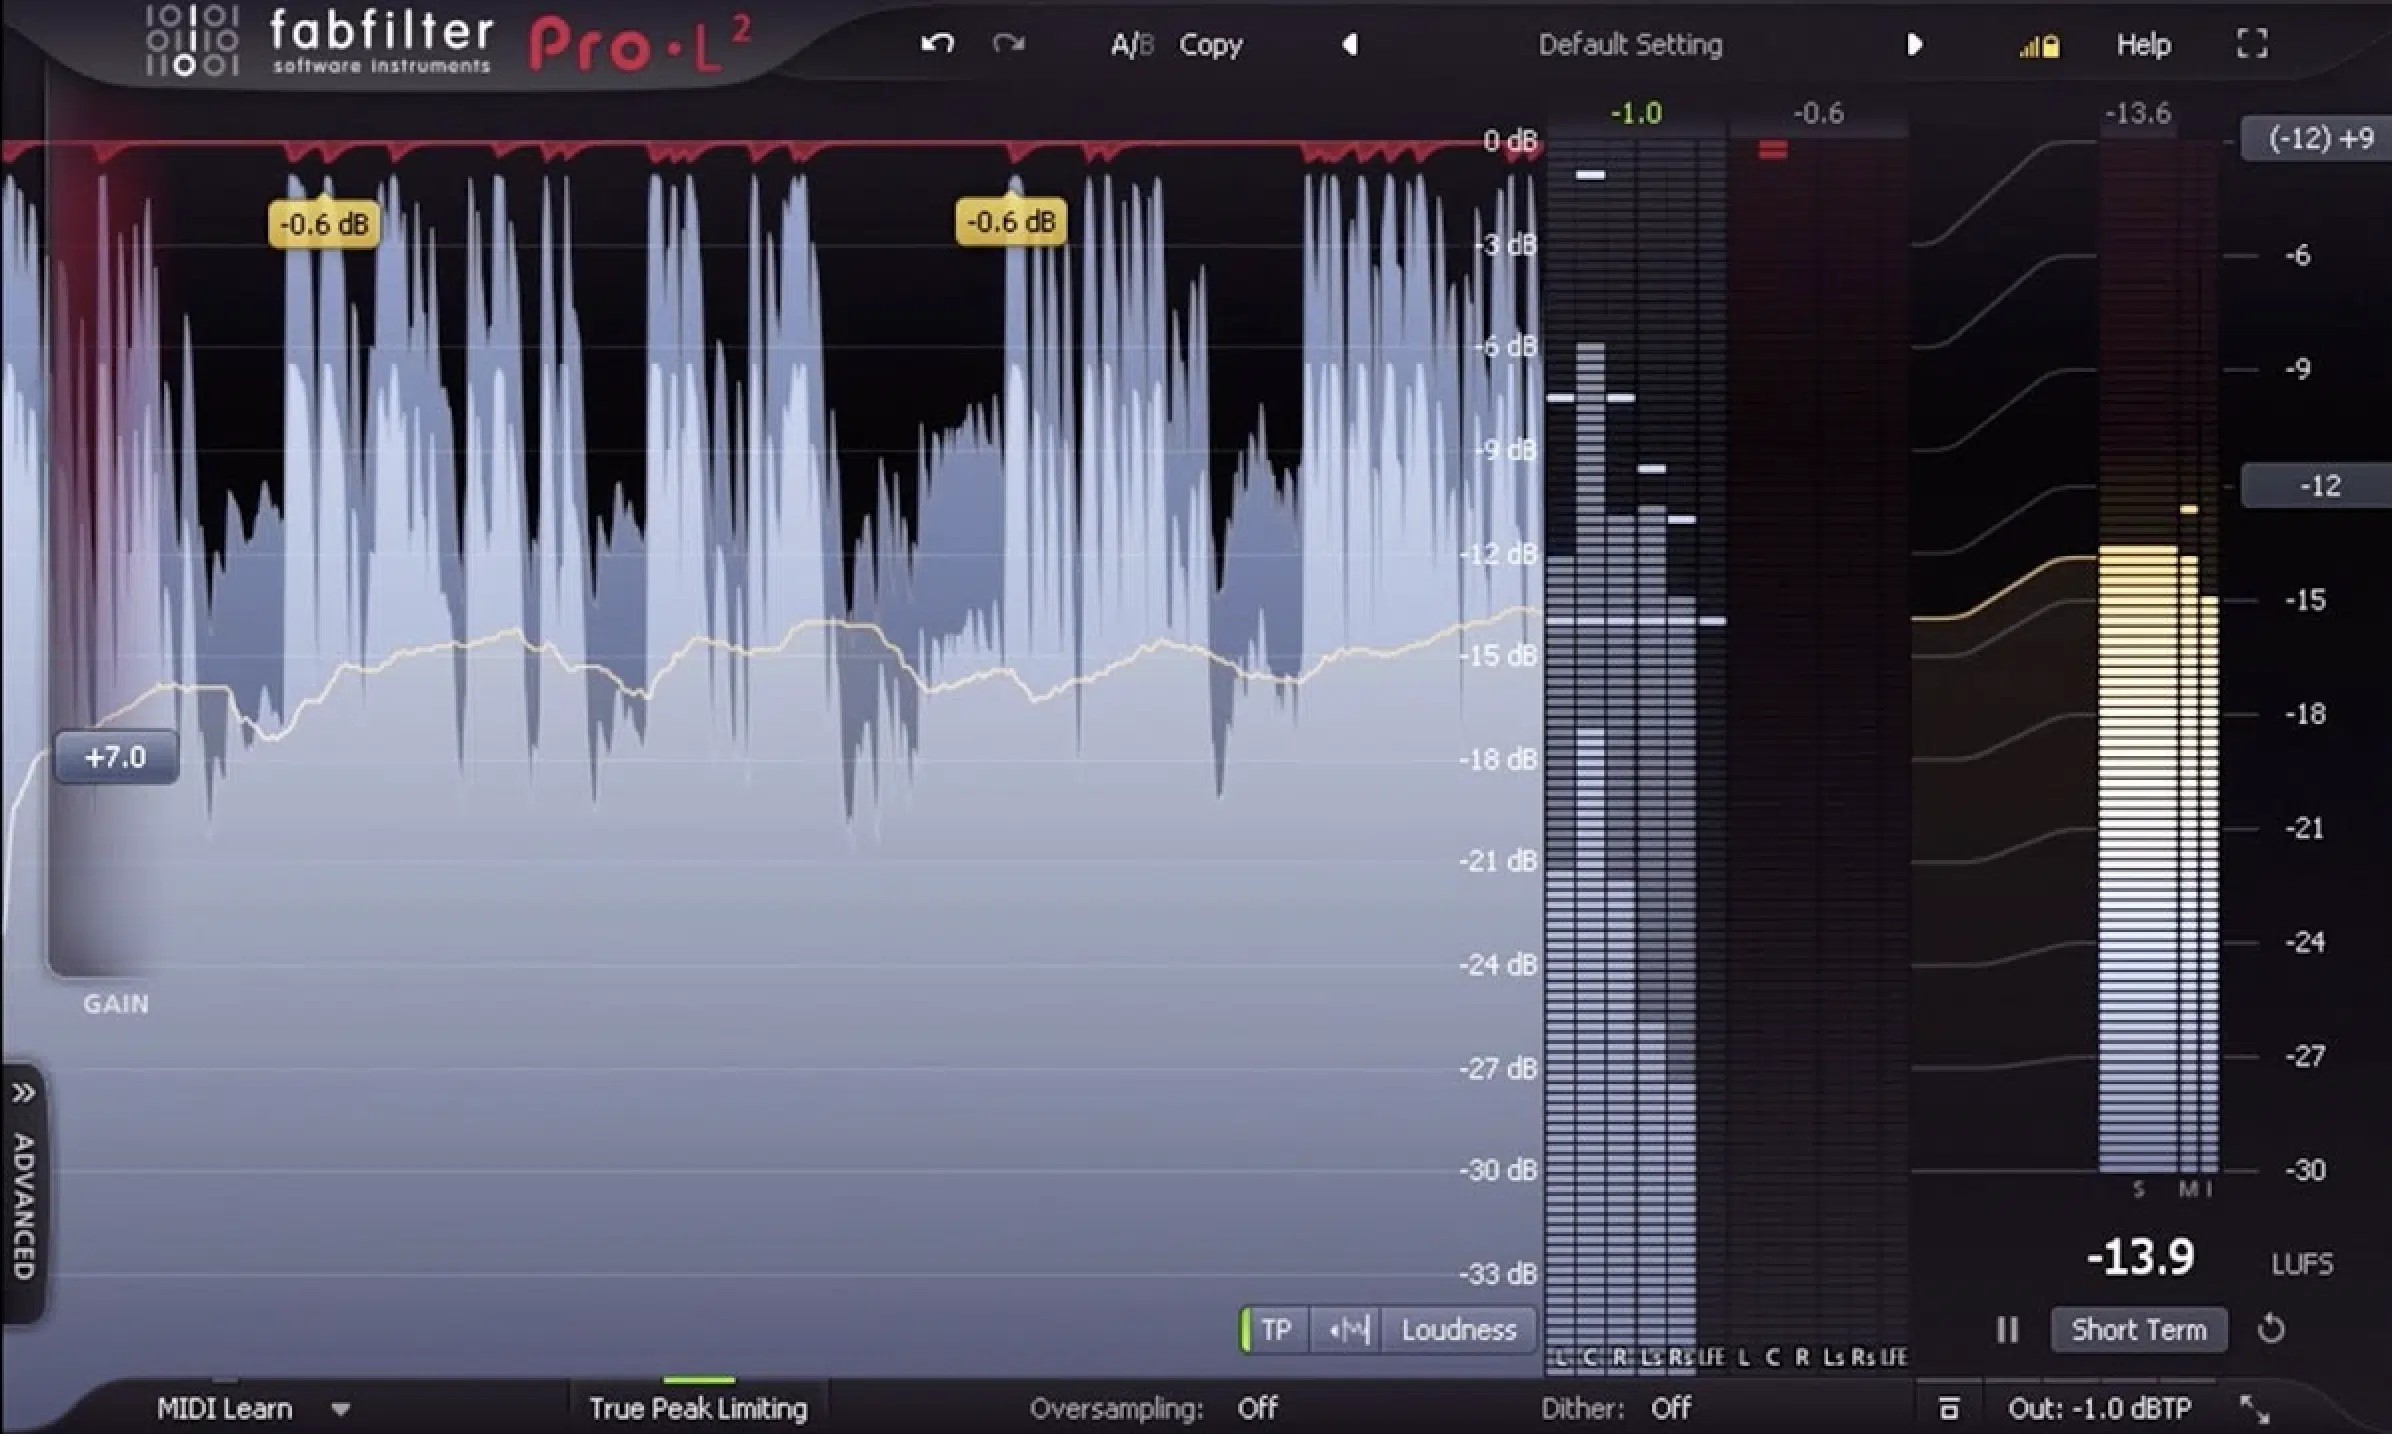
Peak limiters are designed to control sudden spikes in the audio signal, like when a snare hit or vocal gets loud out of nowhere.
They work best when you set a threshold just below the loudest parts of your mix.
For example, setting the threshold at -3 dB can catch peaks without affecting the rest of the track, so that’s a great place to start.
And, to keep the transients crisp and natural, I recommend starting with an attack time of around 1-3 ms and a release time of 30-50 ms.
This way, the limiter will clamp down quickly but release fast enough to maintain the track’s energy, which is what you want.
For instance, if your kick drum feels too dominant in the mix, using a peak limiter can tame its peak while preserving its punch.
I suggest using audio limiters like FabFilter Pro-L 2 or Waves L1, as these give you precise control over settings like input gain and output level.
Just make sure to leave enough headroom on the output ceiling, like setting it to -0.2 dB, to prevent true peak limiting from causing distortion on streaming platforms.
NOTE: Don’t forget to monitor the gain reduction meter to make sure you’re not squashing the dynamics too much.
A reduction of 1-2 dB is usually enough to control peaks without sacrificing the dynamic range, so keep that in mind as well.
Over-limiting can introduce unwanted artifacts, so keep your ears tuned for any changes in the sound and dial back if needed.
-
Brickwall Limiters
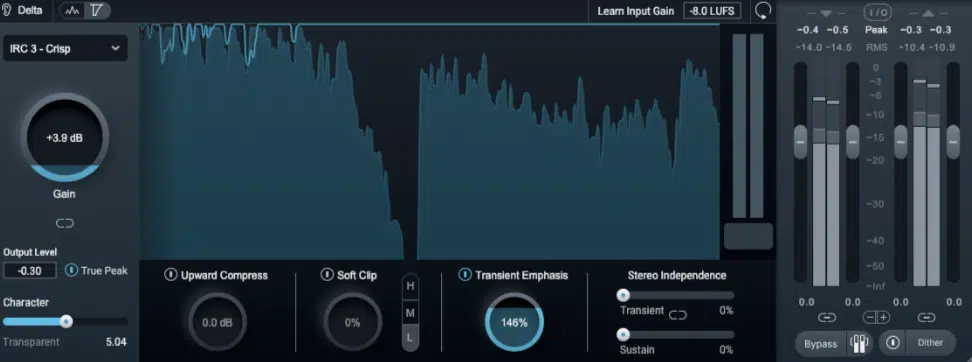
My favorite limiter type is called brick wall limiters, which are designed to make sure that your audio signal never exceeds the maximum level you set.
They feature an infinite ratio, which means any signal that crosses the threshold is immediately brought down to the set output ceiling.
For mastering, I recommend setting the output ceiling to -0.1 dB or -0.2 dB to prevent distortion when your music is played on streaming platforms.
The threshold is where you decide when the limiter engages…
For a loud, competitive master, you might set the threshold between -6 dB and -8 dB 一 depending on the dynamic range you want to preserve.
Brick wall limiters are perfect for controlling an entire mix during the mastering process so your track hits the desired loudness without causing unwanted distortion.
For example, on a master bus, a brick wall limiter can keep your mix loud and clean while avoiding clipping.
To do so, simply set the output ceiling to -0.1 dB and tweak the threshold to control peaks without over-compressing the dynamics.
I suggest using a release time of 20-40 ms for punchier genres like electronic music and 50-80 ms for softer styles like R&B to maintain transparency.
Again, make sure to closely monitor the gain reduction meter (aim for 2-3 dB reduction to balance loudness and clarity).
Pro Tip
When you’re learning how to use a limiter, it’s super important to never push the limiter too hard because over-limiting can result in flat dynamics and introduce unwanted distortion. This is especially true on percussive elements like a kick drum. Focus on balancing loudness and preserving the natural sound of your track and you’ll be good.
-
Multiband Limiters
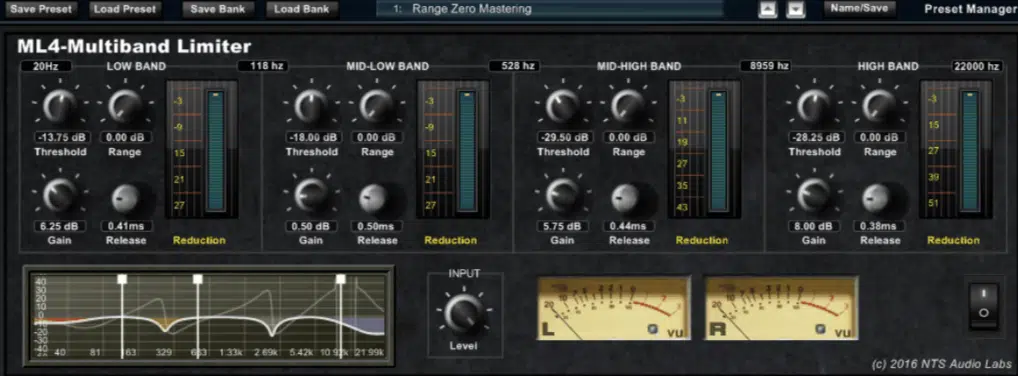
Multiband limiters divide your audio signal into multiple frequency bands so you can control specific ranges independently.
For example, you can target the low end (e.g., 20-200 Hz) to tighten a kick drum without affecting the clarity of vocals in the midrange (e.g., 500-2,000 Hz).
I recommend starting with 3-4 bands when you’re learning how to use limiters, setting thresholds specific to the needs of each frequency band.
For the low end, set the threshold around -5 dB with a release time of 50 ms to maintain tightness without making it feel squashed or crushed.
For the high end (like cymbals or sibilance) set the threshold higher, around -2 dB, with a faster release time of 10-20 ms to preserve brightness.
I’d suggest using an audio limiter like Waves L3 Multimaximizer, which lets you fine-tune the output gain for each band.
If you’re working with tracks that have complex dynamics, like let’s say orchestral arrangements or heavily layered electronic music, multiband limiters are ideal.
For example, if your bass is too boomy, isolating the low band with a multiband limiter can smooth it out while leaving the rest of the track untouched.
NOTE: Use multiband limiting cautiously on individual tracks but more freely on the master bus during the final stage of the mastering process.
Just remember that it’s a powerful tool for achieving a polished, balanced mix, but overuse can lead to a lifeless sound, and nobody has time for that.
Key Parameters of Limiters
When you’re learning how to use limiters, the first thing you’ll need to master is the key parameters. They’ll help you achieve the perfect balance between loudness and transparency. So, let’s break down the main controls (threshold, output ceiling, attack and release times, and hard knee vs. soft knee) to help you use a limiter like a boss.
-
Threshold
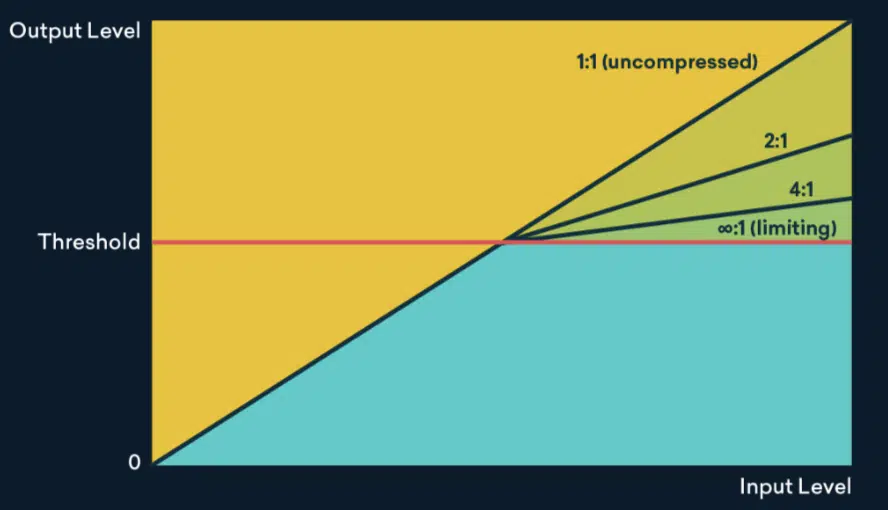
A limiter’s threshold determines the point it starts reducing the audio signal’s peaks.
Setting this the right way is everything… For example, start with -3 dB on a master bus to catch loud transients while keeping the dynamic range on point.
For punchy genres like EDM, you might experiment with a slightly lower threshold, such as -4 dB, to push the mix louder without destroying clarity.
For individual tracks like a kick drum, you might set the threshold lower (around -6 dB or even -8 dB) to make sure the punch is consistent while taming any excessive peaks.
NOTE: If you’re seeing reductions greater than 4 dB, the limiter may be working too hard and could affect the sound quality with distortion or by flattening dynamics.
When dealing with multiple frequency bands, you have to set different thresholds for each band to retain clarity while shaping the mix.
For example, a low-end band (20-200 Hz) might need a threshold of -5 dB to tighten the bass, while a high-end band (2 kHz and above) could be set at -2 dB for brightness.
Also, avoid setting the threshold too low, as this can lead to unwanted distortion and flatten the track’s energy.
I recommend testing with different levels (e.g., adjusting by 0.5 dB at a time) while listening carefully to make sure you’re preserving the natural tone of the sound.
-
Output Ceiling
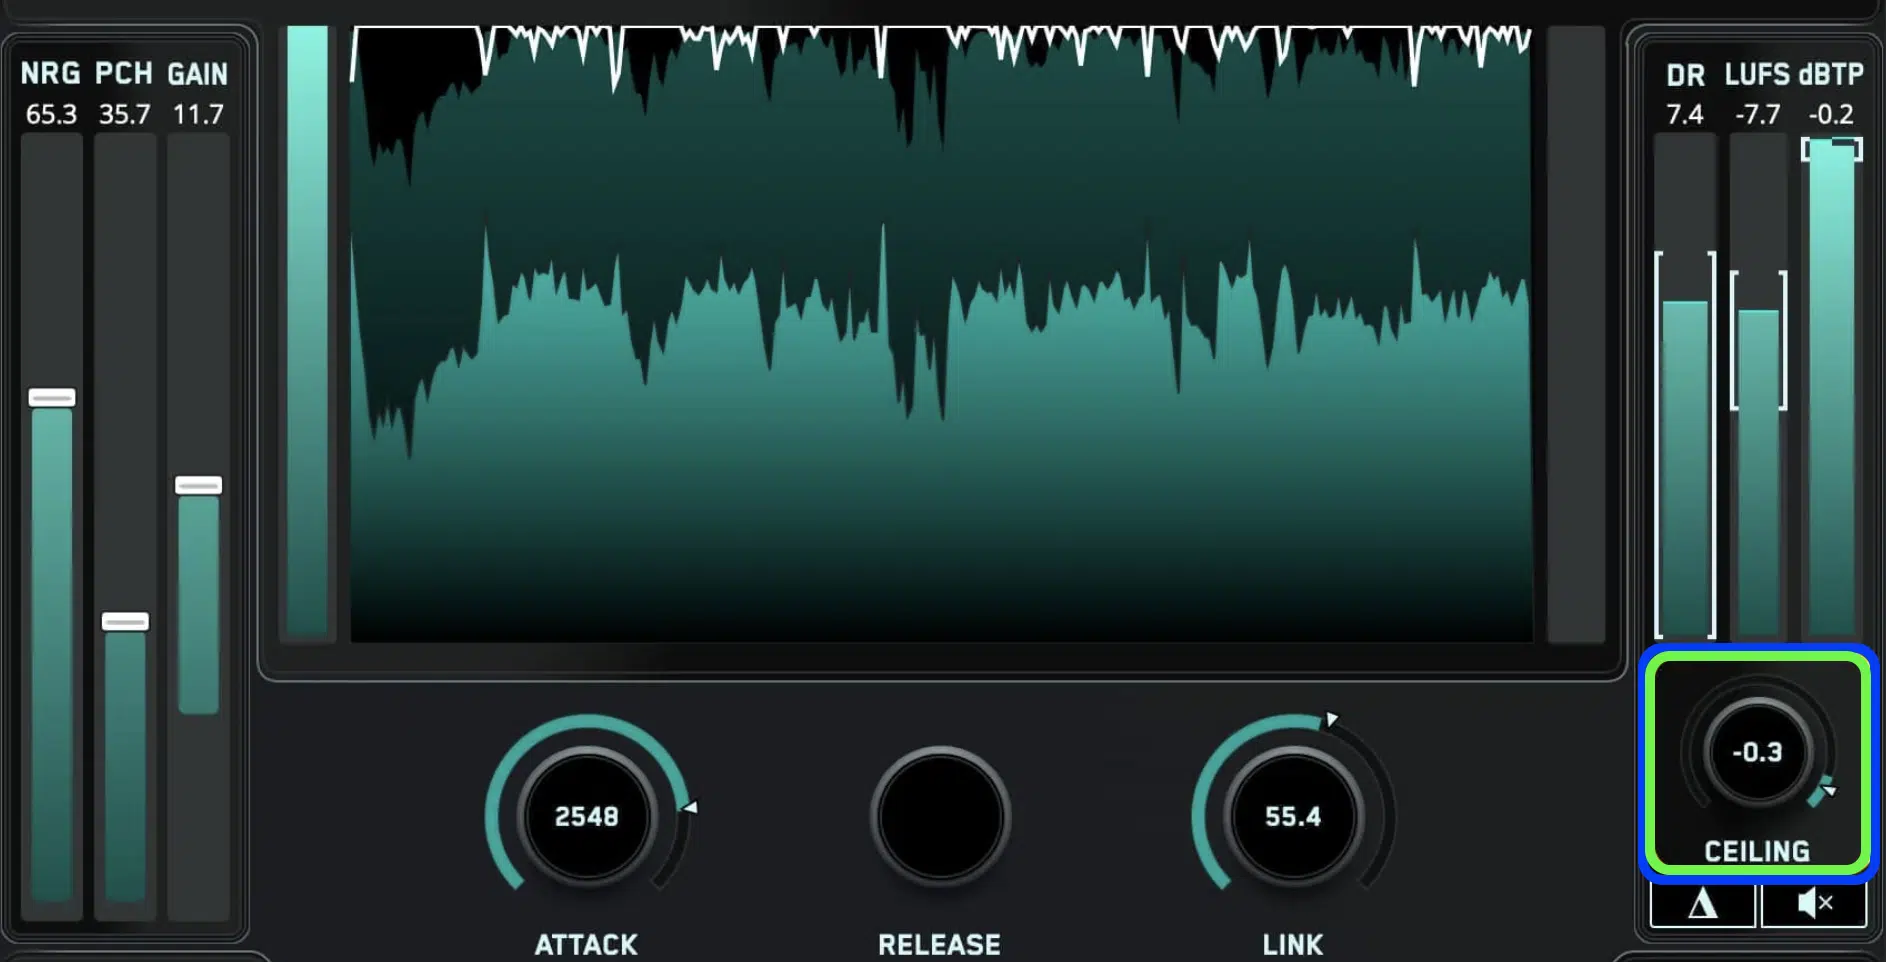
The output ceiling determines the maximum level the audio signal can reach after processing.
For mastering, I suggest setting this between -0.1 dB and -0.3 dB to prevent distortion on streaming platforms, for example:
- For maximum loudness in most genres, -0.1 dB is ideal
- For dynamic tracks or those with heavy low-end content, -0.2 dB is safer
This way, any inter-sample peaks won’t cause distortion during playback.
For tracks that require true peak limiting, make sure to set the ceiling to -0.2 dB or lower and adjust the threshold to avoid exceeding LUFS standards.
-14 LUFS is usually the standard for major platforms for Apple Music, but always double-check just in case.
If your mix includes sharp transients, try leaving an even larger margin (such as -0.3 dB) to guarantee accurate conversion in lossy formats like MP3 or AAC.
On a mastering chain, leaving a small margin with the output ceiling ensures that the signal doesn’t clip, even during loud playback or format conversion.
For example, setting an output ceiling of -0.2 dB on a bass-heavy track, combined with careful gain reduction monitoring, can prevent overshooting without dulling the energy.
NOTE: Always check the output level using reliable metering tools like LUFs meters to avoid exceeding the commercial loudness standards while maintaining transparency.
I recommend keeping gain reduction below 3 dB.
Always remember that pushing the ceiling too high might risk unwanted distortion, especially in the loudest parts of your mix.
-
Attack and Release Times
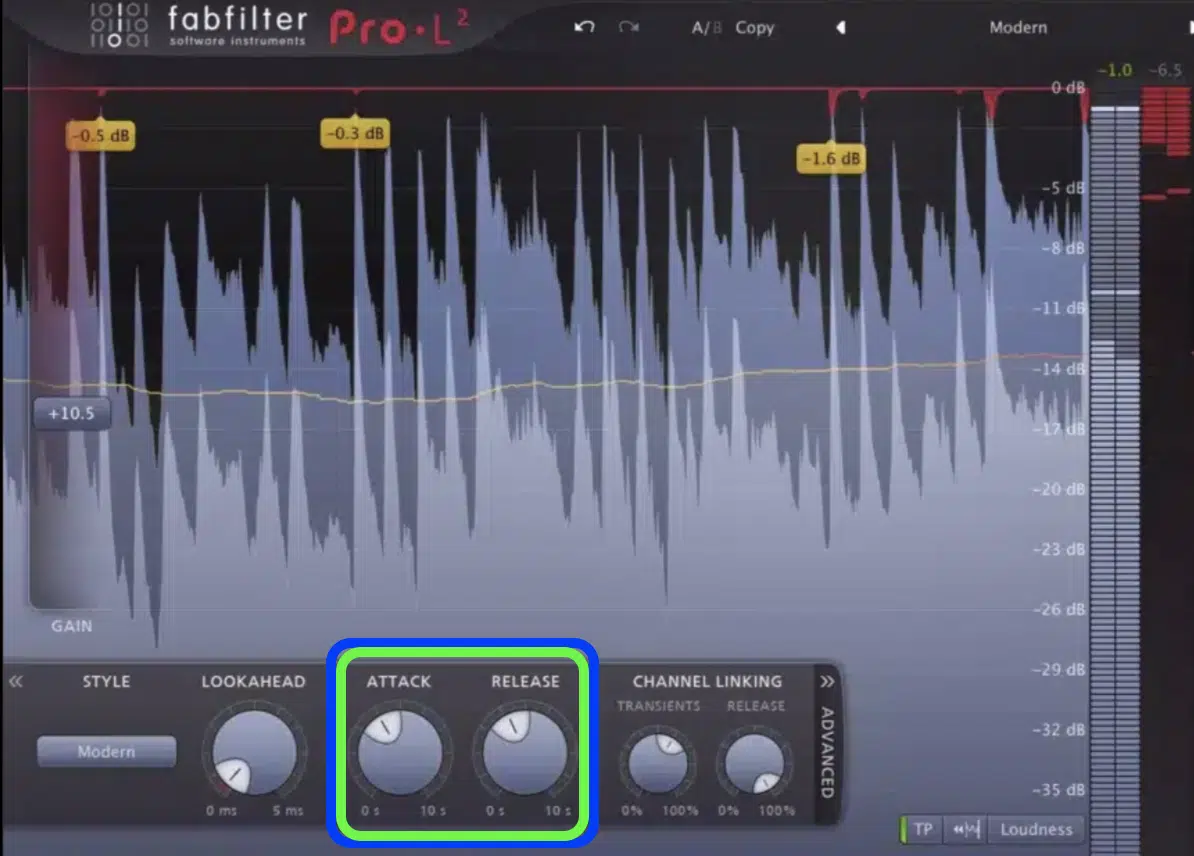
Attack and release times in a limiter tell you just how quickly it responds to incoming peaks and how soon it stops reducing gain after the peak has passed.
For example, an attack time of 1-3 ms works well for taming transients like snares and kicks, while 5-10 ms is better for preserving punch in an entire mix.
The release time is equally important, of course…
Shorter settings (20-30 ms) can make the limiter sound more aggressive, while longer times (50-100 ms) create a much smoother effect.
On a master channel, I recommend starting with an attack time of 3 ms and a release time of 50 ms 一 adjusting based on the genre and desired feel.
A good rule of thumb is to set faster settings for energetic tracks and slower settings for smoother, melodic mixes.
NOTE: Faster release times can enhance the perceived volume, but setting them too fast can lead to unwanted artifacts, especially in bass-heavy tracks.
Always listen critically and simply adjust until you find the sweet spot (yes, I’m going to say it a million times so you never forget; thank me later).
Setting Up Your Limiter: Step-by-Step Guide
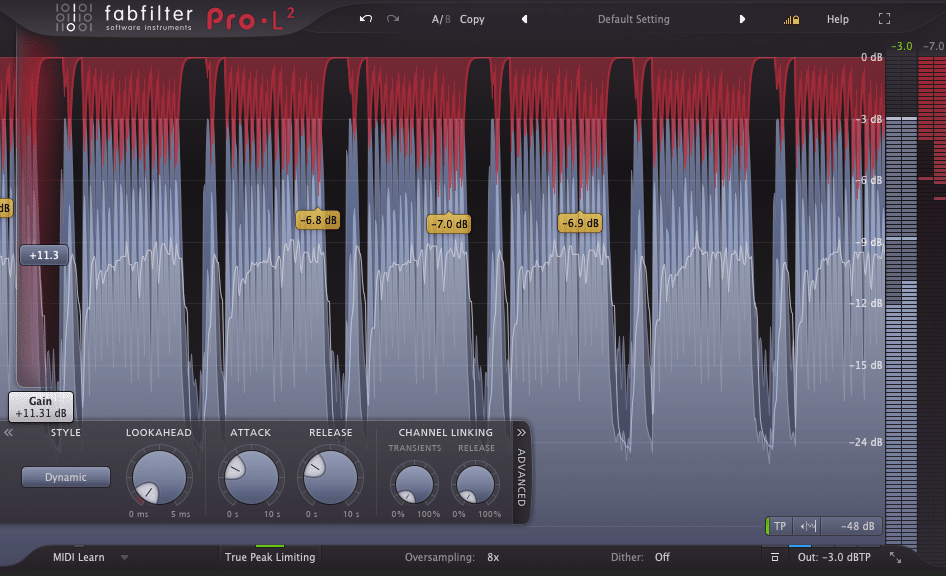
So, now that you know what limiters do, how to use them, and the key parameters, it’s time to move on to how to set them up.
Remember, when learning how to use limiters (just like all things music production), it’s all about learning how to do things the right way so you can break the rules properly.
- Start by placing your limiter at the end of the mastering chain so it affects the entire mix rather than individual elements
- Set the output ceiling to -0.1 dB or -0.2 dB to avoid clipping and ensure compatibility with streaming platforms. This prevents overshooting, especially during conversion to MP3 or AAC formats.
- Adjust the threshold to control peaks. For a loud, competitive track, set the threshold between -5 dB and -8 dB, but monitor the gain reduction to keep it below 3 dB for a transparent sound.
- Fine-tune the attack time and release time. For punchy transients, use a fast attack (1-3 ms) and medium release (30-50 ms) 一 for smoother styles, use a longer release time (50-80 ms).
- On bass-heavy tracks, test a true peak limiter to prevent inter-sample peaks, especially on percussive elements like the kick drum for no distortion during playback.
- Use metering tools to monitor your dynamic range and output level. Aim for LUFS readings around -14 LUFS for streaming platforms like Apple Music.
- If your mix has uneven dynamics and you need more dynamic control, try a multiband limiter to control specific frequency bands, like tightening the low-end at 20-200 Hz without affecting vocals.
- Finally, always A/B your limited mix with the unprocessed version to make sure you’re enhancing the sound without introducing unwanted distortion or flattening the dynamics.
How to Use Limiters for Super Creative Effects
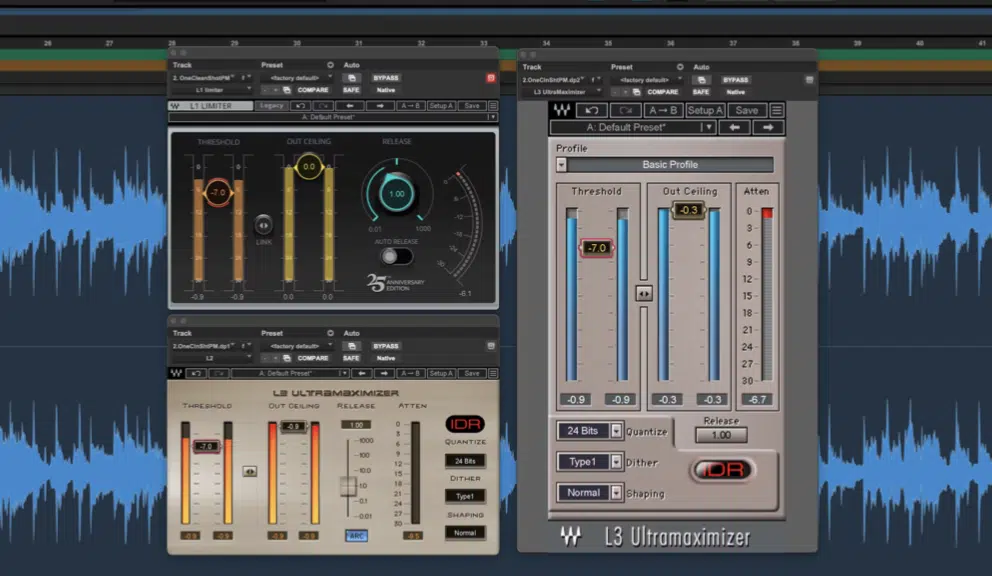
When you’re learning how to use limiters, remember that they can be used creatively to enhance the sound of your mix, beyond just controlling peaks.
One great technique is boosting the perceived volume by setting the threshold slightly lower (e.g., -6 dB) and gently increasing the input gain.
For example, set the threshold to -5 dB with an output ceiling of -0.2 dB, and pair this with a short attack time (1-3 ms) and a slightly longer release time (40-60 ms).
This will create a balanced and fluid feel 一 giving your mix a fuller, louder feel without introducing noticeable distortion.
Another creative use is exaggerating transients for MAX impact.
On a kick drum, set the threshold at -4 dB, with a medium release time of 30-50 ms and minimal input gain to tighten up the kick while giving it a punchier, in-your-face feel.
This one is perfect for all my electronic music producers out there.
For smoother elements like vocals, you can use limiting to gently hype up dynamics.
To do this, simply start with a higher threshold (-2 dB) and a longer release time (70-100 ms) to subtly control peaks while maintaining natural flow/warmth.
Finally, you can play around with parallel limiting, which is where you blend a heavily limited signal with the original track.
For example, apply limiting with a threshold of -8 dB and an output ceiling of -0.5 dB to the parallel layer, then mix it back in at a lower level.
This will successfully enhance the overall depth and presence of your track.
Pro Tip
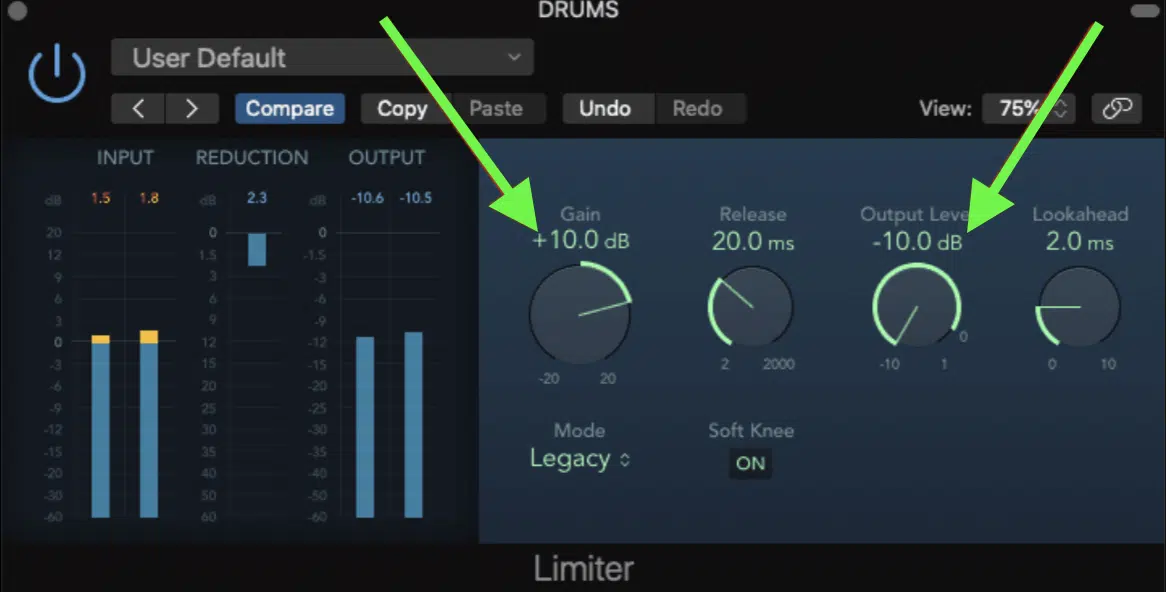
Experiment with applying limiters to individual tracks like a drum bus to glue elements together while retaining dynamics.
Just ensure the output ceiling is set conservatively (e.g., -0.2 dB) to avoid clipping or unwanted distortion; this is very important.
Creative limiting is all about subtle adjustments because small changes can have a huge impact when it comes to the sound of your track.
Final Thoughts
When you’re learning how to use limiters, just remember it’s all about balance, precision, and creativity 一 this is key.
They help you control peaks, enhance perceived volume, and make sure your tracks sound clean and professional across all platforms, every single time.
Plus, making sure your output levels are consistent and free from distortion is super important when it comes to achieving a polished, competitive sound.
This way, your beats will always stand out and be on point, and your mixes will translate perfectly on any playback system.
By using all the techniques and tips we talked about today, you’ll be able to successfully master your limiter settings and elevate the quality of your music.
And, as a special bonus, you’ve got to check out these Free Project Files.
They contain 3 professionally-made project files that show you exactly how to produce beats like a pro (from start to finish).
Yes, this includes limiting, of course, plus anything else you’d like to see.
Each project file is available in Ableton, FL Studio, and Logic Pro and was created by the best in the industry, so you’re getting the best possible quality/techniques.
It’s like having the cheat codes to completely crush your competition, plus they’re all 100% royalty-free, so you can use them however you’d like.
Bottom line, when learning how to use limiters, just take your time, make sure to play around with the settings, and trust your ears.
With the right techniques (like we gave you access to today), your mixes will be flawless and you’ll create tracks that are not just loud but truly dynamic.
Remember, limiting is the final touch that turns a good track into a great one, so always make it count and stay true to your unique style.
Until next time…


Leave a Reply
You must belogged in to post a comment.