It’s often thought that pitch correction and vocal processors are only used for pitch correction and vocals…
Well, that couldn’t be further from the truth.
Pitch correction is traditionally used to change a vocalist’s tuning post-recording.
However, as a producer, it’s important that you look outside the box and get creative whenever possible.
Luckily, here at Unison, that’s what we’re all about.
In this article, we’re going over 5 unique ways to use pitch correction software for other purposes.
It will:
- Help your tracks stand out in a major way
- Discover new & exciting ways to use pitch correction
- Add personalized touches to traditional techniques
- Instantly capture your audience’s attention
Plus, we’ve included a well-kept industry technique that will put you on par with the professionals!
Let’s dive in…
Table of Contents
#1: Pitch-Correct & Vocode Your Synths
Vocoders are the original auto-tune, so to speak.
They were originally designed solely for vocals since their inception.
Today, there are much more creative uses for them.
For example, merging pitch correction and vocoding techniques on an element other than vocals.
When done correctly, the results can be awe-inspiring.
This tip includes using a vocoder in combination with pitch correction.
However, you can choose to use either or instead.
It all depends on the intended effect and specific the synth/preset you’re using.
As well as how much additional processing it can handle, respectively.
STEP 1 一 Open your favorite synth and load up your favorite preset.
STEP 2 一 Open up a Pitch Correction Processor, and set it to the desired key.
STEP 3 (crucial) 一 Take your synth patch and change it to a non-harmonic value.
Play around with it, and keep in mind your entire effect will depend on how hard you push it.
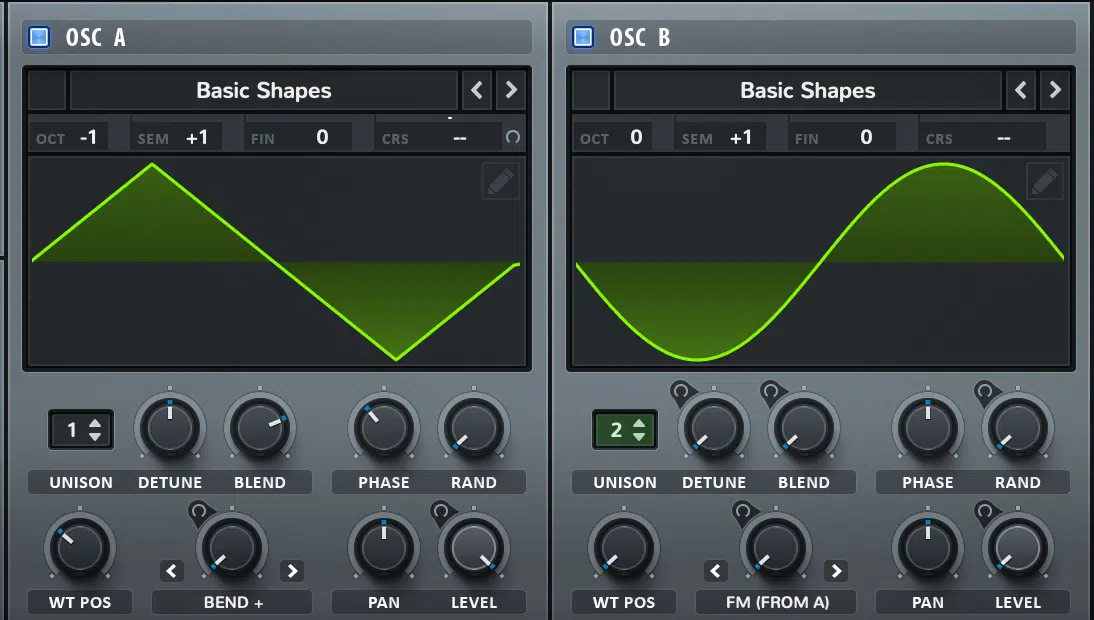
To start, just make sure your synth and its encompassing oscillators are outputting a different note than you are playing.
Start by simply increasing/decreasing it by +/-1 semitone.
You’ll hear the pitch correction sliding the synth back into place as you play the notes in your desired key.
It should provide you with a very unique and intriguing quality.
STEP 4 一 Play around with the Speed settings on your pitch correction software.
Making the processor kick in slower will cause a more noticeable effect and vice versa.
STEP 5 (optional) 一 Add a vocoder to the mix to make things extra spicy.
This can be applied on its own, for some real wild effects, with or without the correction processor.
You may even find better results without it.
Try this pitch correction technique to really capture your audience’s attention.
#2: Pitch Correct Your Loops
Autotune has a very desirable effect, there’s no doubt about that.
Especially when you purposefully sing off-pitch, as it glides you flawlessly back into place.
But, did you know that you can apply the same technique to loops too?
By feeding a monophonic loop through a traditional pitch correction processor, you’re able to achieve a similar effect.
NOTE: Make sure the monophonic loop is in a different key than your pitch correction settings.
This is key.
STEP 1 一 Choose your favorite monophonic loop.
Again, make sure that it incorporates a different key than your current session.
Within our packs, we’ve included all the keys of the included loops for convenience and ease.
They’re all professionally crafted and epic beyond belief.
You can check them all out right here.
For a more drastic effect, use a Minor loop for a Major session, or vice versa.
STEP 2 一 Open up your pitch correction processor, and place it first in the chain.
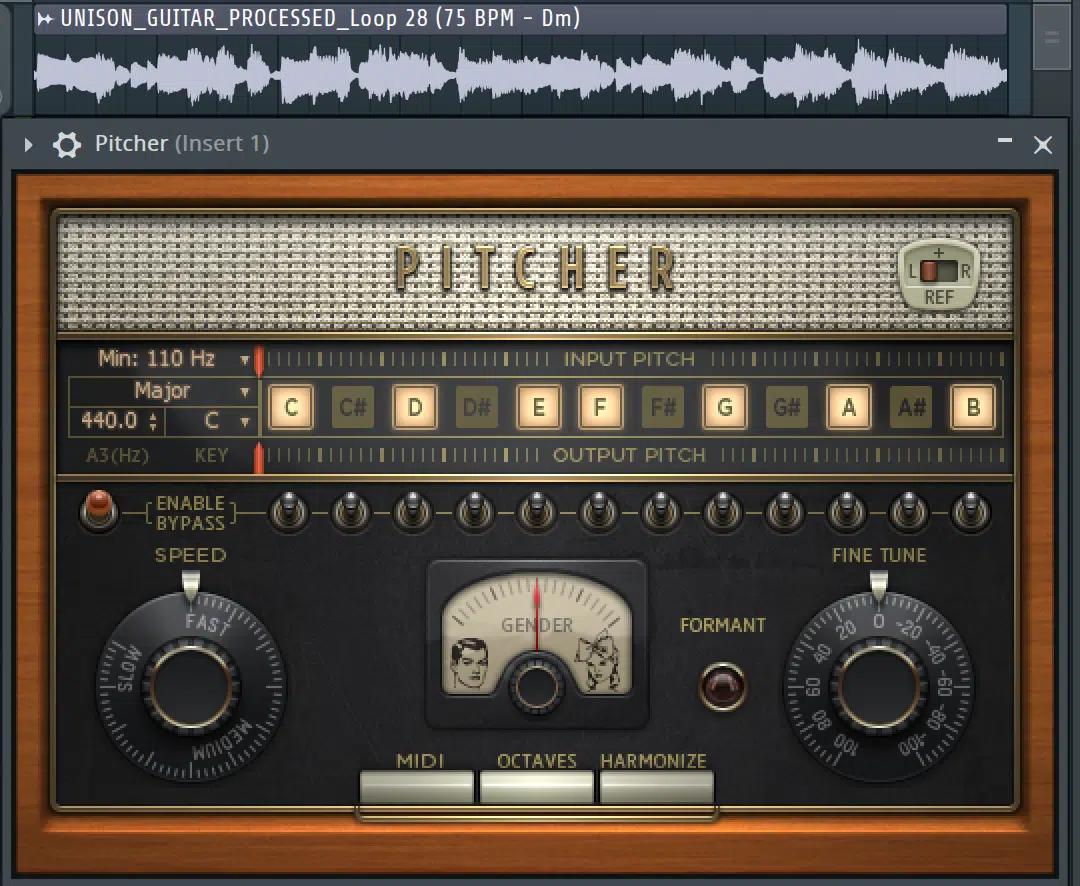
STEP 3 一 Set it to the key that matches your song.
Similar to all pitch correction processors, the Speed and Correction amounts are paramount.
Be sure to play around with them.
It determines how much of an effect will be heard when sliding between notes.
Sure, you can use this technique to lock any loop into the key of your session…
However, it’s more about the intended effect it has on a loop, in this particular case.
As you push it harder, it will give you a granular-like quality.
Plus, of course, the autotune effect when sliding between notes is always ear-catching.
#3: Vocal Chops
Vocal chops are typically created by:
- Processing a set of vocals (even random words/sounds).
- Splitting them up.
- Reconfiguring & merging the sliced audio together.
However, there’s a much easier way:
Throw your vocals in a Sampler and apply the process at the end of the chain instead.
This way, it will be suitable for any session, in any key, at any time.
STEP 1 一 Take any vocal line you have and throw it in your Sampler.
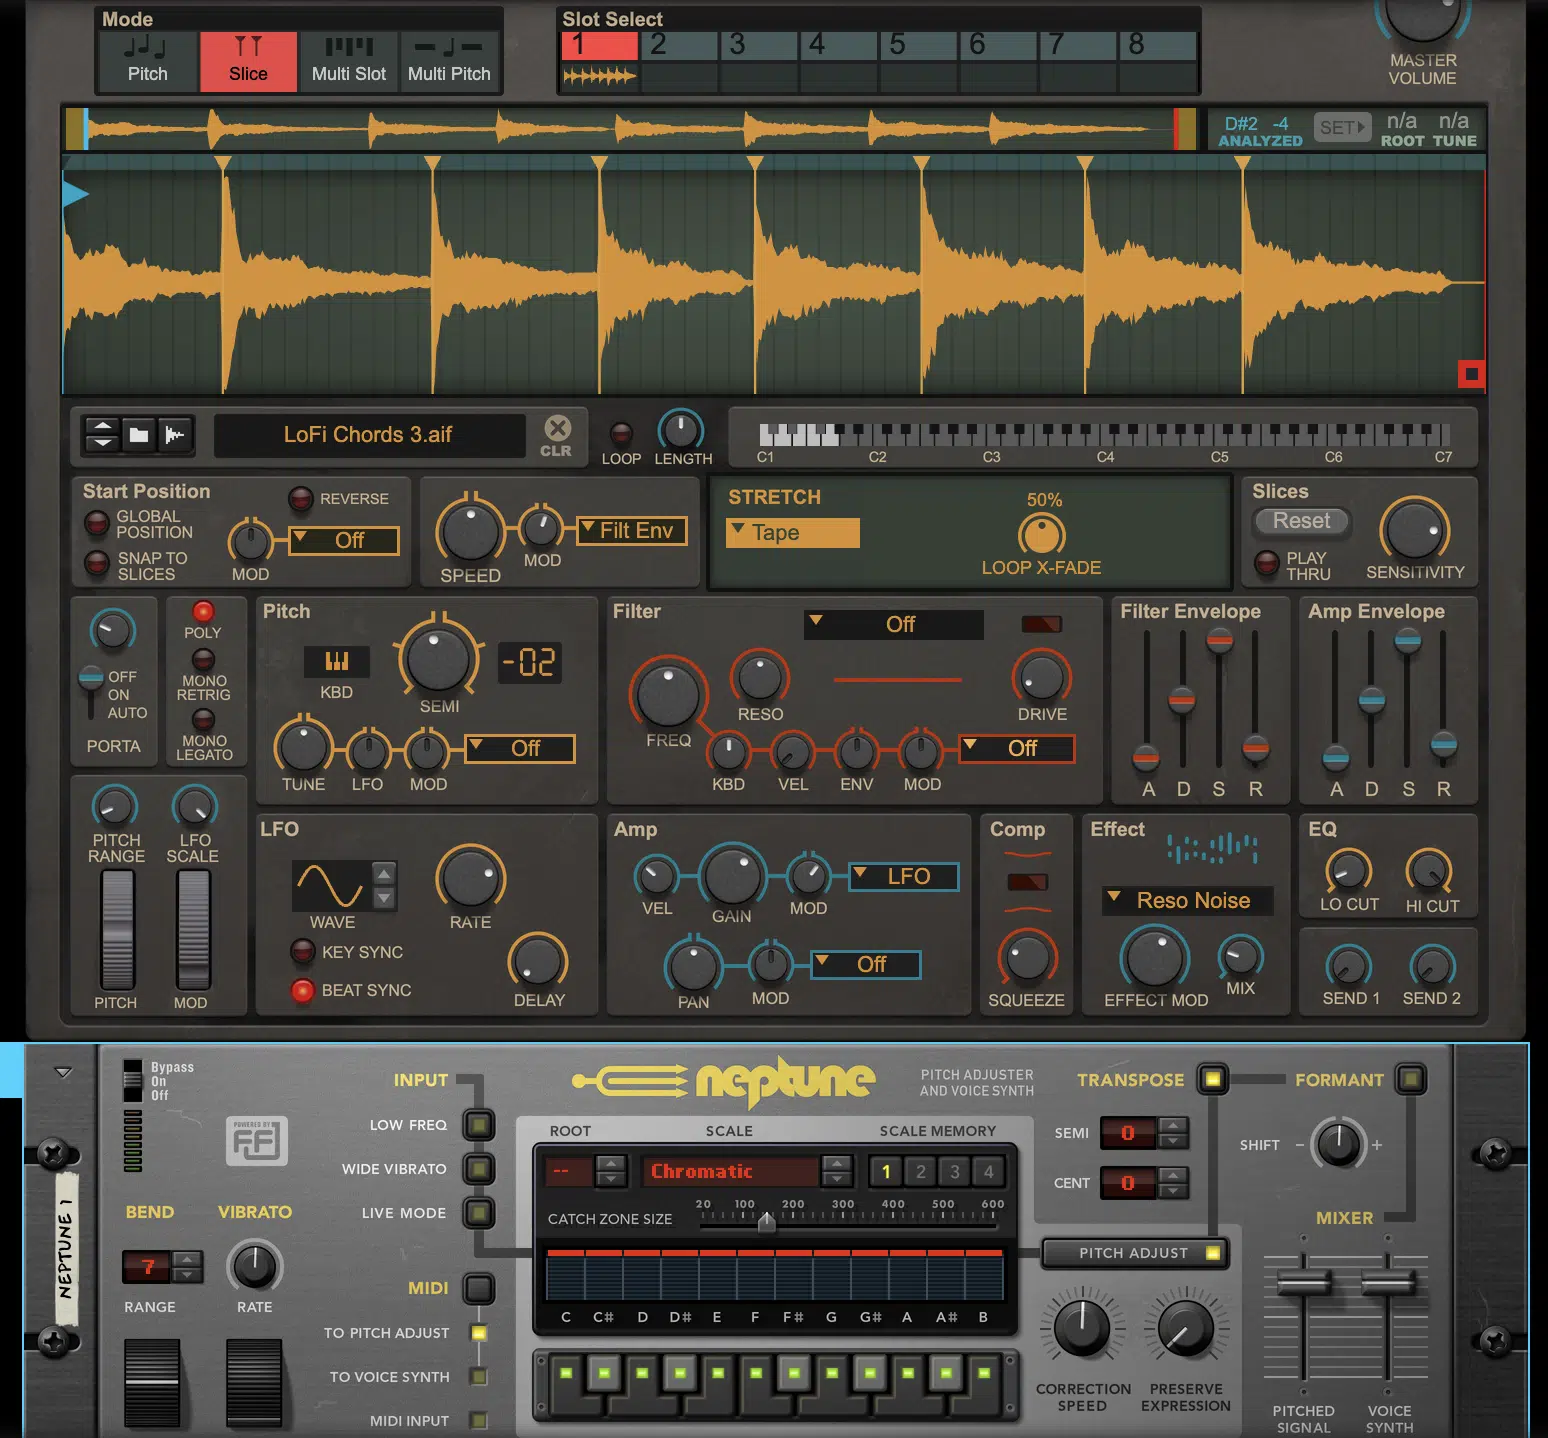
It doesn’t matter which key it’s in, just make sure it’s not a one-shot.
You’ll want a lot of material to work with.
The Sampler you use should chop it up based on its Transients.
STEP 2 一 Set the Threshold and Slicing sensitivity.
You’ll want to set these parameters high.
It will cut off the actual end of each word, so they won’t be perfectly sliced.
This gives you that much-desired ‘choppy’ effect.
At this point, you’ll have unprocessed vocal chops to play around with, like usual.
STEP 3 一 Add a pitch correction processor first, and set it to the desired key.
Now, any chop you play, regardless of the sample you’re using, will always be in-key with your current session.
STEP 4 一 Time for the fun part.
Add a Vocoder at the end of the chain.
This will really skyrocket your chops to the next level.
Just ask your favorite chop master, like Malaa.
Now you no longer have to worry about copying/pasting in an attempt to create a collage from audio.
It can simply be done in the traditional way with a Sampler and your MIDI keyboard.
#4: Pitch Correction: Formants & Harmony
Now that we’ve discussed using standard pitch correction in regard to vocal instruments and synths, let’s talk about harmonies.
Formants can be used to seemingly ‘shift the pitch’ of any given signal.
However, it’s really only changing the perceived pitch (aka Timbre).
Let’s dive in…
STEP 1 一 Take an epic sample you’d like to harmonize.
Then, make sure to duplicate it in your DAW.
STEP 2 一 Use the Processor’s internal Formant Shifting parameters to increase it by +7 semitones.
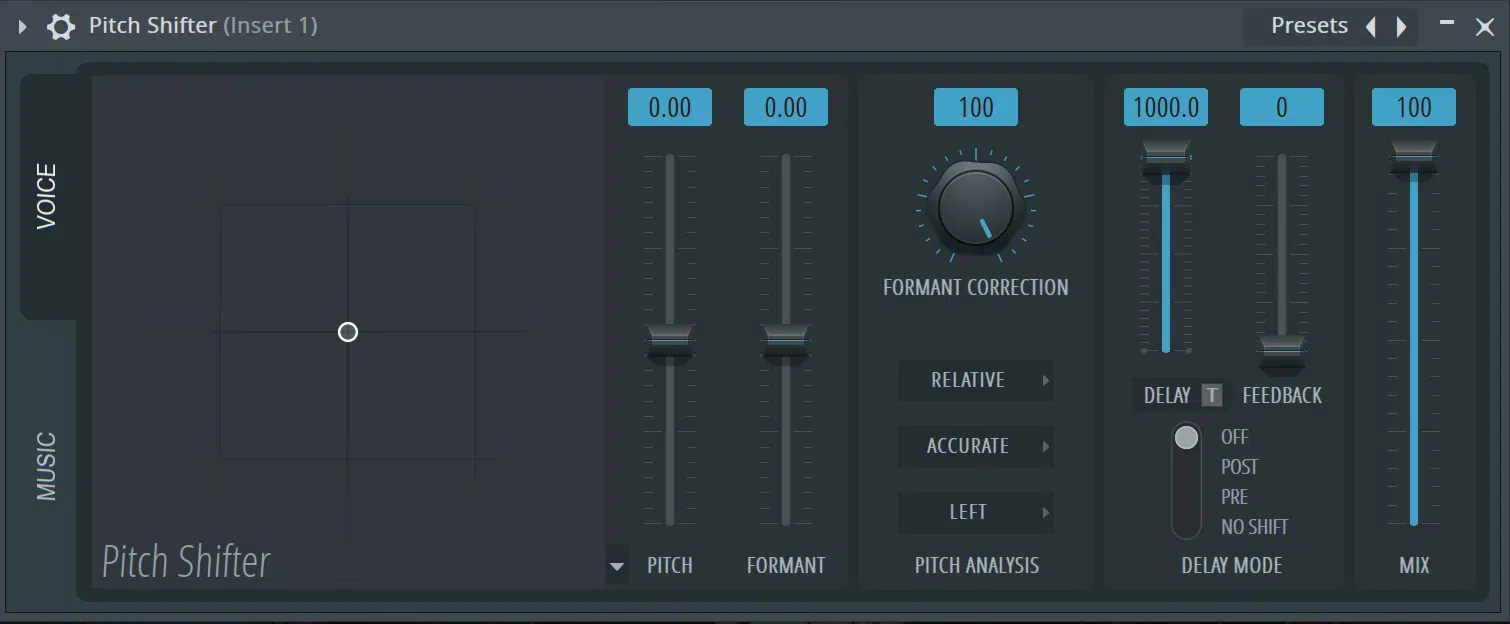
STEP 3 一 This time, use the processor to shift the pitch up by +7 semitones instead.
When you compare and contrast, you’ll instantly hear the difference between Formant- and Pitch-shifting.
The creative possibilities of formants will blow your mind.
STEP 4 (optional) 一 Get creative.
You’re going to add automation to the Formant parameter.
Then, add some drift to your harmonies.
Now, you can produce sounds that are super vintage, super futuristic, or anywhere in between.
It all depends on the source material, and personal preference, so get creative!
#5: Convert, Analyze, and Alter Polyphonic Samples
For this technique, you’re going to convert, analyze, and alter polyphonic samples with a Melodyne-type processor.
This is a well-kept industry secret, so buckle up.
You can use this pitch correction tip as is, or make it original to you.
It can even be used as a learning tool as well.
STEP 1 一 Choose a polyphonic pitch processor, such as Melodyne, and bring in your favorite sample.
For this example, we’re using a complex loop, with a melody and chord progression.
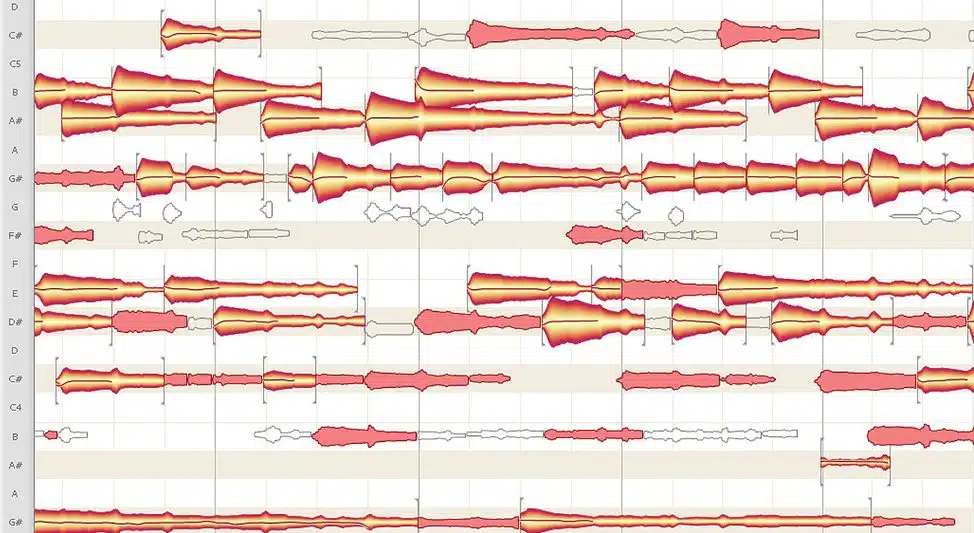
This is to show you just how versatile this pitch correction technique can truly be.
STEP 2 一 Open up the processor.
Now you’ll be able to see all of the loop’s data as if it were MIDI on the piano roll.
To check out the top 10 free MIDI packs of 2023, click here.
From here, you’re able to do anything you’d like with it!
STEP 3 一 Take the progression and make your own song out of it.
To this, simply delete the melody information.
STEP 4 一 Transpose the progression to another key to truly make it your own.
If you’re versed in Music Theory you can take it one step further.
Try transposing individual notes in said chord, to create inversions.
Or even paint in new data altogether, for extended chords.
STEP 5 一 Add a melody.
Now you’ve successfully taken the basis of your track and modeled it off of a sample.
While simultaneously making it original and true to you as well.
Incredible, right?
Pitch Correction: Final Words
When it comes to pitch correction, vocals are just the tip of the iceberg.
Depending on the type of Pitch Processor you’re using, it can venture way beyond the realm of pitch modulation.
- Does your synth section seem a little dry?
- Does your sample need to stand out more?
- Do you want to add your own flare to already perfectly pitched vocals?
Well, next time, simply grab a pitch correction processor.
Make sure to grab the Unison Beatmaker Box (Free Teaser) for the most epic loops on the planet.
They’re all created by world-renowned producers, and their quality and appeal are absolutely unmatched.
This way, you’ll have professional sounds to apply the above tips to.
Don’t forget, get as creative as you want, there are no limits!
Until next time…


Leave a Reply
You must belogged in to post a comment.