Ring modulation is one of the most unique and powerful modulation techniques in the music production game (especially electronic genres).
It can create metallic sounds, robotic textures, and bell-like tones that wouldn’t be possible with subtractive synthesis or even frequency modulation.
Plus, even a simple waveform can be transformed into something completely unrecognizable 一 can you say complex sound design opportunities?
As producers and sound designers, knowing all about ring mod can seriously enhance your skills and help your tracks stand out with unique, unpredictable textures.
That’s why I’m breaking down everything you need to know, including:
- How ring modulation works and what makes it unique ✓
- Ring modulator vs. FM synthesis vs. amplitude modulation ✓
- How carrier and modulator signals interact to shape the output ✓
- Using a sine wave vs. a square wave for different results ✓
- How frequency ratios affect the final sound ✓
- Using a ring modulator super creatively ✓
- What sounds ring modulation produces ✓
- Designing robotic voices and sci-fi sound effects ✓
- Ring modulation in hardware synthesizers and digital plug-ins ✓
- Advanced techniques like modulating the modulator ✓
- Much more about ring modulation ✓
By knowing all about ring modulation (ring mod), you’ll be able to expand your sound design skills and create sounds that will blow people’s minds.
Plus, you’ll master how to use ring mod to shape basses, leads, percussive textures, and evolving soundscapes like a boss.
This way, your tracks will sound more unique, feel more experimental, and stand out every single time.
Table of Contents
- What is Ring Modulation Synthesis & How Does it Work?
- Pro Tip: Ring Modulation vs. Frequency Modulation vs. Subtractive Synthesis
- The Key Components of Ring Modulation
- How to Use Ring Modulation in Production & Sound Design
- Ring Modulation in Hardware & Software Synths
- Advanced Ring Modulation Techniques
- Final Thoughts
What is Ring Modulation Synthesis & How Does it Work?
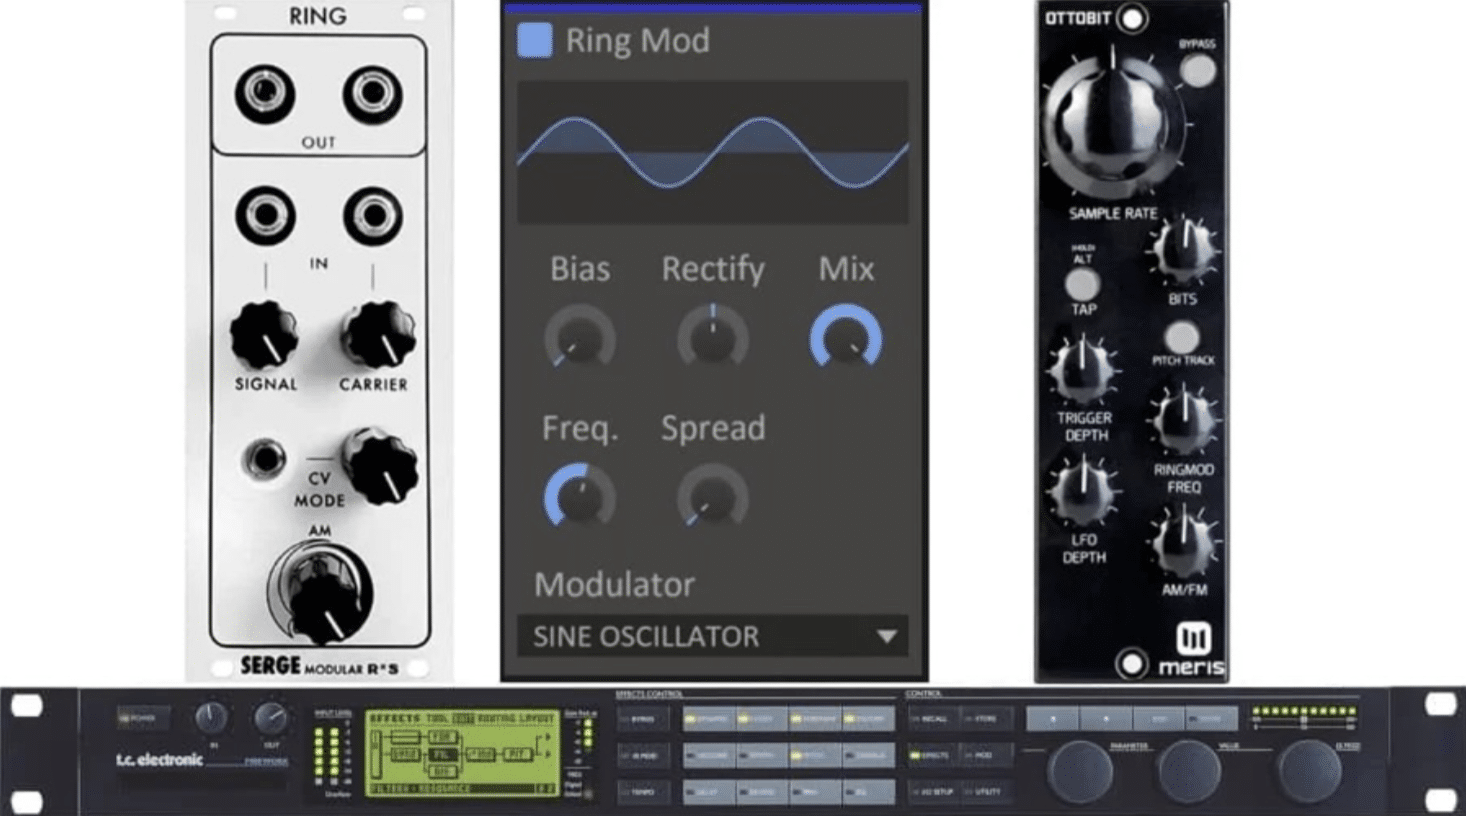
Ring modulation is a synthesis technique that takes an input signal and combines it with a modulator signal.
This creates a completely new output signal based on the sum and difference of their frequencies.
Unlike frequency modulation (FM) or amplitude modulation (AM), ring modulation removes the original signals, leaving only these new frequencies for:
- Metallic sounds
- Robotic textures
- Bell-like tones
For example, if your carrier frequency is 300 Hz and your modulator signal is 700 Hz, the ring modulator will generate 1,000 Hz and 400 Hz, with none of the original tones remaining.
The type of waveform used for the modulator dramatically impacts the final sound 一 a sine wave keeps it smooth, while a square wave makes it harsh and gritty.
The frequency ratio between the two signals also plays a huge role, with integer ratios sounding more musical and non-integer ratios producing dissonant, alien-like textures.
Either way, there’s some seriously dope sound possibilities here.
Bottom line, ring modulation (ring mod) is a powerful tool for creating experimental, futuristic, and completely unpredictable sounds.
It’s a favorite for electronic music production and sound design, which is my jam.
And don’t worry, I’ll break down everything you need to know about ring modulation throughout the article so you get a super solid understanding.
Pro Tip: Ring Modulation vs. Frequency Modulation vs. Subtractive Synthesis
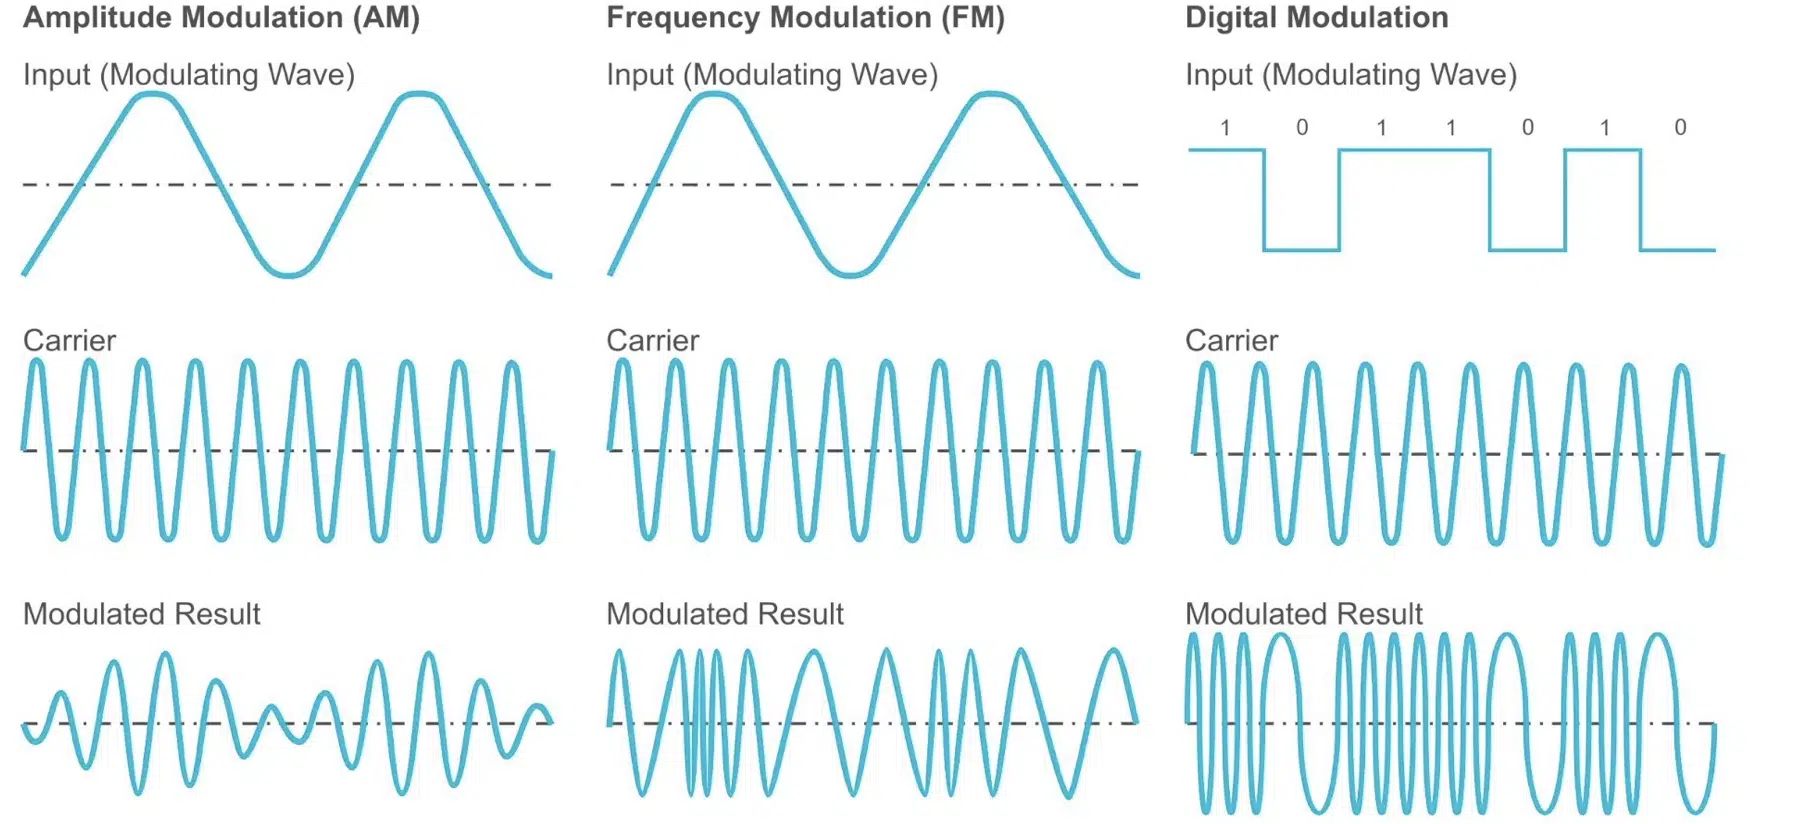
It’s easy to confuse ring modulation with FM synthesis or subtractive synthesis, but each of these techniques is totally different and has its own sound.
In FM synthesis, a modulator signal alters the frequency of a carrier, creating new harmonics that still retain part of the original sound.
Ring mod, on the other hand, removes the original signals entirely, leaving only the sum and difference frequencies.
This makes it sound way more alien or robotic than FM, like we just spoke about.
For example, in FM synthesis, if you use a carrier frequency of 440 Hz and a modulating signal of 220 Hz, you’ll get richer tones with the original carrier signal in the mix.
But with ring mod, using the same frequencies present would remove the carrier and modulator 一 leaving only the sum (660 Hz) and difference (220 Hz) frequencies.
That’s why ring modulation works so well for metallic sounds and sci-fi effects, while FM synthesis is better for expressive, evolving tones.
Now, subtractive synthesis, on the other hand, is a different beast entirely.
With subtractive synthesis, you start with a waveform that’s already harmonically rich (like a square wave or saw wave) and shape it using a filter cutoff to remove frequencies.
Ring modulation doesn’t use filters at all, it just mathematically creates new frequencies from the two input signals, producing harsh, dissonant, or atonal textures.
Ones that wouldn’t be possible with a standard subtractive synth.
Another major difference is in how each method affects the timbre.
Subtractive synthesis is all about removing frequencies, while FM synthesis creates harmonic overtones that blend into the sound.
But, like we talked about, ring mod doesn’t do either. It literally destroys the original signals and replaces them with something totally different.
This is why it’s used all day in experimental electronic music, film scoring, and sound design where musicality isn’t quite the main goal.
If you’re after weird, distorted textures, ring mod is your best bet, and if you want expressive leads and basses, FM synthesis is the way to go.
And if you just need classic analog warmth, subtractive synthesis with one oscillator and filter cutoff is the most familiar option.
Each technique has its place, but if you’re into glitchy, experimental sounds, ring modulation is by far the most unpredictable and exciting tool you can use.
The Key Components of Ring Modulation
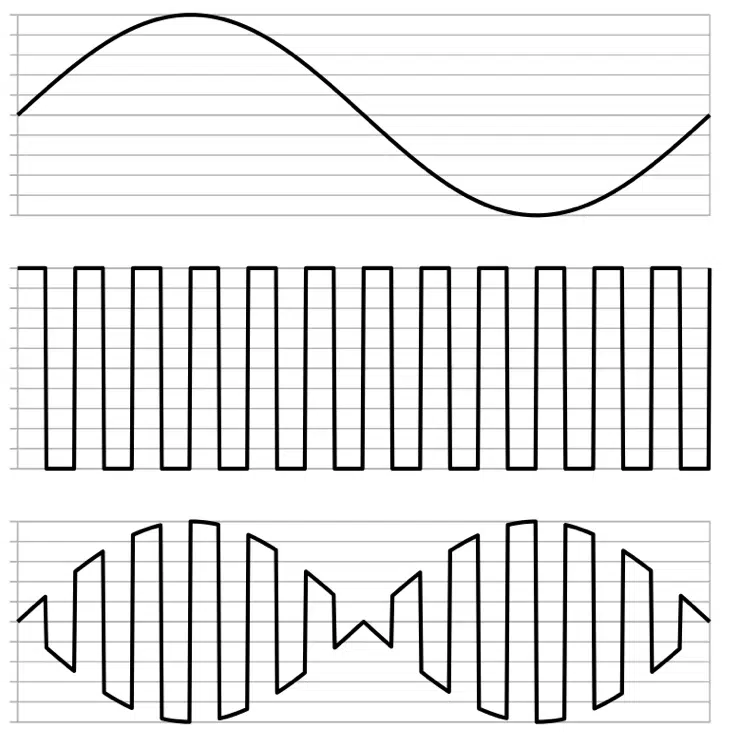
At the heart of ring modulation, you have two input signals:
- The carrier signal.
- The modulator signal
They both interact to create a completely new output signal with sum and difference frequencies.
The carrier frequency is usually your main sound source, like a sine wave at 300 Hz, while the modulator signal (also often a sine wave) might be set at 200 Hz.
Instead of simply blending these two, a ring modulator removes the original signals and leaves only the sum (500 Hz) and difference (100 Hz) frequencies.
This completely changes the sound characteristics.
If you’re using a simple waveform like a sine wave for both the carrier and modulator, you’ll get clean bell-like tones or smooth metallic textures.
But if you use a square wave or something more harmonically on point as the modulator signal, the output signal becomes much more complex and aggressive.
For example, setting a carrier at 440 Hz (A4)and a square wave modulator at 220 Hz (A3) creates a gritty, robotic tone, perfect for sci-fi effects/industrial electronic music.
The frequency ratio between the carrier oscillator and the modulator signal is key to shaping the final sound.
Integer ratios (like 1:1, 2:1, or 3:1) result in harmonic, more musical tones, while non-integer ratios (like 1.37:1 or 2.51:1) lead to metallic sounds that feel dissonant.
If you want ring modulation to produce something closer to a pitched, playable sound, my advice is that you stick to simple integer ratios.
But if you’re going for experimental, alien-like textures, try non-integer ratios and push the modulating signal into higher frequencies (above 5 kHz).
Another important factor is how modulation depth affects the output…
If the ring modulator signal has a low amplitude, it subtly influences the carrier frequency 一 adding mild tremolo effects.
When you push the modulation depth higher, the carrier oscillator becomes unrecognizable, and the sound turns into full-on chaotic metallic textures.
Experimenting with different filter cutoff settings post-ring modulation can help tame some of the harshness, and lets you shape the sound into something more ‘usable.’
NOTE: If you’re looking to create rich, evolving sounds, you can also experiment with two oscillators interacting through ring mod. For example, setting one at 100 Hz and another at 450 Hz, then automating the modulator’s pitch to shift over time.
This creates moving textures that work great for soundscapes, ambient music, and experimental beats.
Since ring modulation removes the original input signals, you can make a standard synth patch sound totally unrecognizable, which will blow your mind.
And if you’re an electronic music production enthusiast, you definitely have to go try that out right now… you’ll thank me later.
How to Use Ring Modulation in Production & Sound Design
Now that you understand the key components of ring modulation, let’s dive into techniques you can use to create unique, powerful sounds in your tracks. We’ll break down how to use ring mod to design metallic tones, robotic textures, and epic soundscapes.
-
Creating Metallic & Bell-like Tones
If you want to create those metallic sounds and bell-like tones like we spoke about, ring modulation is one of the best tools for the job, hands down.
The trick is using a sine wave as the carrier signal and a high-frequency sine wave as the modulator signal (typically set to a 2:1 or 3:1 frequency ratio).
For example, setting a carrier frequency of 440 Hz (A4) and a modulator frequency of 880 Hz (A5) results in pure, shimmering bell-like sounds with clear harmonic content.
If you want something even brighter, using a square wave modulator instead of a sine wave adds extra harmonics, which makes the output signal sharper and more complex.
Another technique is to slightly detune the modulator frequency, so instead of 880 Hz, set it to 885 Hz or 890 Hz.
This will create a more natural, evolving bell resonance, similar to how real-world metallic objects ring out over time.
If you’re using a ring modulator plug-in, try adding a low-frequency sine wave modulator (below 20 Hz) to introduce a slow-moving tremolo effect.
This can make your bell-like textures feel more alive and vibrant.
For extra realism, use an envelope generator to shape the attack and decay of the sound, with a fast attack (0-5ms) and a long release (1-3 seconds) to mimic how actual bells sustain in the air.
If you want chime-like, glassy tones, applying a low-pass filter cutoff after ring modulation helps remove unwanted high-end harshness.
It’ll keep the sound smooth, musical, and extremely professional.
For even more complexity, layering two oscillators and setting their modulation depths differently can add extra richness to the resulting output signal.
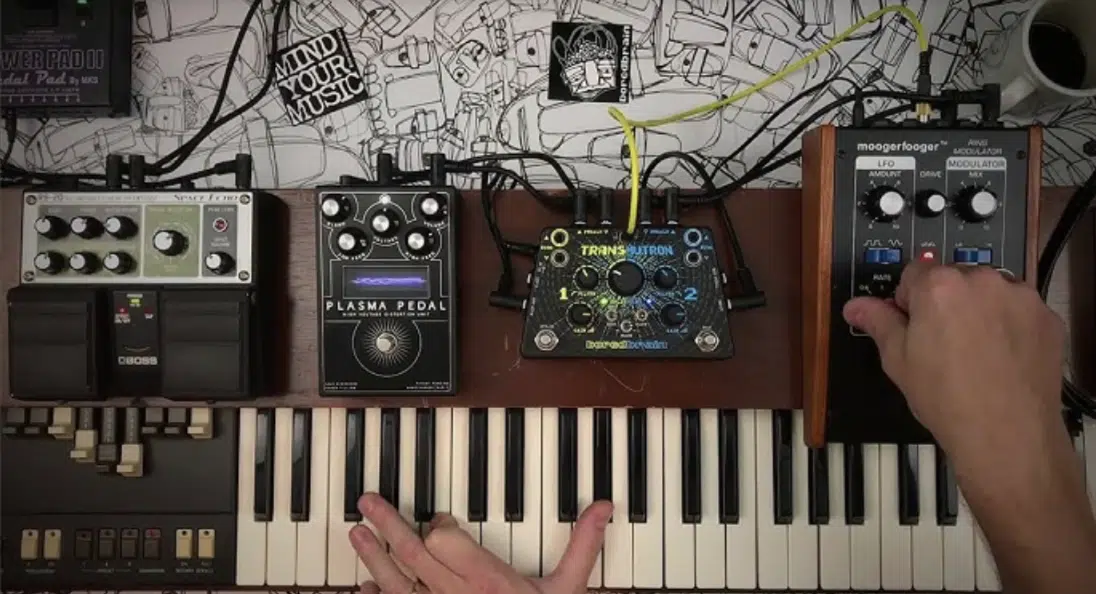
NOTE: If you’re using hardware synths like the Moog Matriarch, adjusting the expression pedal to control the modulator frequency in real-time lets you sweep through metallic overtones, which is great for hybrid/experimental performance techniques.
-
Designing Robotic and Sci-Fi Sounds
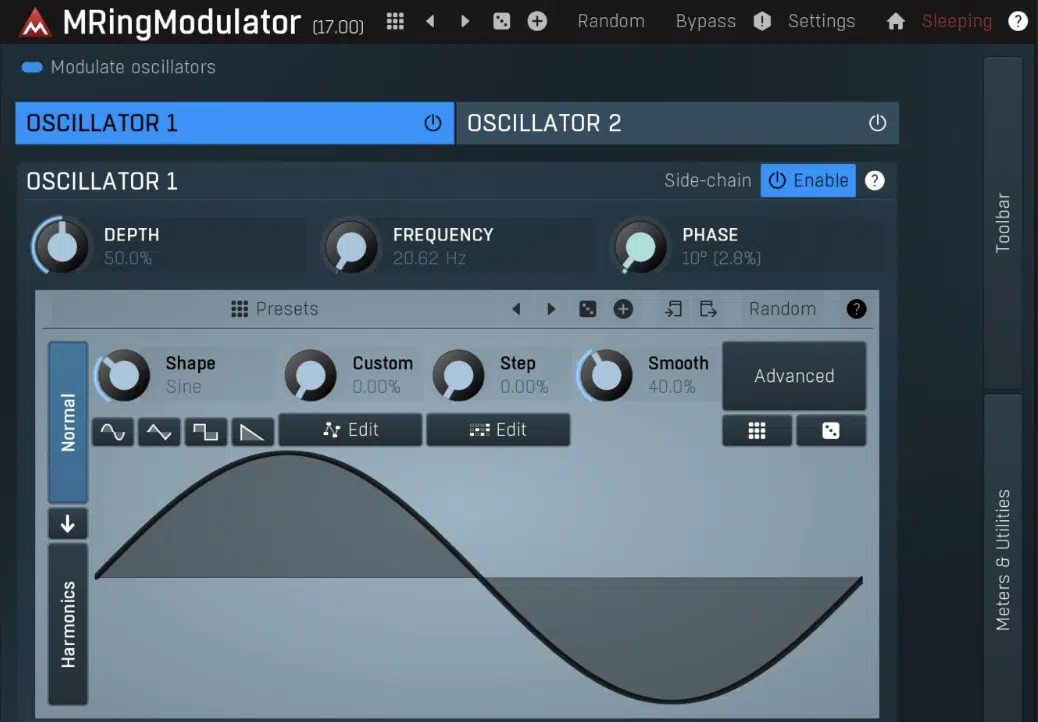
Ring modulation is also the best if you’re going for robotic voices, sci-fi textures, and mechanical soundscapes as well.
The key is using a voice sample or synth pad as the carrier signal, then applying a modulator signal with an inharmonic frequency ratio.
For example, setting a carrier at 300 Hz and a ring modulator at 787 Hz creates a harsh, mechanical effect that sounds almost like a talking robot.
For even more synthetic realism, try using a square wave modulator instead of a sine wave to introduce extra edge and crunch into the modulated voice.
One classic sci-fi effect is the Dalek voice, which was made famous by early Doctor Who sound design.
You can replicate it by using a spoken voice sample as the input signal, then modulating it with a low-frequency sine wave (30-50 Hz) to create a deep, pulsing robotic tone.
If you increase the modulation depth, the voice becomes completely unintelligible.
This transforms it into a metallic drone perfect for industrial electronic music or sci-fi soundtracks that people go absolutely crazy for.
For more glitchy, futuristic textures, try setting the carrier frequency to a high pitch (above 1 kHz) and using a fast LFO (6-10 Hz) to modulate the modulator frequency.
This makes the sound constantly shift and shimmer, almost like it’s being run through a digital filter cutoff.
If you want computerized beeps and bleeps, set a carrier at 400 Hz and a modulator at 1,200 Hz while applying random automation to the modulator depth.
It will successfully create unpredictable, evolving robotic tones.
For film and game sound effects, you can combine ring modulation with a granular synthesis plug-in to break the sound apart into tiny fragments, making it feel out of this world (alien, if you will).
NOTE: Adding a high-pass filter after ring modulation is another great way to clean up unwanted low-end rumble.
This is especially true if you’re using harsh modulator waveforms like square waves or saw waves, that kind of thing.
Ring Modulation in Hardware & Software Synths
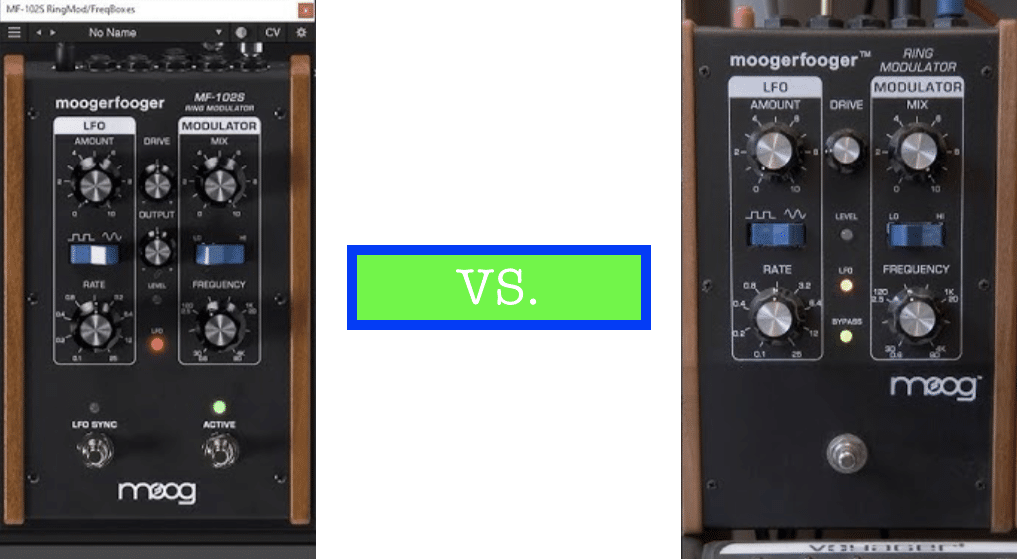
When it comes to ring modulation, you have two main options:
- Hardware synthesizers
- Digital ring modulation in modern plugins
If you prefer hands-on control, hardware synths like the Moog MF-102 Ring Modulator, Korg MS-20, and Elektron Analog Four all feature built-in ring mod circuits.
It gives you real-time access to modulator frequency, depth, and mix settings which you’ll really need to master this concept.
The Moog MF-102, in particular, is known for its diode ring circuitry, which produces incredibly warm, organic tones that are perfect for both classic and experimental vibes.
For digital producers like myself, there are tons of ring modulator plugins that allow for deeper modulation control inside your DAW.
Some of the best include Soundtoys’ RingMod, Logic Pro’s stock Ring Mod effect, and Ableton Live’s Frequency Shifter, which lets you apply ring modulation with full automation control.
In FL Studio, the Fruity Ring Mod plug-in allows you to fine-tune both the modulator frequency and waveform 一 giving you complete flexibility over the output signal.
If you want crazy experimental effects, the Mutable Instruments Warps Eurorack module features an advanced digital ring modulator.
With it, you can easily blend between different frequency ratios for constantly shifting harmonics.
Another great trick is using two oscillators from a hardware synth like the Behringer Neutron, then running them through an external ring mod unit to process the sum and difference frequencies in a unique way.
Many modern ring mod plugins also allow you to modulate the modulator frequency dynamically.
This means you can automate LFO sweeps or map them to a MIDI controller to create evolving, moving textures.
If you’re into sound design for games and film, combining ring mod with delay and reverb plugins lets you create deep, atmospheric soundscapes that feel alien yet organic (it’s a great trick to pull out of your pocket).
-
Pro Tip
If you’re using ring modulation inside your DAW, you can also try layering it with other effects like bitcrushing or phase distortion to add even more harmonic complexity.
Whether you’re working with analog hardware or digital plug-ins, knowing how to properly shape your input signal and modulator settings is the key to getting the best results with ring modulation, for sure.
And side note, in most modern ring modulators, many plug-ins allow you to apply automation to the modulator signal, so you can sweep the modulation depth in real time for even more motion and expression.
Advanced Ring Modulation Techniques
Now that you understand how to use ring modulation in hardware and software, it’s time to push things even further. Below, we’ll explore advanced techniques, like modulating the modulator for deeper motion, and layering ring modulation with other synthesis methods for completely new sound design possibilities.
-
Layering Ring Modulation with Other Synthesis Types
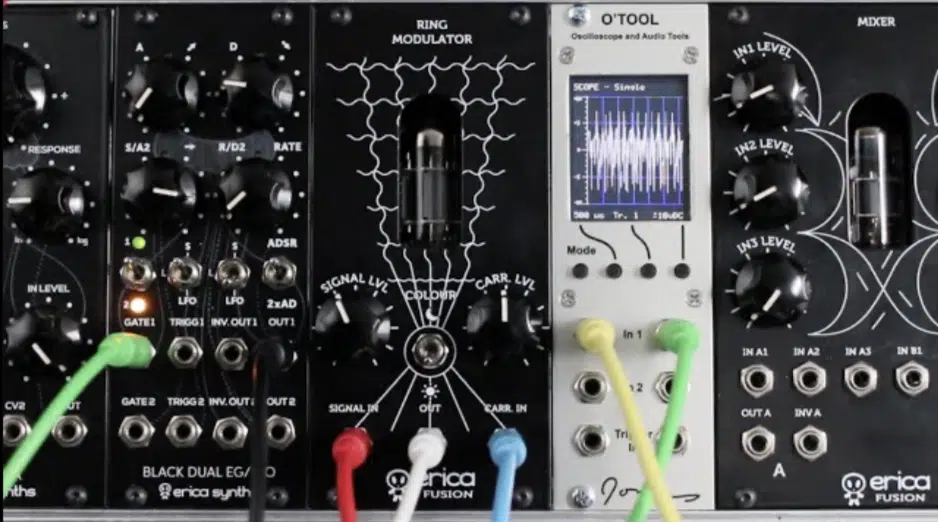
Combining ring modulation with other synthesis techniques can push your sound even further (it’s a super powerful tool once you master it).
If you mix ring modulation with additive synthesis, you can layer harmonic-rich waveforms with the inharmonic textures of a ring modulator.
It creates a hybrid sound that blends both complexity and warmth.
A good example is using a carrier at 220 Hz with an FM synth tone modulating at 660 Hz, then applying ring mod on top.
This one is all about producing bell-like sounds that’s super layered; both metallic and full.
For a more playable, musical tone, try adding subtractive synthesis after ring modulation by passing the output signal through a low-pass filter with a filter cutoff around 2 kHz to remove harsh upper harmonics and tame higher frequencies (super smooth).
You can also mix ring modulation with granular synthesis, where small grains of the ring modulated sound are scattered and stretched.
If you’re looking for interesting, evolving, ambient sounds this one is perfect for you.
Also, using two frequencies at slightly detuned values before running them through a ring modulator can create deep chorus-like effects.
My advice is to make sure that one signal has a slow LFO applied to its pitch.
This is a great trick when working with two oscillators in a polyphonic synth because you’re able to blend a clean oscillator signal with a modulated, evolving texture.
Another killer technique is using ring modulation in parallel with wavetable synthesis, where you apply ring mod to the wavetable oscillator and blend it with the original audio signal.
This lets you retain the clarity of a synth while adding unpredictable metallic textures.
In electronic music production, this works especially well for glitchy leads, evolving pads, and synthetic percussion that needs an extra layer of movement and depth.
To make the sound even more spatial and dynamic, send the ring modulated audio signal through a stereo delay or reverb with random modulations applied to the pan position to spread the output signal across the mix so it feels more immersive.
If you want even more weirdness (which I’m all about), you can actually play around with modulating the wet/dry balance of the ring modulator.
This way, it will fade in and out subtly instead of being fully engaged at all times.
NOTE: Using two signals where neither the carrier or the modulator is static (both are constantly shifting) results in a completely unpredictable, evolving texture that works great for soundscapes and ambient compositions.
Whether you’re working in hardware or digital plug-ins, knowing how to properly layer ring modulation with other techniques is key to unlocking its full potential.
-
Creative Uses of Ring Modulation in Percussion & FX
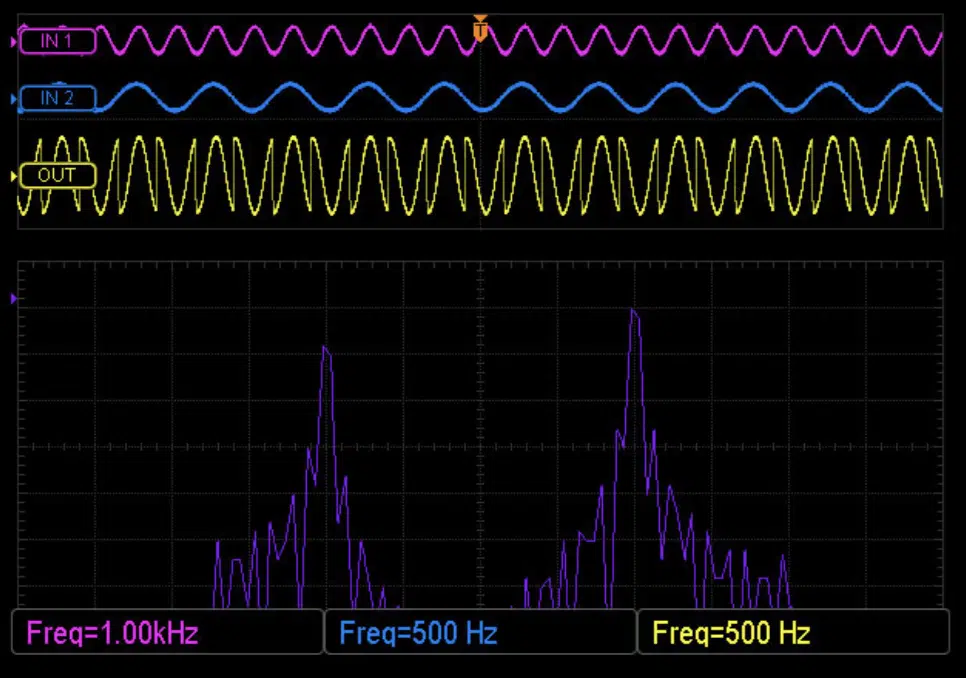
One of the most overlooked tricks in ring modulation is applying it to percussion and sound effects to create sharp, metallic textures that cut through a mix.
By using ring mod on a snare drum or hi-hat, you can introduce clanging overtones and make the hits sound mechanical or robotic.
Especially if you set the modulator frequency to a non-integer value like 275 Hz.
For kick drums, a low-frequency sine wave modulator (below 30 Hz) can add subtle tremolo-like movement 一 making the low end feel more dynamic.
You can also take real-world sounds, like a door slam or vocal sample, and process them through a ring modulator with a high-frequency square wave modulator to create glitchy, distorted FX.
If you’re working with field recordings, running them through two oscillators in a ring mod chain can add metallic textures without making them completely unrecognizable.
Also, layering a ring-modulated version of a sound with its dry version is another great trick for keeping the original punch while adding complexity to transients.
Final Thoughts
And there you have it: everything you need to know about ring modulation and how to use it like an absolute boss.
Remember, it all comes down to choosing the right carrier and modulator signals, setting the right frequency ratios, and using modulation depth creatively.
This way, you’ll be able to shape your sound all day to match any vibe.
Just remember to always pay attention to the balance between harmonic and inharmonic tones because otherwise, your sound can quickly become too chaotic.
And, as a special bonus, since we mentioned electronic music production so much, you’ve got to check out the most legendary Free EDM Kit in the game.
It contains 45 individual drum samples, loops & MIDIs, specifically designed to make your EDM tracks sound clean, crisp, and polished.
If you want your tracks to hit harder than ever and completely dominate the competition, this is the perfect pack for you.
And, it was created by expert sound designers and producers, so you’re getting the highest quality with every single sample.
If you’ve been experimenting with ring modulation on your drums, bass, and synths, pairing those sounds with high-quality drum samples from this kit will make your tracks feel more dynamic and powerful.
Whether you’re using ring modulated textures to create weird FX or futuristic percussion, having tight, punchy drum samples ensures your mix stays impactful.
Trust me, you do not want to miss out on this epic pack, even if you don’t produce EDM.
Bottom line, when it comes to ring modulation, it’s all about understanding how sum and difference frequencies shape your sound, knowing when to use integer vs. non-integer ratios, and applying modulation depth with purpose.
Just remember to experiment with different modulator waveforms and automation, because small tweaks can make a huge difference.
Plus, layering ring mod with other synthesis types, tweaking filter cutoff settings, and knowing how to use it properly will help really up your sound design game.
If you apply everything we covered, your tracks will always stand out with a unique, futuristic edge.
You’ll be creating some of the most interesting, dynamic sounds possible with ring modulation and hopefully sell your beats quicker than ever.
Until next time…


Leave a Reply
You must belogged in to post a comment.