Subtractive EQ is all about removing the unwanted frequencies that clutter your mix and prevent your tracks from sounding clean and professional.
It helps you create space, improve clarity, and balance the frequency spectrum across all elements of your song.
By cutting out what doesn’t belong, your tracks will always sound polished, and your overall sound will sit perfectly in the mix.
As producers, mastering subtractive EQ techniques can seriously level up your skills and give your beats that industry-standard edge.
That’s why I’m breaking down everything you need to know, like:
- What subtractive EQ is and how it works ✓
- How to reduce frequency masking ✓
- Tips for creating space in your mix ✓
- Removing problematic frequencies with ease ✓
- Using filters: high-pass, low-pass, band-pass ✓
- When and where to use subtractive EQ ✓
- A step-by-step guide to the EQ process ✓
- Pro tips for dynamic EQ and mid/side EQ ✓
- The difference between subtractive and additive EQ ✓
- Much more about subtractive EQ ✓
By knowing all about subtractive EQ and the techniques to apply it, you can seriously enhance your music production skills.
Plus, you’ll be able to mix cleaner, create professional-sounding tracks, and carve out the perfect frequency range like a boss.
Don’t underestimate the difference it can make, which we’ll cover today.
Table of Contents
What Exactly is Subtractive EQ?
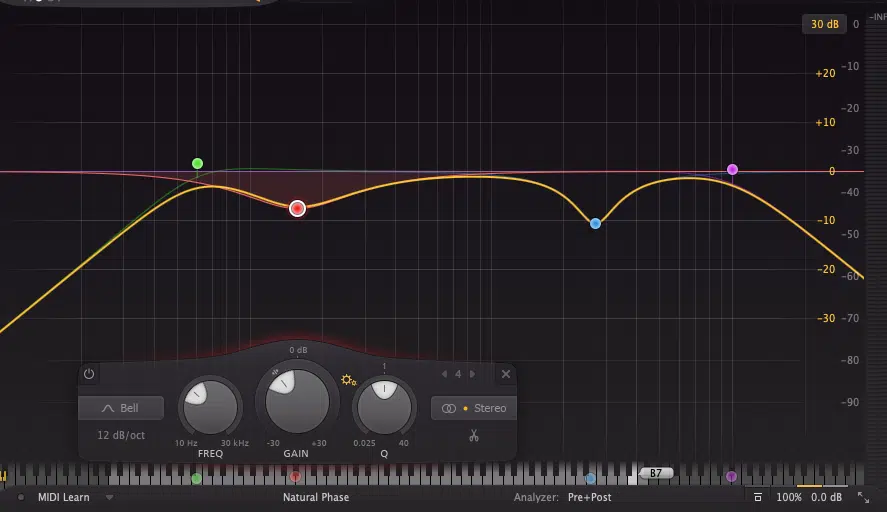
Subtractive EQ is the process of removing unwanted frequencies in a track to clean up the sound and make room for other elements in the mix.
Unlike additive EQ, which involves boosting frequencies, subtractive EQ focuses on cutting problematic frequencies that might clutter the frequency spectrum.
Or, that might cause clashes between elements.
For example, if a vocal track sounds muddy, you can cut around 250 Hz to 400 Hz to reduce excessive low-end buildup and make the vocal clearer.
Personally, I’ve found that using subtractive EQ early in the signal chain often simplifies the entire process by creating a solid foundation for other processing like compression.
It’s an essential part of music production when aiming for a clean and professional mix, so buckle in and we’ll break it all down for you (in detail).
Side note, if you want to learn all about the different EQ types other than subtractive EQ, we got you covered.
-
Reducing Frequency Masking
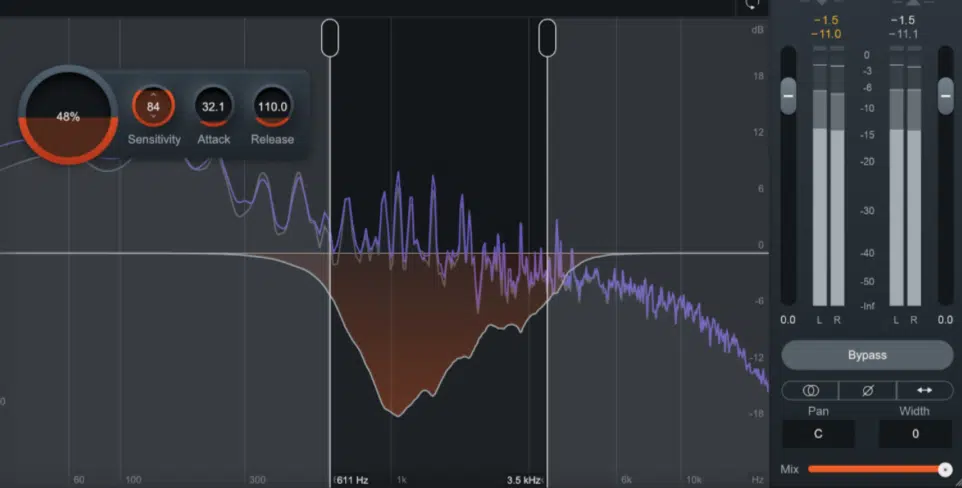
Frequency masking happens when two or more sounds compete for the same frequency range, which makes it much harder to distinguish them in the mix.
For example, a common issue is overlap between the kick drum and the bass guitar, which can result in a boomy and undefined low-end.
To handle this, start by using a high-pass filter on the bass guitar 一 cutting frequencies below 80 Hz to allow the kick drum to dominate that region.
Another great technique is to use a dynamic EQ to target overlapping frequencies only when both elements are playing together at the same time.
For example, a -3 dB dynamic cut at 100 Hz on the bass guitar can tighten up the low-end without sacrificing its depth when the kick drum isn’t present.
These precise subtractive EQ techniques make a seriously big difference in creating a balanced and polished mix, so don’t underestimate it.
-
Creating Space in the Mix
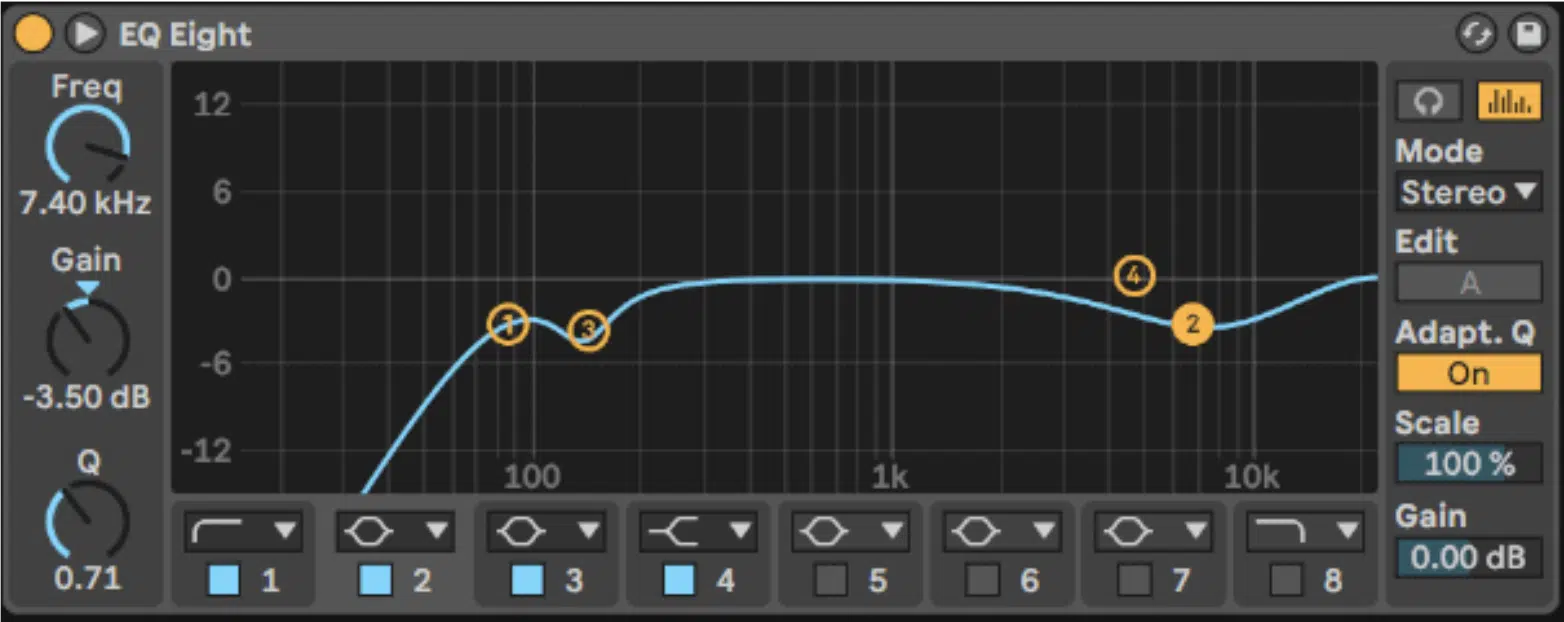
Creating space in a mix is all about making sure every element has its own place in the frequency spectrum 一 nothing outshining or overpowering the others.
Subtractive EQ is the key to making sure this happens, especially when multiple elements overlap in the same frequency range as we just said.
For example, cutting a narrow band around 300 Hz in a pad or synth can leave room for a vocal track to sit more naturally in the mix.
On the same note, attenuating some higher frequencies in cymbals can help a lead instrument sparkle without sounding cluttered.
Just remember to always listen in context…
Soloing a track might make the EQ cut sound extreme, but in the full mix, it usually makes sense and improves the overall sound in a major way.
-
Preventing Unwanted Resonances
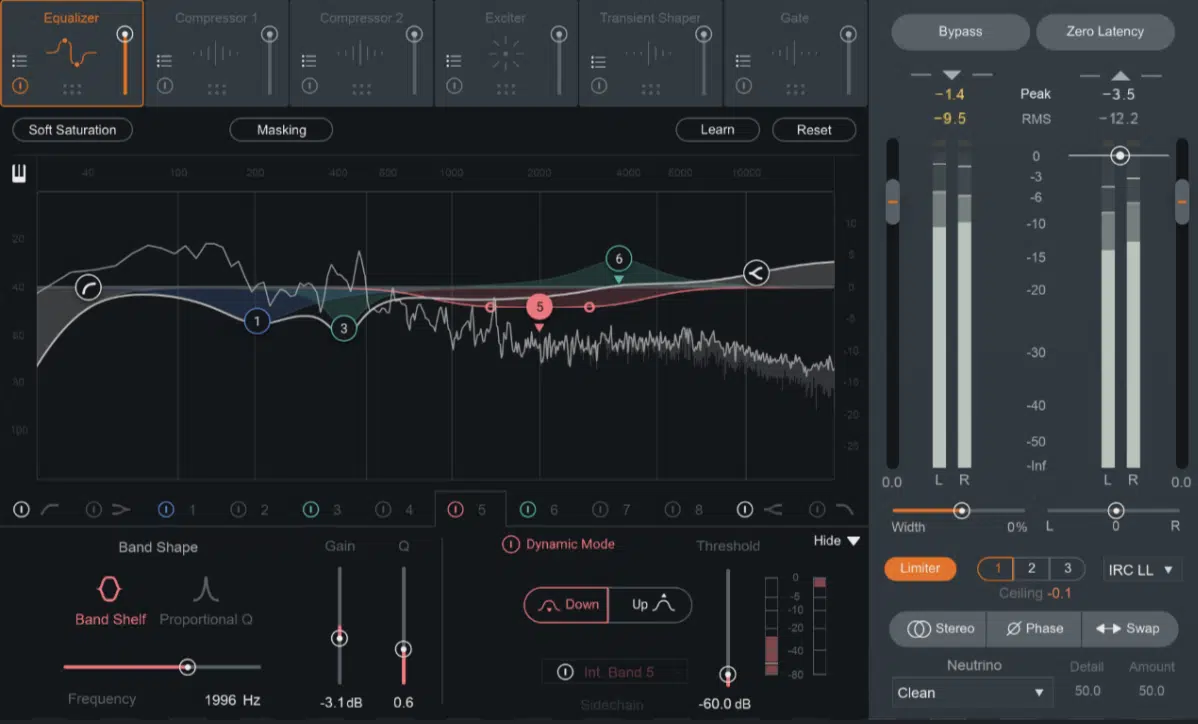
Unwanted resonances are sharp, unpleasant peaks in the frequency spectrum that can make a whole track sound:
- Harsh
- Boxy
- Unbalanced
To tackle this, use a narrow Q setting on your EQ plugin (equalizer plugin) and sweep through the frequency range to locate any problem areas.
For example, a harsh resonance at 3 kHz in a vocal track can often be reduced with a -4 dB cut using a precise Q setting around 2.5.
In one project, I used this method to smooth out an electric guitar’s ‘honkiness’ in the mid-range, which instantly made the track sounds more natural/cohesive.
Don’t forget to keep the cut subtle…
Aggressive cuts can completely strip the character out of the sound, so aim to attenuate just enough to remove the offending frequencies without losing life.
Pro Tip: Common EQ Plugins for Subtractive EQ & Their Key Features
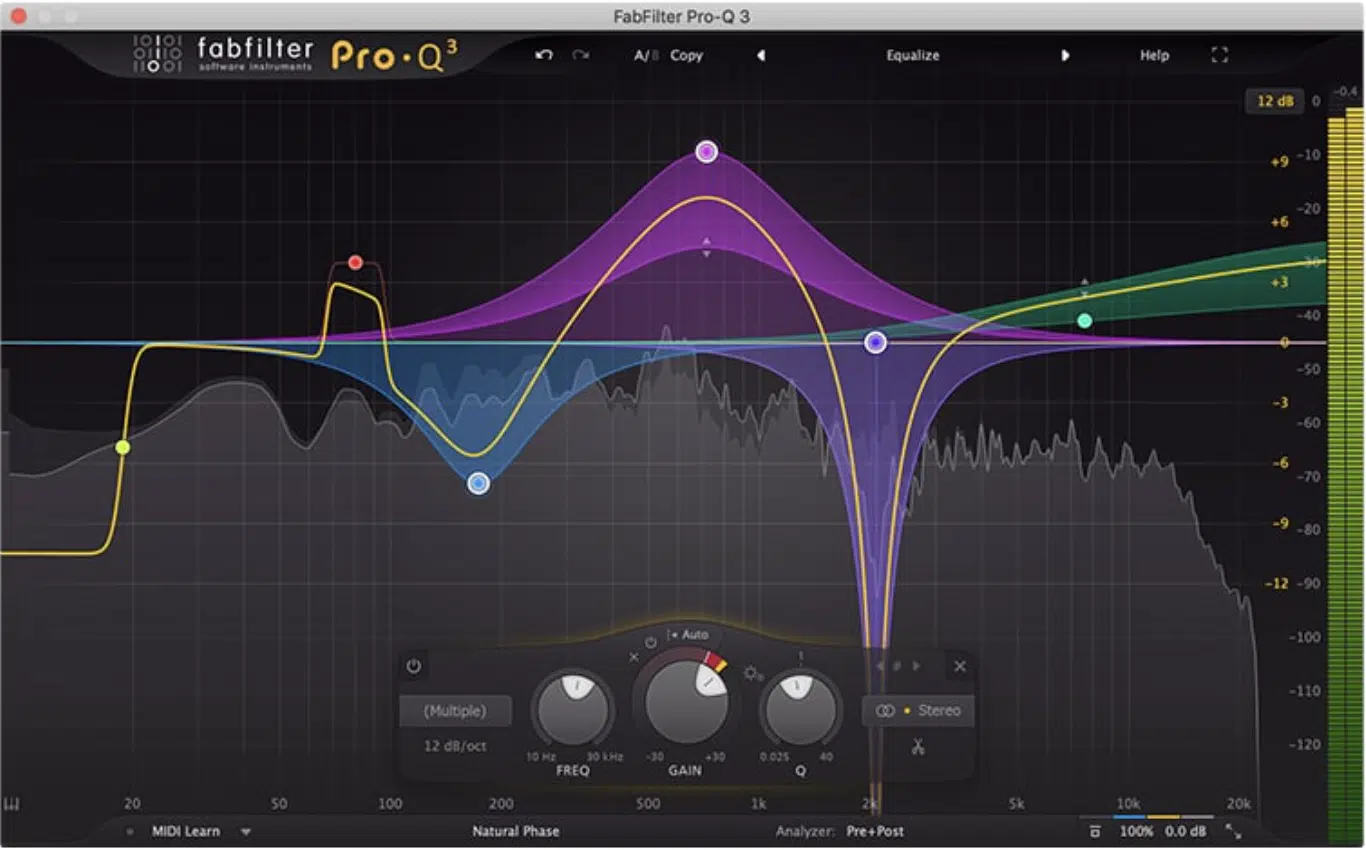
When it comes to subtractive EQ, having the right EQ plugins can make-or-break things and help you really master the entire process altogether.
My personal favorites are FabFilter Pro-Q3 and Waves Q10, but you can always use stock EQ plugins in your DAW (like Ableton Live and Logic Pro).
It’s all about ensuring things are super precise and flexible.
For example, FabFilter Pro-Q 3 features a visual analyzer that displays the frequency spectrum 一 making it very easy to identify and cut unwanted frequencies.
Dynamic EQ functionality is another key feature which allows you to target specific frequency bands dynamically, cutting them only when necessary.
Personally, I find linear phase EQ helpful during the mastering stage for transparent cuts, especially when adjusting mid-frequencies in a full mix, but dealer’s choice.
NOTE: No matter the EQ plugin you like best, look for adjustable Q settings, real-time feedback, and spectrum analyzers for razor-sharp subtractive EQ moves.
The Role of Filters (High-Pass, Low-Pass, Band-Pass)
Filters are some of the most useful tools for subtractive EQ, especially for controlling the extremes of the frequency spectrum.
High-pass Filters
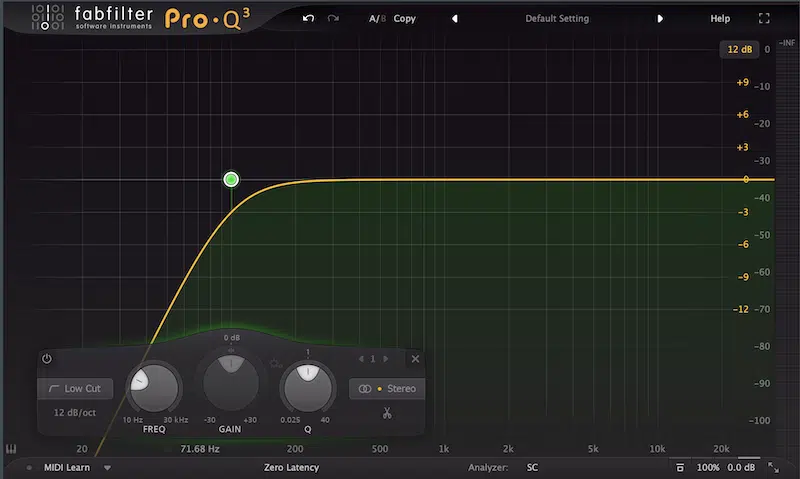
High-pass filters remove low-end rumble, which is super useful for tracks that don’t need bass energy.
For example, cutting a vocal track below 80 Hz with a gentle slope like 12 dB/octave can clean up sub-bass rumble caused by mic handling or environmental noise.
All while keeping the vocal’s natural tone intact, of course.
For acoustic guitars, applying a high-pass filter at 120 Hz prevents the instrument from clashing with the kick drum and bass guitar in the mix.
On softer synth pads, raising the cutoff to around 200 Hz can eliminate muddiness so the low-end frequencies are reserved for more essential elements like drums/bass.
Low-pass Filters
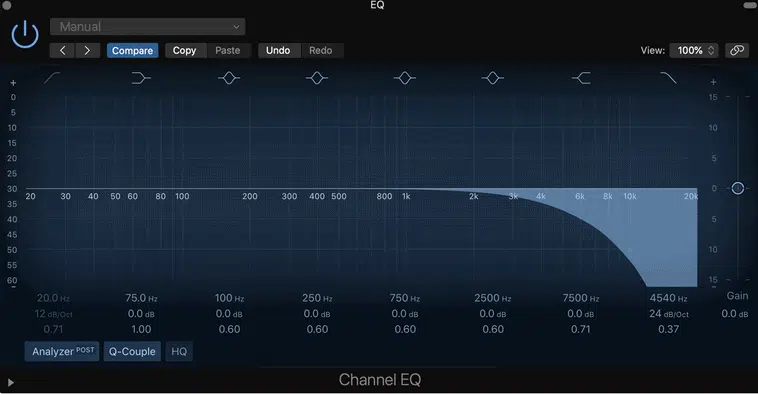
Low-pass filters tame harsh higher frequencies, like reducing cymbal sharpness at 15 kHz or smoothing synth pads at 10 kHz for a balanced background texture.
Using a gentler slope like 6 dB/octave can make these adjustments feel more natural and less noticeable, so keep that in mind.
Band-pass Filters
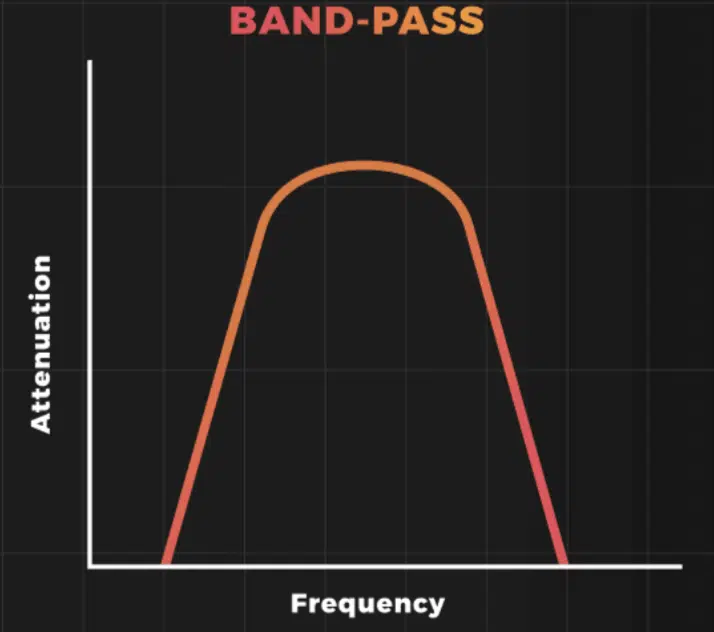
Band-pass filters isolate specific frequency bands 一 making it easy to cut resonances, such as reducing nasal tones in vocals at 1.2 kHz.
Let’s take a bass guitar for example…
Focusing on its primary range of 60–120 Hz with a band-pass filter can tighten the instrument’s tone while removing excess low-end rumble or unnecessary high-frequency noise that might clash with other elements in the mix.
The only advice I’d give you about this is to always apply filters in context, use gentle slopes for natural cuts, and avoid being too aggressive unless absolutely necessary.
Automation can also bring filters to life, such as gradually increasing a high-pass filter during a buildup to create dynamic energy.
Mastering filters can help make sure your mix is super clean, balanced, and professional, so make sure to practice and play around.
Subtractive EQ: Step-by-Step Breakdown
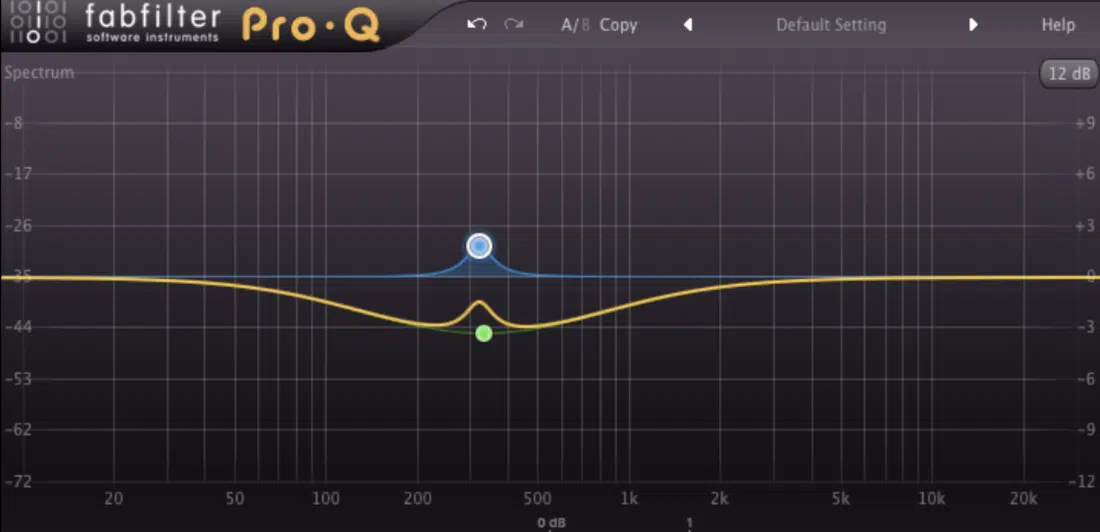
Using subtractive EQ starts with a clear understanding of what your single track needs and where potential issues might lie. So, let’s break down the exact steps to help you identify problematic frequencies, apply targeted cuts, and evaluate the results.
Step 1: Identifying Problematic Frequencies/Unwanted Frequencies
The first step in using subtractive EQ is identifying problematic frequencies or unwanted frequencies that clutter the mix (as we talked about in the previous sections).
Start by enabling a narrow Q setting on your EQ plugin and boosting a specific frequency band by +6 dB to +10 dB.
As you sweep through the frequency spectrum, listen carefully for any harsh, muddy, or nasal sounds that stick out unnaturally.
For example, a vocal track may have excessive energy around 3 kHz, which could sound harsh or piercing, and nobody wants that.
Once you locate these areas, note the exact frequency range to prepare for targeted cuts so you can knock them out.
I’ve found that wearing good studio headphones during this process often makes it way easier to pinpoint these offending frequencies, especially in dense mixes.
Step 2: Applying Cuts
After you identify any problem frequencies, the next process is to apply precise cuts to clean up the track.
Use a narrow Q setting to target the specific frequency band, and start with a cut of -3 dB to -6 dB.
For example, in a kick drum, cutting around 300 Hz can reduce muddiness and allow the punch of the low-end frequencies to come through.
For a bass guitar, a gentle cut at 100 Hz can make space for the kick drum while maintaining the overall sound quality and vibe.
Always be subtle here because over-EQing things can make your track sound thin, amateur, and lifeless.
NOTE: Rely on both your ears and the visual feedback from your EQ plugin to ensure your cuts are improving the mix without damaging the element’s natural tone.
Step 3: A/B Testing
Once you’ve applied your subtractive EQ moves, it’s super important to evaluate the impact by A/B testing.
Toggle the bypass button on your EQ plugin to compare the processed and unprocessed sound (this is very important, please don’t skip this).
Listen carefully to how the track sits in the mix, and ask yourself, does it feel cleaner, clearer, and more defined?
For example, after cutting around 4 kHz on a synth lead, you should notice less harshness and more room for the vocal track.
If you don’t, you have to switch things up.
Just remember to test in context of the full mix, as soloing (with the solo button) can sometimes be a little misleading.
Personally, I like to automate the bypass during playback to ensure that the changes enhance the overall sound and not just a single frequency range.
Pro Tips For Mastering Subtractive EQ
Mastering subtractive EQ is about understanding when to cut and how much to cut without compromising the overall sound. With the right tips, it’ll help you refine your approach for cleaner and more professional results in your mix. And the following are just that.
-
Less is More: Avoid Over-EQing

When using subtractive EQ, it’s easy to overdo it, but cutting too many frequencies can leave your track sounding flat and lifeless.
You want to focus on the areas that are truly problematic.
For example, instead of cutting multiple frequency bands in a vocal track, prioritize one or two trouble spots…
A -3 dB cut at 200 Hz can reduce muddiness caused by overlapping low-mid frequencies, allowing the vocal to sit more clearly in the mix.
A -2 dB cut at 4 kHz, on the other hand, can smooth out sibilance or harshness without making the vocal sound dull.
If you’re working with a kick drum, a small cut at 400 Hz can help reduce boxiness 一 letting the low-end punch through without compromising its overall power.
Always listen to the track in the full mix to guarantee that the cuts serve the overall sound as we talked about, rather than relying on the soloed track.
Cuts that sound great in isolation can sometimes leave an element feeling hollow or disconnected when placed back into the mix.
For example, removing too much midrange from a guitar to make it sound “cleaner” might leave a gap in the frequency spectrum and kill the warmth/presence.
A helpful tip is to start with gentle cuts (-2 or -3 dB) and gradually increase them only if you’re confident they improve clarity without thinning the sound too much.
-
Use Subtractive EQ Before Compression
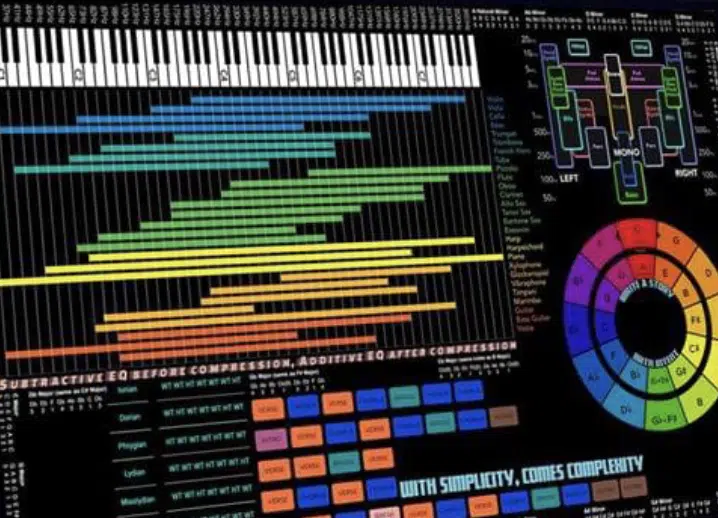
Applying subtractive EQ before compression ensures that unwanted or resonant frequencies don’t trigger the compressor unnecessarily.
Compressors react to the frequency content of a signal, so eliminating problem areas first prevents them from dominating the compressor’s response.
For example, a kick drum with excessive rumble at 50 Hz can cause the compressor to overreact, resulting in a muddy and uncontrolled low-end.
A gentle cut of -3 dB to -6 dB at 50 Hz with a narrow Q setting helps clean up this area so the compressor focuses on the punch and attack rather than amplifying unwanted sub-bass energy.
Similarly, in a bass guitar, removing boominess around 80 Hz before compression can create a more defined low-end 一 avoiding a mix that feels overly heavy/bloated.
By cutting these other frequencies first, the compressor focuses on shaping the dynamics of the clean frequency range.
Also, cutting boxiness in a vocal track at 300 Hz before compression allows the compressor to work more evenly across the frequency spectrum.
For instruments like acoustic guitars, a small cut at 120 Hz can prevent low-end resonance from being exaggerated by the compressor.
This will give you a cleaner, more balanced sound.
Always think of subtractive EQ as preparing your track for smooth and professional dynamic processing as opposed to a fix-all.
For example, cutting harsh frequencies in cymbals at 5 kHz before compression ensures that the brightness is controlled naturally, while the compressor can focus on taming transients.
Bottom line, this order in the signal chain will keep your mix tighter and more balanced.
-
Automating EQ Adjustments
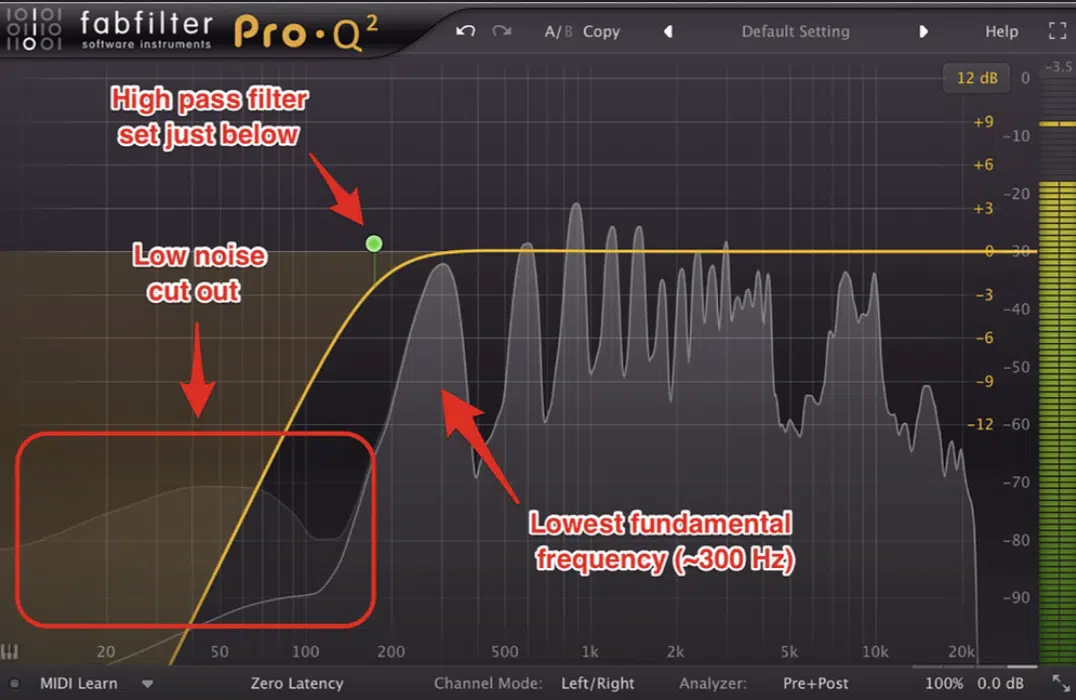
Automation is another game-changer for using subtractive EQ, especially when a track’s frequency content shifts over time.
For example, if a bass guitar alternates between a fingerstyle verse and a slap-heavy chorus, you can automate a cut around 150 Hz during the verse.
And, reducing a resonant peak at 3 kHz during the slap sections will make sure that the bass remains punchy but not overpowering (ideal for dense arrangements).
In a vocal track, let’s say, automating a slight cut at 2.5 kHz when the vocal becomes aggressive can prevent harshness without overprocessing quieter sections.
Automation allows you to adapt your subtractive EQ moves to the unique dynamics of each track 一 ensuring a consistent sound throughout the song.
Always make sure to review transitions in your mix, like between verses and choruses, and adjust cuts as needed to keep everything balanced and natural.
-
Dynamic EQ for Precise Control
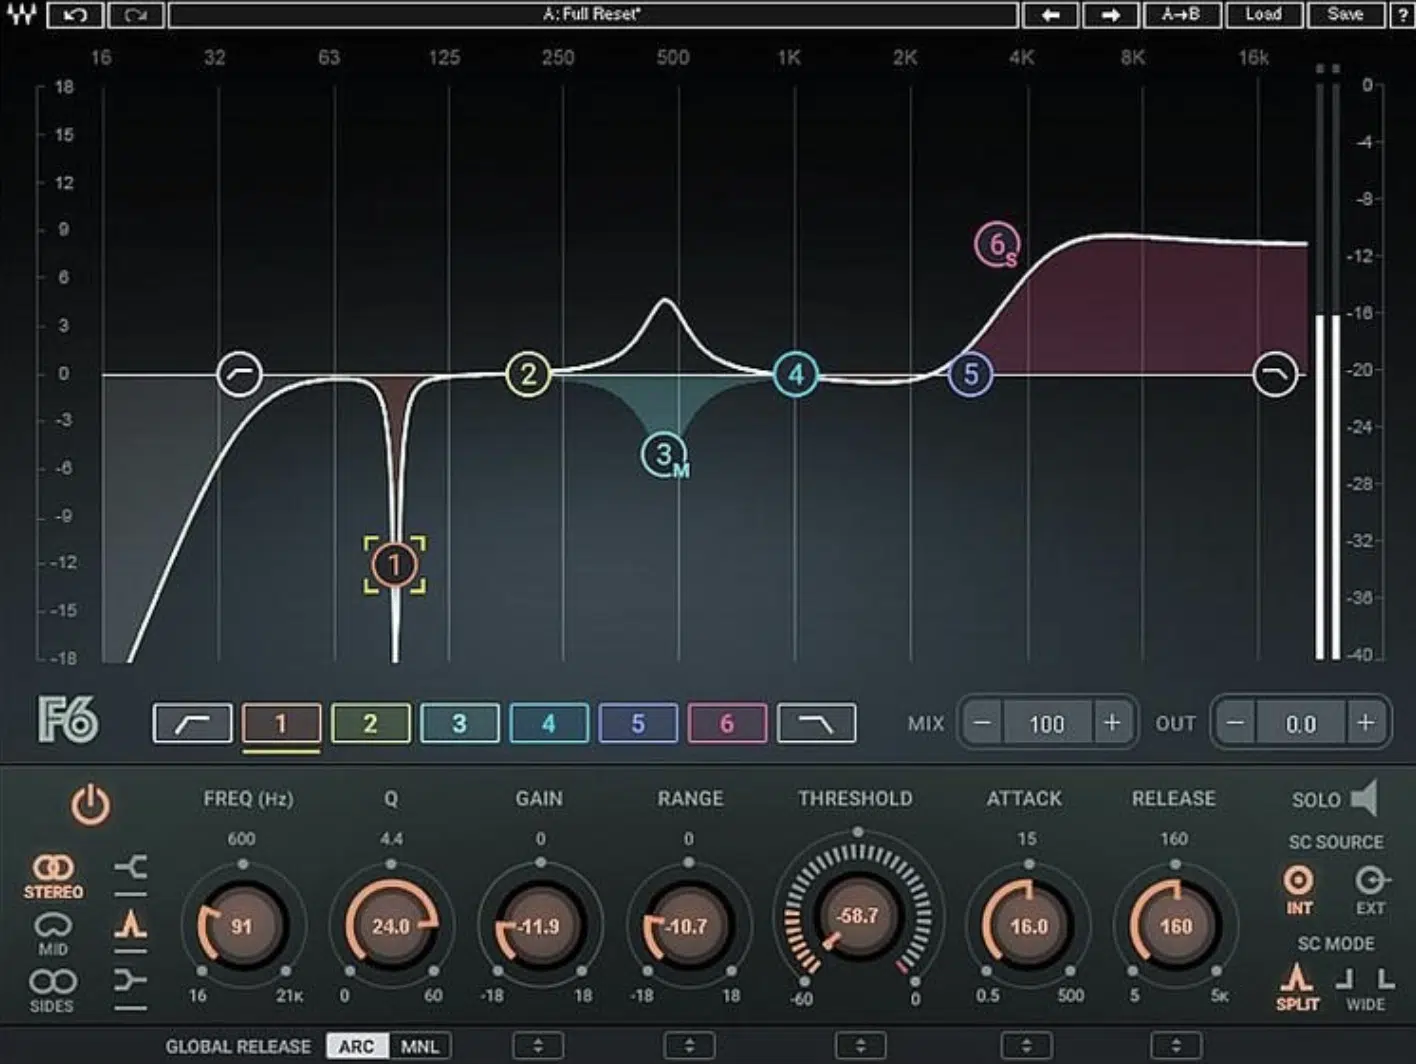
Dynamic EQ combines the precision of subtractive EQ with the adaptability of compression, making it ideal for targeting other problematic frequencies that fluctuate in a track.
For example, if a vocal track has occasional harshness around 3 kHz, a dynamic EQ can apply a -3 dB cut only when those peaks occur.
Leaving the rest of the frequency spectrum untouched, of course.
In a bass guitar, on the flip side, dynamic EQ can tame low-end rumble at 80 Hz when the part becomes too boomy without completely removing the warmth during quieter sections.
A great dynamic EQ technique is setting a medium attack and release to allow the dynamic EQ to react naturally to transients.
This will also maintain transparency in the overall sound and ensure your track sounds consistent while avoiding overprocessing.
-
Mid/Side Subtractive EQ
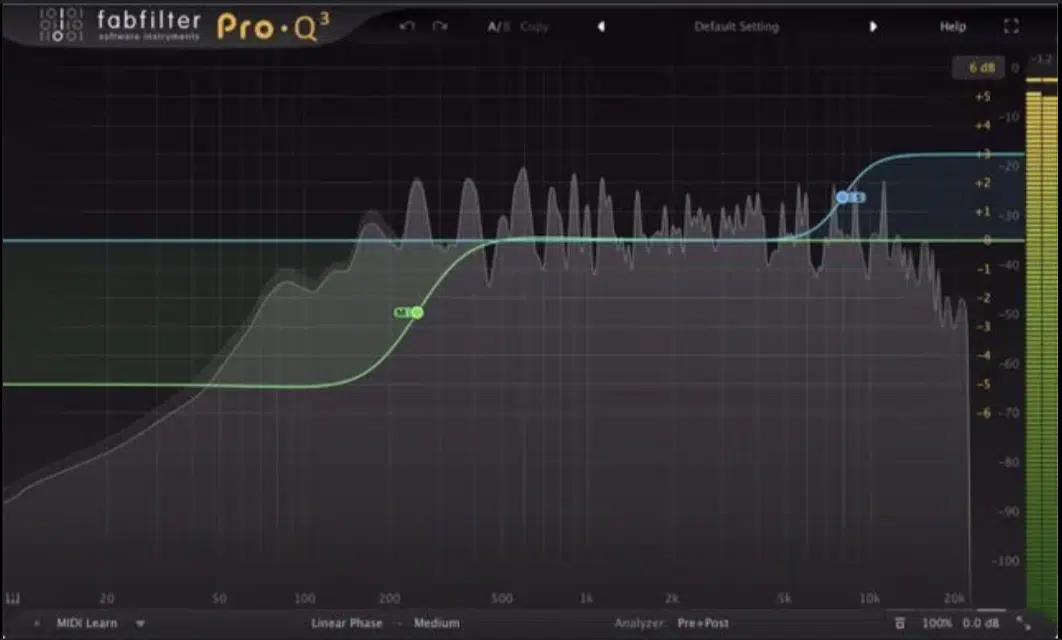
Mid/side EQ allows you to apply subtractive EQ moves to either the center (mid) or sides of the stereo field.
This makes it perfect for managing frequency content in wide mixes.
For example, cutting 200 Hz in the mid-channel of a vocal track can clean up muddiness while preserving the clarity of the surrounding instruments.
On the sides, a gentle low-pass filter at 15 kHz can reduce excessive sparkle in cymbals without dulling the lead elements.
NOTE: Use mid/side EQ during the mastering stage to remove problem frequencies in the mid-channel while keeping the sides vibrant and spacious.
This approach helps balance the mix while maintaining a wide and professional stereo image.
Bonus: Subtractive EQ vs Additive EQ
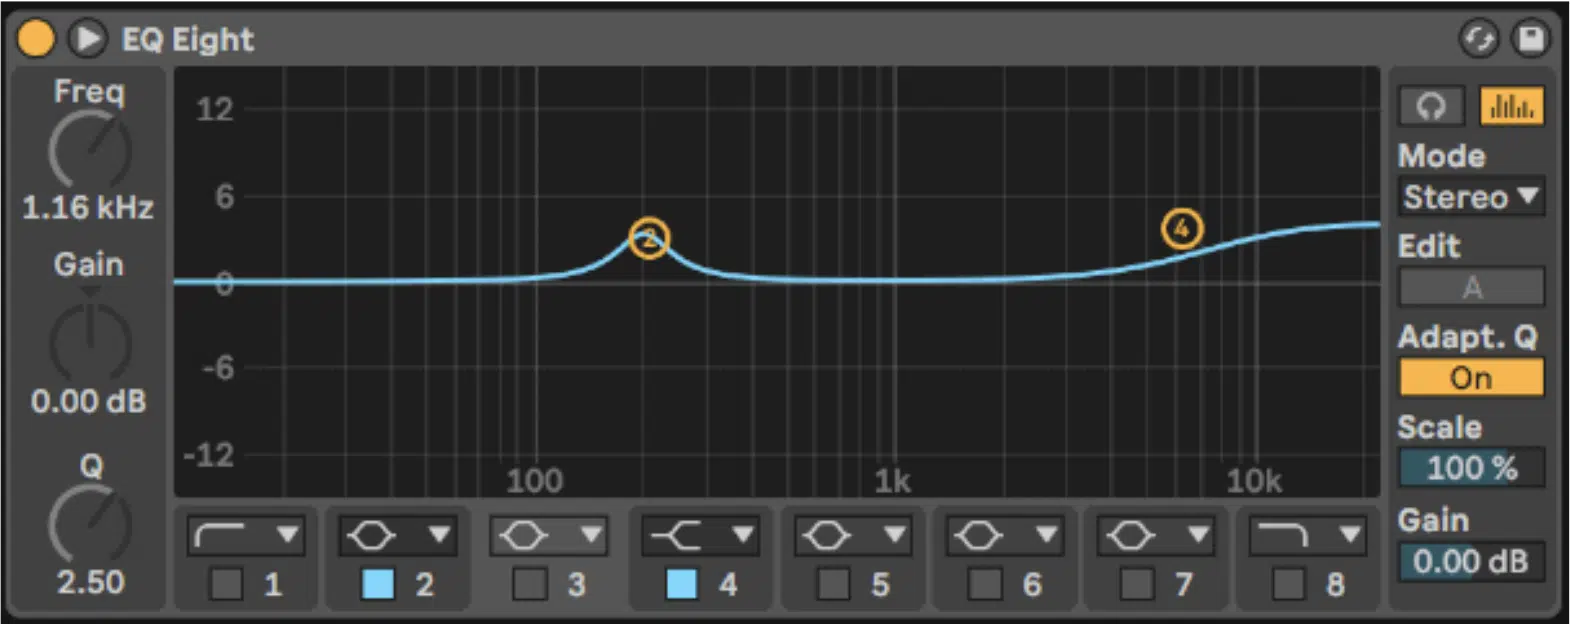
Additive EQ
To wrap things up, let’s break down the differences between subtractive EQ and additive EQ because it’s key to getting a professional mix.
- Subtractive EQ involves cutting unwanted frequencies.
- Additive EQ will boost frequencies to enhance the desired characteristics of a track.
For example, in a vocal track, you might use subtractive EQ to cut 250 Hz for clarity, followed by additive EQ to boost 8 kHz for air and presence.
However, using too much additive EQ can introduce harshness, especially in the high-end frequencies, which is why it’s worth noting to cut before you boost.
Boosting more than +5 dB at 10 kHz on a lead vocal could result in an overly bright or sibilant tone.
Begin with subtractive EQ techniques to clean up the frequency spectrum, then use additive equalization a little bit to enhance the overall sound.
For instance, subtractively cutting 150 Hz in a kick drum makes sure it fits better in the mix, while boosting 4 kHz adds attack for more presence.
Ultimately, a balance of subtractive EQ and additive EQ is essential for achieving a clean yet vibrant audio track sounds.
Final Thoughts
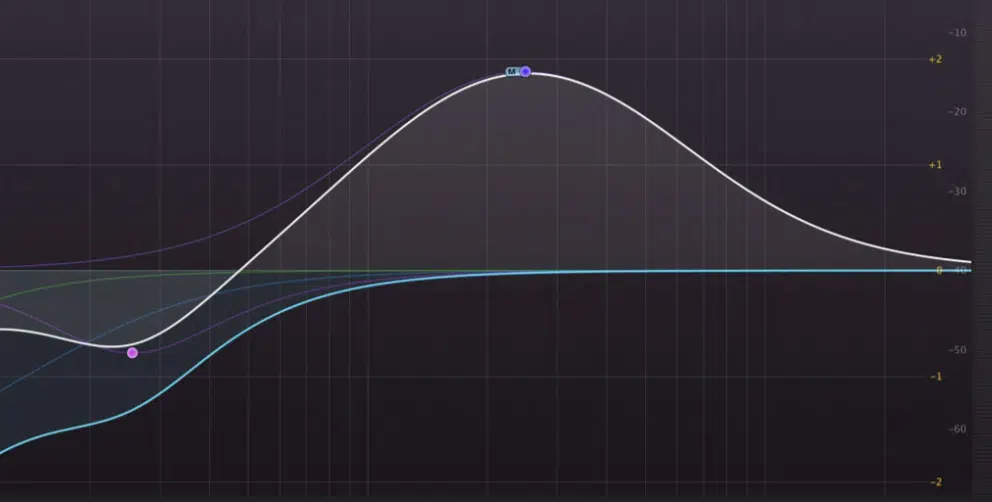
Subtractive EQ, as you now know, is all about removing unwanted frequencies to clean up your mix and create space for each element.
By carefully cutting problematic areas, you can enhance clarity, balance, and ensure that each instrument occupies its own place in the frequency spectrum.
It will help your tracks sound more polished and professional 一 preventing any muddiness and frequency clashes.
It can completely transform your mix if you apply it right, so don’t overlook the power of subtractive EQ in your production process.
And, as an added bonus, you’ve got to check out these 3 industry-renowned Free Project Files.
With them, you can see exactly how professional-quality tracks are made, from start to finish, including any effect imaginable (including, of course, subtractive EQ).
This way, you can dissect the structure, processing, and arrangement techniques used by experts, and apply these insights to your own beats.
It can give you an invaluable look into the workflow of seasoned producers, basically giving you the cheat codes to professional production.
Bottom line, by mastering subtractive EQ and exploring these professional project files, you’re well on your way to elevating your music production skills.
So, keep practicing, always stay curious, and continue refining your craft to achieve the polished, professional sound you’re aiming for.
Until next time…


Leave a Reply
You must belogged in to post a comment.