Plugins are undoubtedly one of the best tools you have as a producer.
And, if you’re wondering how to add plugins to FL Studio, you came to the right place, because in today’s article, we’re breaking down the process step by step.
This way, you can easily expand your sound library and get back to making music.
In today’s article on how to add plugins to FL Studio, we’ll break down:
- The difference between VST plugins & AU plugins ✓
- Locating your plugin folder ✓
- Placing the plugin file ✓
- Opening FL Studio ✓
- Accessing the plugin manager ✓
- Scanning for new plugins ✓
- Verifying the plugin installation ✓
- How to organize and manage plugins ✓
- Adding plugins to the Channel Rack ✓
- Configuring plugin settings ✓
- Managing 64-bit and 32-bit plugins ✓
- More more about how to install plugins in FL Studio ✓
After reading this article, you’ll know exactly how to add plugins to FL Studio.
This way, you can maximize and streamline your workflow in a major way.
Plus, you’ll be able to manage your plugins like a true professional 一 ensuring your production process is always optimized for creativity and efficiency.
So, let’s dive in…
Table of Contents
VST Plugins vs AU Plugins (Quick Recap)

Before we dive into the steps on how to add plugins to FL Studio, let’s quickly recap the difference between VST plugins and AU plugins.
A VST plugin (Virtual Studio Technology) and AU plugin (Audio Units) are both essential tools for music production mastery.
VST plugins, developed by Steinberg, are compatible with both Windows and macOS.
VST plugins come in VST2 and VST3 versions, with VST3 offering more advanced features like improved automation and performance.
AU plugins, developed by Apple, are exclusive to mac OS and integrate seamlessly with software like Logic Pro but are also usable in FL Studio.
Knowing the difference between these plugin formats is key 一 for example, if you’re using FL Studio on Windows, you’ll primarily focus on VST plugins.
On macOS, you can use both VST and AU plugins, which gives you more flexibility.
This understanding helps in selecting the right plugins for your setup/process and ensuring compatibility with your digital audio workstation (DAW).
So, now let’s get into how to install plugins easily and what to do so you can use those installed FL Studio plugins like a boss.
How to Add Plugins to FL Studio: Step by Step
Now that you know the difference between VST plugins and AU plugins, let’s dive into exactly how to add plugins to FL Studio. Each of the following steps will make sure your plugins are correctly installed and ready for use, whether they’re VST plug-ins or AU plugins.
-
Step 1: Locating Your Plugin Folder
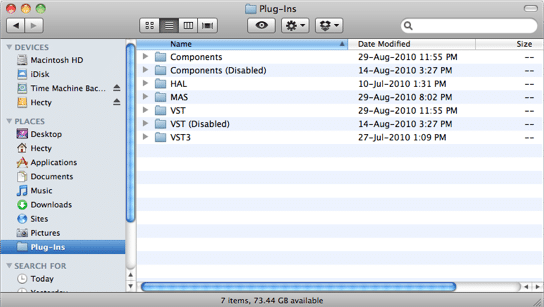
The first step in adding plugins to FL Studio is locating your plugin folder.
In FL Studio, the default plugin folder is typically found in the program files directory.
- For Windows users 一 Navigate to C:\Program Files\VSTPlugins or C:\Program Files (x86)\VSTPlugins for 32-bit plugins.
- On macOS 一 The default folder is usually located in Library/Audio/Plug-Ins/VST.
If you have customized your plugin search paths, just make sure you know those specific folders properly so you never get tied up.
Organizing your plugin folders correctly can save time and avoid confusion.
NOTE: Make sure to differentiate between 32-bit and 64-bit plugins to ensure compatibility with FL Studio. This organization helps FL Studio locate and integrate your plugins during the scan process.
-
Step 2: Placing the Plugin File Into Your Plugin Folder
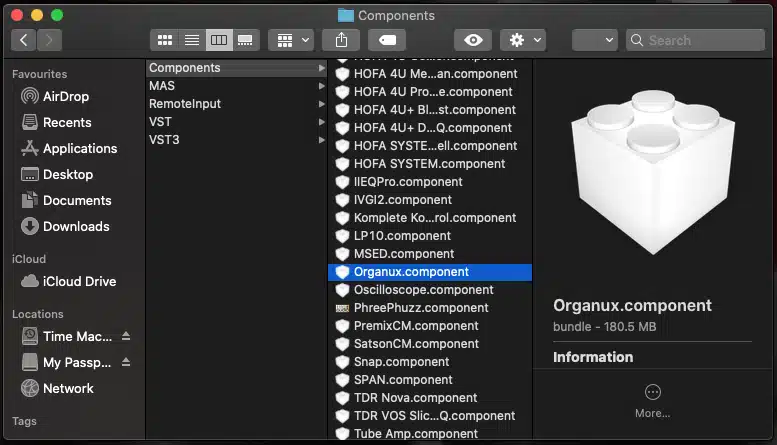
After locating your plugin folder, the next step is to place the plugin file into it… just make sure to download the VST or AU plugin from a trusted source.
The plugin file is typically:
- A .dll file for VST plugins
- A .component file for AU plugins
Simply copy or move the downloaded plugin file into your designated plugin folder.
Make sure to place 32-bit plugins in the 32-bit folder and 64-bit plugins in the 64-bit folder to avoid compatibility issues.
Properly categorizing your plugins will help FL Studio recognize them correctly, quickly, and easily.
This step ensures that your digital audio workstation, in this case FL Studio, can load the plugins without any issues, which is always key.
NOTE: Always verify the plugin file is in the correct folder before proceeding to the next step.
-
Step 3: Open FL Studio
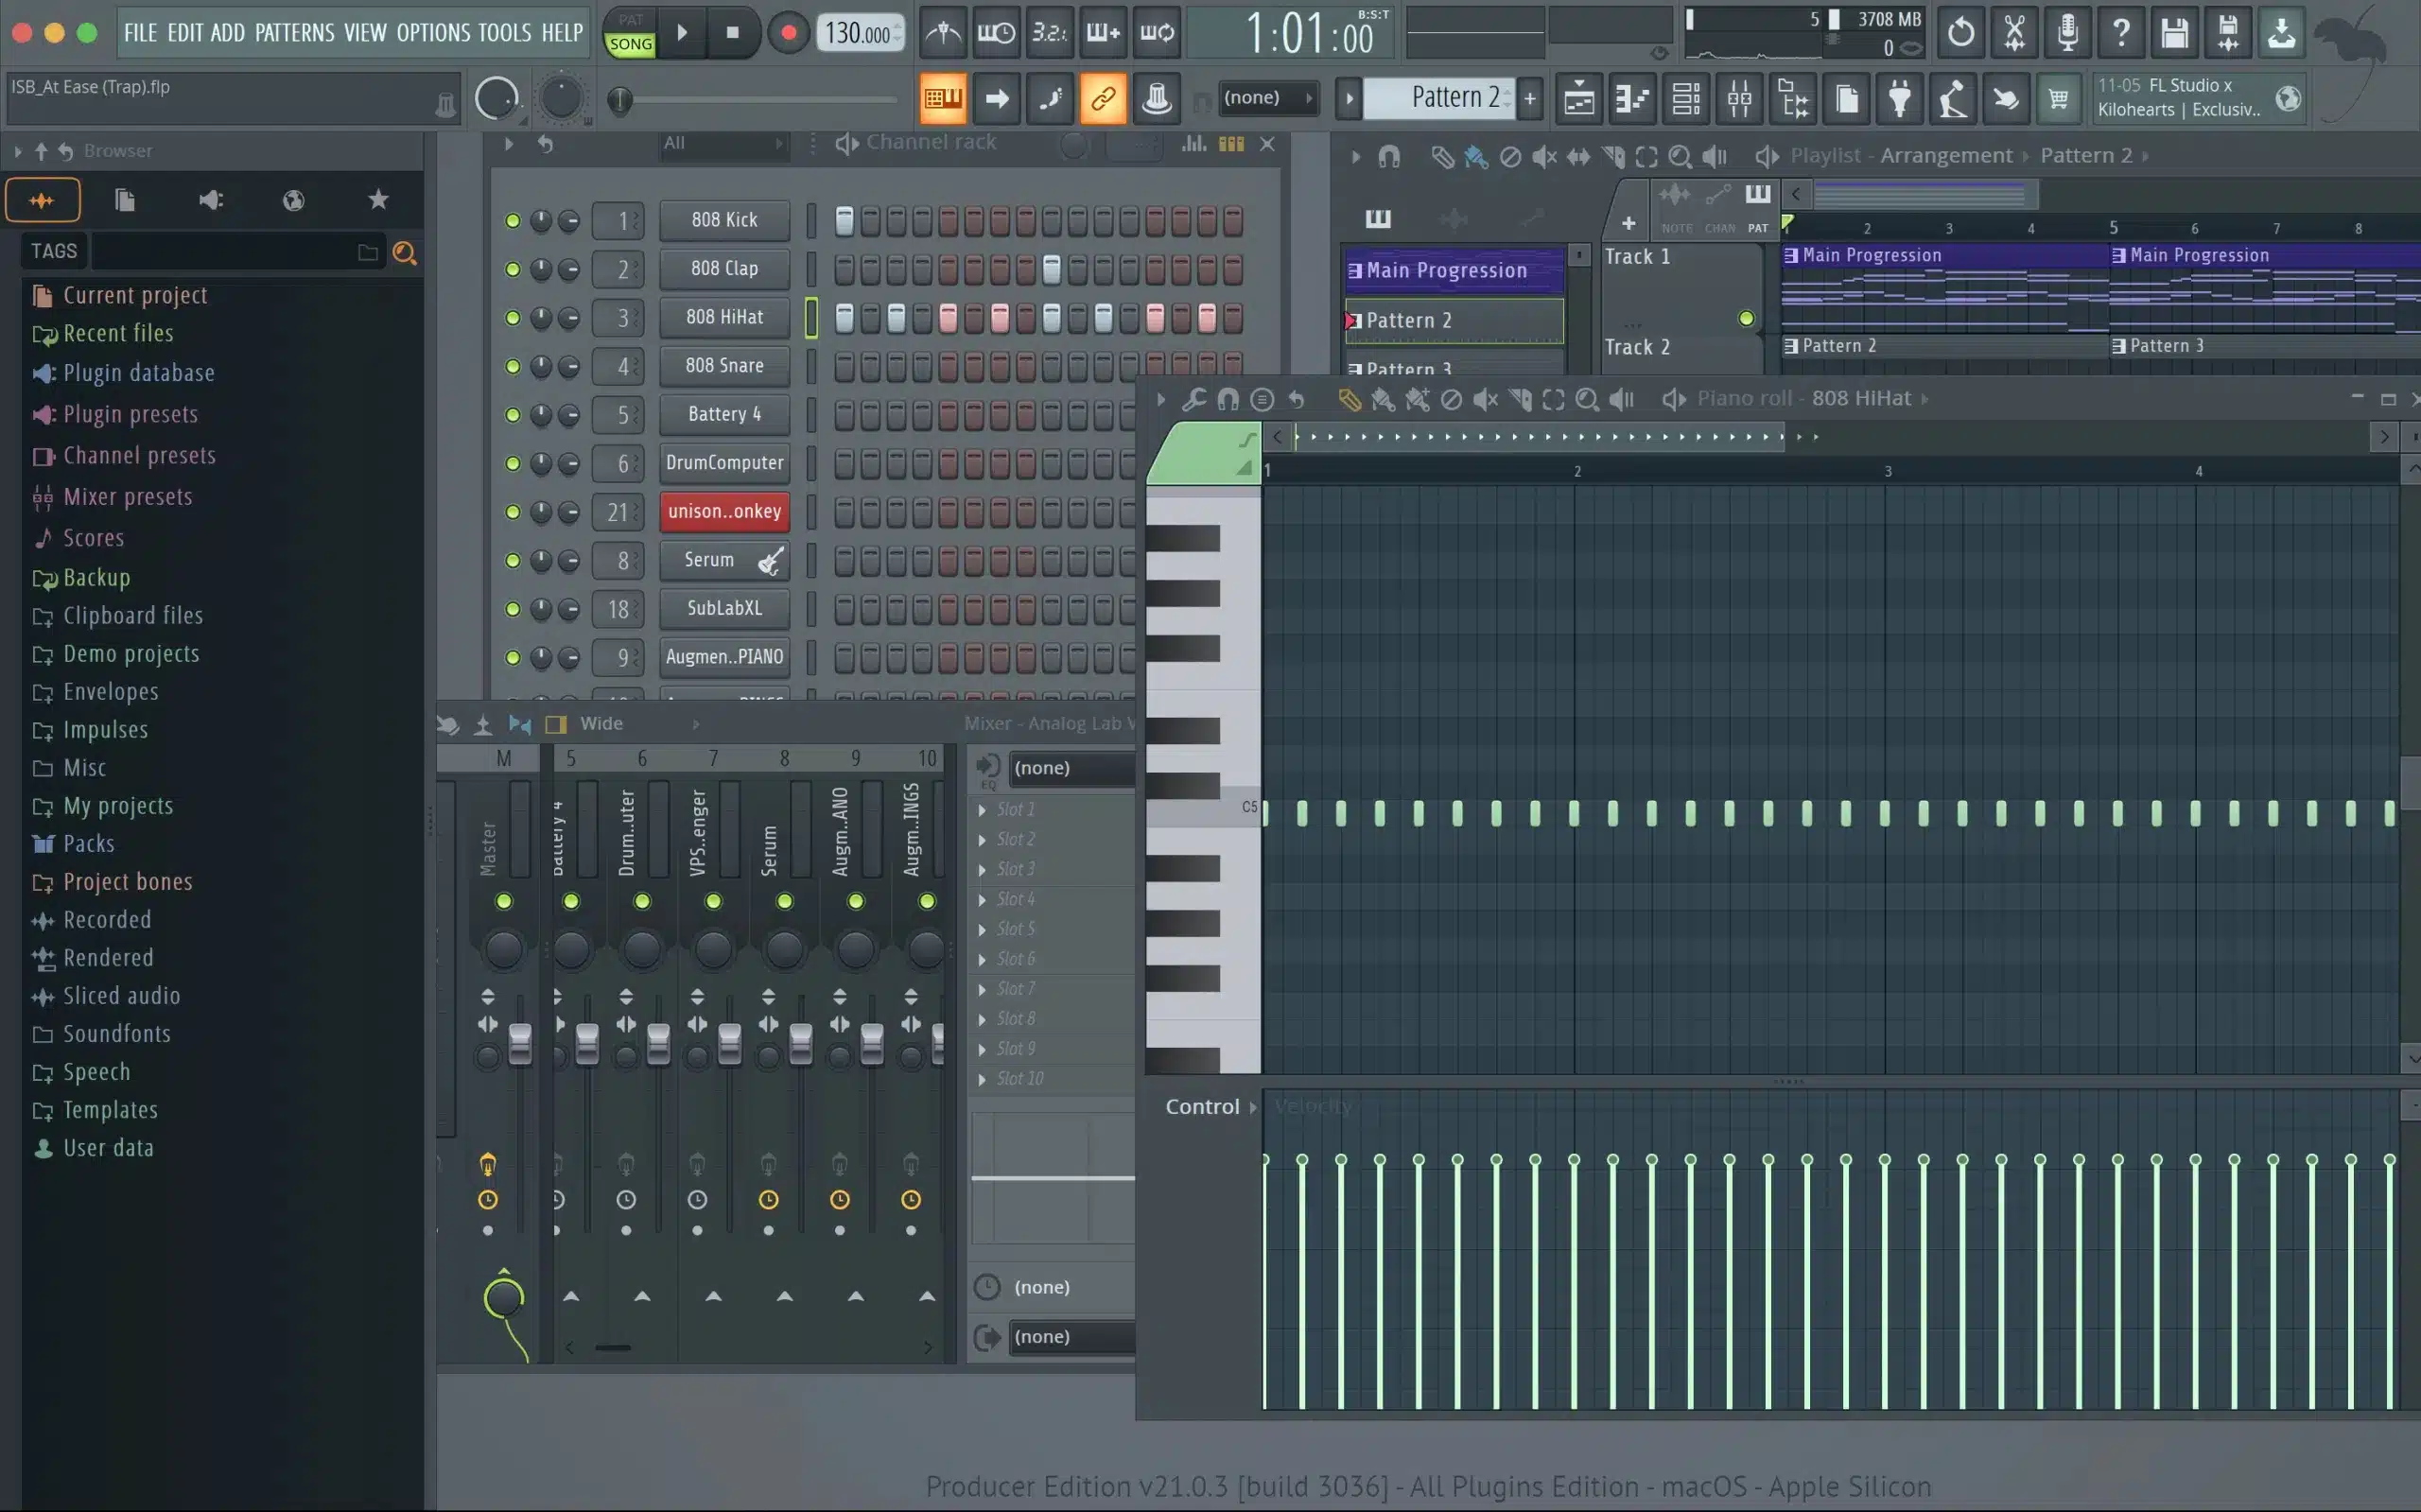
Once the plugin files are in the correct folders, it’s time to launch FL Studio and get down to business (yes, I know this sounds pretty obvious, but we have to include it).
To open FL Studio, simply double-click the FL Studio icon on your desktop or search for it in your applications.
When FL Studio opens, it loads its default interface 一 make sure all necessary updates are installed to ensure compatibility with the latest plug-ins.
Using FL Studio with the most recent updates reduces the risk of encountering bugs.
NOTE: Opening FL Studio by Image-Line as an administrator can help avoid permission issues, especially on Windows computers/laptops.
This simply makes sure that the software has full access to the system files needed for plugin installation.
-
Step 4: Accessing the FL Studio Plugin Manager
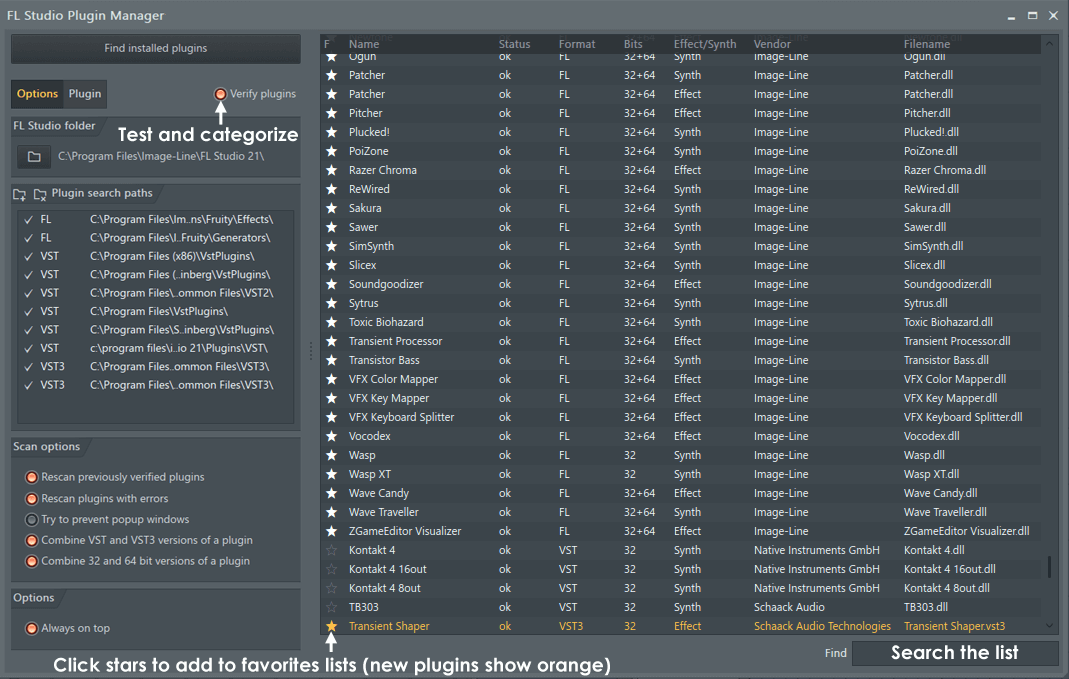
To manage your plugins, you need to access the FL Studio plugin manager.
To do so, click on the “Options” menu bar located in the upper left-side (top left) of the FL Studio interface.
Then, from the drop-down menu bar, select “Manage plugins,” which opens the FL Studio plugin manager window and displays all installed plugins.
In the plugin manager, you’ll be able to see both VST versions and AU versions if you’re using a Mac.
The plugin manager allows you to:
- Fast scan for new plugins
- Add more plugins to your database
- Verify plugins that are already installed
Getting familiar with the plugin manager is key when it comes to proper plugin management, as it provides an in-depth overview and control of your plugin database.
You can also customize your plugin search path options here 一 ensuring that FL Studio scans the correct folders for your VST plugins (like VST instruments) and AU plugins.
Make sure to use this tool to regularly update and organize your plugins for optimal production workflow.
-
Step 5: Scanning for New Plugins
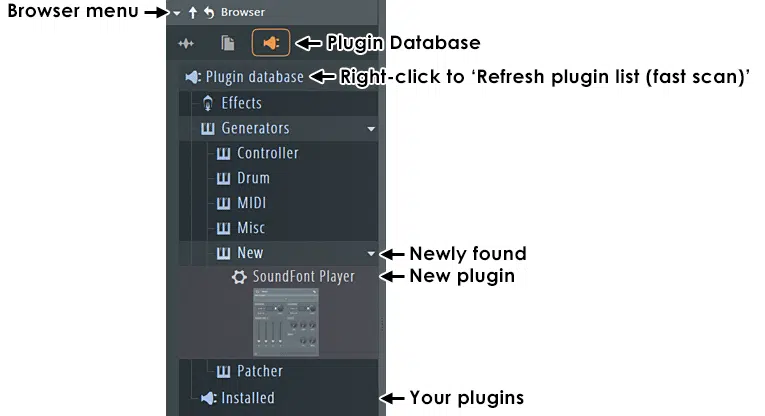
In the plugin manager, the next step is to fast scan for new plugins.
Click the “Find Plugins” button at the top of the plugin manager window, which initiates a scan of your designated plugin folders for new additions.
NOTE: The scan process may take a few minutes, depending on the number of plugins and their locations, so just be patient.
During the scan, FL Studio searches for both 64-bit and 32-bit plugins, of course.
Once the scan is complete, newly detected plug-ins will appear in the list 一 make sure to review the list to ensure all your plugins are recognized.
This step ensures that FL Studio can access and utilize your newly added plugins.
-
Step 6: Verifying the Plugin Installation
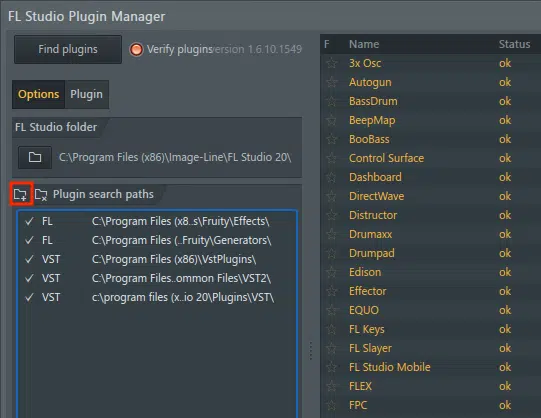
After scanning, it’s important to verify the plugin installation.
In the plugin manager, look for the newly added plugins and ensure they are enabled 一 simply click on the plugin name to highlight it and check the status.
If a plugin does not appear, check the plugin search paths to ensure the folders are correctly listed.
Sometimes, re-scanning can help FL Studio detect overlooked plugins, so just make a note of any plugins that fail to appear and troubleshoot as needed.
Verifying ensures that all plugins are correctly installed and ready for use in your projects 一 this step is vital for avoiding issues during production, so don’t overlook it.
-
Step 7: Organizing/Managing Your Plugins in FL Studio
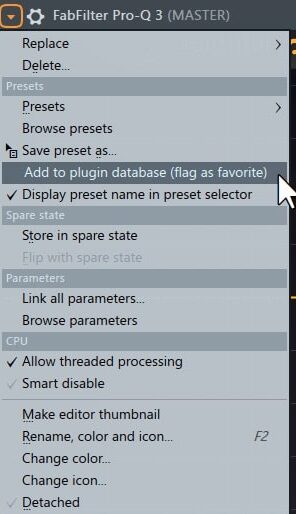
Organizing and managing your plugins in FL Studio is key for a smooth workflow.
In the FL Studio plugin manager, you can categorize your plugins by type, such as:
- Virtual instruments or effects
- Developer
- Quality
- Etc.
This is done by right-clicking on the plugin and click “Add to plugin database (Flag as favorite)” for quicker access in future sessions.
Use the “Plugin database” feature to create custom categories that fit your workflow, making it easier to find and load the right plugin during a session.
Regularly update your plugin list and remove any unused or outdated plugins to keep your plugin database clean and efficient.
Utilize the “Favorite” option for frequently used plug-ins 一 ensuring those VSTs appear at the top of your list for quick access.
Effective management of your installed plugins enhances productivity and reduces the time spent searching for specific tools, so you can focus on creating music.
Additionally, take note of each plugin’s functionality and categorize them accordingly to make your production process smooth.
Keeping your plugin database well-organized seems like a little thing, but it’s huge, I promise.
Using Plugins in Your Projects
With your plugins installed and organized, you can now start using them in your projects. So, as a bonus, let’s cover how to add plugin to the channel rack and configure different plugin settings.
-
Adding Plugins to the Channel Rack
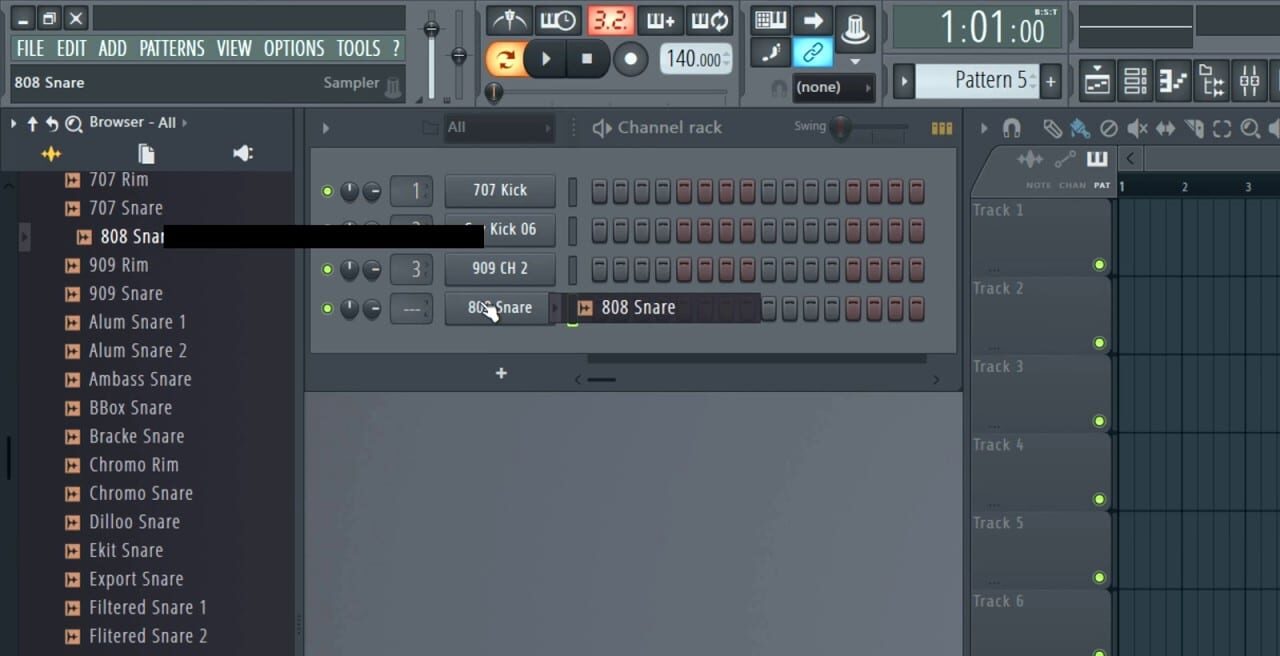
To use your newly added plugin, just add it to the Channel Rack, which can be done by right-clicking on an empty slot in the Channel Rack and selecting “Insert.”
A list of available plugins will then appear (easy, right?).
Simply select the desired plugin/plug-ins from the list to add it to the Channel Rack.
The plugin interface will then open, allowing you to start using it immediately.
Just make sure the Channel Rack is organized for efficient access to your virtual instruments and effects 一 making it easy to incorporate new sounds into your projects.
-
Configuring Plugin Settings
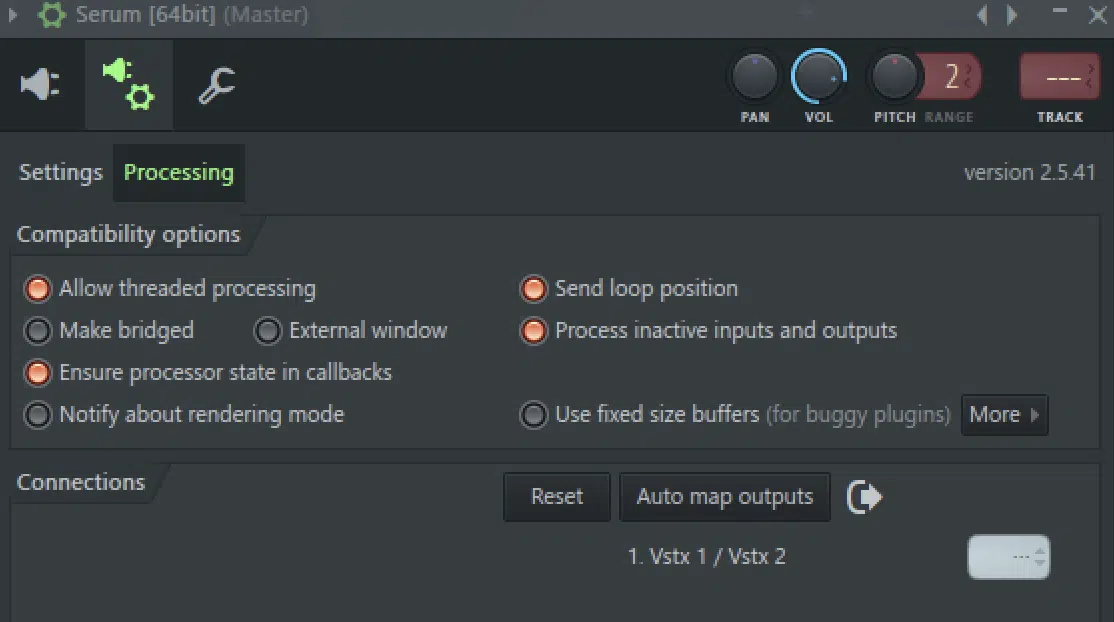
When you configure different plugin settings, it will optimize their performance all day.
Simply open the plugin interface by clicking on the plugin name in the Channel Rack and adjust the settings to fit your project’s needs.
NOTE: Most plug-ins offer presets, which provide a good starting point.
Customize parameters like volume, pitch, and effects to match your sound design goals.
Make sure to save your settings as presets for future use (it’s super beneficial).
Proper configuration ensures the plugin performs at its best, and experimenting with different settings can lead to unique and creative sounds.
How to Add Plugins to FL Studio: Final Thoughts
By following these 7 simple steps, you now have a thorough understanding of how to add plugins to FL Studio.
It will help make sure your plugins are well-organized, efficiently managed, and easily accessible.
This way, you can get back to banging out beats and showing them off to the world.
Speaking of plugins, if you’re looking for the most epic, highly-renowned free lo-fi plugin to add to your collection, you’ve got to check out Zen Master.
It completely transforms any sound into a warm, vintage masterpiece with just five essential knobs.
Not only is it super easy to use, it produces some of the most pristine sounds around.
The best part is, Zen Master combines the best of analog and digital modeled effects and is 100% free forever 一 can’t get any better that that.
Now, go use this knowledge to quickly and easily add plugins to FL Studio, but remember to never stop growing and evolving.
As well as trying out new plugins and techniques; you have to stay ahead of the game.
Until next time…


Leave a Reply
You must belogged in to post a comment.