Learning how to make your music louder is super important if you want your tracks to stand out and reach professional standards.
It can help your songs grab attention, cut through the mix, and keep listeners engaged.
Plus, ensuring your tracks are always loud and clear so they’ll never sound thin, get lost in a playlist, or sound like an amateur did it.
That’s why I’m breaking down everything you need to know about how to make your music louder, like:
- Understanding perceived vs. technical loudness ✓
- Setting proper gain staging levels ✓
- Mastering EQ settings for clarity ✓
- Using compression effectively ✓
- Max volume with limiting ✓
- Adding saturation for a fuller sound ✓
- Comparing LUFS, RMS, and peak metering ✓
- Avoiding over-limiting and audio distortion ✓
- Advanced loudness techniques for pros ✓
- Much more about how to make your music louder ✓
After this article, you’ll know everything about how to make your music louder like an absolute boss without it getting completely destroyed.
You’ll be able to enhance clarity, boost impact, and bring out the best in every element of your mix so you can dominate the competition (and be taken seriously).
Your tracks will always sound exactly as loud and polished as they should.
So, let’s dive in…
Table of Contents
- How to Make Your Music Louder: Understanding Loudness in Music Production
- Techniques for Increasing Loudness/Making Your Music Louder
- Comparing LUFS, RMS, and Peak Metering
- Tips for Mastering Loudness in Different Genres & Avoiding Over-Limiting and Distortion (Dynamic Range)
- How to Make Your Music Louder: Final Thoughts
How to Make Your Music Louder: Understanding Loudness in Music Production

Loudness is key in today’s music production, and it’s often what makes tracks stand out on platforms like Apple Music or Spotify.
But while cranking up the volume might seem like the solution, it’s easy to lose sound quality if you’re not super careful and precise.
The trick is learning how to make your music louder without totally compromising your track’s clarity or dynamic range.
Loudness isn’t just about raw volume 一 it’s also about balance, EQ settings, and how sound waves interact within the mix.
You’ll need to tackle each part of your mix individually, from EQ adjustments to volume level optimization.
This way, you’ll achieve a louder sound that retains its quality, making sure that all elements in your mix pop while sounding clear and full.
-
Perceived Loudness vs. Technical Loudness
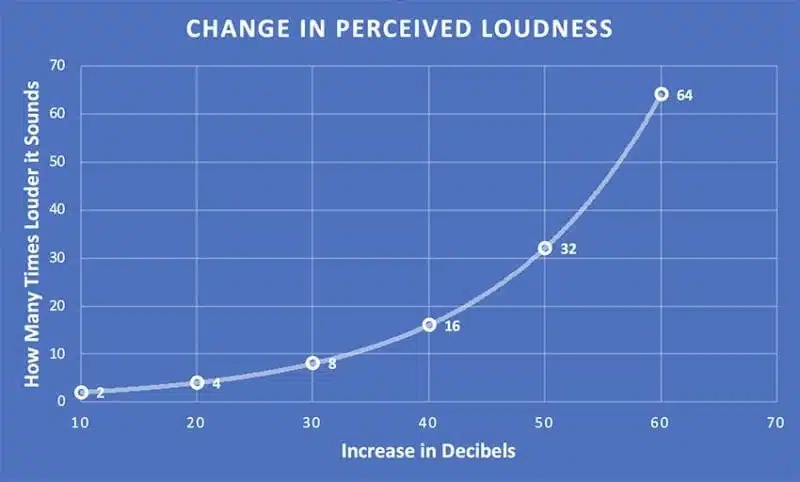
When thinking about how to make your music louder, it’s important to know the difference between perceived loudness and technical loudness.
Perceived loudness is about how the track sounds to the listener – how full, punchy, or impactful it feels.
Technical loudness, on the other hand, is what you’re measuring with tools like:
For example, a track might have a higher technical loudness with a good volume limit.
But just remember, if the frequencies aren’t balanced or if it’s over-compressed, it won’t sound loud to the ear.
You want both to be optimized, so the music feels loud while maintaining the dynamic range and things stay super clean/pristine.
This balance is super important so don’t overlook it, especially when adjusting different settings during the mastering stage.
-
The Role of Frequency Range in Loudness
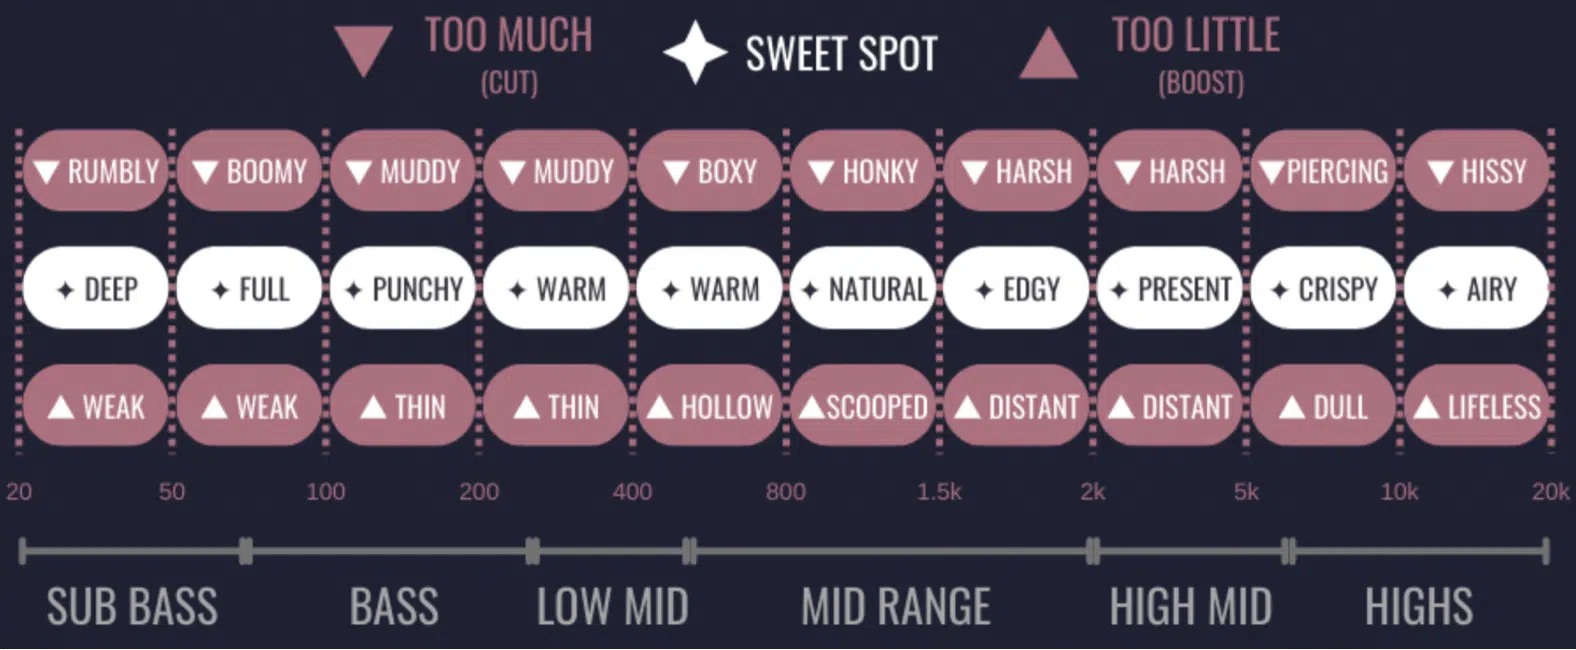
When thinking about how to make your music louder, remember that each frequency range contributes differently to perceived loudness.
Low-end frequencies, like bass and kick, give your track that solid foundation but can quickly eat up headroom if they’re too powerful.
If your bass and kick aren’t balanced, they’ll compete for space 一 making it harder to boost the overall volume level without distortion.
For example, try using a high-pass filter on non-bass elements, like synth pads and background vocals, to free up room for the bass frequencies.
Then, carve out space between the bass and kick using EQ settings so each sound shines through.
If you want to learn all the correct EQ settings for any occasion, we got you covered.
High frequencies also add brightness to your track so it’ll help things sound clearer and louder even when you’re not cranking up the volume.
By balancing each range, you’re optimizing for both loudness and clarity so no part of your mix is overpowering or causing issues in the audio section.
-
Balance Your Elements
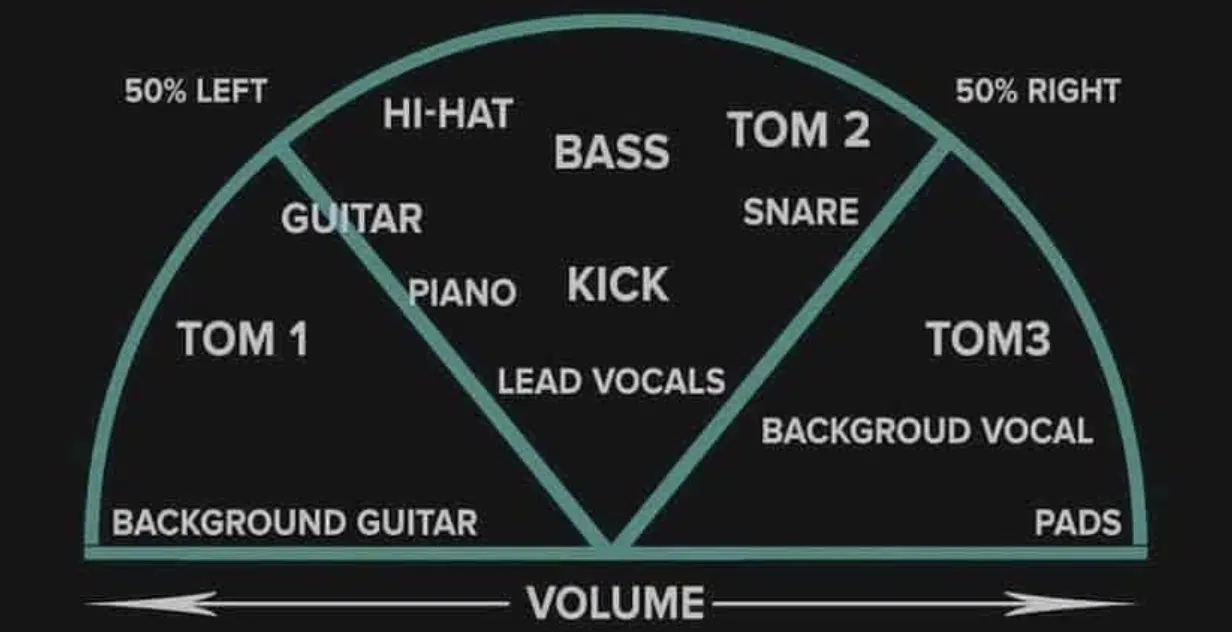
A key part of how to make your music louder is balancing your mix elements, so everything sits right without clashing.
This starts with panning instruments and setting proper levels.
For example, keeping your bass in the center and panning other elements like guitars or synths to the sides can create space 一 allowing each sound to be heard clearly.
I always make sure the kick and bass are tight and punchy because it lets me bring up the loudness without the mix sounding muddy.
The right balance between instruments not only makes your track feel louder but also clearer, so listeners can pick out each sound, even at higher volumes.
Proper balance also helps when you’re EQing and compressing later on.
-
Use EQ to Clear Up Muddy Frequencies
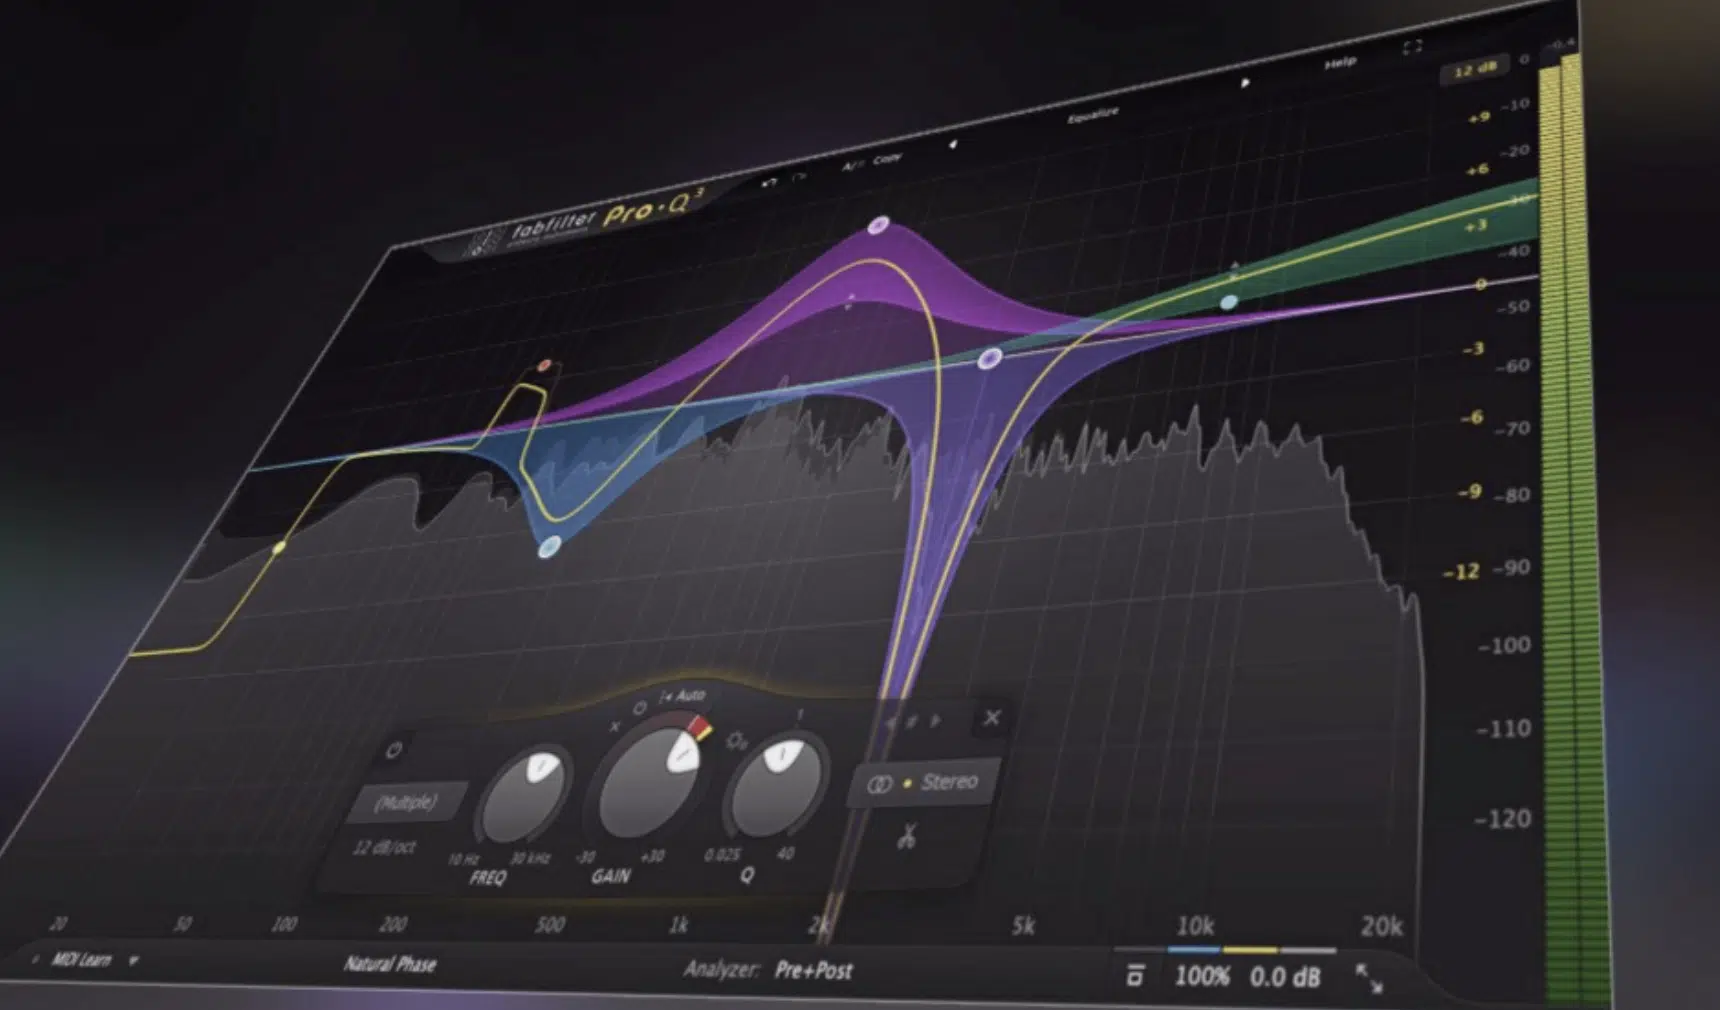
EQ is essential for controlling the frequency range in your mix and making it sound loud and clear (and professional, of course).
When you’re focused on how to make your music louder, one of the first things to do is find any muddy frequencies in your audio and cut them.
Muddy frequencies typically lie in the low-mid range (around 200-400 Hz) where many elements can clash and get all out of sorts.
For example, if you’re mixing vocals with guitar, they might overlap in this range 一 reducing clarity and that’s something you never want.
A common technique is to use a narrow EQ cut on the guitar around the 300 Hz range, which is where it most likely clashes, to make room for the vocals.
A narrow EQ cut on the guitar in that area, about -3 dB to -6 dB with a Q factor of around 4, will create space for the vocals to sit more prominently.
Another example is if you have a kick drum and bass line that are fighting for attention in the low-end.
Here, you could try using a high-pass filter on the bass around 40 Hz to reduce unnecessary sub-bass frequencies and then add a gentle low-shelf boost on the kick around 60-80 Hz.
This way, the kick hits with power, while the bass still has presence without overwhelming the lower frequencies.
Try sweeping through the frequencies while playing your track using a bell-shaped EQ; set a boost of around 6-10 dB and sweep through the frequencies around 200-400 Hz.
You’ll easily spot any unwanted resonances by listening for spots that sound boxy or muddy.
When you find one, reduce the boost and pull that frequency down by a few dB until you hear a cleaner sound.
This lets the essential elements, like your kick and bass, sit clearly and makes your music louder by eliminating unnecessary sounds that can overpower the mix.
It’s all about freeing up headroom, keep that in mind.
Techniques for Increasing Loudness/Making Your Music Louder
Once you’ve balanced your mix and optimized your EQ settings, it’s time to move on to the next step of learning how to make your music louder. So, let’s break down different techniques that will help you boost the overall loudness of your track.
-
Gain Staging 101
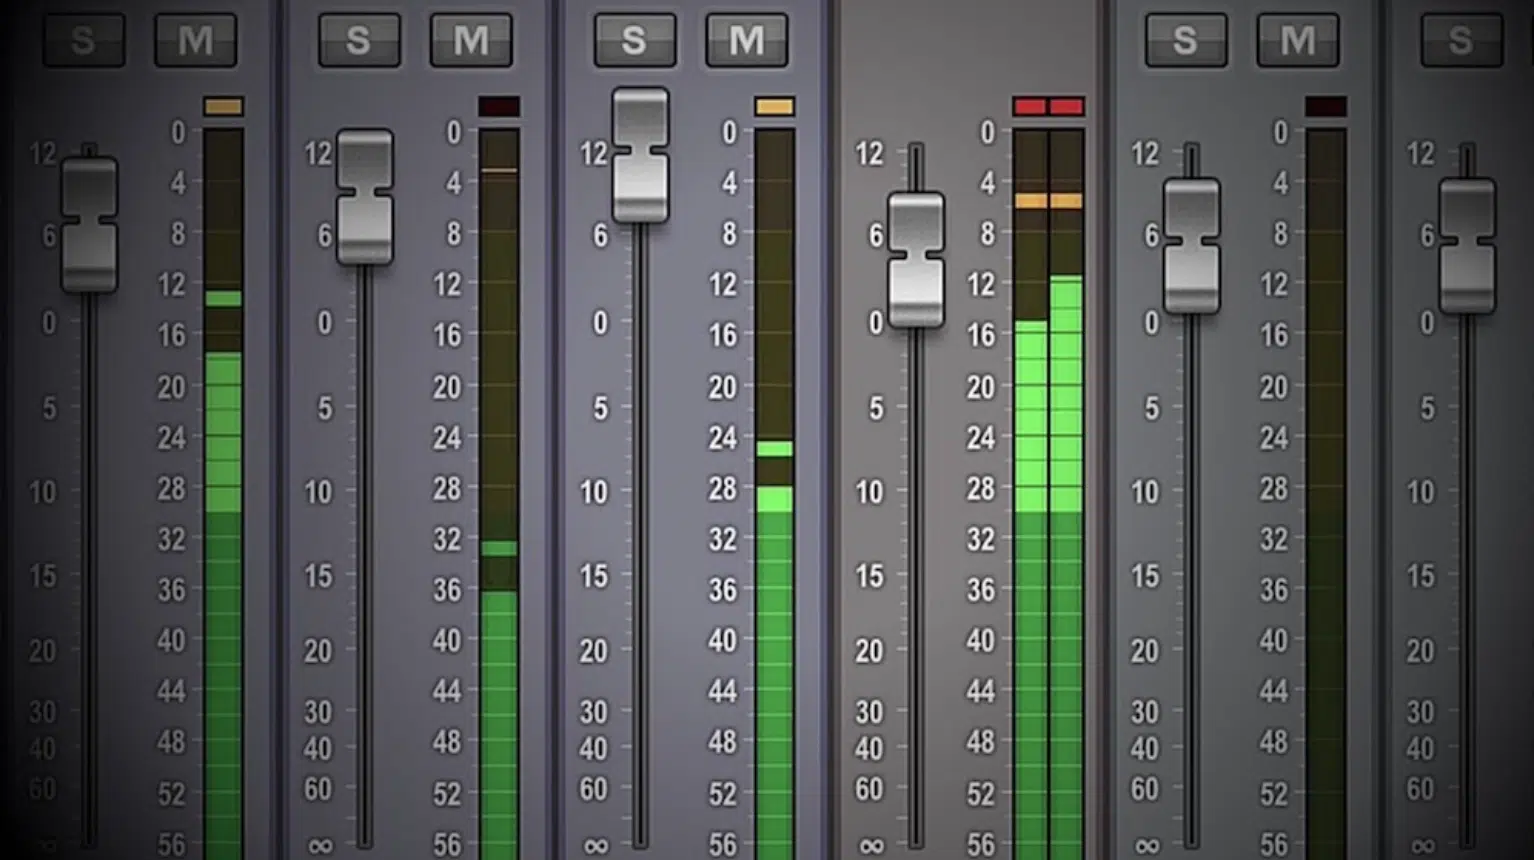
When learning how to make your music louder, proper gain staging sets the foundation (please don’t be one of those producers who overlook it!).
Gain staging means adjusting the levels at each stage of your mix so you have enough headroom for processing without clipping.
Start by setting the input levels on each track so they’re not too high; you want to leave about -6dB of headroom on your master channel.
For example, if your drums are peaking at -10dB and your vocals around -8dB, you’ve got room to work without risking distortion.
This initial balance gives you a smoother mixing process, especially when you start adding compression and EQ later on.
Always remember to adjust the gain after each major effect you feature 一 this keeps your sound clean and ready for that final volume boost in the top right corner.
-
Compression Techniques for Louder Mixes (Sound Loud)

Over-compression (Avoid at All Costs)
Compression is one of the most key tools for how to make your music louder while keeping the dynamics controlled.
Start by compressing your drums and bass, where peaks tend to stand out.
For example, on your kick, use a medium attack (around 20-30 ms) to let the initial hit come through, but a quick release (around 50-60 ms) so it doesn’t eat up headroom.
For vocals, you should use a ratio of 4:1, which smooths out the volume level so you can turn up the overall track without sudden jumps in volume.
Set the attack between 5-10 ms to catch some of the transient but still allow the vocal to retain its natural energy.
A release time of around 100-150 ms is a solid starting point, allowing the compressor to back off in time for the next phrase.
When compressing multiple elements, like drums and bass, play around with parallel compression on a separate bus.
Send your drum tracks to a bus, and add a compressor with a:
- High ratio (like 8:1)
- Fast attack (5-10 ms)
- Moderate release (80-100 ms)
Blend this heavily compressed signal back in with the original drum tracks 一 dialing in just enough to add weight and sustain without losing the original punch.
This allows you to boost loudness for a fuller sound that maintains its energy/clarity.
As you work, you have to avoid heavy compression on every track, as this can make the sound quality feel lifeless and sound unnatural.
With the right amount of compression, you’re able to increase volume without sacrificing the energy and clarity of your mix (you’ll hear the difference right away).
-
Utilizing Limiting to Maximize Volume
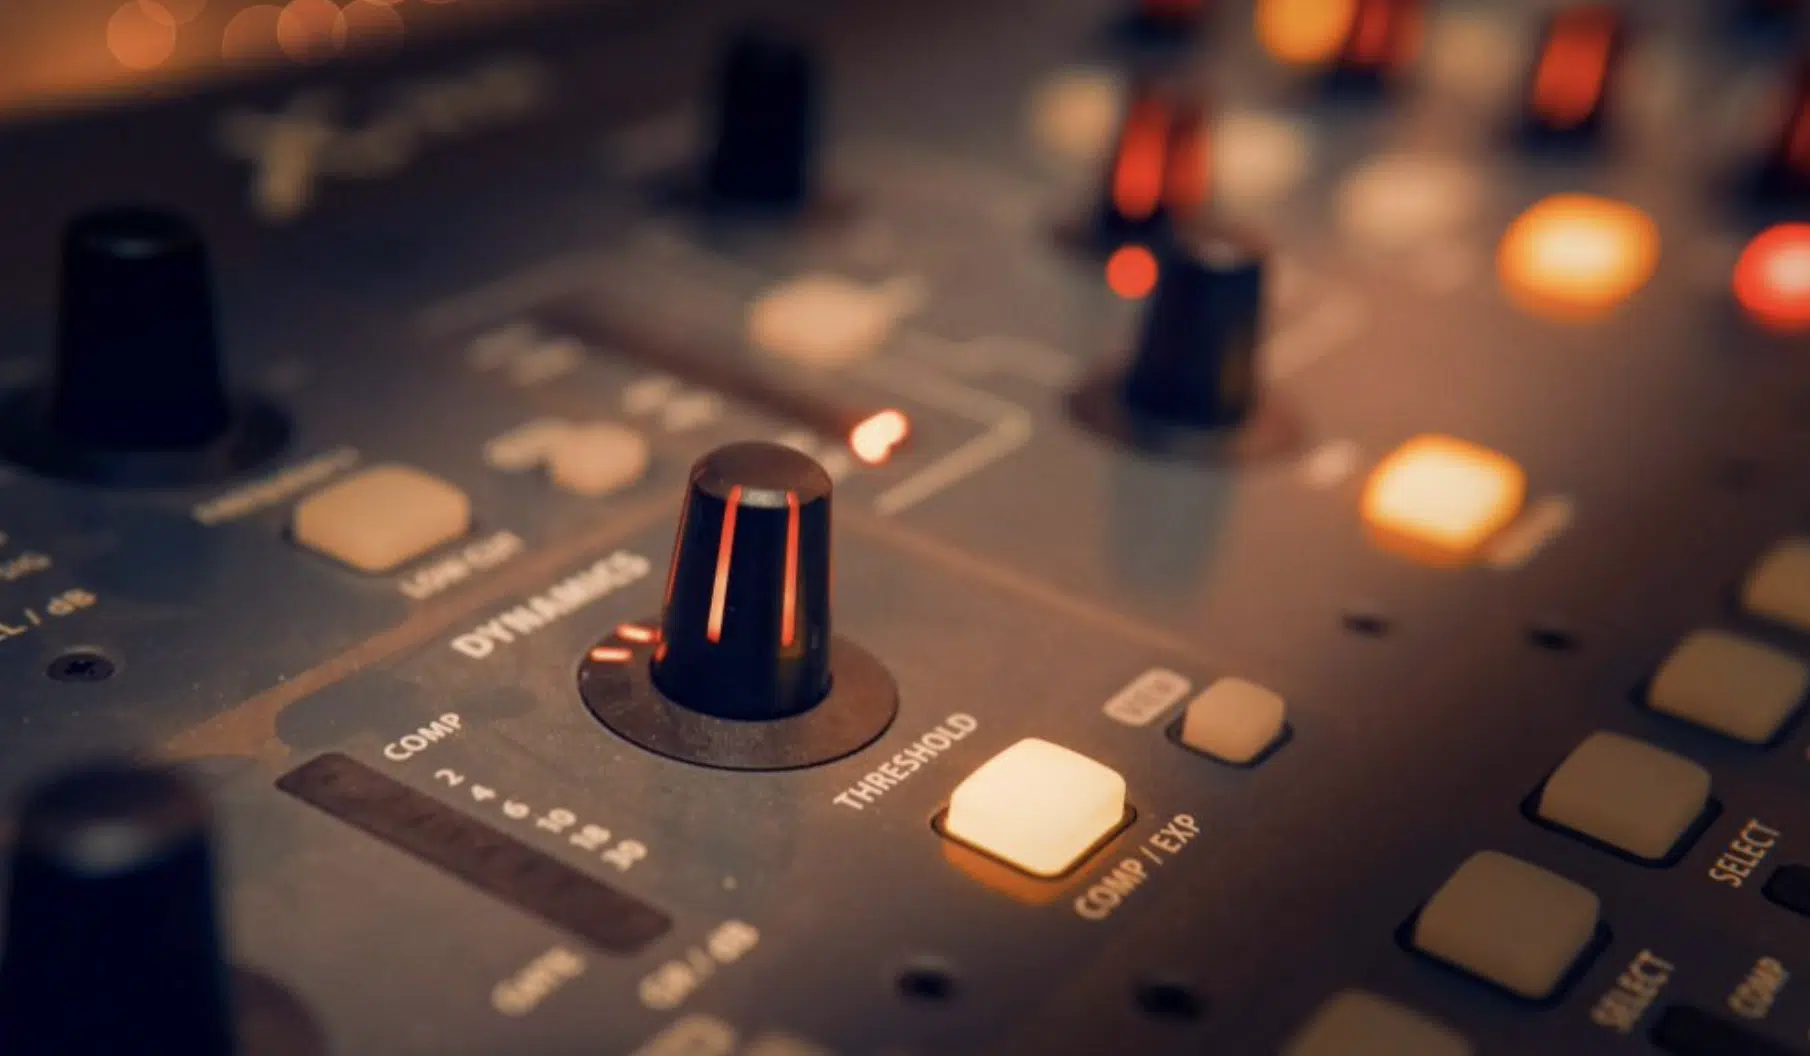
Limiting is the final step to get the loudest sound without distorting your track.
By setting a limiter on your master track, you’re able to push the volume up to a desired level while keeping it from clipping.
When you’re focusing on how to make your music louder, set the threshold of your limiter so it kicks in only during the peaks.
For example, if your track is peaking at -2dB, you can lower the threshold to -1dB for an added max push.
A ceiling of -0.3dB helps ensure no part of the audio clips, so your song stays clean but hits as loud as possible.
Be mindful of how the limiter affects different frequencies (lowest frequencies to the highest frequencies), as it can sometimes reduce the punch if overdone.
-
Using Saturation for Extra Loudness
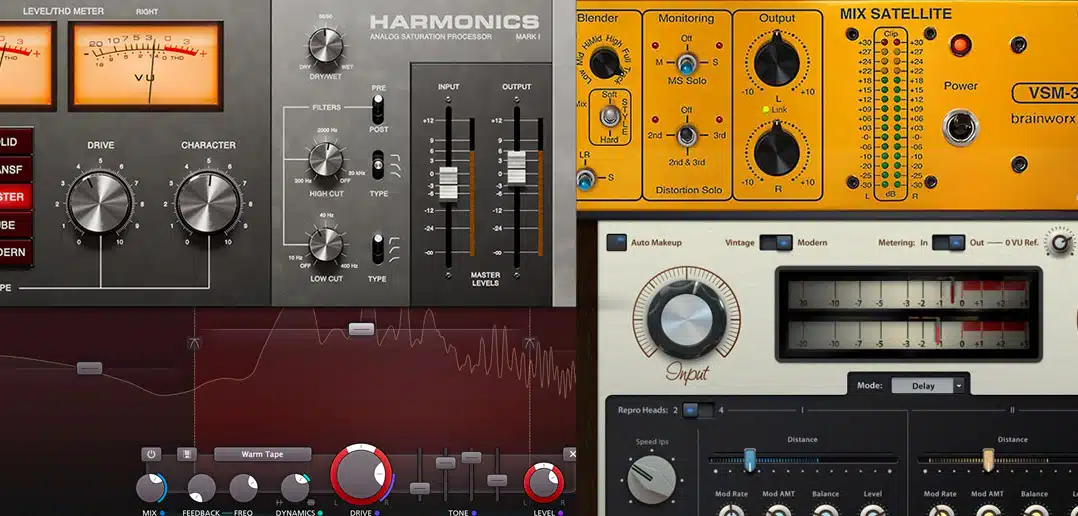
Saturation is a subtle but powerful tool in achieving loudness without degrading sound quality, adding harmonic content (making your music louder/more present).
For example, try adding some tube or tape saturation on your drums and bass to give them more weight.
Tube saturation can emphasize low and mid frequencies, giving your drums more punch and your bass more weight.
With a saturation plugin, start with a low drive setting (around 15-20%) and turn it up slowly until you hear the effect adding warmth and fullness.
This will give your kick and snare more body so they really stand out without boosting the volume level too high.
Tape saturation is another great option that adds a natural compression effect 一 smoothing out transients and creating a glue-like quality on bus tracks.
It’s especially useful on drum busses where you want the sound to feel cohesive.
Vocals can benefit from a touch of saturation as well…
For instance, a light application of tube saturation on the vocal track (around 10-15%) can add warmth so your vocals sound fuller and help them cut through a busy mix.
Just be cautious with high-end frequencies, as too much saturation can make vocals sound harsh, especially in the presence range (around 3-5 kHz).
NOTE: I have to emphasize, when you experiment with saturation, remember to keep it subtle; too much will cause distortion, making the sound quality suffer.
Comparing LUFS, RMS, and Peak Metering
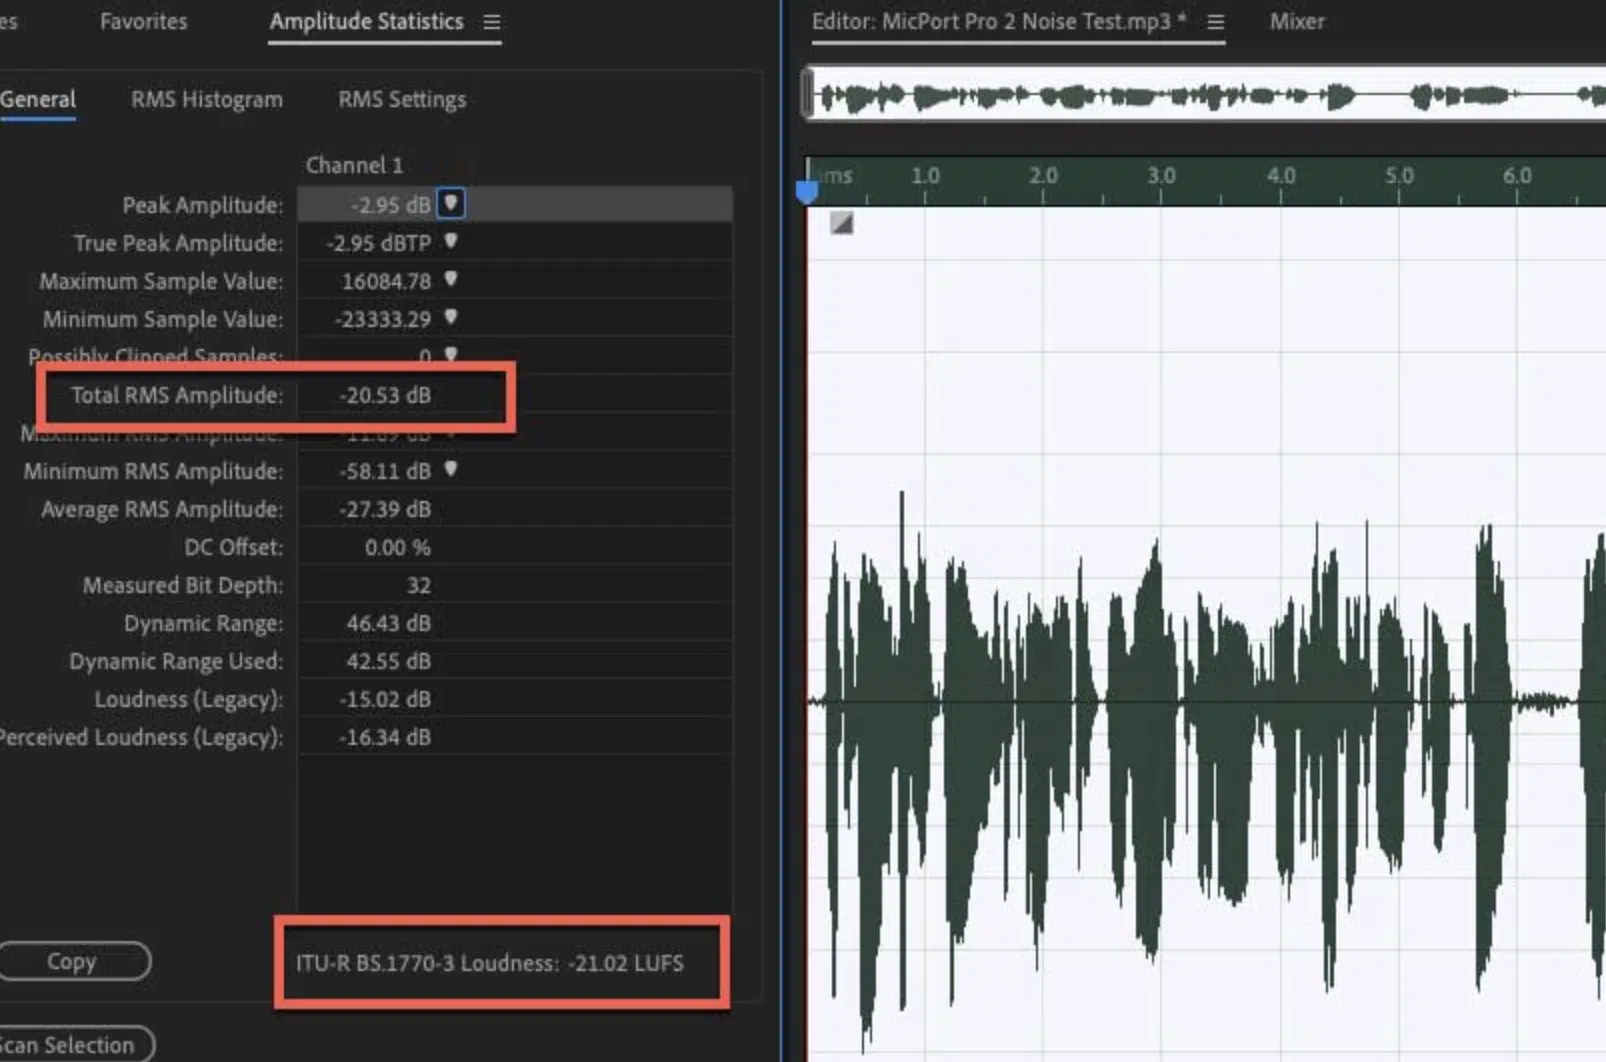
When measuring loudness, understanding LUFS, RMS, and peak metering is key for achieving the right balance.
- LUFS (Loudness Units Relative to Full Scale) measures perceived loudness, which is what streaming platforms like Spotify and Apple Music use for normalization. Aim for around -14 LUFS, typically.
- RMS shows the average power of your track and helps you gauge the energy level. A common target for RMS is between -9 and -12 dB.
- Peak metering, on the other hand, shows the highest levels in your track, which is important for avoiding clipping, which occurs when the volume exceeds 0 dB and causes distortion. When increasing volume, keep your peaks below -1 dB as a safe buffer.
Knowing the differences between these measurements is key when learning how to make your music louder effectively.
For example, a LUFS target of -14 for streaming is typical, while for RMS, you might aim between -9 and -12.
Using these together lets you control both perceived and technical loudness, so your track sounds powerful across all platforms.
That includes everything from iPhone speakers to high-end studio monitors.
Tips for Mastering Loudness in Different Genres & Avoiding Over-Limiting and Distortion (Dynamic Range)

Every genre has its own loudness expectations, so it’s important to know the standards before you start (it’ll help you learn how to make your music louder in general).
For EDM, you might want a heavy kick and punchy bass while, on the flip side, pop music benefits from brighter sounds.
As you focus on how to make your music louder, avoid over-limiting, which can make the sound unnatural and flatten dynamics.
Always check your track in different settings (headphones, speakers, car, iPhone device, etc.) to make sure the loud sounds aren’t too overpowering, and adjust as needed.
Remember, clarity and balance go hand-in-hand with loudness 一 so preserving the dynamics is above all else.
This will help your track feel loud but stay very enjoyable to listen to.
-
Pro Tip Settings App

If you want to make your iPhone louder when listening on the go, go into your settings app and tap headphone safety to reduce loud sounds.
You can also tap sounds under the audio section, then tap playback and tap EQ to select different settings that you can play around with.
For a quick boost, tap late night under EQ settings to make your sound louder.
In Apple Music, this setting can make your iPhone louder while still helping to reduce loud sounds to protect your hearing.
For Android apps like Tap Music, look for settings that reduce loud sounds and control the sound coming from your device.
NOTE: If you’re comfortable with advanced settings, you might even explore an app that allow root access to increase volume further.
How to Make Your Music Louder: Final Thoughts
Learning how to make your music louder without sacrificing quality can be difficult but, by using all the tips and knowledge you now know after this article, you’ll master it fast.
You’ll be able to boost your track’s loudness, balance each element, and create a powerful mix that stands out.
Plus, you’ll be able to keep your sound quality intact and avoid common pitfalls, like over-compression and distortion, without losing any clarity.
And as a special bonus, you should check out these Free Project Files that show you exactly how to create a professional beat from start to finish.
Yes, including gain staging, EQ settings, and compression techniques.
Plus, advanced tips on saturation, limiting, and mixing in various genres 一 it’s like having the cheat codes to music production that you really don’t want to miss out on.
Mastering how to make your music louder takes time, but the results are worth it.
Stick with these strategies, and soon, your mixes will be louder, clearer, and ready to make an impact in the industry.
Just remember to keep experimenting, stay focused, and watch your skills grow with every track you create.
Until next time…


Leave a Reply
You must belogged in to post a comment.