Learning how to play guitar on a MIDI keyboard isn’t the easiest thing because it takes the right gear and techniques so everything transfers the right way.
Plus, you have to nail down the dynamics, articulations, and strumming patterns so your tracks sound genuine.
Successfully pulling this off can open up a world of creative possibilities 一 letting you produce lifelike guitar MIDI parts without ever picking up a real guitar.
As producers, knowing how to throw in those authentic guitar sounds using your MIDI keyboard is super valuable.
And even if you’re not a guitarist, with this knowledge you can add some professional guitar parts like a boss.
That’s exactly why I’m breaking down everything you need to know about how to play guitar on a MIDI keyboard, like:
- Key tools and plugins/virtual instruments for realistic guitar MIDI ✓
- How to map chords and voicings for authenticity ✓
- Dynamic playing with velocity & modulation ✓
- Techniques like hammer-ons, pull-offs, and slides ✓
- Programming realistic strumming patterns ✓
- Using MIDI pickups ✓
- Effects like delay, reverb, and distortion ✓
- Recording methods: real-time vs. step sequencing ✓
- Editing and layering for a more polished mix ✓
- Much more about how to play guitar on a MIDI keyboard ✓
By knowing all about how to play guitar on a MIDI keyboard, you’ll be able to produce tracks that sound professional and engaging.
Plus, your songs will have that authentic feel and emotional depth that a real guitar brings.
You’ll be able to add expressive guitar-like parts to your music and even experiment with techniques and effects like a pro, which will really enhance your production skills too.
Table of Contents
How to Play Guitar on a MIDI Keyboard: The Essentials & Challenges
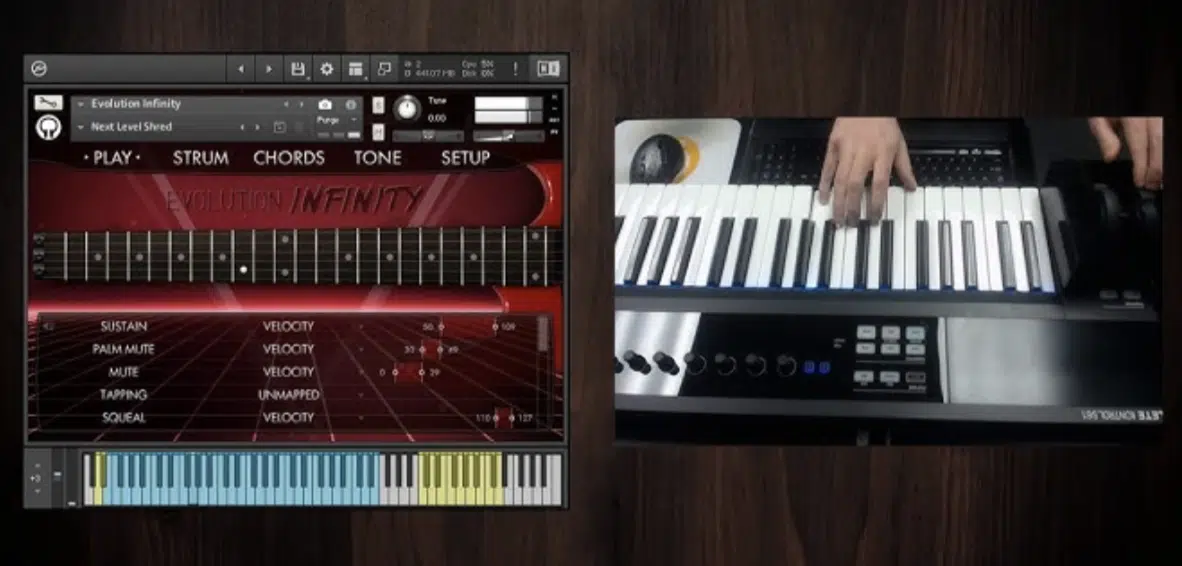
Figuring out how to play guitar on a MIDI keyboard is great to know, there’s no doubt about it, but it definitely comes with its challenges, I can’t lie.
First, you’ll need a good MIDI keyboard or MIDI controller paired with a top-notch VST plugin or virtual instrument.
Plugins like Ample Guitar or Native Instruments Session Guitarist are amazing because they come loaded with realistic features like:
- Hammer-ons
- Pull-offs
- Strumming patterns
All of which can make your playing sound just like a real guitar.
One of the biggest challenges is, of course, replicating all the complexities of a real guitar, because think about it…
A guitar has six strings and typically 20–24 frets, which gives it a massive range of notes that can be tricky to translate onto a MIDI keyboard.
Especially if yours only has 49 or 61 keys, like most do.
The trick here is to map multiple notes across octaves and make good use of the pitch bend wheel, which I’m going to be breaking down today.
For example, set your pitch bend range to 2 semitones so you can slide between notes easily 一 perfect for mimicking that smooth, fretboard-sliding sound.
Another big thing to watch out for is dynamics because, on a real guitar, the way you press or pluck the strings creates a ton of variation in sound.
You can recreate this by using velocity sensitivity on your MIDI keyboard.
Try keeping velocity values between 30–60 for softer strumming and bump it up to 90–120 for harder, more aggressive playing.
This helps you get that natural feel that doesn’t sound overly robotic.
Latency can also be a pain because if there’s even a small noticeable delay between pressing a key and hearing the sound, it can totally throw you off.
To avoid this, make sure you’ve got a low-latency audio interface with a buffer size of 128 samples or less.
PRO TIP: If you’re using a MIDI pickup like the Fishman TriplePlay, it can turn the notes you’re playing on your real guitar into MIDI data.
This will let you combine the feel of a real guitar with the flexibility of digital production, and with the right gear and a little practice, you’ll have realistic MIDI guitar parts easily.
Don’t worry, we’ll break down everything in detail so you get the full picture and you’ll learn how to play guitar on a MIDI keyboard like a professional.
Recreating Guitar Techniques on MIDI Keyboard
One of the keys to mastering how to play guitar on a MIDI keyboard is learning to emulate the nuanced techniques that make a real guitar sound expressive and dynamic. These include articulations like slides, hammer-ons, and pull-offs, as well as strumming patterns that add rhythm and groove to your playing. Let’s dive into these techniques and how you can achieve them with your MIDI controller.
-
Articulations and Techniques
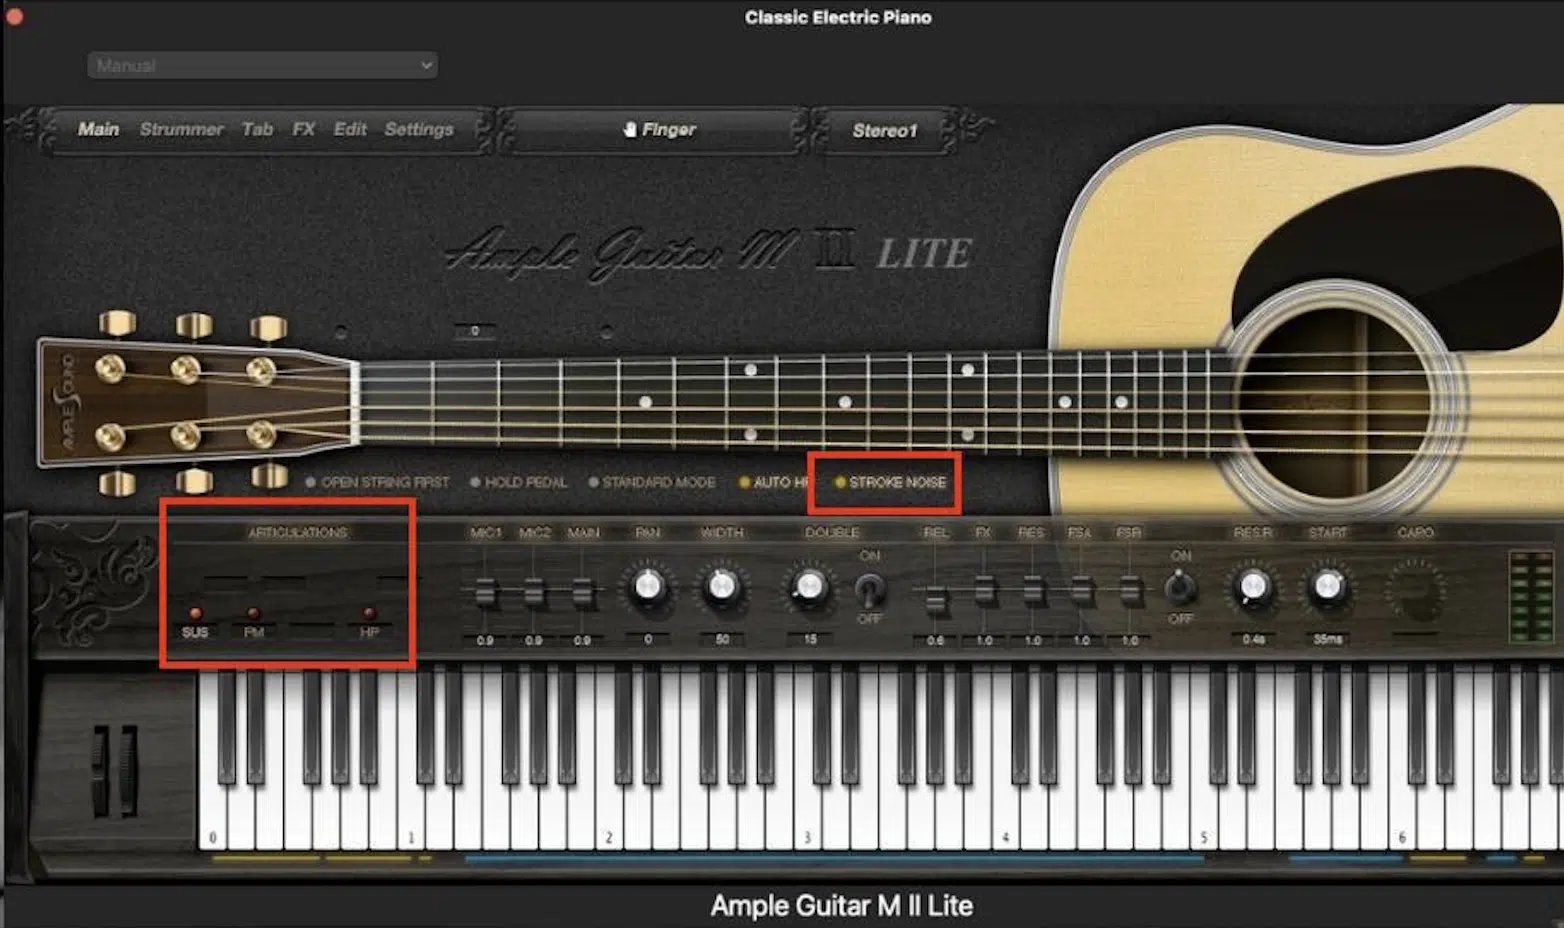
Articulations are perfect for making your MIDI guitar parts sound realistic and techniques like hammer-ons/pull-offs can be mimicked using overlapping MIDI notes.
For example, to replicate a hammer-on, you’re going to place the second note slightly after the first (e.g., 50-100 ms) without re-triggering the attack.
On the same note, a pull-off can be created by overlapping the second note slightly before the first ends; adjusting velocity to simulate a softer release.
Pitch bend wheels are invaluable for slides…
Set your pitch bend range to 2 or 4 semitones within your VST plugin, then use the wheel to glide between notes flawlessly.
Just like a guitarist would slide their finger along the fretboard.
For vibrato, use aftertouch or assign modulation to an LFO with a rate of around 5–7 Hz for subtle, natural pitch fluctuations.
Trills (another common guitar articulation) can be programmed by alternating two MIDI notes rapidly 一 setting velocities between 60–80 for consistent dynamics.
For bends, assign the pitch wheel to move in smaller increments, such as 1–2 semitones, and automate the motion to form the natural bend tension of guitar strings.
PRO TIP: Use randomization tools in your DAW to slightly vary note timing and velocity, as no guitarist plays perfectly evenly, of course.
If your VST plugin supports it, enable round-robin sampling to make sure each note doesn’t trigger the same sample to avoid any mechanical sound.
And the last thing I would recommend when learning how to play guitar on a MIDI keyboard is to not overlook muting techniques.
Use short note lengths with low velocities to emulate palm muting, and pair this with EQ cuts around 200 Hz to remove excess resonance.
This will create a tight, percussive sound.
Bottom line, with these articulation techniques, your MIDI controller can realistically recreate even the most intricate guitar parts.
-
Strumming Patterns
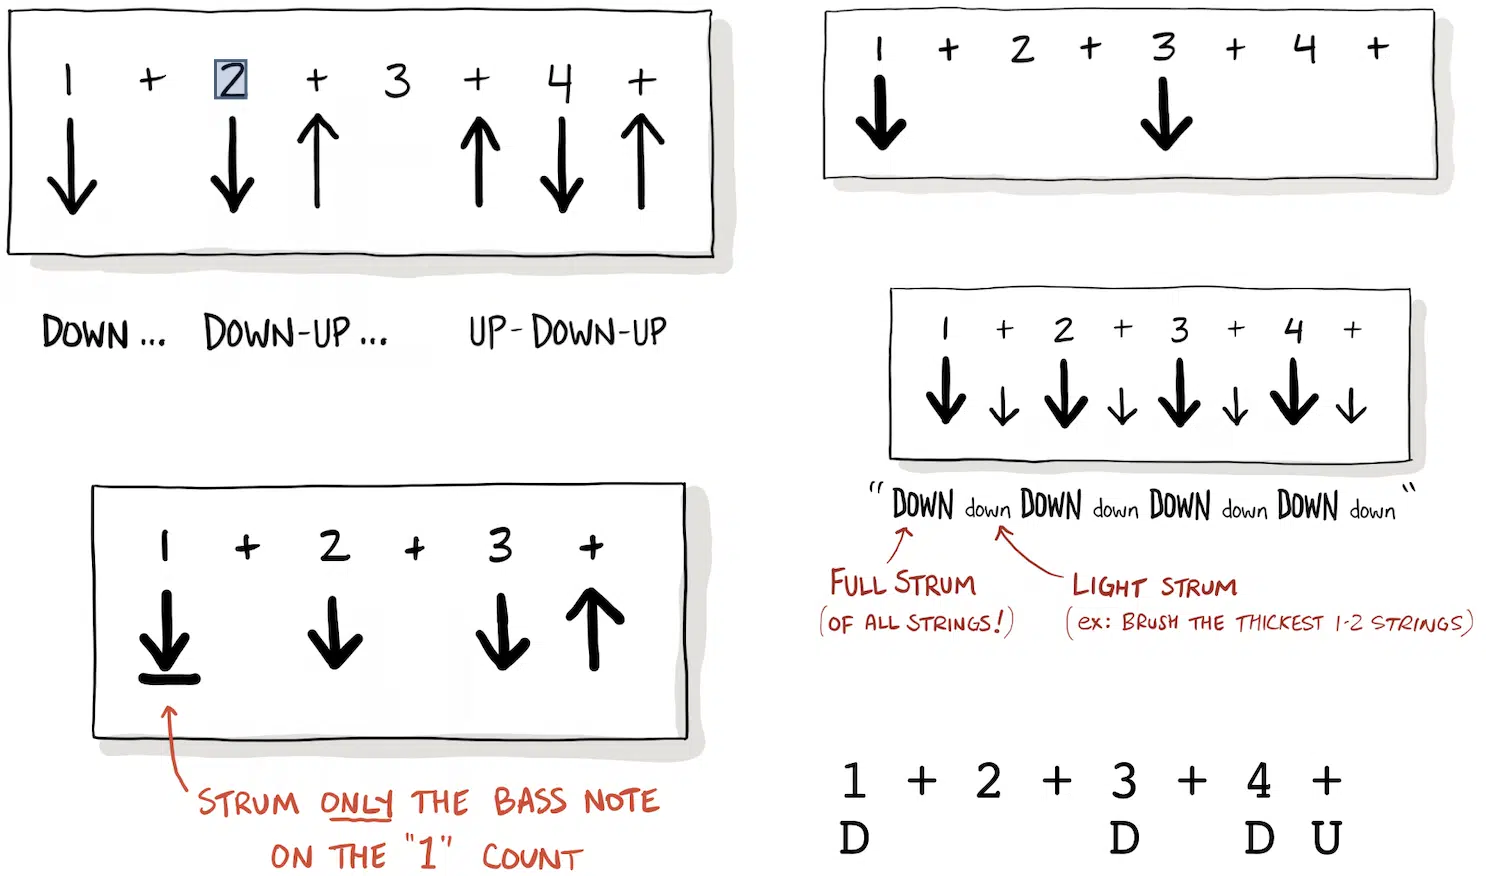
Emulating strumming patterns is key for replicating guitar playing on a MIDI keyboard and learning how to play guitar on a MIDI keyboard.
You’re going to want to start by programming upstrokes and downstrokes manually.
For example, in a 4/4 rhythm:
- Downstrokes might fall on beats 1 and 3.
- Upstrokes land on 2 and 4.
To achieve this, stagger MIDI notes slightly (e.g., 10–30 ms) to mimic the timing of a guitarist’s strumming hand.
If your VST plugin or DAW (like FL Studio or Logic Pro) has a built-in arpeggiator, set it to 1/16 or 1/8 time divisions to replicate quick strums.
Experiment with gate settings between 70% and 90% to control the length of each note and avoid overly robotic timing.
For slower ballad-style strumming, use triplets or adjust the arpeggiator to play in free time.
Velocity is also key for creating dynamic strumming…
For example, set velocities of downstrokes higher (80–100) and upstrokes lower (40–60) to mimic the uneven pressure of a guitarist.
Also, layering multiple takes of the same chords with slight timing variations can create a lush, natural sound.
For muting or percussive strums, my advice is to use extremely short note lengths (e.g., 10–20 ms) and set velocity values under 30.
Combine this with an EQ cut around 100–300 Hz to emulate the “chuck” sound of muted strings and you’re good to go.
You can also use the sustain pedal sparingly to let certain strums ring out while keeping others tight.
PRO TIP: Assign your MIDI controller’s modulation wheel to control strumming speed in real-time, which is always super great.
This allows you to dynamically adjust the pace of the strum during live performance or recording 一 adding a human touch to the track.
By layering these techniques, your strumming can sound as fluid and expressive as a real guitar, which you should always be aiming for.
-
Dynamic Playing
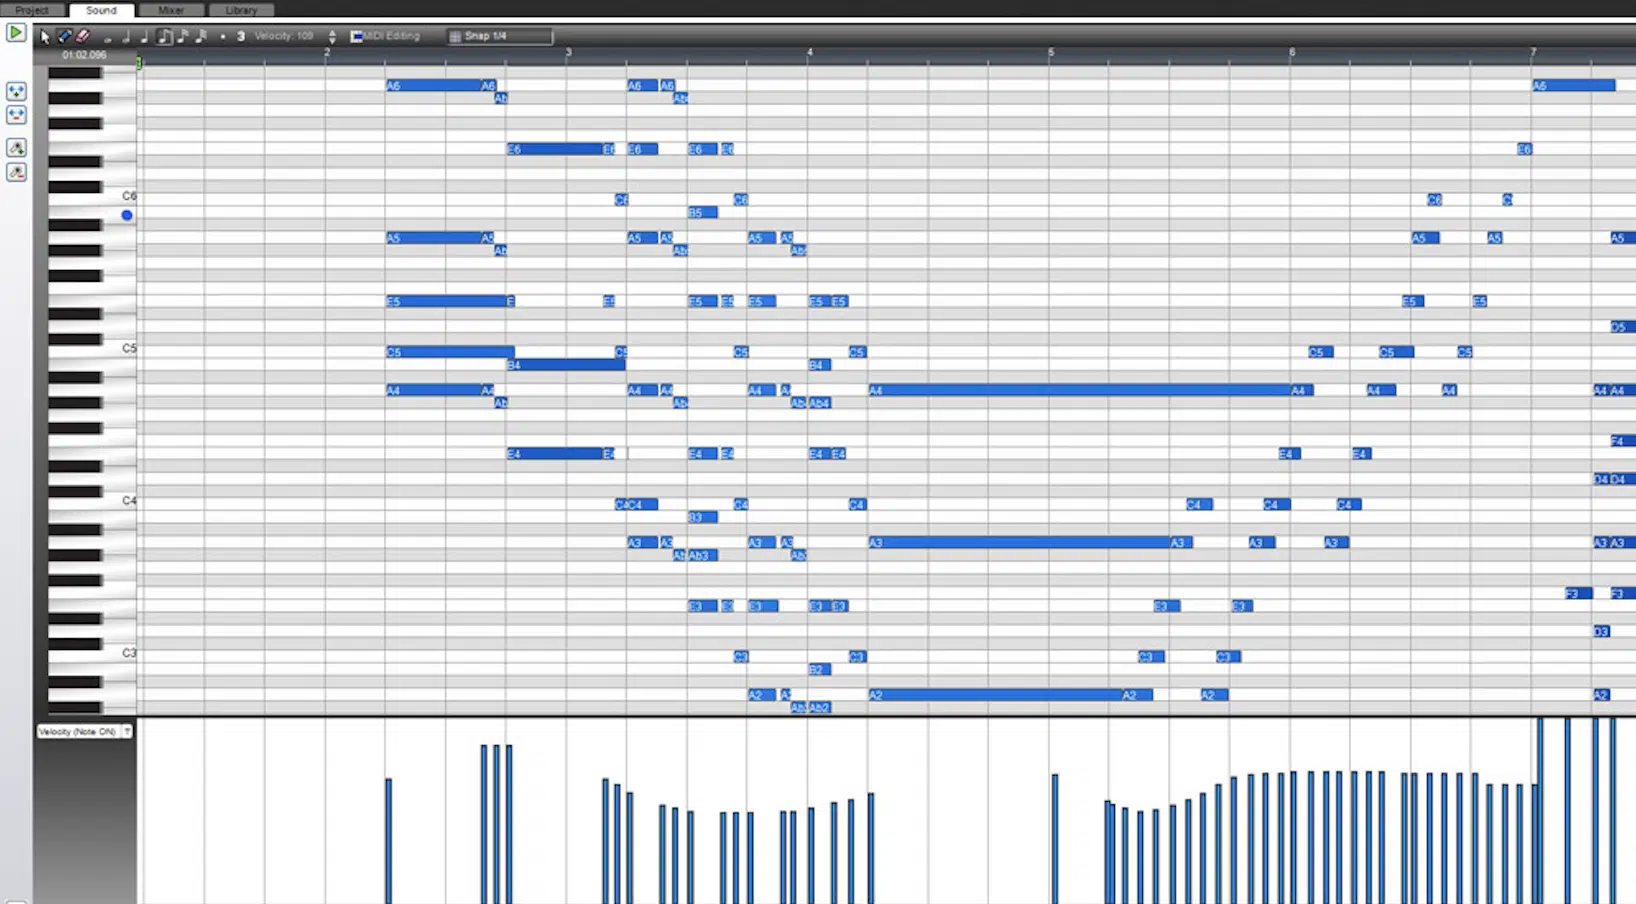
Dynamic playing is super important for making your MIDI guitar parts sound expressive and natural, and you want to begin by fine-tuning your velocity settings for each note.
For example, when emulating a soft fingerstyle piece, keep velocity values between 30–60, and for heavier strumming or picking, push them closer to 90–120.
This variation mimics the natural dynamics of a real guitar, where the pressure on strings changes with each strum or pluck, as we talked about.
A MIDI controller with aftertouch can add another layer of expression, and I definitely advise you to invest in one if you want to try this out.
Assign aftertouch to control parameters like vibrato or volume, so pressing a key harder sustains one note or adds subtle modulation.
This is similar to a guitar player holding and bending a string.
For even more realism, map velocity-sensitive layers in your VST plugin to trigger different guitar sounds based on how hard a key is struck.
For instance, soft touches can activate a clean tone, while harder presses bring in a touch of distortion or bite.
Use the modulation wheel to control tremolo effects and set the rate to around 6 Hz for gentle pulsation.
On the flip side, assign the wheel to manipulate dynamics in real-time 一 fading notes in and out as a guitarist might do with their picking hand.
To emulate fingerpicking, program alternating velocities for multiple notes (e.g., 40, 60, 50, 70) to simulate the uneven pressure of individual fingers.
Another tip is to randomize timing and velocity slightly, using DAW tools like MIDI randomization to break the mechanical consistency of programmed MIDI notes.
Just make sure to keep timing deviations between 5–10 ms for a subtle, humanized feel (you don’t want things sounding overly-digital or unnatural).
Layering two takes of the same part with different velocities and timing can also create a fuller, more organic guitar sound.
By focusing on dynamics, your MIDI guitar parts can truly play authentic, captivating listeners with their lifelike expression.
Effects, Pedals, and Automation for Realism
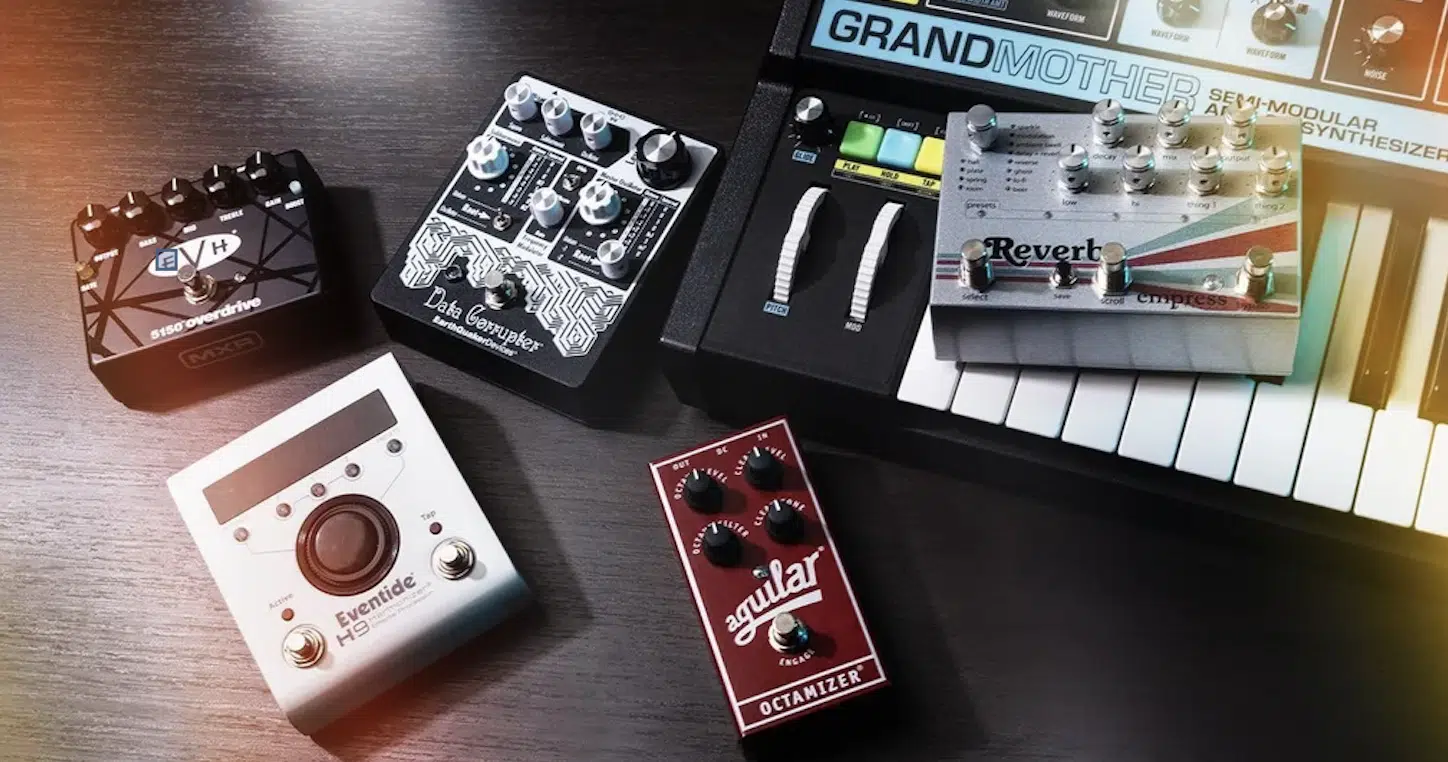
When it comes to making your MIDI guitar parts sound authentic the following can make all the difference:
- Using the right effects
- Automation
- Even physical or virtual pedals
Start with reverb to simulate the natural acoustics of a real guitar.
For example, a hall reverb with a decay time of 2.5–3.5 seconds and a pre-delay of 20–30 ms works wonders for ambient guitar parts.
A shorter plate reverb (decay time around 1.5 seconds), on the other hand, would be great for rhythmic strumming.
Delay is another must-have, of course, so try out a ping-pong delay with 1/8 note or 1/4 dotted note timing to create rhythmic echoes.
Make sure to set the feedback to 20–30% and mix levels to around 25% for more subtle effects, and for a more experimental vibe, crank feedback to 40-50%.
Amp simulators like Guitar Rig 7 or AmpliTube 5 (free) are key to shaping your tone.
For clean tones, use a Fender Twin Reverb emulation with EQ settings like bass at 3, mids at 5, and treble at 7.
If you want to throw in some rock or metal parts, crank up the gain and use high-gain amps like Mesa/Boogie or Marshall models, setting the distortion to 50–60%.
Pedals can add an extra layer of realism too, whether you’re using physical ones or emulating them through VST plugins.
For example, a Tube Screamer-style overdrive with gain at 40%, tone at 60%, and level at 50% will add some extra warmth to your tone.
Make sure to assign modulation or sustain controls on your MIDI controller to toggle effects like delay or reverb in real time, like I mentioned before.
For even more control, map a pedal to modulation settings for vibrato or strumming dynamics during a live performance.
Automation ties all these elements together and makes your MIDI guitar parts feel alive, so automate volume to replicate the natural swells and fades of a guitarist’s playing.
For example, fade in notes over 500 ms for a swelling effect or reduce volume gradually in softer sections.
Don’t forget about using pitch bend automation for slides and bends either.
Set the pitch range to 2 semitones and create smooth curves in your DAW to mimic fretboard movements with your fretting hand.
Similarly, automate modulation for vibrato by assigning it to an LFO with a rate of 5–7 Hz 一 increasing depth at the end of sustained notes for a more expressive finish.
NOTE: Layering effects with automation is where the magic happens.
For example, automate the mix level of a chorus effect, starting at 10% and rising to 30% during a climactic section.
Add automation to your delay feedback as well; set it to 20% for clean rhythms and boost it to 50% for dramatic builds.
By combining effects, pedals, and automation, your MIDI guitar will have the depth, dynamics, and emotion of a real guitar.
This will give your tracks a professional and polished feel, and help you learn how to play guitar on a MIDI keyboard way faster.
-
Recording and Refining MIDI Guitar Performances
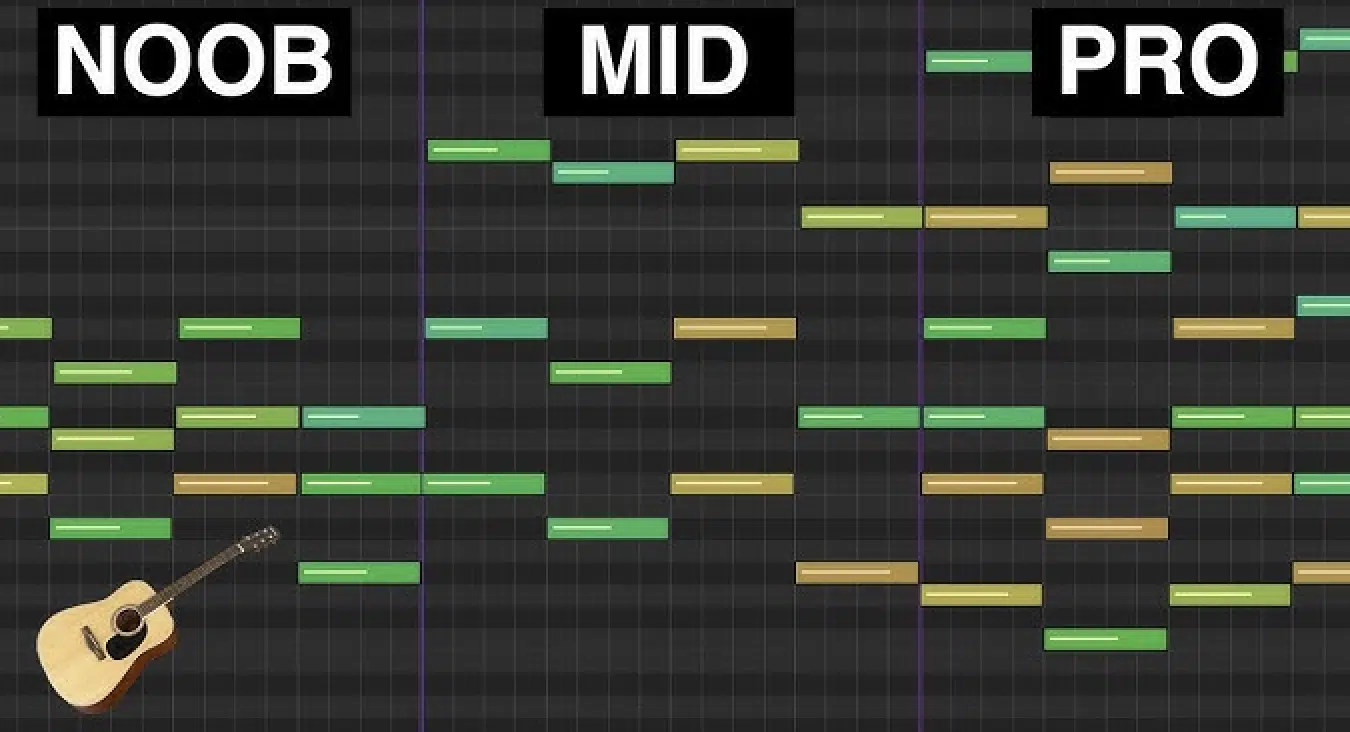
Recording MIDI guitar is a chance to make your playing shine, but it’s all about choosing the right method: real-time playing or step sequencing.
When you’re learning how to play guitar on a MIDI keyboard, it’s all about what works best for you and what matches your unique style.
For real-time recording, you’ll want a MIDI keyboard with velocity sensitivity and an audio interface with low latency.
Set your buffer size to 128 samples or lower to avoid any noticeable delay between your key presses and the sound output.
Real-time recording allows you to play naturally, capturing the groove and timing of a real guitarist like a boss.
Step sequencing is your go-to method if you’re looking for razor-sharp precision.
Manually input MIDI notes into your DAW’s piano roll 一 adjusting their start times and velocities to match the dynamics of a live performance.
For example, alternate note velocities between 40–60 for softer fingerpicking and between 80–100 for harder strumming.
Layering is key here: record the same part twice with slight timing variations and pan one layer slightly left (-15) and the other right (+15) for a wide stereo output.
Also, you have to use quantization to tighten up your timing, but don’t overdo it (set quantization strength to 50–75% so your parts retain a human feel).
For strumming, make sure to stagger note start times by 10–20 ms to mimic the natural sweep of a pick across strings.
And again, to avoid a robotic feel, randomize note timing and velocity slightly if your DAW allows you (which most do).
Automation comes into play again during editing:
- Gradually increase volume for a crescendo.
- Automate reverb mix levels to create a sense of space in different sections of your track.
You can also automate EQ to emphasize certain frequencies by boosting around 3 kHz for a crisp, clean tone or cutting below 150 Hz to reduce muddiness in layered parts.
Finally, don’t forget to apply effects and refine the tone of each layer, which we talked about in the previous sections.
For example, use a clean tone for the base layer and add a distorted layer with less low end (e.g., cut at 200 Hz) to enhance clarity.
Whether you’re recording in real-time or building parts with step sequencing, the goal is the same: to make your MIDI guitar sound polished, professional, and full of life.
Pro Tip: What Exactly Are MIDI Pickups?
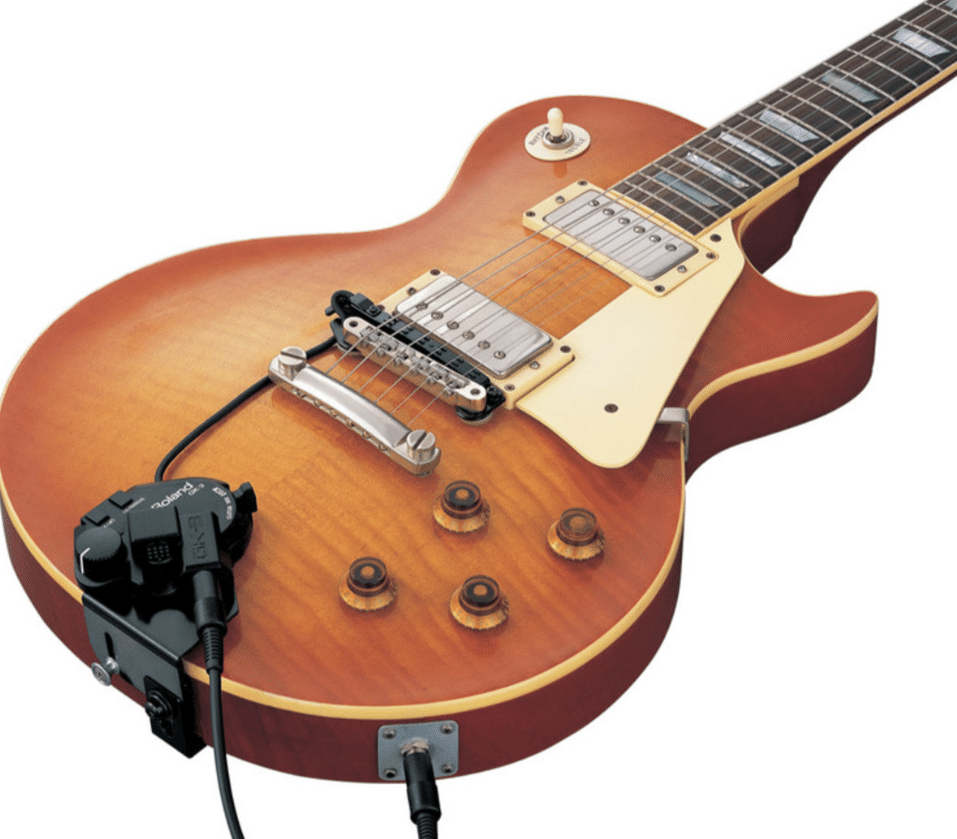
When you’re learning how to play guitar on a MIDI keyboard you might hear the phrase “MIDI pickups,” which simply converts a guitar’s vibrations into MIDI data.
This will let you control/play virtual instruments directly from your own guitar 一 the best ones in my opinion are the Fishman TriplePlay or Fishman Triple Play Connect.
Unlike a regular pickup, a MIDI pickup translates each string’s vibration into separate MIDI control signals (now your guitar signal) for highly accurate tracking of:
- Multiple notes
- Complex chords
The hex pickup is one of the most popular examples, which reads data from each string individually.
For example, when playing an E major chord, the pickup processes all six strings separately for precise pitch and velocity information for every note.
To minimize latency, pair your MIDI pickup with a low-latency audio interface and adjust your DAW’s buffer size to 128 samples or lower.
While most MIDI pickups are designed for an electric guitar, they can also work with acoustic instruments, provided they have piezo or magnetic pickups installed.
Using a MIDI pickup can eliminate the need for programming every note manually, allowing you to play naturally and focus on creative expression.
Whether you’re triggering virtual instruments or creating custom MIDI files, a MIDI pickup can seriously help you blend the tactile feel of a real guitar with the endless possibilities of digital music production.
Bonus: Best VST Plugins/Virtual Instruments
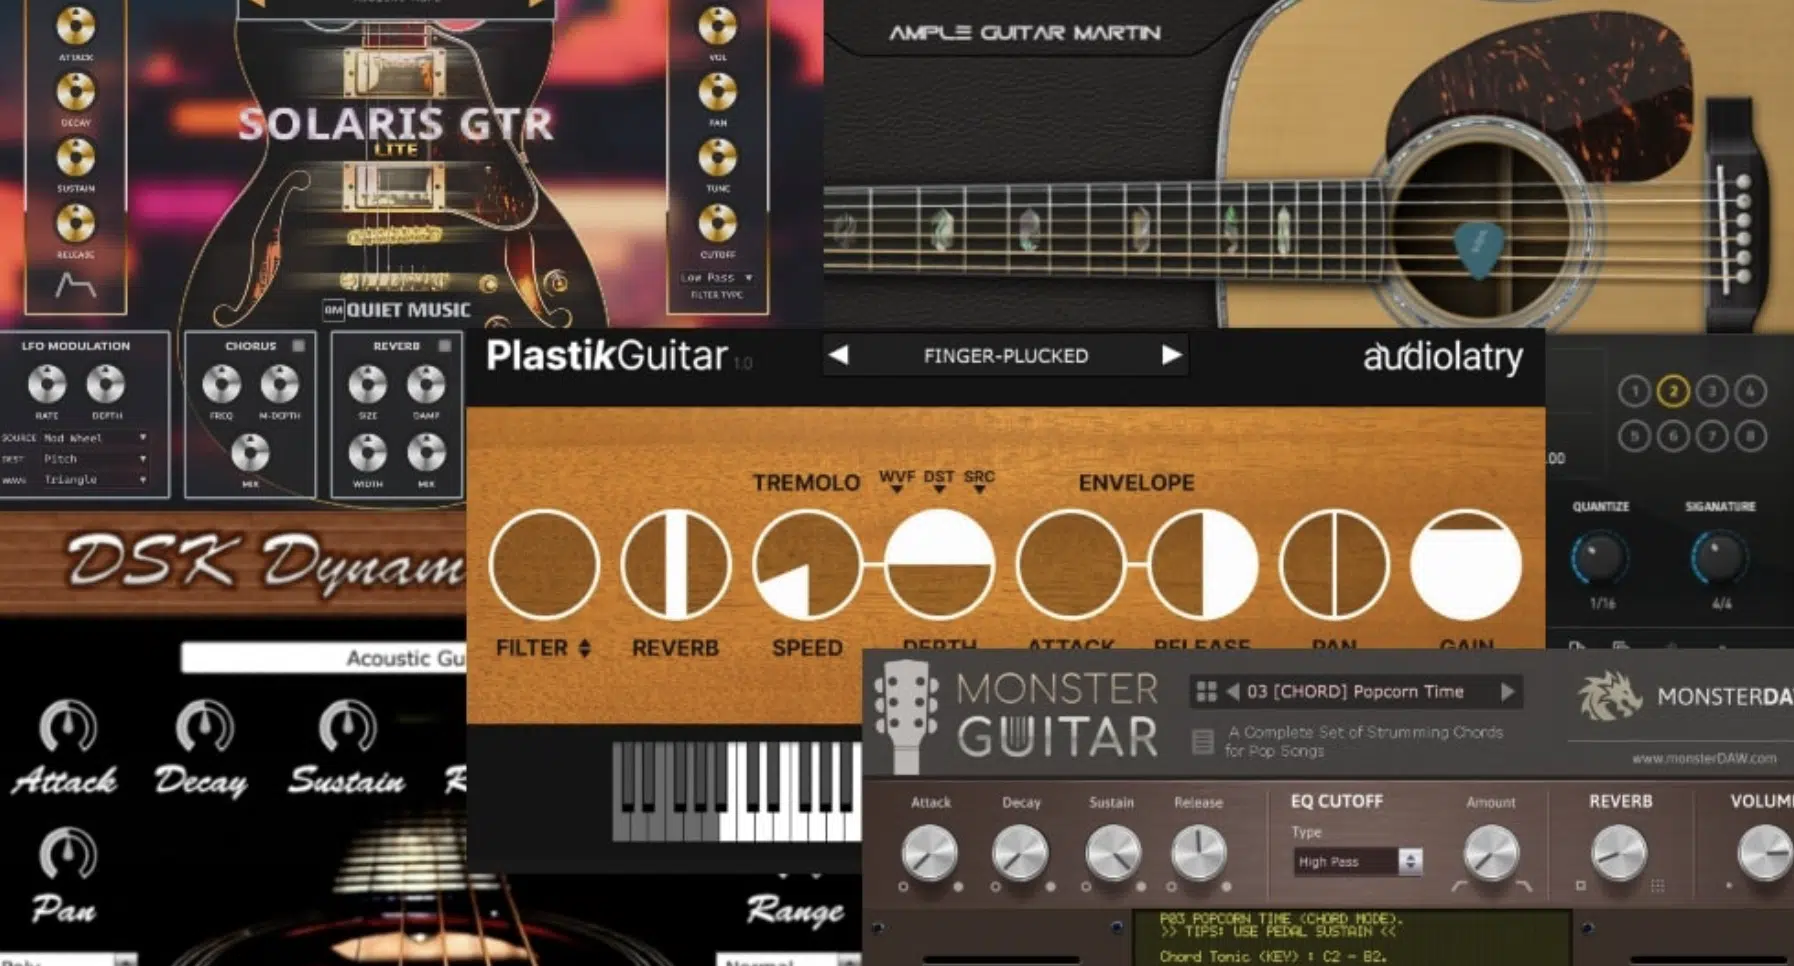
When you’re learning how to play guitar on a MIDI keyboard, choosing the right VST plugins is what it’s all about (it can even make-or-break the whole process).
If you want realistic guitar parts, then you have to make smart moves.
For acoustic tones, Ample Sound Acoustic Guitars is on point with its built-in strumming engine and realistic articulations like hammer-ons and pull-offs.
For electric tones, IK Multimedia’s AmpliTube 5 offers a wide range of amp and pedal simulations so you can shape your tone down to the smallest detail (it’s epic).
Native Instruments’ Session Guitarist is another OG if you’re looking for pre-recorded patterns that you can modify using MIDI data.
It gives you unmatched control over dynamics and sustain.
If you need a free trial version, Spitfire LABS provides a stripped-down yet highly usable library for basic guitar sounds, so definitely check that out.
For experimental producers, Output’s REV offers reversed and manipulated guitar textures perfect for ambient or cinematic tracks.
Lastly, don’t count out Heavyocity’s Scoring Guitars for hybrid sounds that blend real guitar and synths flawlessly.
Pair these plugins with a Fishman TriplePlay or similar MIDI pickups for the ultimate combination of tactile guitar playing and digital flexibility.
Bottom line, with these plugins at your disposal, your MIDI keyboard can produce professional-grade guitar parts for any genre, period.
Final Thoughts
When you’re learning how to play guitar on a MIDI keyboard, it all comes down to having the right plugins, techniques, and a super creative mindset.
Plus, you have to focus on dynamics, articulations, effects, and always pay attention to those little tiny details that make a track sound professional.
Luckily, with the tips and tricks we talked about today, you’ll successfully be able to replicate realistic guitar parts, add authentic tones to your tracks, and experiment.
And, as a special bonus, you’ve got to check out these legendary Free Guitar Loops, which contains 7 free guitar loops + 70 audio & MIDI stems.
All of them are super high-quality and recorded by professional guitar players, so you’re getting the most realistic samples in the game.
Plus, they’re all modeled after the hottest styles and biggest hits in modern music, and all of them are 100% royalty-free.
Trust me, if you want the best guitar loops in the entire industry, you do not want to miss out on this free gem.
Bottom line, by mastering how to play guitar on a MIDI keyboard, you’ll not only take your production skills to the next level, but also unlock some serious power.
With it, you can create lifelike and expressive guitar parts that blow the competition out of the water and sound insanely realistic.
Whether you’re creating intricate solos or adding rhythmic strumming to your tracks, your music will always sound on point and be extraprofessional.
The possibilities are endless, so make sure to play around and think outside of the box (nothing is too crazy, trust me).
Until next time…


Leave a Reply
You must belogged in to post a comment.