Phase alignment is a super important step in the music production process.
It’s all about locking in the timing between waveforms so your tracks, layers, and frequencies hit together in sync.
Without cancelling each other out or thinning your overall sound, of course.
Once you lock it down, you’ll be able to get tighter drums, fuller vocals, and bass that absolutely slaps.
Plus, you can easily identify weird phase issues and lock in your stereo image so your mixes sound solid in both mono and stereo (seriously enhancing your skills).
That’s exactly why we’re breaking down everything you need to know about phase alignment, like:
- Phase alignment vs time alignment ✓
- How to fix phase issues ✓
- Different settings you need to know ✓
- Comb filtering & how to avoid it ✓
- Manual phase adjustment tips ✓
- Plugins for phase correction ✓
- Phase offset in kick/bass ✓
- Aligning multiple microphones ✓
- Keys to fine-tuning your effects ✓
- Stacked synth & vocal alignment ✓
- Mid/side imaging phase tricks (creative ways) ✓
- Much more about phase alignment ✓
By knowing all the best tricks, tips, and techniques when it comes to phase alignment, you’ll be able to spot problems fast and clean them up like an absolute boss.
Your tracks will sound crazy clean, wide, and full of energy.
Plus your mixes will translate across every system, and your frequency content will stay tight from low to high 一 which separates the pros from the amateurs.
You’ll never have to worry about weird cancellations, thin low-end, or washed-out width ever again.
Table of Contents
- What is Phase Alignment & Why Does it Matter?
- Phase vs Polarity: Breaking Down the Difference
- Detecting Phase Issues (By Ear & By Eye)
- Time Alignment vs Phase Alignment
- Manual Phase Alignment: The Classic Methods
- Stereo Imaging & Mono Compatibility
- Phase and Reverb/Delay Sends
- Mid/Side Processing & Phase Interaction
- Common Phase Mistakes to Avoid
- How Phase Problems Affect Mastering
- Super Creative Uses of Phase Shifts
- Linear Phase vs Minimum Phase Plugins
- Advanced Techniques for Phase Alignment
- Final Thoughts
What is Phase Alignment & Why Does it Matter?
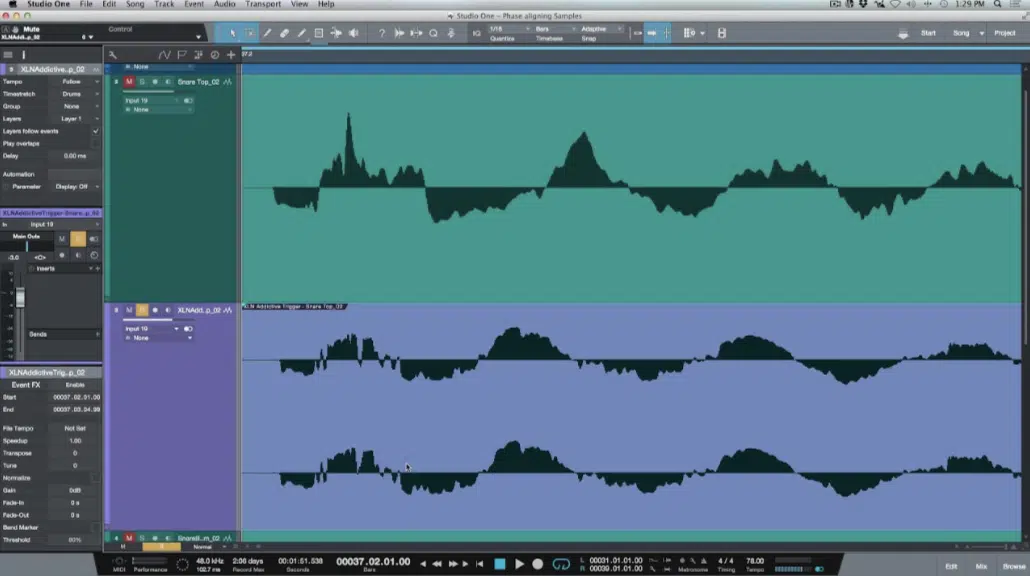
Phase alignment is the process of making sure that the waveforms from different tracks, layers, or recordings are moving together instead of against each other.
When two similar sound waves are slightly misaligned (even by a few milliseconds) they can cancel each other out, especially in the low frequencies.
This leads to a flat or hollow-sounding mix, which nobody has time for.
This usually happens when you’re working with multiple microphones, multi-mic recording, or layered sounds like claps, kicks, or stacked vocals.
For example, if one mic on a drum kit picks up the snare 2ms later than the overheads, that phase delay will cause a phase shift that kills the snap and thins out the body.
You’d be surprised how much energy gets sucked out from just a 0.5ms time offset.
Most of us layer multiple other tracks with different sources like kicks and 808s, or vocals and harmonies.
This is why making sure everything is phase aligned is one of the most overlooked, yet powerful tools for making your mixes punch/translate properly.
And trut me, you don’t want to be one of those people who overlook it and wonder why your mix isn’t as perfect as humanly possible.
Bottom line, if you don’t adjust phase, you’re leaving clarity, punch, and width on the table without even realizing it.
Don’t worry if it sounds a little complicated at the moment, because I’ll be breaking down everything you need to know (in detail) throughout the article.
Phase vs Polarity: Breaking Down the Difference
Before we go into the more advanced phase alignment moves, we’ve gotta clear up one thing that throws off a lot of producers: the difference between phase and polarity. Even though people use those terms interchangeably, they’re not the same, and mixing them up can make it harder to fix phase issues the right way. So let’s break down the difference so you’ll know exactly when to flip polarity, when to fix timing, and when to leave it alone.
How Polarity Inversion Works + Key Elements
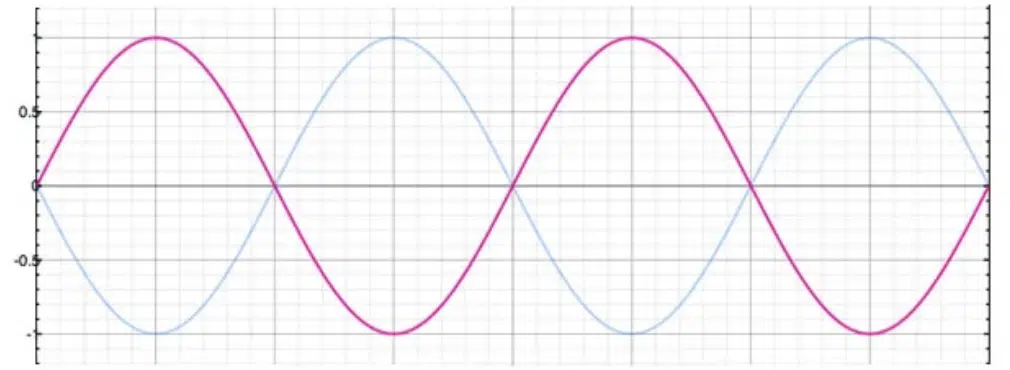
In the simplest way of putting it, polarity inversion flips a sound wave upside down; all positive values become negative and vice versa.
It doesn’t move the waveform in time, it just reverses its amplitude.
For example, if you take a snare top mic and flip the polarity on the snare bottom mic, you can often get more punch and body instead of the typical phase cancellation you’d usually hear.
Most DAWs have a polarity or phase invert button, for example, in Pro Tools, it’s the “Ø” symbol on the EQ or trim plugins.
You can also use stock utility or gain plugins in DAWs like Ableton or Logic Pro to flip polarity (dealer’s choice).
A good tip is to try flipping polarity on two tracks that were recorded from opposite mic positions, like kick in vs kick out, to see if the low-end gets tighter or looser.
But the main thing here is that polarity inversion is a binary change 一 it’s either flipped or it’s not, there’s no “in-between.”
So if the problem you’re hearing is more about timing than tone, you’re likely dealing with phase, not polarity.
Once you understand this distinction, it becomes WAY easier to know when you need phase alignment and when a quick polarity flip is all you need.
Why Phase and Polarity Get Confused
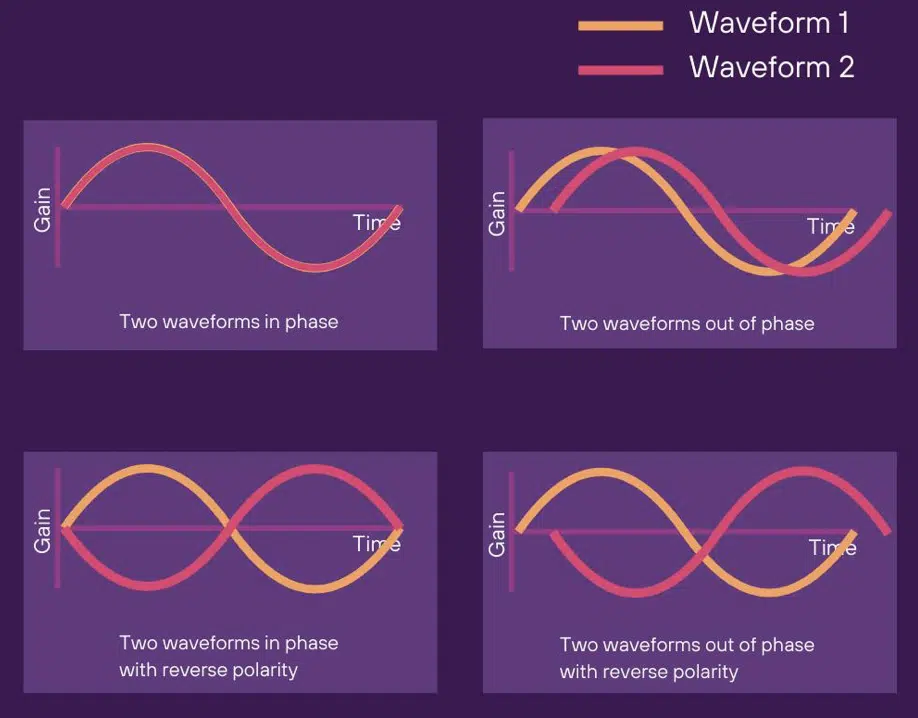
People confuse phase and polarity because they can cause similar problems, like:
- Volume loss
- Comb filtering
- Weird frequency dips
But they happen for different reasons 一 polarity is about amplitude inversion, and phase is about time alignment and arrival time.
For example, if you record a vocal with multiple mics and the capsule distance is slightly off (like one mic is 2 inches further back), you’ll get about a 0.15ms time delay.
This is because sound travels roughly 1 foot per millisecond.
That’s a phase issue, not a polarity one, and it’ll cause a phase shift that completely eats up the frequency content in the highs and mids.
Another reason the terms get mixed up is that some plugins label their polarity invert button as “phase,” which is actually not right if you want to get technical.
This throws a lot of newer producers off and leads to thinking flipping polarity is a cure-all for phase problems, when it’s really just one of many tools.
So always remember that if the problem is about delay, misalignment, or weird cancellations at certain frequencies, you need to look into phase alignment and not just flip polarity and call it a day.
When to Flip vs When to Align
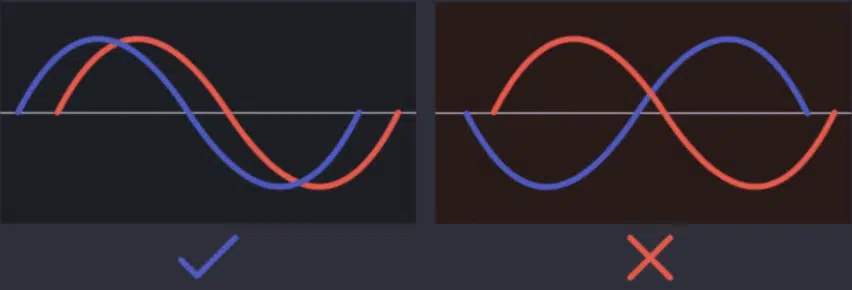
So the easiest way to know when to use polarity inversion versus full-on phase adjustment.
If you have two tracks that were recorded from the same distance but sound hollow or out of sync, try flipping polarity first.
For example, kick drum mics (in vs out) or snare top and bottom mics are classic spots where a polarity flip can instantly improve the sound like we just talked about.
But if the tracks were recorded from different angles, or you’re layering samples from different sources, then you’re probably dealing with phase delay or phase offset, and that’s where phase alignment comes in.
This means zooming in, looking at waveforms, or using delay compensation tools to actually shift the audio in small increments (sometimes as tiny as 0.2ms).
If you move a track forward or backward in time to line up the transients, that’s phase correction, not a polarity change.
And trust me, those little nudges can have a massive effect on the punch and depth of your mix, especially when you’re working with layered claps, snares, or stacked vocals 一 getting the correct phase alignment can be the thing that makes everything pop.
NOTE: My advice would be: if something feels off and you’re not sure why, flip polarity. If that doesn’t work, it’s time to time align and get into the phase game for optimal results.
Detecting Phase Issues (By Ear & By Eye)
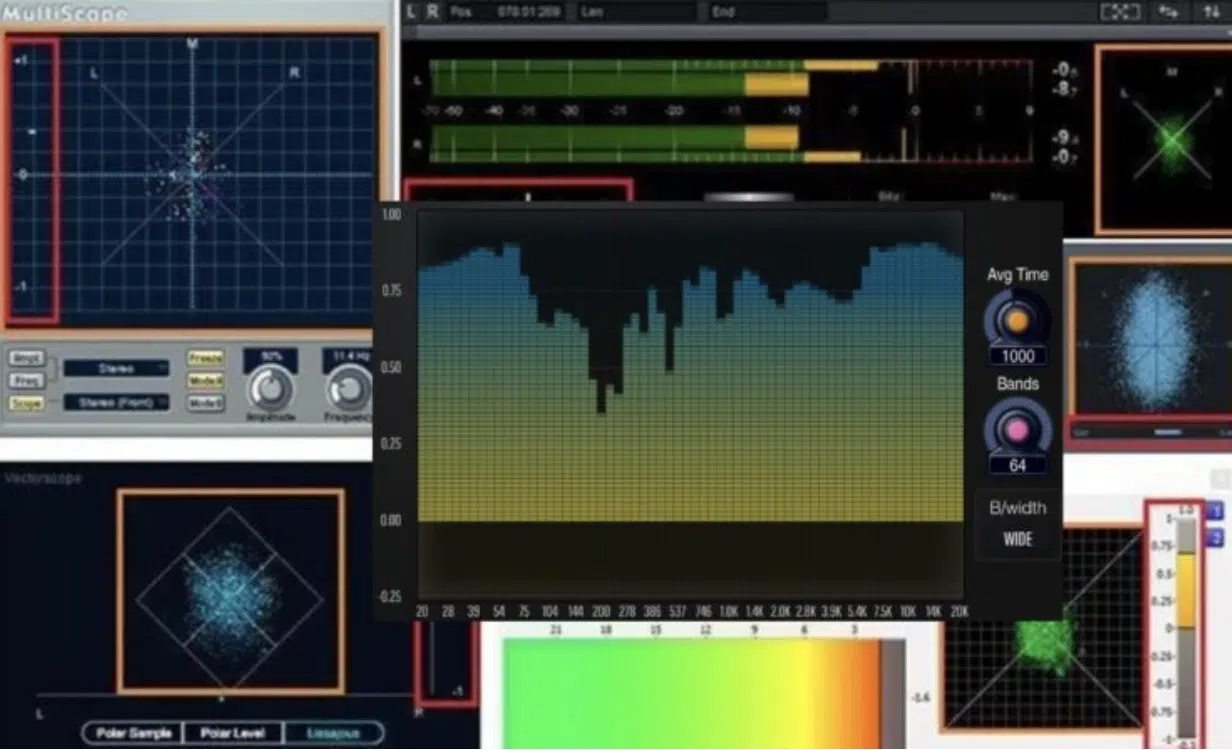
Once you know what to listen for and what tools to look at, spotting phase issues will become second nature. And the faster you catch them, the easier it becomes to dial in proper phase alignment and avoid headaches down the line. Whether you’re mixing drums, vocals, or layered synths, learning how to detect phase problems both by ear and visually is a game changer for mixing.
What Phase Problems Sound Like in a Mix
Phase issues usually show up as that weird hollow or “papery” sound 一 almost like something’s missing, but you can’t quite tell what exactly.
For example, when you’re layering two snares and one sounds slightly off, it’s often a result of a small phase offset that’s canceling out the frequency content in the body or crack of the snare.
You’ll notice the problem most in the low-end and upper mids…
Frequencies between 100Hz–400Hz can disappear if two sound waves are 180° out of phase, especially with kicks, basses, or vocals.
That’s when things start sounding thin and weak (and not in a cool way).
One trick I like to use is to:
- Solo just the layered sounds
- Flip the polarity on one
- Listen critically to how it affects the tone
If it gets tighter, there’s your phase problem and it’s no doubt time to go deeper and figure out whether a polarity inversion or phase alignment is the real fix.
PRO TIP: If your kick drum and 808 are layered but lacking punch, solo them together in mono. If the low end disappears, it’s probably a phase delay between them.
So just keep in mind that a quick time adjustment of 5–10 samples (or about 0.1–0.2ms) can get that punch back right away.
Visual Tools: Phase Correlation Meters & Oscilloscopes
When you’re dealing with phase alignment, you’re not just trusting your ears alone because sometimes you’ve got to look at it too.
That’s where a phase correlation meter comes into play 一 a visual tool that shows the phase relationship between the left and right channels of your stereo image.
If the needle is constantly dipping below zero, that means there’s some phase cancellation going on, and you need to check out what’s causing it.
For example, in Insight 2, the correlation meter is right at the top.
A value of +1 means perfectly in-phase, 0 means the channels are uncorrelated, and -1 means completely out of phase.
You never want to sit below zero for long unless it’s on purpose.
Another killer tool is an oscilloscope like the one in Voxengo Span Plus, which lets you see the actual waveforms of two signals overlaid.
If the peaks and troughs aren’t lining up (especially around the attack points) that’s a clear sign your phase alignment needs to be tightened up a little bit.
You can even use a mid/side analyzer to detect frequency-dependent phase cancellation.
For example, if everything looks fine in the mids but the highs or low frequencies look smeared or collapsed in the sides, it could be a phase shift happening from an imager or stereo widener plugin.
PRO TIP: When you’re checking a drum kit, try running a stereo room mic and close mic into a goniometer.
If it forms a tight vertical line, they’re in phase. If it looks like a splatter or diagonal mess, you’ve probably got time delay or phase rotation issues between them.
Zooming into Waveforms to Spot Misalignment
Sometimes the best thing for the job is just zooming way into the audio and looking at the waveforms up close.
In Pro Tools, for example, you can zoom down to individual samples using the magnifier tool 一 this gives you pinpoint control to time align manually.
What you’re going to do is look at where the transient begins on each track.
If the first upward peak of your snare sample hits even a few milliseconds later than the top mic, you’ll get a phase delay that messes with your attack.
That’s why you should always line up the transient peaks on layered drums or vocals, especially if we recorded them using multiple mics at different distances.
Let’s say you’re stacking two 808s, one with glide and one with distortion, right…
If one starts even 0.5ms later, that tiny time offset can cause a phase shift in the 50Hz–80Hz range. And that’ll kill your low-end faster than you think.
PRO TIP: When aligning by hand, work in small increments like 10–20 samples at a time and listen critically after every move.
Simply line it up visually, then flip between mono and stereo to double-check the phase alignment across both channels.
Time Alignment vs Phase Alignment
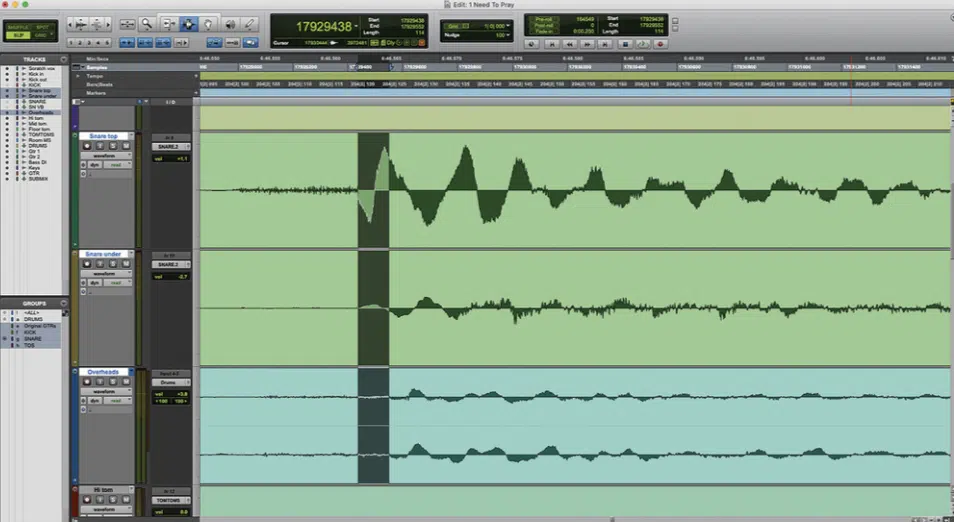
Time alignment and phase alignment are closely connected, but not the same.
When you time-align something, you’re literally shifting the track forward or backward in time so the waveforms line up.
This can directly affect phase, especially if you’re working with layered sources or multiple microphones like we touched upon in the previous sections.
For example, if one snare sample is hitting 600 samples (around 13.6ms at 44.1kHz) later than another, you’re going to get stuck with a nasty phase shift that hollows out the midrange and softens the transient.
You could nudge the lagging sample earlier manually, or apply a delay compensation plugin to match the arrival time without cutting or slicing.
It just depends on how clean the rest of the signal flow is, really.
If you’re working with a drum kit and the overheads are causing a phase offset with your kick, a delay of just 0.2ms (9 samples) might be all it takes to time-align the low-end attack with the rest of the mix.
That minor shift can bring the punch right back without affecting the frequency content elsewhere.
That said, not every signal needs to be aligned to perfection… Sometimes a bit of natural phase delay adds width or vibe, so only nudge when you hear a phase problem.
If everything sounds great and nothing’s getting canceled out, leave it alone and keep your workflow moving because overdoing it is a big no-no.
PRO TIP: Start with transient-heavy tracks like kicks, snares, and vocals.
These are the easiest spots to hear time alignment issues and test whether a phase adjustment or a simple delay tweak makes the biggest difference.
Manual Phase Alignment: The Classic Methods
If you want total control over your phase alignment, sometimes nothing beats just diving into the waveforms and lining them up by hand, for real. Manual editing gives you the most precise adjustments, and it’s great when dealing with layered tracks, multi-mic recordings, or samples from different sources. So, now let’s talk about the classic moves to lock in tight phase alignment across your mix like a boss.
Aligning Transients by Zooming & Nudging
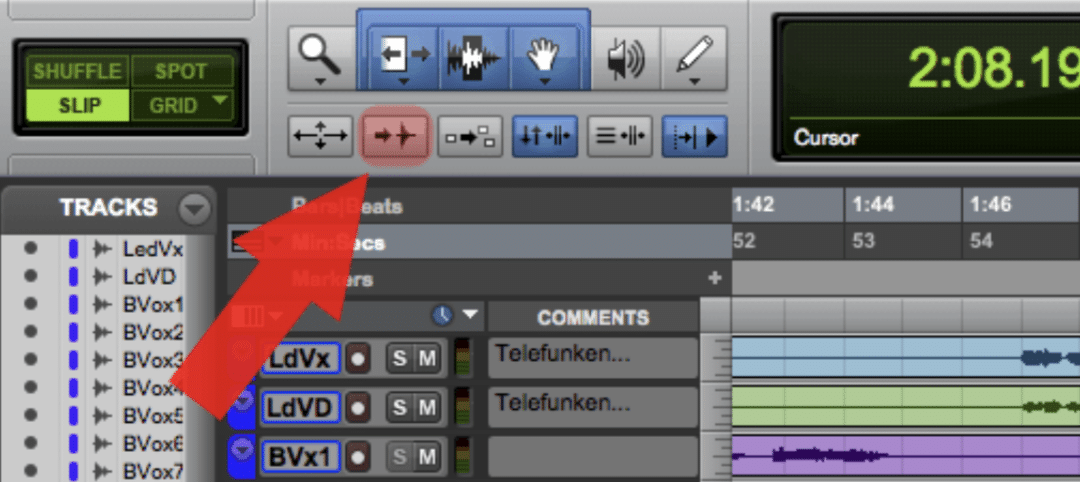
To kick things off, you’re going to zoom in on the transients of the two tracks you’re working with, making sure you’re at sample-level resolution.
In Pro Tools, for example, you can use the Tab-to-Transient feature to easily jump to the attack point of any waveform.
Once you see where the first big peak happens, you can adjust the later track by nudging it earlier in small increments (like 10–15 samples at a time).
If you’re working in Ableton, turn off grid snapping and use the sample nudge arrows or delay compensation in milliseconds.
Even 0.2ms of phase delay can change how the low frequencies interact.
For example, when aligning a distorted 808 with a clean sine 808, nudging one earlier by 20 samples might tighten the low end without affecting the tone.
Just make sure to always listen critically in both stereo and mono after each move.
You want to hear more punch, fewer holes in the frequency, and a stronger transient 一 that’s how you know your phase alignment is on point.
Use a spectrum analyzer while soloing the two tracks, and watch for dips around 100Hz–400Hz because that’s where most comb filtering happens when transients aren’t locked in.
Tips for Layered Drums, Claps, and Bass
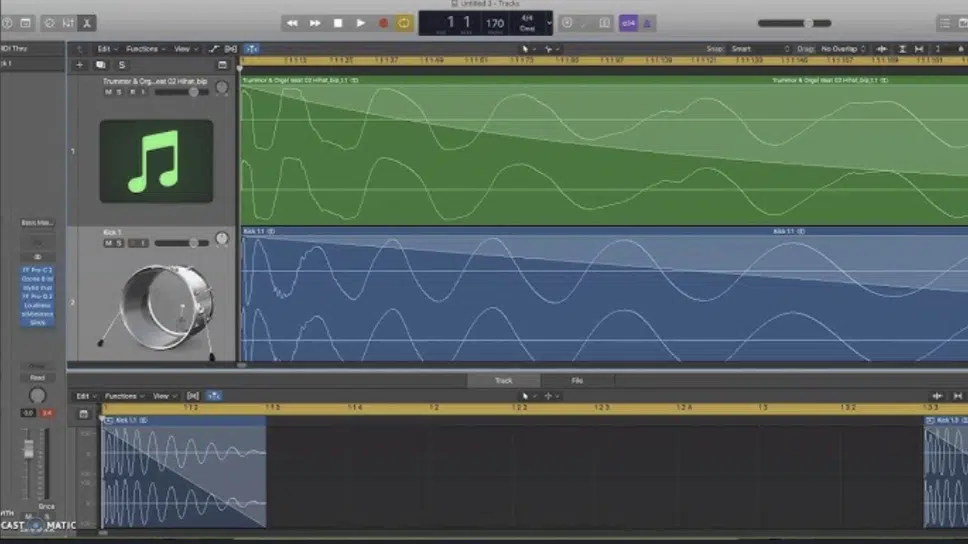
When you’re layering drums or claps, you’ve gotta make sure their attack points are working together, not against each other.
For example, if you stack two claps and one starts 30 samples behind the other, you’ll get phase cancellation in the upper mids that makes the layer sound soft or flanged.
To fix it, zoom in and line up the second clap’s peak to match the first, and don’t worry about the tails 一 it’s the transients that affect phase alignment the most.
Then, bounce the group to audio and double-check the combined waveform looks clean and uniform.
Same with bass, especially sub + mid-bass layering.
Say your sub is hitting at 50Hz and your top bass is distorting around 300 Hz… If they’re out of sync by more than 0.3ms, you’ll lose both punch and definition.
Time-align the transients and then recheck your stereo image.
PRO TIP: Use high-pass filters on your claps before layering. This cuts low-end mud that can create unpredictable phase interactions with the kick drum or room mics.
Fixing Timing Without Losing Groove
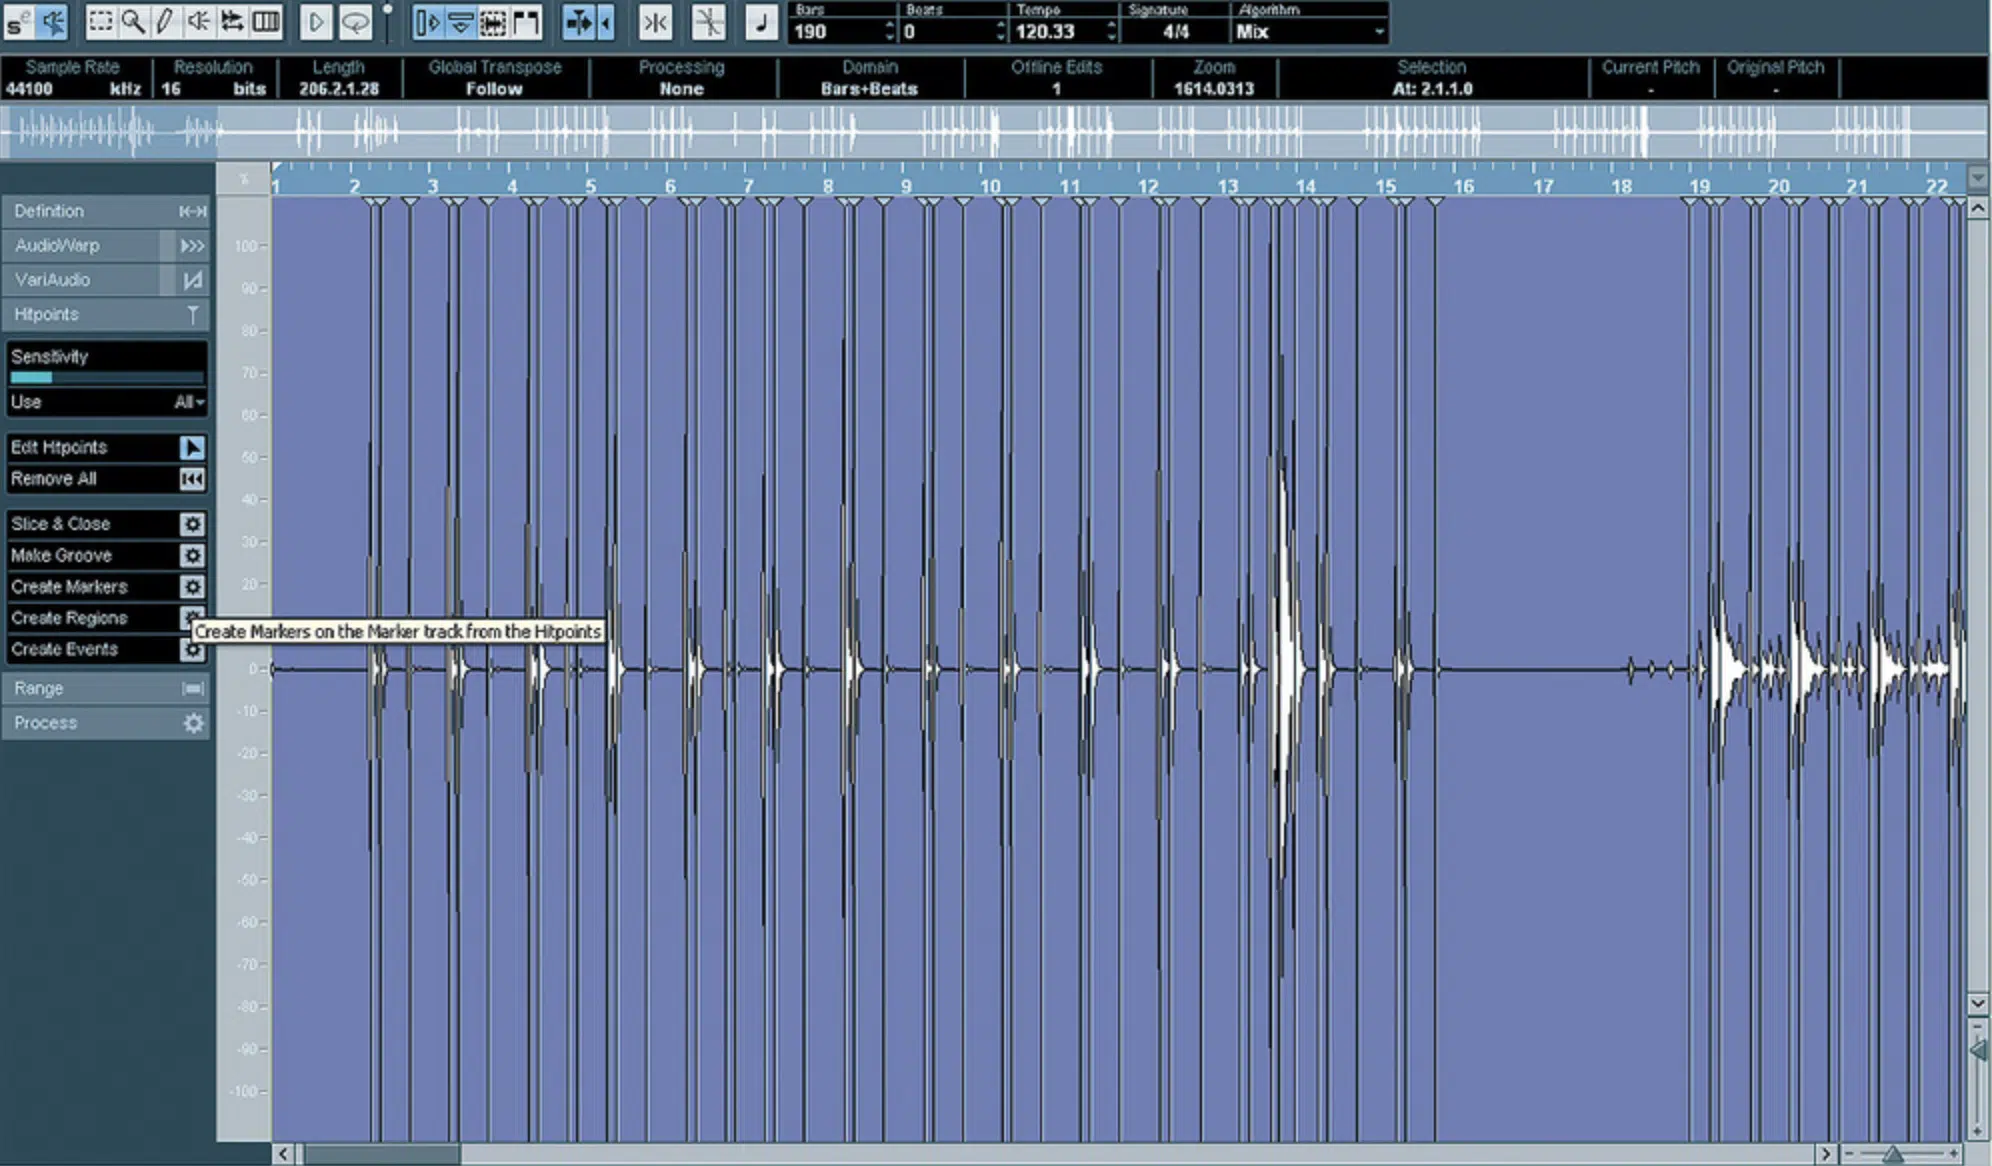
One thing a lot of producers mess up is over-aligning 一 just because the waveforms look lined up doesn’t mean they feel right!
You can easily kill a groove by snapping everything to the grid or overusing delay tools, especially when it comes to the percussive stuff.
This is equivalent to over-quantizing a MIDI part that you want to sound natural.
Instead, go for feel first, my friends. For example, if you’ve got a swung hi-hat loop layered with straight drums, don’t force the hats to align perfectly (let them breathe).
Just make sure to use small increments like I told you, about 5–10 samples, to shift things closer without flattening the pocket.
If you’re fixing live-recorded bass guitar to match programmed kicks, line up the downbeats but let the grace notes or slides lag naturally.
This keeps the musicality on point and professional while still getting the phase alignment right where it counts.
PRO TIP: Only time-align notes that share frequency range and transient content.
Let everything else stay loose to preserve natural timing and feel because that’s the real art of phase alignment.
Kick, 808 & Bass Phase Relationship
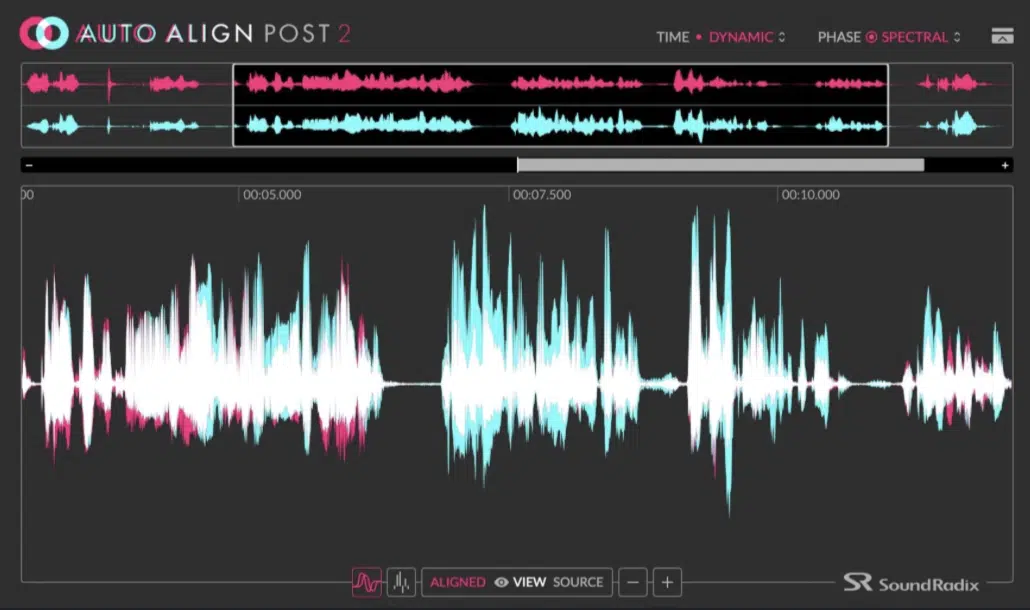
When your kick drum and 808 are out of sync, the first thing you’ll hear is a lack of low-end punch, and that’s almost always a phase alignment problem.
For example, if your kick has a transient peaking at 75Hz and your 808 has a sine wave locked around 50Hz, even a time offset of 0.5ms (22–23 samples at 44.1kHz) can cause comb filtering in the subs that wipes out the thump in mono.
One fix is to use a utility delay.
Try nudging the 808 backward in 0.1ms steps using Sound Radix Auto-Align, or manually line up the zero-crossing point of the 808 with the peak transient of your kick.
Also, always listen in mono because if your low-end suddenly disappears or sounds washed out, there’s an easy fix to it.
You can simply use phase adjustment to bring everything back in line and restore the full energy of your bottom end.
Aligning Vocals, Harmonies & Doubles
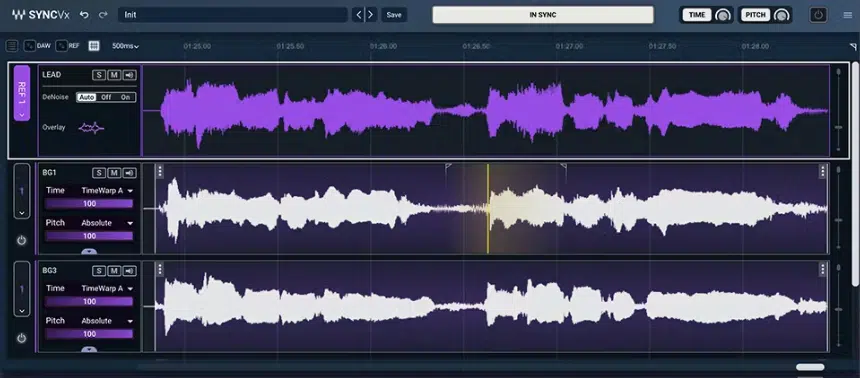
When you’re stacking doubles or harmonies, phase alignment is what’s going to keep your vocals sounding full and not weirdly filtered or hollow.
For example, two takes of the same line recorded with slightly different arrival times (like even a 0.3ms delay between them) can cancel out the breathiness or scoop the mids, especially around 1–3kHz.
To fix this, you can:
- Zoom in on the transients of each vocal take
- Align the peaks
- Then use a high-pass filter on the doubles at around 120Hz to clean out the low-end buildup that can mess with phase relationships
Sometimes, though, a slight delay between the main and double (like 10–15ms) can actually add width without causing comb filtering.
So, never be afraid to experiment and use small increments to find the sweet spot because that’s how you’re going to enhance your skills even more.
Stacked Synths & Sample Layers
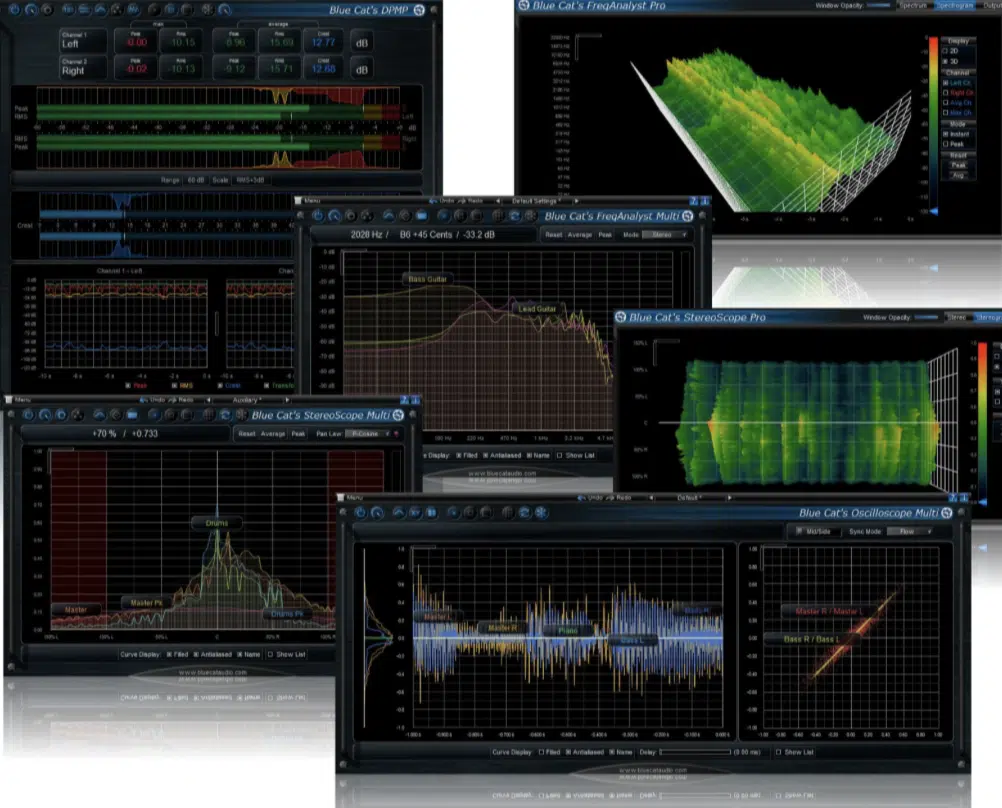
When you’re layering synths, like a wide saw pad with a plucky lead or a sub with a distorted mid-bass, proper phase alignment is king.
It’s the key to keeping them clean and powerful, which you always want.
Let’s say you’ve got a detuned saw playing at 240Hz and you layer it with a square wave lead sitting around 450Hz…
If the phase is off by even 0.4ms, you’ll notice a dip in the midrange body that ruins your overall sound.
A solid move is to run each layer through a spectrum analyzer like FabFilter Pro-Q 4, flip one layer’s polarity temporarily, and listen up for any added punch or volume.
That tells you where a phase shift might be happening.
To avoid collapsing your stereo image (especially with widened layers), just make sure to check them in mono and use mid/side EQ to carve out any overlapping frequency content that’s causing unintentional phase cancellation.
Dealing With Phase in Drum Recordings
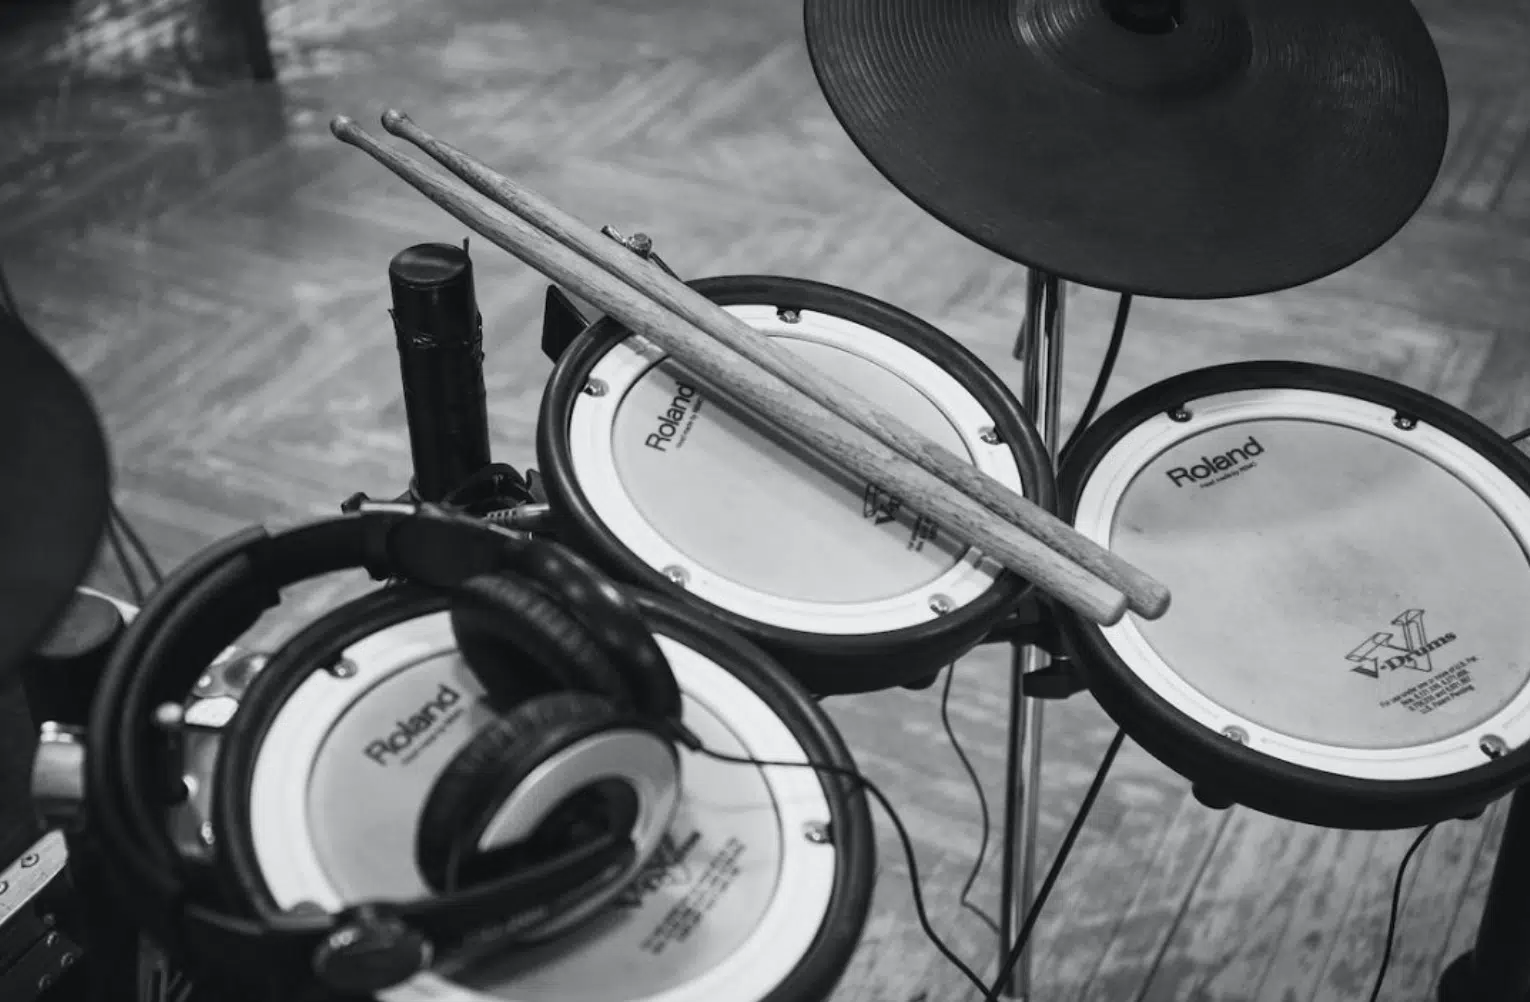
When dealing with a live-recorded drum kit, phase alignment between all the mics is what separates a boxy mess from a punchy, natural-sounding kit.
Start with the snare top and bottom mics because they’re often recorded in opposite directions, so a quick polarity inversion on the bottom mic usually locks the tone back in and prevents thin-sounding snare hits.
Next, check the overheads against the close mics.
Measure the distance from each overhead to the snare, and time-align any channel that’s more than 1–2ms off (around 44–88 samples) to kill that washy phase delay.
The final step is to align your room mics so the attack hits in sync with the close mics, but without killing the ambience.
Sometimes nudging the room mics back by 3ms brings everything into focus while preserving depth.
Stereo Imaging & Mono Compatibility
Before summing anything to mono, you should definitely check your phase alignment between left and right, especially for:
- Widened synths
- Ambient FX
- Stereo-mic’d instruments
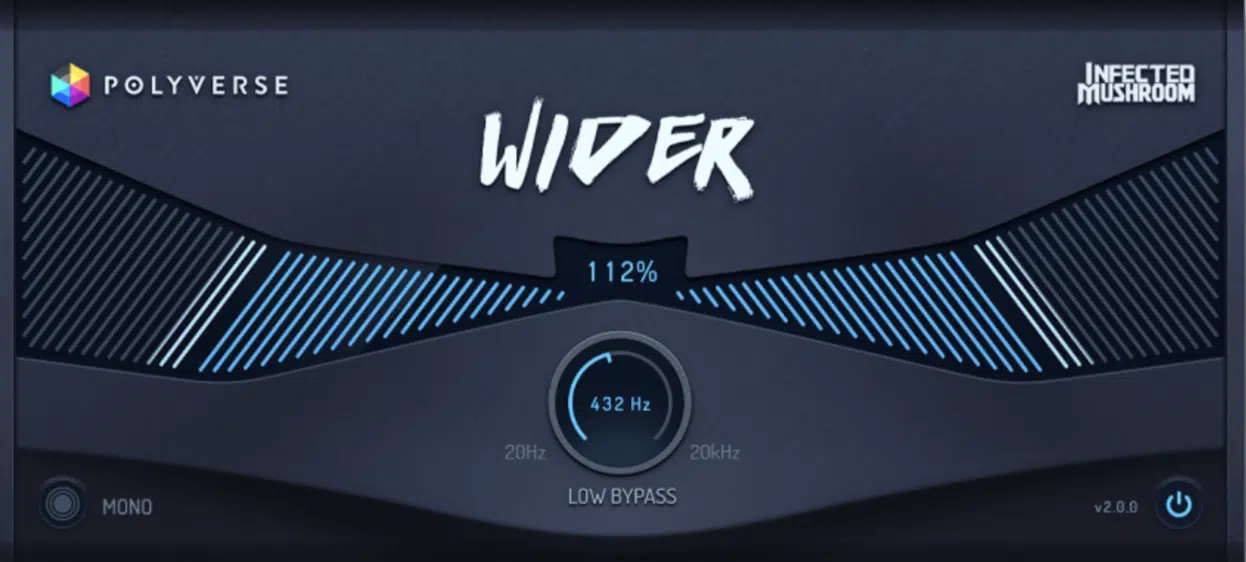
For example, a pad processed through a stereo widener like Wider 2.0 might sound huge in stereo, but dip -6dB in mono due to side-phase cancellation around 250Hz–400Hz.
Use a correlation meter like the one in iZotope Insight 2.
Remember, values close to +1 are phase-coherent, while anything below 0 can mean phase problems that affect mono playback.
Another move is to use a mid/side EQ and tame side channels in the low mids (try 2dB cuts around 300Hz with a Q of 1.2) to keep the stereo image intact while still sounding full in mono.
PRO TIP: Solo in mono frequently while mixing.
If your elements still hit with clarity and weight, you’ve likely nailed the correct phase alignment, even across wide stereo layers.
Phase and Reverb/Delay Sends
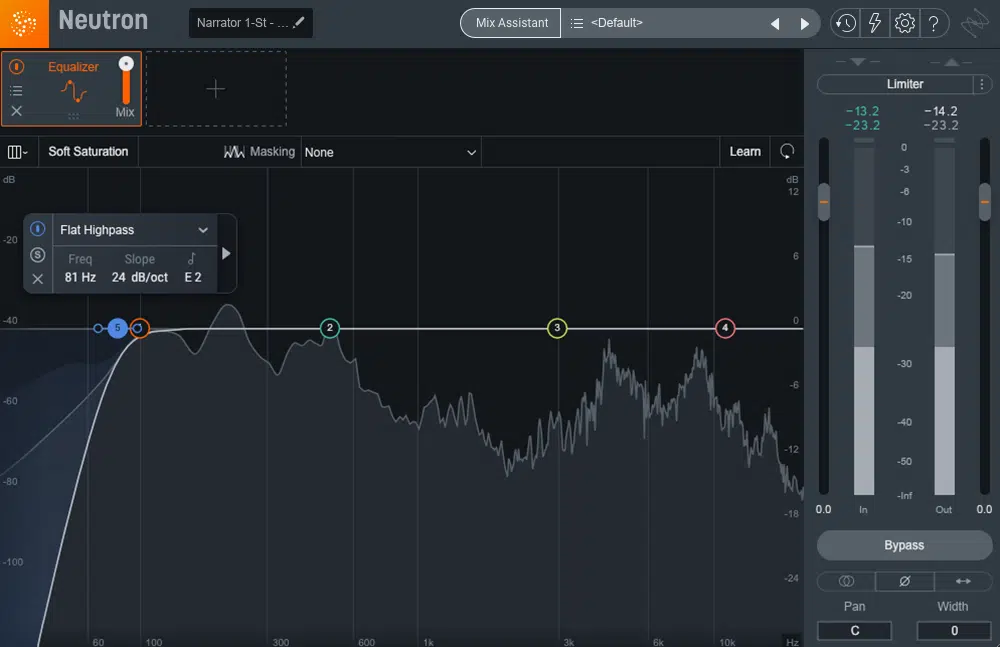
Adding reverb and delay is a staple in the production world, there’s no doubt about it, but it can sneak in phase shifts that wreck your clarity if you’re not watching for it.
For example, using a stereo hall reverb with pre-delay set to 30ms on vocals may cause comb filtering when summed with the dry signal, especially around 500Hz–1kHz.
To avoid reverb phase wash, try high-passing your send around 180 Hz and low-passing around 8kHz 一 this minimizes frequency content that clashes with the dry track while maintaining space.
Phase alignment between wet and dry is key here.
So, try inserting a sample delay (e.g., 5–10ms) on your dry track if the reverb plugin introduces even a slight arrival time difference.
For delay sends, avoid stereo ping-pong delays on mono sources unless you verify the phase relationship with a goniometer or phase correlation tool.
A good tip that I can give you is to flip the polarity on either the wet or dry track temporarily while A/B testing, and if your signal loses punch, you’ve got a phase offset and need to adjust phase using either delay or timing compensation.
Mid/Side Processing & Phase Interaction
Mid/Side (M/S) processing is obviously powerful, but if used recklessly, it’ll create major phase alignment issues, especially when you fold back to stereo or mono.
EQs like FabFilter Pro-Q 4 let you process mids and sides separately, but boosting the side channel around 1.5kHz while cutting the mid by 2–3dB can introduce an audible phase shift that weakens your overall sound when collapsed to mono.
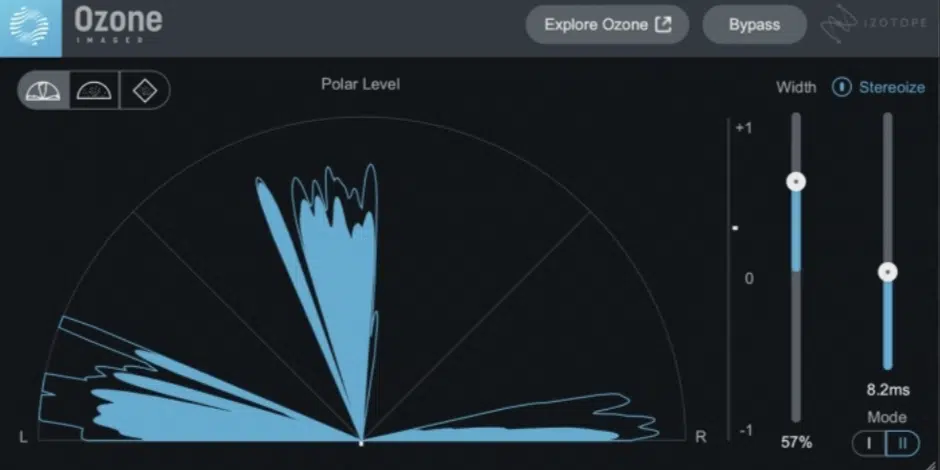
Then you’ve got imaging plugins like Ozone Imager 2, which often apply all-pass filters or micro-delays to widen elements.
And this is fine, just as long as you’re checking that the stereo image doesn’t collapse in mono or shift your transients.
And keep in mind that downmixing after M/S tweaks should always involve a phase correlation check and mono A/B…
Anything dipping below 0 usually means your side processing was too aggressive or needs phase correction.
PRO TIP: Use small increments when widening 一 boosts of +1.5dB in the side channel and minor cuts in the mid are usually safer.
Go beyond that, and you’ll probably need to apply manual phase alignment to keep everything feeling locked.
Common Phase Mistakes to Avoid
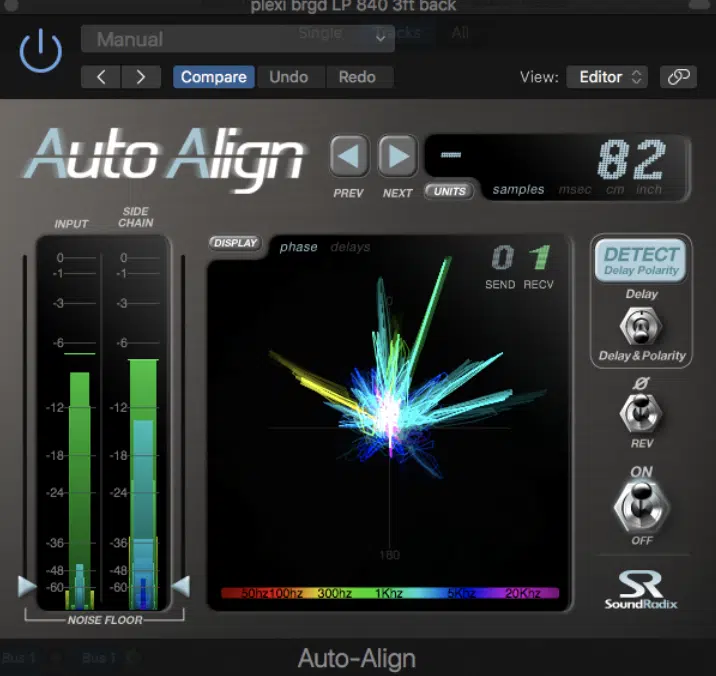
One of the biggest mistakes producers (including my students) make is over-aligning everything visually and killing the groove or stereo image in the process.
Remember, just because the waveforms look perfect doesn’t mean the phase alignment actually sounds right.
For example, if you snap every drum transient exactly to the grid and align each sample’s peaks by sight, you might accidentally cancel out essential frequency content, especially around 200Hz–600Hz, where comb filtering tends to creep in during stacking.
The same goes for vocals because lining up doubles or harmonies too tightly can make them sound sterile if you’re zoomed in too far and ignoring the feel of the performance.
This kind of over-editing can flatten your track and make it feel robotic, especially when dealing with swing or groove-heavy material like hip-hop or R&B.
Another mistake you want to watch out for is waiting until mastering to address phase issues, which can leave you scrambling with a correlation meter trying to fix collapsed width or disappearing low-end.
If the stereo field feels off or your mix loses power in mono, it’s almost always better to fix it at the source 一 recording, layering, or bussing.
Not with EQ tricks or widening plugins at the end.
You can’t expect a stereo imager or linear phase EQ to recover that punch that was canceled out 30 tracks ago due to a bad phase offset.
Relying too heavily on visual tools like oscilloscopes or frequency analyzers without trusting your ears is another trap.
Just because you see two snares that look identical doesn’t mean they’re in phase…
A 20-sample delay (about 0.45ms) between layers can cause serious phase problems, even if they look locked on the screen.
In some cases, rotating the phase slightly or nudging one layer by small increments (like 5–10 samples) actually sounds better, even though it looks “off.”
PRO TIP: When in doubt, switch to mono and trust your ears. If something feels hollow, thin, or lacks energy, you’re likely dealing with a phase alignment issue.
Start by checking kicks, vocals, or layered bass tracks, and don’t be afraid to experiment with polarity inversion, sample delay, or phase rotation until the sound locks in, not the waveform.
Let the mix breathe. You’re after feel and clarity, never perfect math.
How Phase Problems Affect Mastering
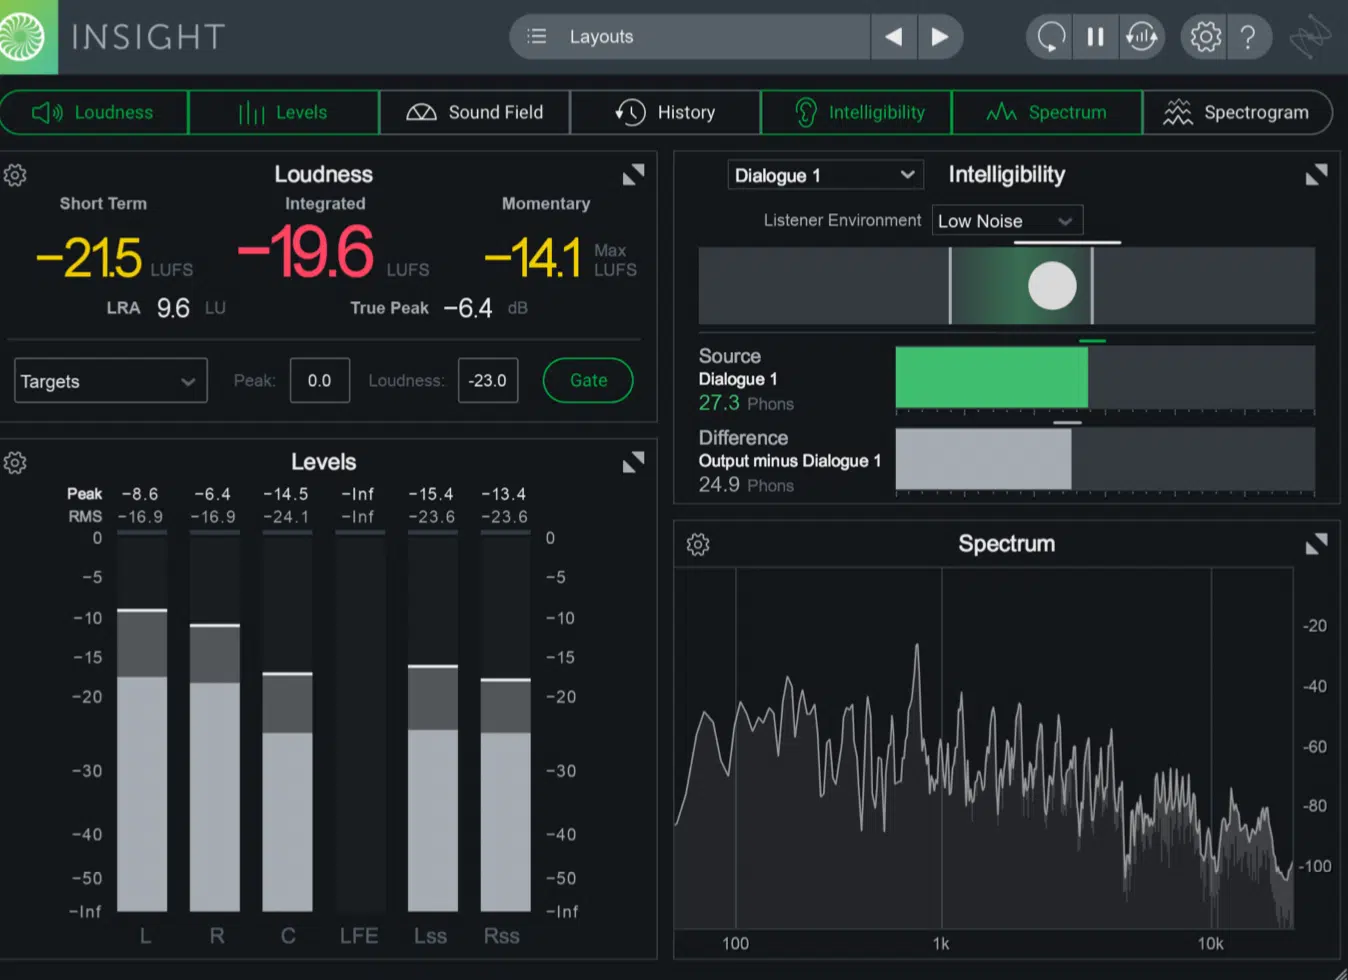
Now let’s talk about how phase problems affect mastering for a second because mastering exposes every last flaw in your mix, and if your phase alignment is even slightly off, the result is a less punchy, less powerful master.
For example, if you’re working with a stereo synth layer that’s been widened using a micro-delay of 15ms on one side, you’ll probably run into a dip in your mono compatibility once that signal hits your limiter.
The mid-channel might feel solid, but if your side information includes comb filtering from earlier widening tricks or sloppy edits, it won’t be good.
The stereo image will get warped, and the limiter will respond unevenly.
So, use tools like iZotope Insight’s correlation meter or Voxengo Span to check for anything dipping below +0.2 (during choruses where the most energy stacks up).
PRO TIP: Before committing to a final bounce, do a null test 一 duplicate your full mix, flip the polarity on one version, sum to mono, and anything that disappears is being affected by bad phase alignment and needs a second look.
Super Creative Uses of Phase Shifts
Once you’ve nailed clean, punchy phase alignment, you can actually flip the script and start breaking the rules. These creative tricks use phase shifts and delays not to fix problems, but to open up new textures, stereo movement, and depth that would otherwise be impossible with traditional panning or EQ.
Intentionally Misaligned Layers for Texture
Slight time offset between two identical audio layers can turn a sterile synth or vocal into something that sounds edgy, hazy, and jam-packed with dimension.
For example, duplicate a vocal harmony and delay the copy by 0.6ms (about 26 samples at 44.1kHz) and the two tracks will start subtly phasing.
This creates an airy tone that’s somewhere between chorus and doubling.
And if you filter the delayed copy using a low-pass at 3.5kHz and apply stereo spread, the phase shift becomes even more complex.
You’ll get some serious depth without stepping on the main vocal, which is great.
This works super well on pads, textures, and ambient FX (anything that doesn’t need sharp transients but benefits from tonal movement, really).
PRO TIP: Combine this trick with saturation on just the delayed layer.
The non-linear response adds unpredictable phase interactions that sound wide and warm, but still respond well in mono if you keep the delay under 1ms.
Comb Filtering as a Sound Design Tool
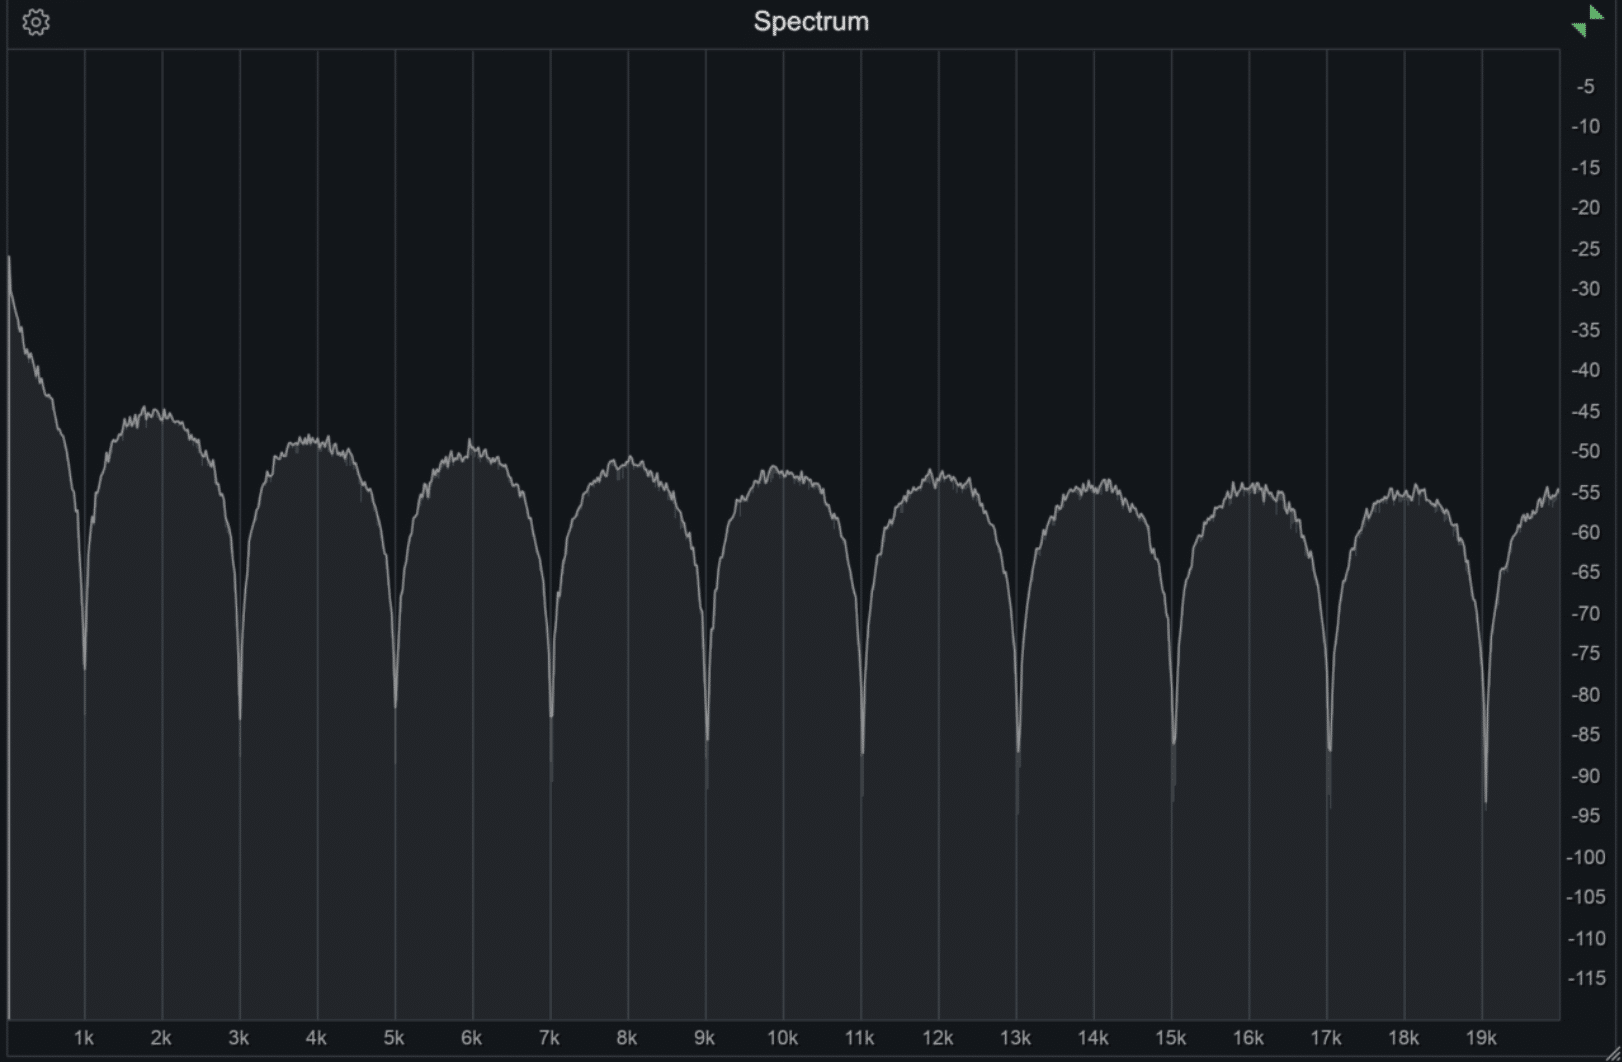
While comb filtering is usually something you avoid during mixing, it can be a sick sound design technique when used properly and in moderation.
You can create a custom comb filter effect by duplicating a sound, like a vocal chop, and delaying it by 1.7ms, then slowly modulating the delay time between 1.5ms and 2ms to sweep the notches through the frequency spectrum.
This introduces cancellation nodes every few hundred Hz, depending on the delay 一 for example, 1ms = notches every 1kHz, while 5ms = notches every 200Hz.
You can use Ableton’s Simple Delay with feedback at 0%, dry/wet at 100%, and phase inversion enabled to sculpt these cancellations with razor-sharp precision.
You can even automate the delay time in small increments (like 0.1ms sweeps) for a synthetic, robotic phasing effect.
One that moves across the tonal range while keeping the phase alignment of your dry signal untouched.
Using Phase Offsets to Build Movement
You can create subtle stereo animation by misaligning modulation cycles or duplicating LFO-affected tracks with slight phase offsets.
For example, apply the same volume LFO to two identical pads.
Then, delay one by 0.3ms and apply a slightly different attack shape to create phase-based panning movement without actually using pan knobs.
This works great with ShaperBox 3, where you can offset one lane by 90° using the phase control and get rhythmic stereo motion that adds groove and depth to flat sounds.
It’s also super effective on percussion…
Delay one hi-hat by 12 samples and low-pass it at 8kHz, and you’ll get a rolling feel with movement in the stereo field, all while keeping your transients clean.
I also recommend that you try this with ambient FX or reversed impacts.
To do so, simply delay one channel by 0.5ms, add a slight detune (1–2 cents), and you’ll get a swirling, phase-rich tail that feels alive and never static.
Linear Phase vs Minimum Phase Plugins
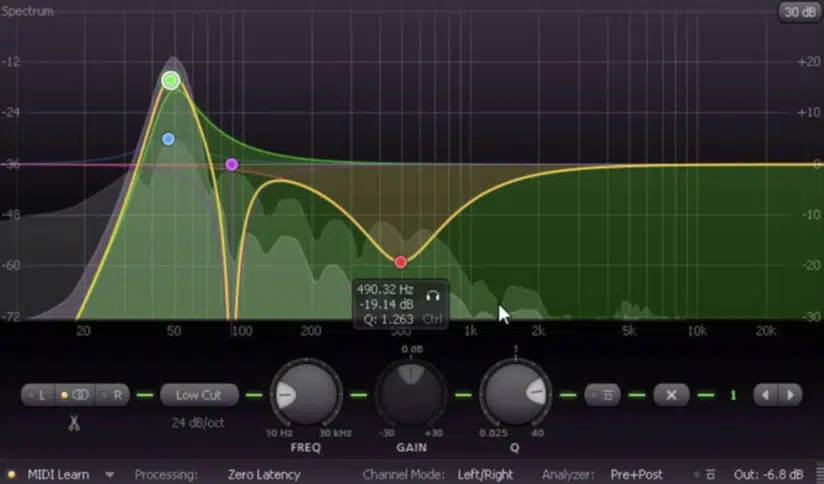
Linear phase EQs preserve the timing and phase relationships of all frequencies by introducing uniform latency across the full spectrum.
Perfect for mastering and parallel chains.
For example, in Pro-Q 4, enabling linear phase mode on a band introduces latency between 2048 and 8192 samples, based on your slope and sample rate.
This can drastically affect the delay and response of real-time processing.
And remember that minimum phase EQs don’t introduce global delay but shift phase around the affected frequency.
For example, a high-shelf boost at 8kHz might introduce a 90° phase shift starting as low as 2kHz 一 depending on Q and gain.
That’s why minimum phase is great for quick tone-shaping in context, but risky for stacked buses where you need perfect phase alignment between parallel paths.
PRO TIP: If you’re stacking parallel compression with a send-return setup, use linear phase EQs on both channels to avoid any pesky smearing.
Or, keep all EQ on the master bus to avoid phase mismatches altogether, dealer’s choice.
Advanced Techniques for Phase Alignment
Once you’ve mastered the basics of nudging, flipping polarity, and using visual meters, it’s time to start experimenting with deeper phase alignment plugins. So, to end things, I’m giving you some of the sickest advanced techniques that involve resampling, phase rotation, and automation to give you total precise control over both tone and movement.
Nudging vs Resampling vs Phase Rotation
When you’re dialing in phase alignment, sometimes nudging a track by a few samples is all it takes, and other times, you’ll need to bounce or rotate to lock things in tighter.
For example, if you’ve got two tracks (like a vocal double and lead) and the arrival time is slightly off by 12 samples (roughly 0.27ms), you can drag the double forward manually to line up the transients and instantly remove the hollow feel.
But if the phase shift is baked into a synth layer with complex modulation, it’s smarter to resample and line up by hand.
Rather than automate timing changes that might affect other automation on the track.
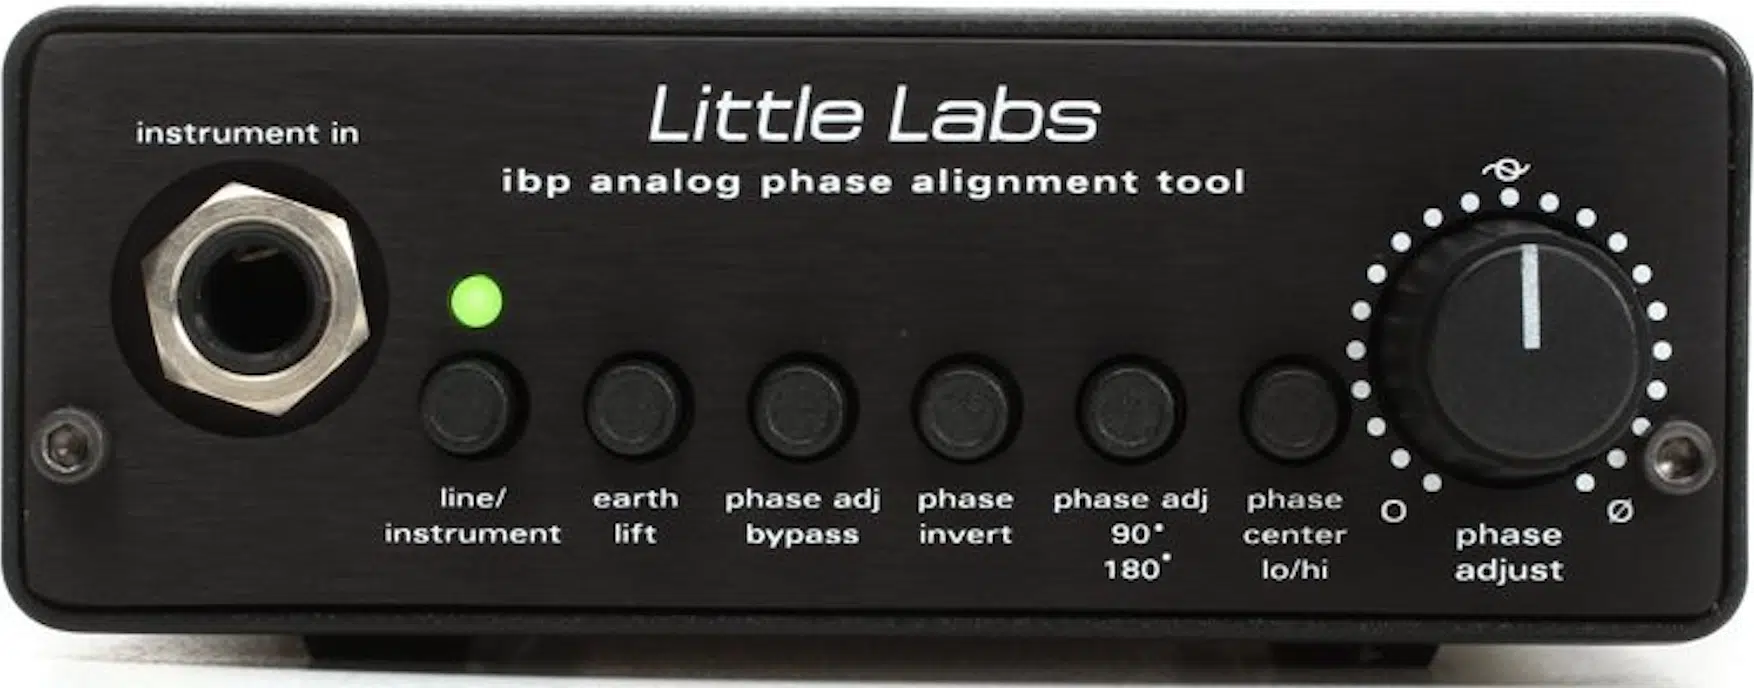
Phase rotation is another underrated move… Using something like the Little Labs IBP plugin, you can rotate the waveform without affecting its time alignment.
It’s perfect when you’re dealing with low-end sound waves or layered 808s and kicks that were recorded from an opposite direction.
PRO TIP: You can rotate the phase by 90° or 180° to test which range hits hardest, especially when working with distorted bass.
It’s a subtle but epic way to restore loudness and body to your frequency content without EQ or compression.
Layering with Polarity in Mind
When you’re layering sounds, especially ones with similar frequency or low-end energy, you’ve gotta think about polarity inversion from the very start.
Say you’re working with a kick that’s got a clean attack and layering it with a distorted sub hit.
If their waveforms are opposite in polarity and one was recorded from a mic pointed in the opposite direction 一 you’re going to get instant phase cancellation.
Yes, even if they’re perfectly time-aligned.
To fix it, always check polarity first by flipping one layer using your DAW’s utility plugin, for example, in Ableton Live, you can just load the Utility device and hit the “Phz Invert” switch.
If the low-end tightens up and the stereo image locks into place, you’ve likely solved a phase alignment problem before it even caused a headache.
PRO TIP: Use a high-pass filter on one of the layers at around 30–40 Hz to clean up the rumble and minimize unnecessary frequency overlap.
This helps your kick and bass hit with more impact while reducing phase mud.
Using Automation for Dynamic Phase Control with Multiple Mics
If your phase alignment sounds good at one part of the song but not so much during transitions or drops, chances are you need dynamic phase correction.
That’s where automation comes in.
You can, for example, automate a sample delay plugin (like Logic’s Sample Delay) to apply a real-time offset of 0.3ms (about 13 samples) only during specific sections.
This could be like when a new synth layer or vocal stack kicks in.
It lets you stay locked-in during verses, then shift phase ever so slightly during a drop for extra width or separation.
Just be careful not to break the phase relationship with other channels.
And if you’re using a mobile device or mixing on headphones, always double-check in mono before printing 一 small automation moves that sound good in stereo can mess with mono compatibility if not double-checked.
Final Thoughts
And there you have it: everything you need to know about phase alignment and how to use it like an absolute boss.
By using these legendary tips, tricks, and techniques, you’ll be able to clean up your mixes, tighten your low-end, and preserve the width in every single layer.
Plus, you’ll never have to worry about hollow snares, weak bass, or collapsing stereo width ever again (think of how great that would be).
And as a special bonus, I’d like to hook you up with the absolute sickest Sample Packs in the game.
Regardless of your genre, style, or vibe, you’re getting the most professional, high-quality sounds in the entire industry.
Every single pack was created by elite producers and sound designers, and they’re 100% royalty-free, so you can use them in your tracks however you want.
From slapping 808s and punchy one-shots, to custom MIDI basslines, melody loops, and genre-specific chord progressions, it’s all right here for the taking.
Believe me, these sounds will instantly level up your beats and help you dominate the competition all day, every day.
Bottom line, when it comes to phase alignment, you always have to listen critically and stay intentional with every move, that’s the best advice I can give to you.
This way, you can keep your layers tight, your punch intact, and get back to what matters most 一 knocking out sick beats.
Until next time…


Leave a Reply
You must belogged in to post a comment.