Epic hi-hat rolls don’t just happen… They require precision, creativity, and a solid understanding of rhythm.
Plus, you’ll need to know the ins and outs of your DAW, automation, and effects processing, too.
This way, your hi-hat rolls will always stand out and keep listeners engaged.
As a music producer, knowing how to create hi-hat rolls like a boss is key, which is why we’re breaking down everything you need to know, like:
- Complex hi-hat patterns ✓
- Automation techniques ✓
- Triplets and polyrhythms ✓
- Swing and groove ✓
- Advanced effects processing ✓
- Pitch shifting and modulation ✓
- Layering patterns ✓
- EQ and compression ✓
- Multi-band effects ✓
- Unconventional techniques/tricks ✓
- Much more about how to create hi-hat rolls ✓
By knowing how to create hi-hat rolls, it won’t only elevate your tracks but also enhance your overall music production skills.
This way, you’ll keep your tracks are always fresh and on point 一 never basic or boring (because, let’s be honest, nobody wants that).
Plus, you’ll have that professional edge that will really take your hi-hat rolls to the next level.
Table of Contents
- What’s So Special About Hi-Hat Rolls?
- How to Create Hi-Hat Rolls: Step-by-Step
- Step 1: Create Complex Hi-Hat Patterns
- Step 2: Use Automation for Dynamic Changes
- Step 3: Apply Triplets and Polyrhythms
- Step 4: Add Swing and Groove
- Step 5: Use Advanced Effects Processing
- Step 6: Experiment with Pitch Shifting and Modulation
- Step 7: Layer Multiple Hi-Hat Patterns
- Step 8: Fine-Tune with EQ and Compression
- Bonus: Additional Tips (Advanced)
- Final Thoughts
What’s So Special About Hi-Hat Rolls?
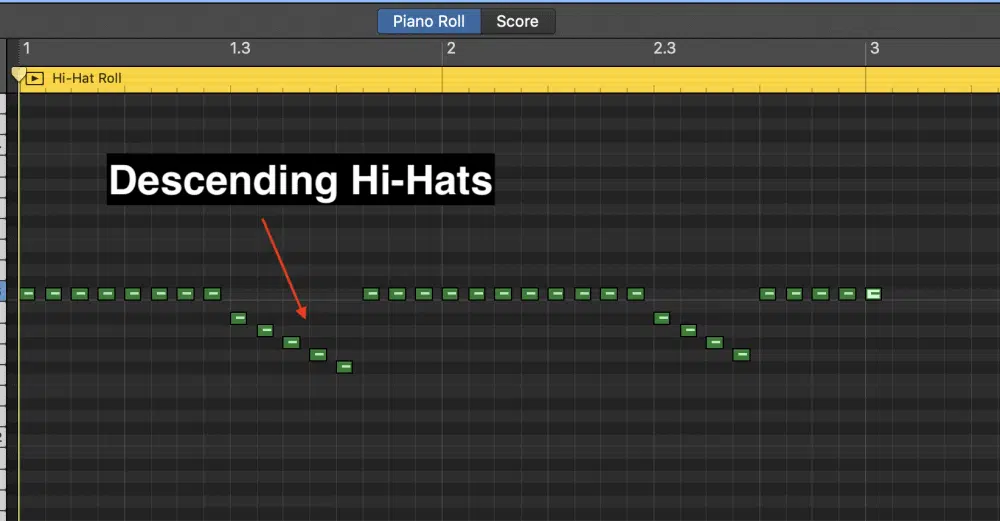
Hi-hat rolls are a key element in many modern music genres (especially in trap music) because they add a distinctive rhythm people almost get hypnotized by.
Unlike simple hi-hats, hi-hat rolls introduce intricate patterns and rapid note divisions like 1/32 or 1/64 一 making your beats more complex and interesting.
You can use different velocity changes, pitch shifts, and automation to create dynamic and evolving hi-hat rolls.
And, hi-hat rolls can vary in speed, intensity, and texture, so they pretty much give you endless creative possibilities to make your tracks unique.
We’ll be breaking everything down throughout the article (in detail) so you get a solid understanding of how to create hi-hat rolls.
How to Create Hi-Hat Rolls: Step-by-Step
Let’s break down the process of how to create hi-hat rolls step-by-step. These steps will help you add professional-sounding hi-hat rolls to your tracks and play around with different techniques so you can really shine with every beat.
Step 1: Create Complex Hi-Hat Patterns
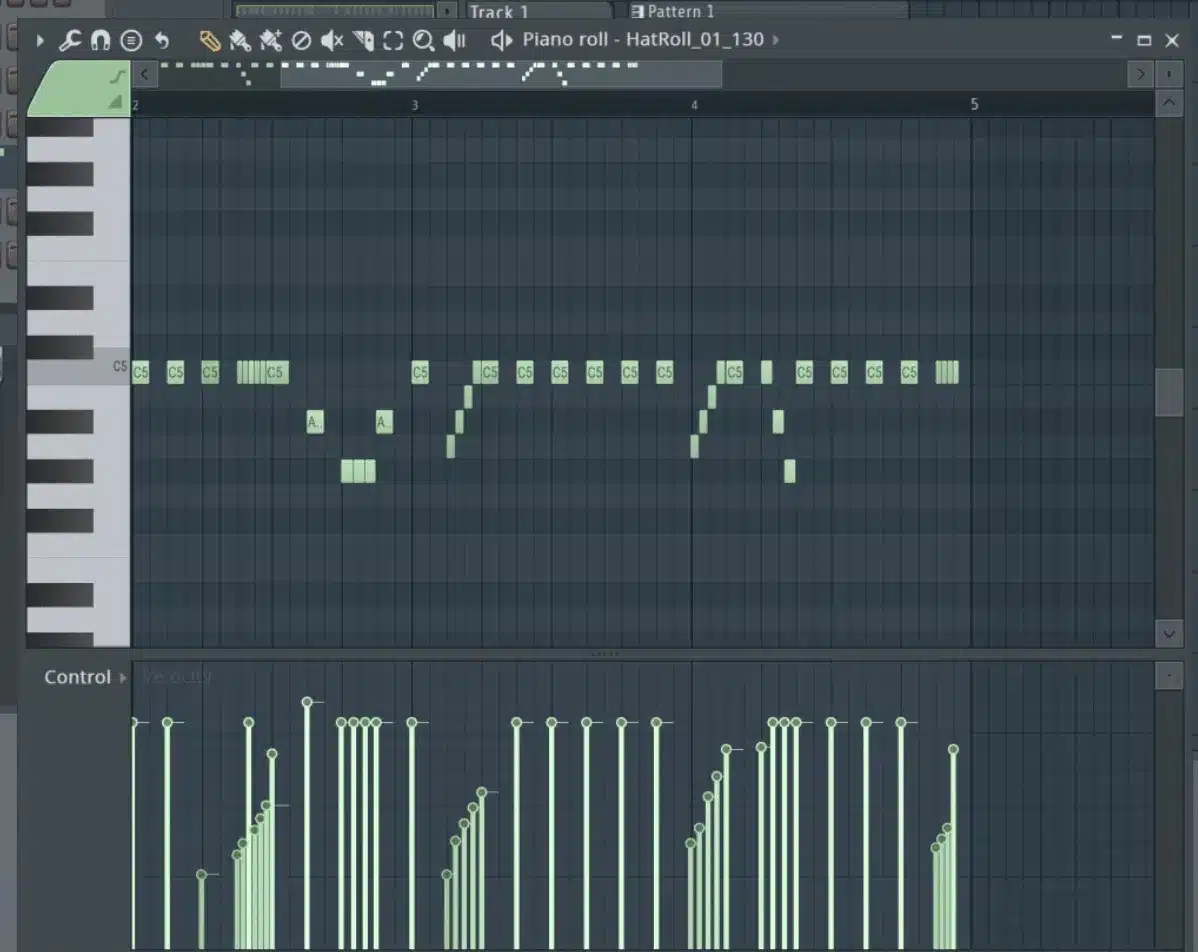
Creating complex hi-hat patterns involves using intricate note divisions, like 1/64 or 1/128, for rapid and precise hi-hat rolls.
For example, in the piano roll of your DAW (like FL Studio), set your grid to 1/64 and fill in the hi-hat notes across a two-bar loop so each note is spaced equally.
Layering multiple hi-hat samples, such as one pitched at -2 semitones and another at +2 semitones, can add even depth and variation to your patterns.
Then, you’ll want to adjust the velocity of each note…
To do so, set the velocity of main hits to 100, ghost notes to 60, and filler notes to 30 一 creating a dynamic (and realistic) pattern.
My advice is to slightly offset the start time of some hi-hat notes by 5-10 milliseconds by manually shifting them in the piano roll to add a human feel to the pattern.
This will make your hi-hat rolls sound polished and professional, as well as enhance the overall groove of your beat, which is always a plus.
Step 2: Use Automation for Dynamic Changes
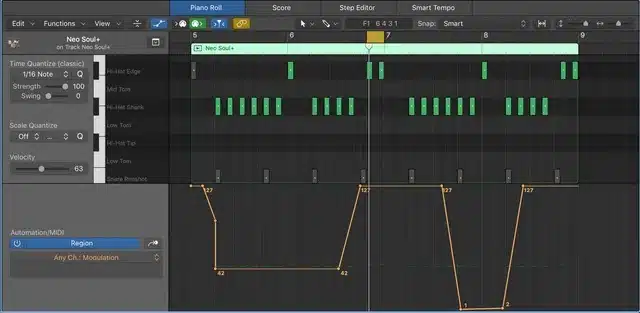
When you’re learning how to create hi-hat rolls, automation is going to be a huge part of it because automation in your hi-hat rolls adds dynamic changes.
It will keep your listeners tuned in all the way through.
You’ll want to automate the pitch of your hi-hat rolls by setting an LFO to modulate the pitch between -3 and +3 semitones over a 4-bar loop (creating an evolving pattern).
You can also automate the panning of your hi-hats to move from left to right by setting a sine wave automation curve with a frequency of 0.5 Hz to add a sense of movement.
Adjust the velocity of individual hi-hat hits using automation 一 for example, set the velocity to transition smoothly from 50 to 100 over the course of a bar.
Also, use an automation curve to gradually increase the reverb send level from 0% to 50% during a build-up, then decrease it back to 0% before the drop.
PRO TIP: Apply a high-pass filter automation to your hi-hat rolls, gradually increasing the cutoff frequency from 200 Hz to 5 kHz over a few bars to create a rising effect.
When you’re learning how to create hi-hat rolls, this technique will add a polished and professional touch to your hi-hat rolls to make them stand out in your mix.
Step 3: Apply Triplets and Polyrhythms

Adding triplets and polyrhythms can bring a unique and interesting rhythm to your hi-hat rolls that can seriously up your skills.
- Triplets are patterns where three notes are played in the space of two beats 一 creating a rolling and swinging feel.
- Polyrhythms involve layering different rhythmic patterns, such as 3/4 and 4/4, to create complex and syncopated grooves.
To apply triplets, set your grid to 1/8T or 1/16T in the piano roll and fill in the hi-hat notes to create a triplet feel that everybody loves.
For example, place three hi-hat notes evenly spaced within the span of one beat to create a rolling triplet pattern.
Polyrhythms involve overlapping different rhythmic patterns…
My advice is to try combining a 3/4 hi-hat pattern with a 4/4 kick and snare rolls/drum pattern for a syncopated groove.
Side note, using snare rolls and snare drums in conjunction with your hi-hat patterns can add complexity and depth to your rhythm/melody (a drum machine is perfect for this).
Adjust the velocity of each hi-hat note within the triplet or polyrhythm pattern to add dynamics 一 try setting velocities to 70, 50, and 90 for consecutive hits.
Also, using triplets in hi-hat rolls during build-ups or transitions can create a sense of tension and anticipation.
It will enhance the overall impact of your track (it just makes sense).
Step 4: Add Swing and Groove
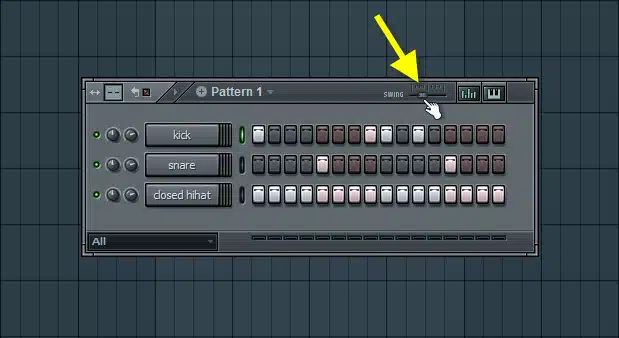
Adding swing to your hi-hat rolls can make them feel more natural and rhythmic, and in my opinion they are a must.
To add swing, adjust the swing or groove settings in your DAW’s step sequencer or piano roll (FL Studio has the best piano roll; just sayin’).
For example, set the swing amount to 50% to create a noticeable off-beat feel.
Apply swing specifically to the hi-hat rolls by selecting the hi-hat notes in the piano roll and adjusting the swing percentage to your preference; it’s super easy.
You’ll also want to adjust the timing of the hi-hat notes manually by shifting every second hit slightly off-grid to create a shuffled feel.
In FL Studio, you can use the Quantize tool’s swing parameter for precise adjustments.
PRO TIP: Listen to trap music tracks for inspiration and mimic the swing and groove patterns to create a similar feel in your own music production workflow.
This will make things more engaging and lively, which is what you want.
Step 5: Use Advanced Effects Processing
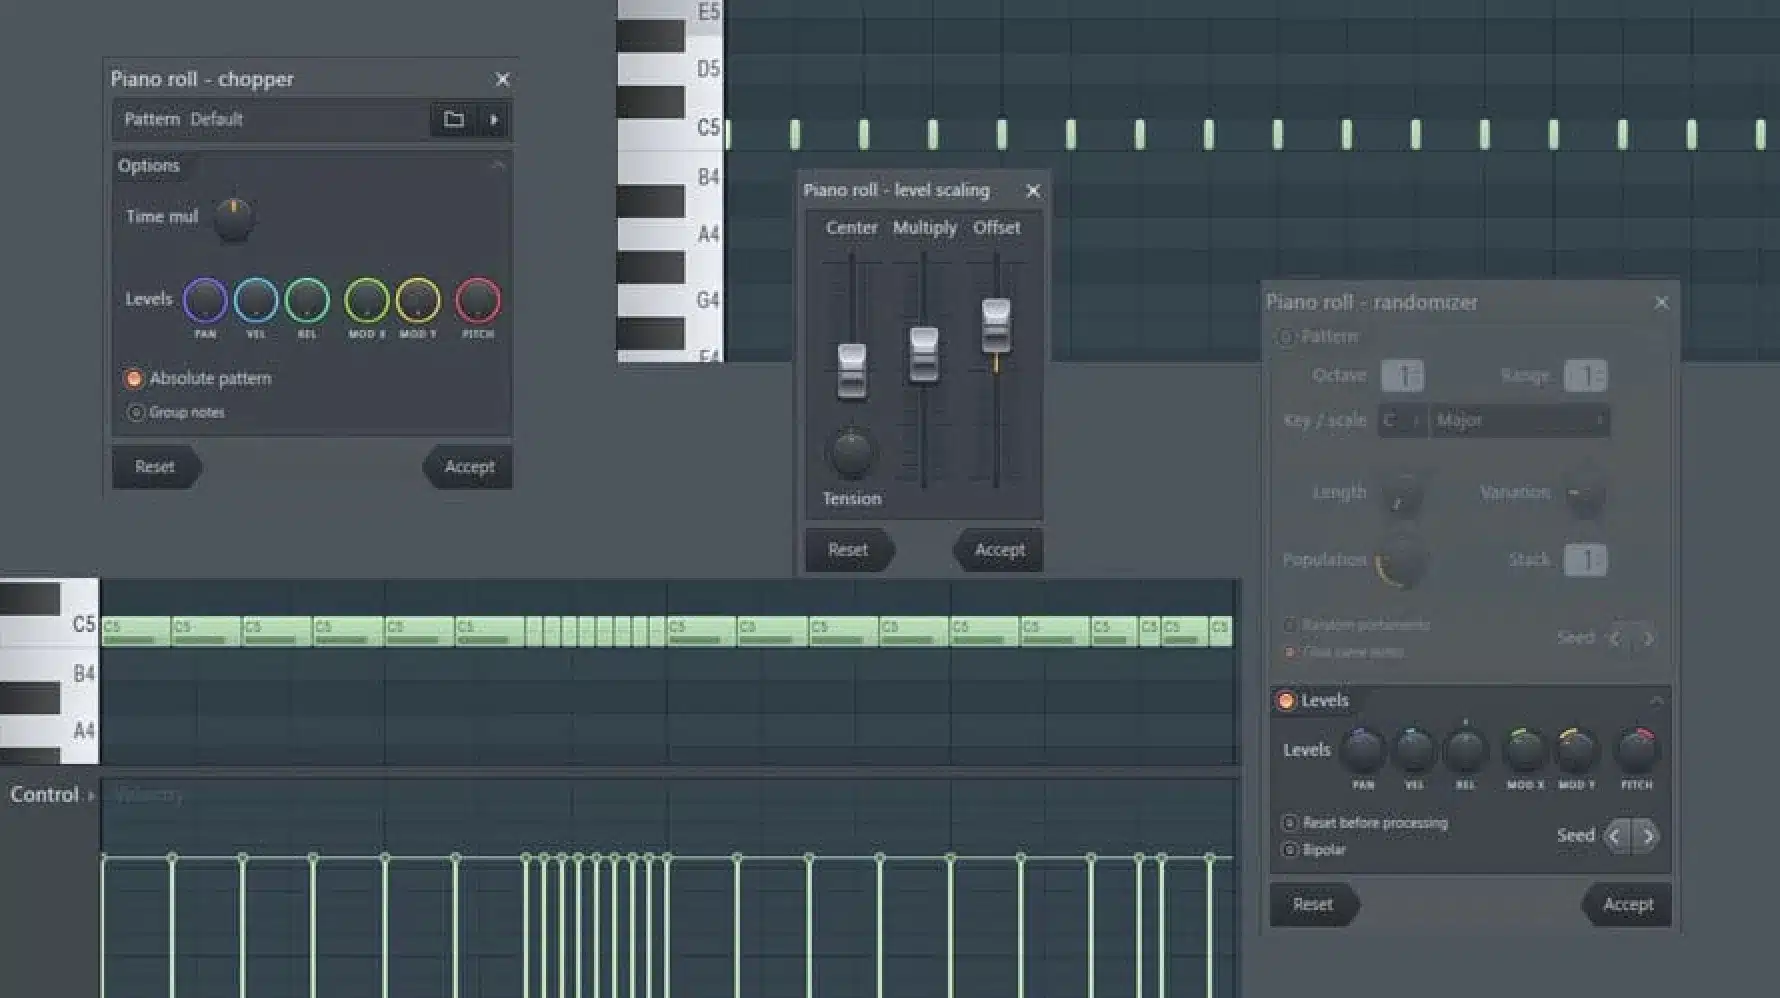
Using advanced effects processing on your hi-hat rolls can elevate the overall sound and add unique textures to your patterns.
Start with applying a slight reverb effect to give your hi-hats a sense of space, so make sure to set the reverb decay time to 0.8 seconds and the mix level to 30%.
Adding a bit of delay can create interesting echoes.
Use a delay time of 150 ms for higher frequencies and 300 ms for lower frequencies with a feedback setting of 25%.
Don’t forget to experiment with distortion or saturation to add grit and character to your hi-hats.
Try a subtle distortion effect with a drive setting of 10% and a mix level of 20%.
Use a high-pass filter to remove unwanted low frequencies, setting the cutoff frequency to 200 Hz and the resonance to 1.5.
Automate these effects for dynamic changes throughout your track…
For example, gradually increase the reverb mix level from 0% to 50% during build-ups and reduce it back to 0% after the drop (you’ll hear this in trap music all day).
By fine-tuning these advanced effects, you can create a more polished and professional-sounding hi-hat roll.
Step 6: Experiment with Pitch Shifting and Modulation

Experimenting with pitch shifting and modulation can add even more depth and complexity to your effective hi-hat rolls.
Using a pitch-shifter plug-in (whichever one you like), set the pitch to vary between -2 and +2 semitones over a 4-bar loop to create an evolving sound.
Apply an LFO to modulate the pitch of your hi-hats…
Set the LFO rate to 0.5 Hz and the depth to 2 semitones for subtle pitch variations.
Combining pitch shifting with other modulation effects like chorus can add richness (play around with a chorus effect with a depth setting of 30% and a mix level of 40%).
Also, use frequency modulation to create distinctive textures 一 set the carrier frequency to 1 kHz and the modulator frequency to 200 Hz with a modulation index of 1.
Automate these modulation effects to create dynamic changes throughout your track, such as increasing the LFO rate from 0.2 Hz to 1 Hz during build-ups.
It will add some extra character to your hi-hat rolls, so don’t overlook this step when you’re learning how to create hi-hat rolls because it will help your beat shine.
Step 7: Layer Multiple Hi-Hat Patterns
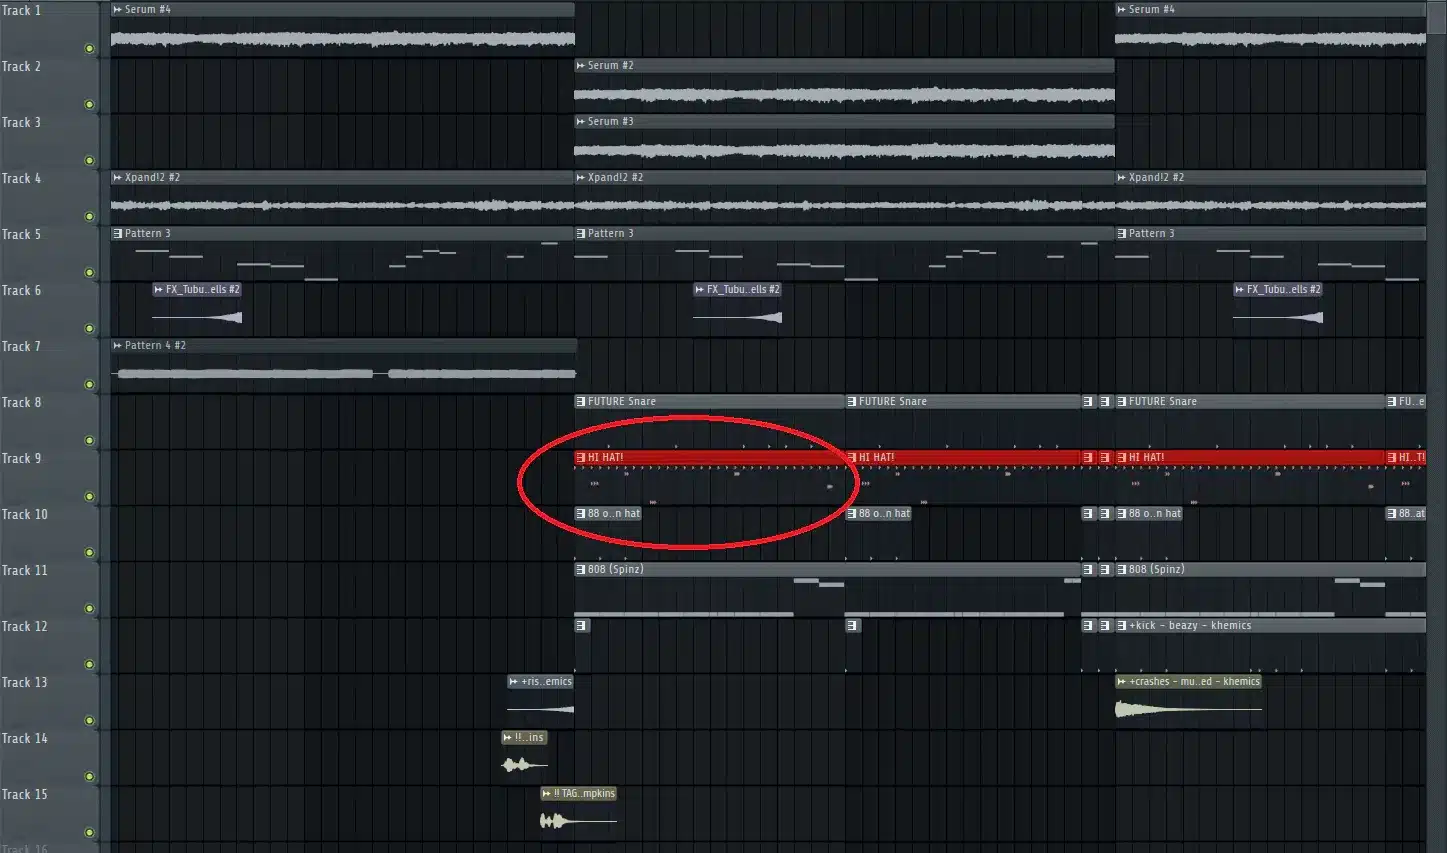
Layering multiple hi-hat patterns can add depth and complexity to your beat.
Start by creating a primary hi-hat pattern with a fast tempo, such as 1/32 notes, and spread it over a two-bar loop.
Then, bring a secondary hi-hat pattern with a different rhythm to the table, such as 1/16 notes, and pan it slightly to the left to create stereo width.
Add a third hi-hat pattern with 1/64 notes and pitch it up by +3 semitones for a contrast in tonality.
Adjust the velocities of each hi-hat layer for natural dynamics:
- The primary pattern to 80% velocity
- Secondary to 60%
- Tertiary to 50%
I suggest using a low-pass filter with a cutoff frequency of 5 kHz on one layer to blend it into the mix better.
It will guarantee that your hi-hat rolls are intricate and captivating and that the rhythm of your song is on point.
Step 8: Fine-Tune with EQ and Compression
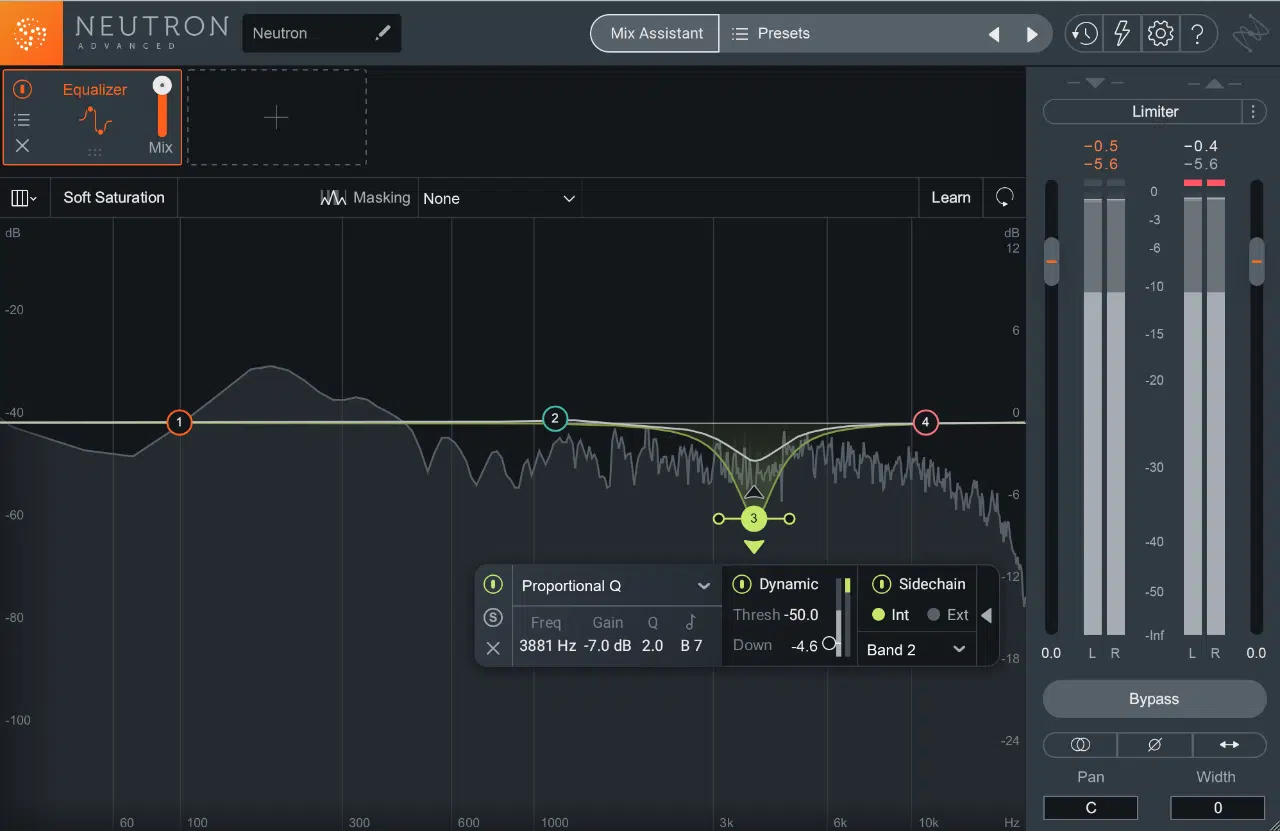
When you’re learning how to create hi-hat rolls that are super captivating, you’ll want to fine-tune your hi-hat rolls with EQ and compression.
It will give you even more polish and cohesion to your mix.
Start by using an EQ to cut muddy frequencies, setting a high-pass filter at 200 Hz to remove unwanted low-end rumble.
Use a notch filter to attenuate any harsh frequencies around 7 kHz by -3 dB.
Then, make sure to boost higher frequencies, like 10 kHz, by 2 dB to add brightness (this helps the hi-hats stand out).
Also, apply light compression to glue the hi-hat pattern together 一 set the ratio to 2:1, threshold to -15 dB, attack to 10 ms, and release to 50 ms.
Also, applying parallel compression can add punch while retaining the natural dynamics, blending the compressed signal back with the original at a 50:50 ratio.
This way, your hi-hats will sound extra polished and professional.
Bonus: Additional Tips (Advanced)
Now that you’ve mastered the basics of how to create hi-hat rolls, let’s dive into some advanced tips to take your hi-hat rolls to the next level. They’ll help you lay down unique, professional hi-hat patterns in your personal style that will certainly impress. Whether you’re prefer to produce trap music or are just learning how to create hi-hat rolls, they’ll seriously help (like everything else we’ve mentioned so far).
-
Use Multi-Band Effects
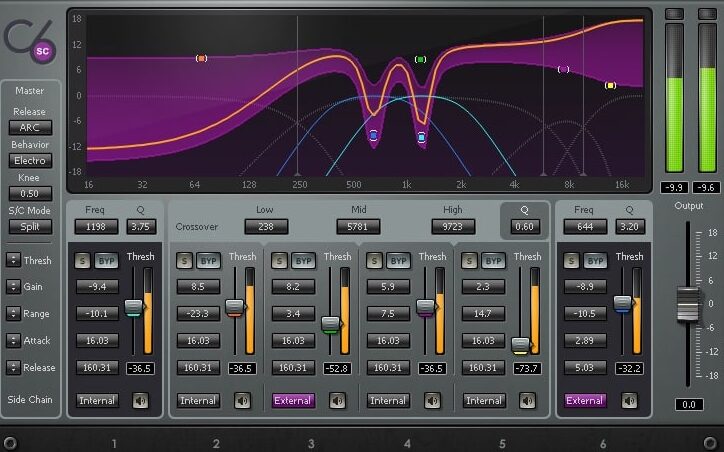
Using multi-band effects on your hi-hat rolls adds depth and precision to your sound.
You’ll want to start by applying a multi-band compressor to your hi-hats, dividing the frequency spectrum into three bands:
- Low (20 Hz – 200 Hz)
- Mid (200 Hz – 5 kHz)
- High (5 kHz – 20 kHz)
Set the compression ratio for the low band to 2:1, the mid band to 4:1, and the high band to 3:1, with a threshold of -10 dB for each band.
You can use multi-band distortion to add character 一 try a subtle overdrive on the mid band with a drive setting of 20% and a mix level of 30%.
NOTE: Apply multi-band reverb, setting a very short period of decay time (0.5 seconds) for the low band, a medium decay time (1.5 seconds) for the mid band, and a longer decay time (2.5 seconds) for the high band, to create a lush and spacious effect.
-
Automating an Arp for Unique Hi-Hat Rolls
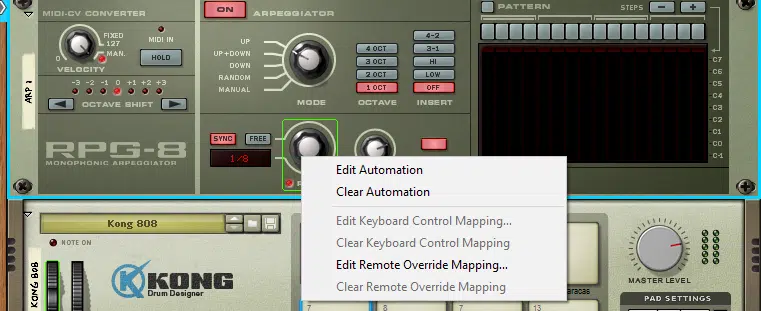
Automating an arpeggiator (arp) can create unique and intricate hi-hat rolls, and it’s one of my absolute favorite techniques.
Set up an arp on your hi-hat track with a pattern of 1/16 notes and a gate time of 50%.
Create an automation curve for the arp rate 一 gradually increasing it from 1/16 to 1/32 over four bars for a progressive roll effect.
You can also automate the pitch of the arp actually, shifting it up and down by 3 semitones to add variation.
Don’t forget to adjust the velocity of the arp notes with automation, starting at 50% and increasing to 100% over the course of a bar.
If you’re looking to learn how to create hi-hat rolls that are complex and have the perfect amount of movement, this one’s for you.
-
Experiment with More Unconventional Techniques

Experimenting with unconventional techniques can lead to unique and creative hi-hat rolls.
Use granular synthesis to break down your hi-hat samples into tiny grains 一 set the grain size to 50 ms and the overlap to 4 grains for a glitchy effect.
Apply a spectral freeze to hold specific frequencies in your hi-hat rolls, setting the freeze duration to 1 second for a stuttered sound (super dope).
Use frequency shifting to move the entire hi-hat spectrum up or down by 100 Hz, which adds an unusual pitch shift.
Combine these techniques with traditional processing like EQ and compression to create a balanced yet experimental sound, which is one of my key tricks.
These unconventional move can bring fresh and innovative elements to your beat (and up your music production skills in the process).
-
Bonus Pro Tip

If you have a MIDI keyboard in your music production setup, a cool way to create rolls is by quickly inputting MIDI notes with very short intervals.
In your DAW (e.g., FL Studio), go to the top left corner of the piano roll and press ALT to activate grid-free mode, which lets you to place notes precisely where you want them.
For example, you can manually input two notes per beat, with one note set to a velocity of 80 and the other at 50 for a more dynamic feel.
For even different sounds, apply a slight pitch shift and set one note to -3 semitones, the other to +3 semitones.
As you hear the rest of all the changes, play around with the timing of the notes so they are about 5-10 milliseconds apart to create a natural human feel.
Remember, you have a unique style, and I hope you remember to incorporate it with every move you make.
Final Thoughts
And there you have it: everything you need to know about how to create hi-hat rolls that aren’t basic or boring.
By having the sickest hi-hat rolls, you’ll successfully grab the listener’s attention and keep them engaged throughout.
This way, your tracks will sound polished and professional, and stand out in the super crowded music production world.
Plus, by using the pro tips we talked about, you’ll seriously elevate your beats and be able to show off your unique style.
And, your hi-hat rolls will always be dynamic and interesting 一 adding a fresh layer of creativity to your tracks that is always a plus.
As a special bonus, you’ve got to check out the most mind-blowing Free Hi-Hat Sample Pack in the game.
It includes 10 perfect MIDI hi-hat rolls that are the best way for you to instantly create perfect drum patterns and make your tracks addictive.
I mean, come on, a lackluster drum pattern is never going to capture the attention of the industry, am I right?
And yes, they were all created by the world’s best producers and are all 100% royalty-free, so feel free to use them however you like.
By mastering how to create hi-hat rolls, you not only up your music production skills in a major way but also bring a unique flair to your tracks.
Always keep experimenting and pushing boundaries to stay ahead in the game.
Until next time…


Leave a Reply
You must belogged in to post a comment.