Resonance in music can either be a powerful tool for creating depth and texture in your mix or a major issue that ruins the clarity of your sound.
However, when it’s bad, it’s distracting, piercing, and can completely take over your track in all the wrong ways.
As producers, knowing how to identify and fix resonant frequencies when mixing can make a world of difference.
It lets you knock out a clean, professional mix and achieve better balance across all the frequencies in your mix (and prevent unwanted resonance from taking over too).
Plus, it’ll help you create smoother low-end, clearer mids, and cleaner highs.
That’s why I’m breaking down everything you need to know, like:
- What resonance frequencies are and how they occur ✓
- How resonance affects sound waves in a mix ✓
- Identifying natural frequency issues ✓
- Managing overlapping frequency ranges in the mix ✓
- Using subtractive EQ to fix unwanted resonance ✓
- Taming specific frequency problems dynamically ✓
- Preventing standing wave patterns in untreated rooms ✓
- Finding resonance caused by lower frequencies ✓
- Controlling amplitude spikes caused by resonance buildup ✓
- Much more about resonance in music/mixing ✓
By knowing everything about resonant frequencies when mixing, you’ll be able to identify problem areas with precision and fix them.
Plus, prevent them from occurring in the first place.
You’ll achieve cleaner mixes, balanced frequency response, and professional results like the pros so your tracks are always on point.
Table of Contents
What is Resonance in Music?
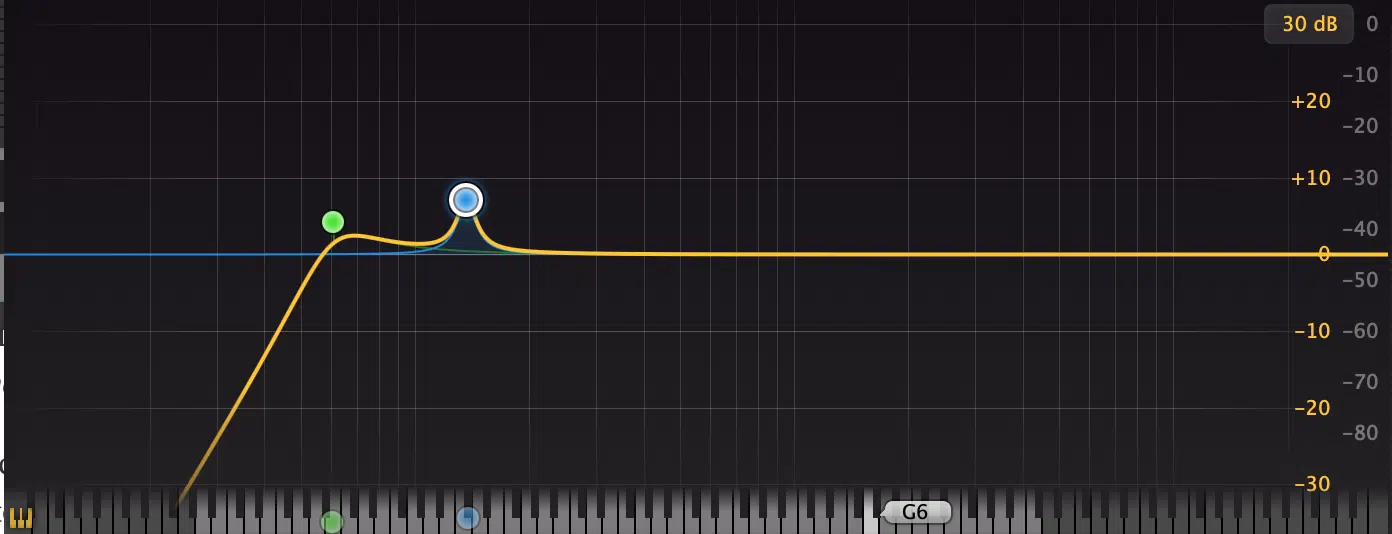
Resonance in music production is all about how certain frequencies amplify naturally within a sound.
Whether it’s a vocal recording or a synth bass, resonance can either enhance or mess up your mix.
Resonance occurs when a sound wave aligns with the natural frequency of a resonating body; think of a guitar string vibrating at a specific frequency when plucked.
When managed properly, resonance can bring life to your mix, which adds texture and depth.
But anytime resonance occurs in excess or the wrong way, it can create unwanted resonance 一 making your mix sound muddy, harsh, or overly boomy.
In digital mixing, resonance frequencies often show up in specific frequency ranges, like a boomy low end or sharp peaks in the high end.
For example, when dealing with vocals, you might notice harsh resonance in the 2–5 kHz range that cuts through horribly.
Understanding resonance is key to knowing how to keep your mixes clean and professional.
Don’t worry, we’ll break it all down so you can identify resonance in your music and know exactly how to fix it.
Understanding Resonant Frequencies
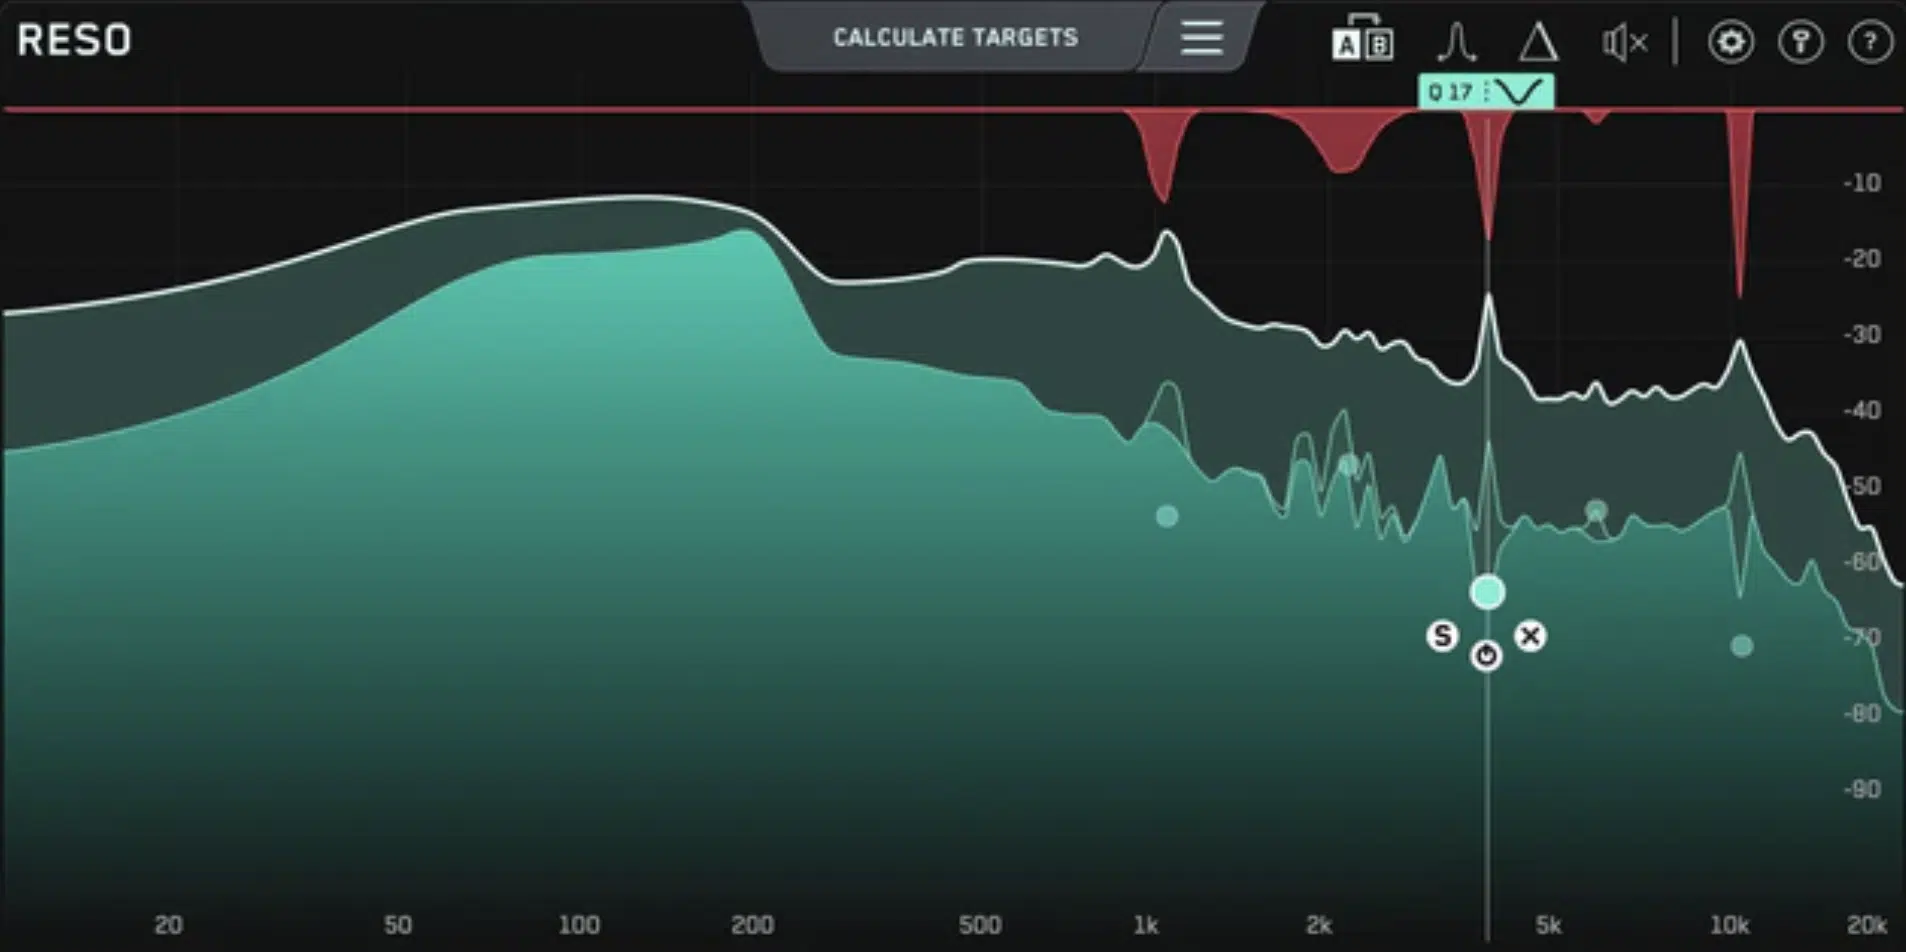
Resonant frequencies are the specific frequencies where sound waves naturally amplify, causing certain tones to stand out more than others.
These frequencies are tied to the natural resonant frequencies of objects or various systems (like a guitar string or a vocal cord).
For example, when a string vibrates, like I said before, it resonates at its:
- Fundamental frequency (the lowest tone)
- Harmonics (higher frequencies that are multiples of the fundamental)
This is what makes each instrument’s tone unique.
In the digital mixing world, resonant frequencies are easy to spot with tools like a spectrum analyzer.
For example, a peak in the 120 Hz range on a bass track could mean there’s a buildup causing boomy resonance.
On the flip side, when working with higher frequencies, like cymbals, you might notice sharp peaks that make the mix sound harsh.
Resonance isn’t just about one specific frequency 一 it’s also about how it interacts with all the frequencies around it in the frequency spectrum.
For example, let’s say you’re working on a kick drum and notice unwanted resonance around 60 Hz. This might make the low end overpowering.
On the other hand, higher frequencies (like 3–7 kHz) can cause sibilance in vocals, which is equally distracting.
Recognizing these issues and understanding how resonant frequencies interact with your mix is the first step toward fixing them.
Why Resonance Problems Happen in a Mix
Resonance in music can be both a creative tool and a problem depending on how it’s handled, that’s a fact. When resonance issues show up in a mix, it’s usually because of overlapping frequencies, poor room acoustics, or over-processing with EQ or compression. So, let’s break down these common causes in detail.
-
Overlapping Frequencies and Buildup
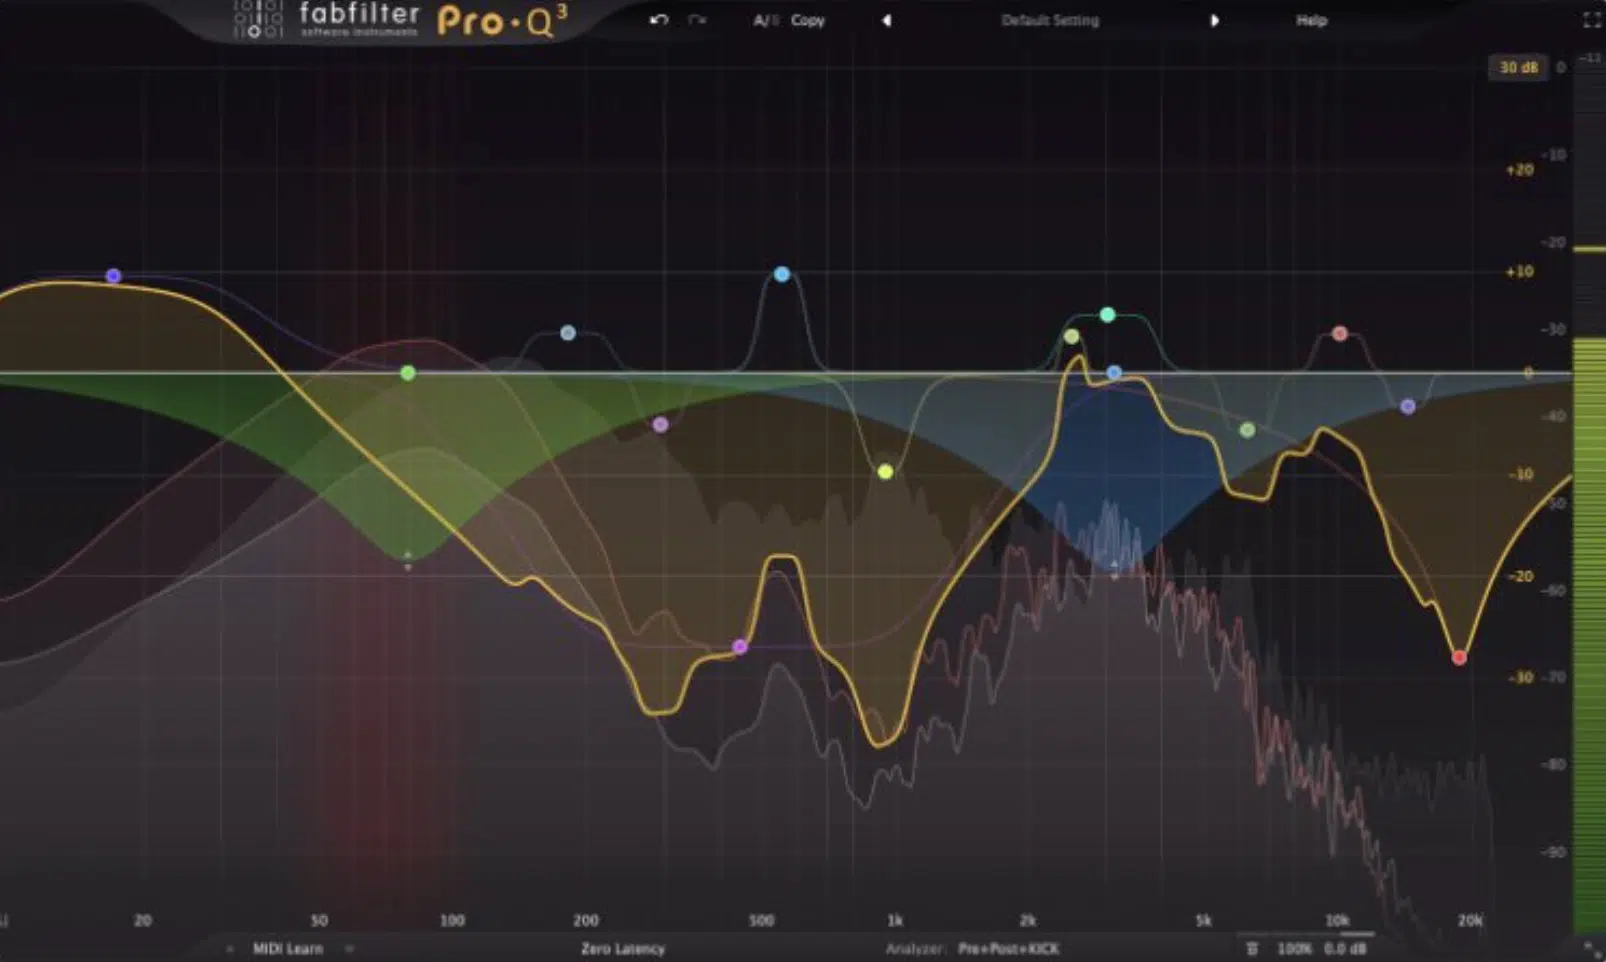
Overlapping frequencies are one of the biggest instigators when it comes to resonance problems in a mix.
For example, if your bass guitar and kick drum are both fighting for space in the same frequency range (usually around 60–120 Hz) it can create a muddy, indistinct low end.
When these sounds stack up, they hype up each other, but in a very unnatural way which leads to excessive resonance.
To identify overlapping frequencies, use a parametric EQ on your bass and kick tracks.
Start by soloing one track and sweeping through the low end with a narrow Q setting (around 3–5)… You’ll notice certain frequencies that jump out as louder.
These are resonance frequencies causing that horrible buildup.
For example, if your kick resonates heavily at 100 Hz, you can notch out 100 Hz slightly on the bass to give each element its own space.
Overlapping resonance doesn’t just happen in the low end 一 it can also occur in the mids and highs (which I’ll break down in a minute).
For example, harshness in a vocal track might overlap with bright synths, both peaking in the 3–5 kHz range.
Cutting certain frequencies in one track and boosting in another, like carving out 4 kHz in the synth while boosting it slightly in the vocal, can prevent this kind of buildup.
-
Room Acoustics and Monitoring Issues

Your room plays a huge role in how resonance is perceived.
Poorly treated rooms can create standing wave patterns, where particular frequencies become louder or softer depending on the room’s dimensions and materials.
For example, if your room boosts low frequencies like 80 Hz due to its shape, it can make you overcompensate by cutting way too much in your mix.
A good way to test your room’s resonance is by playing a sine wave sweep from 20 Hz to 20 kHz and listening for frequencies that jump out or disappear.
For example, if 100 Hz sounds much louder, it’s likely a room mode amplifying that frequency.
NOTE: Adding bass traps in corners and acoustic panels on walls can help reduce these problems, and make sure to check out all our other home studio tips as well.
Monitoring is another issue, of course… Inconsistent frequency response from your monitors can make it hard to pinpoint resonance.
For example, if your monitors have a dip in the 300 Hz range, you might not notice boxiness in a vocal.
Always test out your mix on multiple resonant systems (headphones, car speakers, and even your phone) to make sure the resonance frequencies you’re hearing are accurate.
-
Over-Processing with EQ or Compression

While EQ and compression are essential tools, no doubt about it, overusing them can introduce or exaggerate resonance problems.
For example, aggressively boosting certain frequencies in a vocal (like 2 kHz for clarity) can result in harsh resonance if the boost is too wide.
Always use a narrow Q (around 1–2) when boosting resonance-prone frequencies.
Similarly, over-compressing tracks can emphasize resonance by flattening the dynamics and making peaks more prominent.
For example, if you apply heavy compression to a snare drum without controlling its resonant frequency (often around 200 Hz), the sound may become boxy or overbearing.
To avoid this, use a multiband compressor to target problem areas like the low mids instead of compressing the entire frequency spectrum.
It’s also important to avoid stacking EQ boosts across multiple tracks at the same frequency.
For example, boosting 100 Hz on your kick, bass, and even your synth pad can lead to overwhelming low-end resonance.
Instead, make subtle adjustments and make sure no two elements are fighting for the same frequencies.
Identifying Unwanted Resonance: Breaking it Down
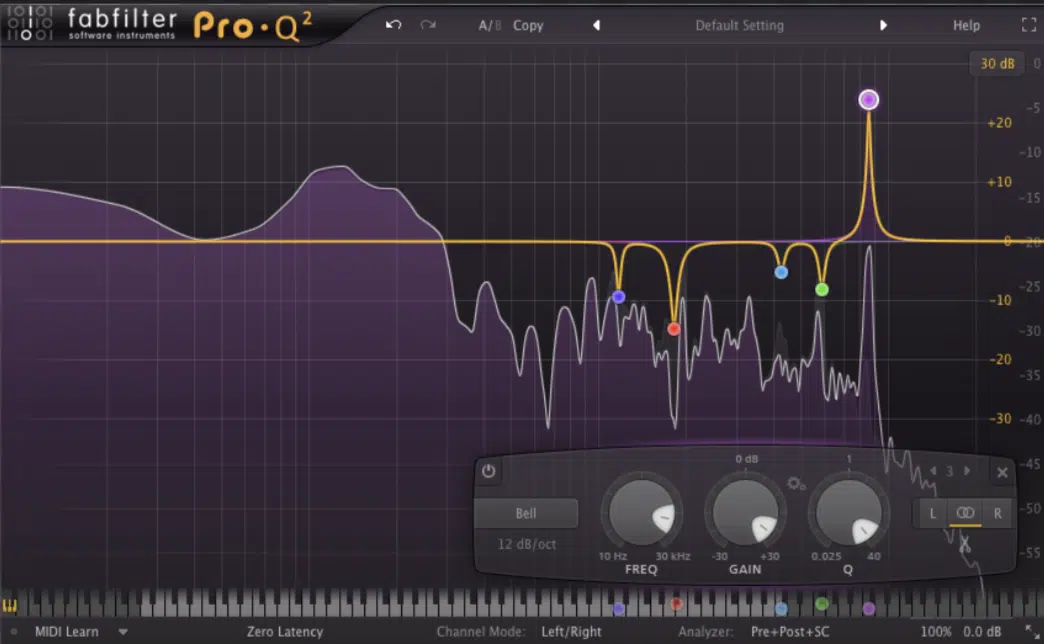
Unwanted resonance in music can sneak up on you and freakin’ ruin an otherwise clean mix by creating harsh, boomy, or piercing sounds.
Identifying it requires both your ears and some visual tools, so start by soloing individual tracks and listening for anything that stands out unnaturally.
For example, in a vocal recording, you might notice harshness around 3–5 kHz that cuts through uncomfortably.
Or, in a bassline, a specific frequency around 60–80 Hz might sound overly boomy.
To confirm what you’re hearing (because human hearing is a tricky thing, especially when you’re at it for a while), use a spectrum analyzer plug-in.
Watch for sharp, narrow peaks in the frequency spectrum while the track is playing 一 these are often resonance frequencies produced.
For example, a sustained peak around 120 Hz in a kick drum could indicate a buildup in that range; it’s pretty simple once you get the hang of it.
Spectrum analyzers like FabFilter Pro-Q 4 make it easy to see these problem areas in real-time.
Another helpful technique is EQ sweeping, and to do this you’re going to grab a parametric EQ and create a narrow boost.
This should be around 6–10 dB with a Q setting of 8 or higher.
Sweep this boost slowly across the frequency range and make sure to pay attention to where the sound becomes unpleasant or harsh.
For example, if sweeping reveals a sharp, grating sound at 4 kHz on your snare, that’s a resonant frequency you’ll want to address.
- Pro Tip
Listening in different environments is very important.
Resonance frequencies may not always be obvious in your bedroom studio, especially if your room accentuates or masks certain frequencies.
For example, a resonance issue in the lower frequencies might sound fine on studio monitors but overpowering in a car or on headphones.
Also, make sure to use mono playback as well to expose subtle resonances that might be hidden in the stereo field.
With practice, identifying unwanted resonance becomes second nature and really help you clean up your mixes properly and professionally.
Using EQ to Tame Resonance
When it comes to dealing with resonance in music, EQ (equalization) is your best friend. EQ allows you to surgically target problem frequencies and remove or reduce them without harming the overall balance of the track. So, now let’s dive into the step-by-step process of using a parametric EQ to handle unwanted resonance like a boss.
-
Step-by-Step Guide to Using Parametric EQ
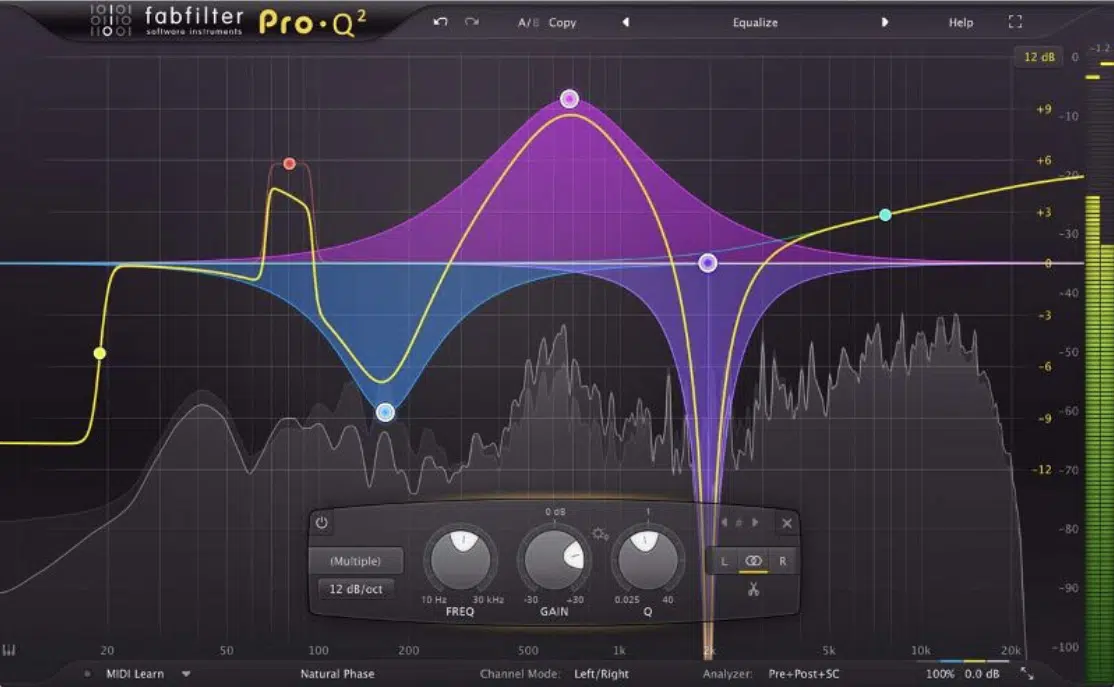
Using a parametric EQ to control resonance starts with isolating the problem frequencies, so let’s break it down real quick.
#1. Insert a parametric EQ plug-in like FabFilter Pro-Q 4 or Waves Q10 on the track where you hear some annoying resonance.
For example, if a vocal track sounds harsh, load the EQ on that track and engage the analyzer to spot any peaks in the frequency spectrum.
#2. Create a narrow boost (about 6–10 dB) with a high Q setting, such as 8–10, to sweep through the frequency range.
This boost helps you pinpoint the exact frequency causing the problem. For instance, if sweeping reveals an unpleasant ringing sound at 5.2 kHz, you’ve found it.
#3. Once identified, flip the boost into a cut by lowering the gain to about -3 to -6 dB.
The exact amount depends on how prominent the resonance is (always trust your ears).
#4. When dealing with bass instruments like a kick drum or bass guitar, resonances often show up between 50–120 Hz.
For example, a kick drum might have a resonant frequency at 80 Hz that overwhelms the mix.
#5. Use a low-shelf or a bell cut in this range to tame it, being very careful not to remove too much low-end punch.
#6. It’s also important to use subtle EQ adjustments across multiple tracks to prevent stacking.
For instance, if both the kick drum and bass share a resonance frequency around 100 Hz, cut slightly in the bass to let the kick shine in that area.
This keeps the mix balanced and avoids introducing additional resonance issues.
NOTE: Dynamic EQs can also be a game-changer, which I’ll break down more in the following sections.
Plugins like TDR Nova or iZotope Neutron 5 let you target resonance frequencies only when they become too loud 一 leaving the rest of the signal untouched.
For example, if a snare drum resonates excessively at 200 Hz only during louder hits, a dynamic EQ can cut just those peaks, keeping the same natural frequency/sound intact.
-
Notching Frequencies: How and When to Use
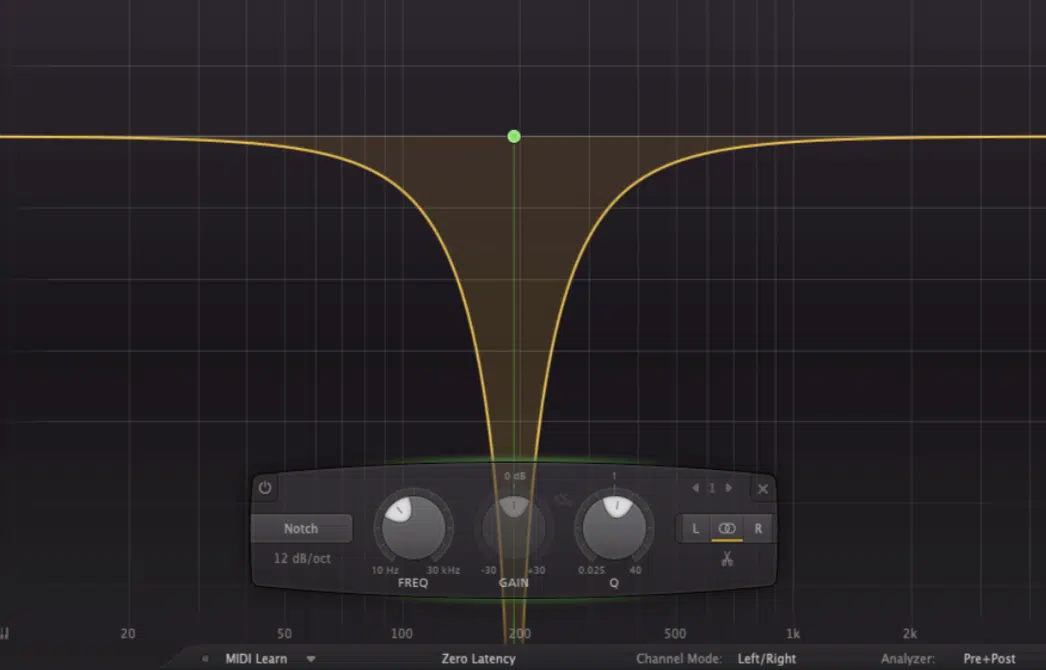
Notching frequencies is one of the most precise and effective ways to control resonance in music without negatively affecting the rest of your track.
To notch a problematic frequency, use a parametric EQ with a very narrow Q setting (around 10–15).
For example, if your vocal track has a piercing resonance at 3.8 kHz, create a bell filter, set the frequency to 3.8 kHz, and apply a cut of around -3 to -6 dB.
The narrow Q ensures that only the problem frequency is affected and leaves the surrounding frequencies intact and on point.
Notching is super useful when dealing with musical instruments that have natural resonant frequencies, such as acoustic guitars or strings.
For instance, a resonant peak in the lower frequencies of an acoustic resonance guitar might occur around 150 Hz.
So, applying a narrow notch at this specific frequency can tame the resonance without thinning out the instrument’s warmth (pretty straightforward).
Just keep in mind that timing is absolutely everything when it comes to notching.
If resonance is only problematic during certain moments (like when a vocal hits a specific note) try automating the EQ to apply the cut only when needed.
For example, automate the notch to activate when the resonance frequency becomes prominent, then deactivate when it’s no longer an issue, which is awesome.
This keeps your track sounding natural (same natural frequency) while targeting the resonance precisely 一 win, win.
-
Balancing Cuts Without Thinning Out the Mix
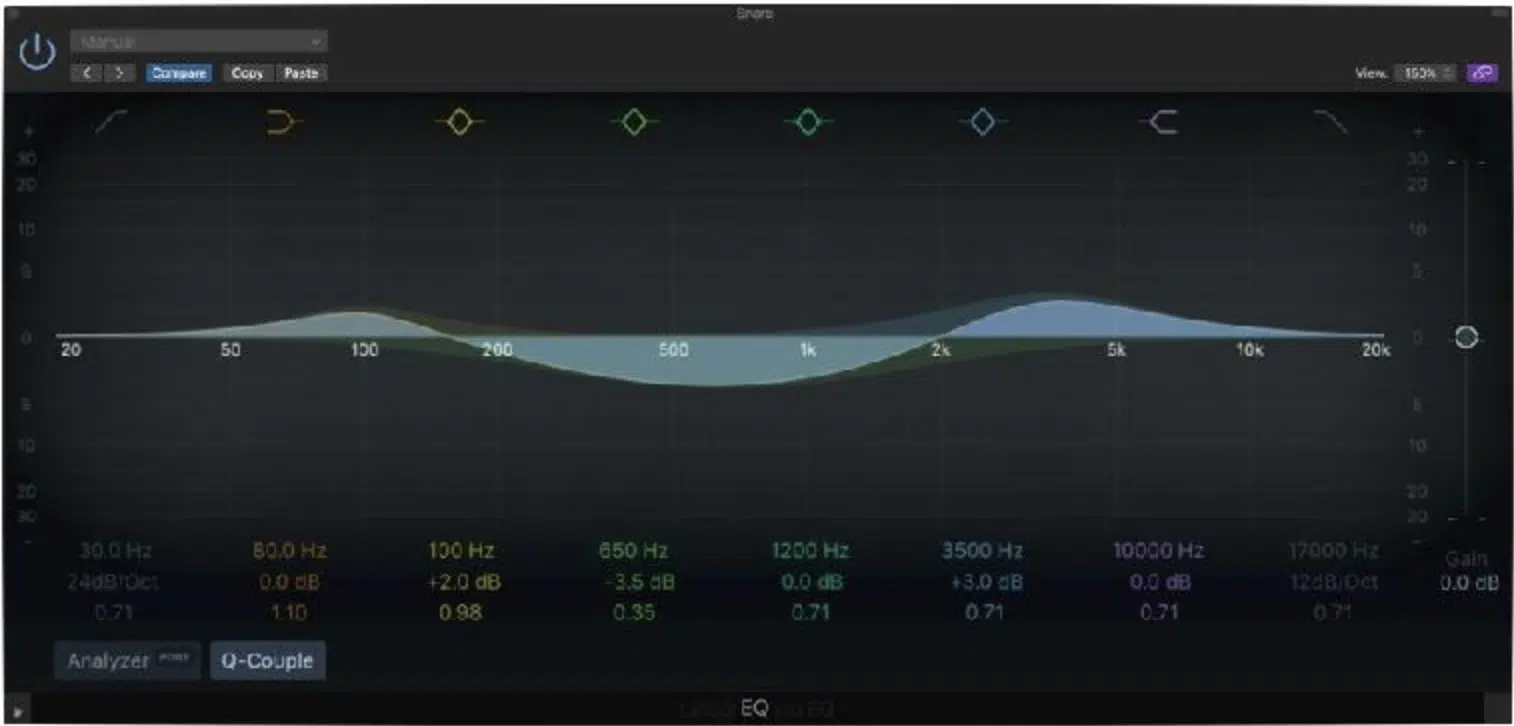
Balancing EQ cuts is all about subtlety and razor-sharp precision so you can successfully tame resonance in music without losing the richness of your sound.
When cutting frequencies, avoid overdoing it by all costs.
For example, if you’re notching out a frequency at 200 Hz on a snare drum, keep the cut between -2 and -4 dB unless the resonance is extreme.
Going deeper than necessary can make the snare sound thin and lifeless.
My advice to you is ALWAYS use a reference track to compare your mix, and if it sounds noticeably dull after a cut, you may have overcompensated and need to dial it back.
It’s also important to check how cuts affect the frequency spectrum of your mix as a whole, because everything needs to be on point.
This is where a spectrum analyzer comes into play because you’ll be able to see, firsthand, whether or not any unnatural dips in the frequency range are happening.
For example, if you’ve cut too much at 120 Hz on a bass guitar, the low-end energy might drop, leaving your mix unbalanced.
When cutting multiple tracks, remember to spread the cuts across the mix rather than stacking them on one frequency.
For instance, cut 2 dB at 100 Hz on the kick drum and 1 dB at 100 Hz on the bass instead of cutting 5 dB on just one track.
NOTE: Always listen to how the adjustments sit in the full mix, not just in isolation because what sounds fine on a soloed track could thin out the entire mix when all the elements come together.
Bottom line, small, calculated cuts are the key to balancing resonance without compromising the beauty of your sound.
Dynamic Tools for Controlling Resonance
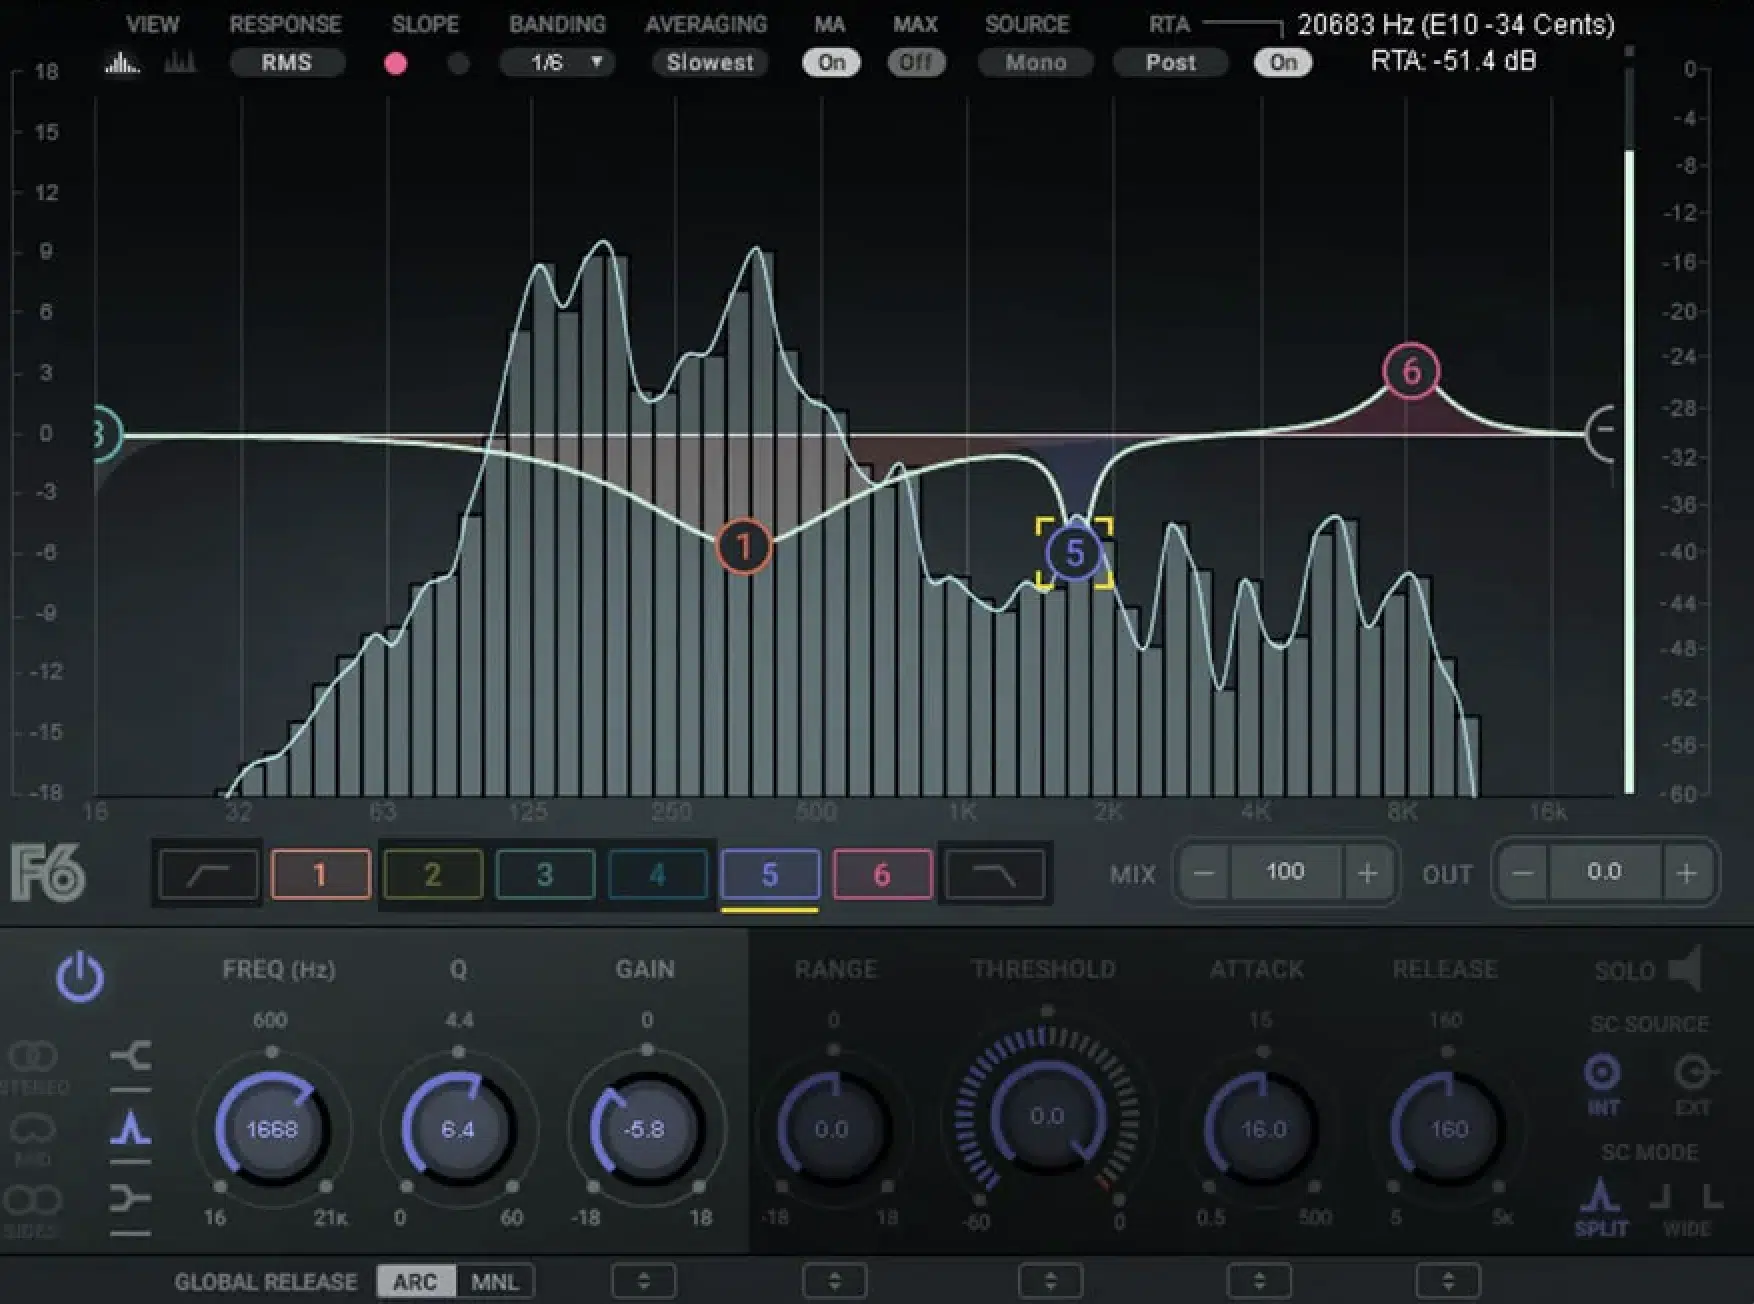
Dynamic EQ and multiband compression are super powerful for handling resonance in music when it’s inconsistent or only appears during specific moments.
Unlike static EQ cuts, dynamic tools react in real time 一 targeting problem frequencies only when they exceed a certain amplitude.
For example, a vocal track with harsh peaks around 4.5 kHz during louder phrases can benefit from a dynamic EQ like FabFilter Pro-Q 4.
Set the EQ to cut only when the resonance frequency exceeds the threshold so the rest of the vocal stays untouched and precise.
Multiband compressors work in a similar way but across broader ranges…
For example, if a bass guitar has resonance buildup between 60–120 Hz only during sustained notes, use a multiband compressor to reduce the amplitude of the low frequencies when they get too loud.
Set the threshold to just above the typical level of the track, and apply gentle compression (e.g., a 2:1 ratio) to smooth out the peaks without killing the punch.
Another great use for dynamic tools is on the master bus, which you can learn all about in our master bus article.
If your mix as a whole has resonance issues, apply a multiband compressor to tame problem areas like:
- Boomy lower frequencies around 100 Hz.
- Harsh higher frequencies at 8 kHz.
For example, use iZotope Ozone’s Dynamic EQ to reduce the amplitude of these frequencies without affecting the balance of the entire mix.
Automation can also work hand-in-hand with dynamic tools.
If you notice that certain frequencies resonate more in specific sections of a song (for example, a synth swell that gets harsh in the chorus) automate the dynamic EQ or compressor settings to handle these changes dynamically.
By combining these techniques, you can shutdown any unwanted resonance while keeping your mix clean and polished.
Common Problem Areas for Resonance
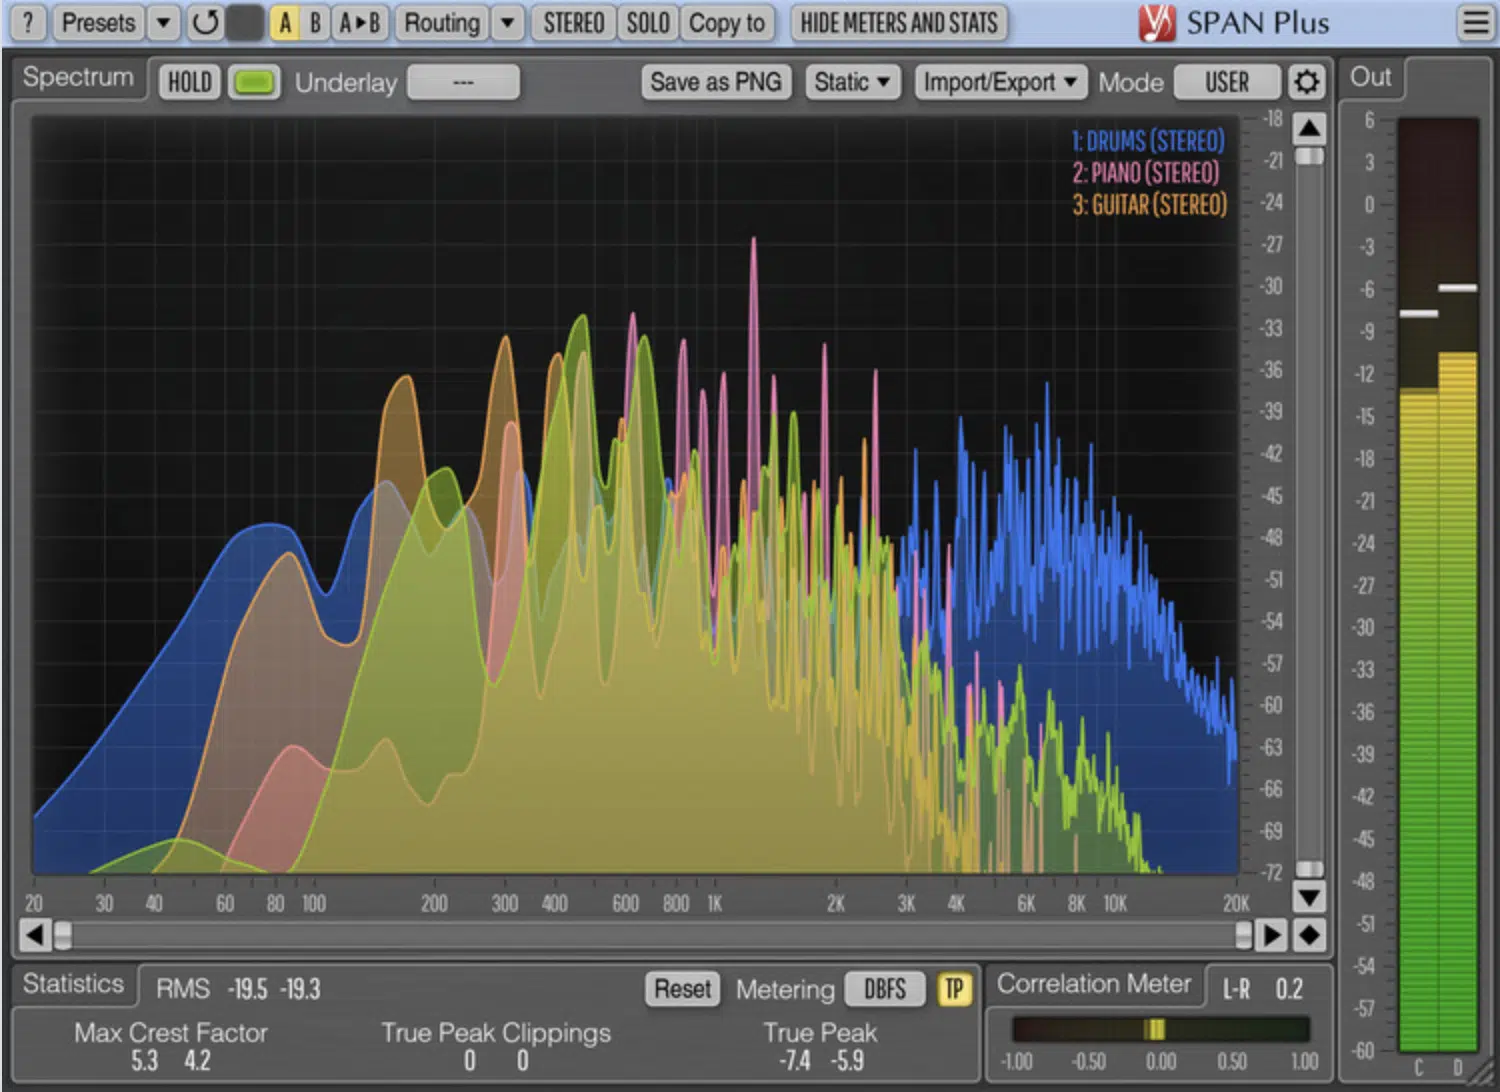
Resonance in music can affect different frequency ranges in specific ways, so understanding where it commonly occurs is key for effective mixing.
In the low-end, unwanted resonance often shows up between 50–120 Hz, especially in bass-heavy tracks.
For example, a kick drum may resonate heavily at 80 Hz 一 creating a muddy mix if it overlaps with the bass.
Using a spectrum analyzer can help identify these peaks, while a subtle notch EQ cut can tame them without losing power.
The midrange (200–800 Hz) is another problematic area where boxiness and nasal tones often occur, especially in vocals, guitars, or snares.
For instance, a snare drum might have a resonant frequency at 400 Hz that adds a dull, cardboard-like quality.
Applying a cut of -2 to -4 dB with a narrow Q (around 5) can clean up the sound without removing its body.
Higher frequencies, particularly in the 2–8 kHz range, can produce harshness and sibilance, which nobody has time for.
For example, a vocal recording might resonate around 5 kHz, which makes certain phrases sound sharp and grating.
A de-esser or a dynamic EQ targeting this specific frequency can work wonders.
On the same note, cymbals often create harsh peaks in the 7–8 kHz range, which can be tamed using a bell cut with a Q setting of 2–3.
NOTE: It’s also worth noting how resonance affects multiple musical instruments at once.
For instance, if your lead synth and hi-hats share the same frequencies in the higher range, they can create harshness/clashing.
By identifying these overlaps and carefully balancing cuts, you can keep the mix clear and professional, which is the whole goal.
Resonance problems differ by track, but addressing these common areas can help you make sure you have a smoother frequency response across your entire mix.
-
Bonus: Automation
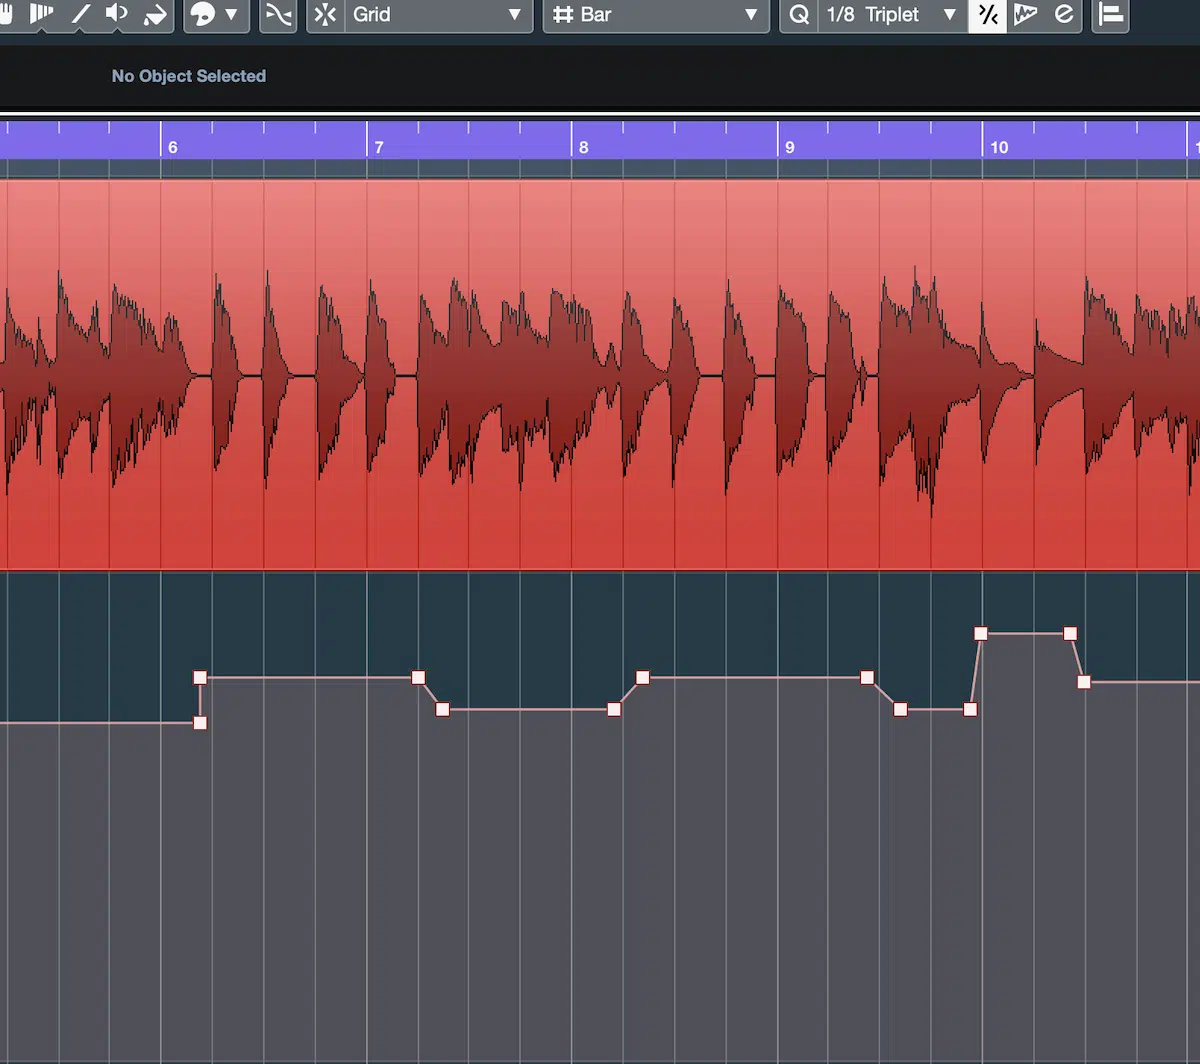
Automation is super awesome and powerful when it comes to controlling resonance that changes throughout a track.
For example, if a vocalist consistently hits a resonant note at 4.2 kHz during loud sections, you can automate a parametric EQ to dip that frequency only at those moments.
Set a bell filter with a narrow Q (around 8–10) and a cut of 2–4 dB.
Then, draw automation curves so the cut engages during the loud parts and disengages during softer phrases.
This ensures that the vocal remains natural and dynamic without over-processing.
Automation also works well for musical instruments with evolving resonance, like a synth pad with sweeping filters.
For example, if a filter sweep on a synth creates a resonant peak at 6 kHz in the buildup to a drop, automate a cut in that frequency range to keep the mix smooth.
Simply automate a gentle EQ cut (-2 to -3 dB) at 6 kHz during the sweep to tame the resonance and keep the mix smooth.
On the same note, if a lead guitar sustains a particular note that rings out too much in the upper mids (2–3 kHz), you can automate a notch EQ to control the resonance only when that note is played.
The same principle applies to drums…
For instance, a snare drum’s fundamental frequency (200–250 Hz) might resonate excessively in a chorus.
Automating a small dip (around -3 dB) at the snare’s fundamental frequency can prevent the mix from sounding muddy while preserving the snare’s punch and presence.
If the resonance shifts slightly between hits, use a dynamic EQ combined with automation to adjust the cut dynamically.
Automation also gives you flexibility when mixing tracks with complex arrangements.
For example, if a bassline starts clashing with the kick drum during the second verse, you can automate a subtle cut at 100 Hz on the bass to create space for the kick.
When the arrangement changes again in the chorus, automate the EQ to return to normal 一 keeping your mix adaptable.
By targeting resonance dynamically, automation allows you to keep control without static EQ cuts that might thin out your track.
It’s a surgical yet flexible way to fix resonance issues in real time.
Final Thoughts

And there you have it: everything you need to know about identifying and fixing resonance in music and keeping your mixes clean and professional.
With all this information, you’ll be able to pinpoint resonant frequencies, tame them like a boss, and create a balanced mix like a professional.
Just remember, it’s all about precision and attention to detail 一 not overdoing cuts or ignoring the interplay between frequencies.
So, make sure to use your plugins wisely, trust your ears, and always double-check your mix on different systems.
By using everything we’ve talked about today, you’ll be successfully controlling resonance in music and achieving polished, high-quality mixes in no time.
And, as a special bonus, you’ve got to check out the absolute Best Free Sample Packs in the game.
Whether you’re looking for booming basses, sick melodies, or even project files and beatmaker blueprints, they’re all here (for free!).
Each of these samples was created by the absolute best producers and sound designers in the industry, so you know you’re getting top-tier stuff here.
No matter what genre you’re producing or what elements you’re searching for, believe me, they’re all here.
They’ll help you get attention, sound professional, and straight-up blow people’s minds.
Bottom line, when it comes to identifying and fixing resonance in music, it’s all about careful listening and using the right techniques.
Just remember to sweep for problem frequencies, automate when necessary, and never stop refining your skills.
This way, your tracks will translate across every system and stand out every single time.
Until next time…


Leave a Reply
You must belogged in to post a comment.