Additive EQ is all about hyping up the best parts of your sound and making your mix stand out.
It can help you bring vocals to life, add some serious weight to a bassline, and give your instruments more clarity.
Plus, learning how to use additive EQ like the pros will help your tracks sound full and immersive without overpowering other parts of your mix.
As producers, understanding additive EQ can take your mixing to the next level, which is why we’re breaking down absolutely everything you’ll need to know, including:
- What exactly additive EQ does ✓
- How to apply additive EQ the same way the pros do ✓
- The difference between additive EQ and subtractive EQ ✓
- Key features like frequency selection and gain control ✓
- How to boost specific frequencies for clarity & balance ✓
- Pro tips for using additive EQ creatively ✓
- Techniques like dynamic EQ and parallel processing ✓
- How additive EQ works in mastering ✓
- Working with different frequencies ✓
- Additive EQing (and subtractive EQing)like a boss ✓
- Ways to avoid over-boosting and creating harshness ✓
- Much more about additive EQ ✓
By mastering additive EQ, you’ll be able to bring out the best in your mixes and make your tracks sound super clean and on point.
Plus, you’ll know how to boost what matters, adjust your sounds perfectly, and keep everything working together smoothly (teamwork makes the dream work).
You’ll never have to worry about muddy low-end or dull highs again.
Table of Contents
What is Additive EQ?
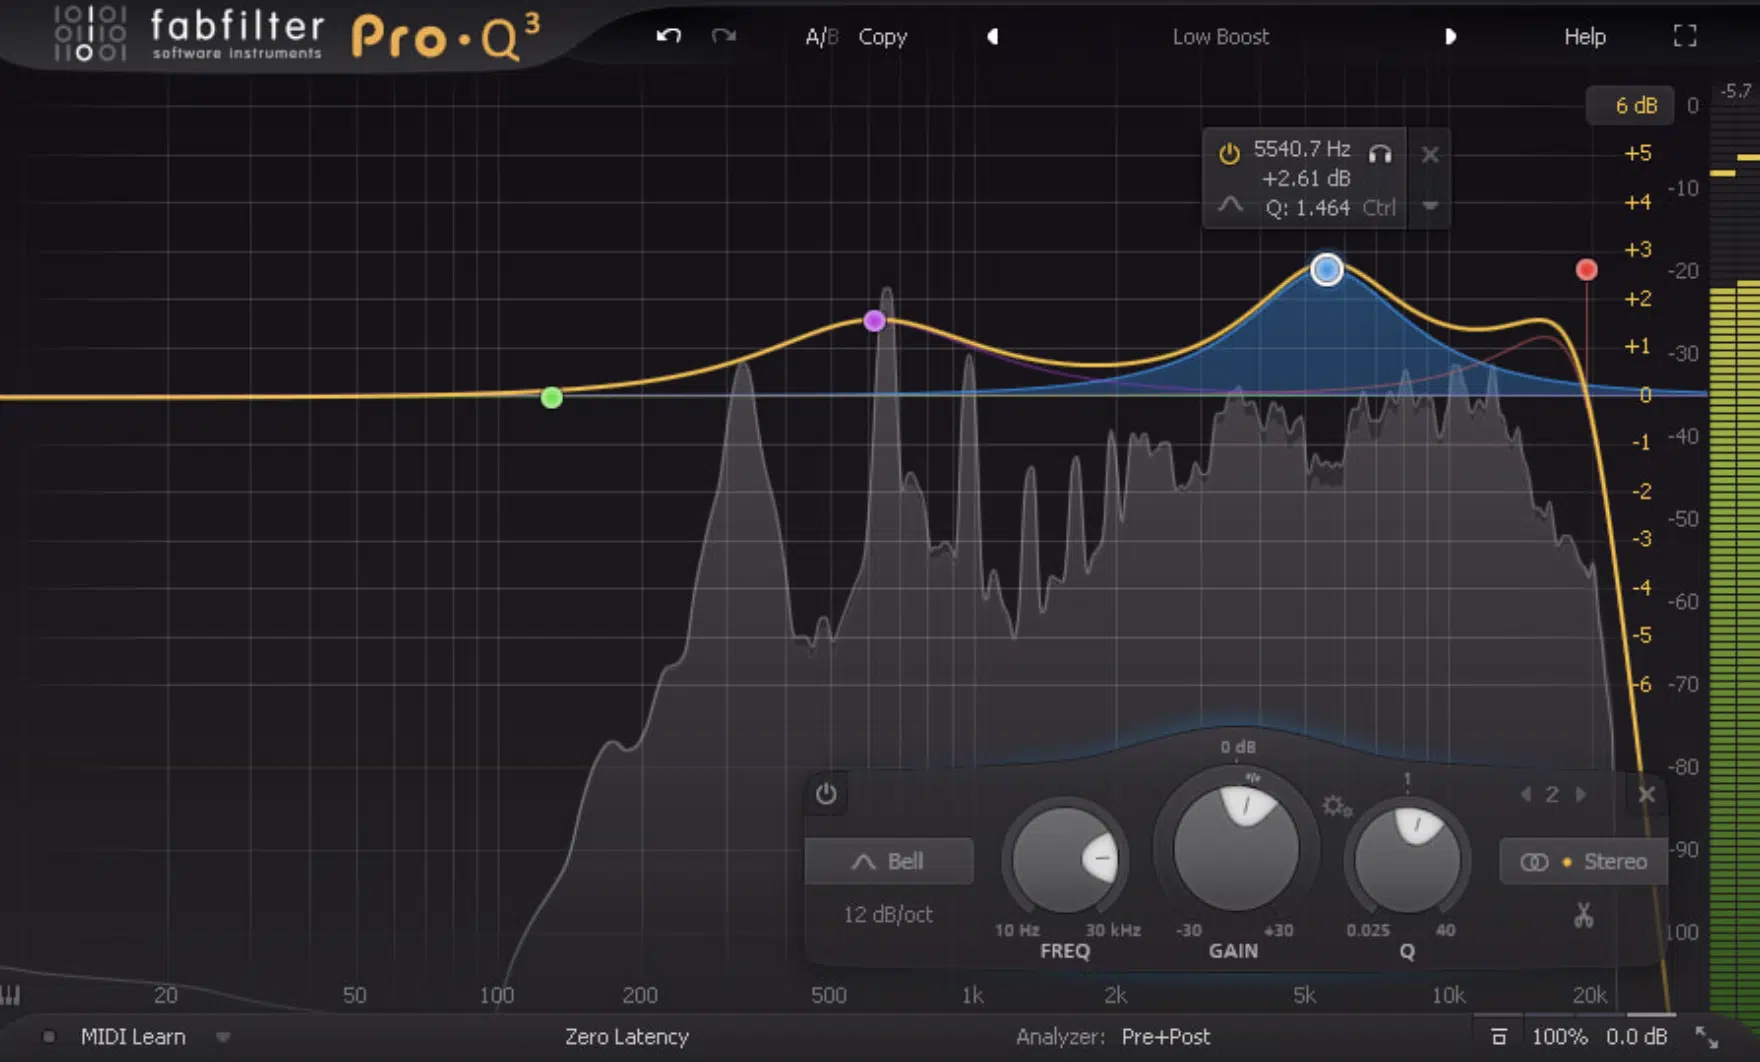
Additive EQ is the process of boosting specific frequencies to emphasize the most standout tonal characteristics of a sound.
This could be adding brightness to vocals or enhancing the punch of a kick drum.
Unlike subtractive EQ, which is about removing unwanted frequencies, additive EQ focuses on amplification…
It’s usually to bring clarity, presence, or energy to individual tracks or a full mix.
For example, if you want your lead vocal to cut through the mix, you might use additive EQ to boost higher frequencies around 8kHz–12kHz 一 giving it that “airy” quality.
On the same note, boosting low frequencies between 60Hz–80Hz on a bass track can make it feel more powerful and grounded.
When you’re working with additive EQ, you should always keep an ear on the balance while boosting because too much additive EQ can introduce harshness.
Or, clash with other elements in the mix (and nobody wants that).
If you go in blind, you’ll never get exactly what you’re looking for.
So, decide whether you’re aiming to enhance the sparkle in a guitar or emphasize the low-end thump of a kick drum, etc.
When you always start with a clear intention, and use a spectrum analyzer if your ears need a little extra guidance, you’ll be able to master it in no time.
Just remember, precision is everything, especially when working in busy mixes with overlapping frequency ranges.
Don’t worry, we’ll break everything down in detail throughout the article so you get the full picture.
Additive EQ vs Subtractive EQ
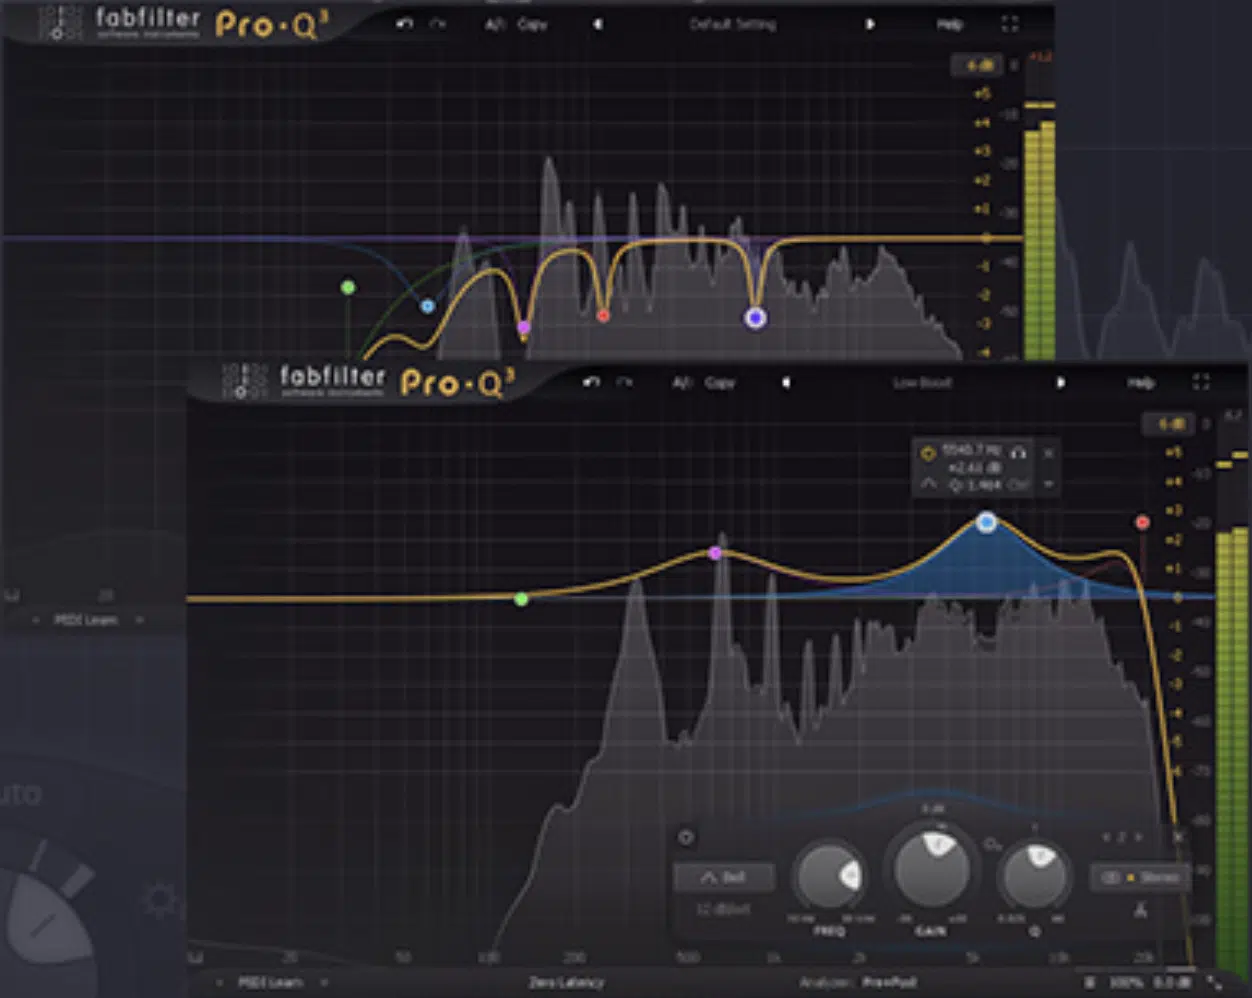
Additive EQ and subtractive EQ are both essential for shaping a balanced mix, but they are for very different things, and you should certainly know the difference.
- Additive EQ 一 Boosts frequencies to enhance specific elements of a track.
- Subtractive EQ 一 Cuts unwanted frequencies that could muddy your mix.
For example, if a vocal you’re working with sounds dull, you might use additive EQ to boost higher frequencies like 10kHz for clarity and air.
However, if that same vocal has a boxy tone, subtractive EQing in the 200Hz–400Hz range can help remove unwanted frequencies before boosting what’s missing.
Let’s say you’re mixing a bass guitar…
You’ll want to cut unwanted frequencies in the low-mids around 300 Hz to reduce muddiness, then use additive EQ to emphasize the bass’s fundamental frequencies.
This will be approx. 60Hz–80Hz for weight and presence.
This combination (cleaning with subtractive EQ and enhancing with additive EQ) helps you achieve a balanced mix without creating loudness issues or distortion.
Just remember to apply subtractive EQ first to carve out space for the elements that matter most.
For example, if you’re working on a dense mix with two instruments competing for attention/space, like a guitar and a synth, use subtractive EQ to clear space in the frequency spectrum.
Then, apply additive EQ selectively to boost the most important frequencies in each track (pretty easy and straightforward, am I right?).
This will make sure none of the louder sounds dominate or overwhelm the mix as a whole 一 keeping every element clear and impactful like it should be.
Many professional audio engineers recommend monitoring your additive EQ adjustments at low playback levels, and I’m one of them.
This forces your ears to focus on what’s truly improving the mix without overemphasizing louder sounds.
With practice, time, patience, and hustle, you’ll learn when to emphasize different frequencies (specific ones we’ll talk about in the following section).
And, when to cut unwanted noise to create a polished, professional mix.
Key Features & Functions
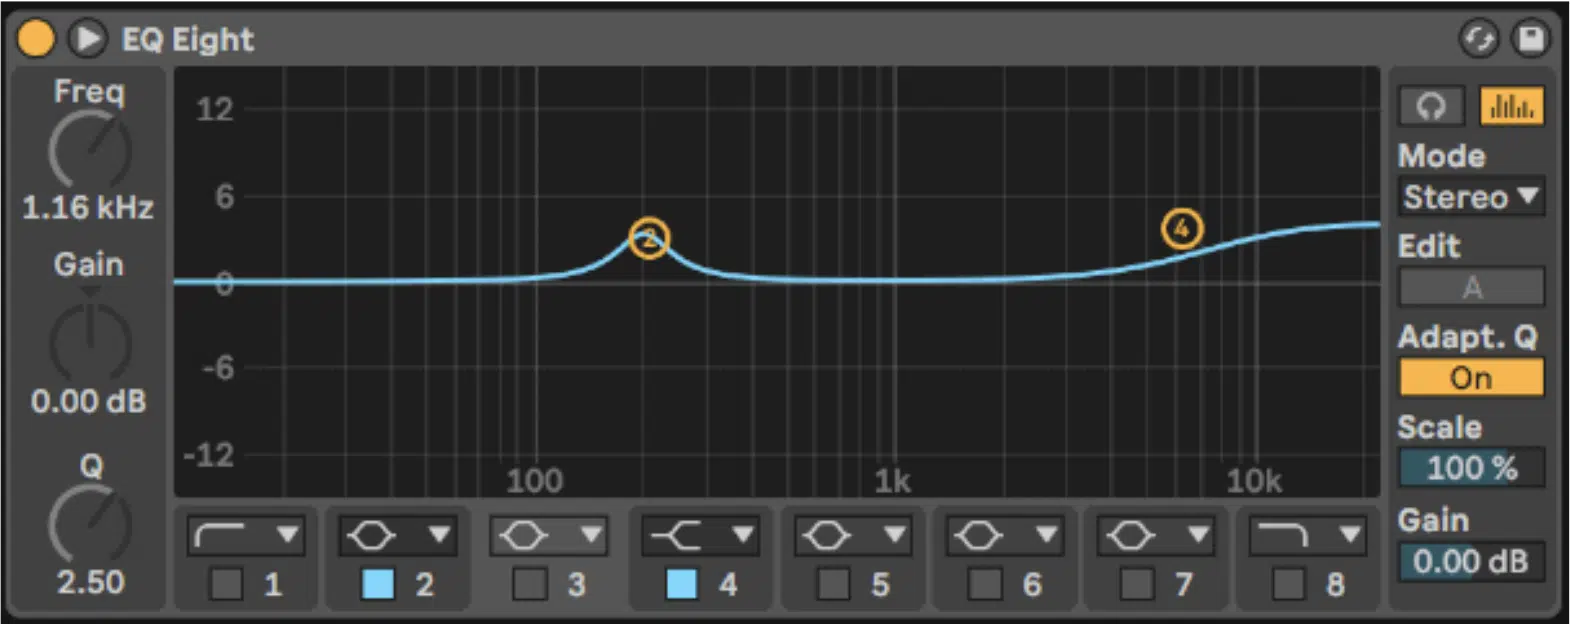
Additive EQ has three essential features that work together to shape tonal characteristics, enhance presence, and emphasize musical elements in your mix.
These 3 key players are:
- Frequency selection
- Gain control
- Q-factor adjustment
#1. Frequency selection allows you to choose the specific frequency band to boost.
For example, you might target 10kHz–12kHz to brighten a vocal or 60Hz–80Hz to add depth to a bass track.
#2. Gain control determines how much you amplify the frequency, and subtle boosts of 2-3dB are ideal for achieving the best clarity while avoiding distortion.
Try boosting 3dB at 6kHz to add sparkle to a hi-hat.
#3. Q-factor adjustment controls the width of the boost, with a low Q-factor creating broader changes (useful for warming pads) and a high Q-factor for pinpointing details.
This could be like emphasizing a snare’s crack at 200Hz.
These features are key to shaping tonal characteristics, such as adding clarity to guitars by boosting around 4kHz.
Or, enhancing presence in a vocal by gently amplifying higher frequencies around 10kH (but remember 一 it’s all about balance, so don’t do anything too drastic).
When emphasizing musical elements, like making a piano stand out in a dense mix, boosting 2kHz–3kHz adds focus without overpowering other tracks.
Always make sure your additive EQ adjustments create a balanced mix by checking your changes in context with the entire track.
Using spectrum analyzers can help confirm what your ears hear, but rely on your listening skills to avoid over-boosting and introducing unwanted harshness.
Understanding the Frequency Spectrum (Additive EQ Musts)
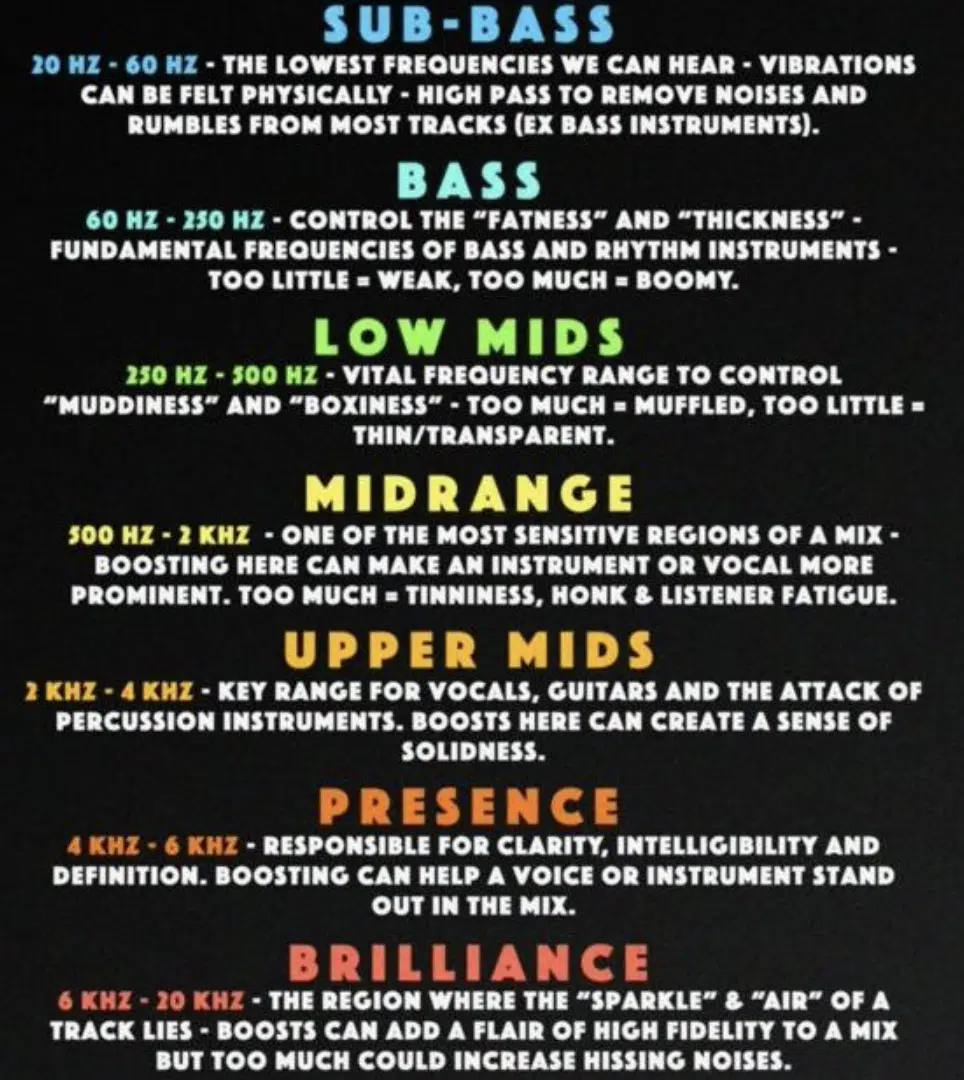
The frequency spectrum is divided into 3 main frequency ranges:
- Bass (50Hz–250Hz)
- Midrange (250Hz–5kHz)
- Treble (5kHz–20kHz)
Each one plays a key role when it comes to shaping your mix, so you’ll want to be familiar with them all.
Boosting low frequencies like 60Hz can give kick drums power, while amplifying 100Hz adds warmth to basslines (but, of course, too much can muddy the mix).
Use a narrow Q-factor around 1.4 to keep the boost focused on the fundamental frequency without bleeding into the lower mids.
Amplifying 100Hz on a bass guitar or 808 can add warmth and fullness, but keeping the boost under 3dB prevents muddiness in the mix.
If the mix starts to feel too heavy, try cutting frequencies around 200 – 250 Hz on other elements to free up space.
The midrange is where most of a track’s character lives, so boosting around 2kHz–3kHz can bring clarity to vocals or guitars.
For example, a gentle 2dB boost at 3kHz can add presence to a lead vocal, while a 1.5dB boost at 2.5kHz can help a guitar solo stand out.
However, boosting upper mids between 3kHz–5kHz requires caution because harshness can quickly creep in (especially on vocals or strings).
If things get too sharp, back off the Q-factor slightly or use a dynamic EQ to control the boost during louder passages.
The treble range enhances brightness 一 making instruments like cymbals and acoustic guitars more present try boosting 2dB at 12kHz to add shimmer to a vocal.
On cymbals or acoustic guitars, try a wider Q-factor to make the brightness feel more natural, organic, and professional.
Be careful not to push above 15kHz, as it can create unnecessary hiss or noise, especially if you’re working on digitally recorded tracks.
You’re going to want to solo individual tracks to pinpoint specific frequencies that need enhancement, but don’t neglect how those changes affect the overall mix.
For example, a 4dB boost at 6kHz on a hi-hat might sound perfect soloed, but it could clash with the upper mids of a vocal when heard in the full mix.
And yes, I’m going to say it yet again: use spectrum analyzers as a guide, but prioritize your ears to maintain a natural sound.
Professional additive EQ isn’t just about boosting… It’s about creating a balanced mix, where each track complements the other without overpowering.
Focus on fine-tuning each frequency range with subtle boosts, usually no more than 3dB, and always check how these changes sit in the context of the entire mix.
Additive EQ Tips You Should Know
Mastering additive EQ is as much about strategy as it is about technique. So, for this next parts, let’s break down how to get the most out of your additive EQ adjustments while keeping your mixes clean, balanced, and on point every single time.
Tip #1: Focus on Harmonic Frequencies
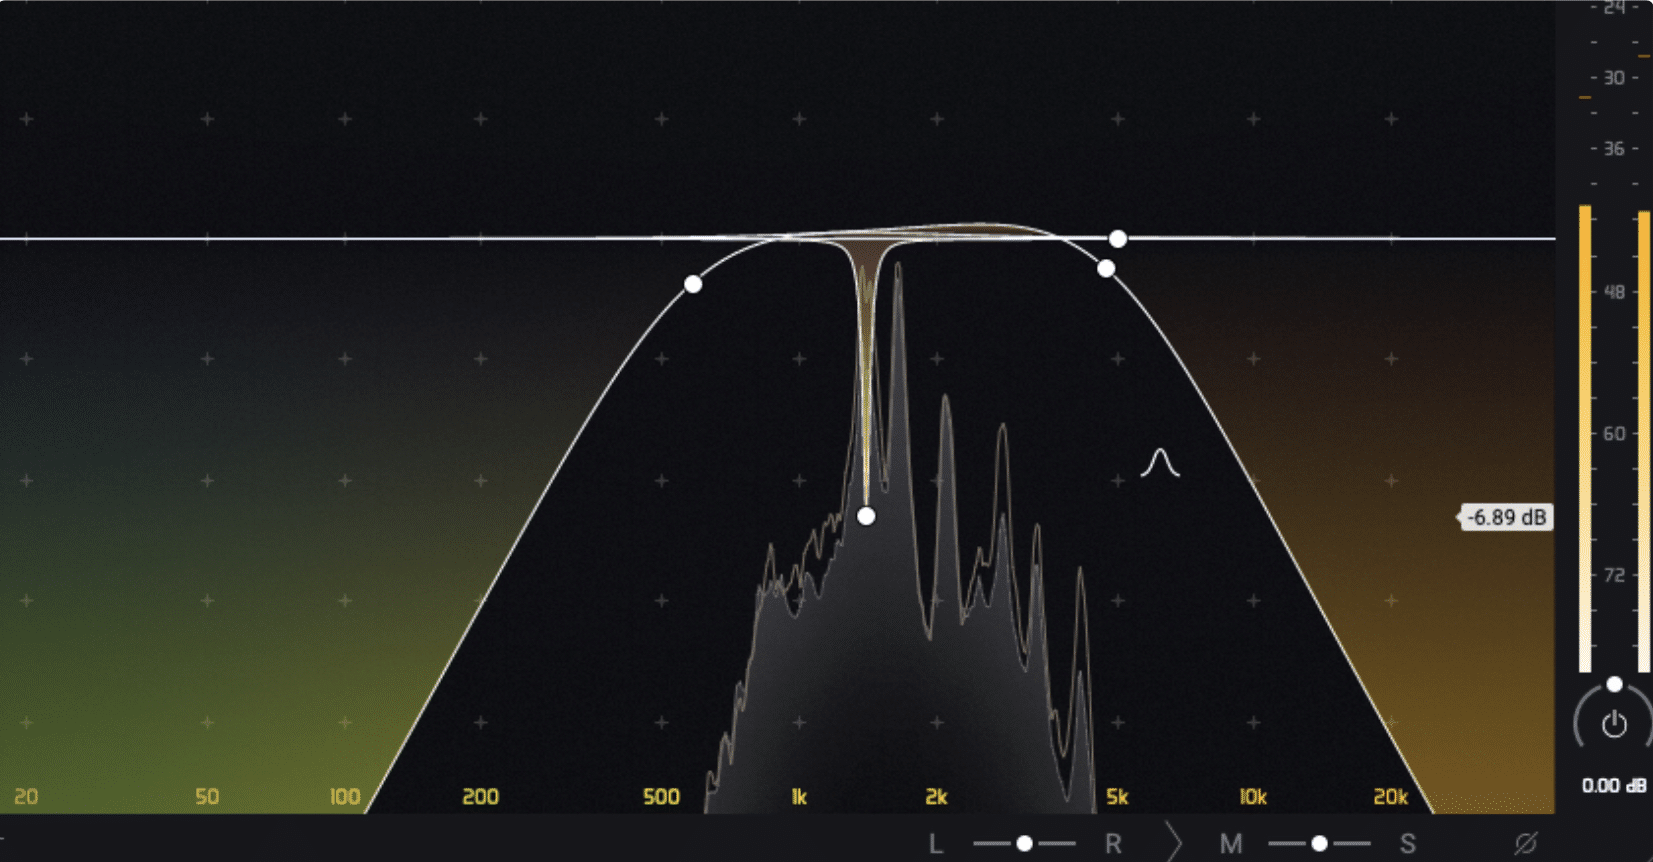
Unwanted Harmonics
When using additive EQ, targeting harmonic frequencies can add richness and depth to your mix without overpowering other elements.
Harmonics are the frequencies that naturally complement the fundamental frequency of a sound.
For example, if a bass note’s fundamental frequency is at 60Hz, boosting its harmonic at 120Hz can give it more presence without adding unnecessary low-end weight.
On the same note, for a vocal with a fundamental frequency around 200 Hz, boosting 400 Hz and 800 Hz can make it sound fuller and warmer without muddying stuff up.
Use a parametric EQ to sweep through the frequency spectrum with a narrow Q-factor (around 2.0) to isolate the harmonics that resonate most clearly.
This is where your sound will benefit most from boosting.
Once you’ve identified these harmonics, stick to small boosts, like 2-3dB, when enhancing harmonics to avoid introducing unwanted frequencies/distortion.
This technique is great for instruments like guitars, pianos, and vocals, where harmonics play a huge role in their tonal character.
Tip #2: Use Parallel Processing

Parallel processing allows you to apply additive EQ while blending it with the unprocessed signal for a more natural sound.
This technique is perfect for boosting frequencies without compromising the track’s dynamics or introducing harshness.
For example, when working with a vocal, you can:
- Duplicate the track
- Apply additive EQ to the duplicate (e.g., a 3dB boost at 8kHz for brightness)
- Then, blend it back into the original
A key parameter to watch is the blend percentage 一 begin with a 50/50 mix of a processed signal and unprocessed signal and adjust until it feels balanced.
This works well for adding presence to vocals, enhancing the attack on drums, or creating shimmer in acoustic instruments without over-processing the original sound.
Make sure to play around with compression on the EQ’d track to control loudness/the louder sounds and keep the mix clean.
Side note, if you want to learn all about compression and/or compressor tricks, we got you covered with our compression article.
Tip #3: Layer Additive EQ Strategically
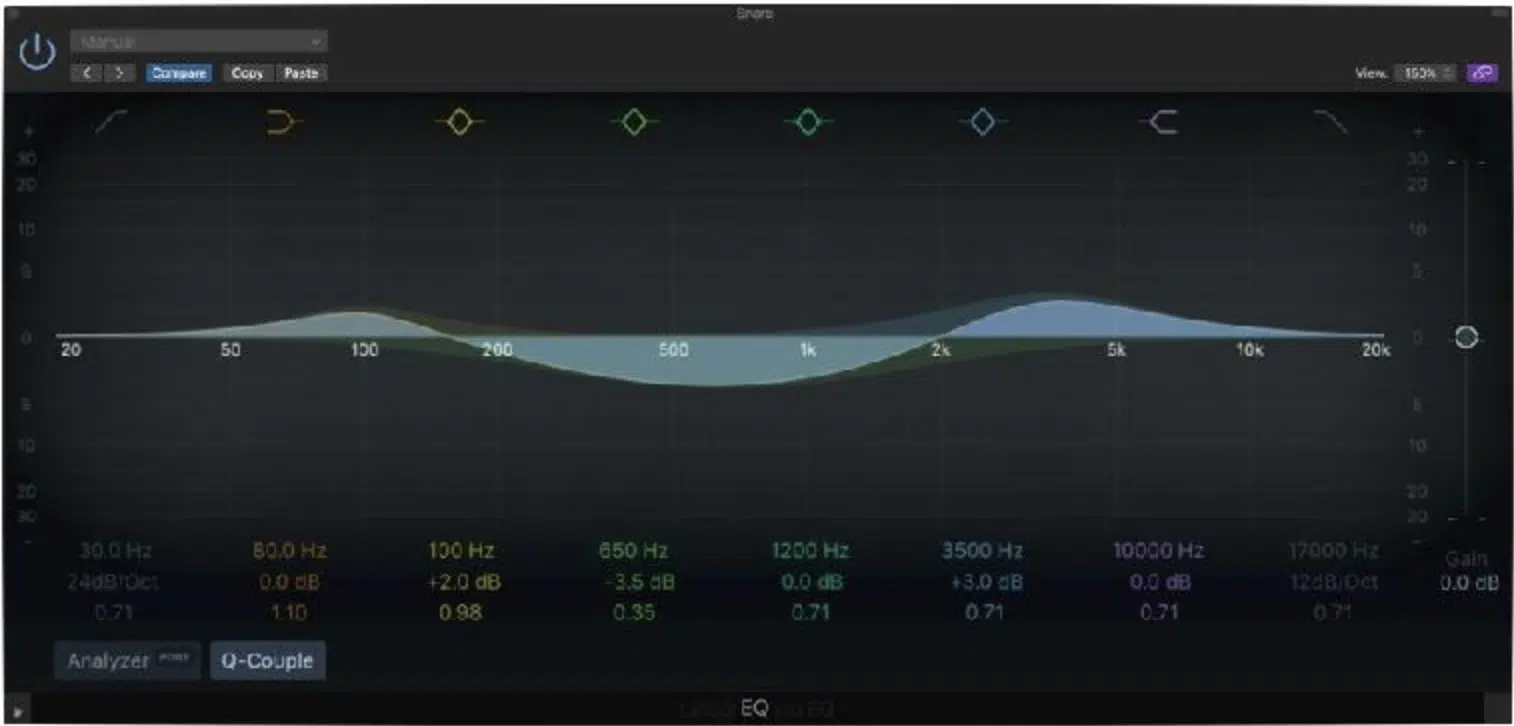
Layering additive EQ adjustments across multiple stages of your mix can lead to more controlled and polished results.
Instead of applying heavy boosts on a single track, break your adjustments into smaller stages, for example:
- Boosting 2dB on an individual track
- Another 1.5dB on a group bus
- A final 1dB in the mastering stage
This ensures each adjustment serves a purpose without overwhelming the mix.
For example, on a drum bus, you might boost 4kHz to add snap to the snare, while on the individual kick track, you might boost 60Hz to enhance the low frequencies.
By spreading out your adjustments like that, everything will be clear across the entire mix and you’ll successfully avoid masking other elements.
Just don’t forget to always revisit your additive EQ adjustments in context to make sure they support the overall mix balance and tonal consistency.
Tools and Plugins for Additive EQ
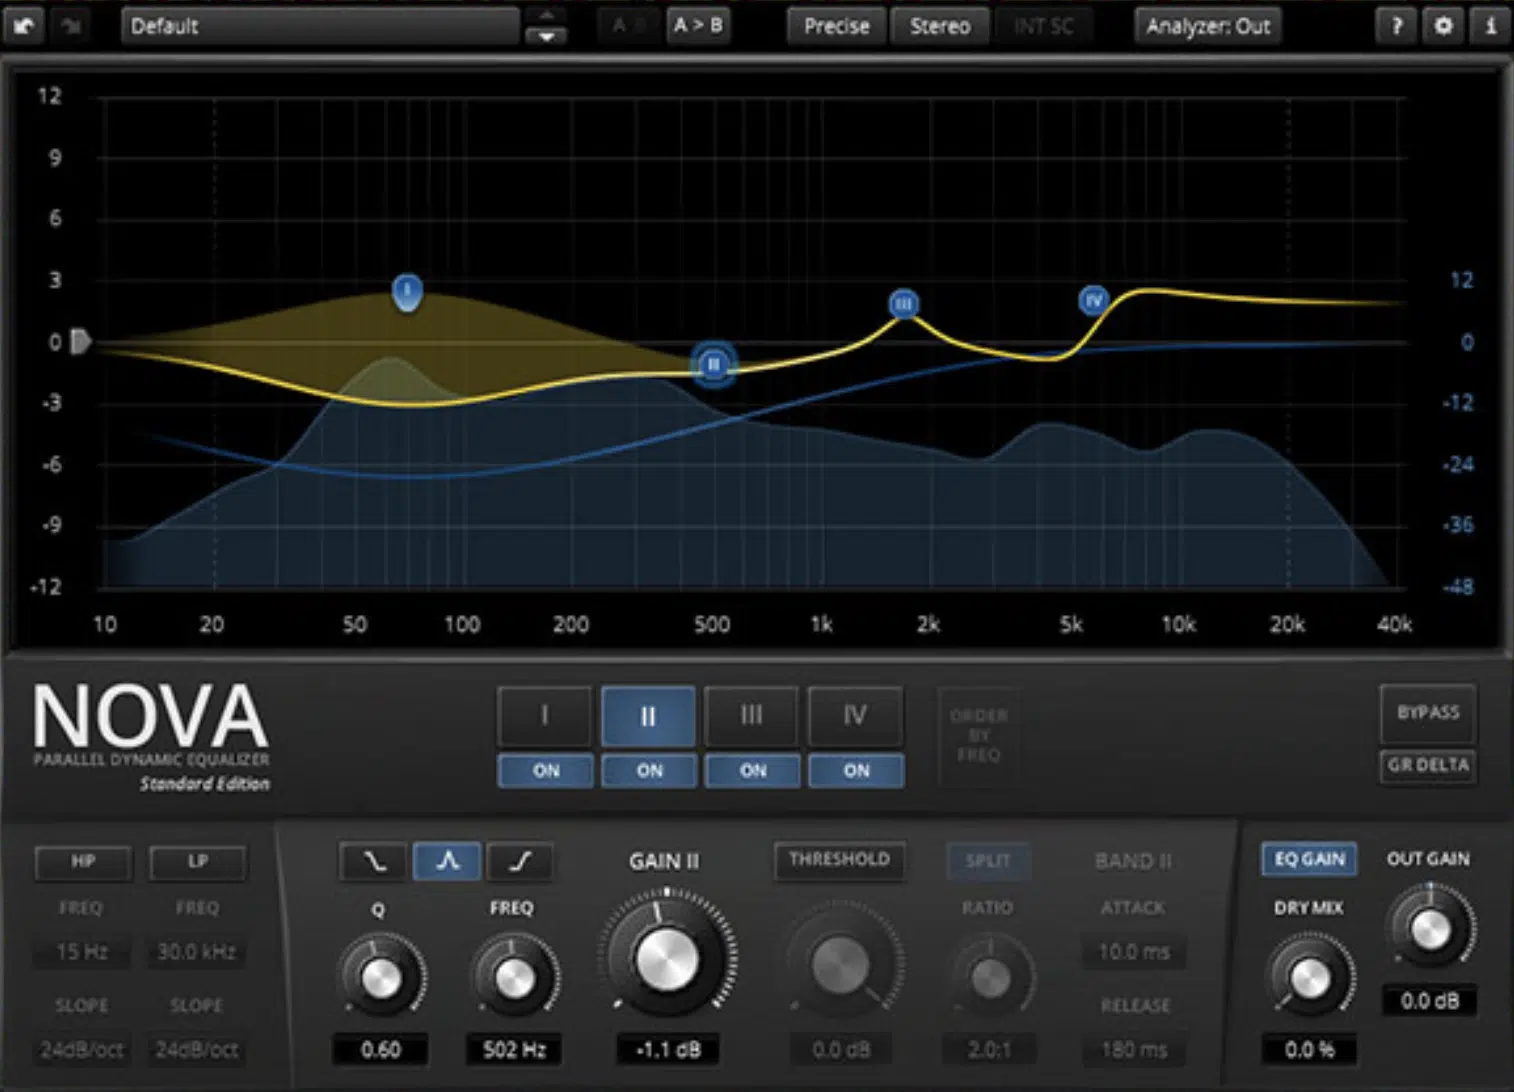
TDR Nova is Completely Free & Pretty Solid
When it comes to additive EQ, having the right plugins can be make-or-break (like any other production process) how your mix sounds.
FabFilter Pro-Q 3 is a go-to (and my personal favorite) because of its precise frequency selection and dynamic EQ capabilities.
This makes it perfect for both subtle and aggressive boosts alike.
For working on enhancing specific frequencies in vocals or drums, the Waves SSL G-Equalizer delivers a smooth, analog-like character.
If you’re on a budget and looking for some dope free options, try TDR Nova (above), which combines traditional EQ and dynamic EQ functionality for detailed frequency shaping.
It’s actually pretty solid for a free option, so that’s definitely worth a go.
If you’re working with a hardware EQ, you should definitely check out the Warm Audio EQP-WA, which is one of the best in the bizz.
It’s a sick, super realistic recreation of the legendary Pultec EQP-1A that adds warmth and clarity to any track.
-
Creative Uses of Additive EQ
Additive EQ isn’t just about fixing things… It’s about creating new tonal possibilities, thinking outside of the box, and never ruling anything out.
For example, try boosting the midrange frequencies around 1kHz–2kHz on a snare drum to emphasize its crack.
Or, around 4kHz–5kHz to give guitars extra bite in a crowded mix.
One creative trick is boosting a narrow frequency band on a reverb return to highlight the shimmer or warmth of the room tone.
If you want to hype up the sparkle in cymbals, try a gentle 2dB boost at 12kHz–14kHz, but make sure to keep it subtle to avoid overpowering other elements.
Using additive EQ creatively also means shaping the character of sounds to fit their role in the mix 一 like giving a bassline more growl by boosting 800Hz–1kHz.
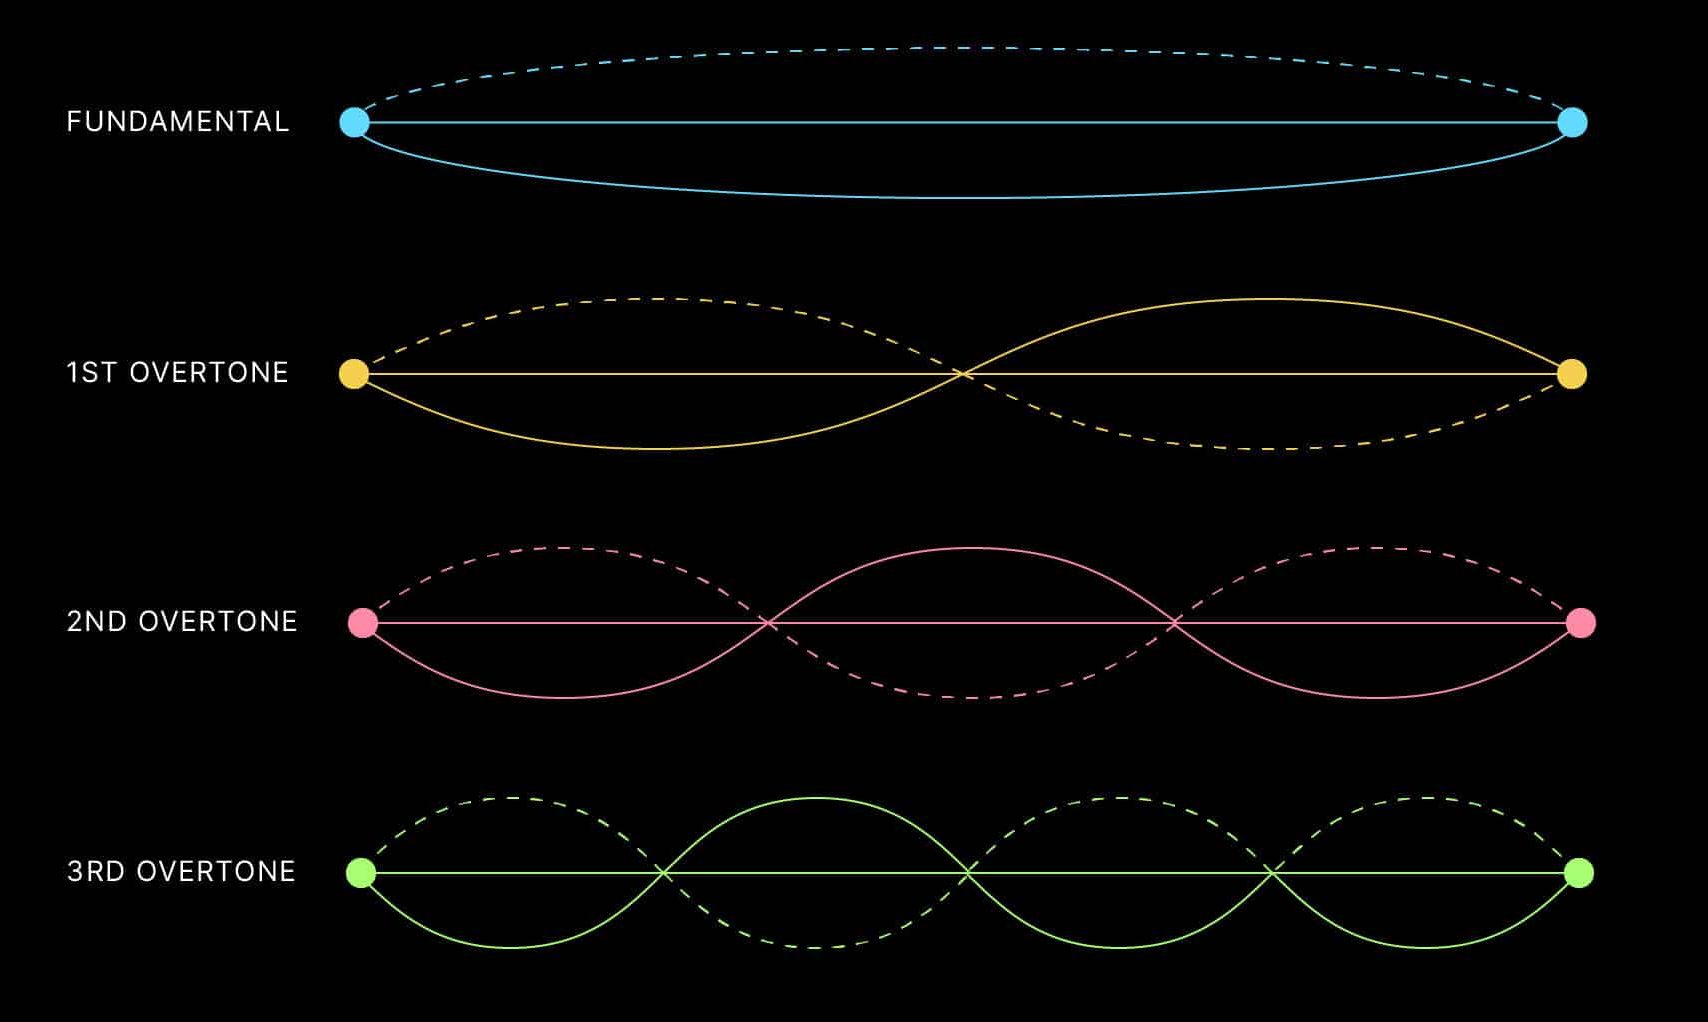
Don’t forget to play around with boosting harmonic frequencies of a fundamental tone to enhance its presence without making it too loud.
NOTE: Always monitor your dB levels carefully and use filters here and there (but don’t go too crazy) to keep the sound natural.
-
Dynamic EQ for Additive Adjustments
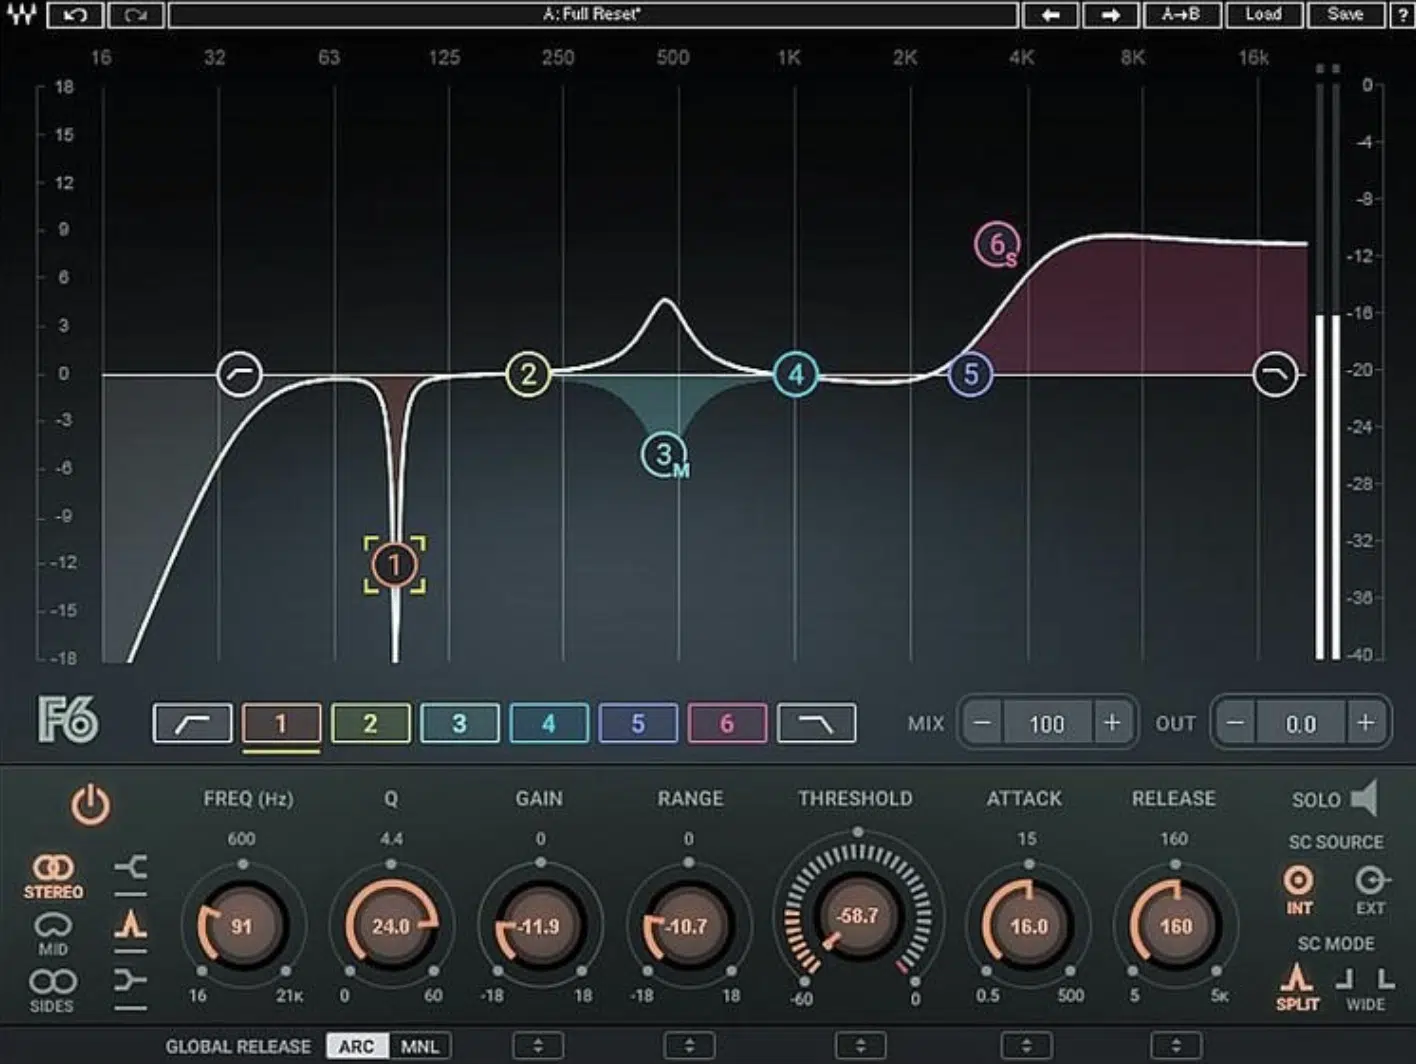
Dynamic EQ, as we touched upon earlier, is one of the best ways to make boosts that react to the natural changes in your track.
Let’s say you’re working on a vocal that sounds thin during softer parts…
You can use dynamic EQ to boost frequencies around 2kHz–4kHz, but only when the vocal drops below -12dB.
This way, the clarity is enhanced where it’s needed without blowing up the louder parts.
For generally smoother results, try setting the attack to around 10ms so the EQ engages quickly but doesn’t sound too sudden.
And, use a release of 150ms to keep the transitions super natural.
Using a plugin that lets you set thresholds for boosts makes this process easy, especially when working with two instruments or vocals that have a lot of ups/downs.
This way, you can dial in the exact range where the boost happens, like adding 2dB to the mids only during quieter sections.
This technique is actually great for drums too.
If your snare’s attack feels inconsistent, you can set a boost at 200 Hz that only kicks in when the snare hits softer 一 adding punch without muddying louder hits.
Keep your range small (around 2-3dB of gain) to keep the changes subtle and on point.
And always make sure to keep an ear on how your adjustments sit in the mix; small tweaks can make a huge difference without making everything sound over-processed.
-
Additive EQ in Mastering: Summing it Up
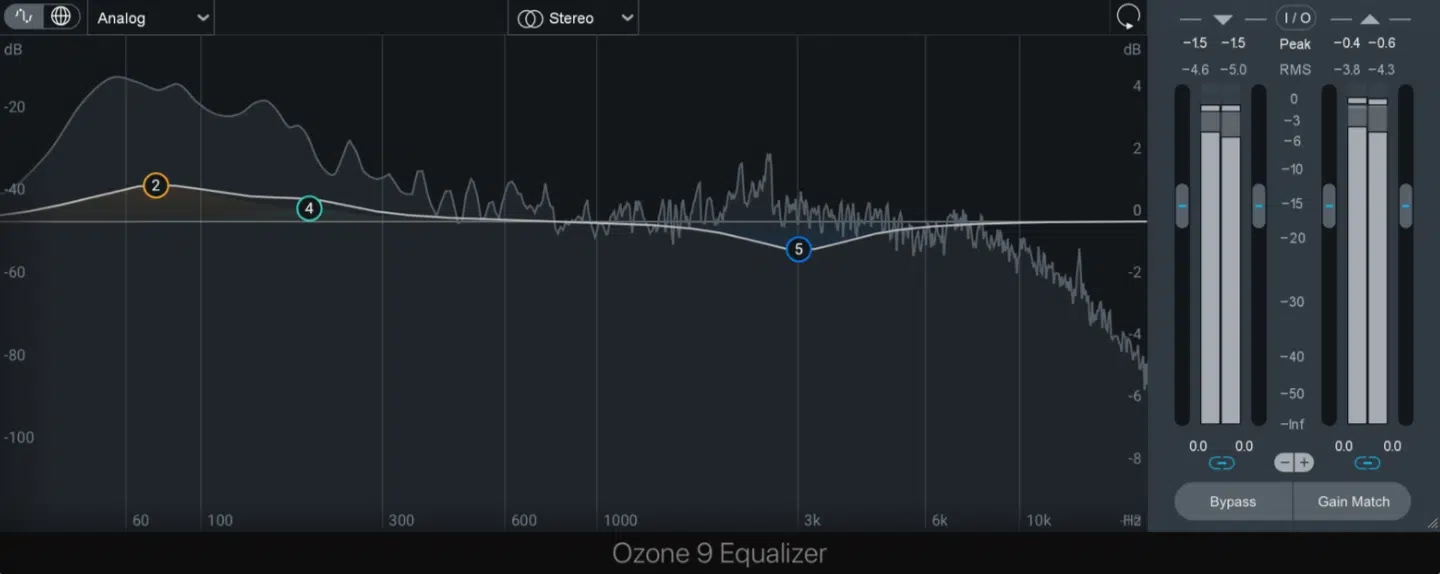
When it comes to mastering, additive EQ is all about making small, precise adjustments that bring out the best in an already solid mix while keeping it fluid.
For example, if a mix feels dull or lacks clarity, try adding a 1.5dB boost around 9kHz–10kHz using a wide Q-factor to brighten the higher frequencies.
This is great for genres like pop or acoustic music, where the shimmer of vocals and cymbals needs to shine through.
If the track feels like it’s missing low-end energy, a gentle boost of 2dB at 60Hz can give the bass more weight, perfect for hip-hop or EDM tracks.
A narrower Q-factor, around 1.2, works well here to keep the boost focused without spilling into the muddy low-mids.
For even more warmth, boosting 1.5dB at 1kHz can really add some life to the body of a vocal, guitar, or piano so it has a fuller tone.
PRO TIP: When boosting in mastering, keep total adjustments subtle, usually no more than 3dB across the spectrum.
For tracks with a bunch of unwanted frequencies, like boxiness in the 200Hz–400Hz range, begin with subtractive EQ before applying any boosts.
This clears up room for the boosts to sound more natural and on point.
Always listen to your EQ adjustments on multiple playback systems like monitors, headphones, and car speakers to make sure the changes translate across devices.
And just keep in mind that the goal in mastering is to enhance what’s already there without introducing any new problems, it can’t fix a shoddy mix.
Bottom line, if you follow all of this, your tracks will sound polished and professional on any system, every single time (which is what you always want).
Final Thoughts
Additive EQ, as you now know, is all about enhancing the best parts of your sound 一 bringing clarity to your mix and making sure every element has its rightful place.
It’s a powerful tool for adding presence, warmth, and polish to your tracks while keeping them balanced/professional.
By using today’s tips and techniques, you’ll be able to seriously step up your EQ game, create cleaner mixes, and achieve a polished sound like a boss.
And, as a special bonus, you’ve got to check out this legendary Free Project Files pack, which includes 3 professional-grade project files.
They’ll show you how to produce a beat from start to finish, breaking down every effect and process you can think of (no joke).
This, of course, includes additive EQ, subtractive EQ, and anything else you’d want to master or improve upon.
Created by professionals and 100% royalty-free, they’re not only an invaluable learning resource but can also be used however you’d like.
These files are polished, well-processed, and ready to give your production workflow a serious upgrade, so you do not want to miss out.
Bottom line, additive EQ can feel like a game-changer when you get the hang of it.
With the right mindset and techniques, you’ll be able to bring out the best in your tracks and keep improving with every mix you create.
Just make sure to keep experimenting, trust your ears, and let additive EQ take your music to the next level.
Until next time…


Leave a Reply
You must belogged in to post a comment.